

That said, I've been working on my art skills on and off the past few years and thought it would be the time to actually start making one. And I'm getting up there in age, I do want to explore this side of the fandom where I'm usually behind the camera.
I'm active primarily on Mastodon if you want to get in touch.
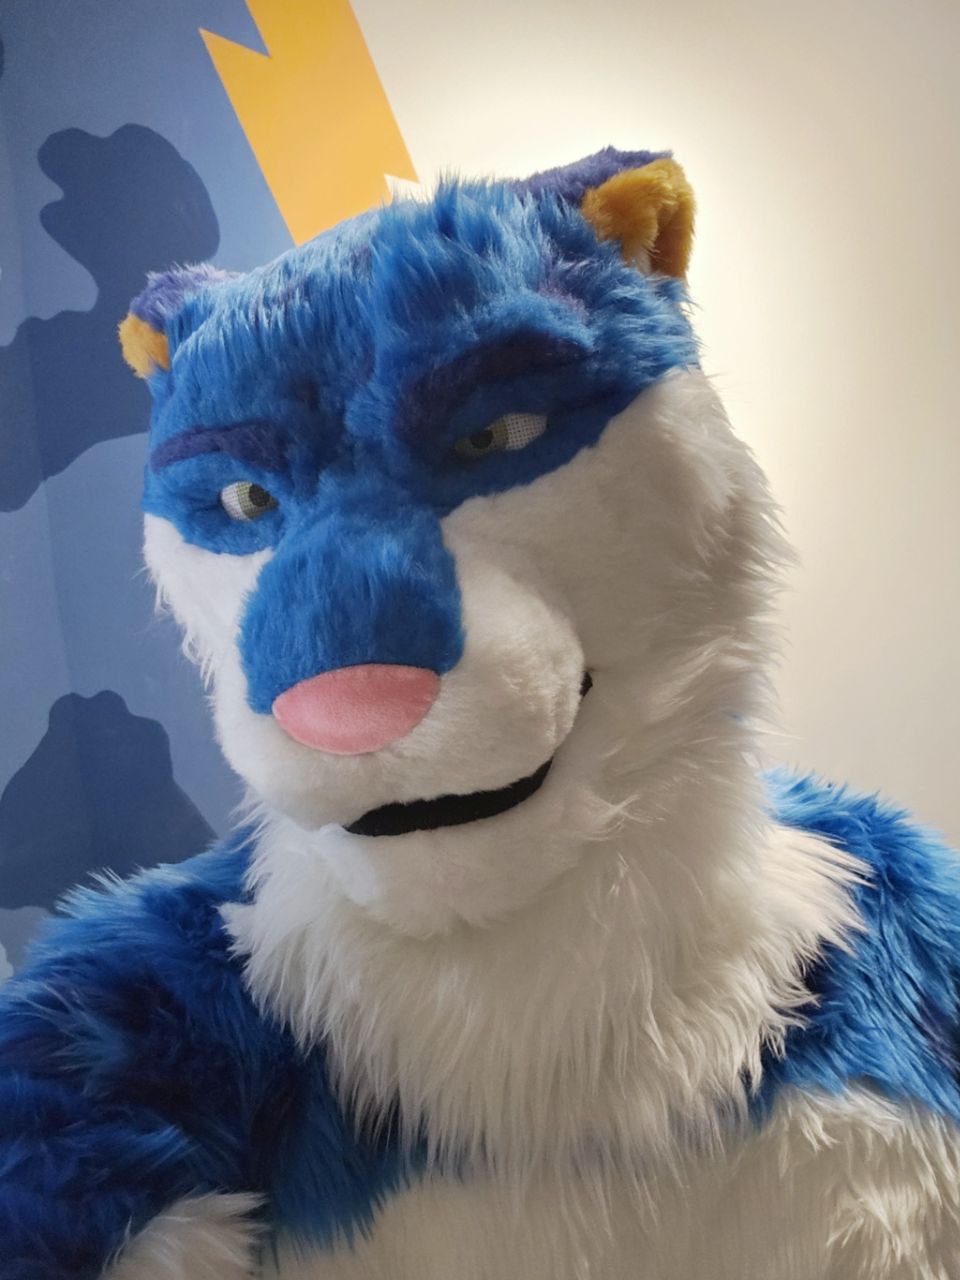
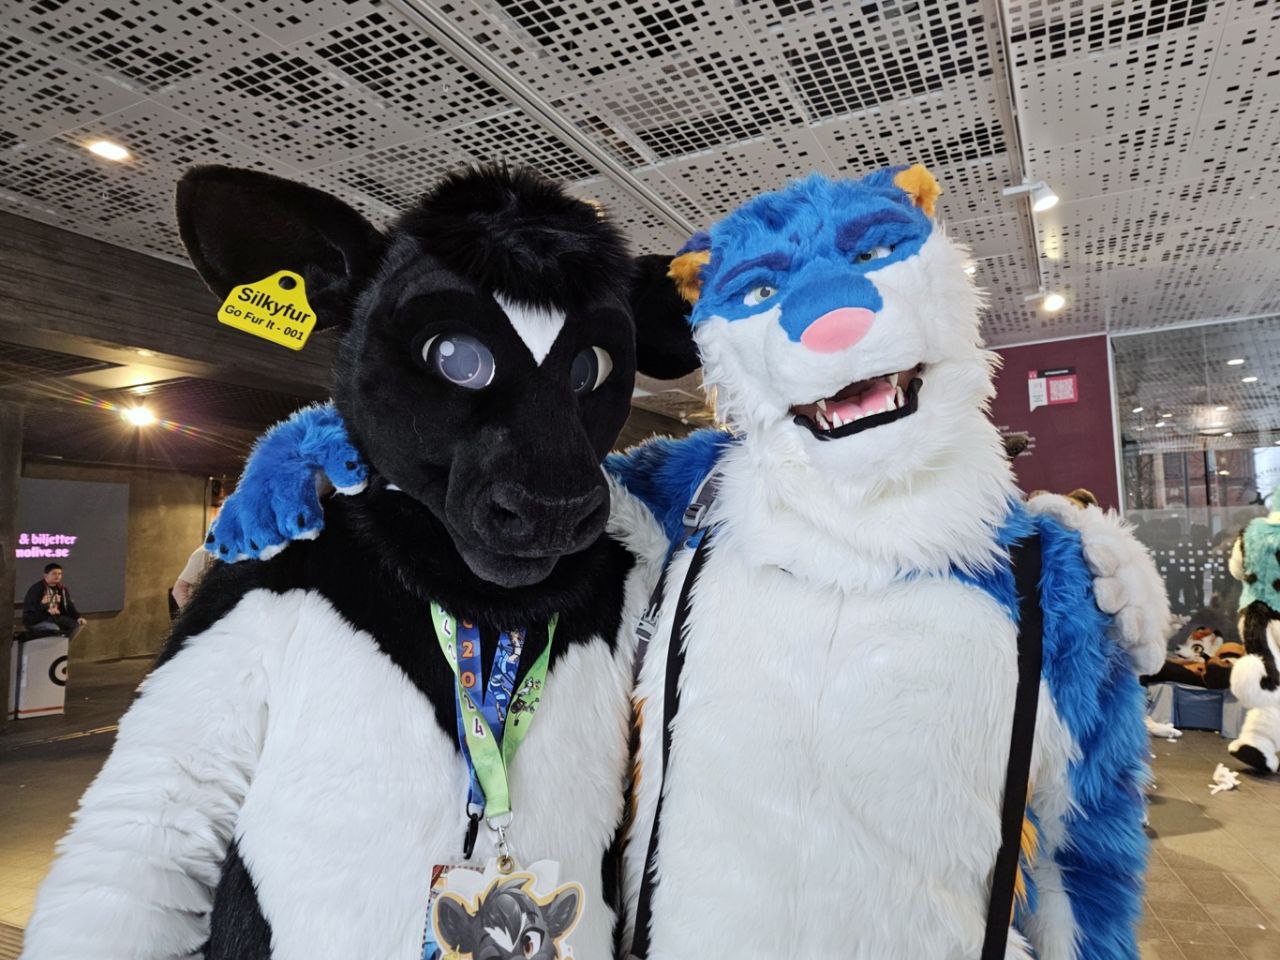
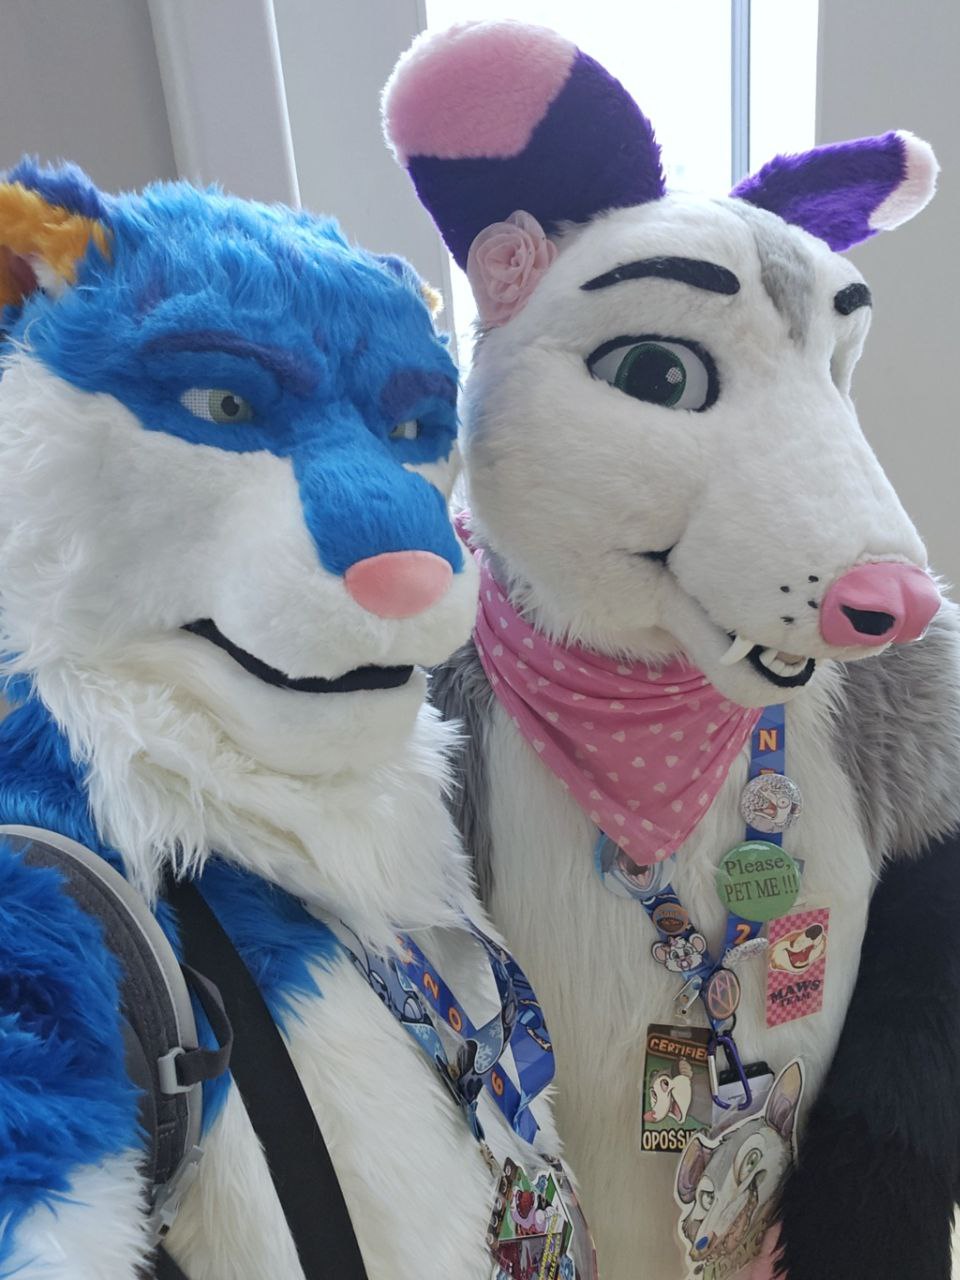
Had quite a bit of fun running around NFC!
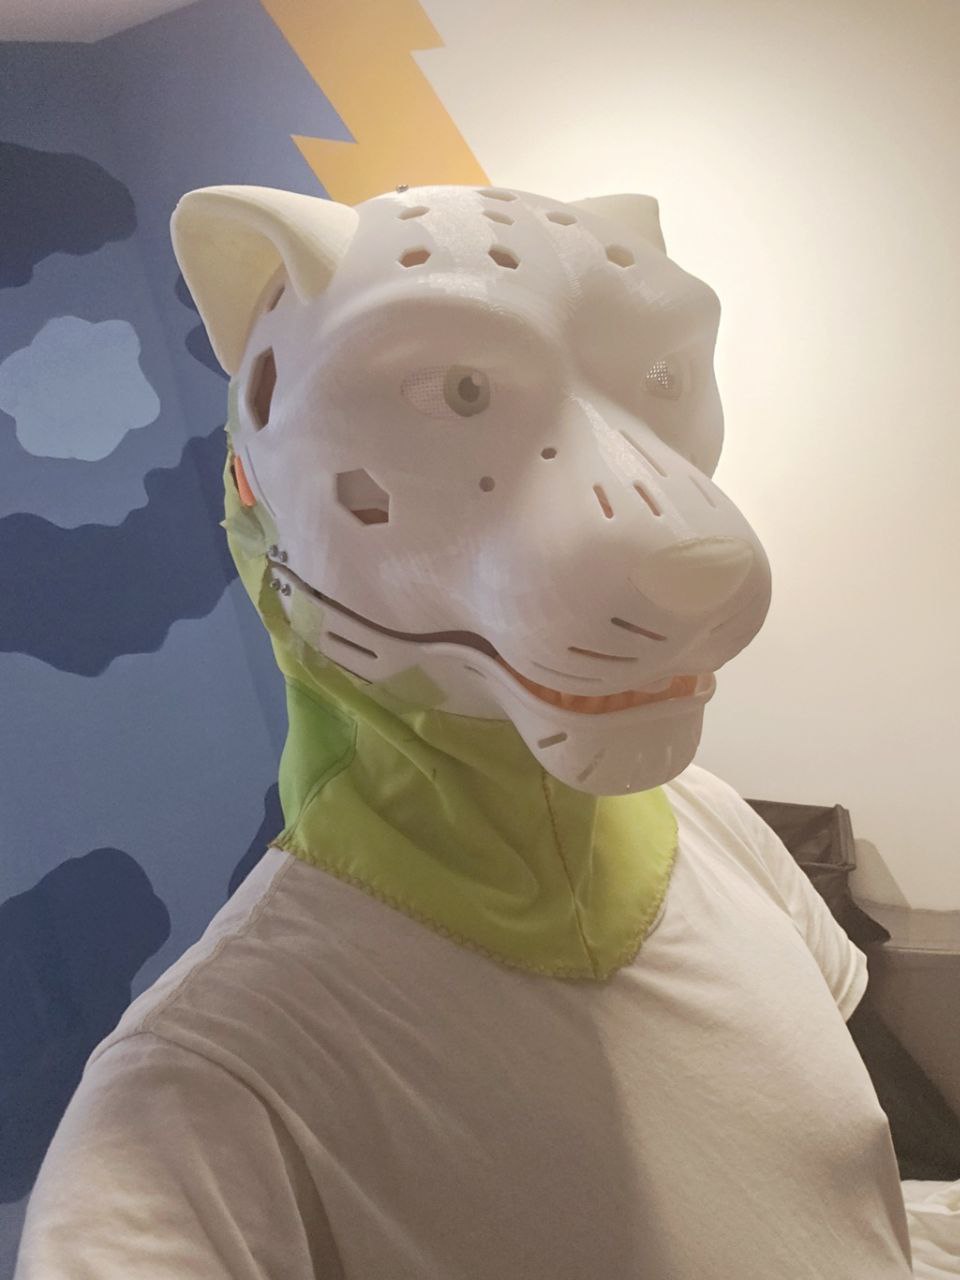
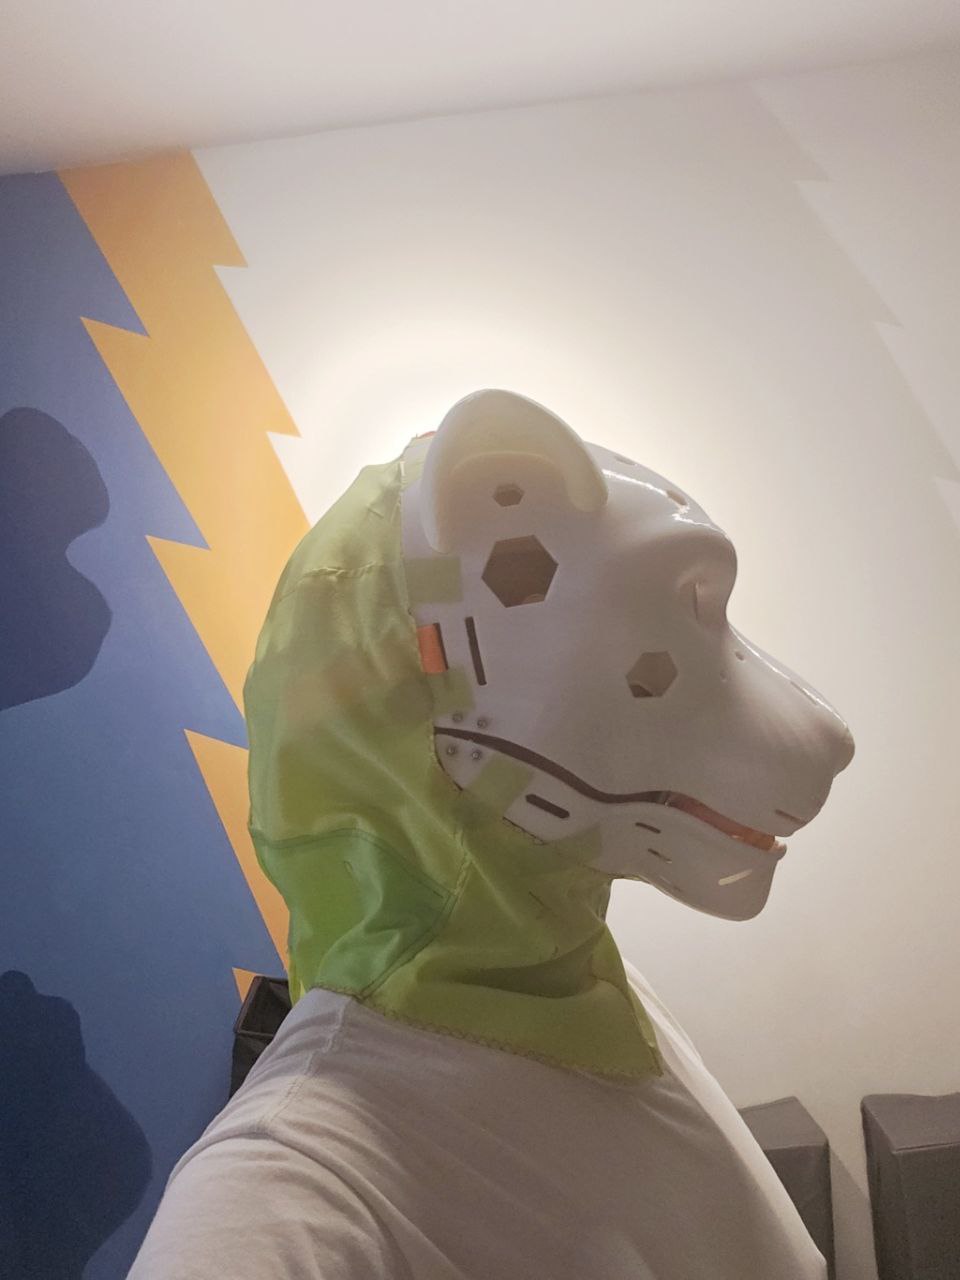
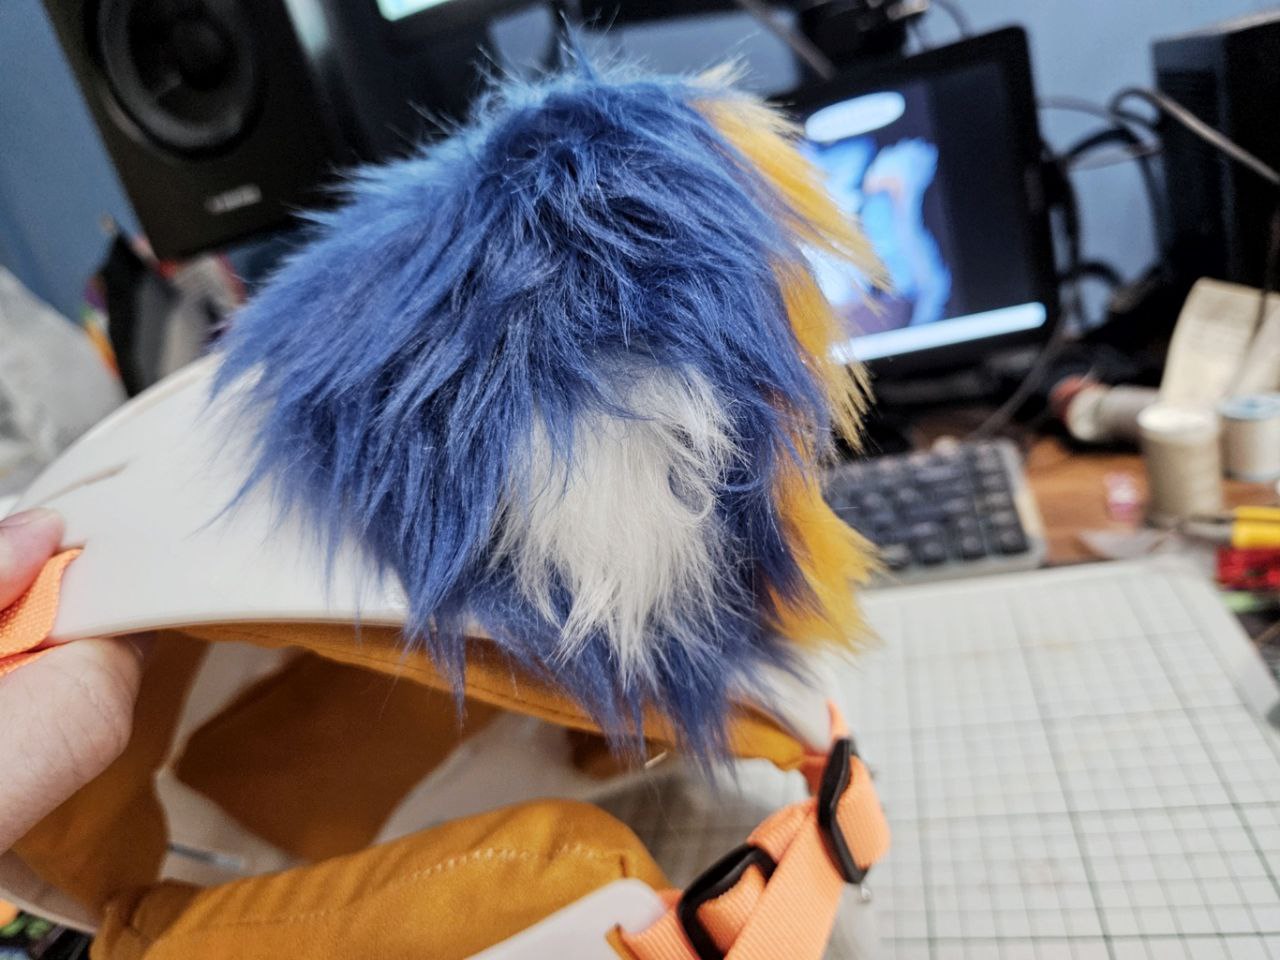
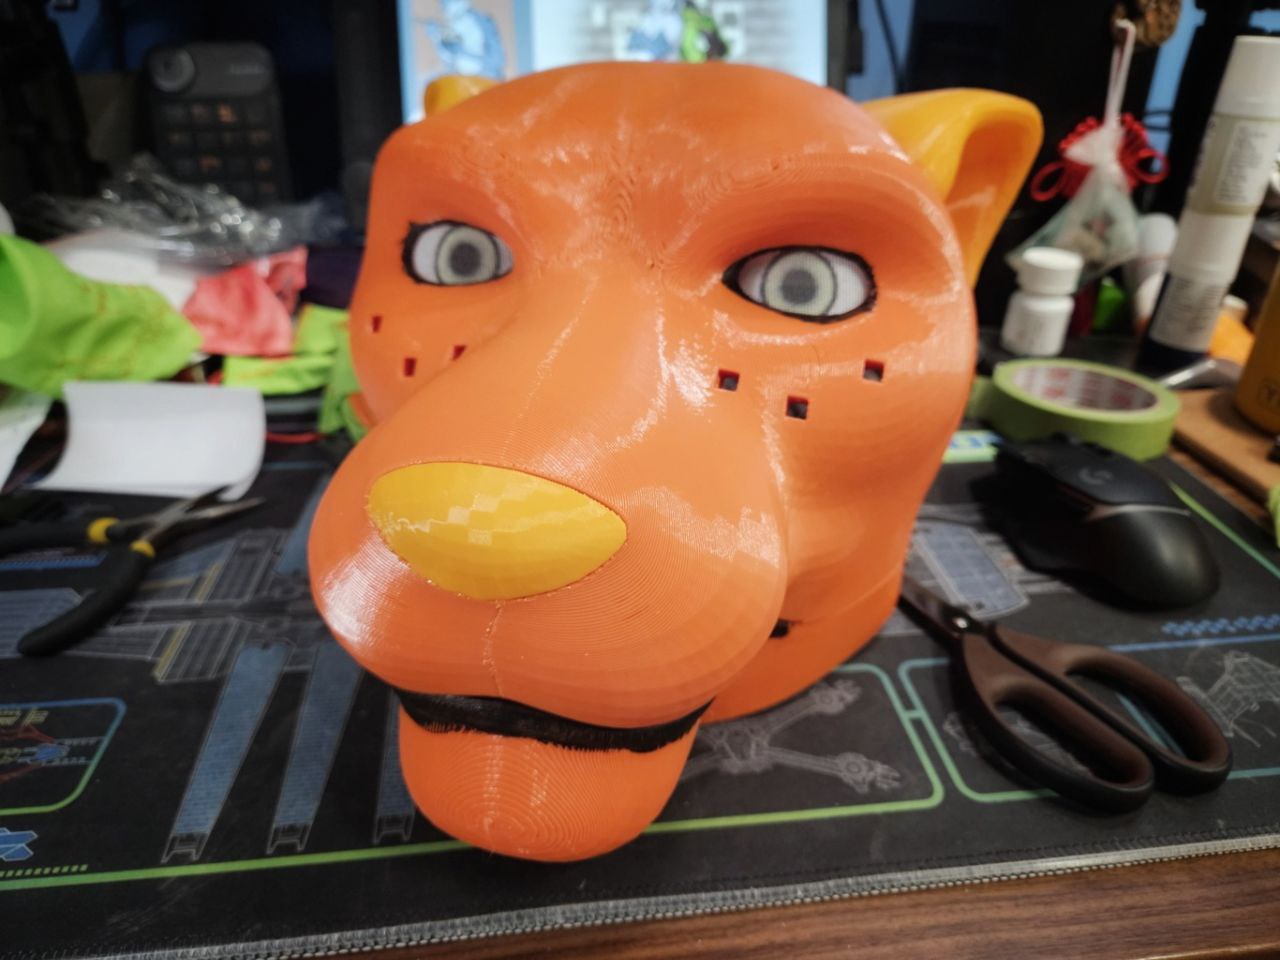
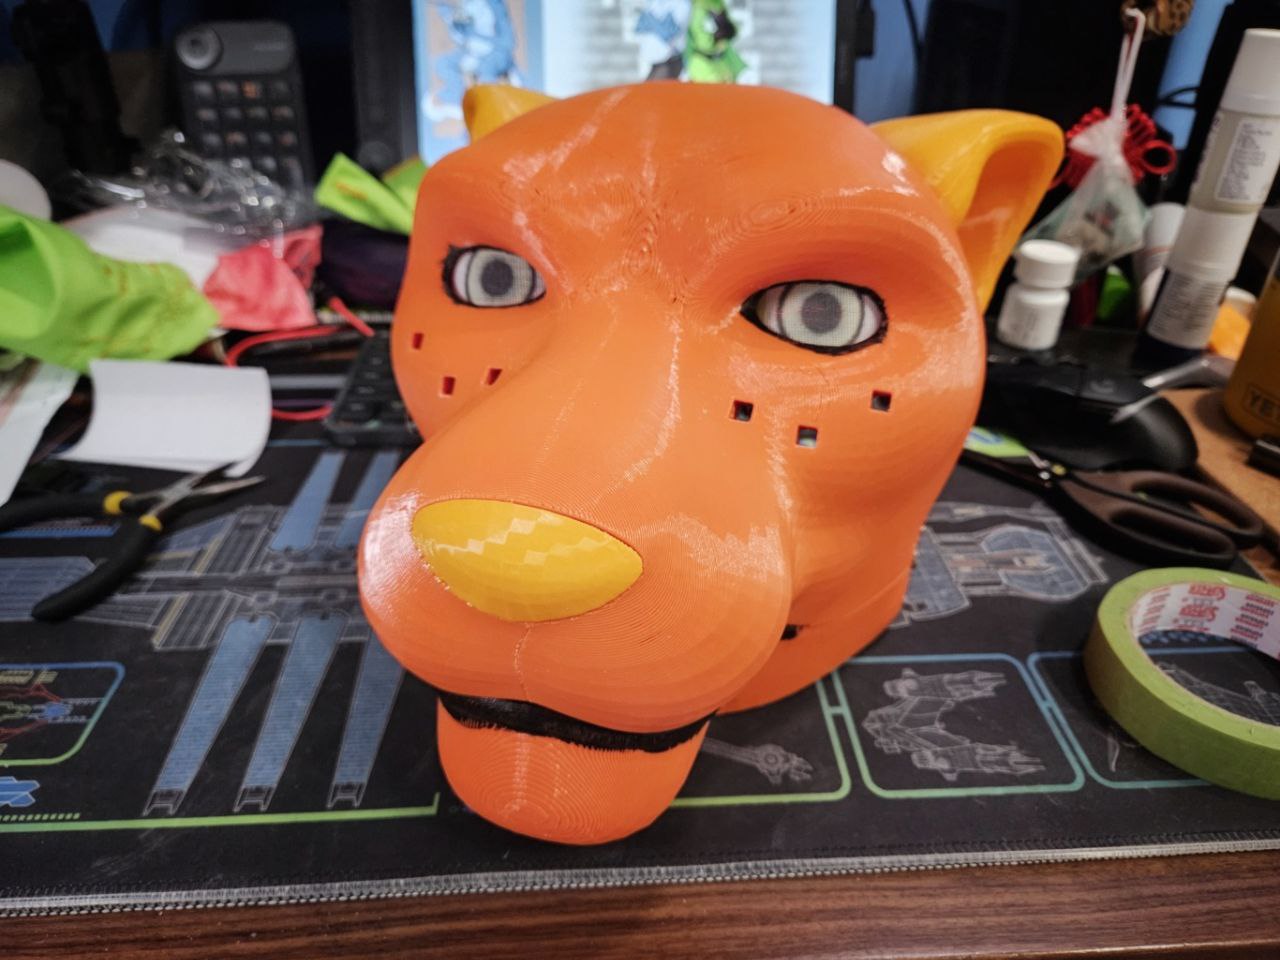
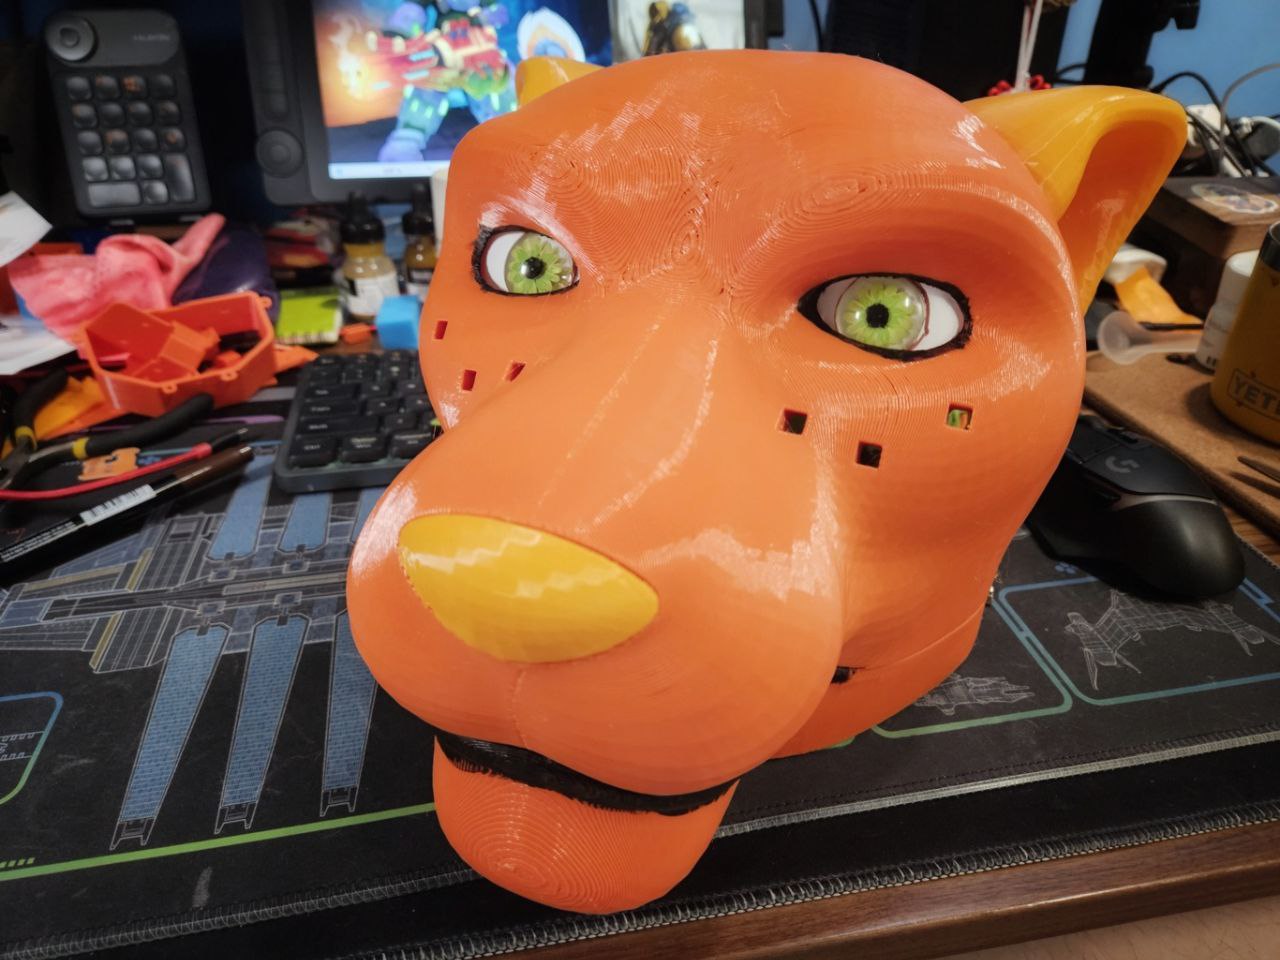
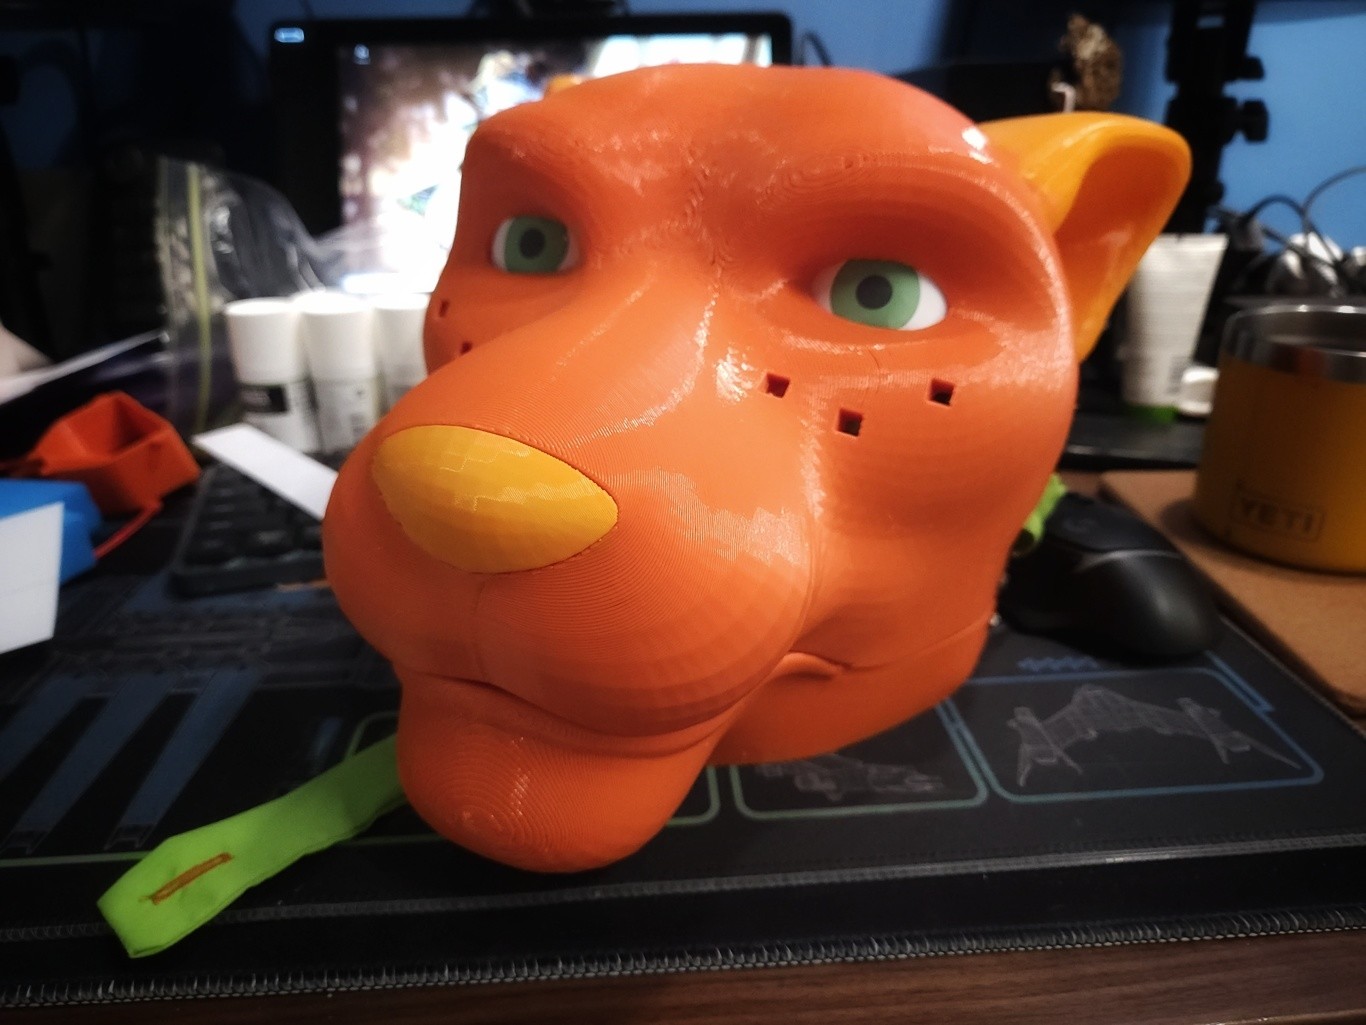
There are quite a few issues with my fursuit. First, the vision is terrible! I'm going to have to make the eyes bigger.
Next, the head is too big.
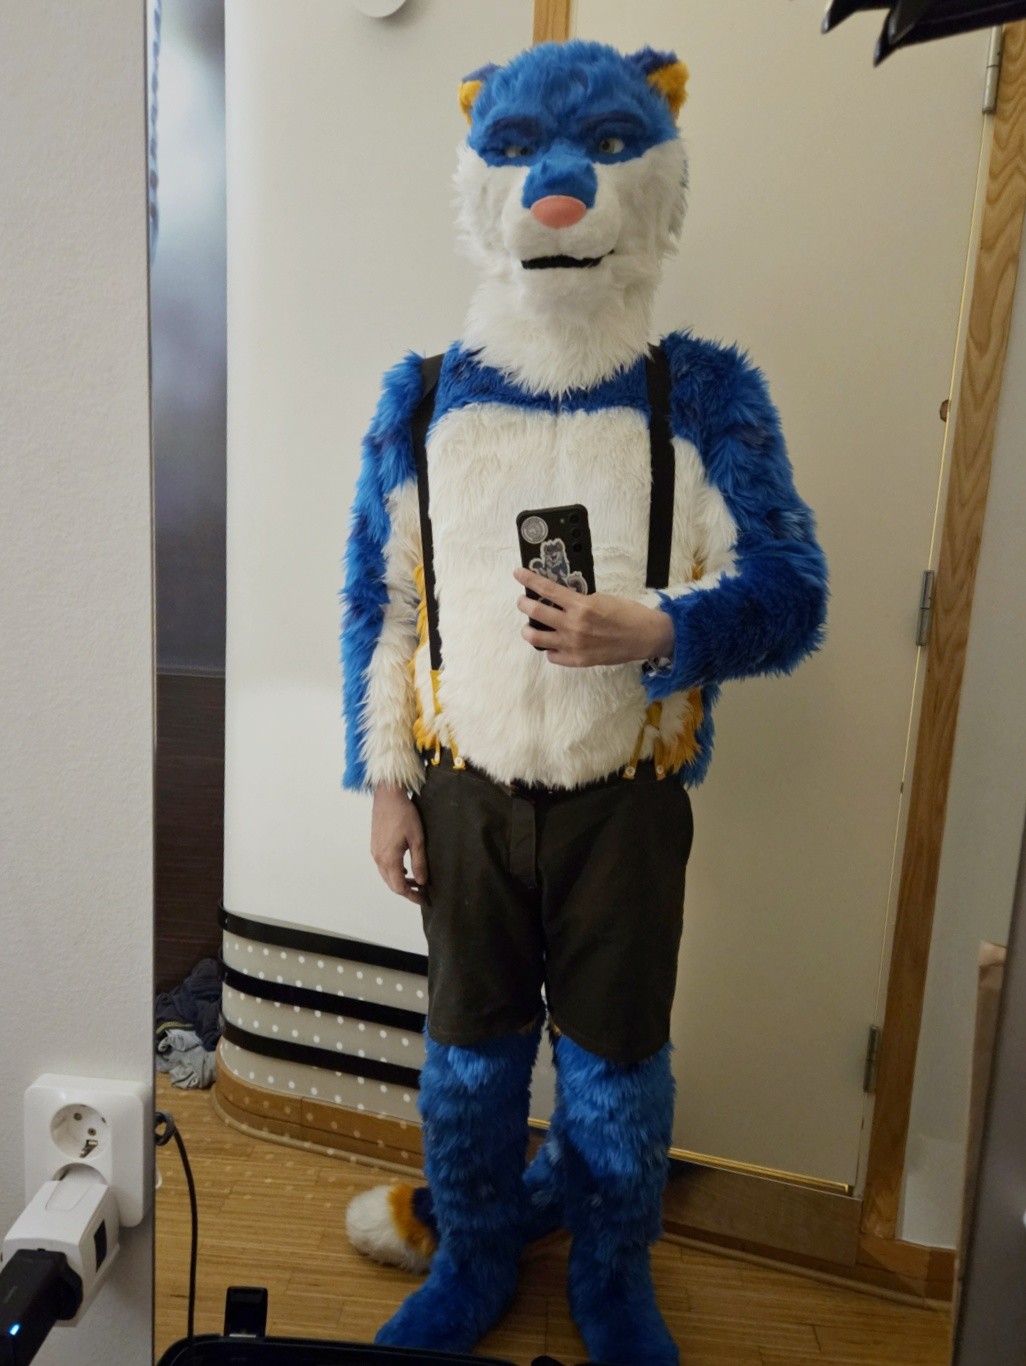
I've voiced my concerns online and folks say it's fine, and compared to normal fursuits with oversized heads its pretty tame. That said, I think the toony styling of most fursuits make having an oversized head work. I think mine with its roots more grounded in realism it is a bit bigger than I'd like.
In addition, the thickness of the padding and structure of the headbase raises the head a fair amount, and it gives the illusion that I have a very long neck.
The weight of the head is also an issue. It's now weighing about a kilo, which is insanely heavy compared to foam heads. The base is designed to be modular, and this hurts the weight.
I also neglected to consider the thickness of the faux fur; this causes the ears to sink into the thicker fur, and the curvature of the cheeks is less defined as such. My redesign will tackle all these issues.
The fursuit also has a few issues.
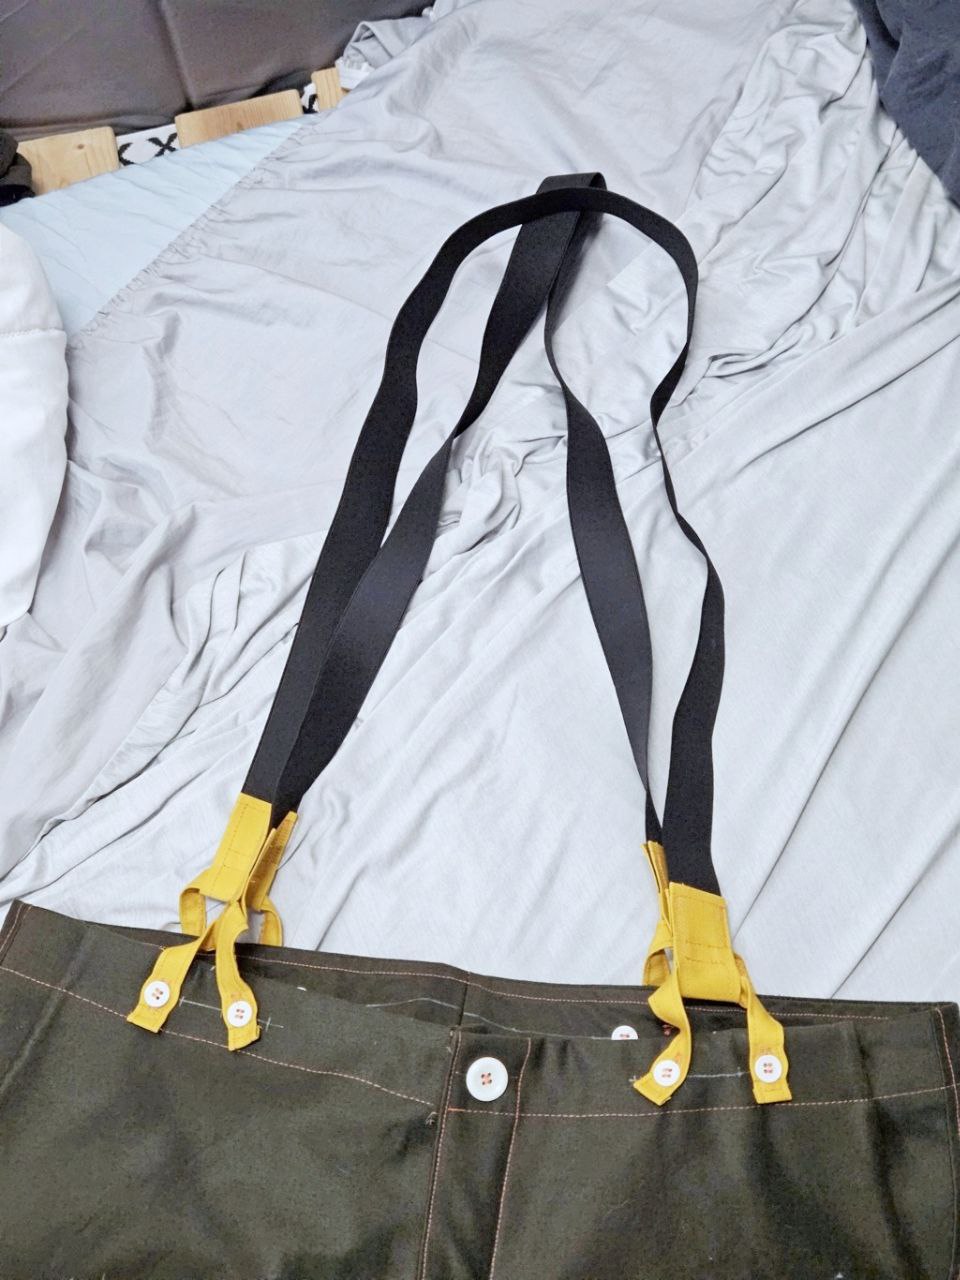
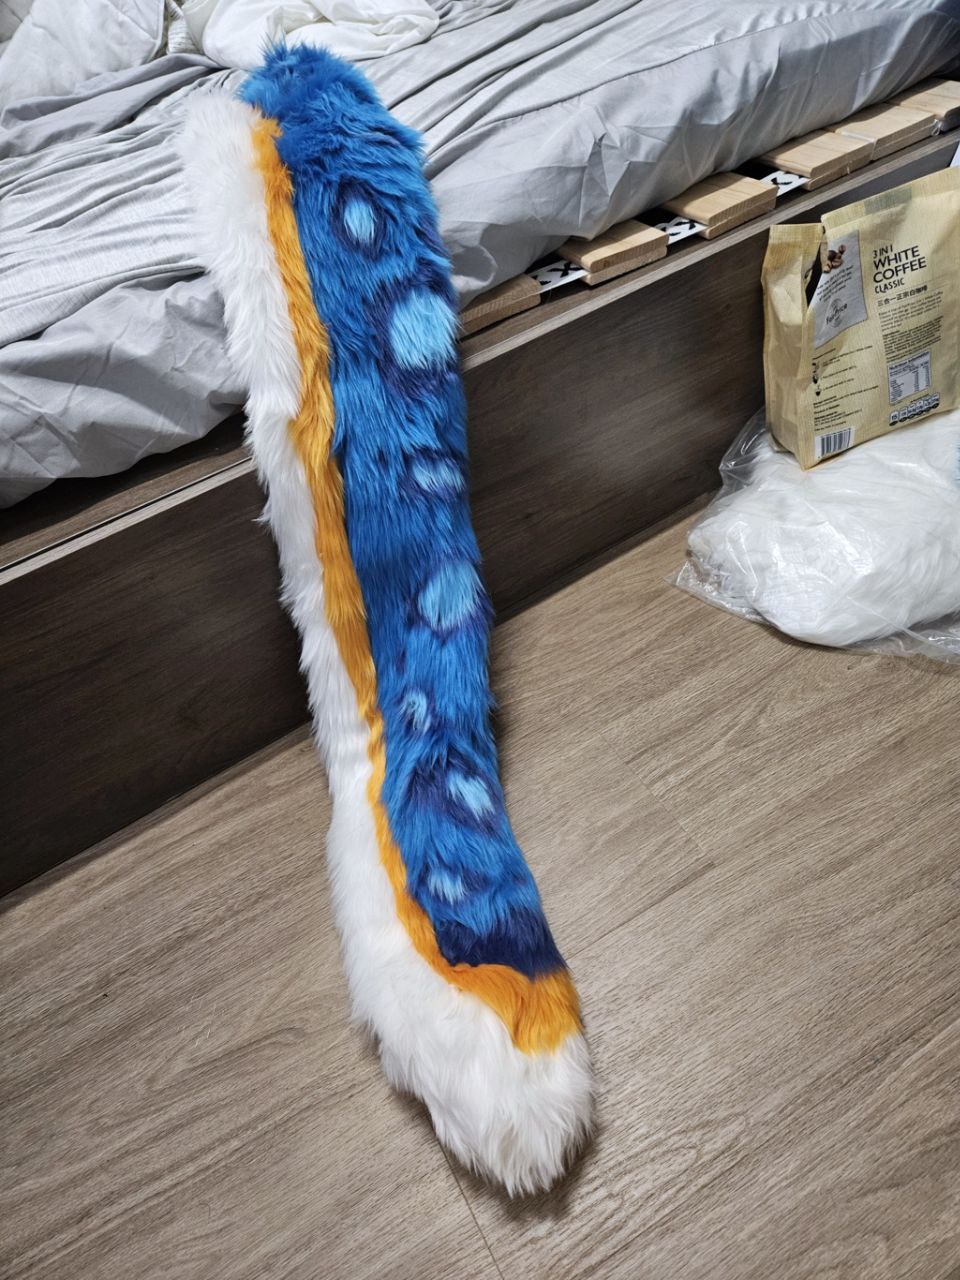
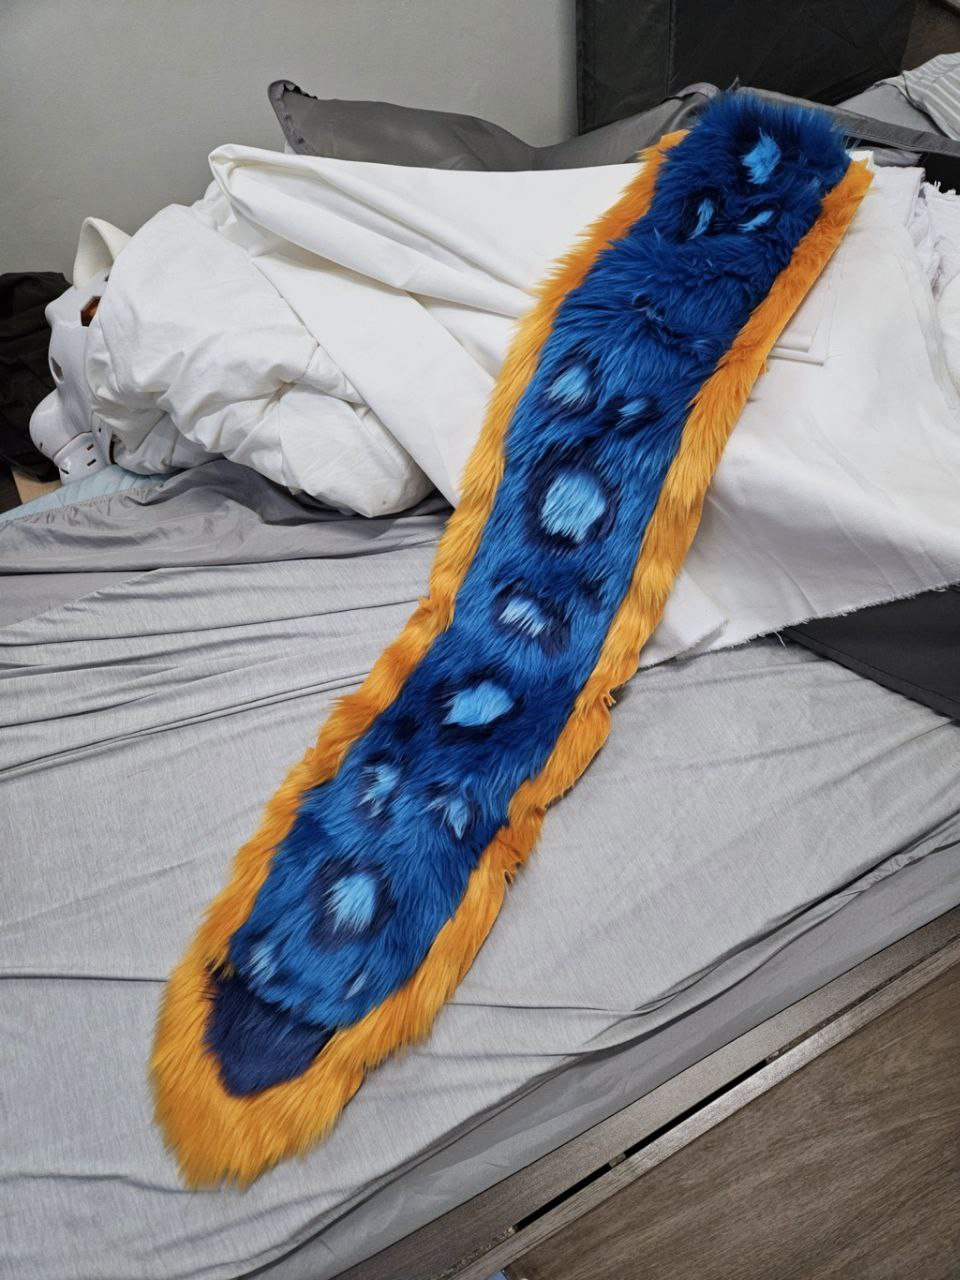
First, the tail is attached to the pants with buttons, and they come loose far too easily, letting the tail flop.
The tail is also very heavy (I filled it with fur scraps and fabric cuts, could not get the inflatable inserts done in time), and pulls the pants down. During the convention I fashioned an internal belt which helped.
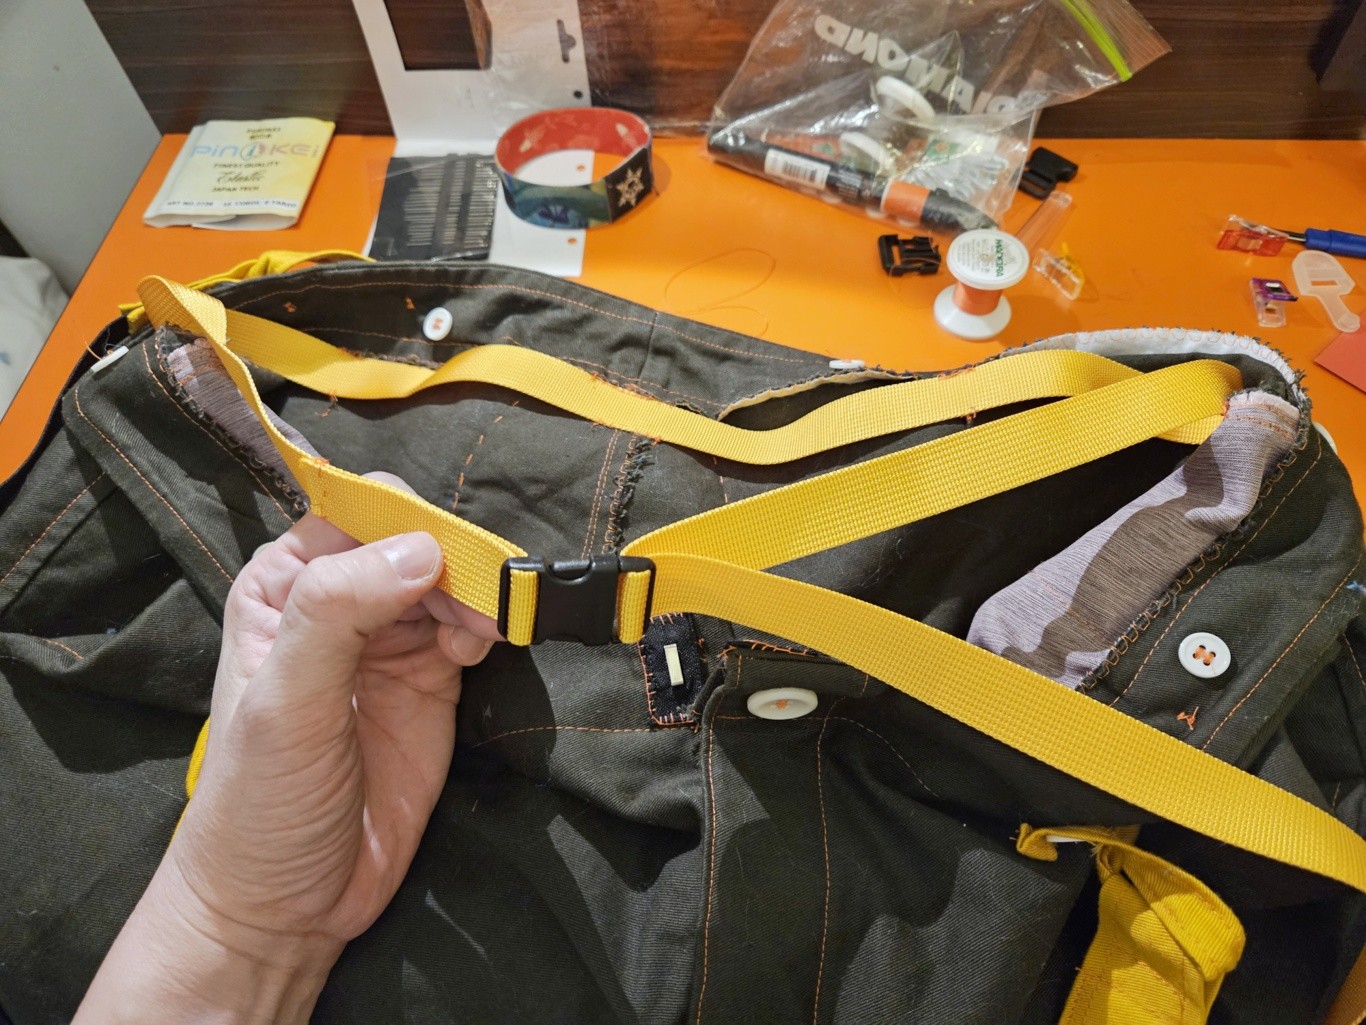
On the plus side, the mobility is excellent in this suit. I can squat with no issues.
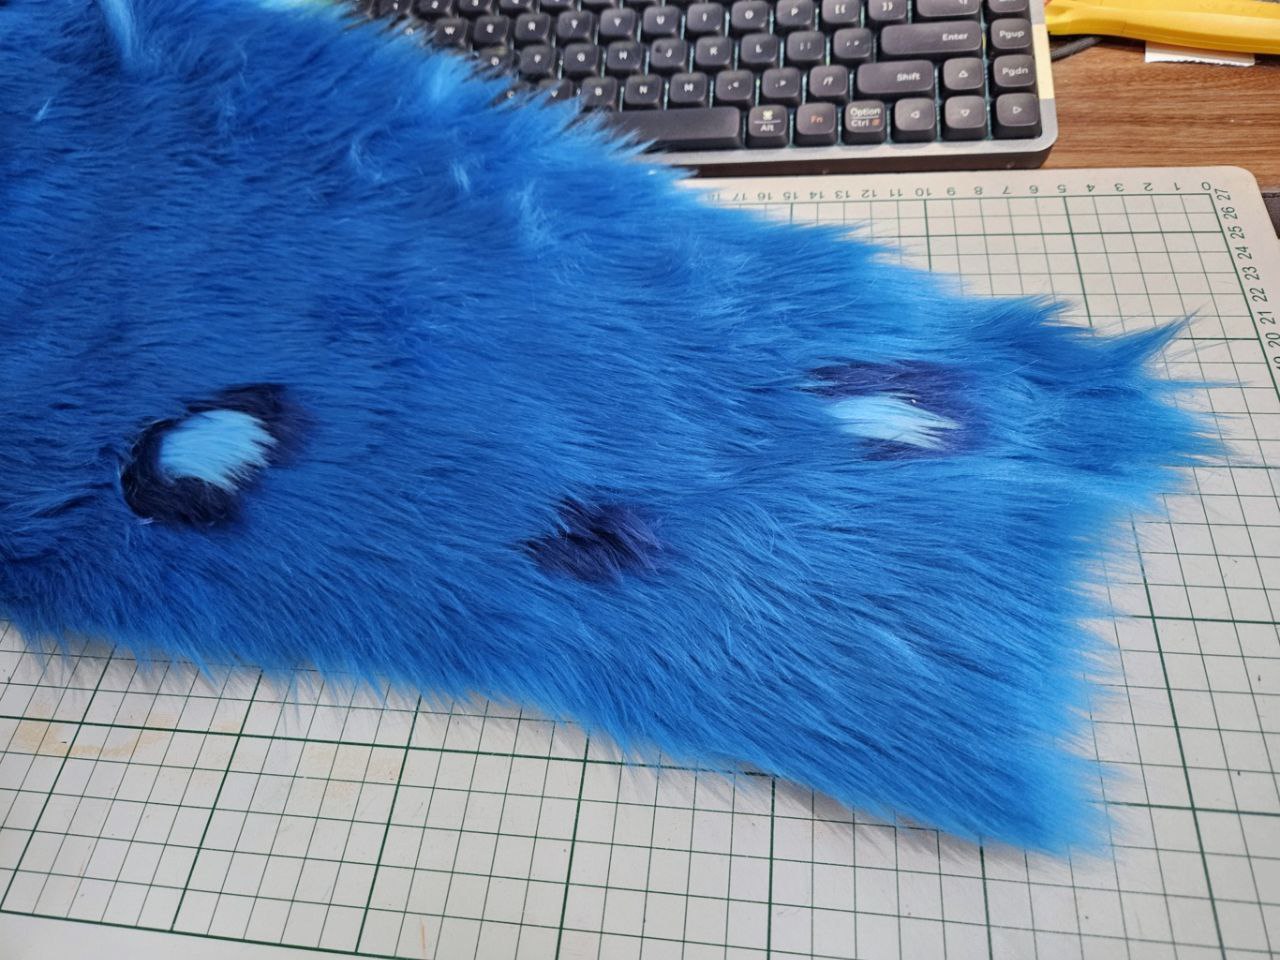
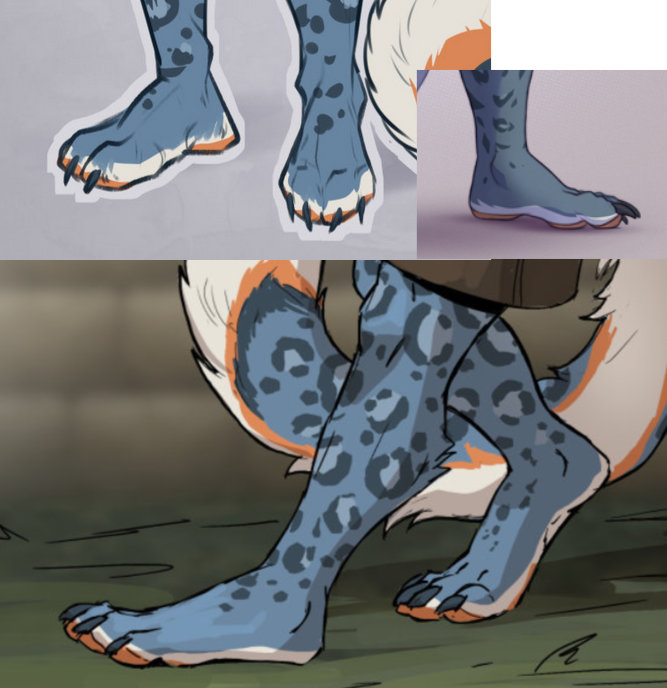
Once I get home, I'm going to try shaving down the fur, it make the rosettes more defined and make me look slimmer.
Going forward though, I will be making a fullsuit, with the objective of high mobility without using stretch fur.
Likely I will need a section that stretches, that would need to be hidden behind _something_. That something I think, will be some kind of anthro-specific piece of fashion wear.
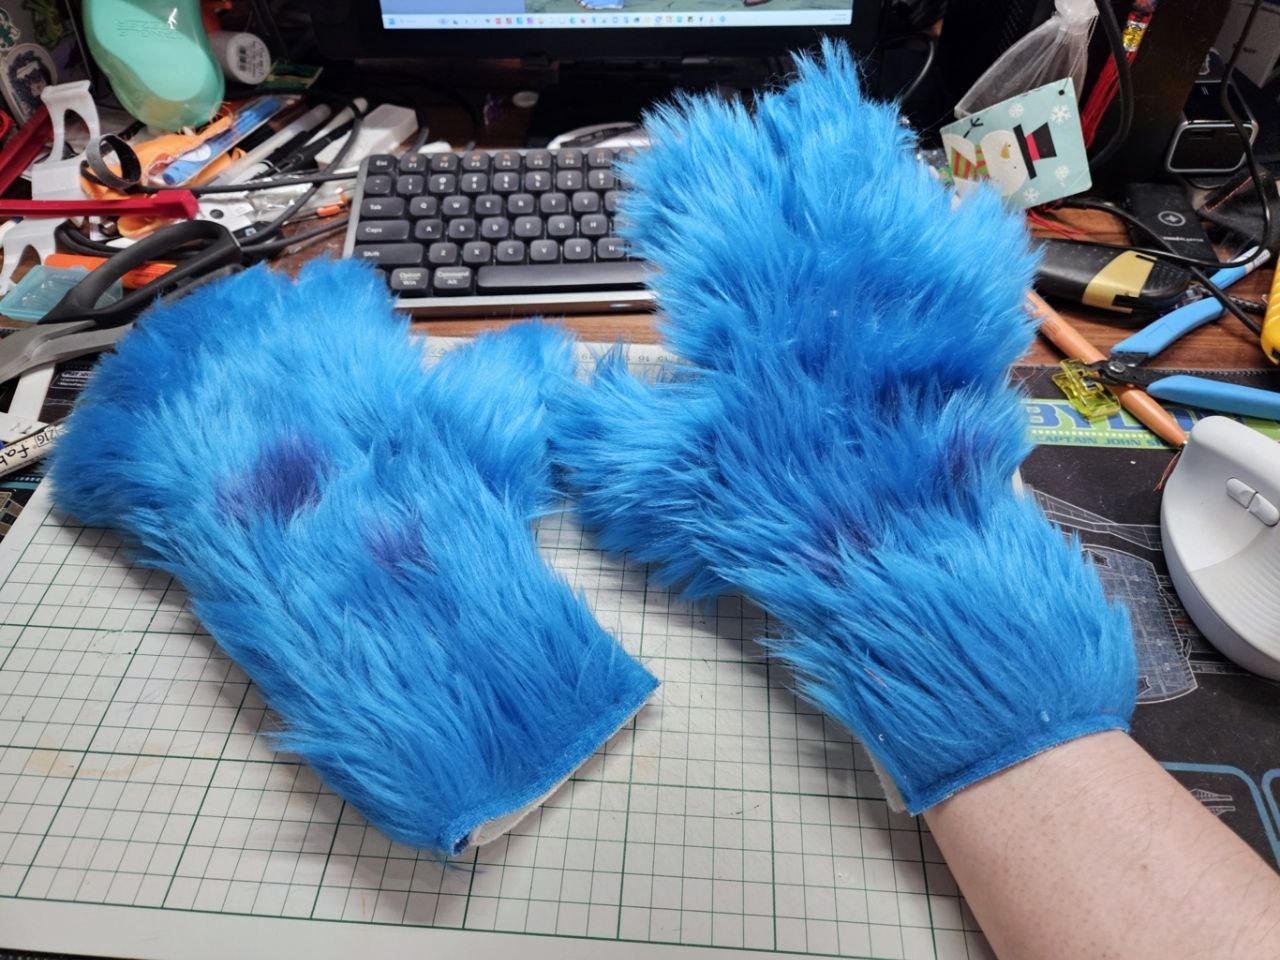
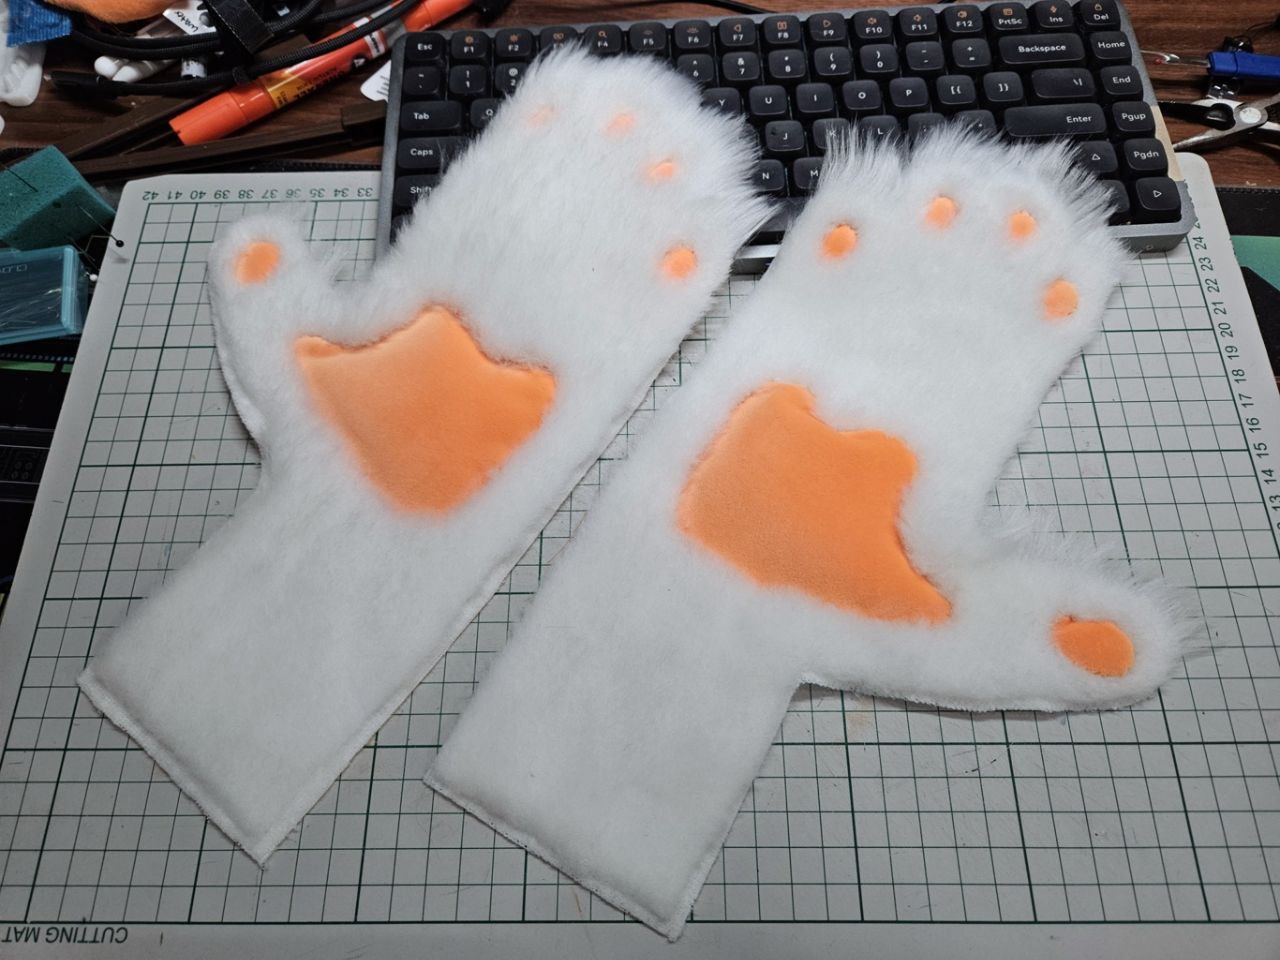
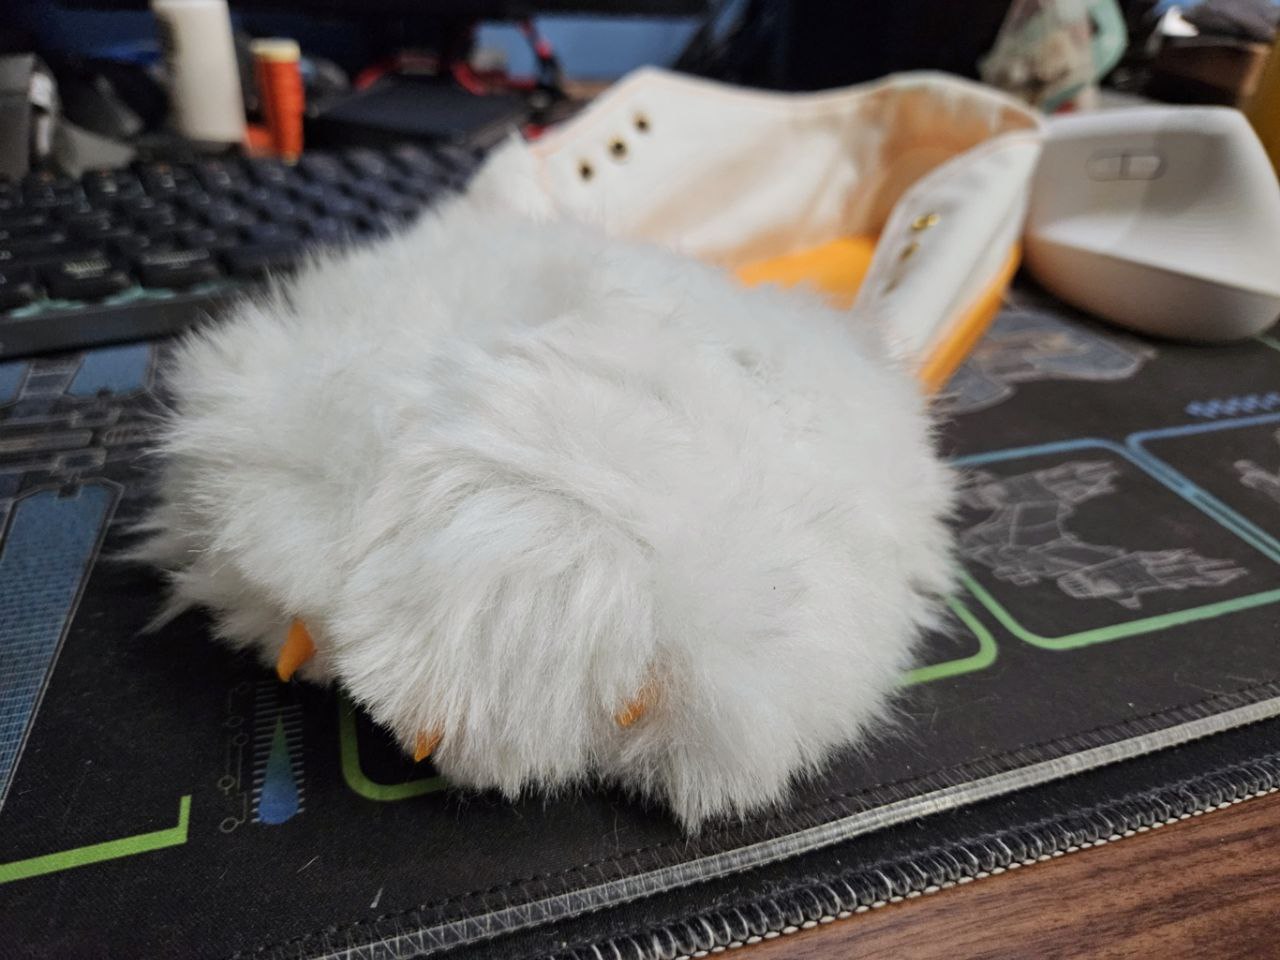
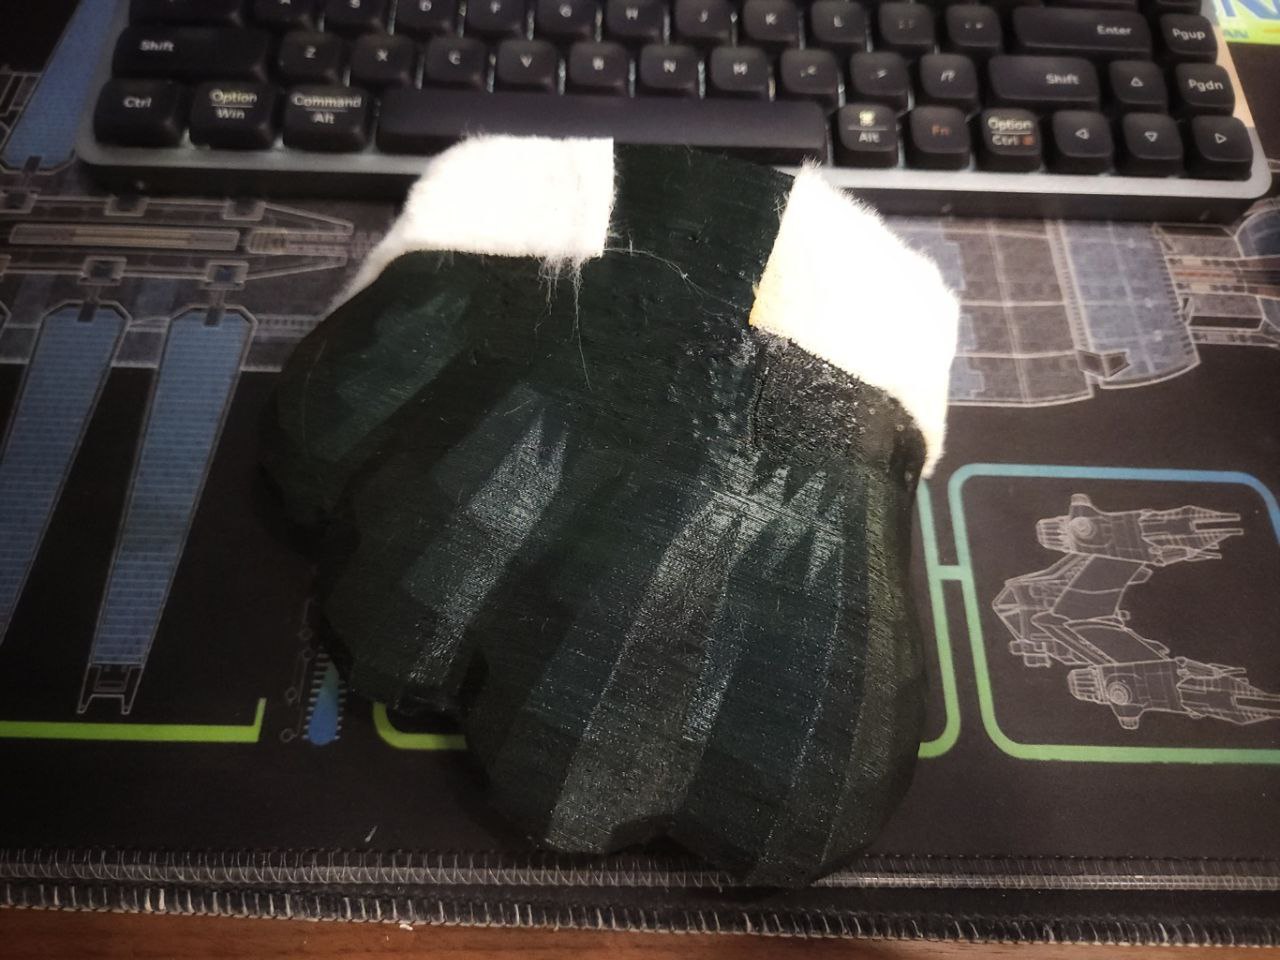
The hand paws work fine, but their construction is pretty crap. Will have to check how other paws are done.
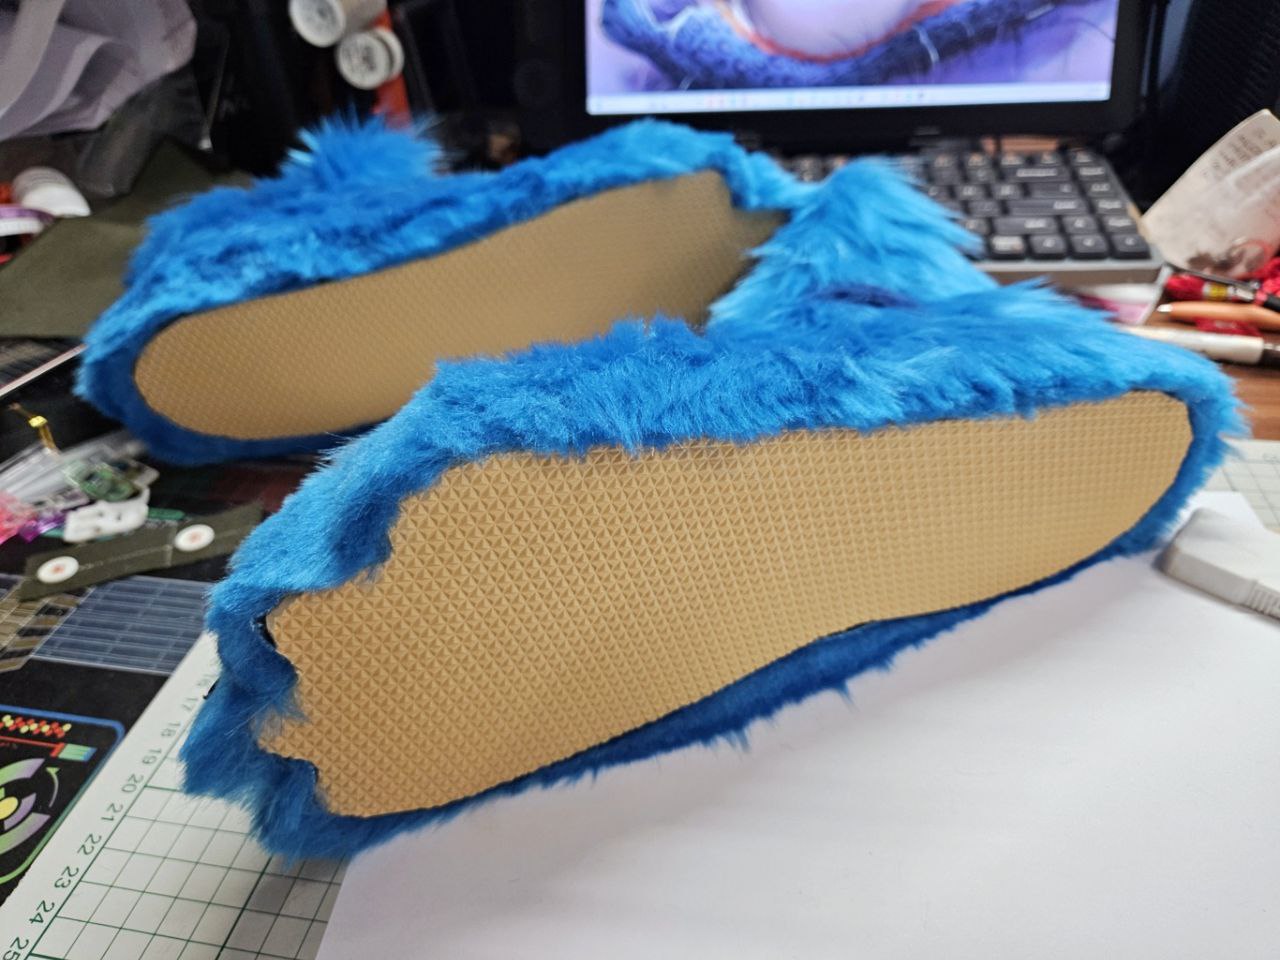
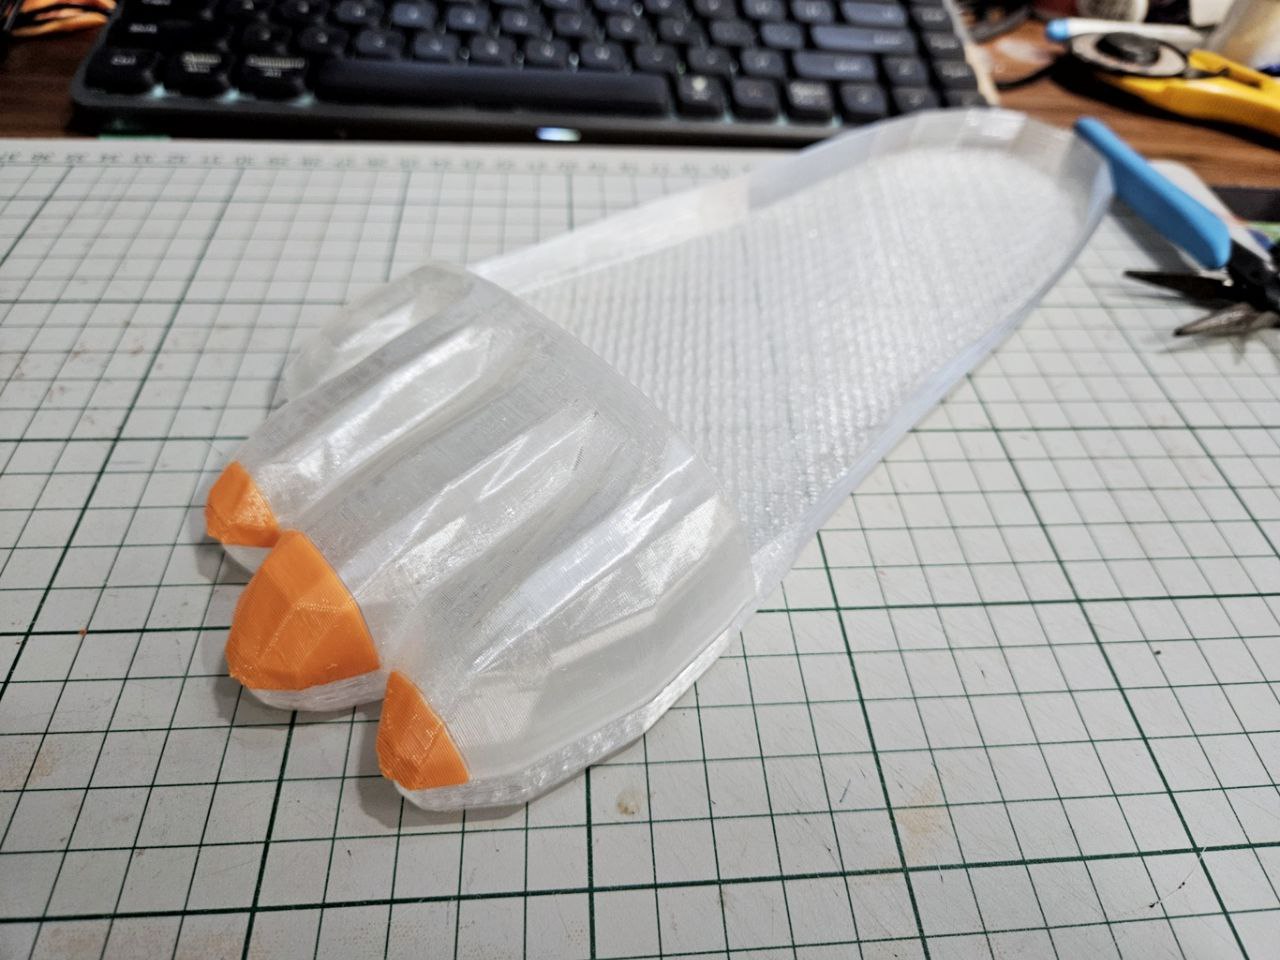
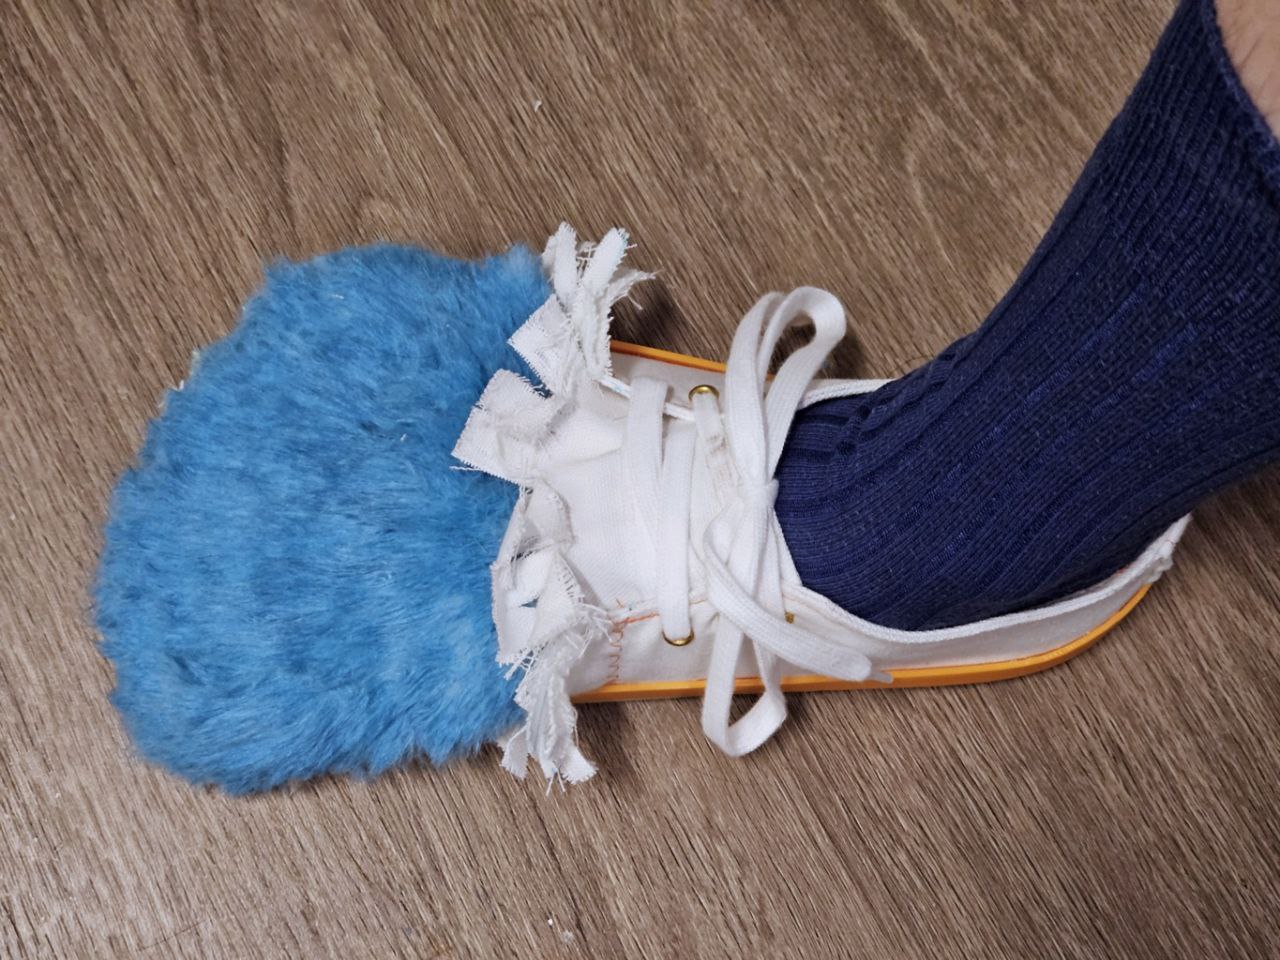
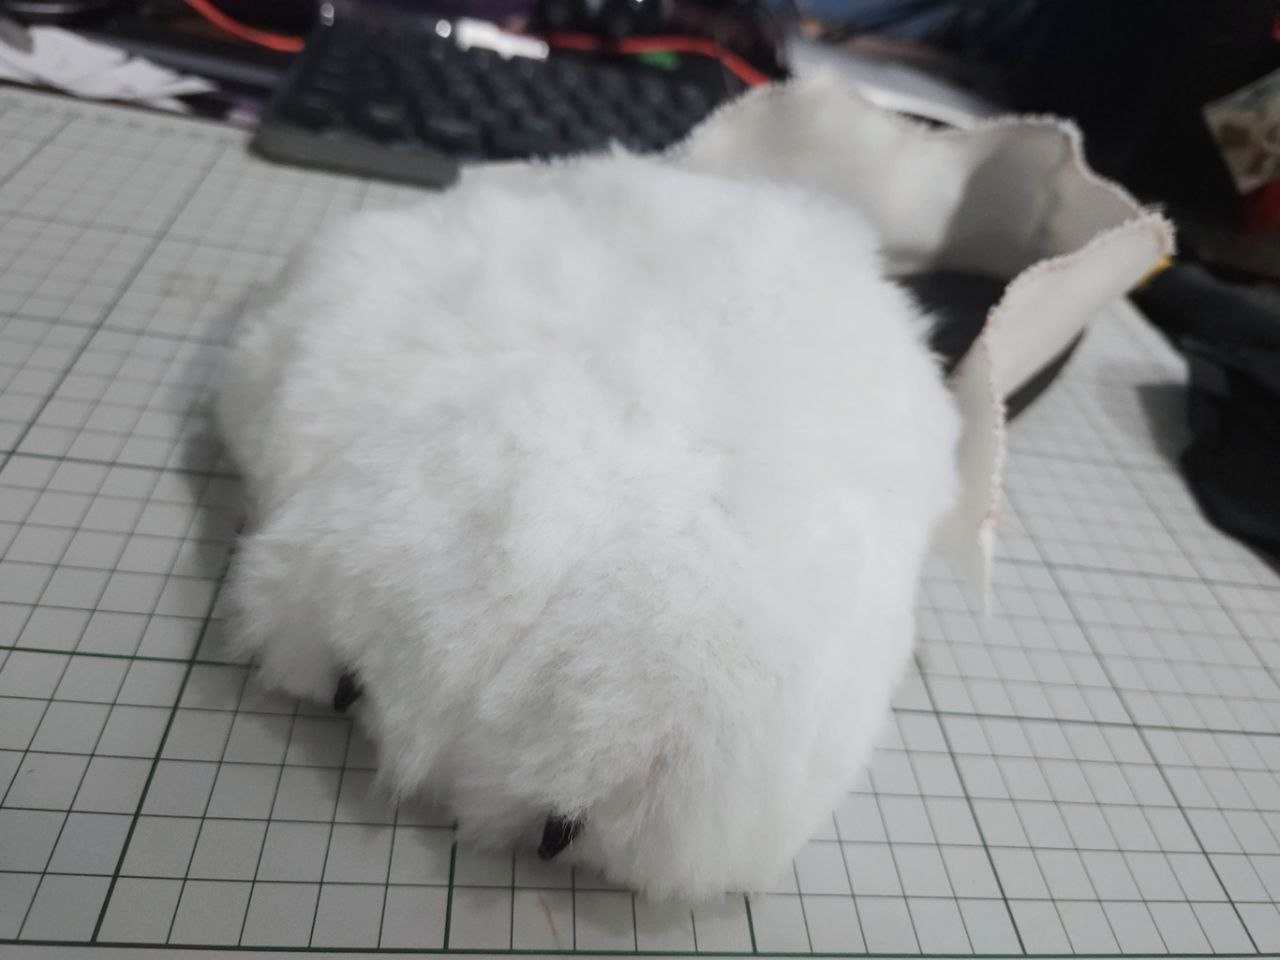
The footpaws are the part of the suit that worked almost perfectly. I will need to raise toe cover slightly, and line it.
I also want to shave the foot paws down, as the ankles aren't visible at all. This likely needs to have the zipper relocated, so I'll have to give it a think.
I'm hoping to finish this V2 suit by Eurofurence, so let's go!
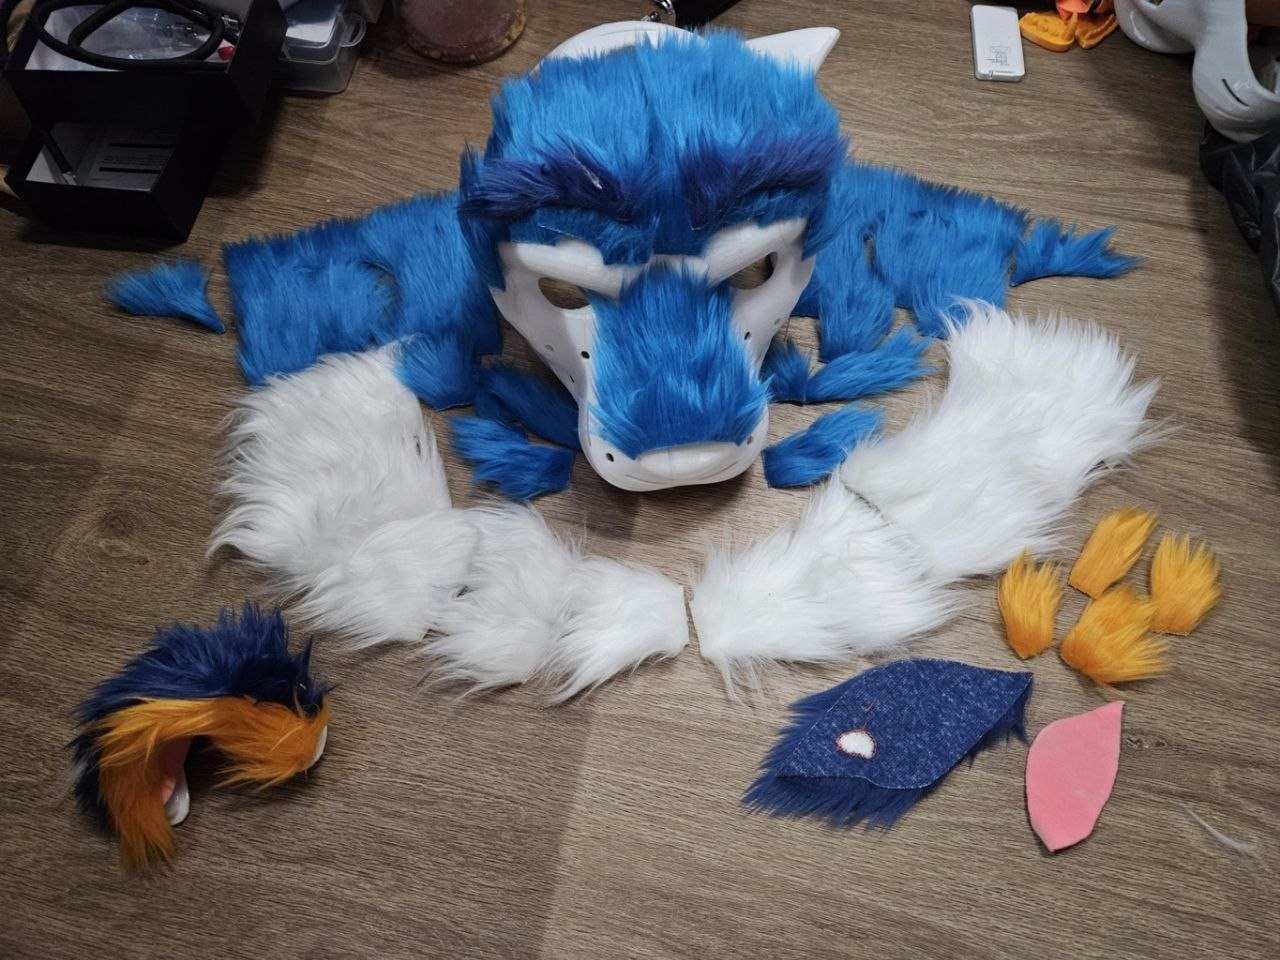
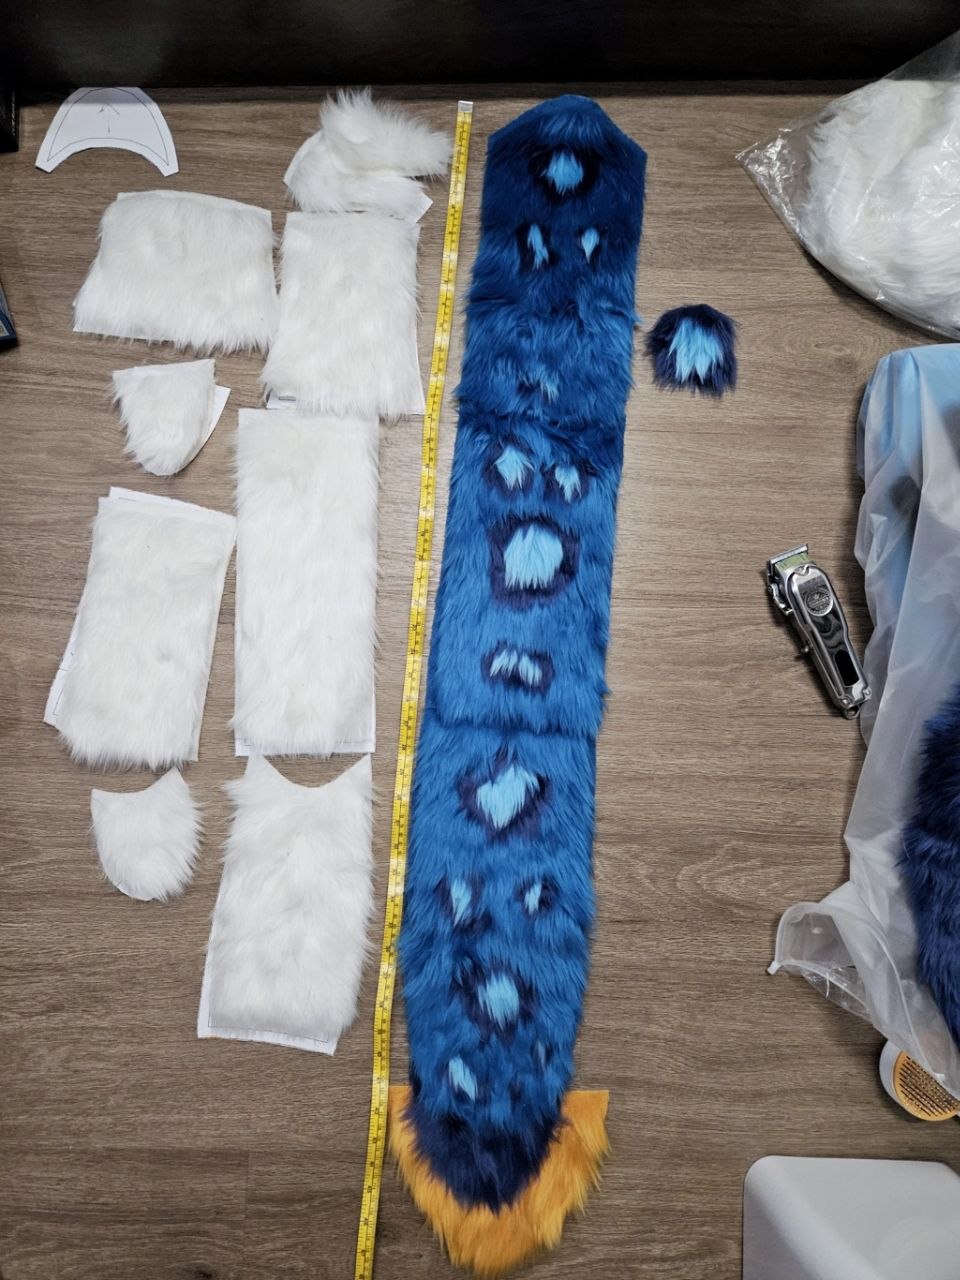
The following photos are just a sample of works in progress towards finishing the suit!
That said I accomplished alot between my last update and today, but I'm rushing to finish the fursuit for NFC - I think I can make it - so I'll update with photos later.
I just wanted to drop in this youtube tutorial on how to finish zipper tape.
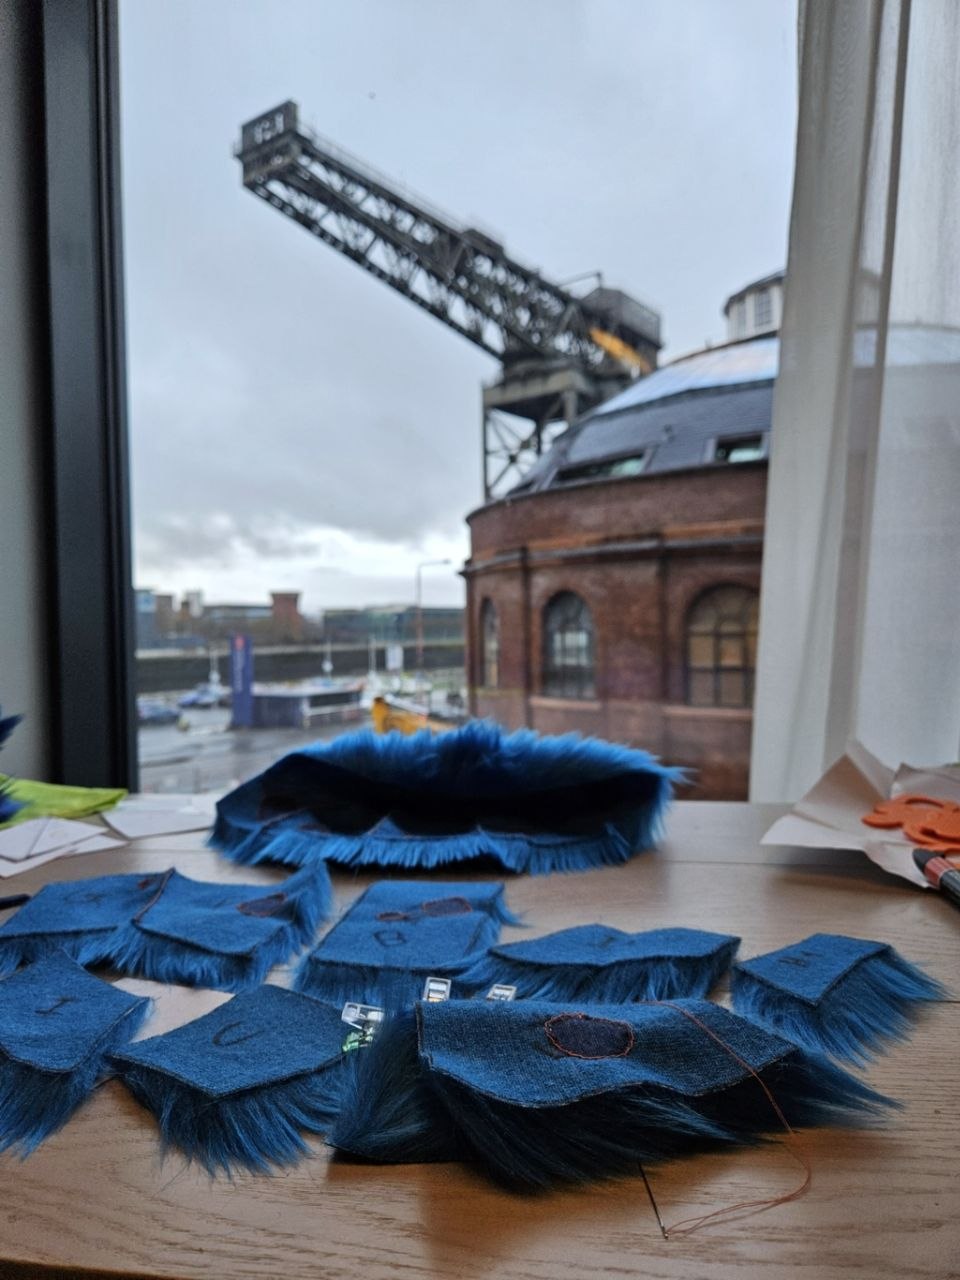
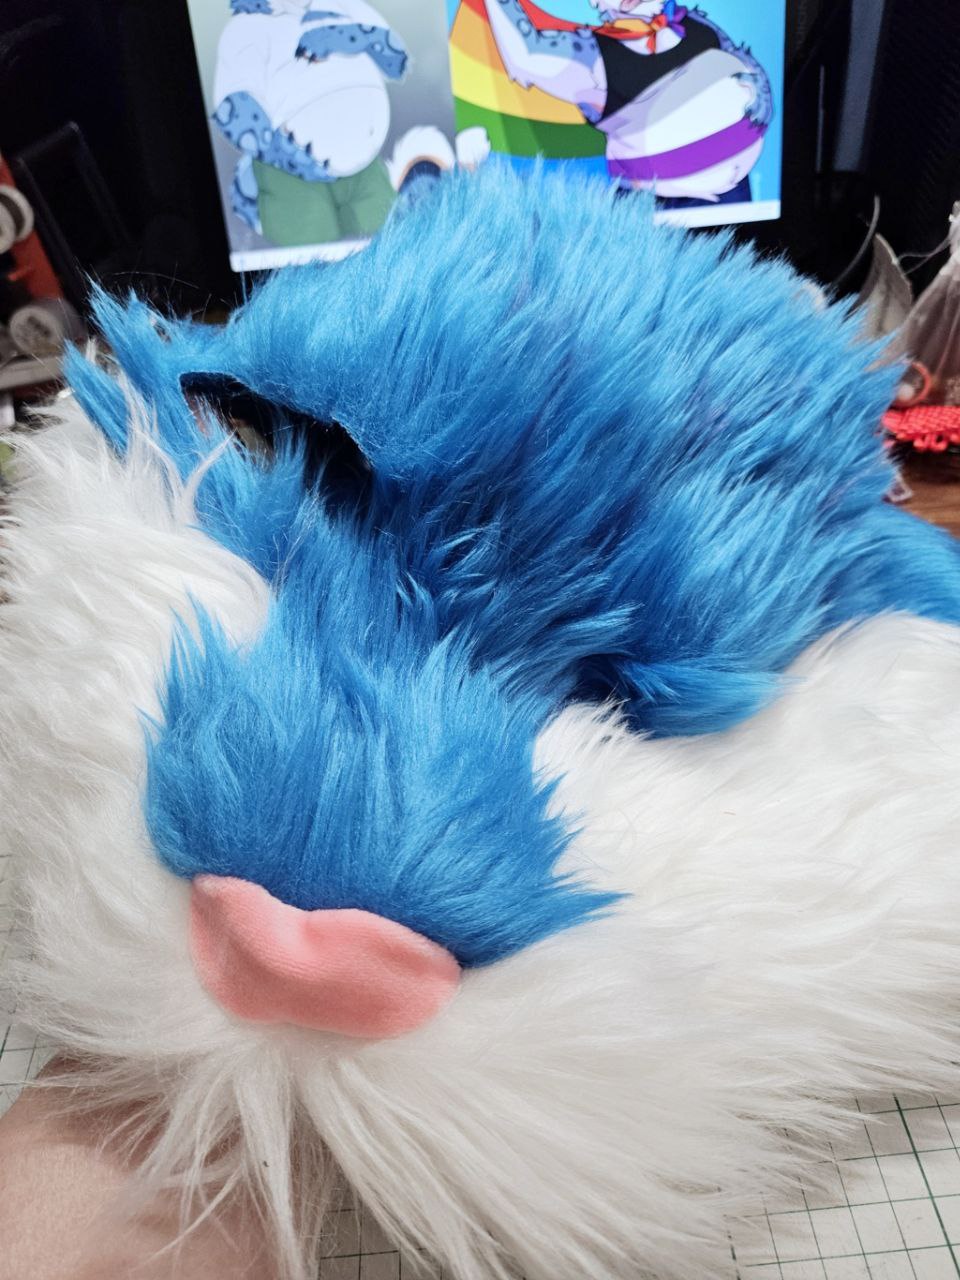
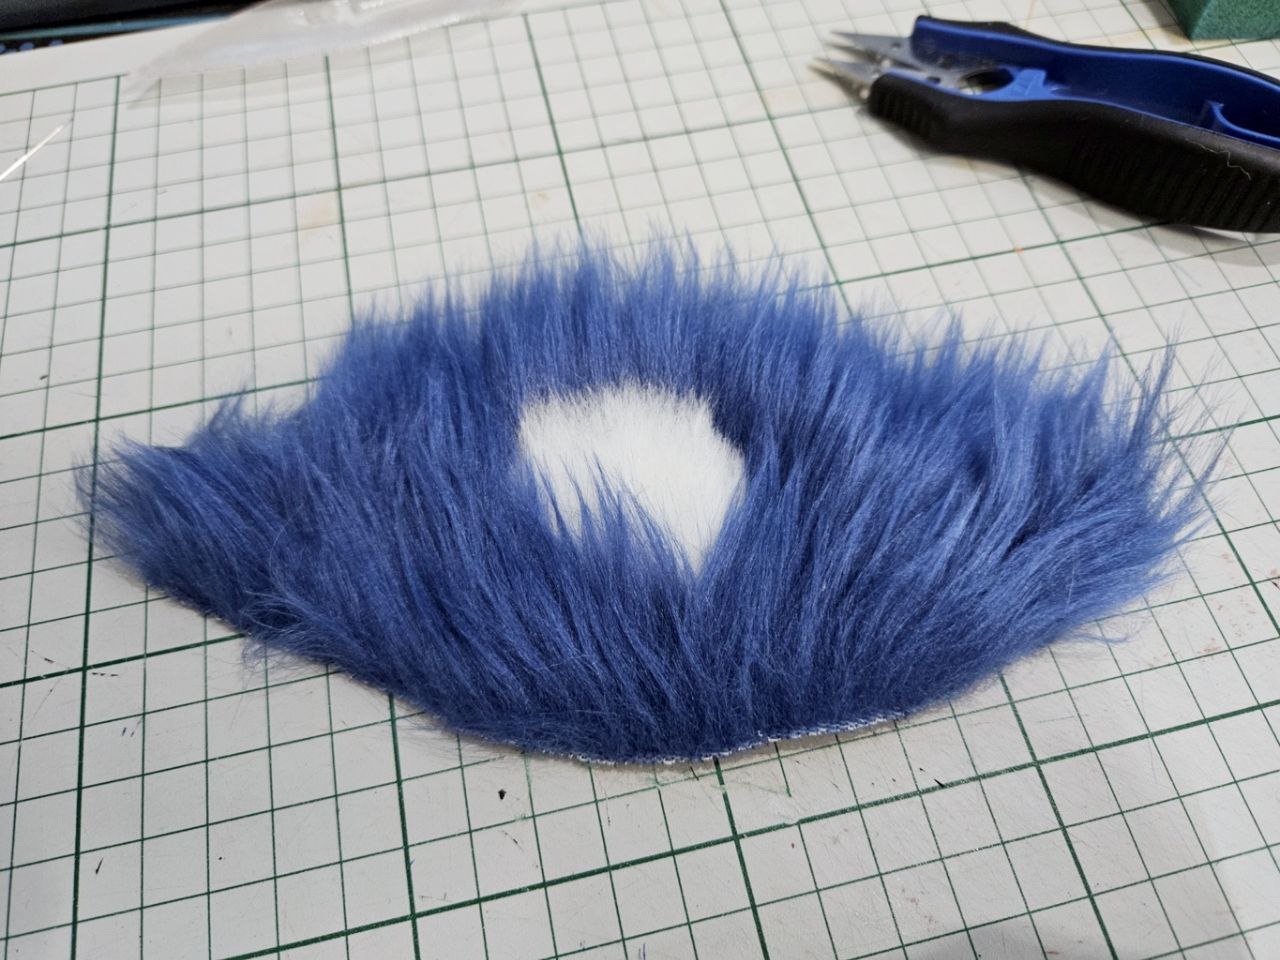
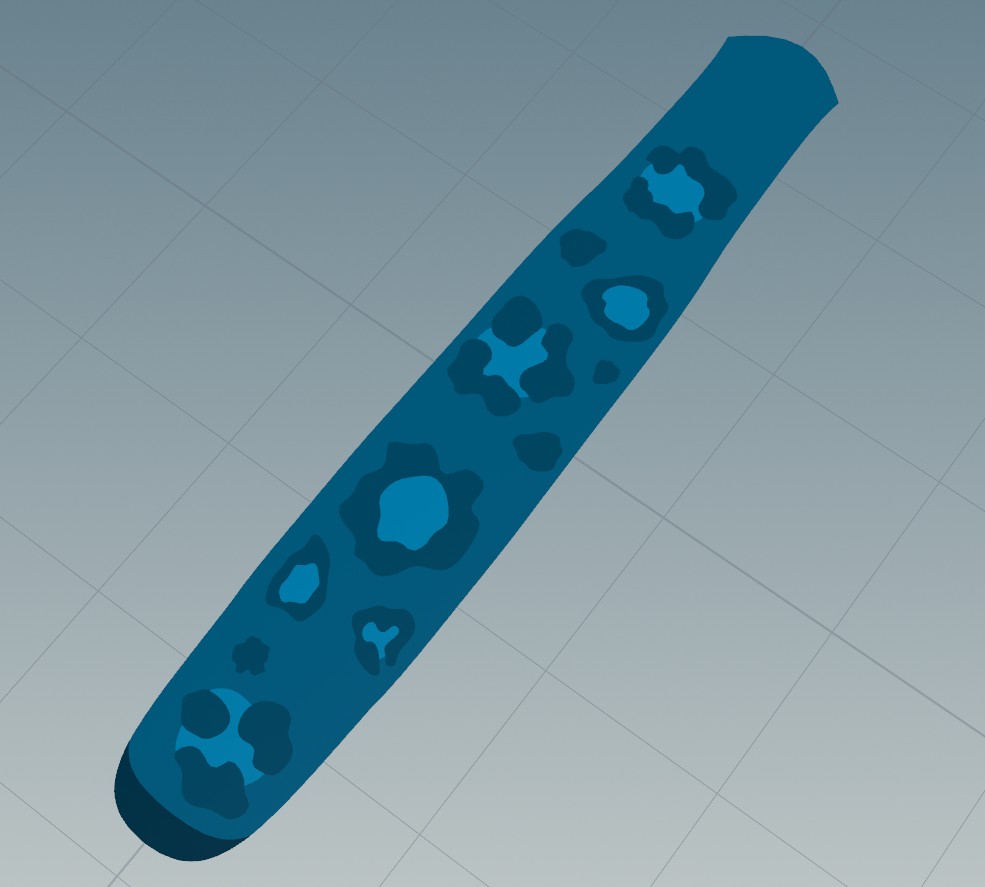
Adding the spots to the upper head took a while - I thought I could wing it but I'd tried painting the spots in houdini and could not get a result I liked. In the end what I did was look at the art I'd commissioned before, and got some shapes of various sizes and played with them until I got a layout I thought would work and went with it.
Could possibly do with a few more.
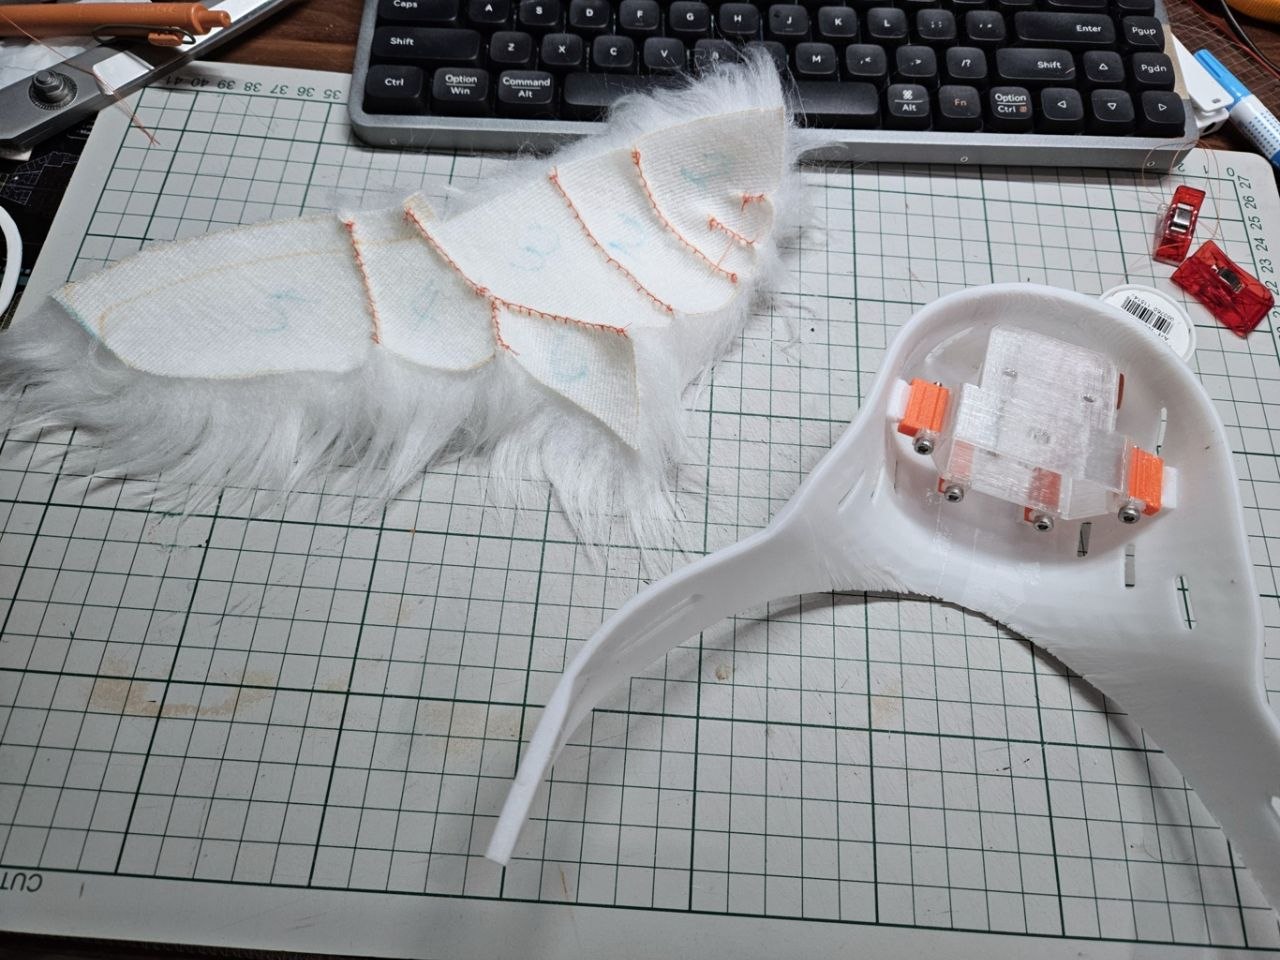
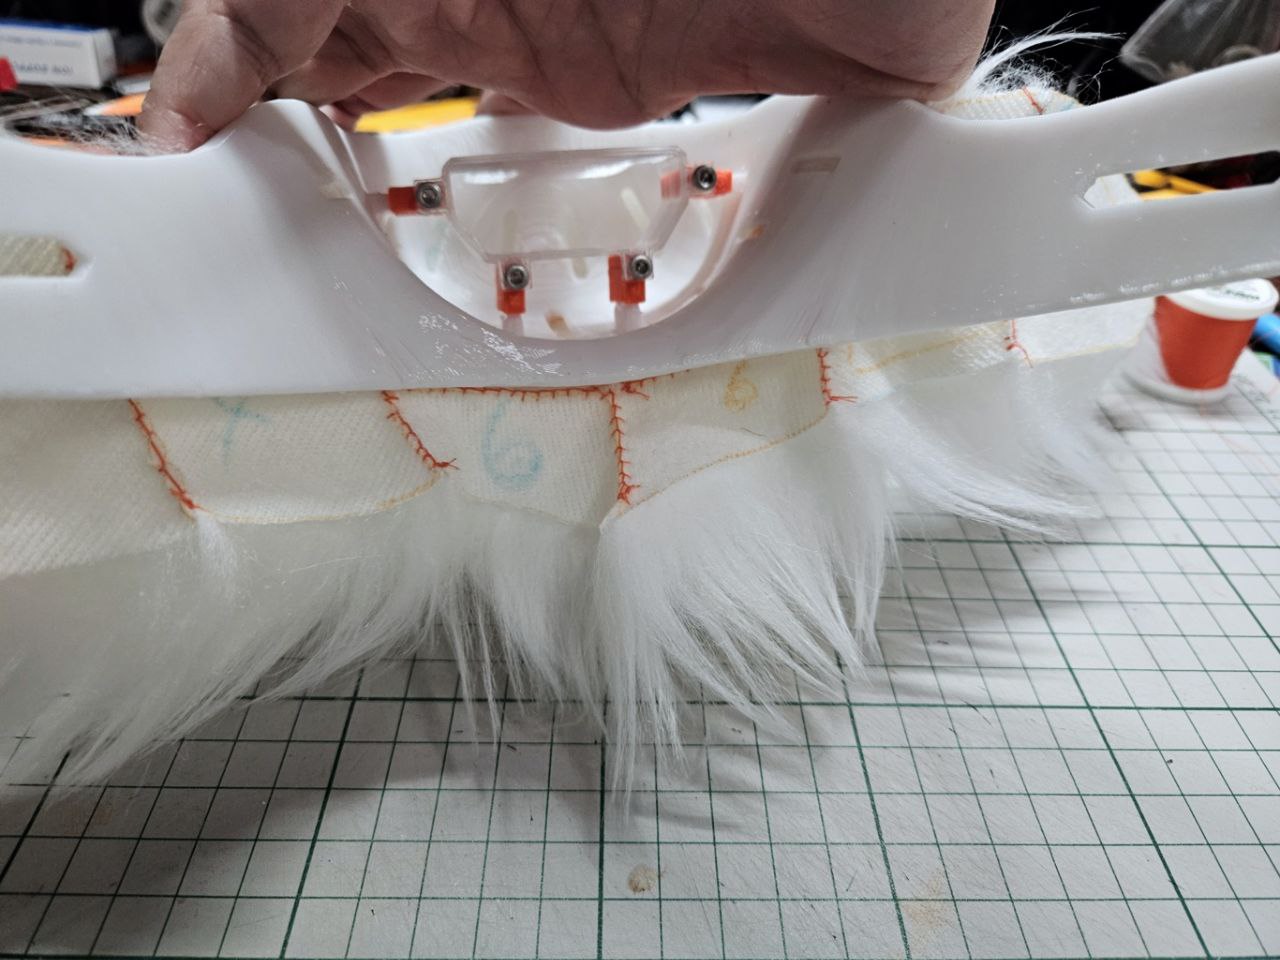
I also made the big leap to actually glue the fur down to the base, that went really well. There are two bare patches though, where the seam allowance is showing, but should be easily fixable with some scrap fur and glue. I'll hold off doing that until I get the head assembled - very likely the upper head's fur will cover that area.
Another thing I was experimenting with was the nostrils. I think the original design was too simple, but it's too late now to change it. Very likely I'm going to keep the original design, and using a dark thread to sew some stitches to give the impression of nostrils. That way I don't need to spend too much time messing around with minky fabric.
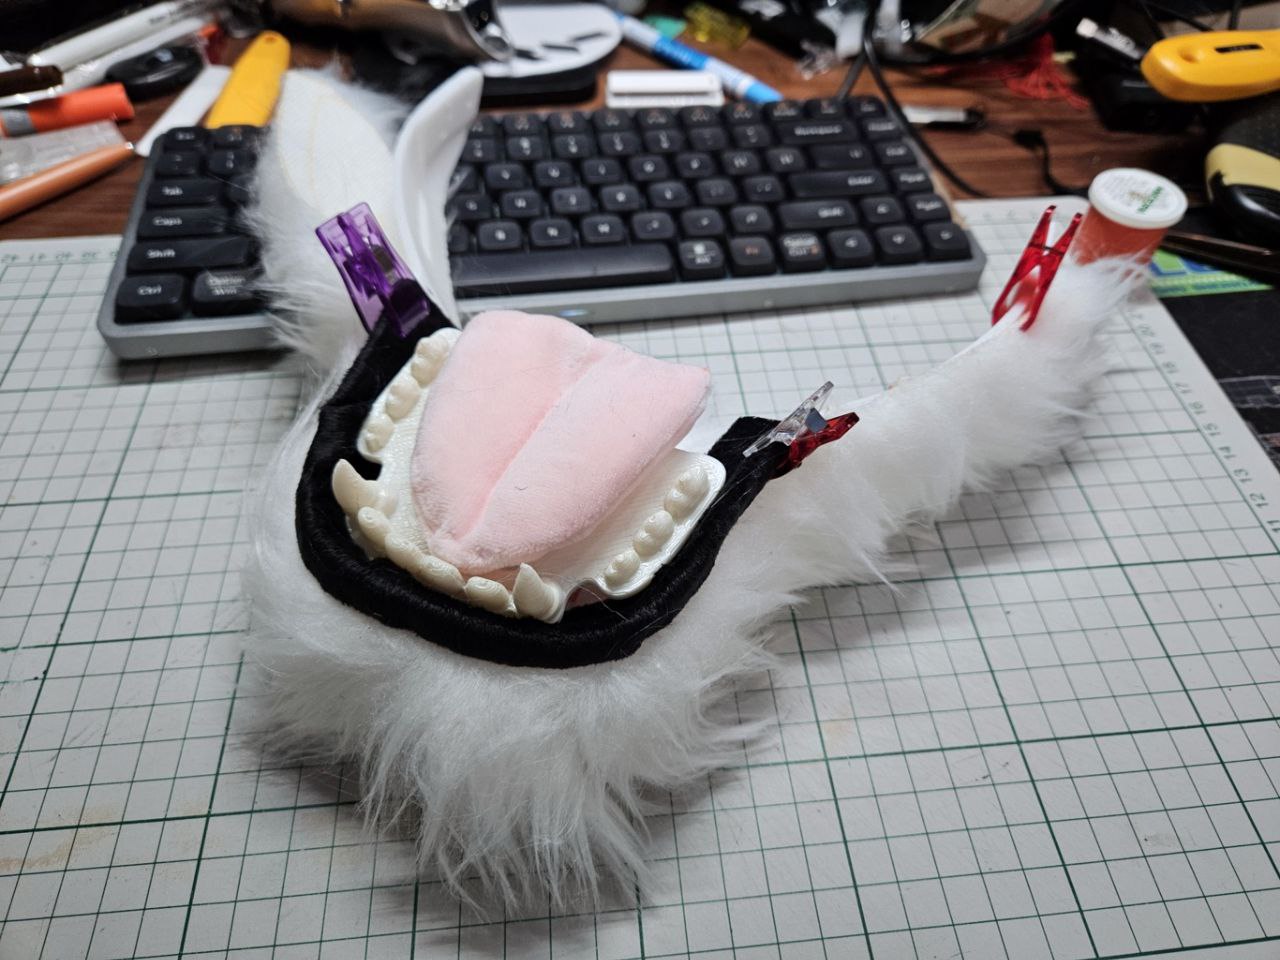
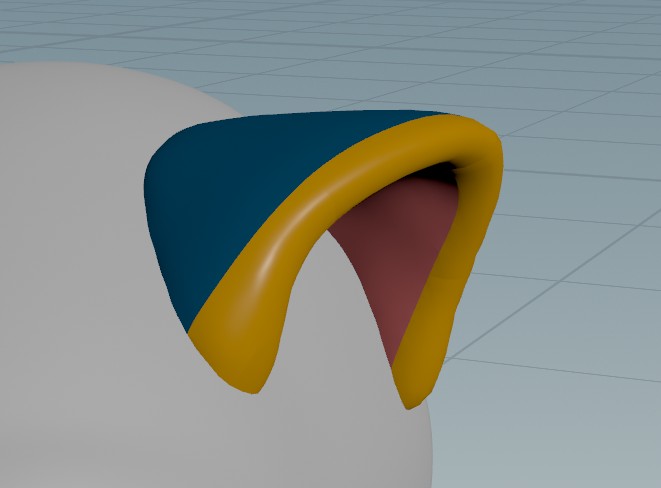
Also re-did the tongue to match the colours of the inner ears. Minky fabric is a pain to sew with, I really should look up tutorials on how people sew it with a machine. ATM I'm just running a basting stitch by hand before running it through the machine. Else I could not keep the fabric from warping like crazy. Even so, I still have a fair amount of warping.`
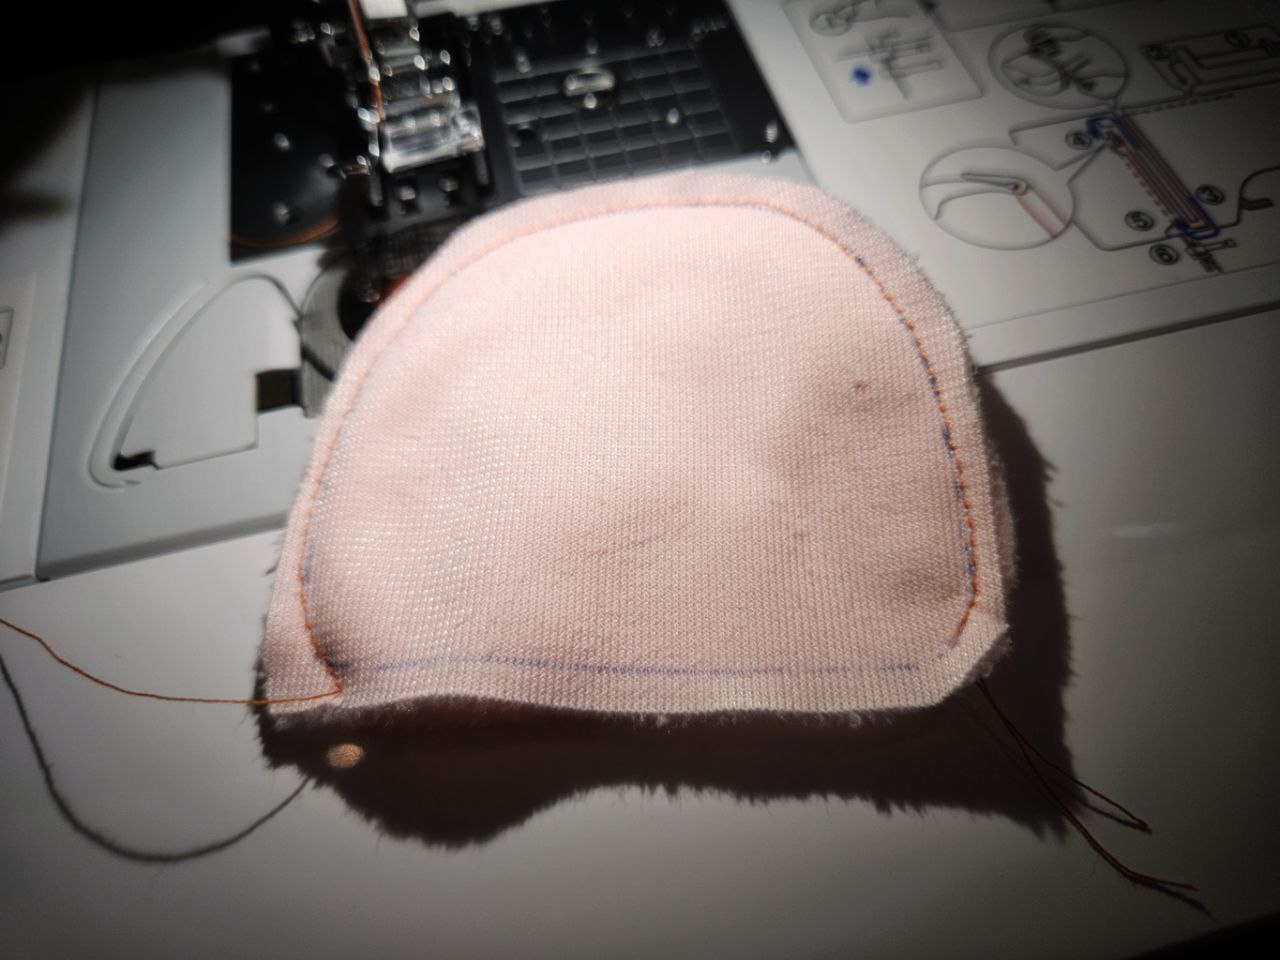
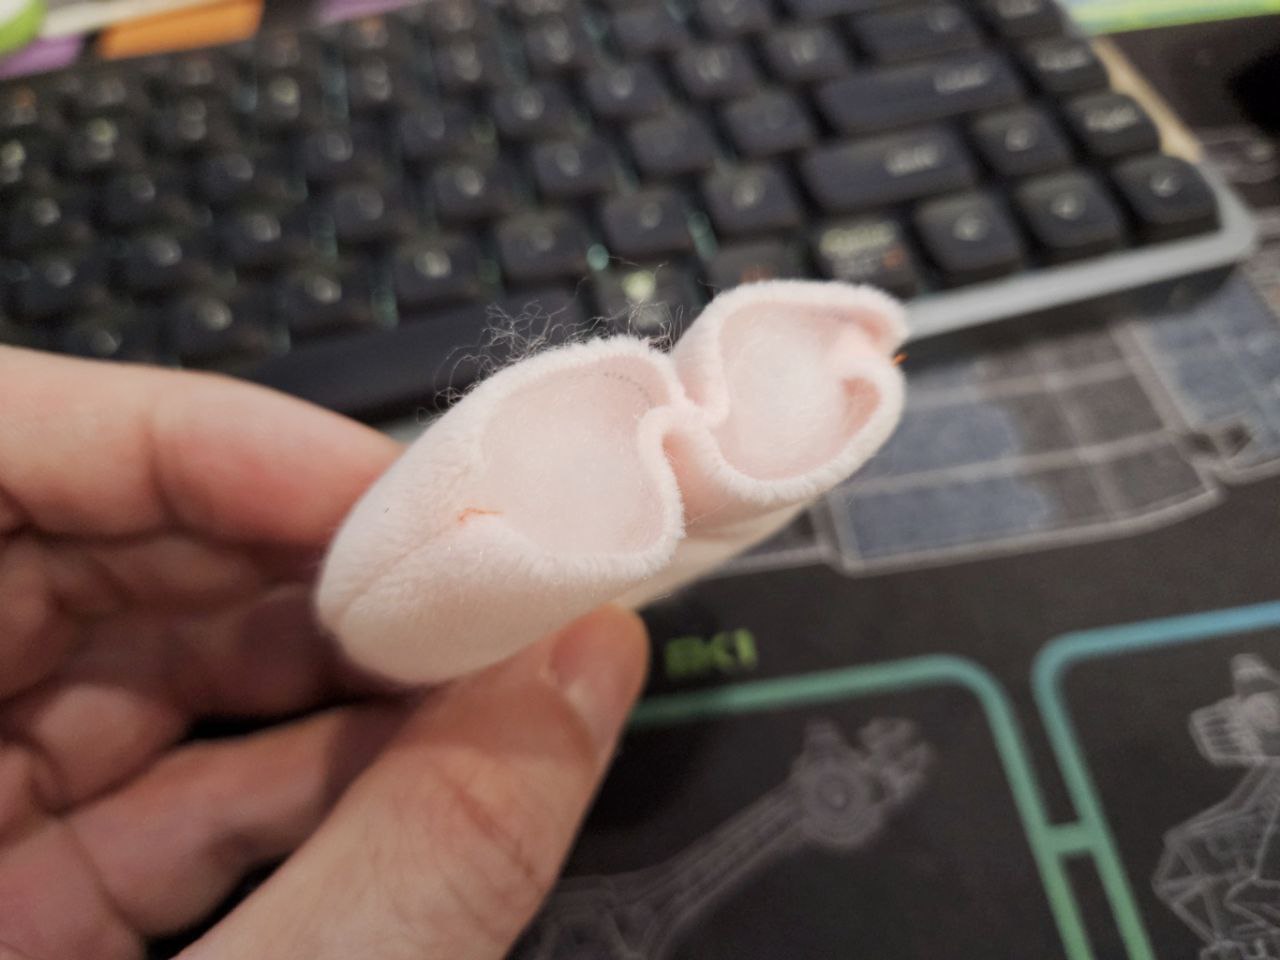
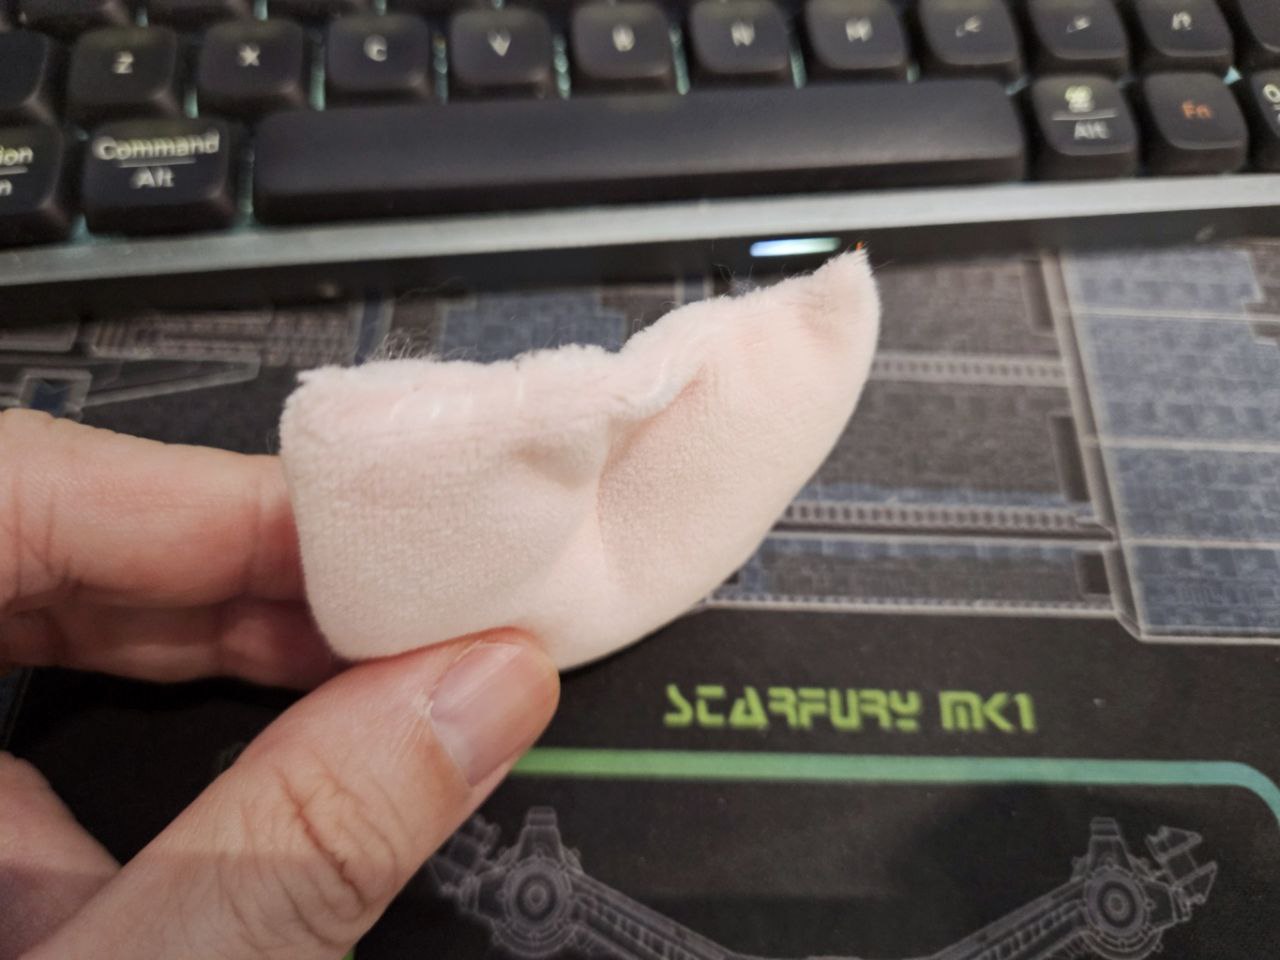
Spent the day cutting out the pattern for the head. Managed to sew up one ear and the fit isn't the best, so I have concerns for the rest of the head. Will know tomorrow!
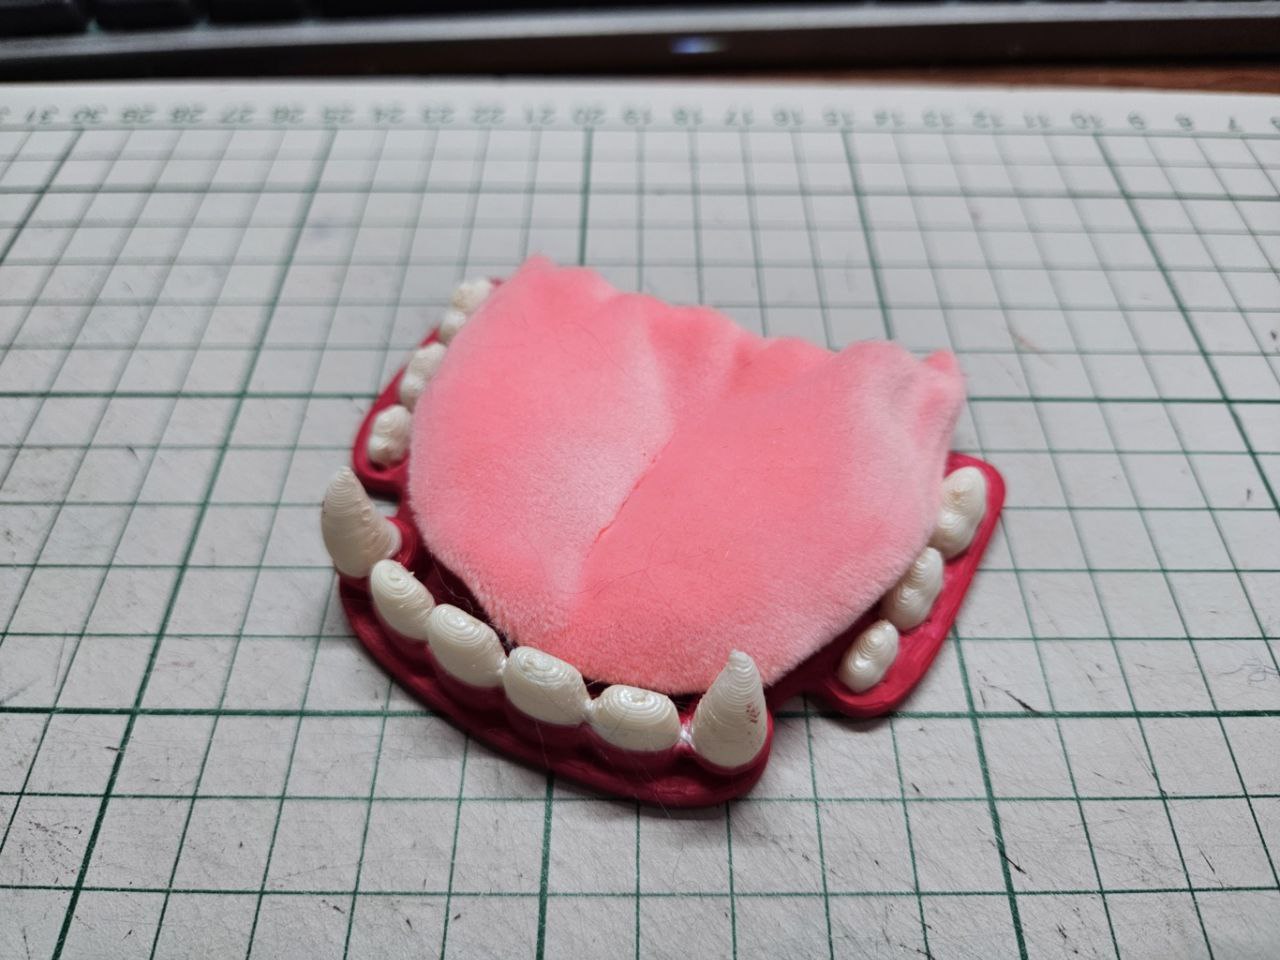
I also printed out a new set of fangs and mixed the cadmium free red with phthalo blue to make it a deeper, cooler colour. This seems to work, though I think now it's a bit too dark - some mixing white added might sort that out.
I did not use the airbrush tonight, just wanted something quick and fast. While I think this is fine for the gums, the original which was airbrushed has a glow that's missing, something like a bit of subsurface scattering. Likely because the airbrushed coats were much thinner than me slathering paint on with a brush.
That said, I'd ordered some gloss medium. It's not liquitex (because holy crap the liquitex gloss medium is insanely expensive here). I'll attempt to apply it as a top coat and see how it goes. I hope the gloss will give an effect of wetness to the fangs/gums.
I'd decided that I would not be able to finish every part in time for scotiacon, and dived into furring the head. The footpaws I should be able to finish in the time leading up to nordic fuzz con.
I forgot to update the pattern after some making some changes, did that, then cut out the fur and sewed up a fair bit of it.
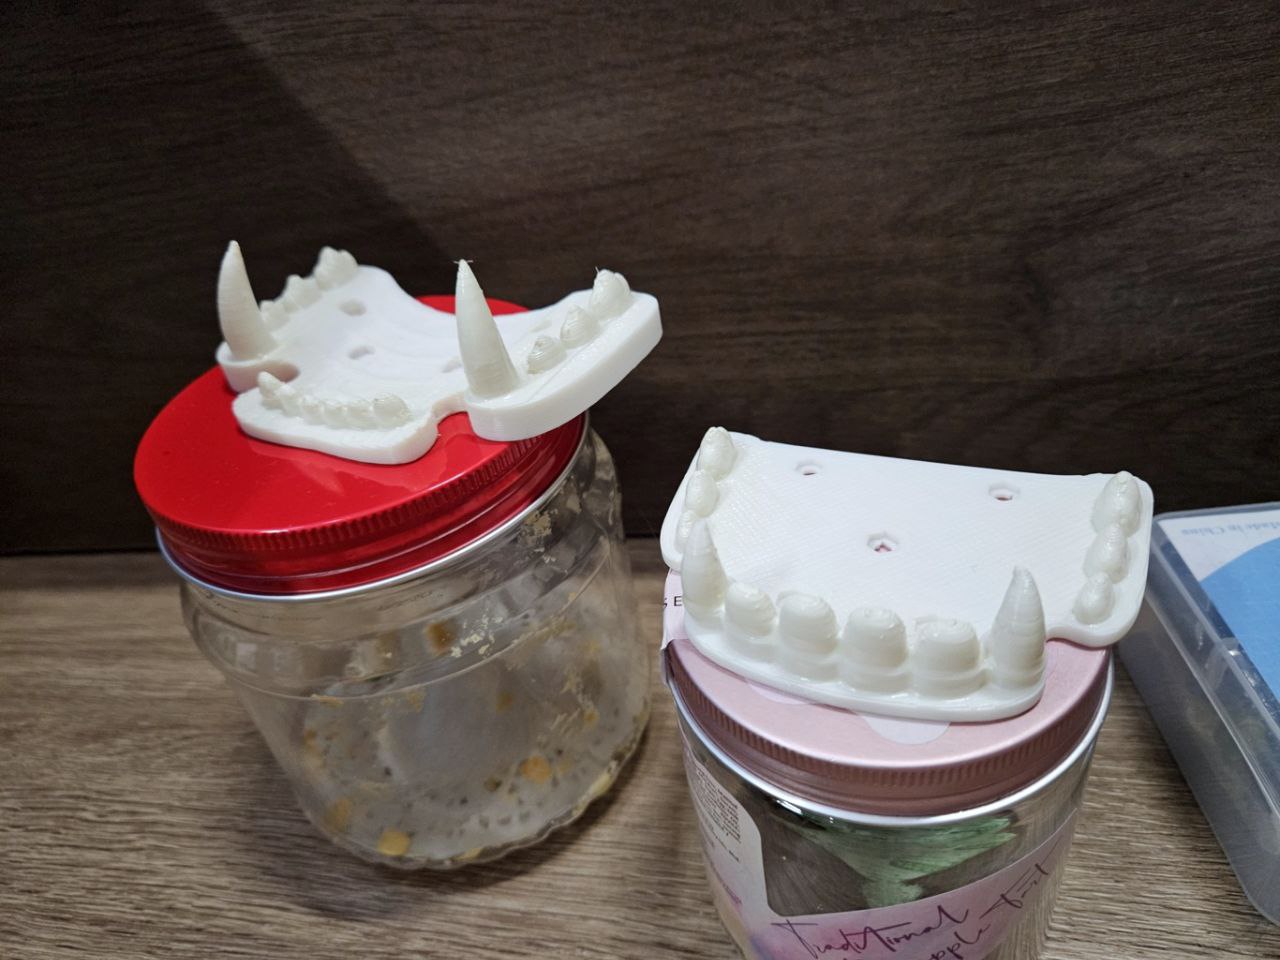
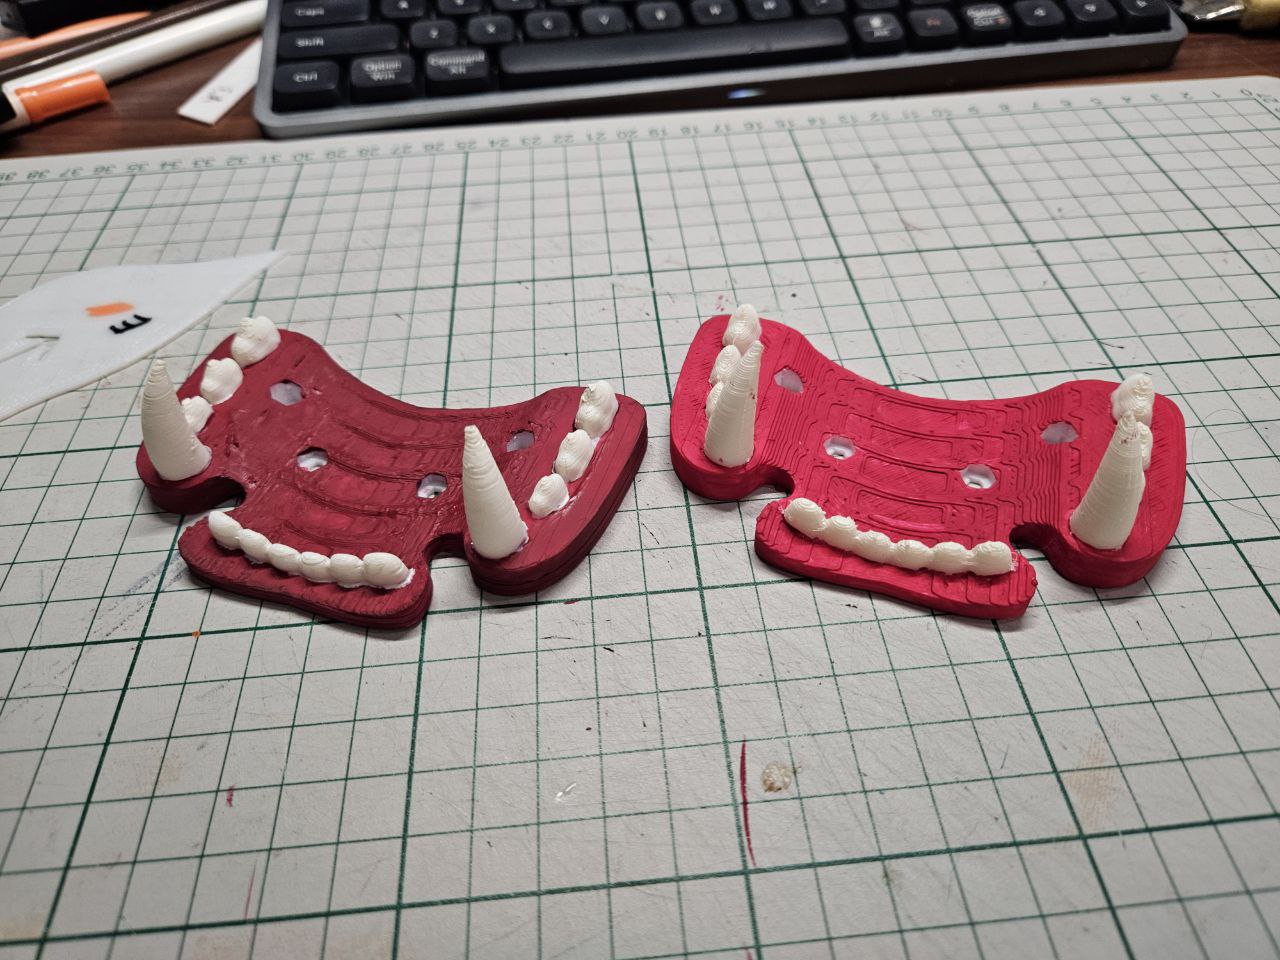
I also airbrushed the fangs and teeth with liquitex parchment mixed with mixing white. I'd re-printed the mouth parts using white tpu, which was too neutral. The airbrushing gave a tone closer to bone.
I don't have any paint for the gums, so will need to make a trip to pick some up. No idea what shade of red to pick hmmm...
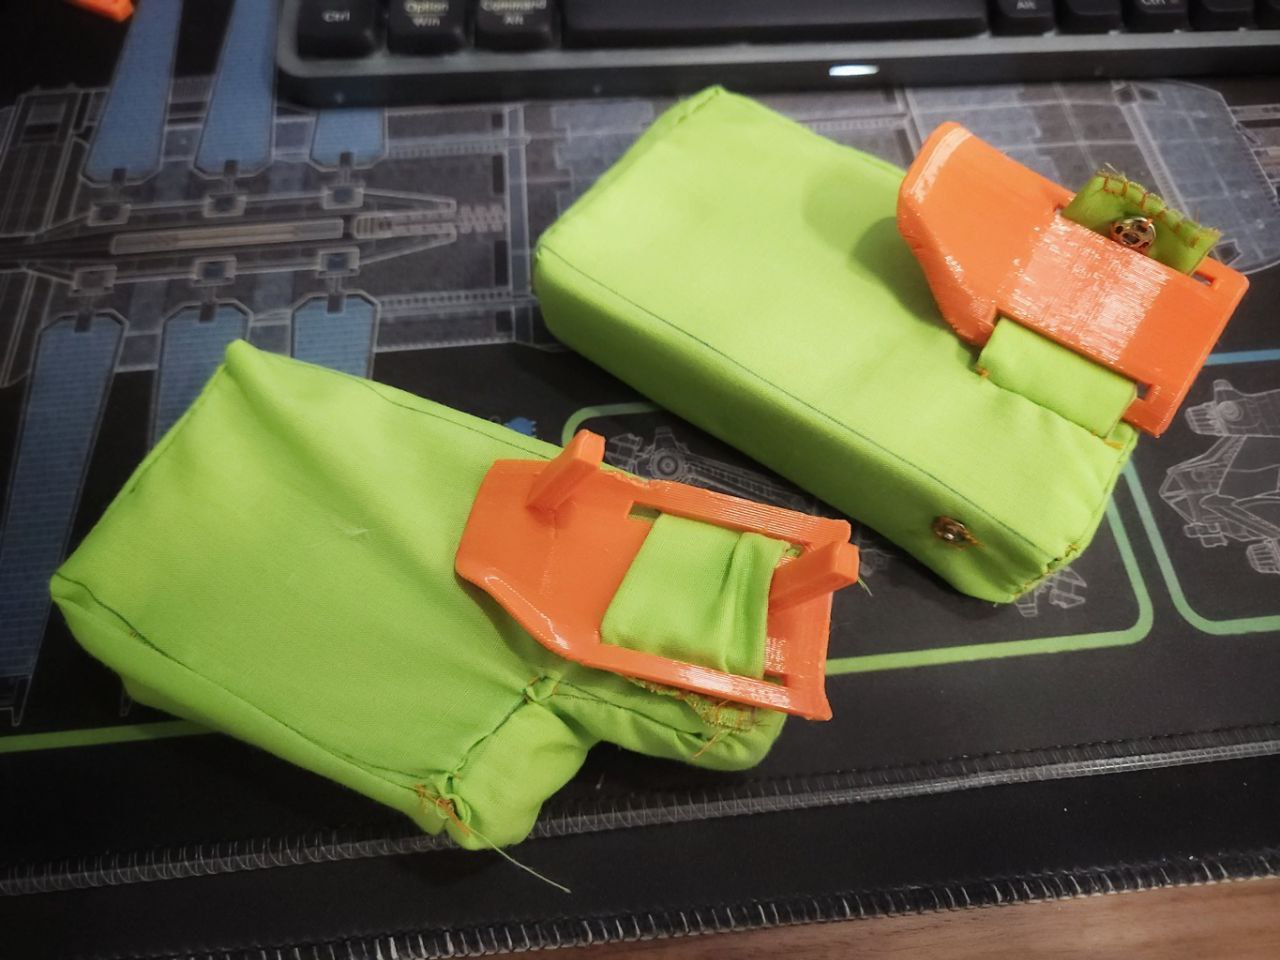
With the paws done, I finished up the bases for the paws.
Alright both are sewed up. Today's pair I made several errors, costing me a fair amount of time. Still need to sew in the velcro. Gonna figure out if I wanna work on the head or foot paws next.

This took forever to sew.

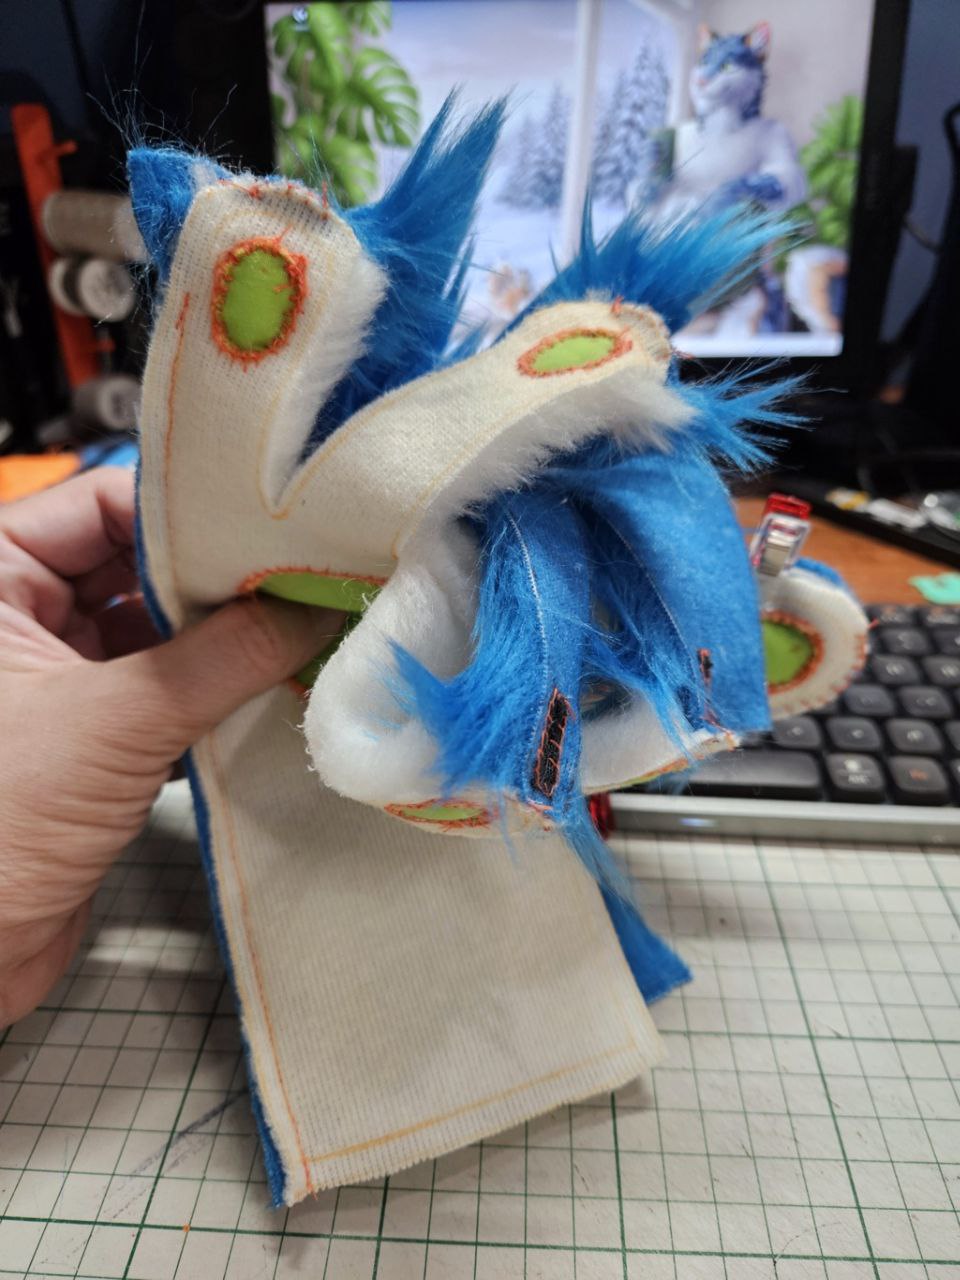
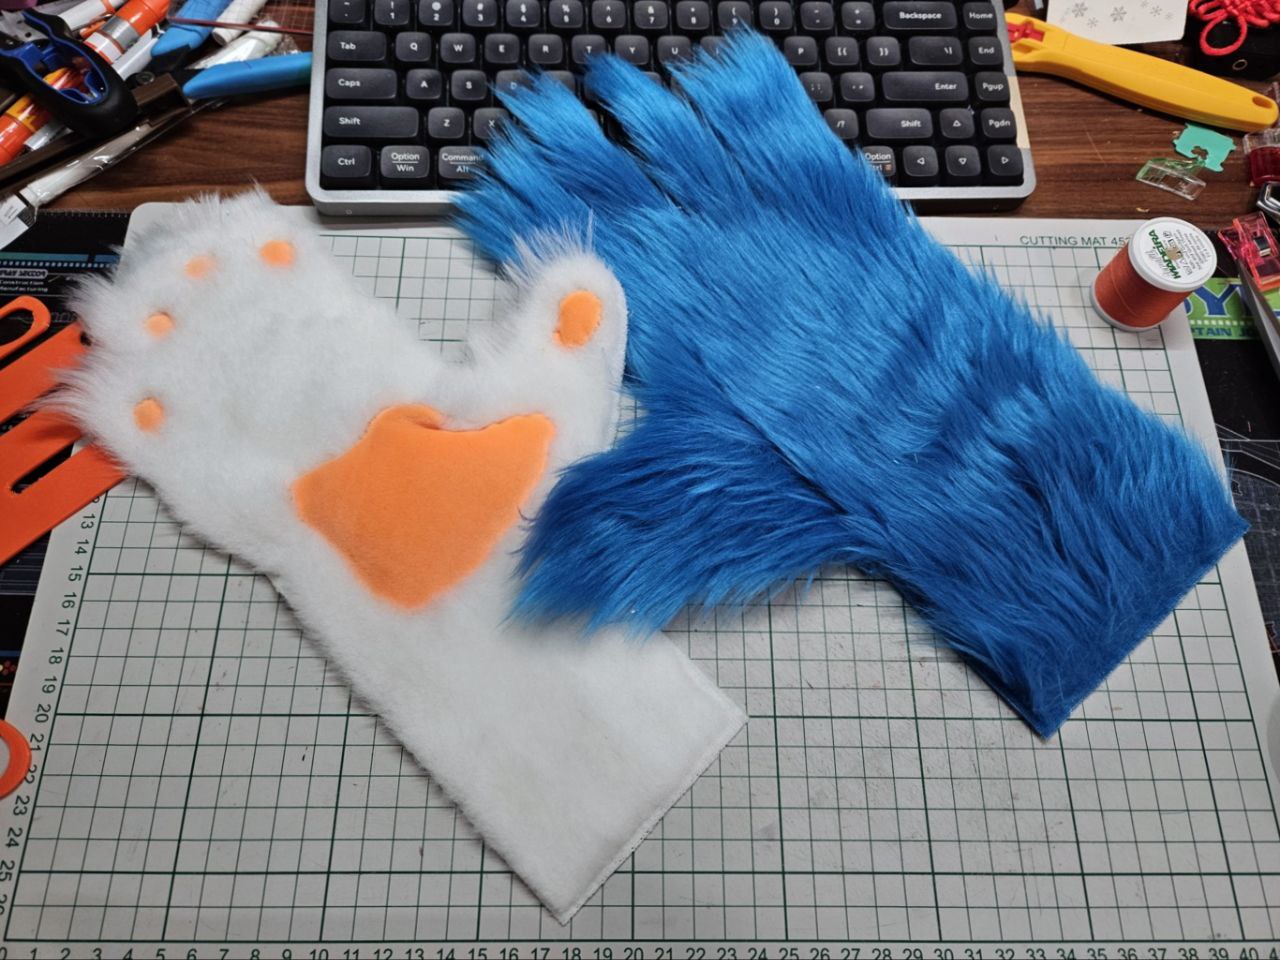
One difficulty I had was using stretchy material for the inside of the paws, that takes an insane amount of time to sew, and attaching it to the faux fur took forever.
I decided to re-do that part with poplin, and got the distortion down by a fair bit.
I also think the orange is too bright :/ Sadly, no time to get more. Would love to have something closer to my orange stripe but oh well.
Next will be to sew up the fourchettes (parts between the fingers).
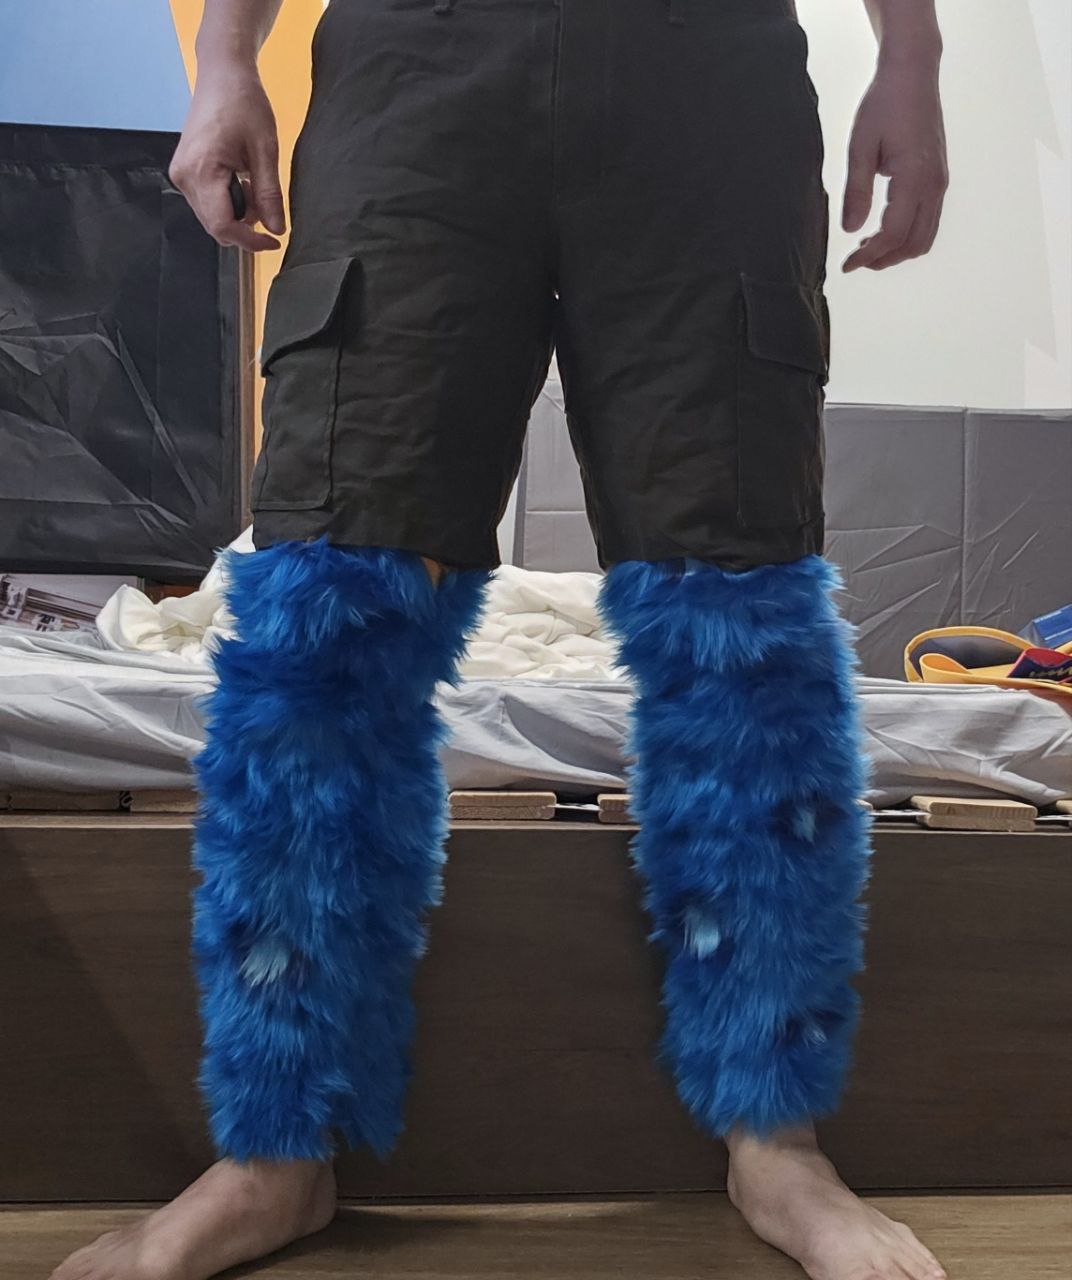
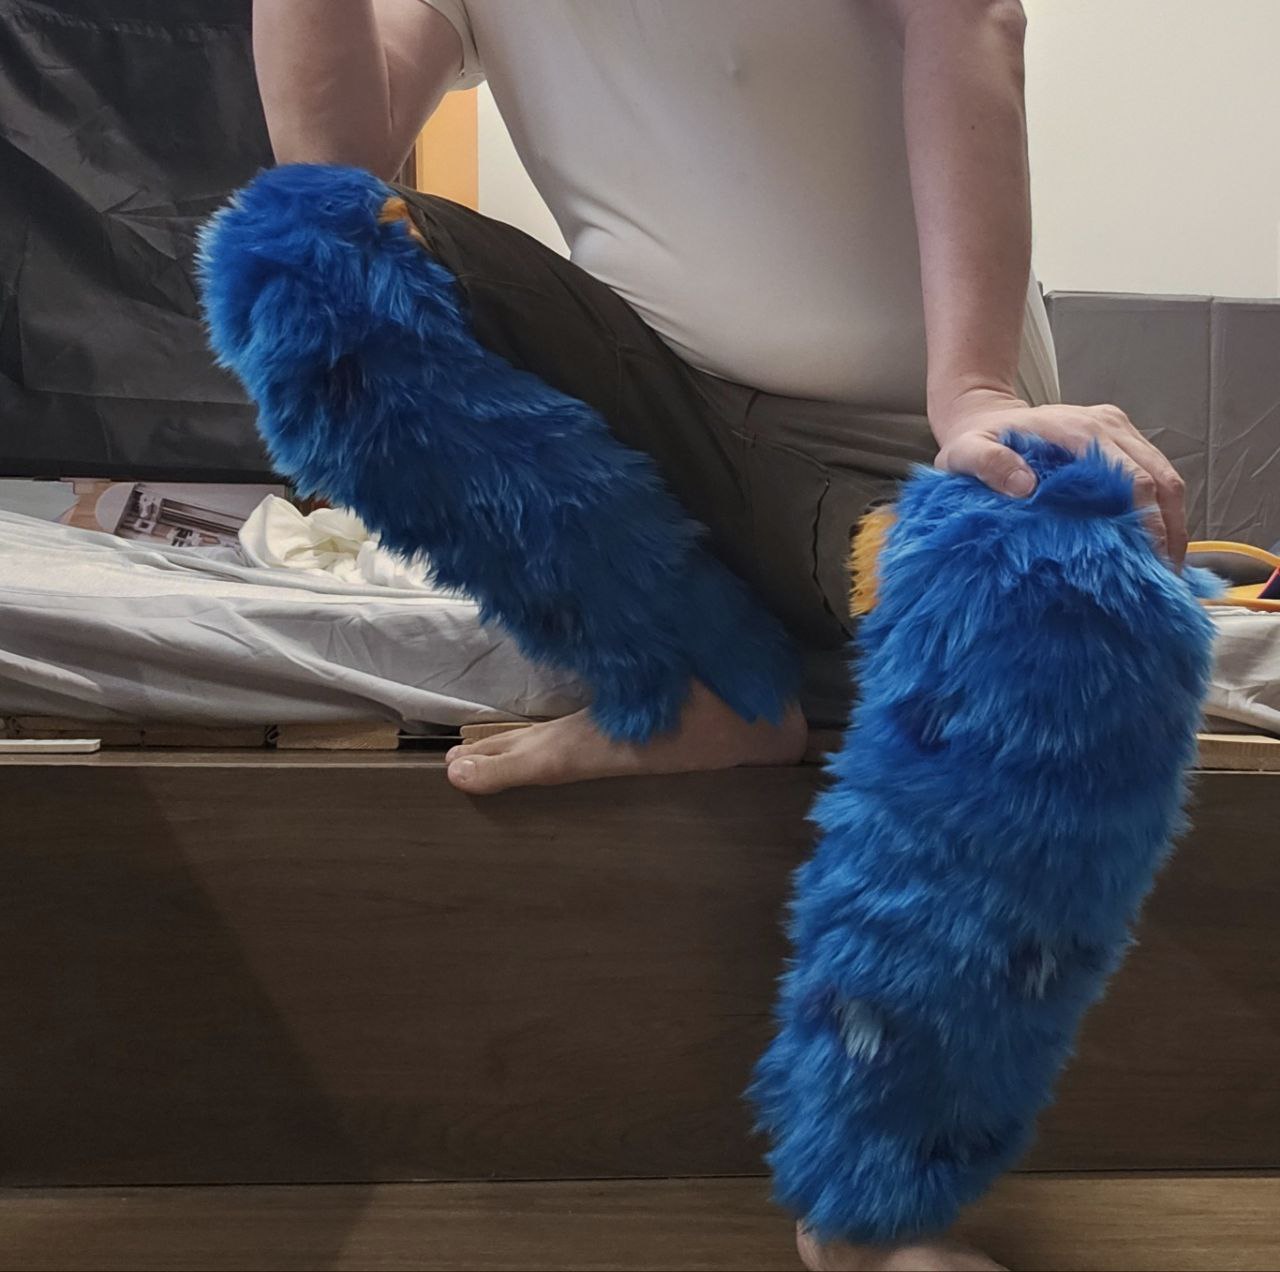
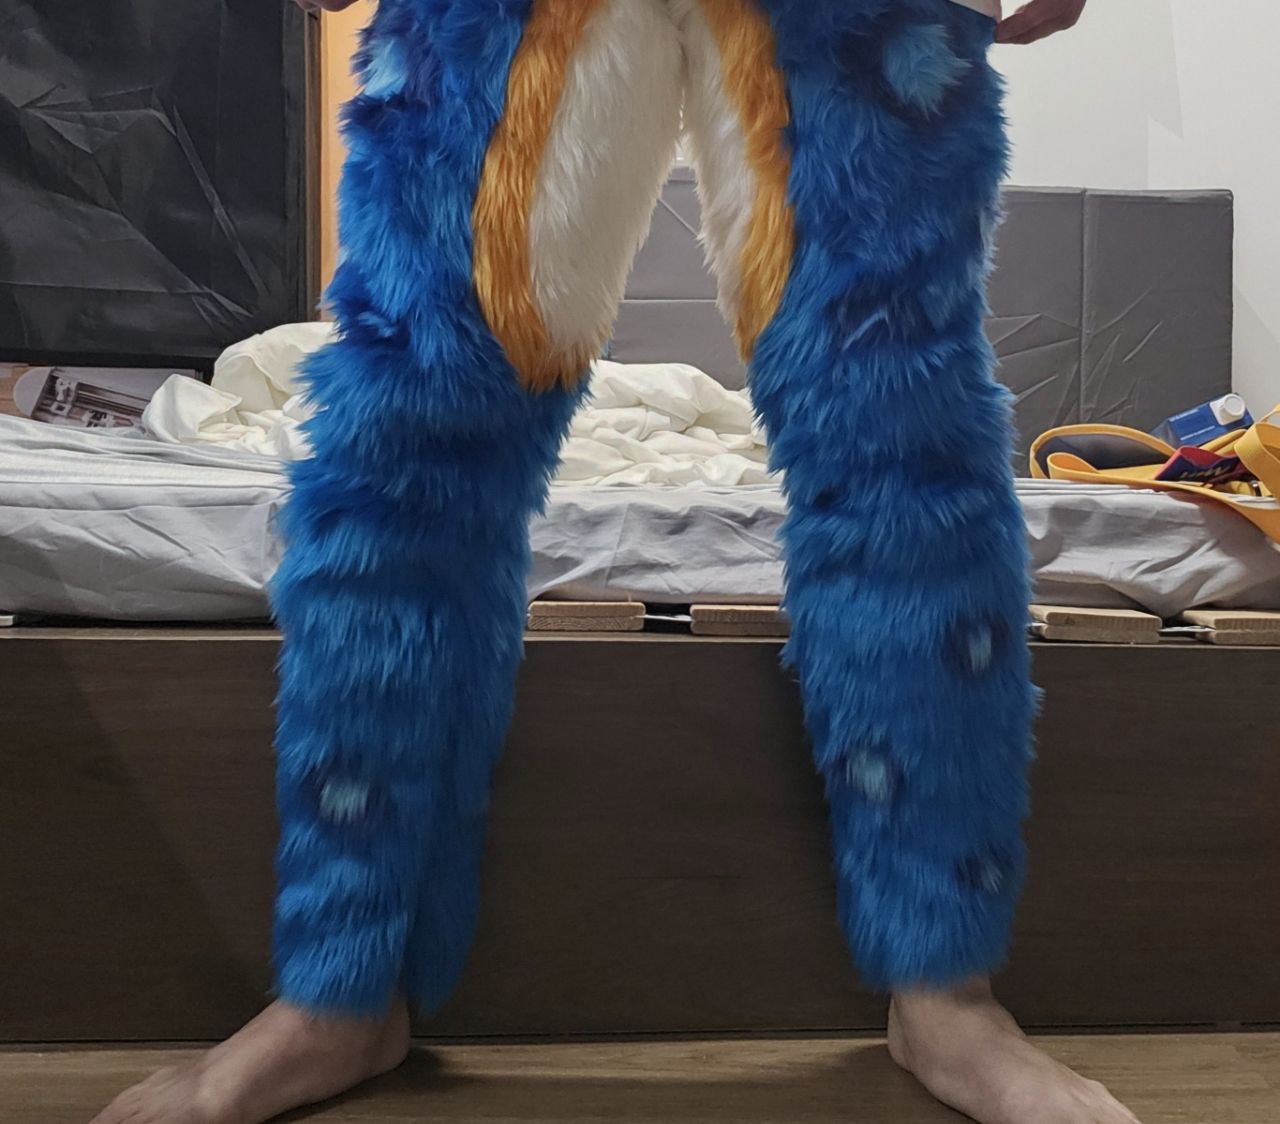
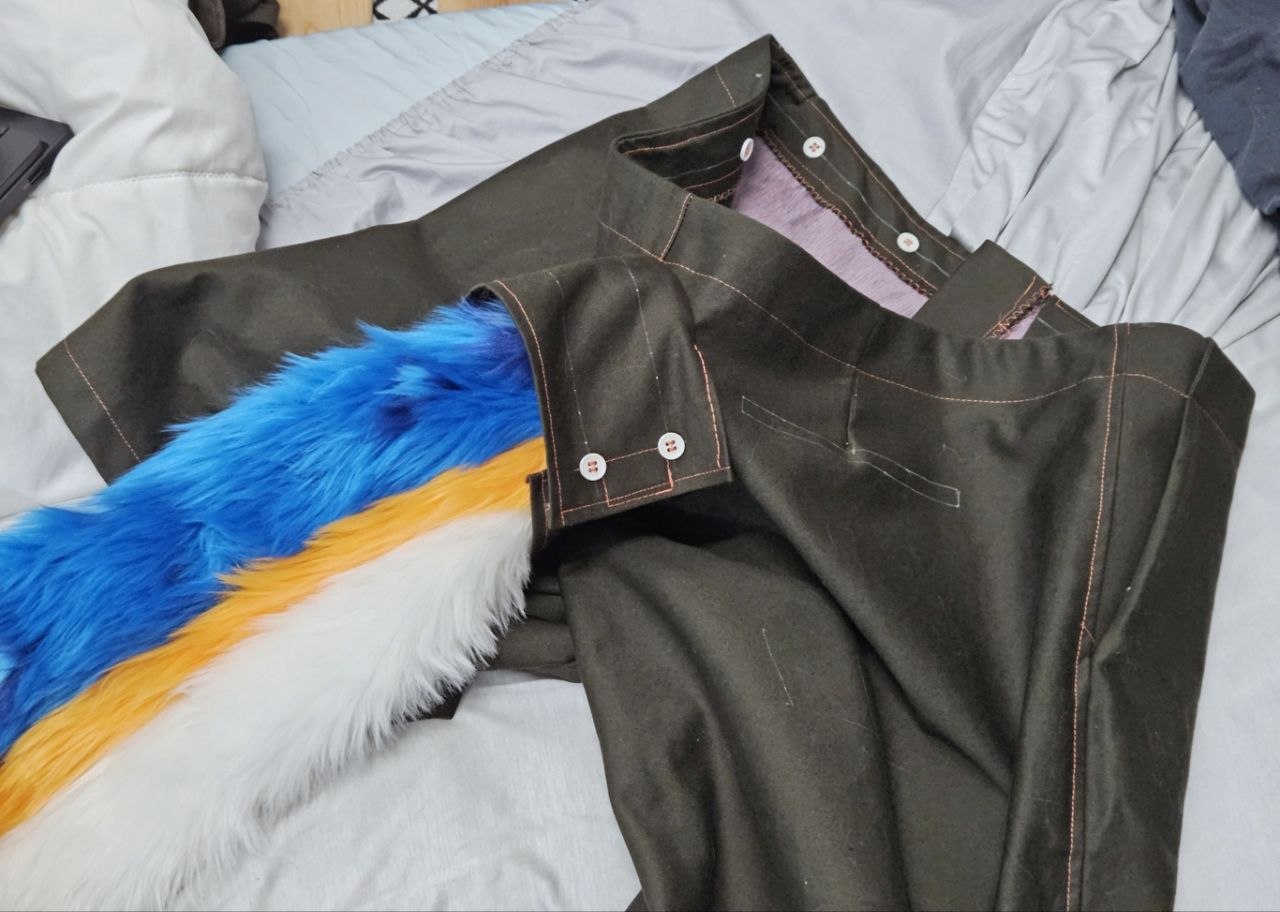
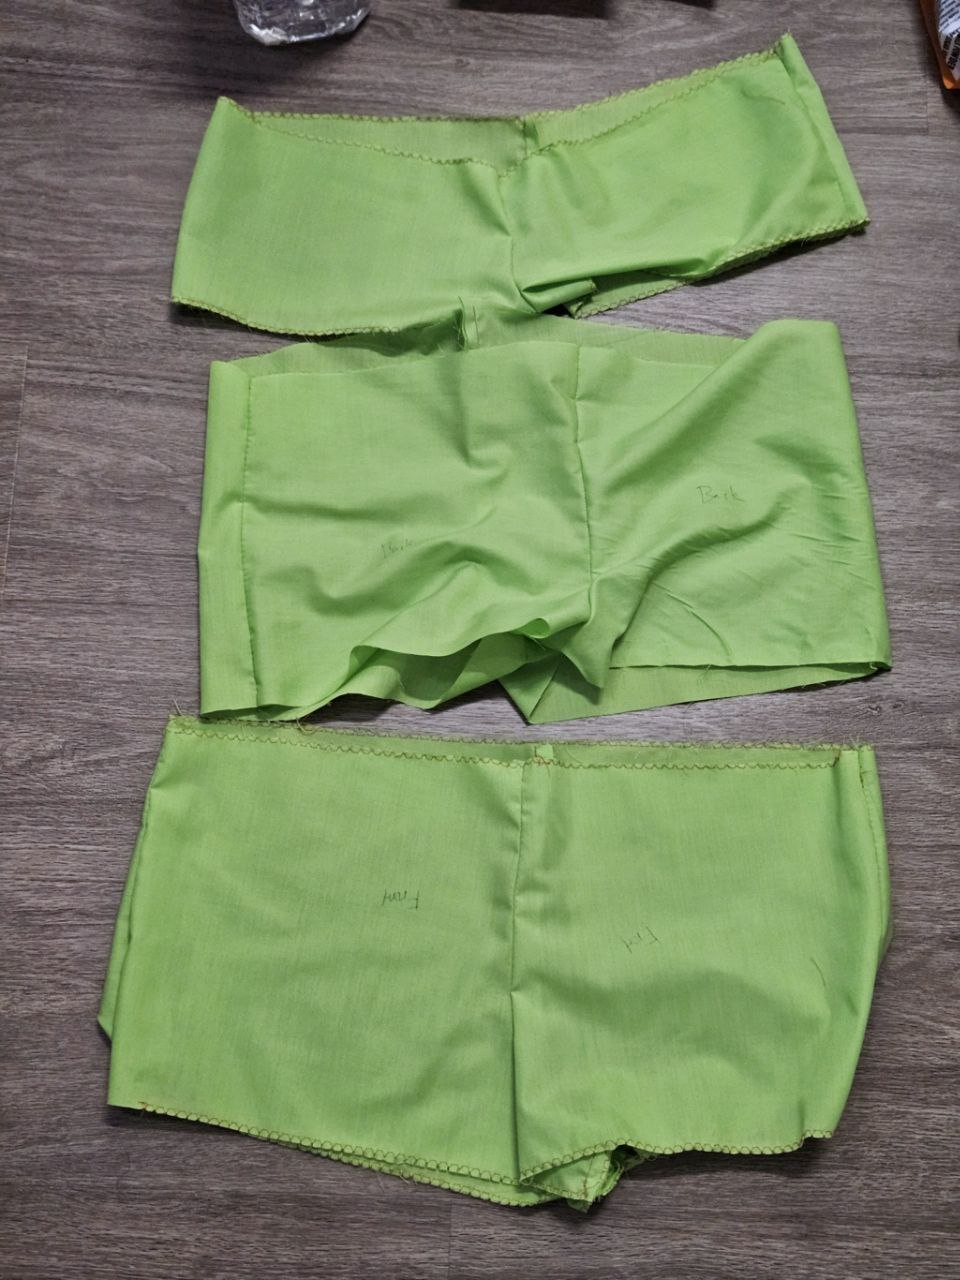
Leggings sewn up! Pretty happy with the fit, and the dual gussets allow a good range of motion. They actually might be a bit too long but that's a good problem to have. Will need to sew up a pair of pants that will fit the partial soon - and maybe have them bit a bit shorter so as to be able to see my orange stripe :3
Left the paws from awhile back, but now on them. Not happy with the center bit's distortions, this was my 3rd time trying to sew it without distortions :/
Not been updating, trying to rush this out. Managed to get the panels for the leggings together.
Finished cutting the shirt and leggings out, and did some seam prep for the faux fur but stopped as it was a bit late and switched to sewing up the hand paws.
The stretchy minky fabric is a bit difficult to get right, I didn't pin it first and there are some creases. I'll leave it and fix that when I have time in Sweden.
Started assembling the inserts for the tail. Taking it slow as the suggested time for the glue to dry is 2 days (iirc) so I decided to just glue it at one point before I continue slowly over a few days.
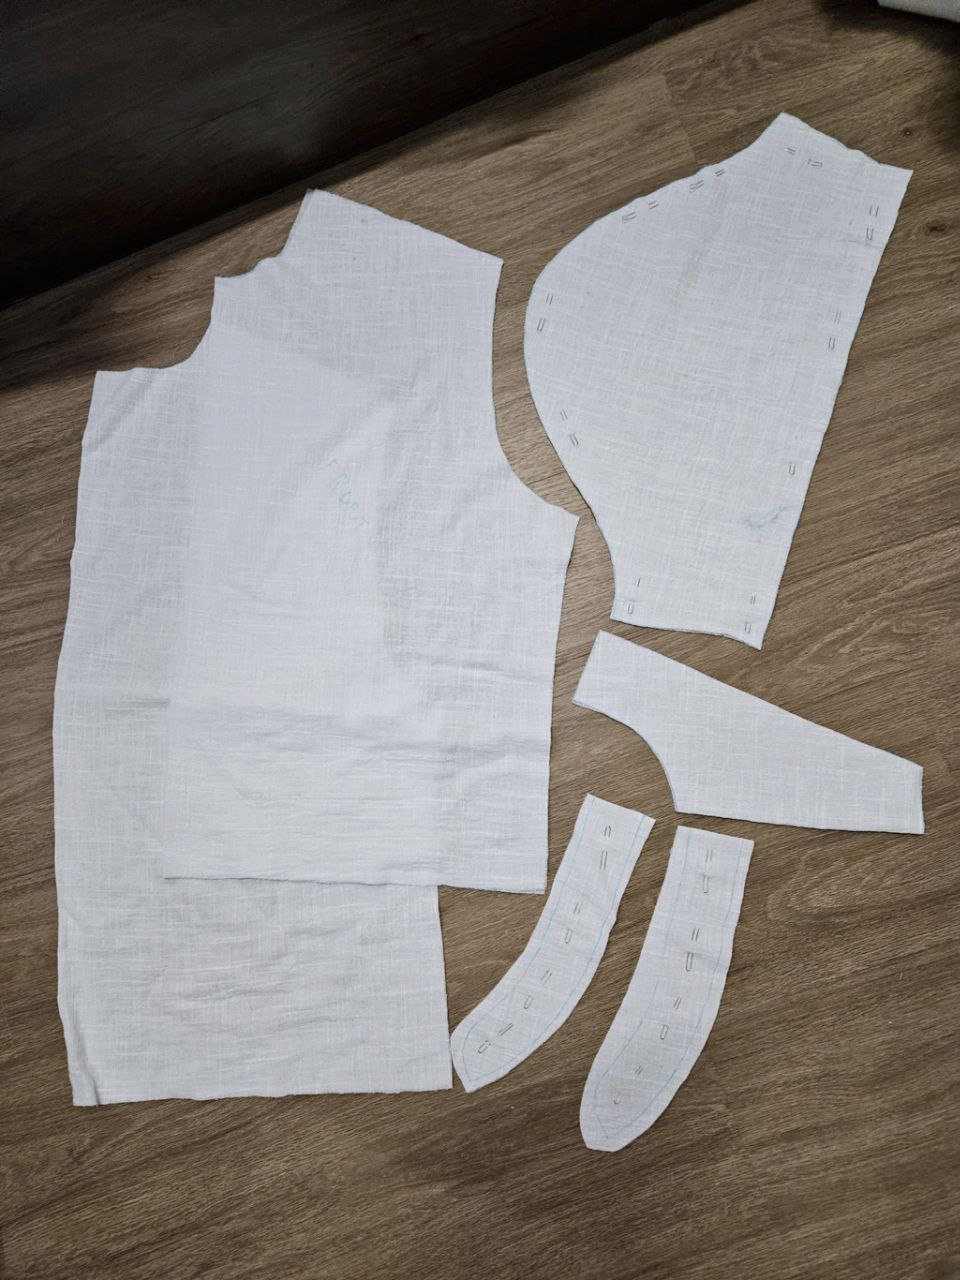
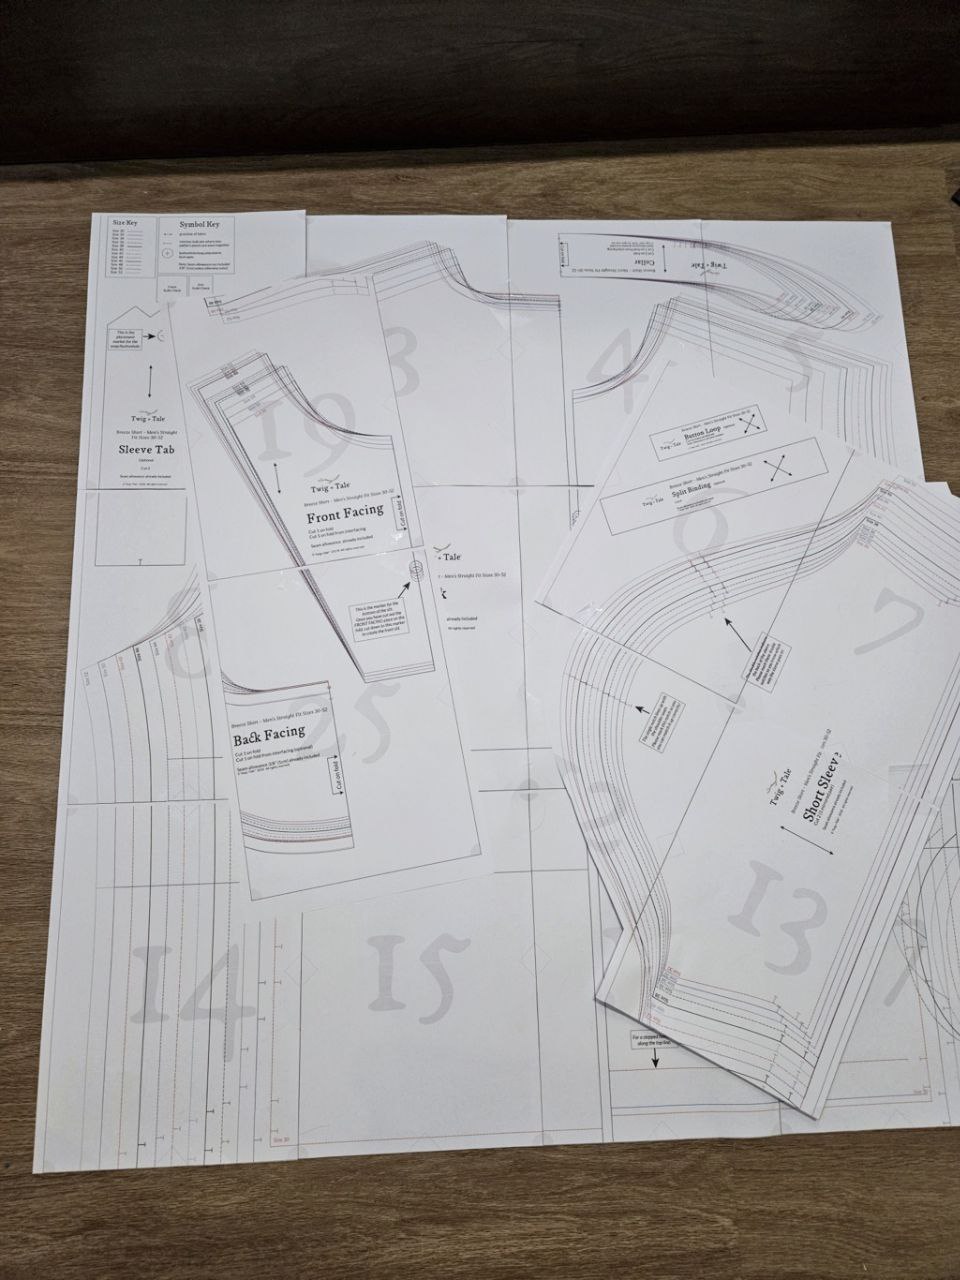
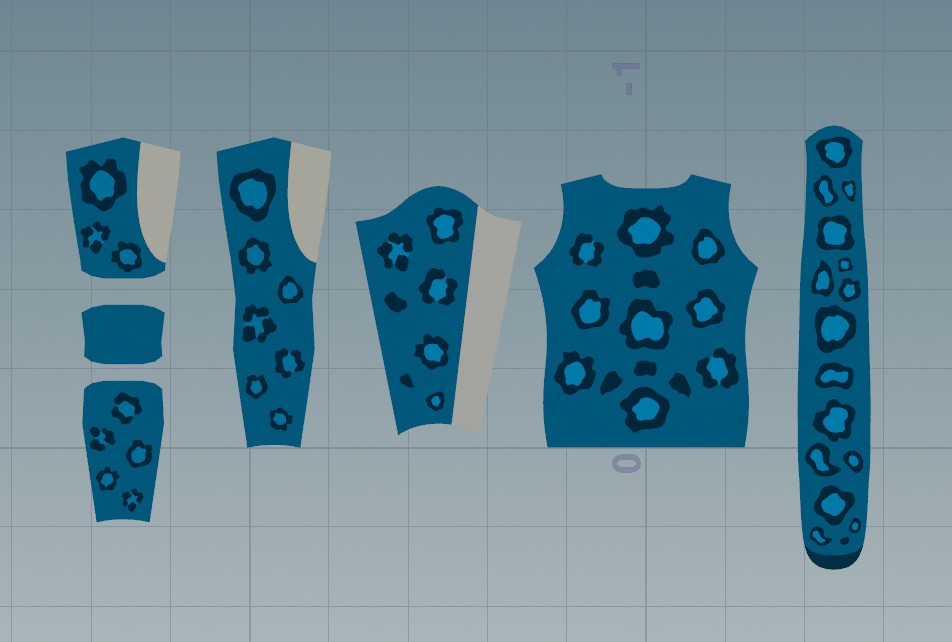
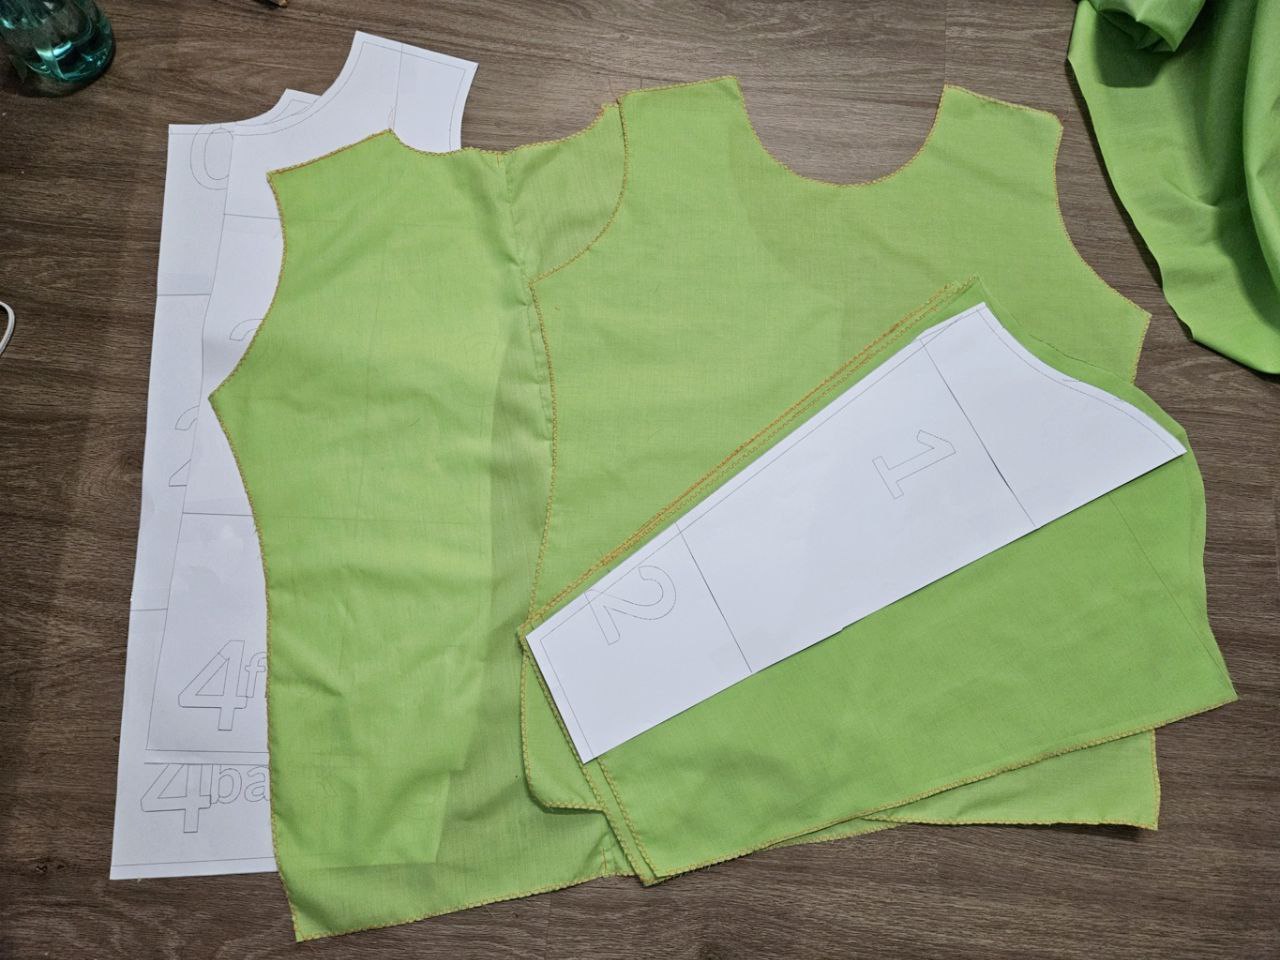
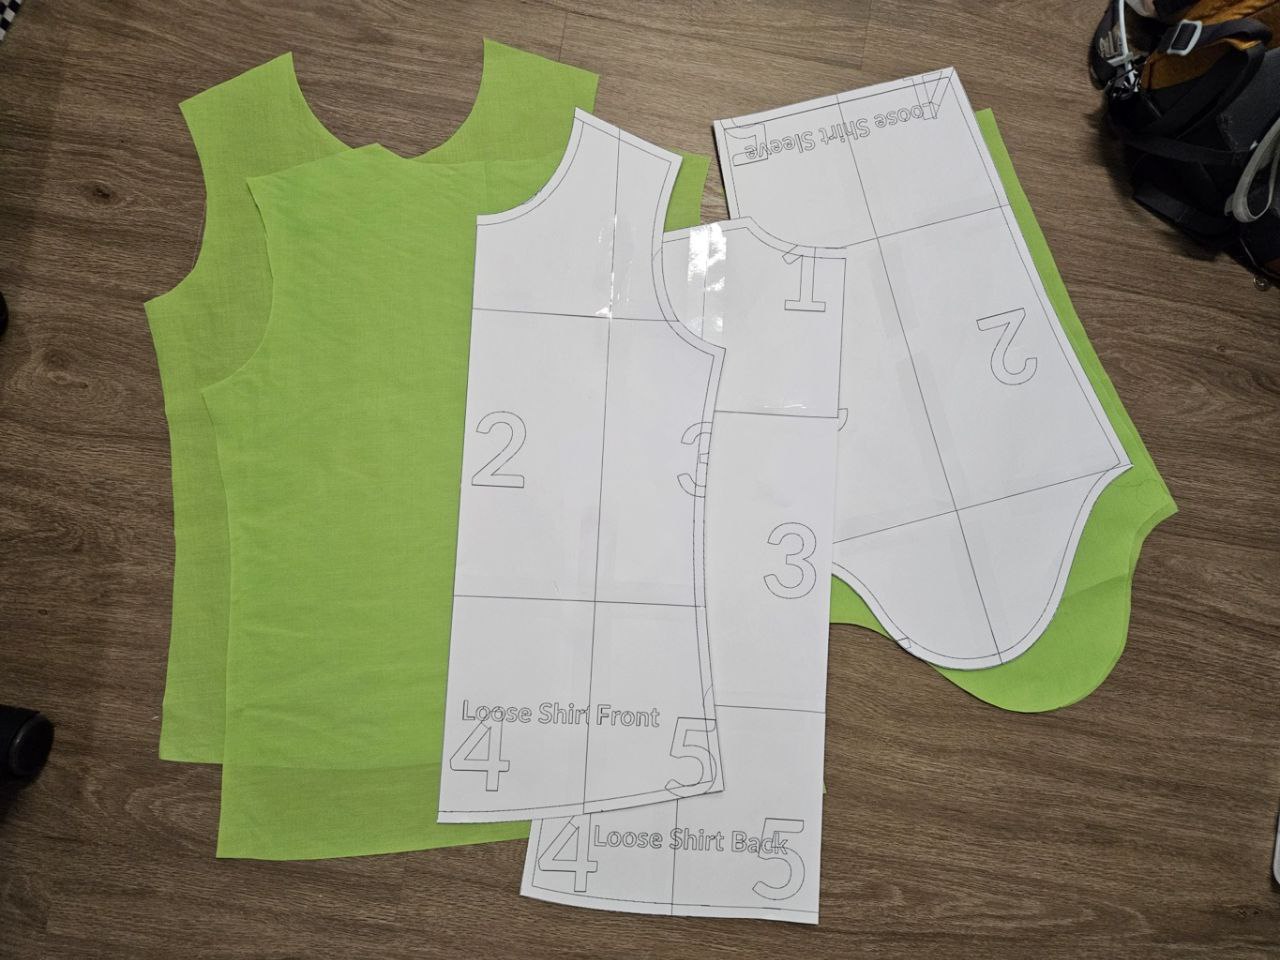
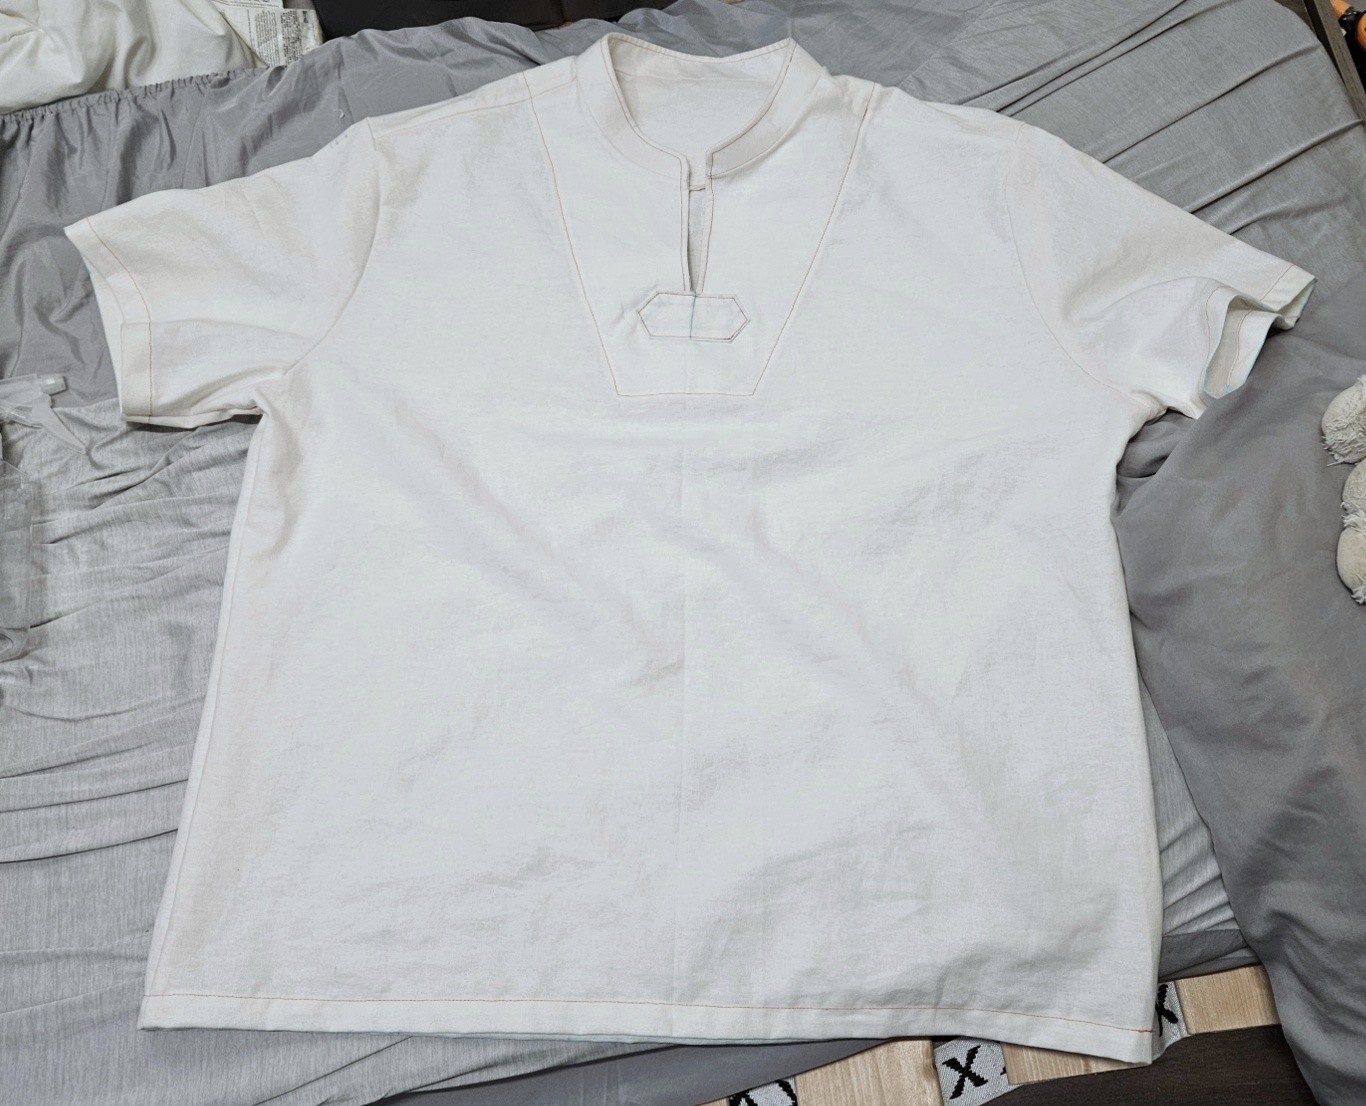
Also printed and assembled the shirt pattern. I'll be reusing the Breeze Shirt pattern from Twig + Tale, just that it will be several sizes larger, and shorter, as I want it to be at my belt line.
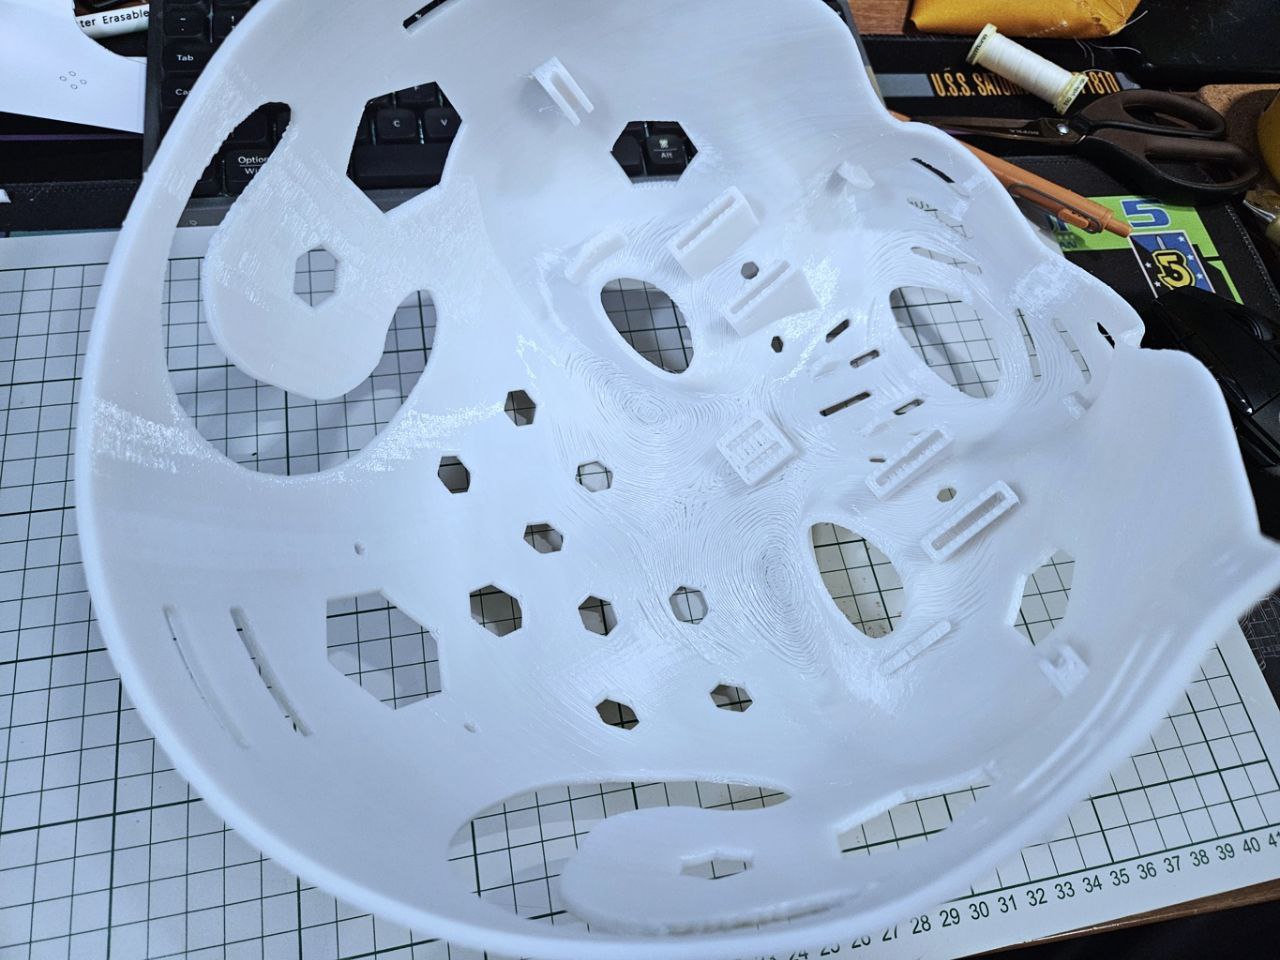
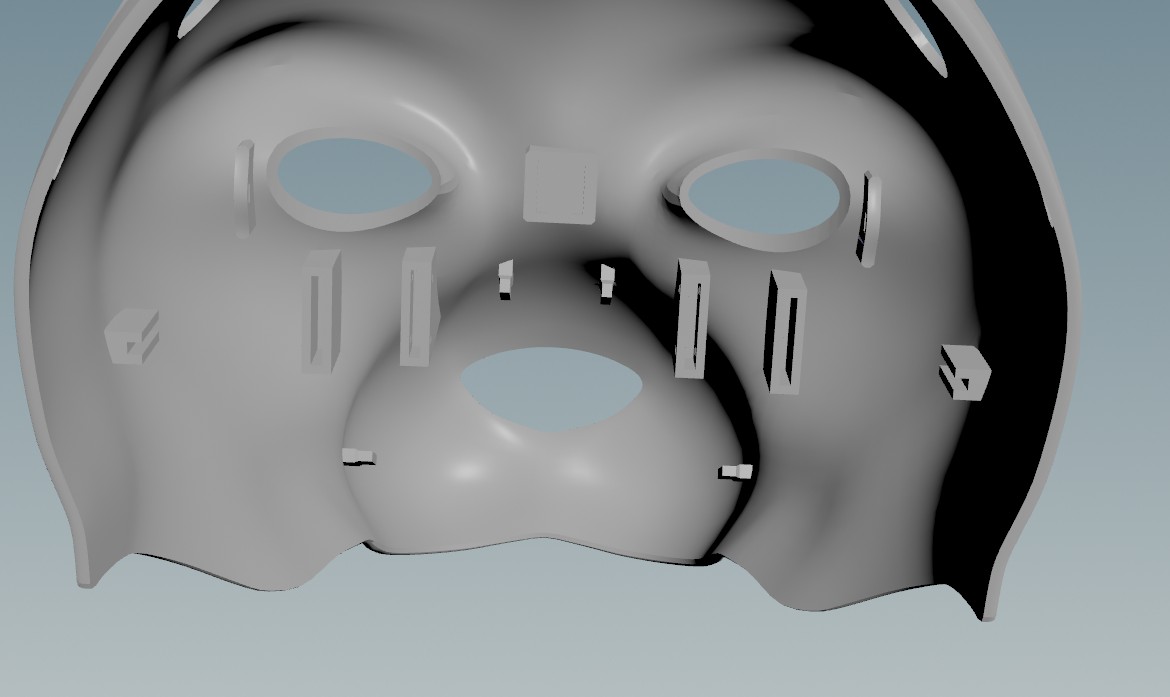
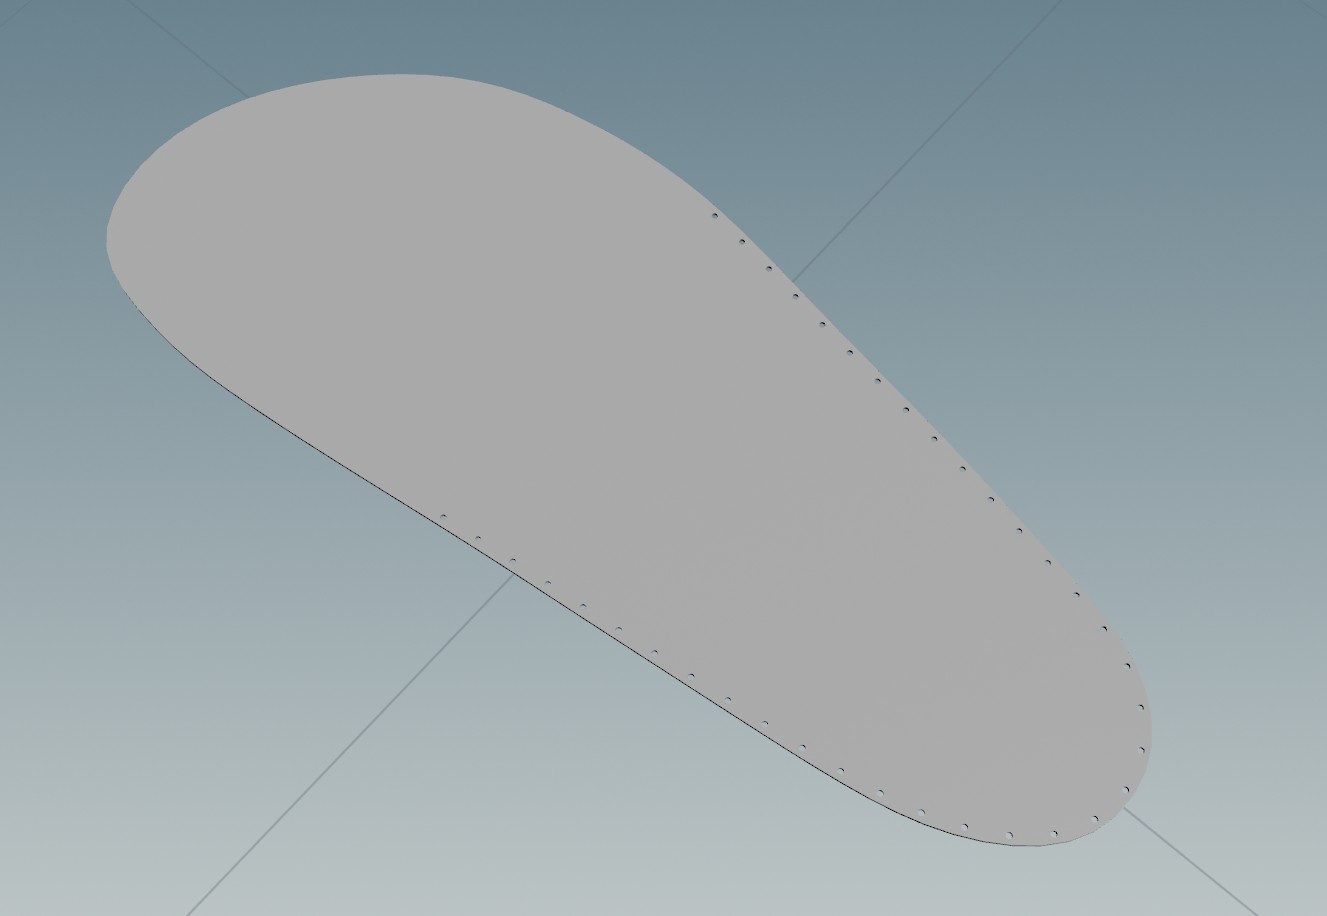
Finally, I need to print the final version of the headbase and decided to go ham and add lots of extra holes in the hope they will help allow _some_ air to pass through the faux fur.
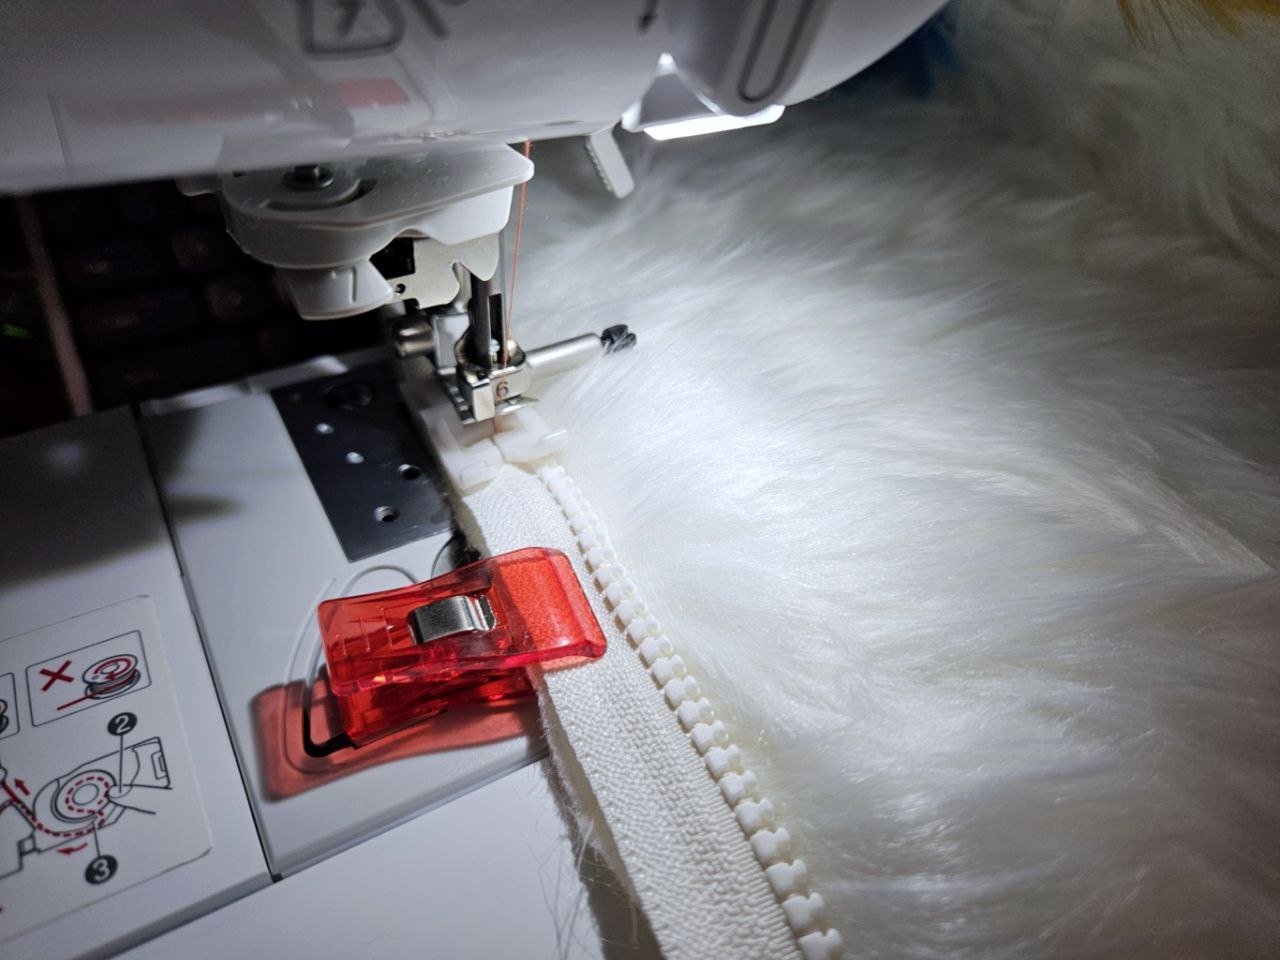
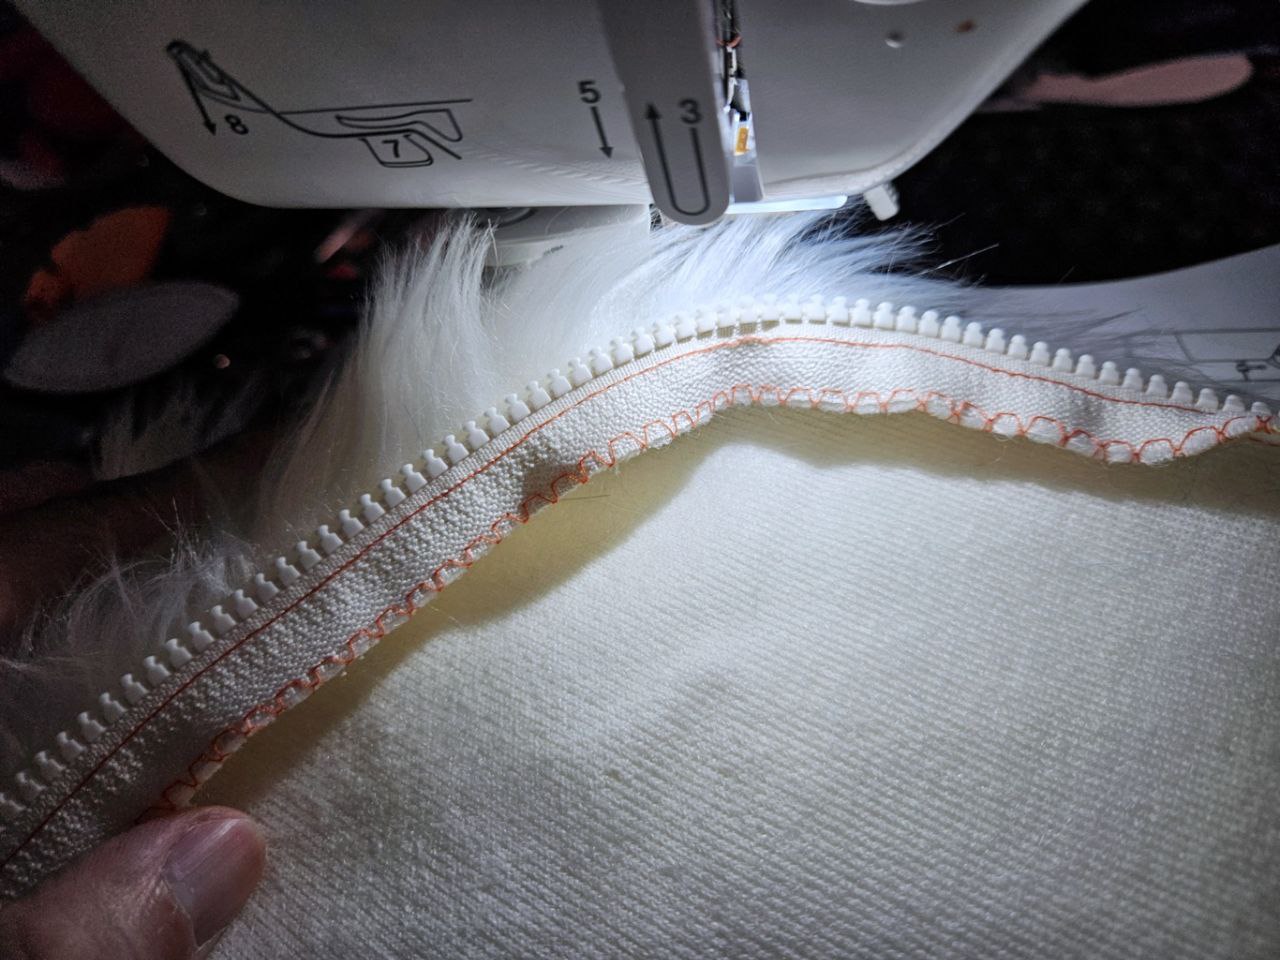
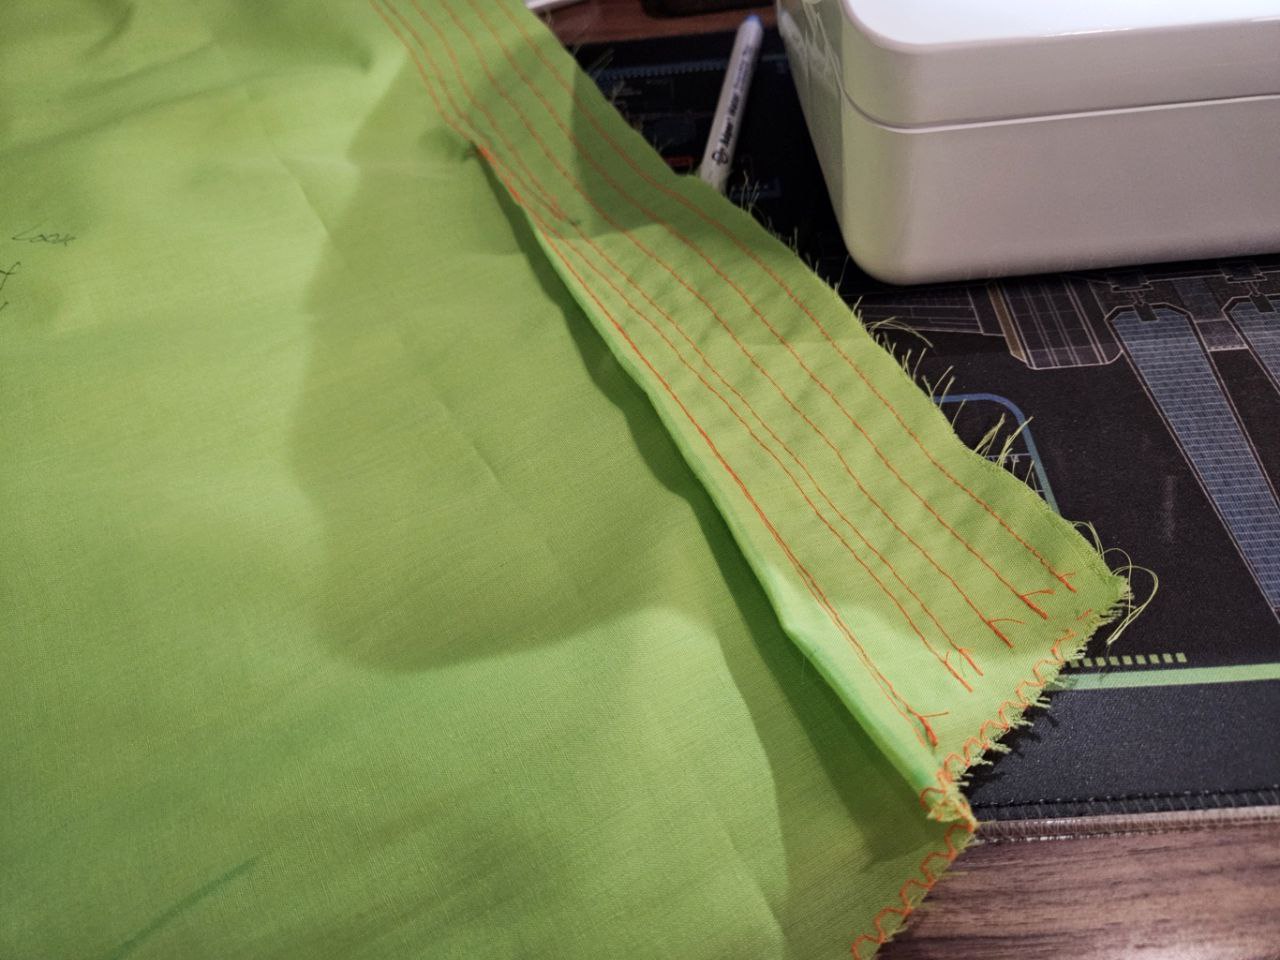
Took me a few tries to get right, but I finally got the zipper right! I followed this tutorial. Originally I used a proper zipper foot but the one that came on my machine has a wide base, and I could not stitch as close to the teeth as I'd like. I then went back to my teflon foot and was able to sew rigth up to the width required for the zipper head to move through.
The actual result is great, can't see the zipper but the seam is still very evident. Personally I'm not too fussed.
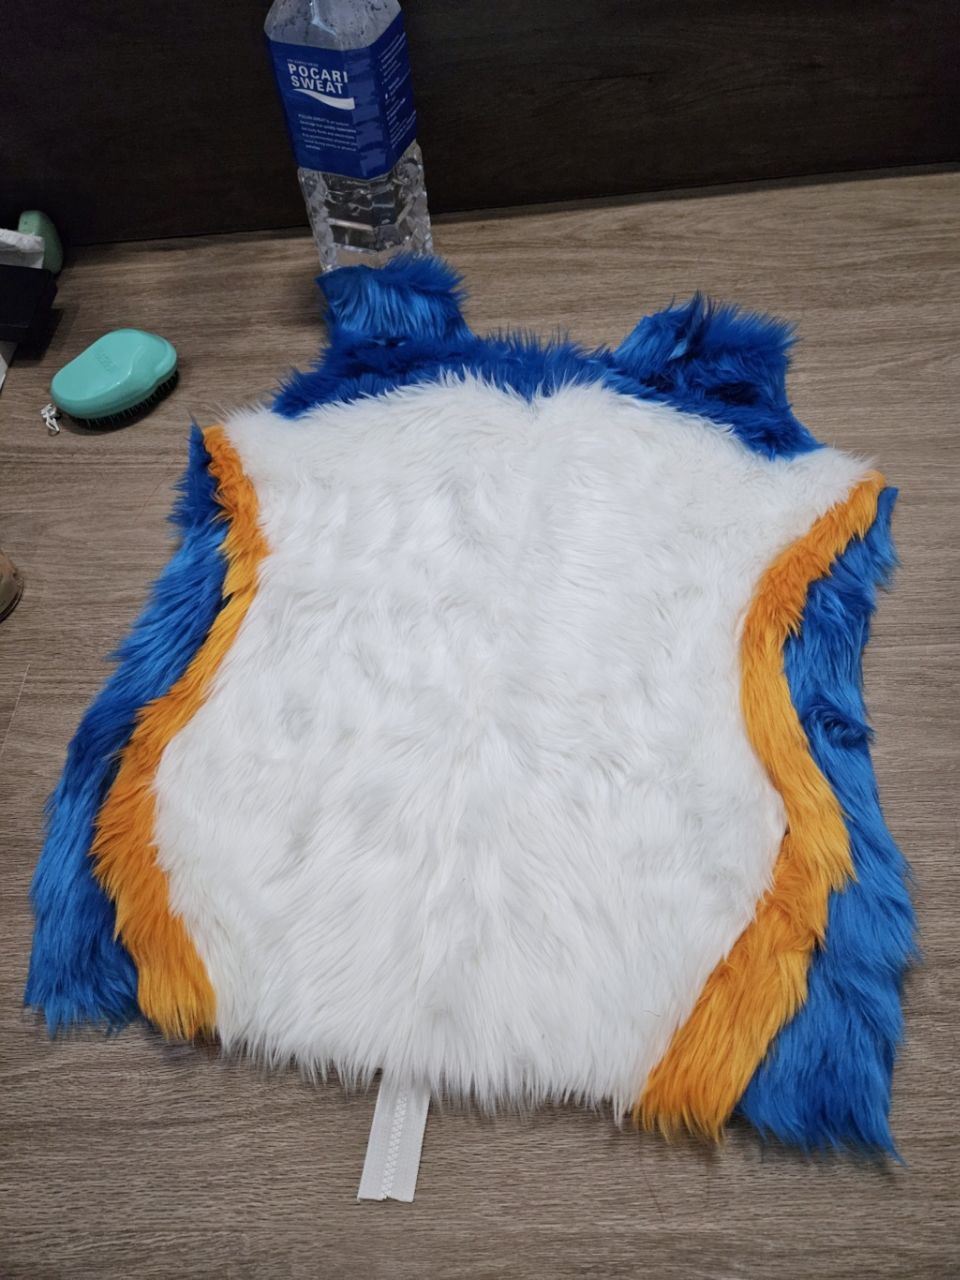
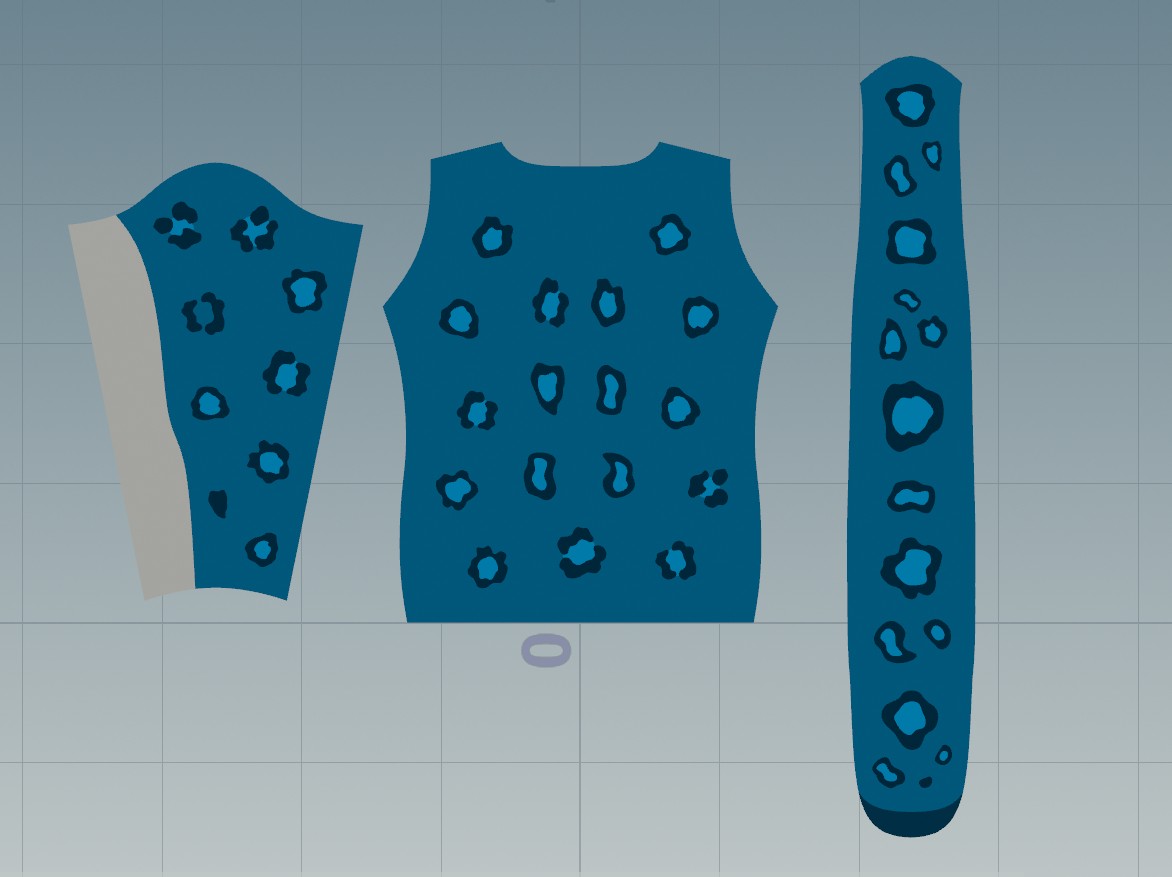
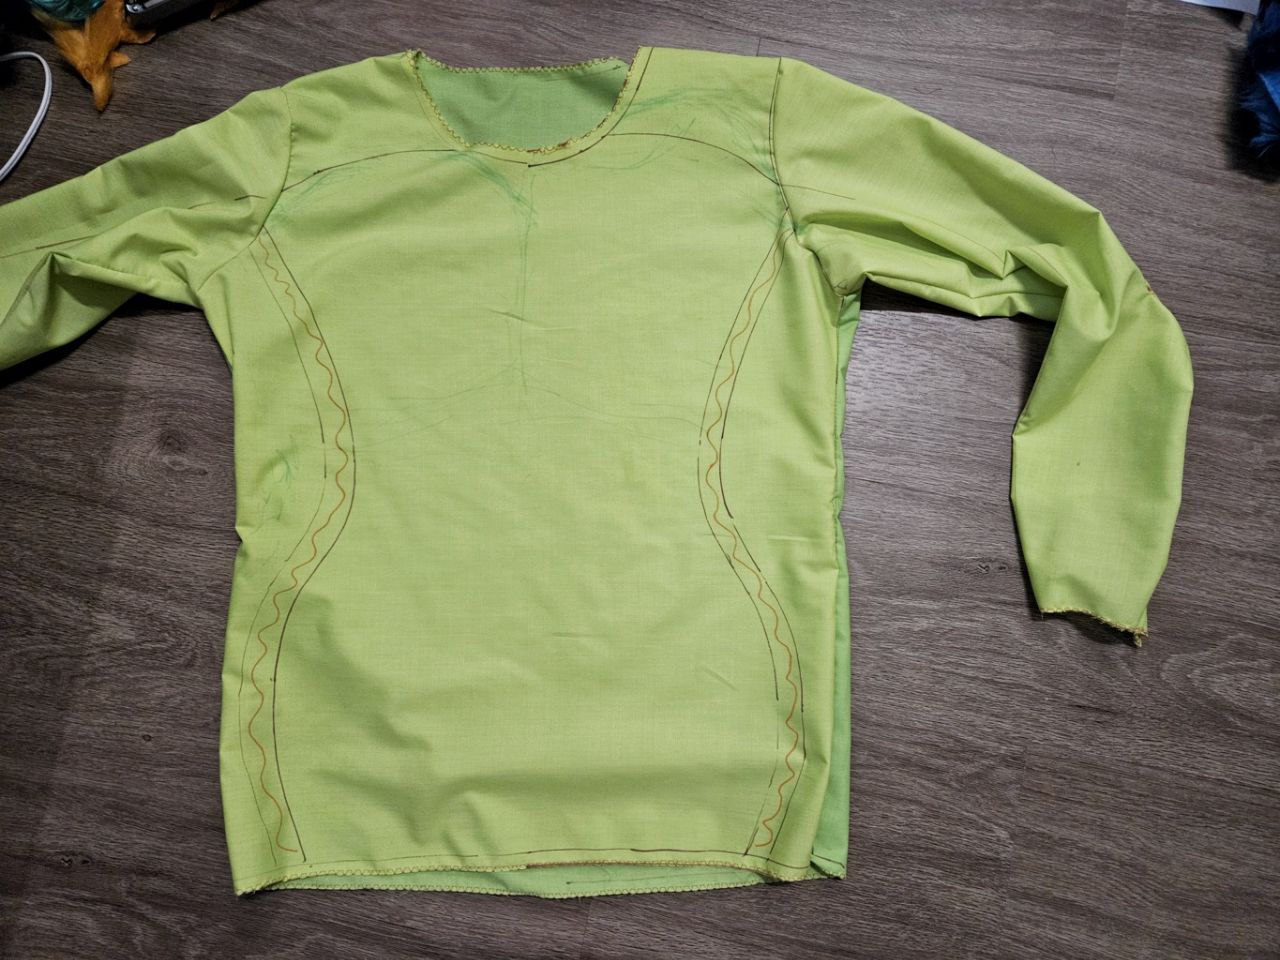
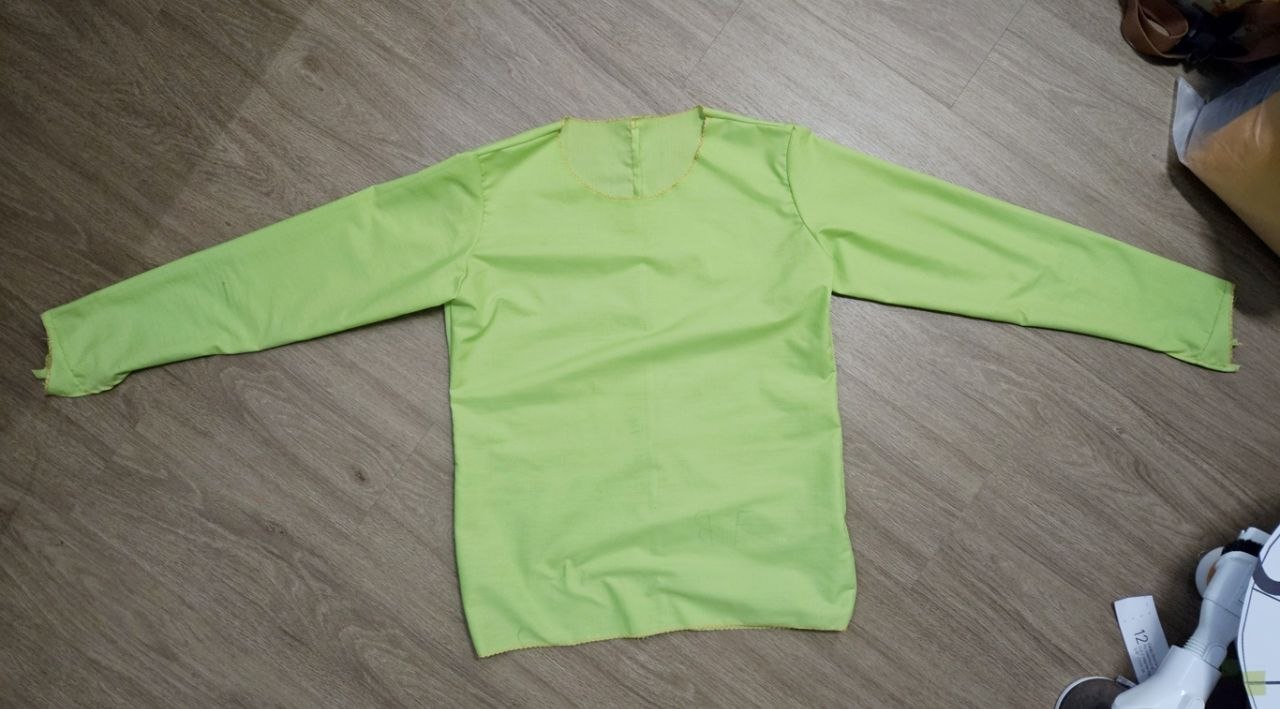
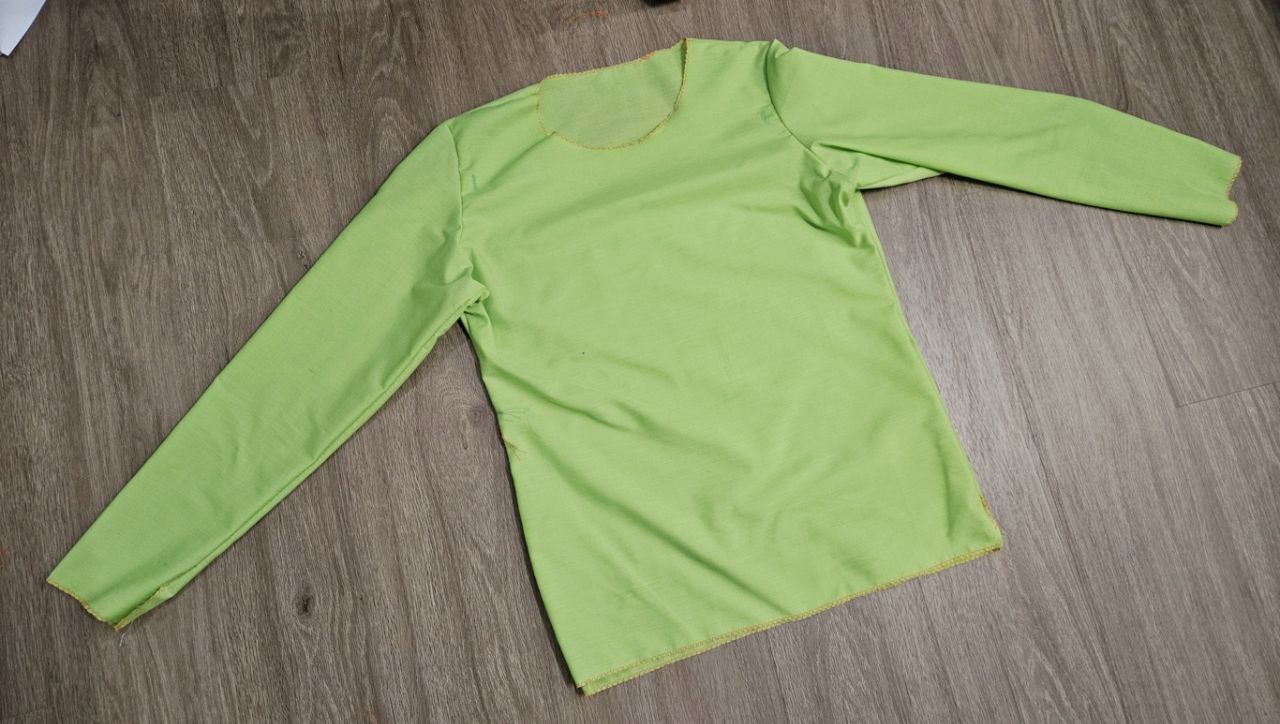
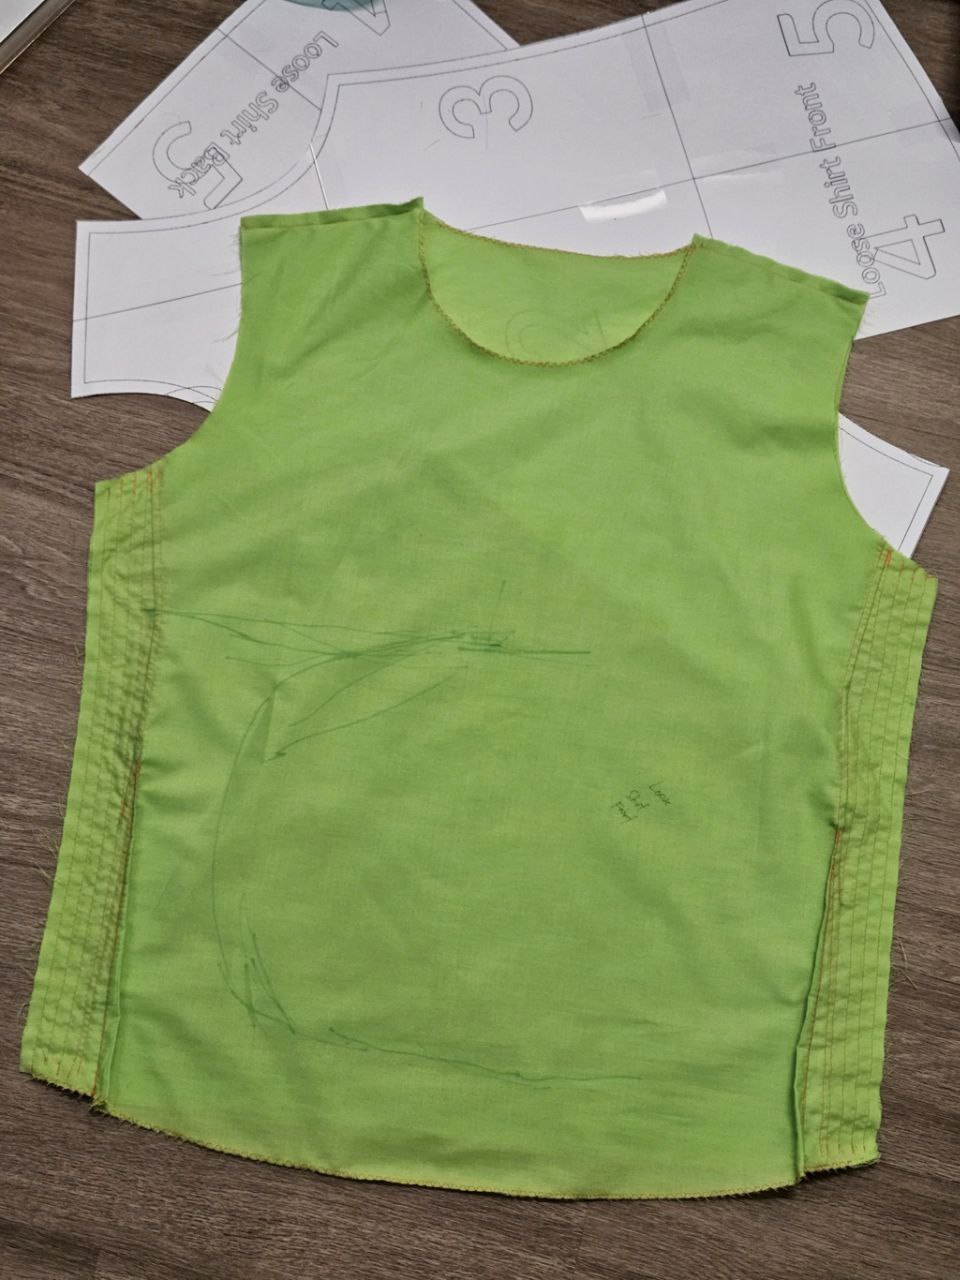
After that, sewing up the bodysuit was very straightforward. The sides I just held together with clips and sewed them on the machine, but for the sleeves I ran a basting stitch through first before sewing.
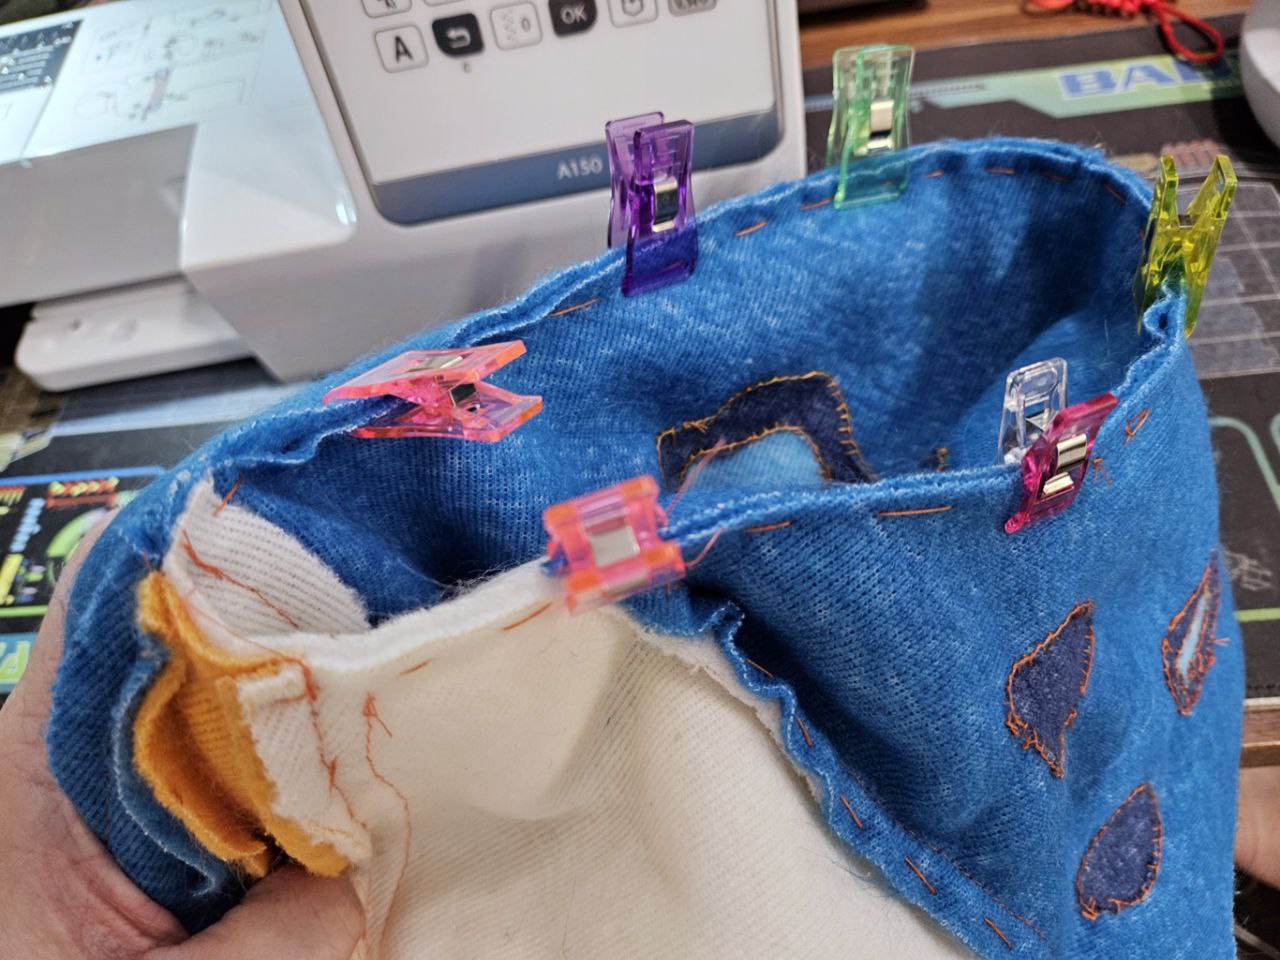
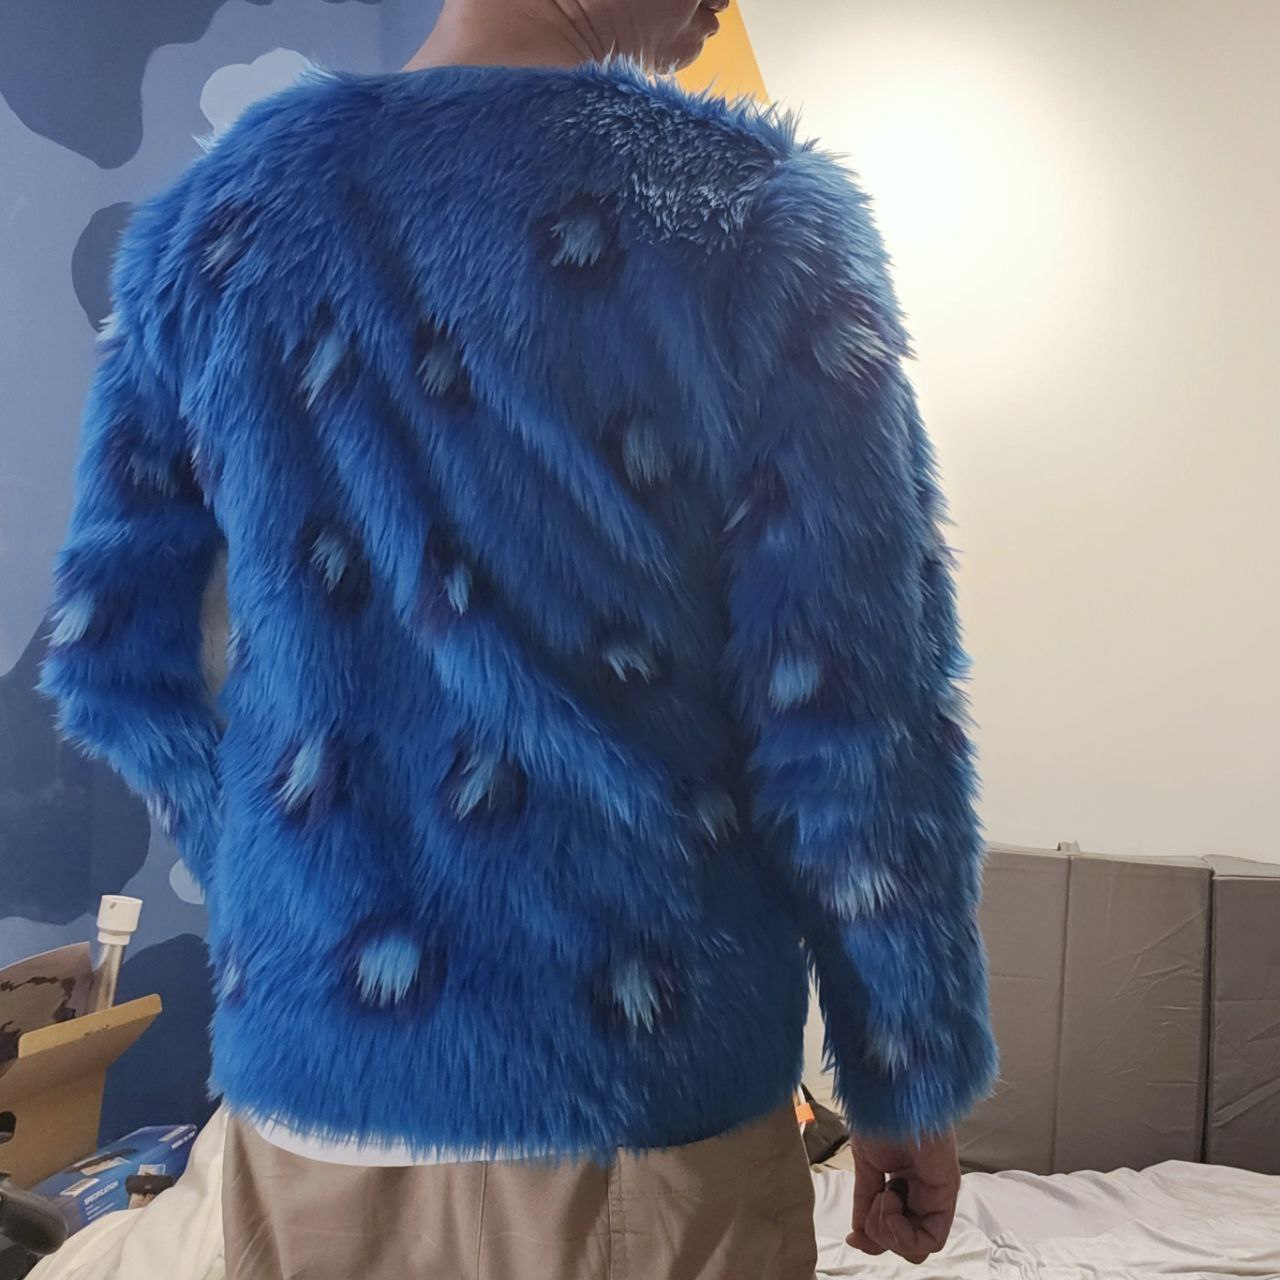
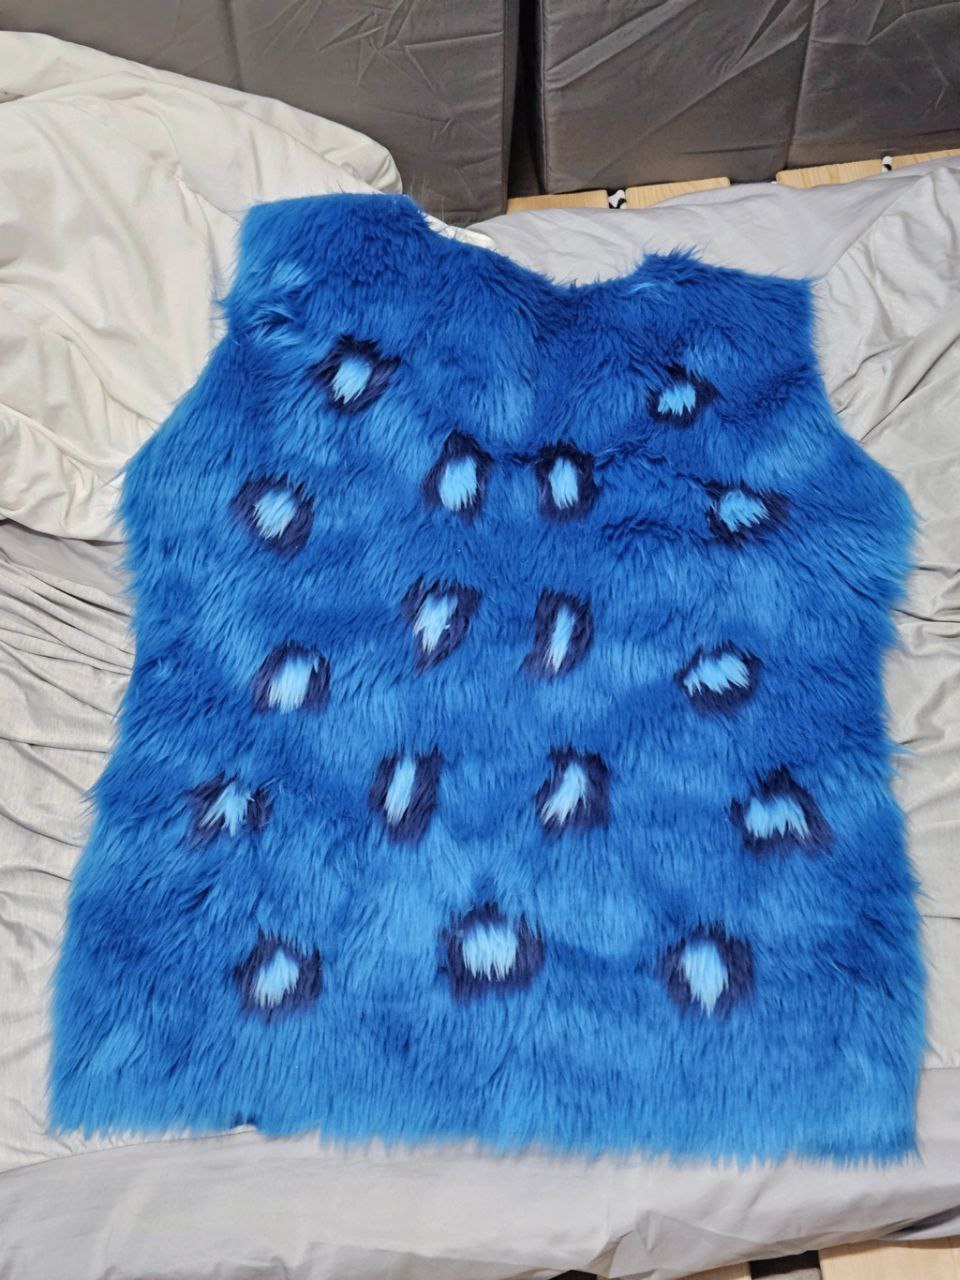
I am not a fan of the rosette layout on the back, will have to figure that out for any future versions.
There are still minor details to finish, like sewing in bias tape for some openings, cutting the zip to the right length, velcro for the sleeve openings. But I'll leave these for later.
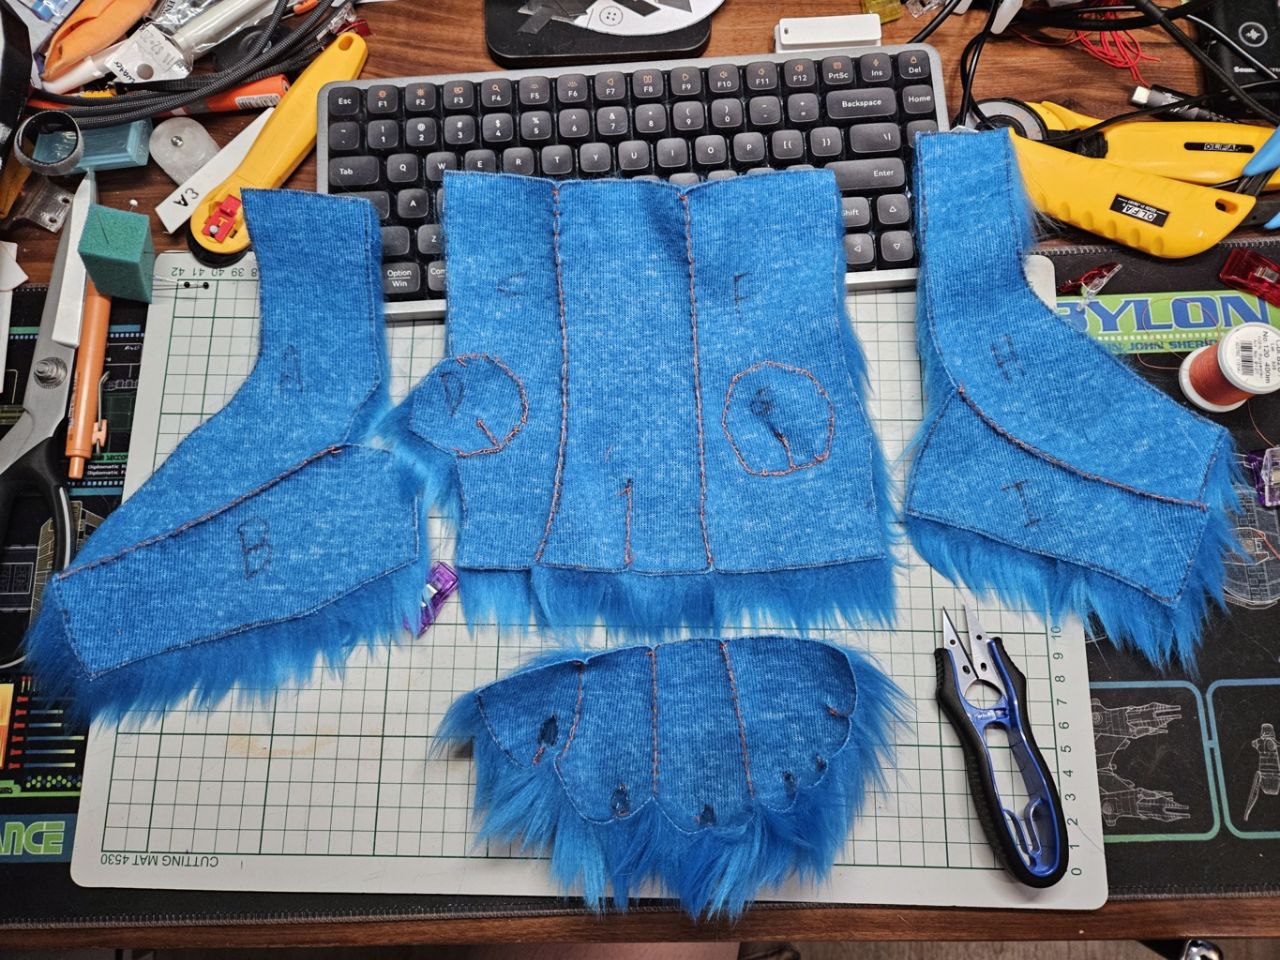
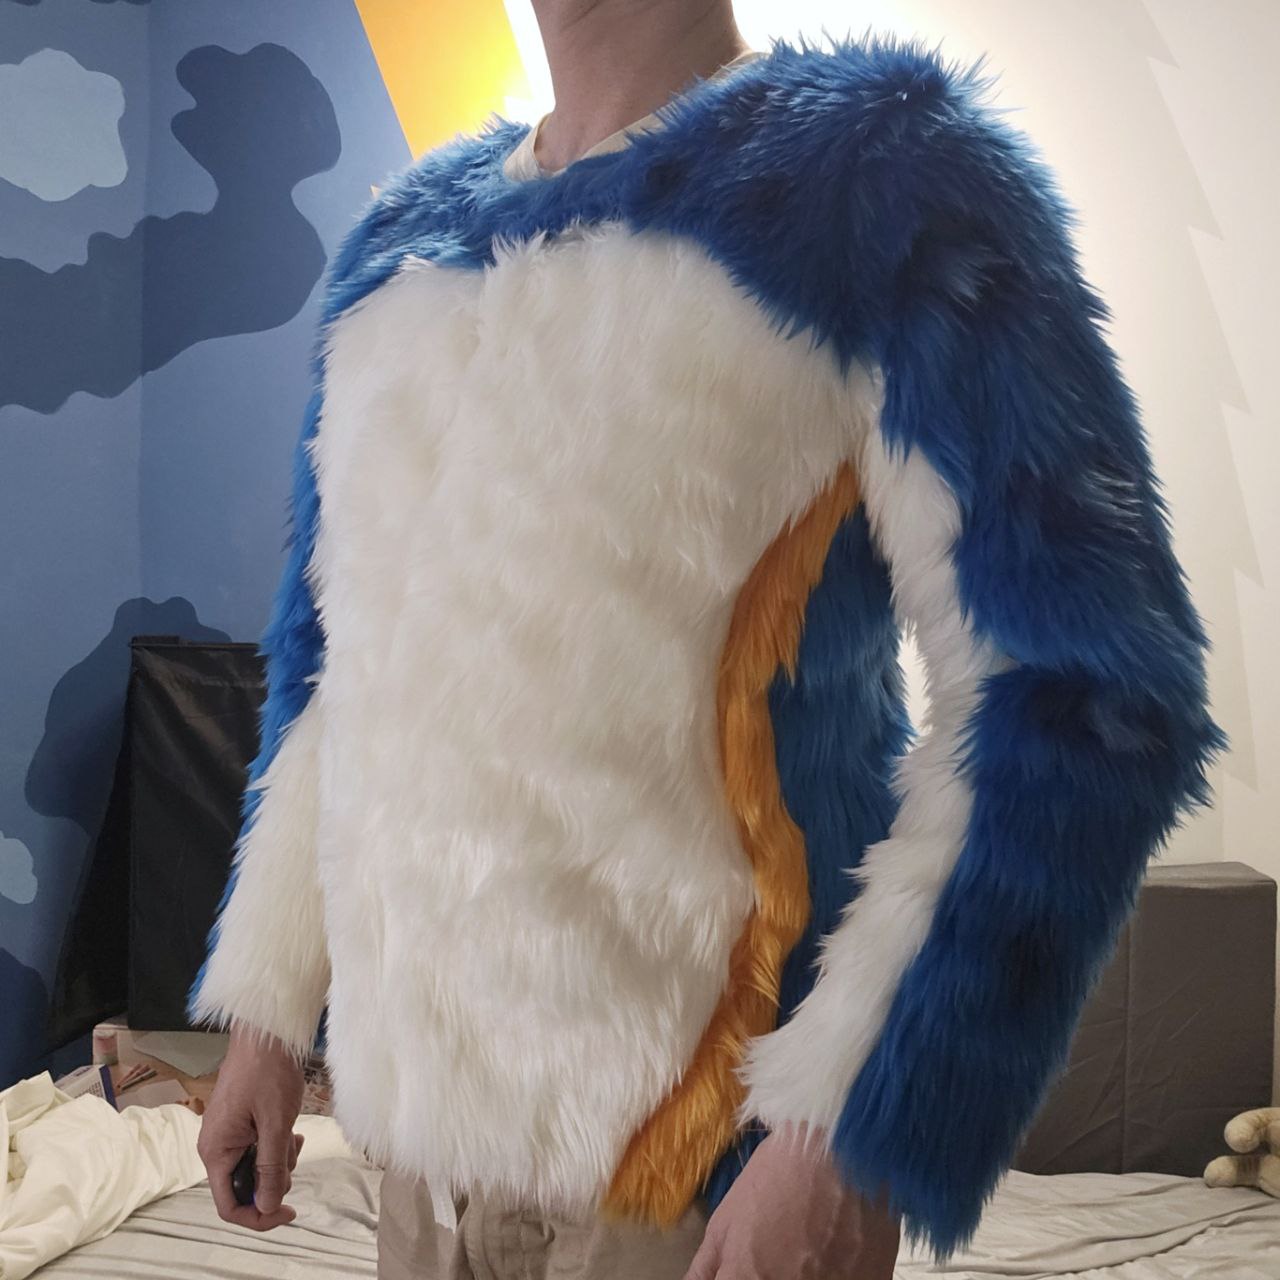
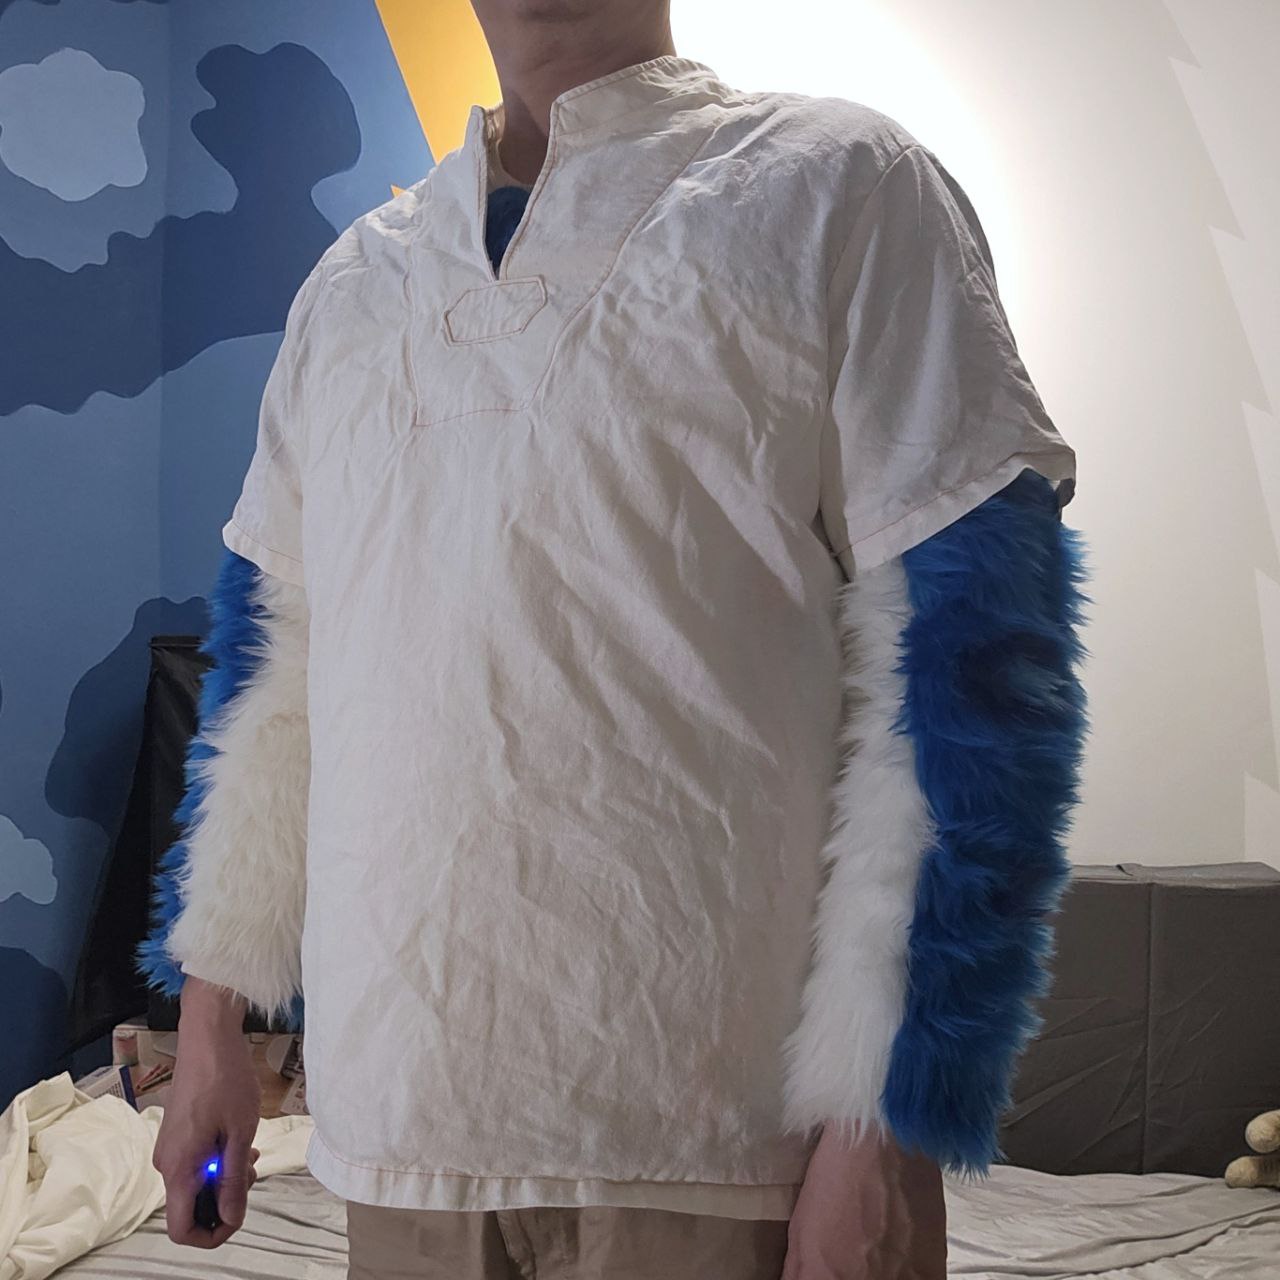
Finally got around to sewing up the upper body, got the sleeves done first then the front body panel. Most of the seams I'd hand sew a basting stitch before I let rip with the sewing machine.
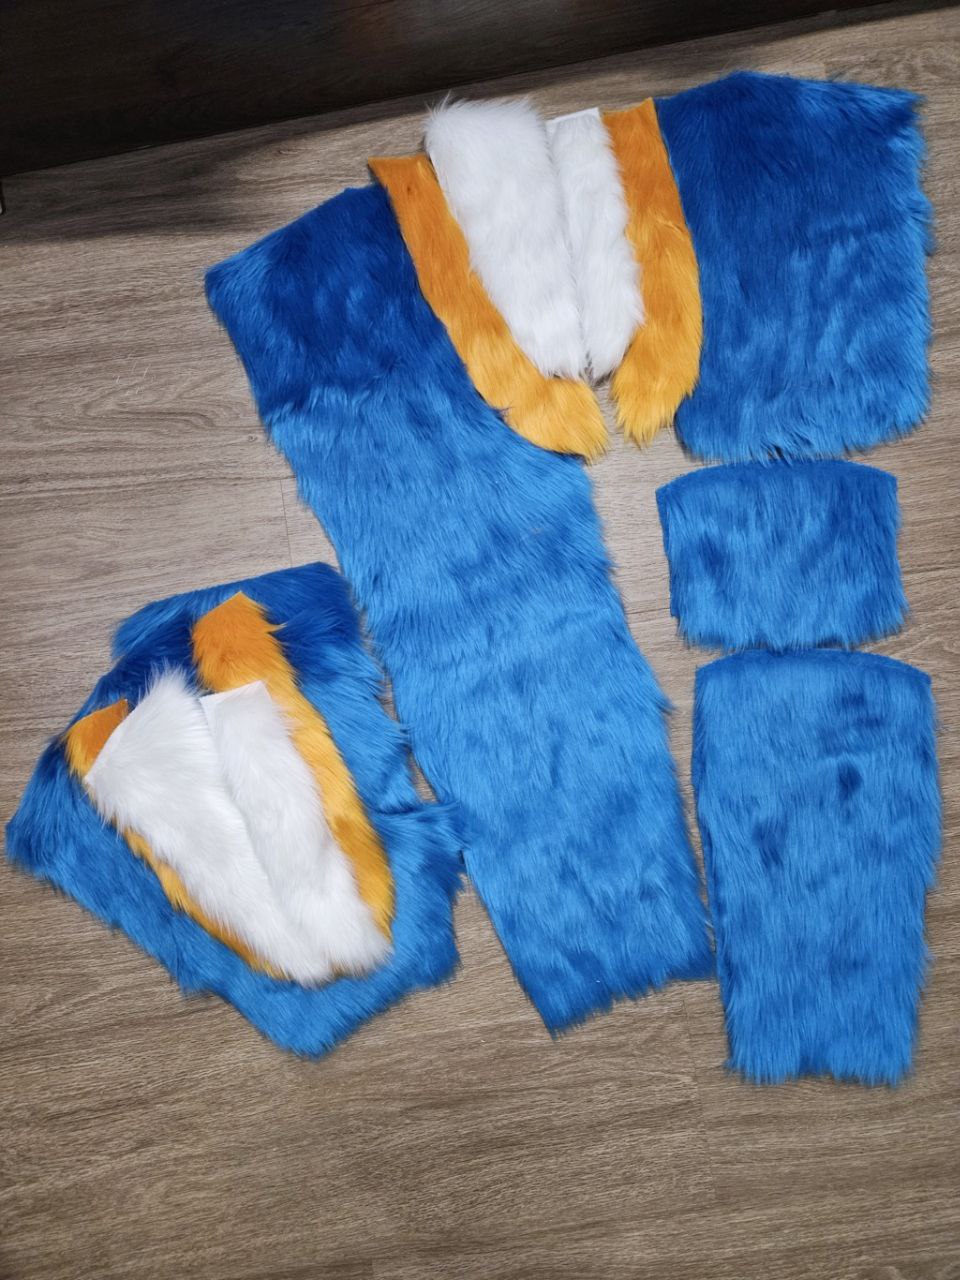
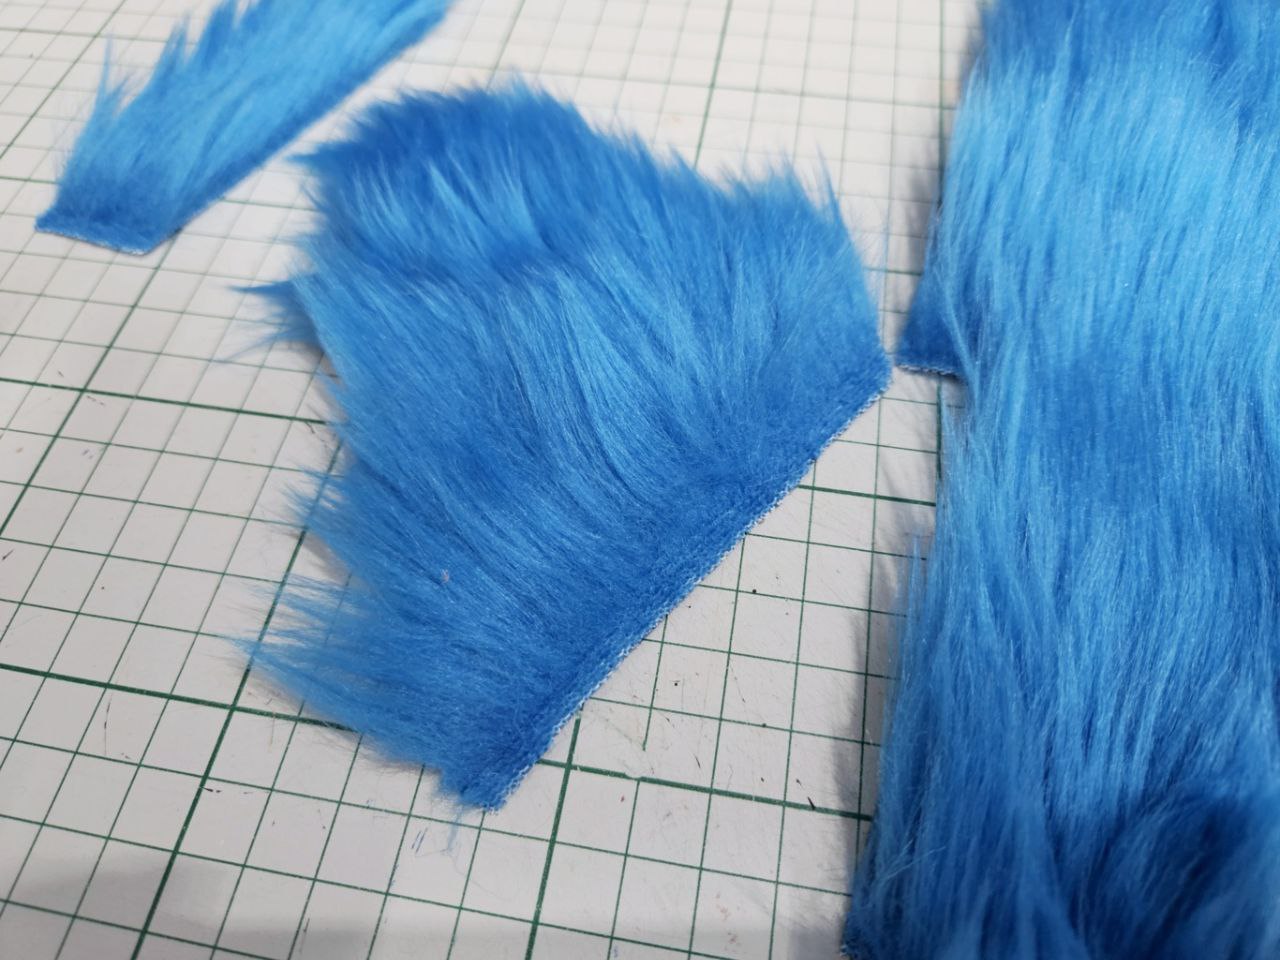
I have noticed a little issue... the white fur is 3cm pile length, while the rest are 3.5cm. While this doesn't seem like much of a difference, the density of the fur is quite substantial - the white fur with the shorter length is waaay more dense. I tried shaving it down on a scrap piece of fur and it didn't seem to help, and makes the white fur really short while the blue fur is longer.
For now I'm just going to leave it.
I also prepped the edges to be glue by roughing them up with a rasp. No photos as I'm very tired and going to sleep - it's only half past nine zzzzz.
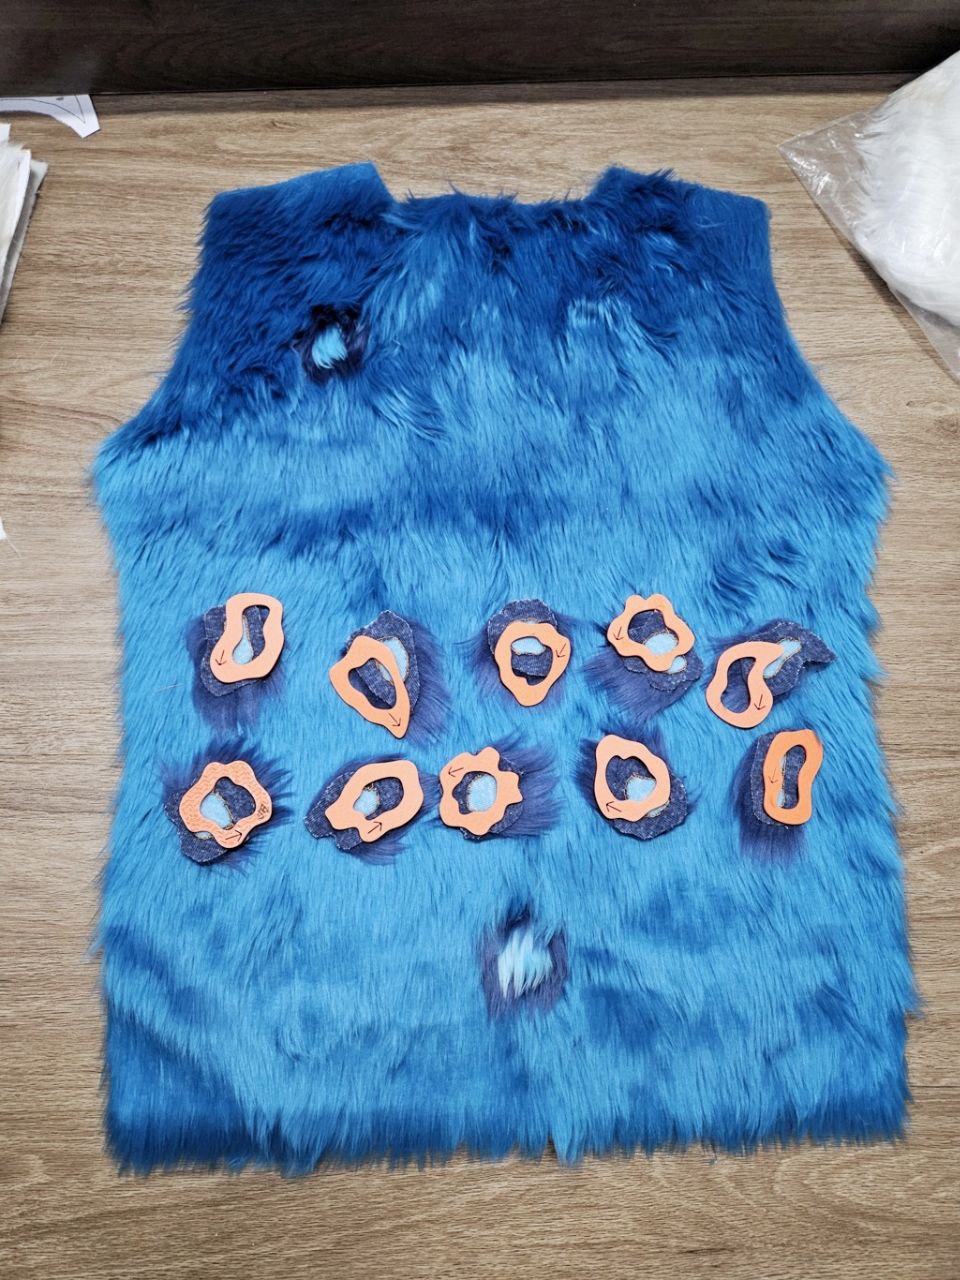
I forgot about adding rosettes to the front blue pieces near the shoulder, so spent some time just adding a few random ones. Didn't want them to be too loud, so only had a small one with the light blue fur, and the other two were just dark blue.
I didn't have any more glue suitable for tpu, so I'll need to buy some tomorrow. In the meantime I cut out and heat welded the main seams for the rest of the inserts.
I also reinforced the seam with some waterproof seam tape. Not sure if it's worth it but since I got it, eh.
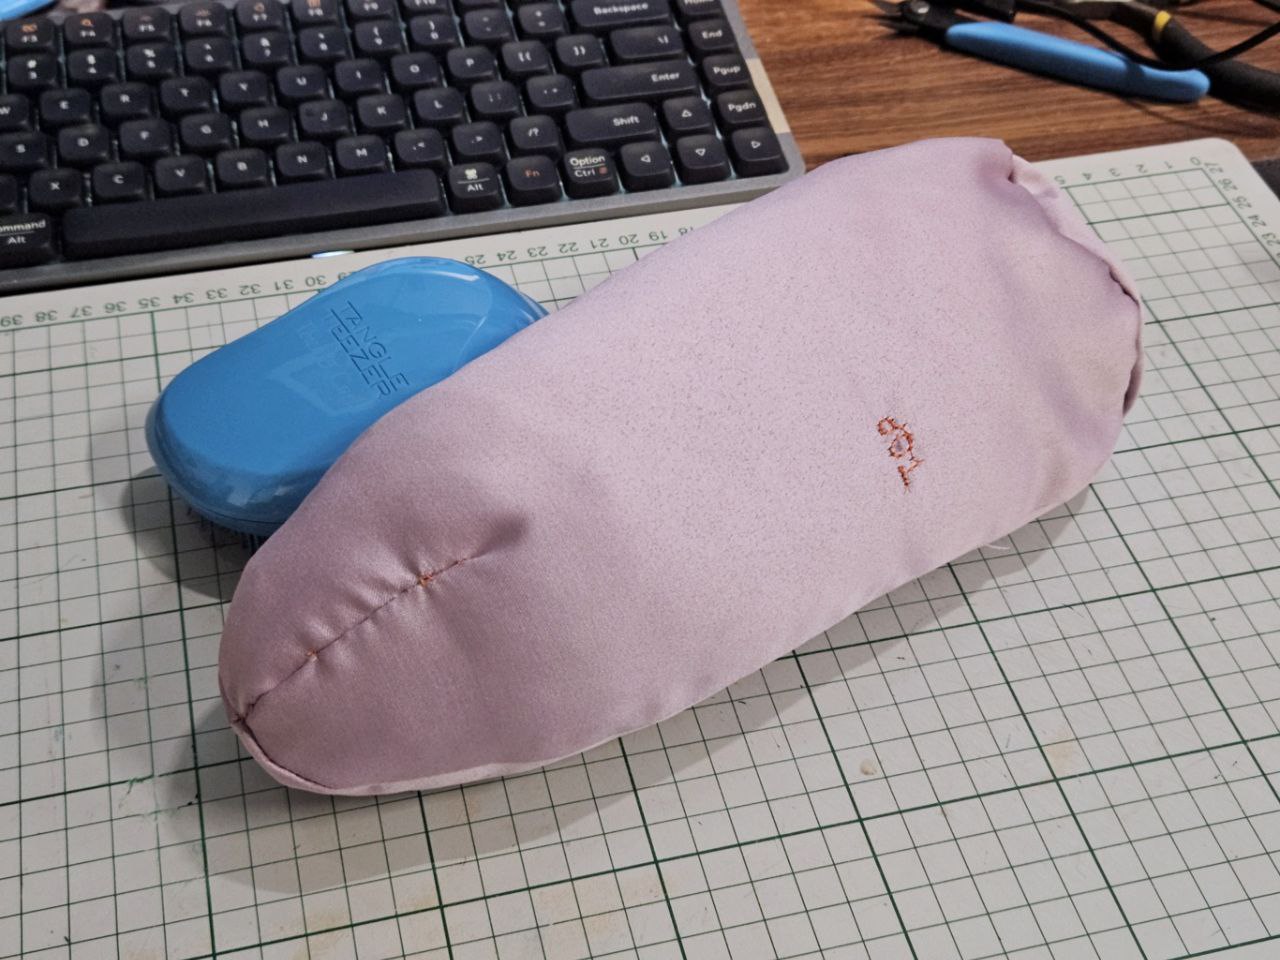
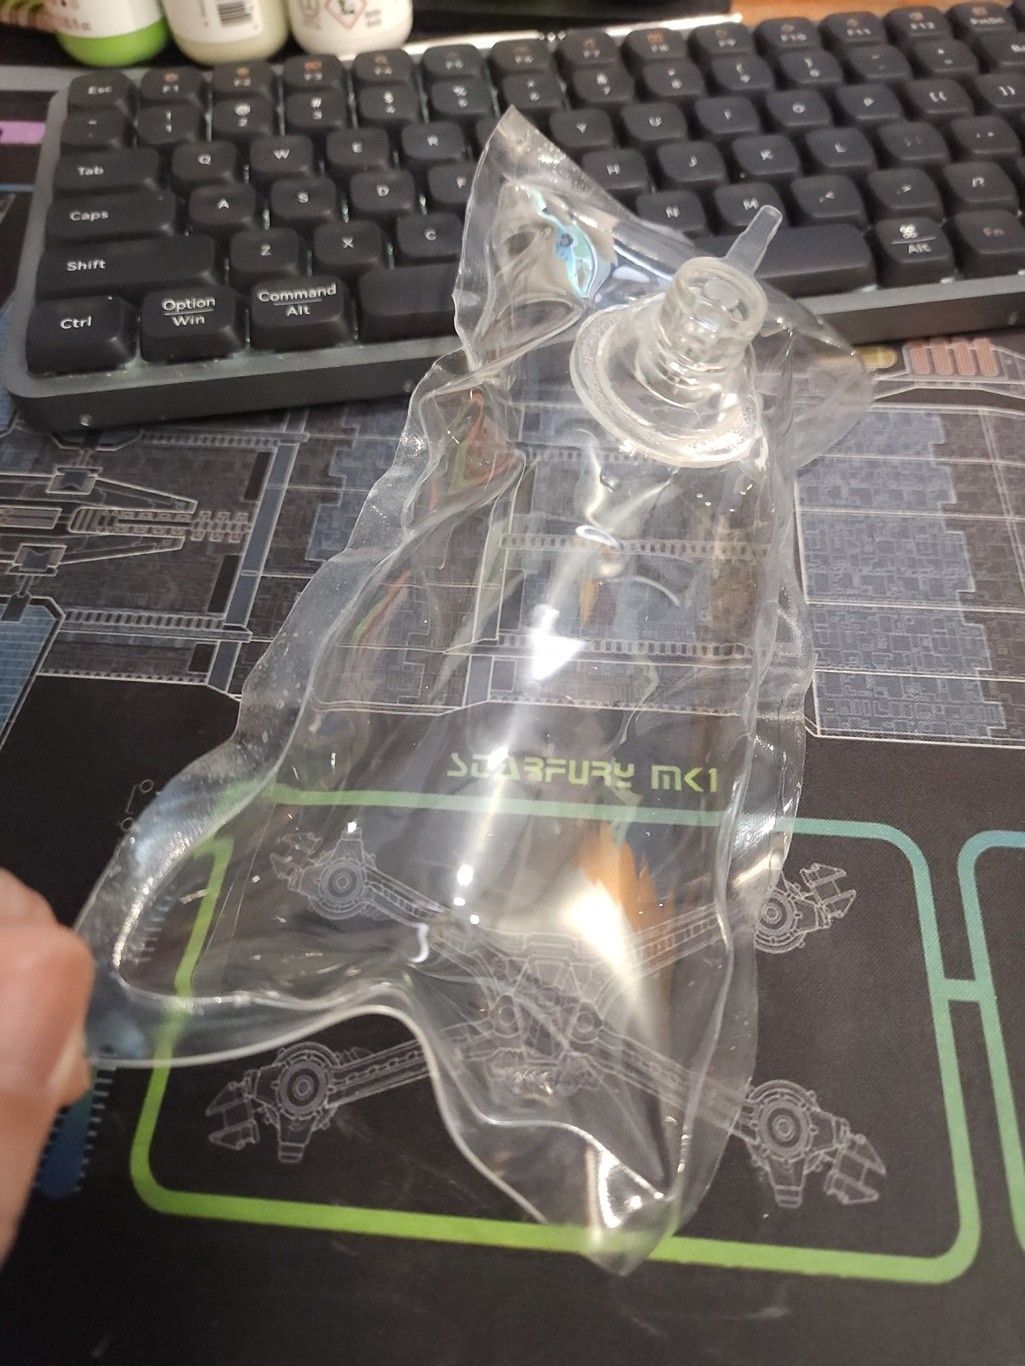
So yes, the tail tip I made using fabric and filled with polyfill.
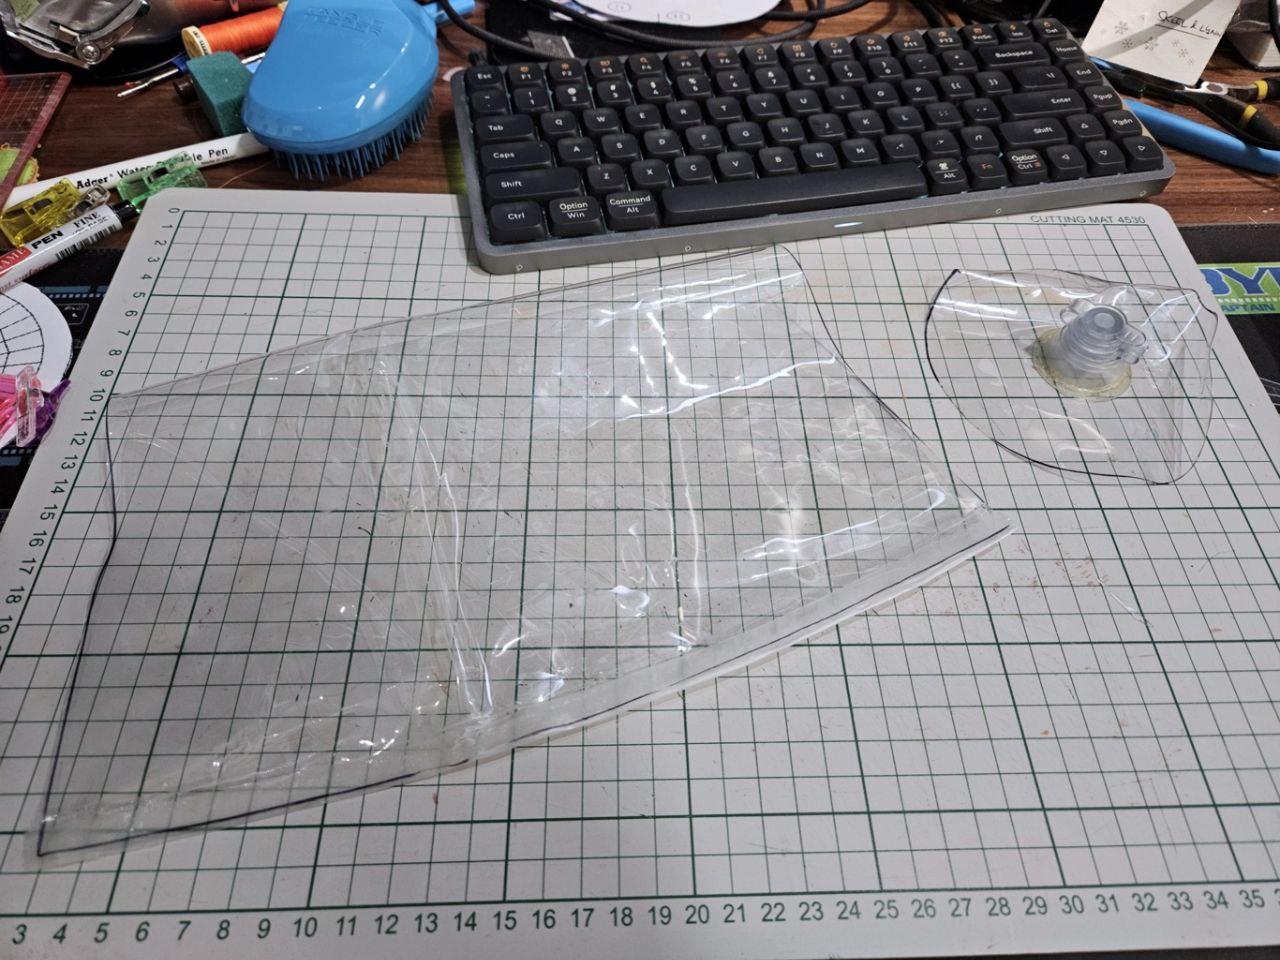
The inserts I'm using sheet tpu, then heat welded together, and afterwards used seam tape on top. It's quite finicky and I made mistakes in 2 places when doing the weld by leaving the iron on too long, so much it melted. Hopefully it is still airtight.
The valve I accidentally used contact cement (in photo), thought I'd try it but it just pulled apart. Thankfully after it dried, it just rubbed off.
Woo! Tail sleeve done! The tip of the tail is quite complex and small and it was hand sewed. I took the time to first run a basting stitch to hold down the panels then used a backstitch for the seam. The rest of the tail (that could fit under my sewing machine) I hand stitched a basting stitch prior to sewing.
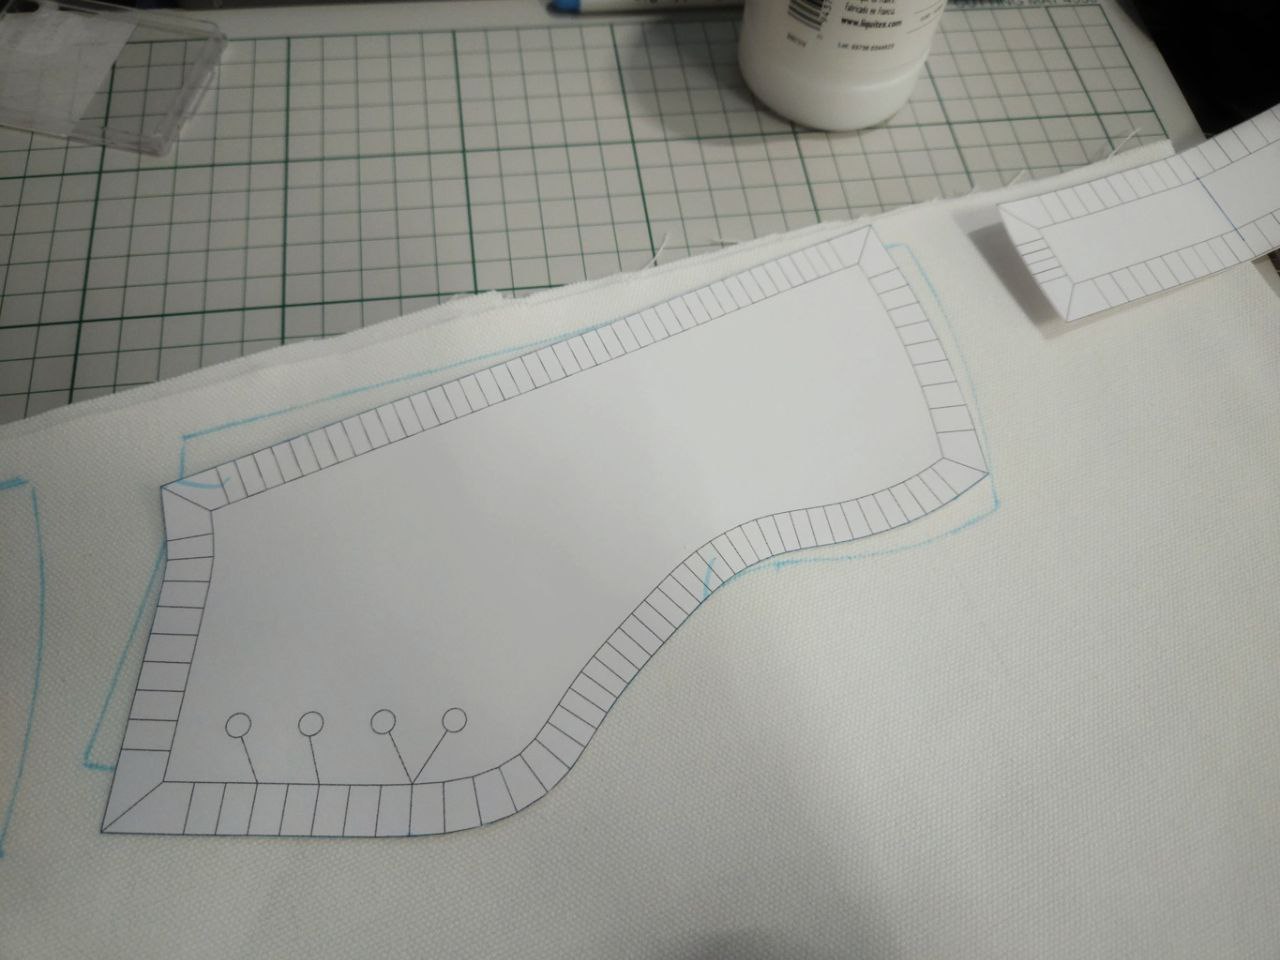
Size wise, I think the tail could be bigger - it's quite tight when flipping it inside out, and I am hoping the inflatable inserts would not be too difficult to insert/remove. Speaking of the inflatable inserts:
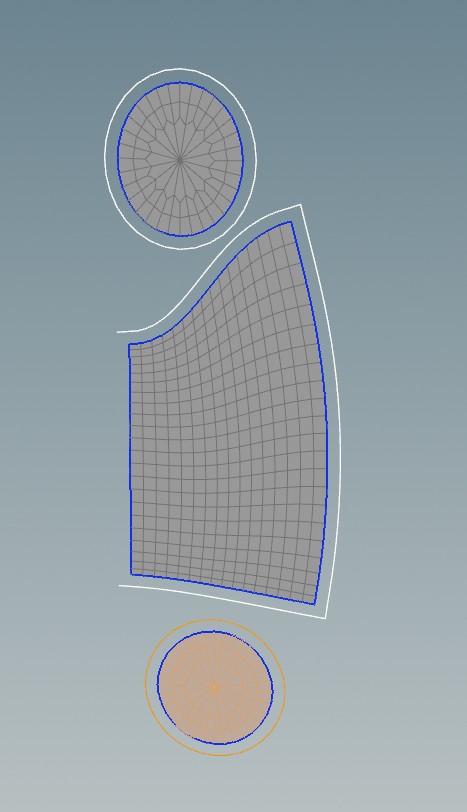
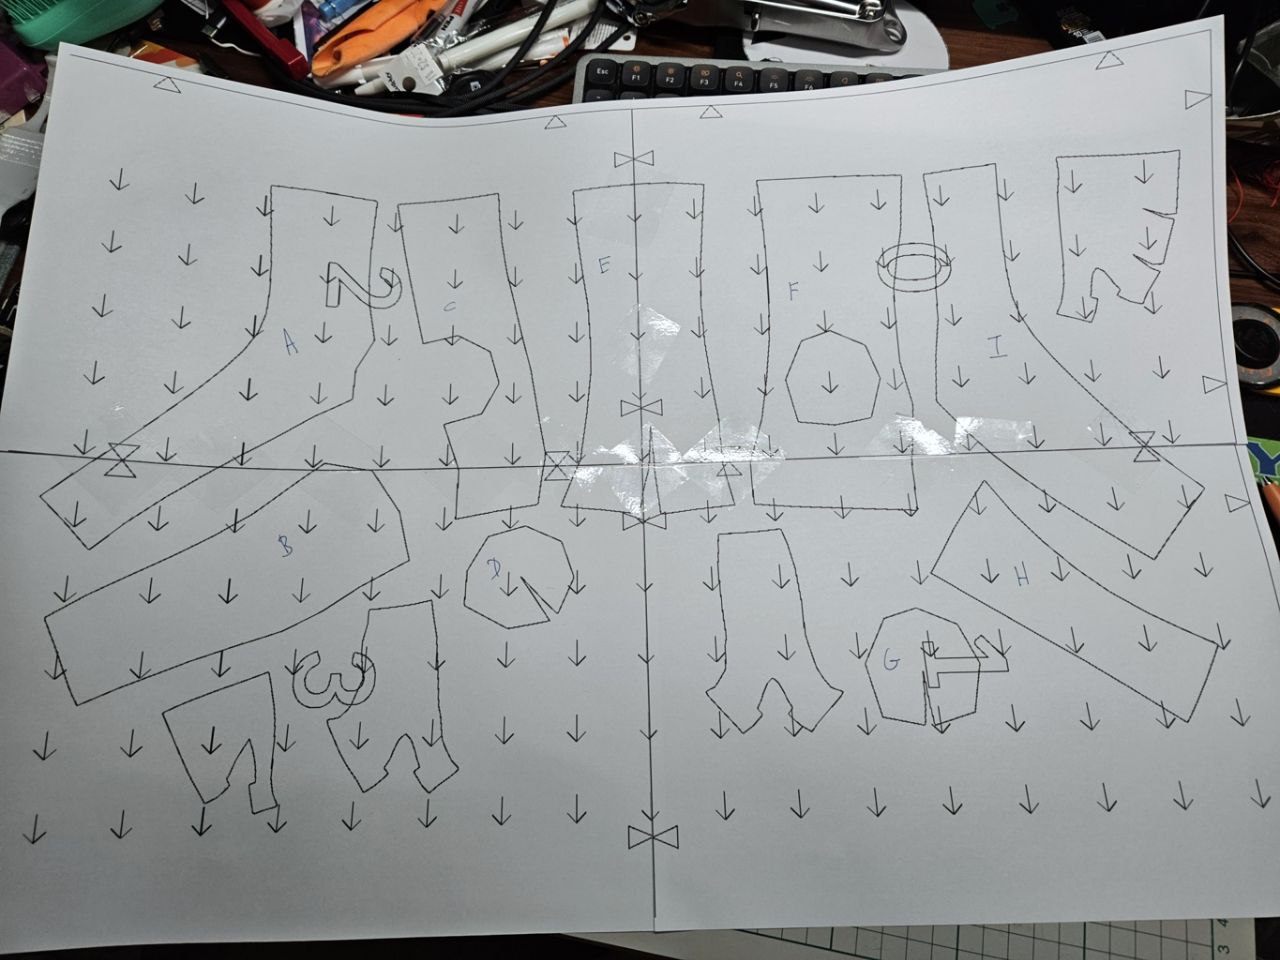
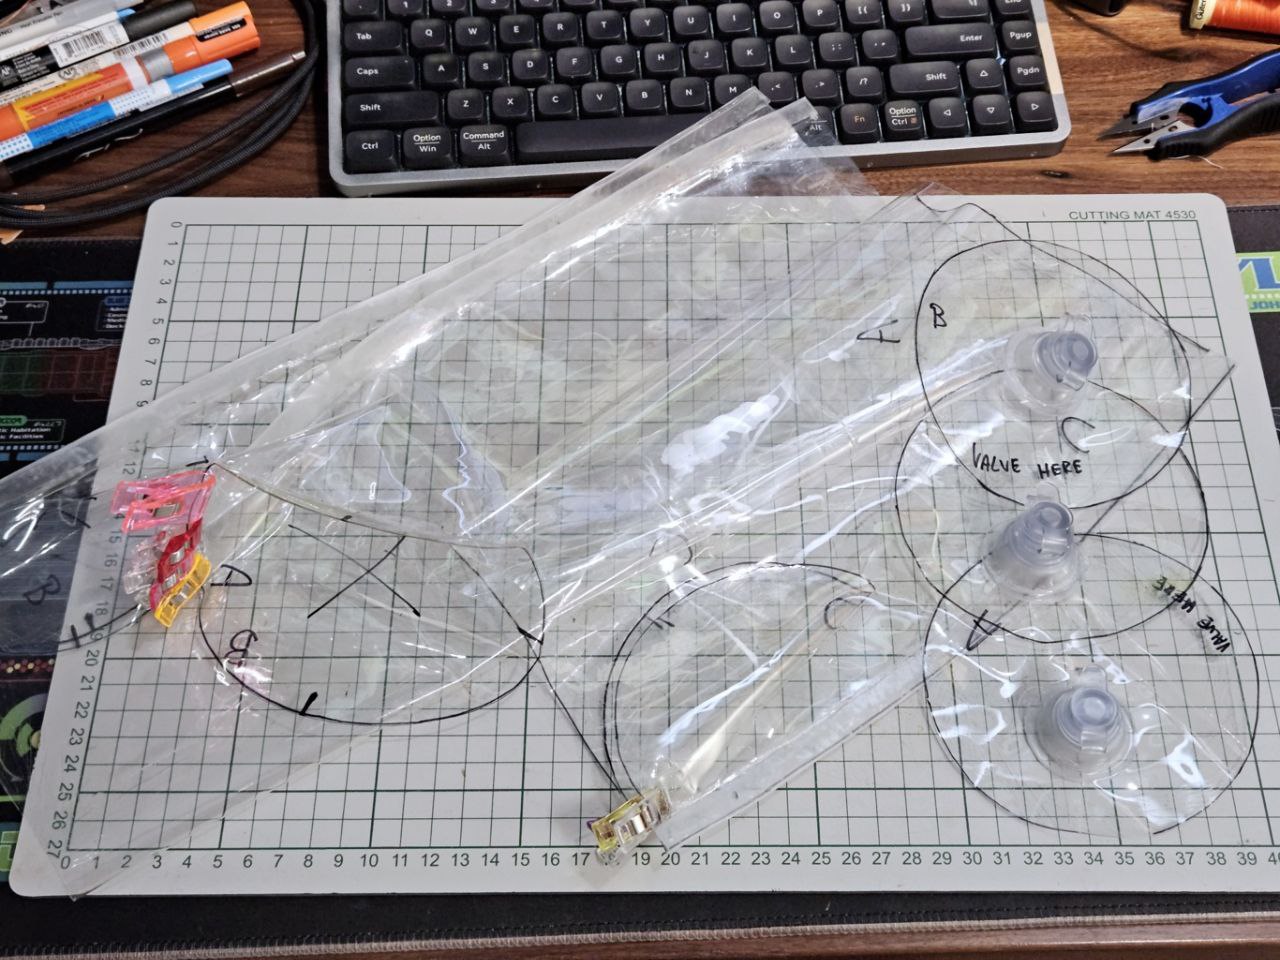
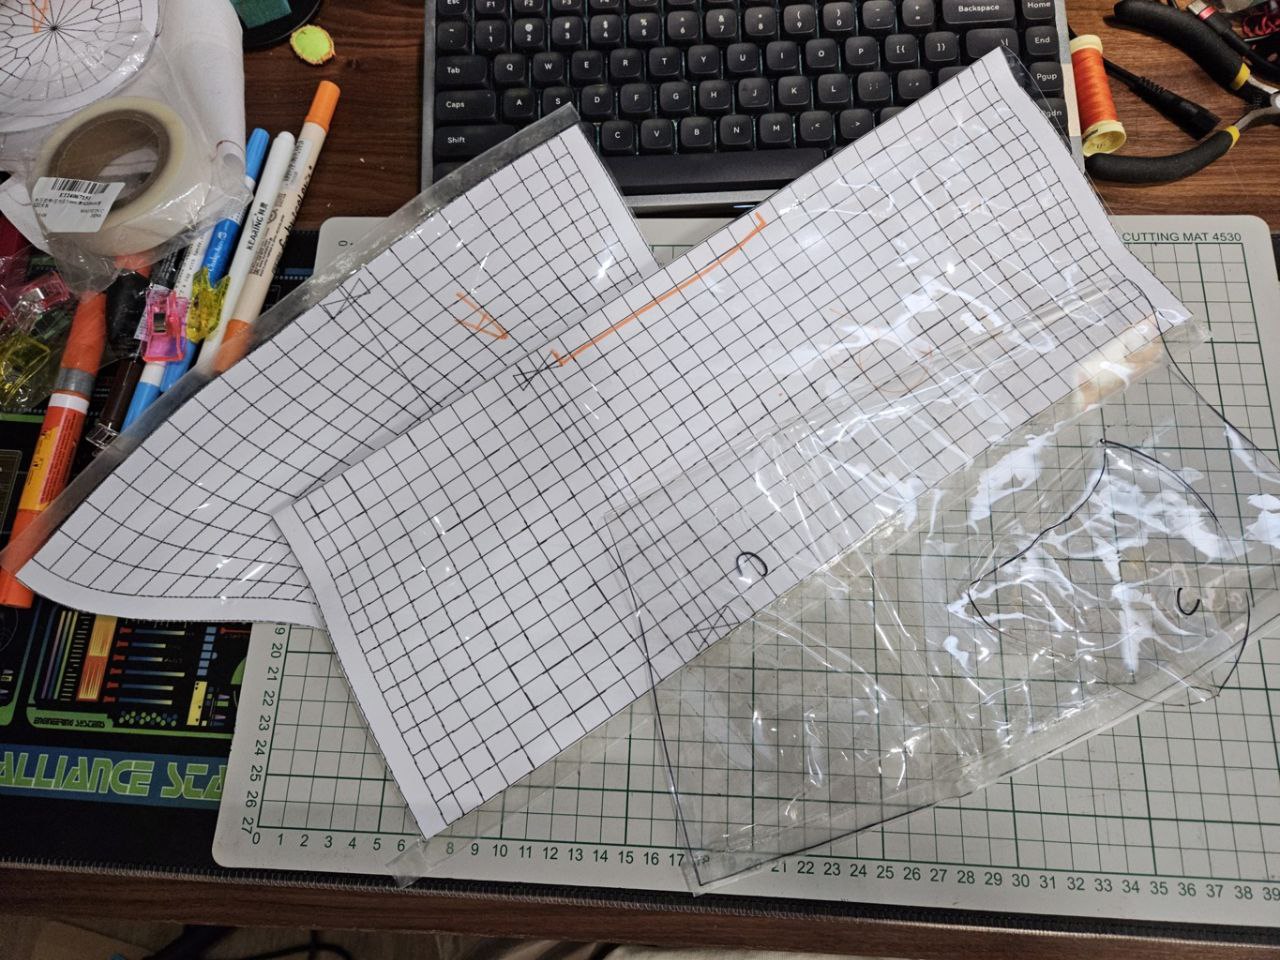
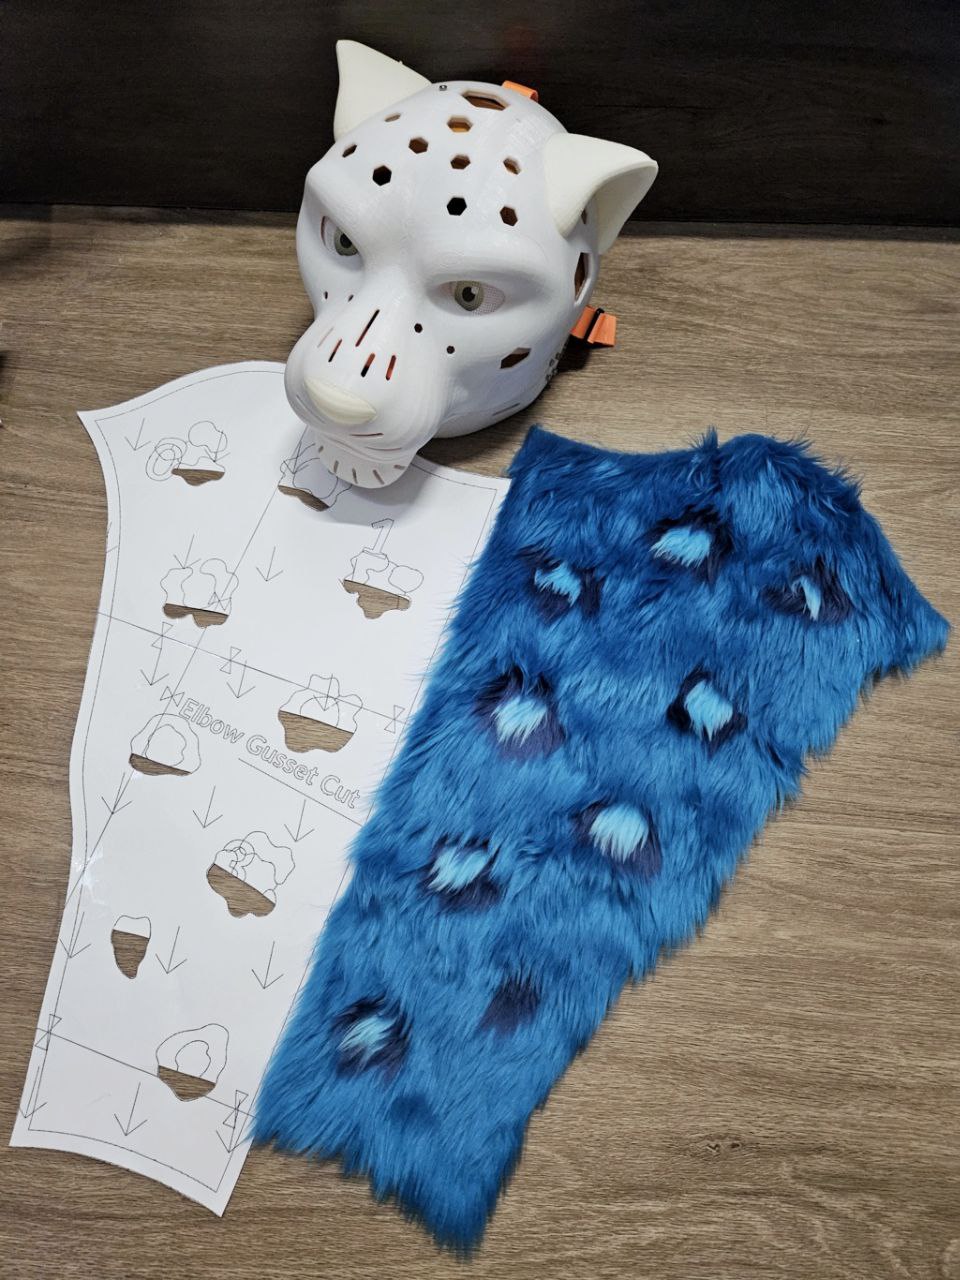
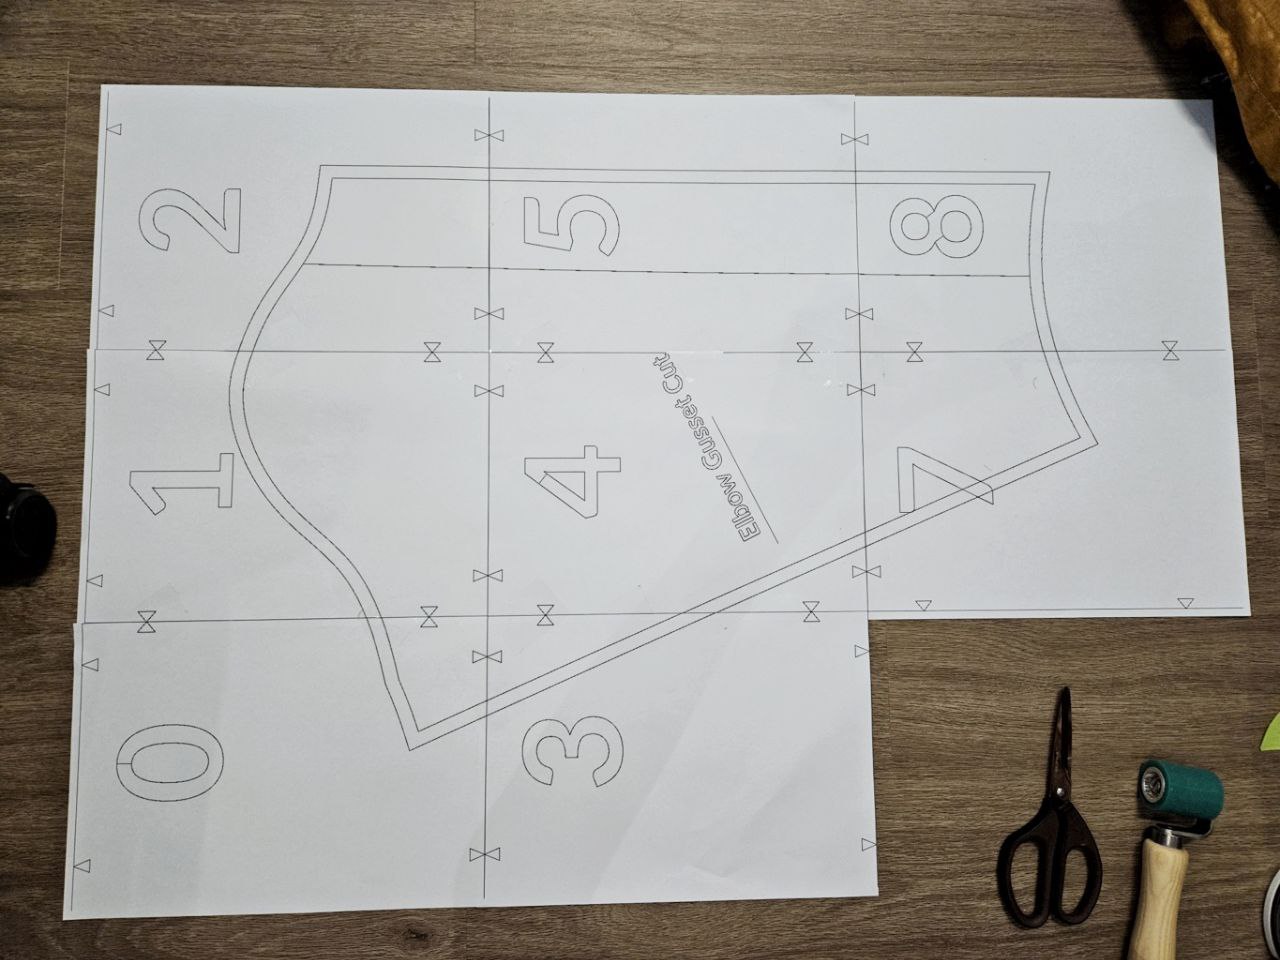
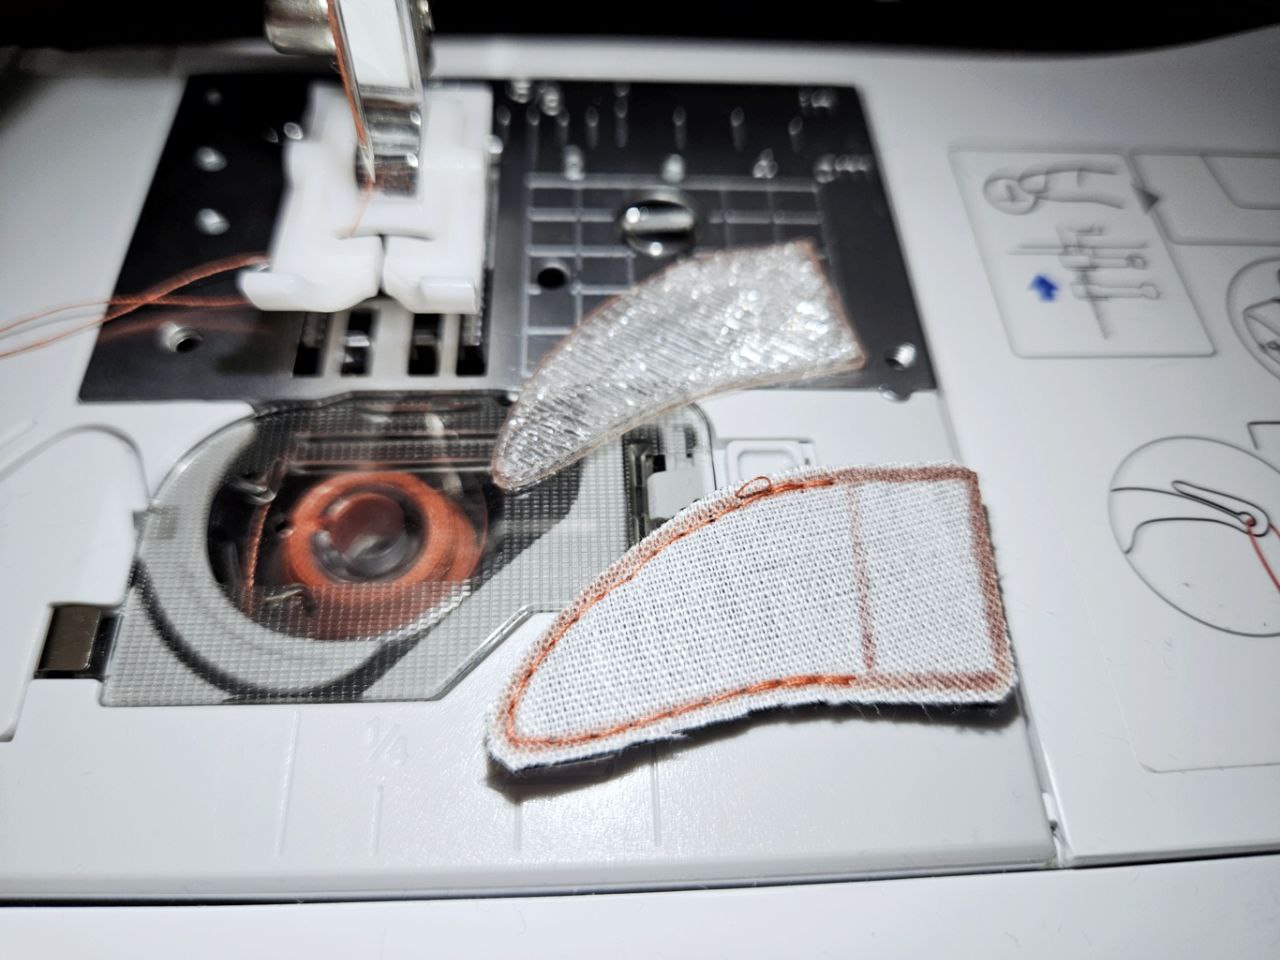
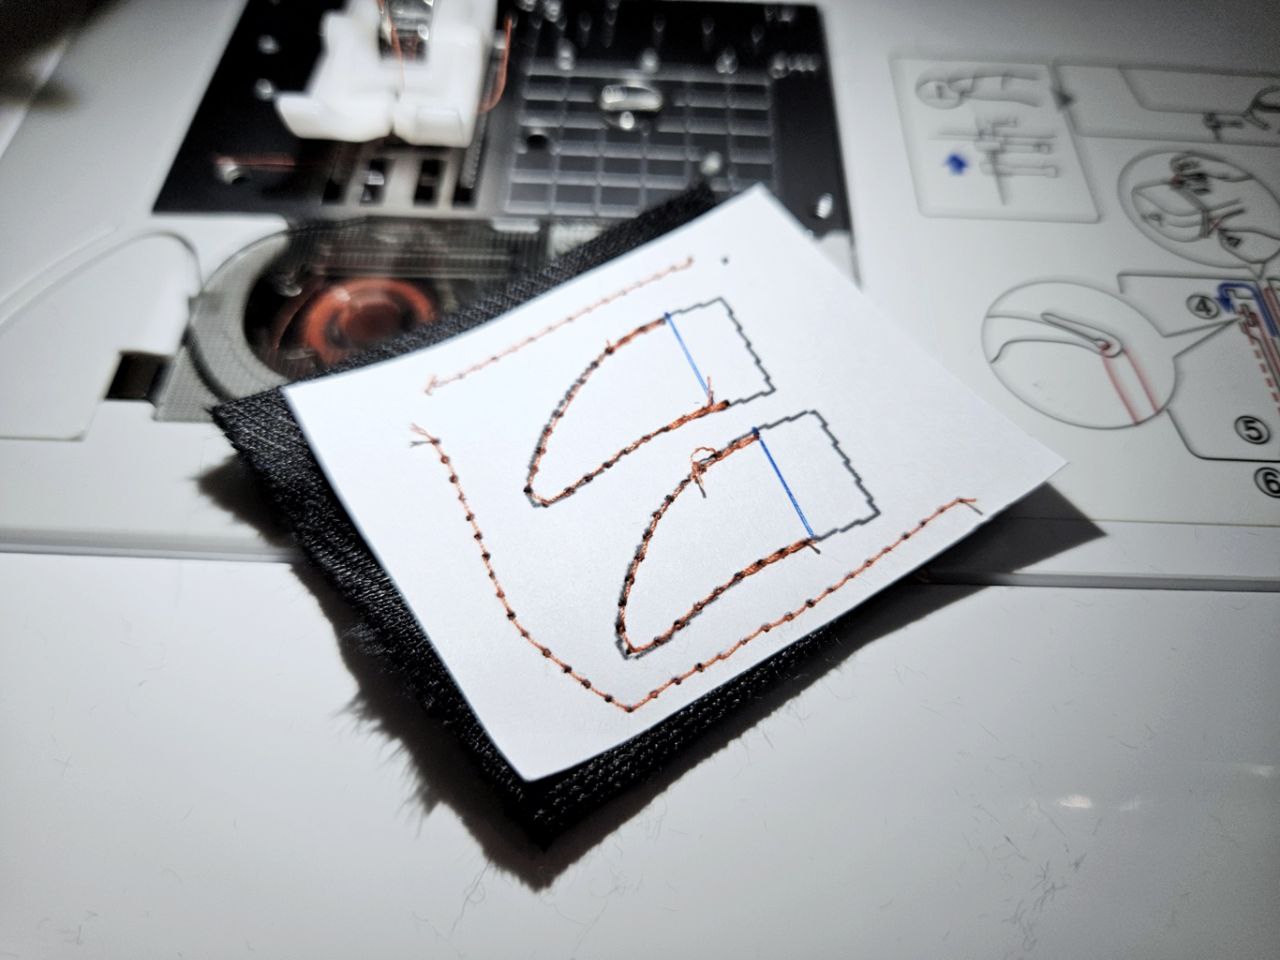
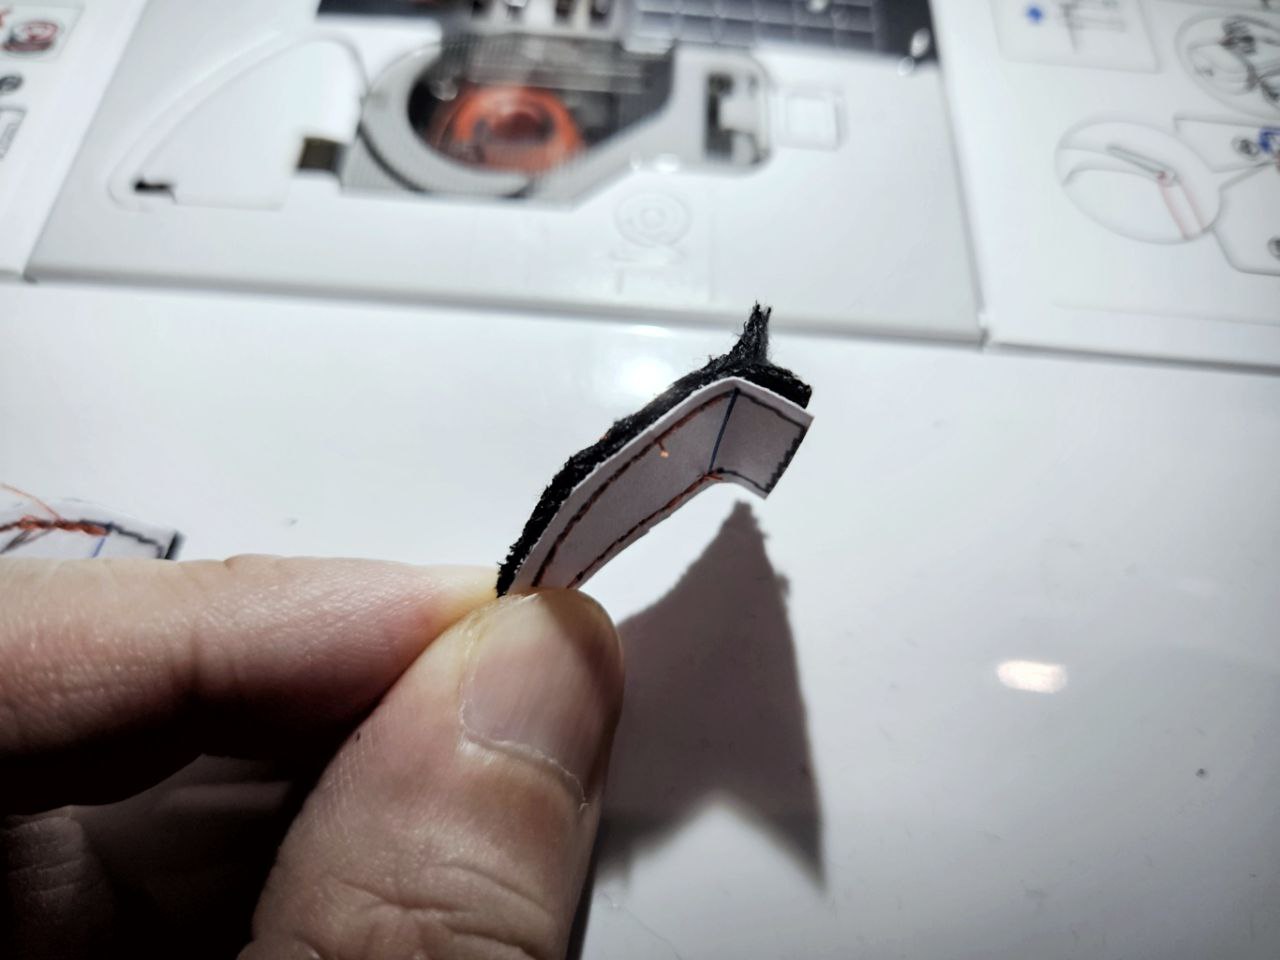
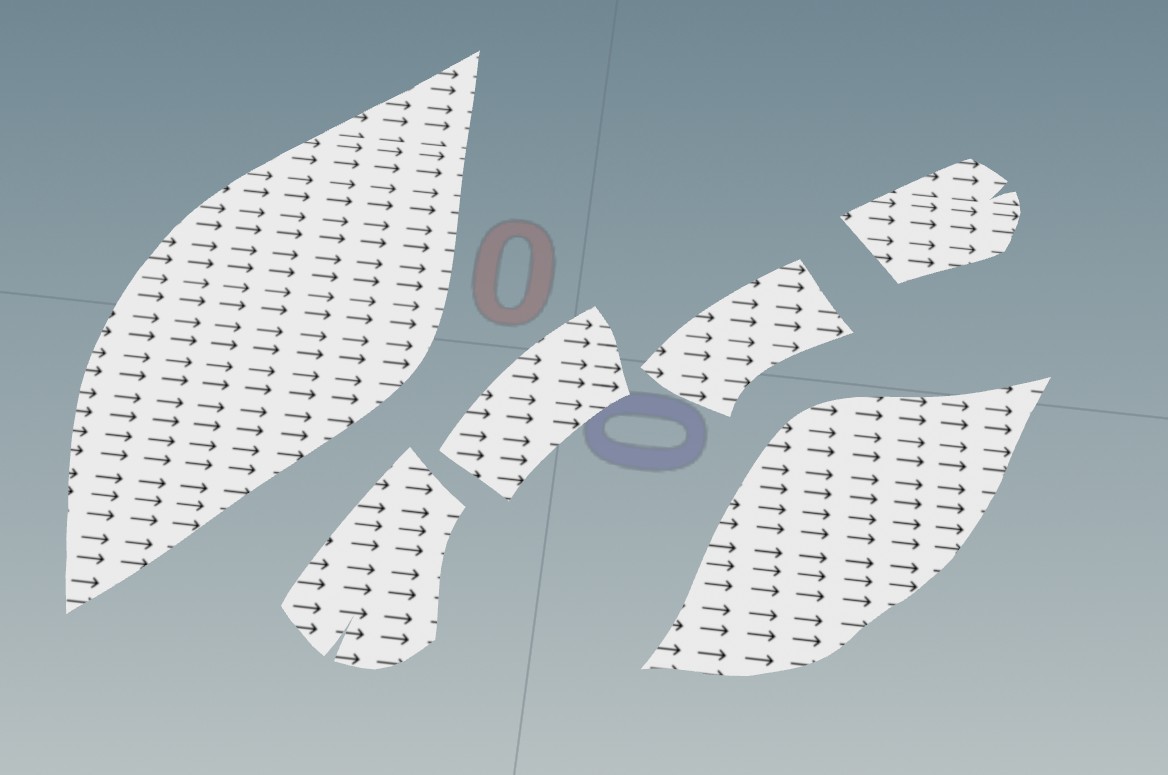
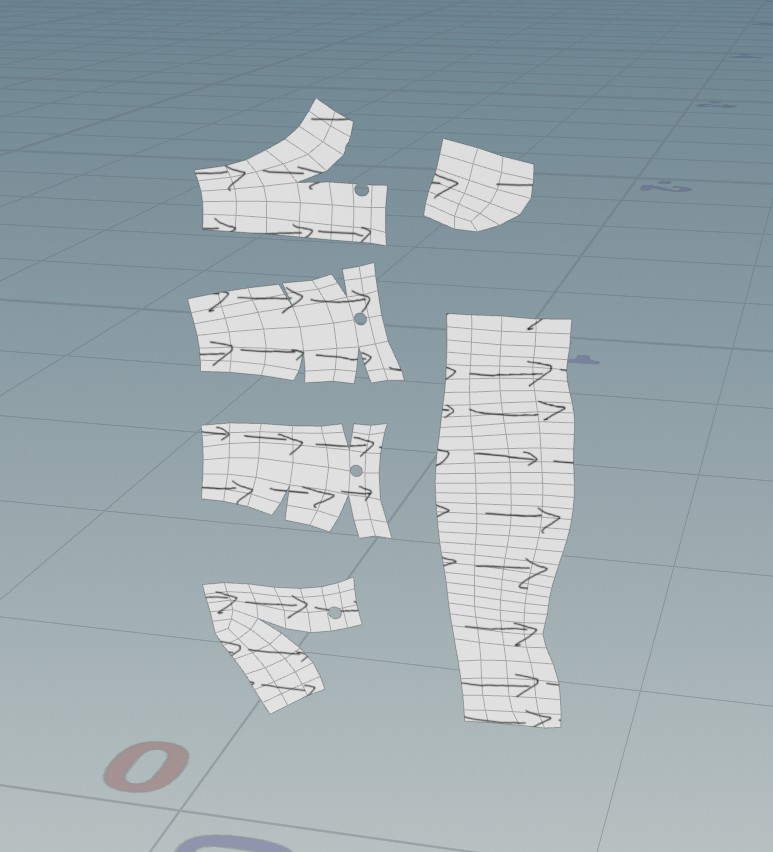
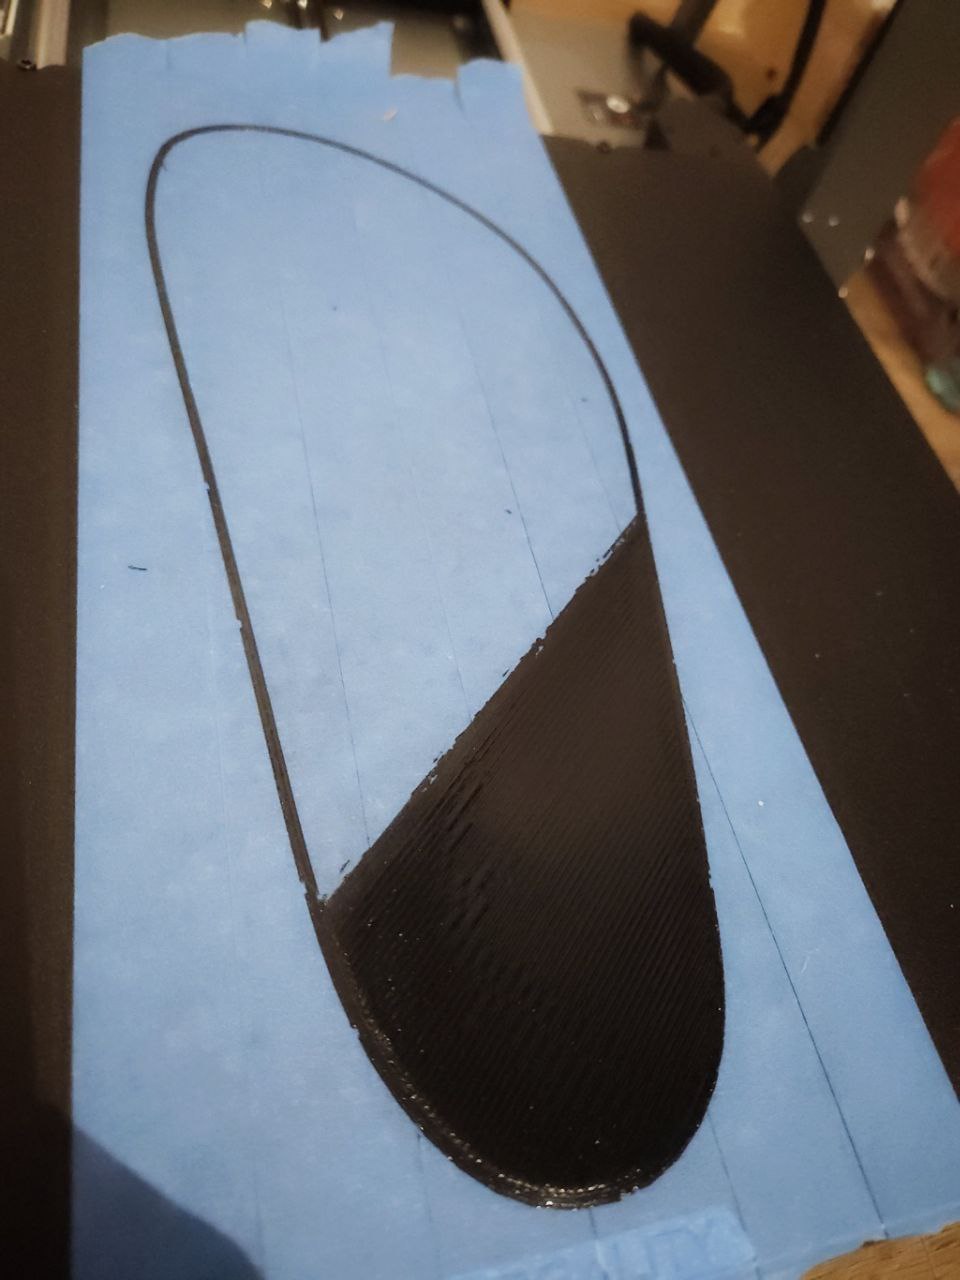
I decided to split the inserts into 4 sections. The pattern above is just for the insert closest to the base of the tail. I didn't check if I have enough TPU to make them, so fingers crossed!
I can likely still order it in time, if not I'll just use an insert with polyfill. Maybe for the tip? Hmmm..... Actually that might be a good idea, as the tip is pretty difficult to reach - as well as the most likely to be stepped on - would make sense actually!
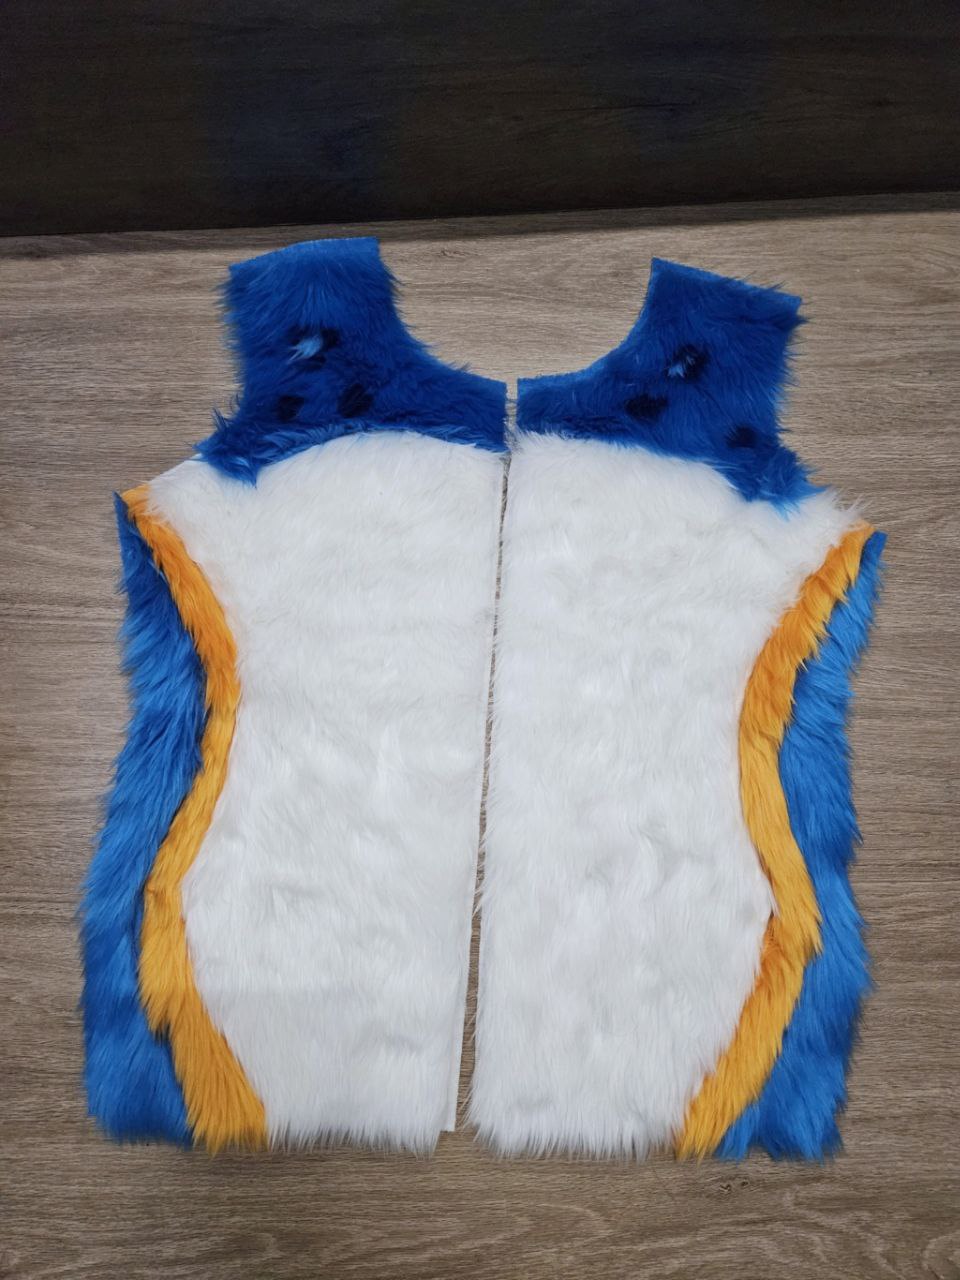
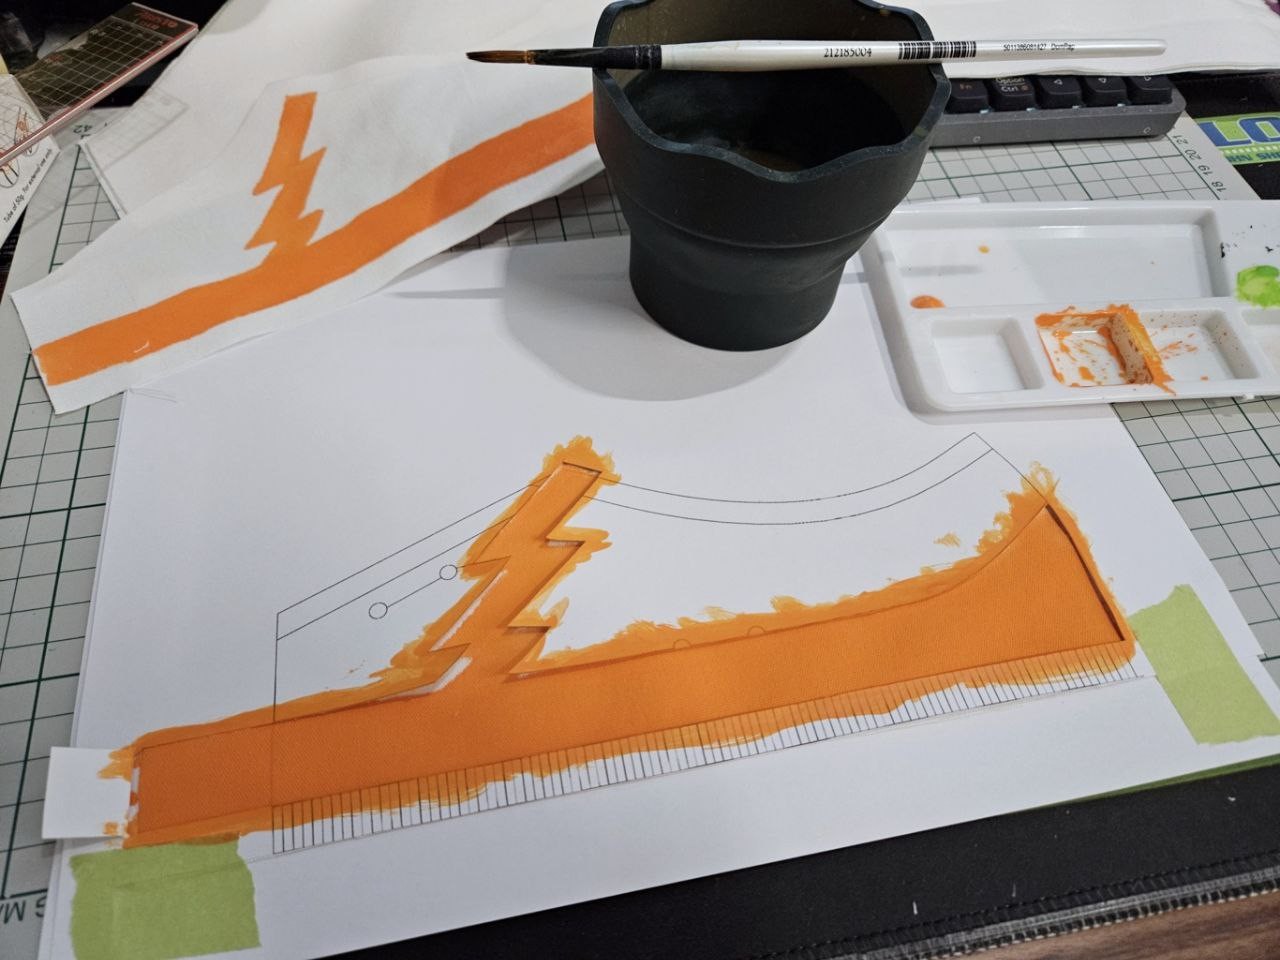
Sewed in the orange stripe!

I redid some of the rosettes on the previously completed sleeve, reducing alot of the distortion.
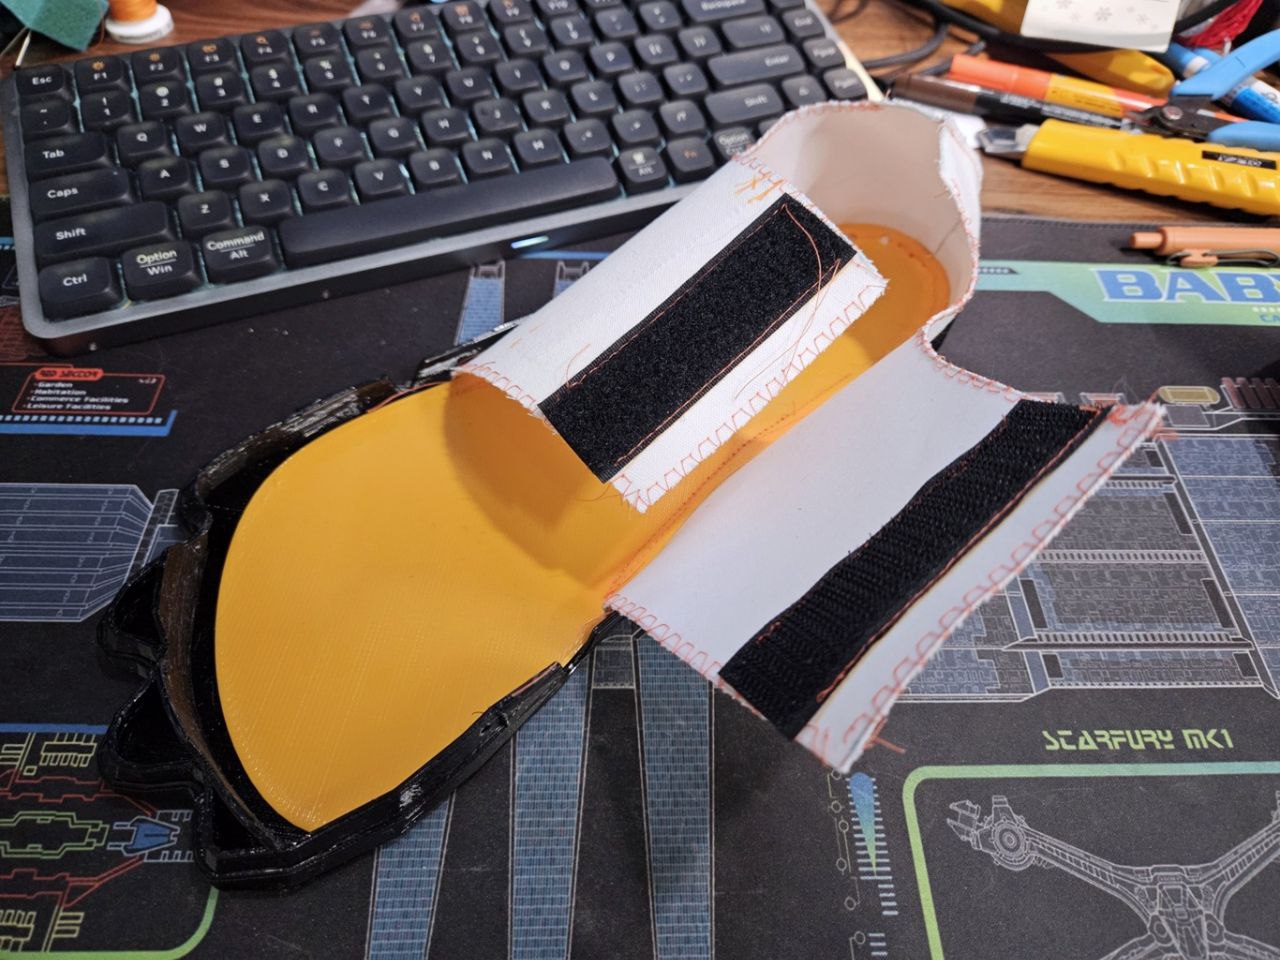
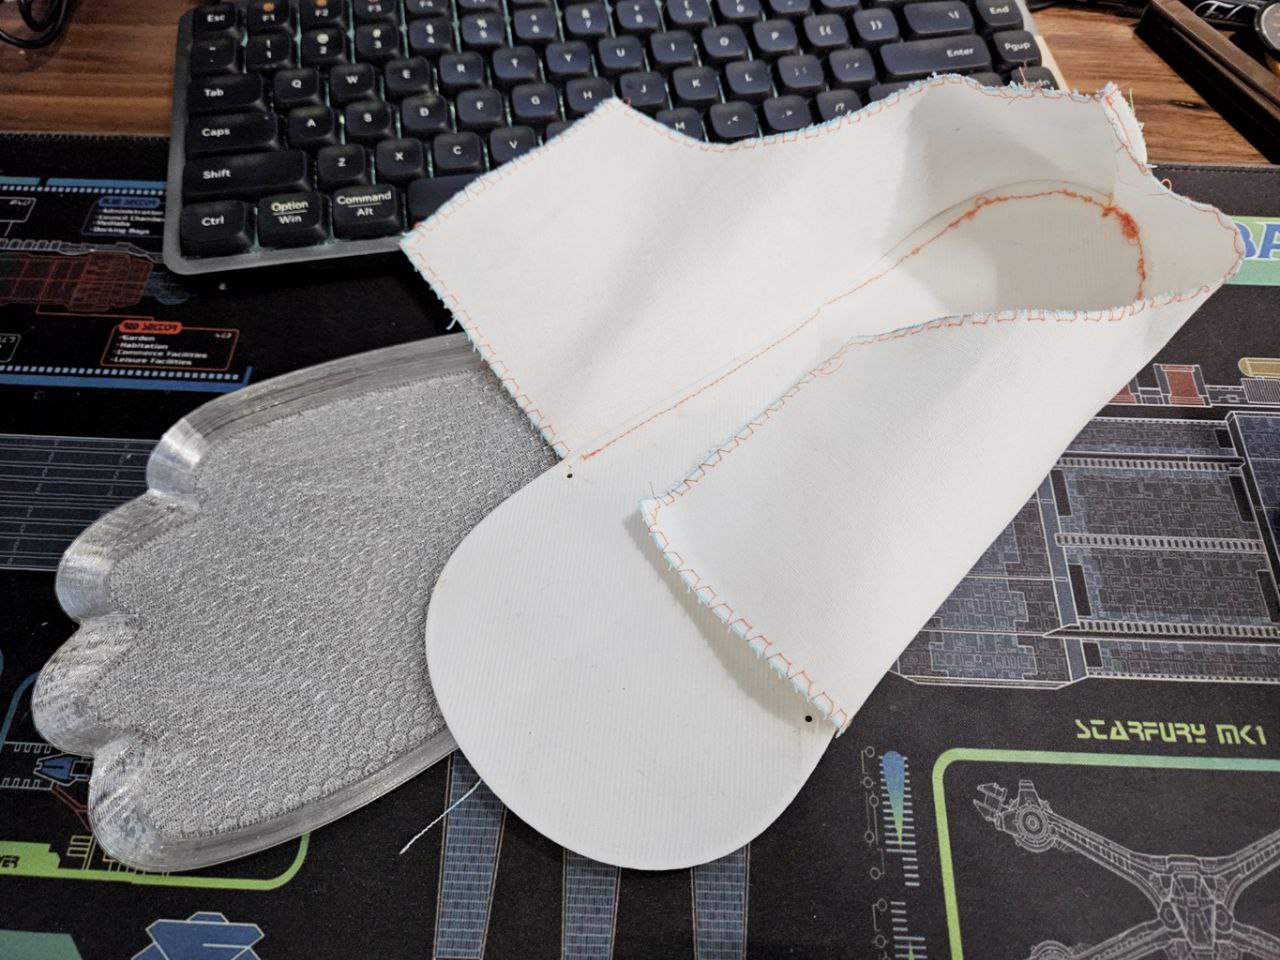
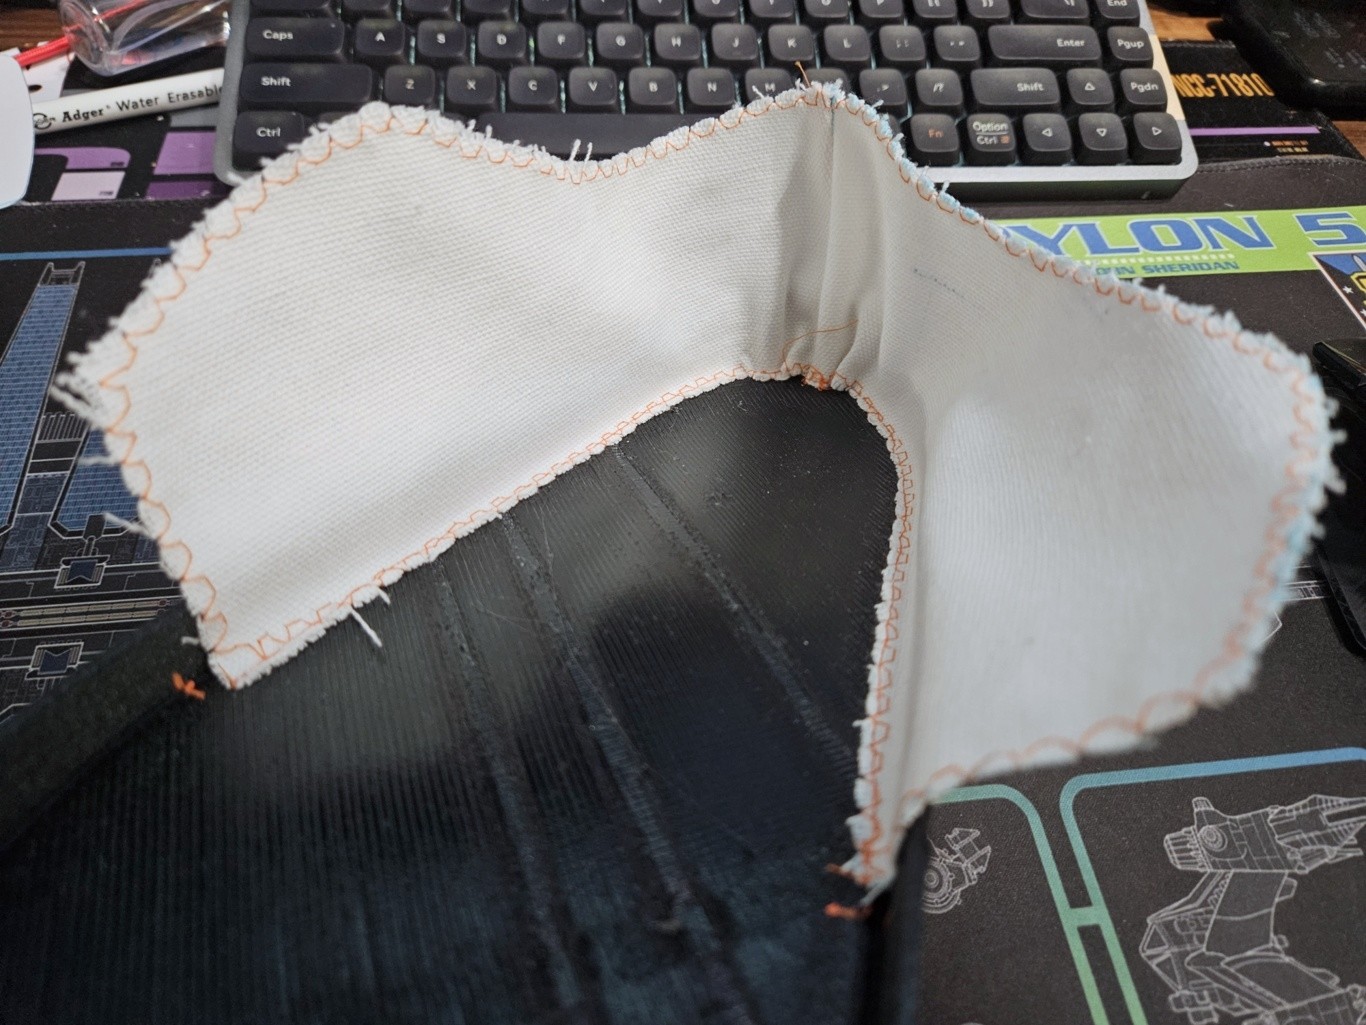
Sewing up the foot paw canvas panel today, the velcro I got is pretty strong and should work well. However, the back curve is too agressive so I made some changes to the pattern and will sew it up tomorrow.


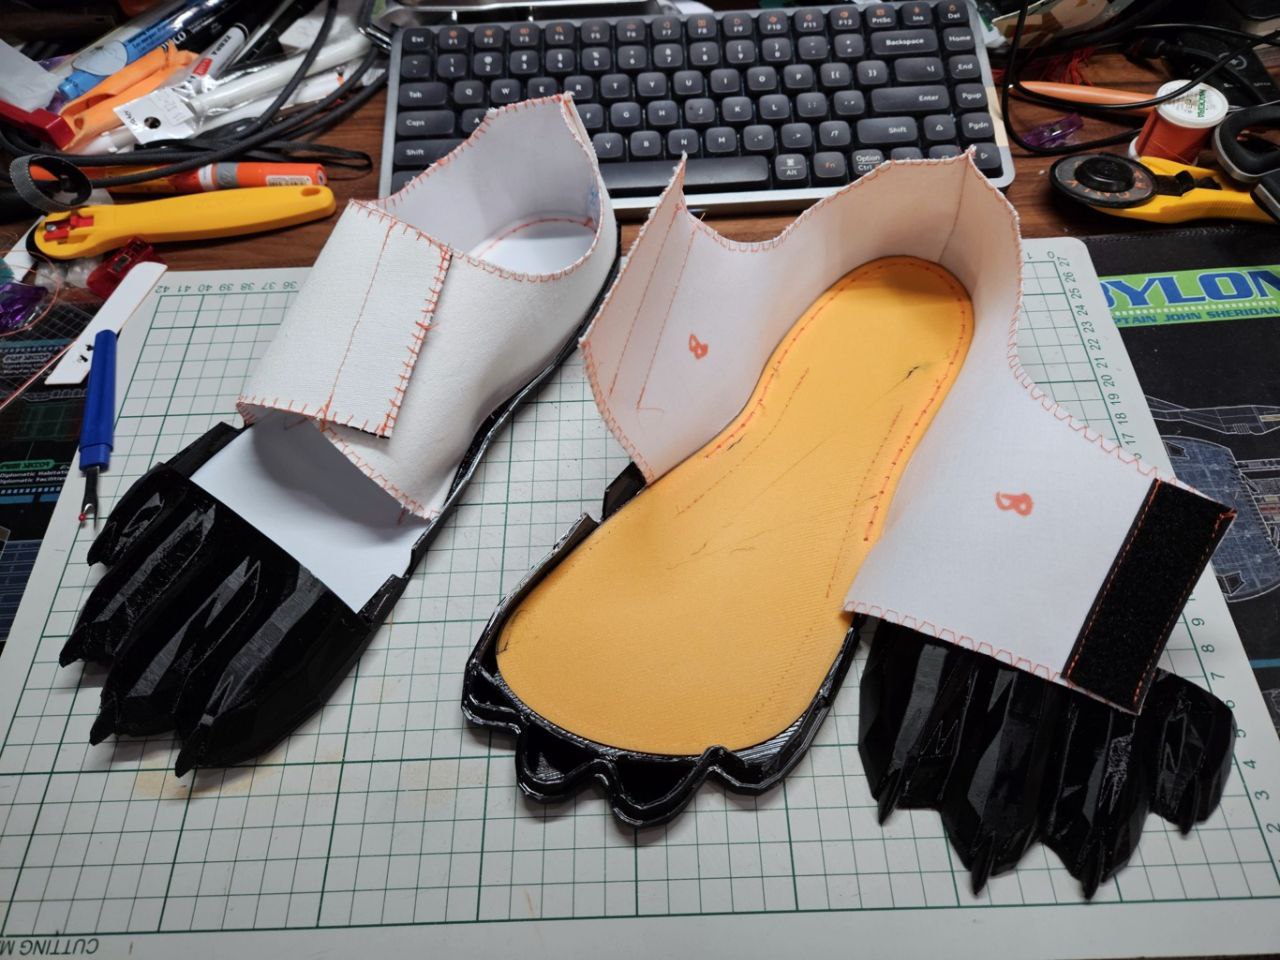
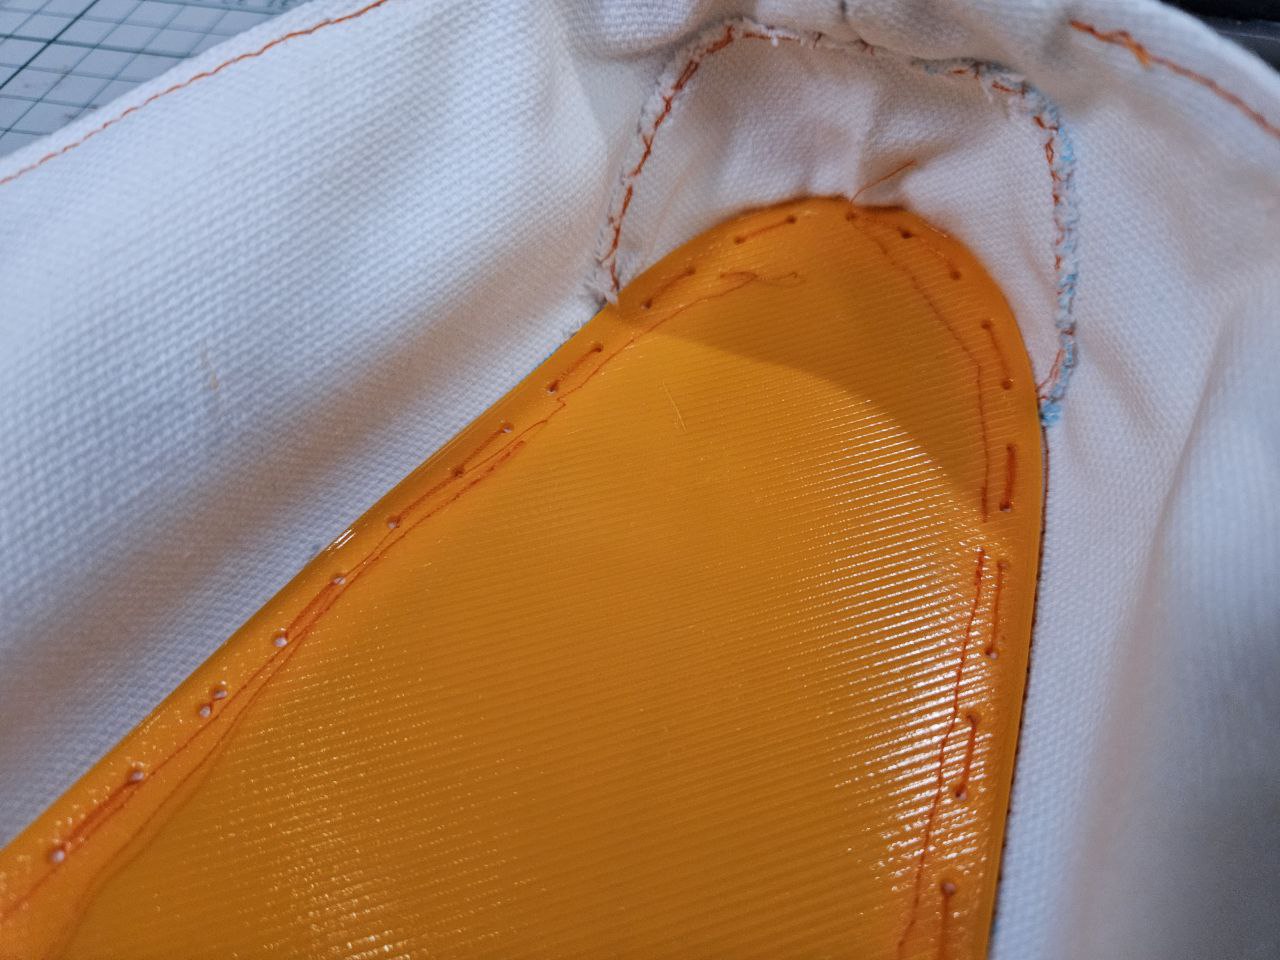
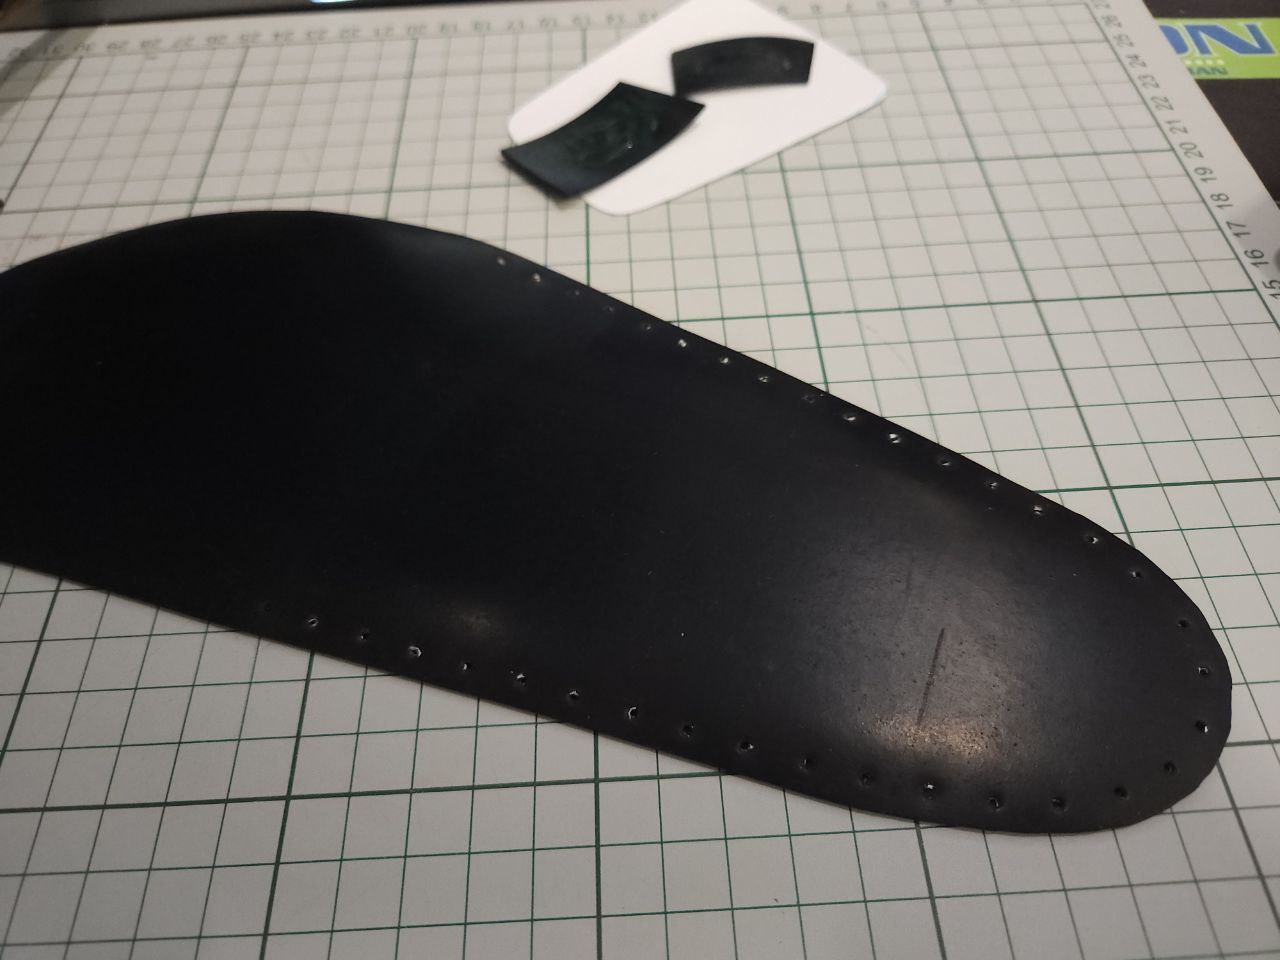
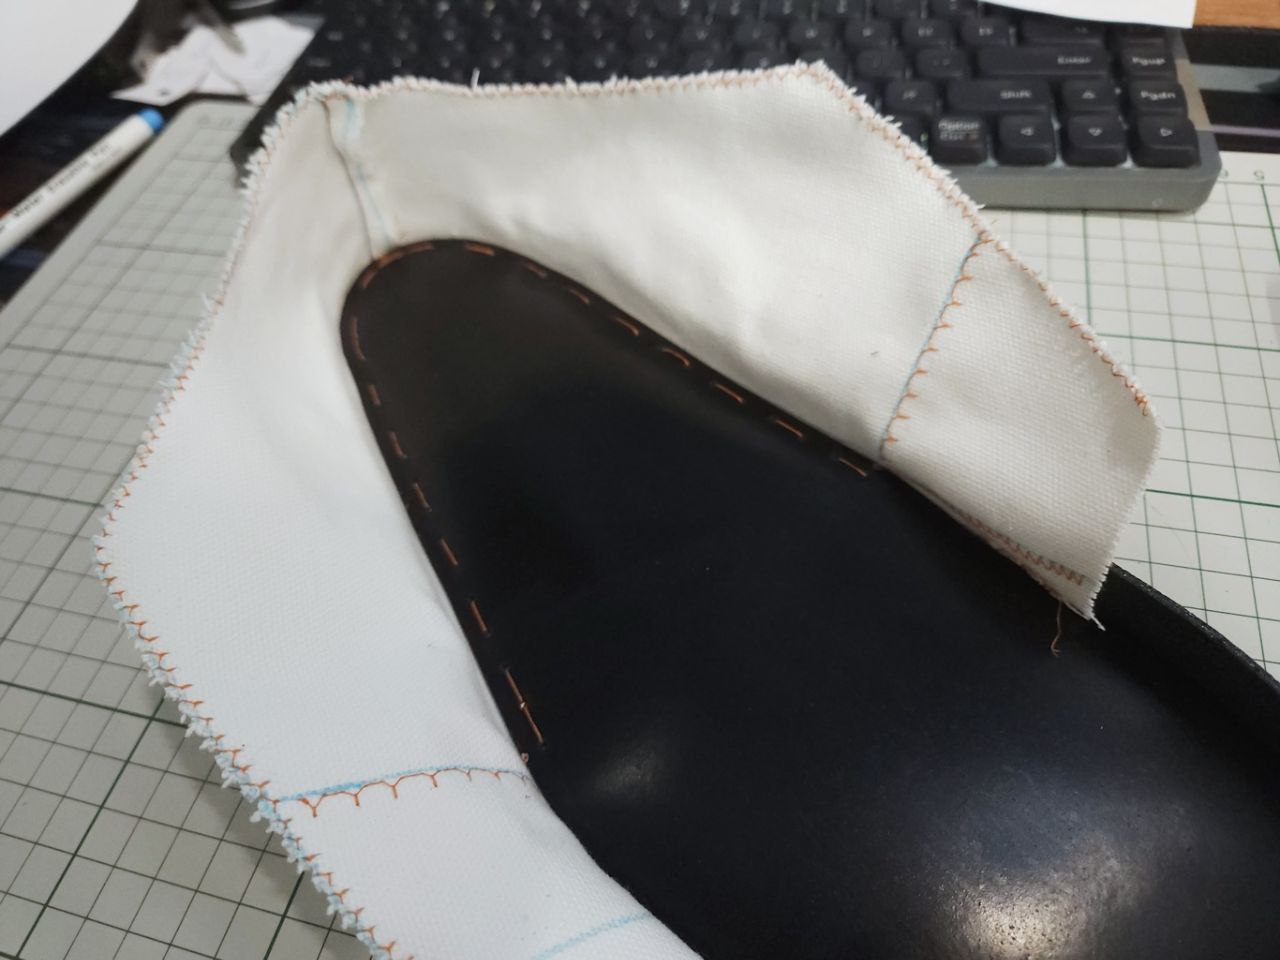
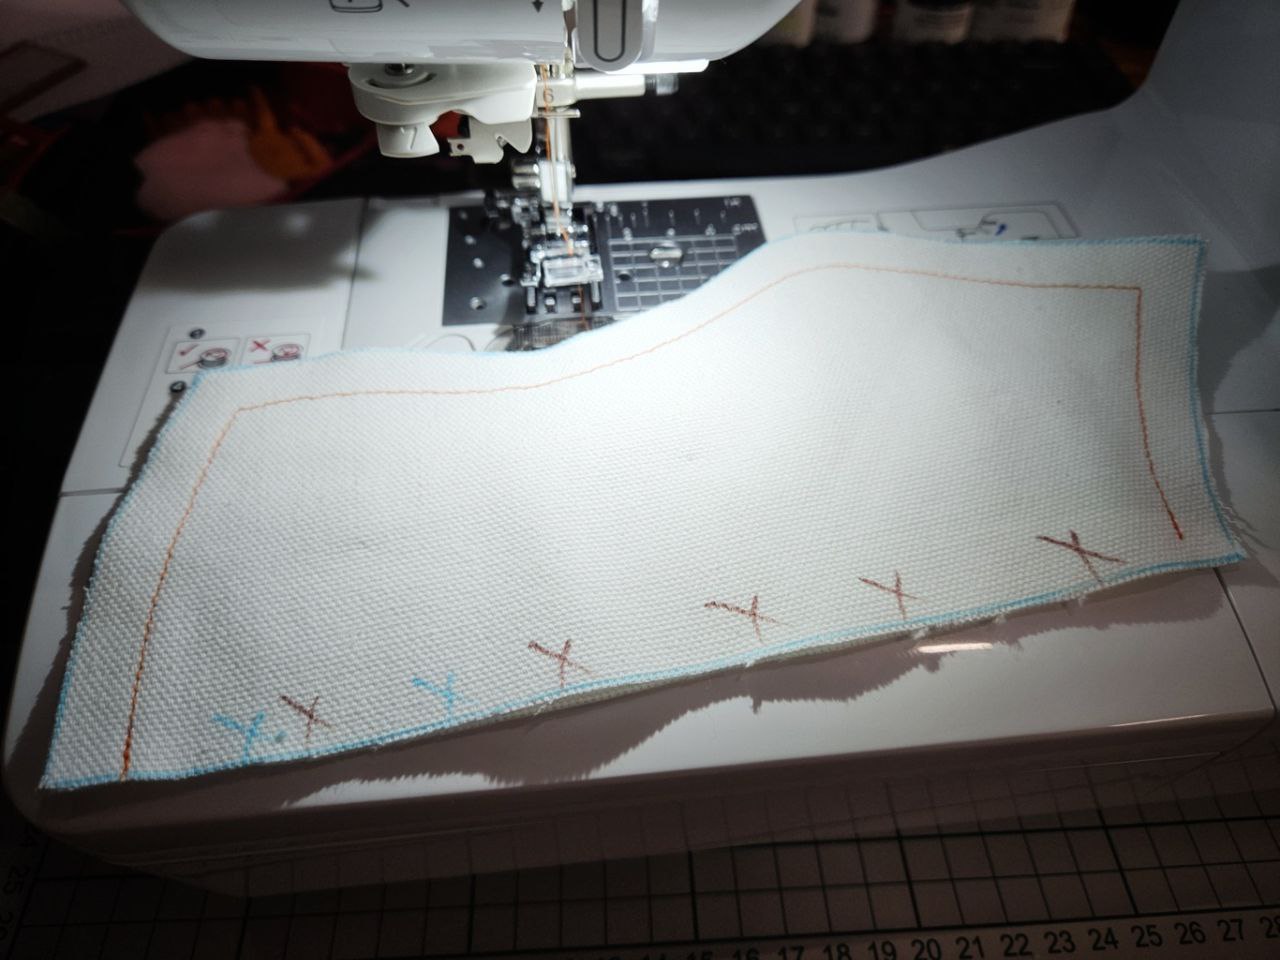
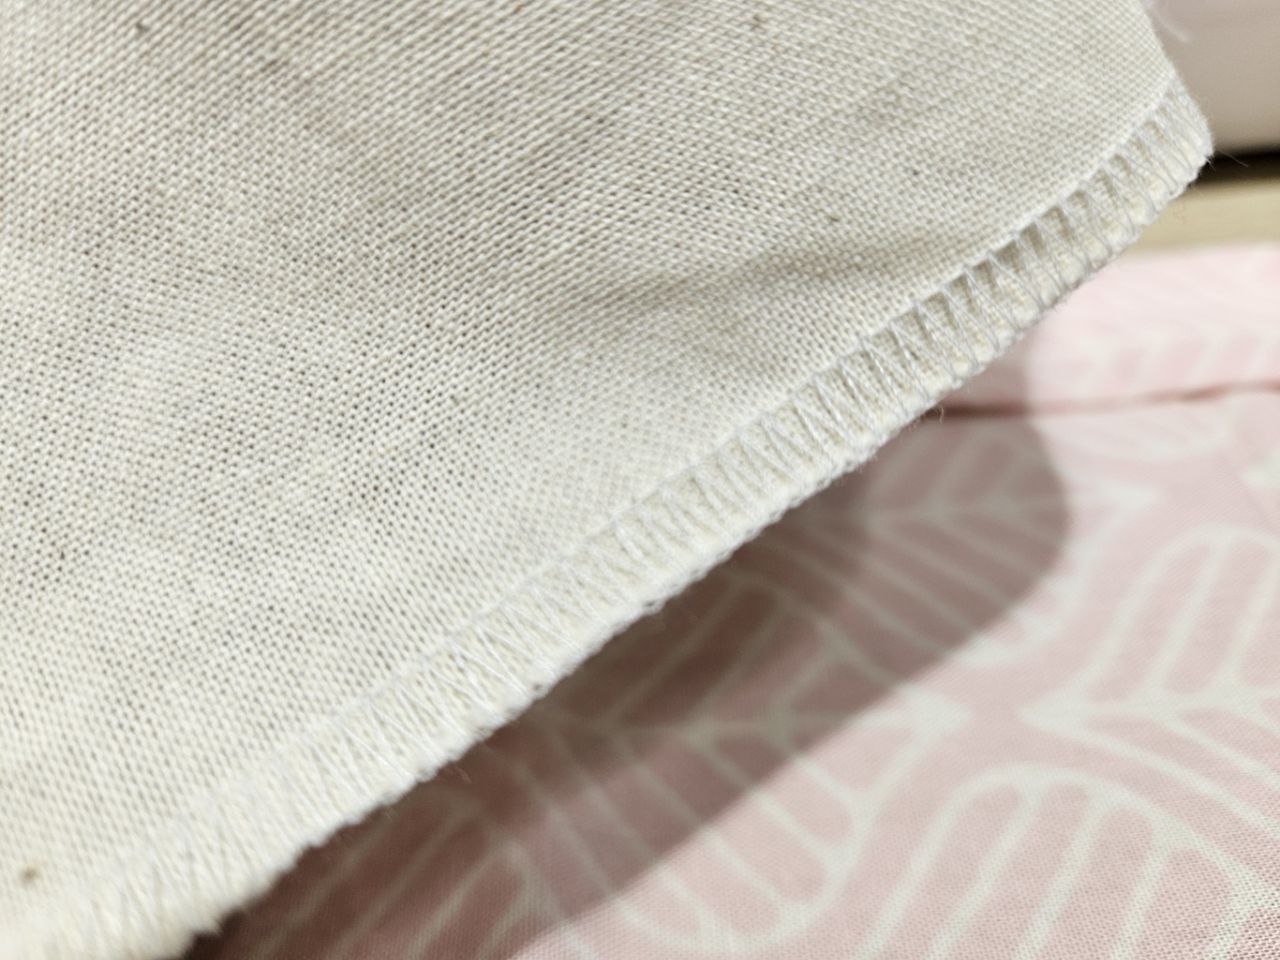
Woke up and sewed up this new version. Barring one or two changes I think this is it. It's not obvious in photos but I did the tests with interfacing on the inside, and there is only one layer of canvas, hence the overcast stitch around the edges. I am only using one layer of canvas to hopefully keep cooler, and the interfacing is to reduce the amount of stretching over time. Hopefully.
Also, part of the insole is stitched directly to the base, the heel unfortunately cannot be stitched as I cannot fit that section under my machine.
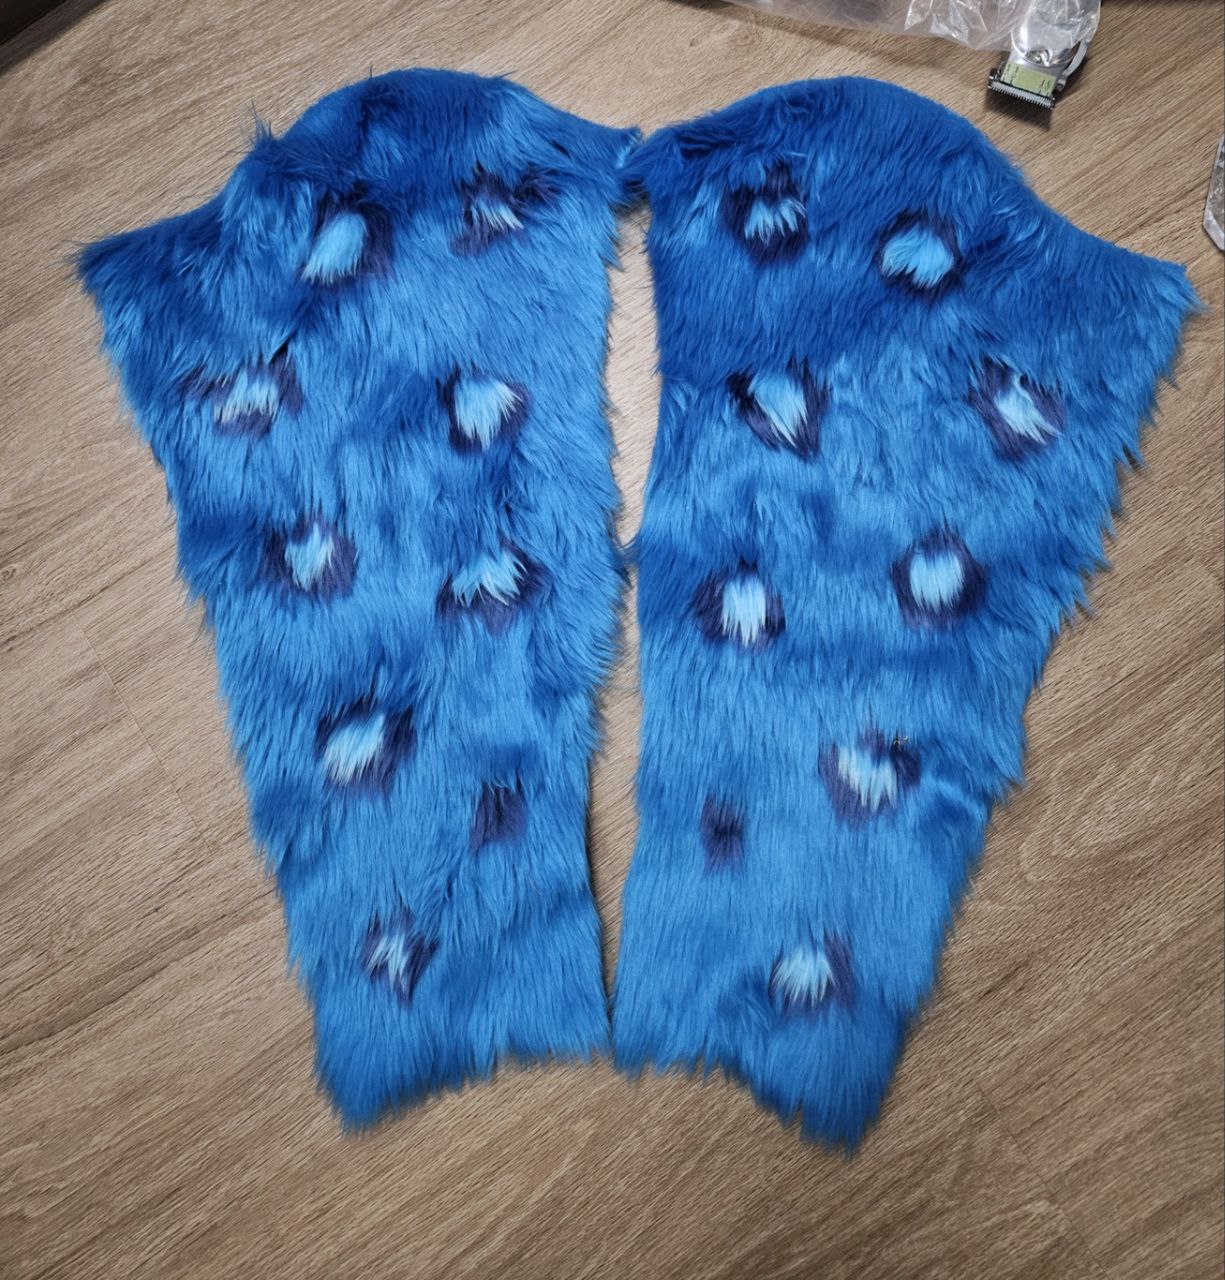
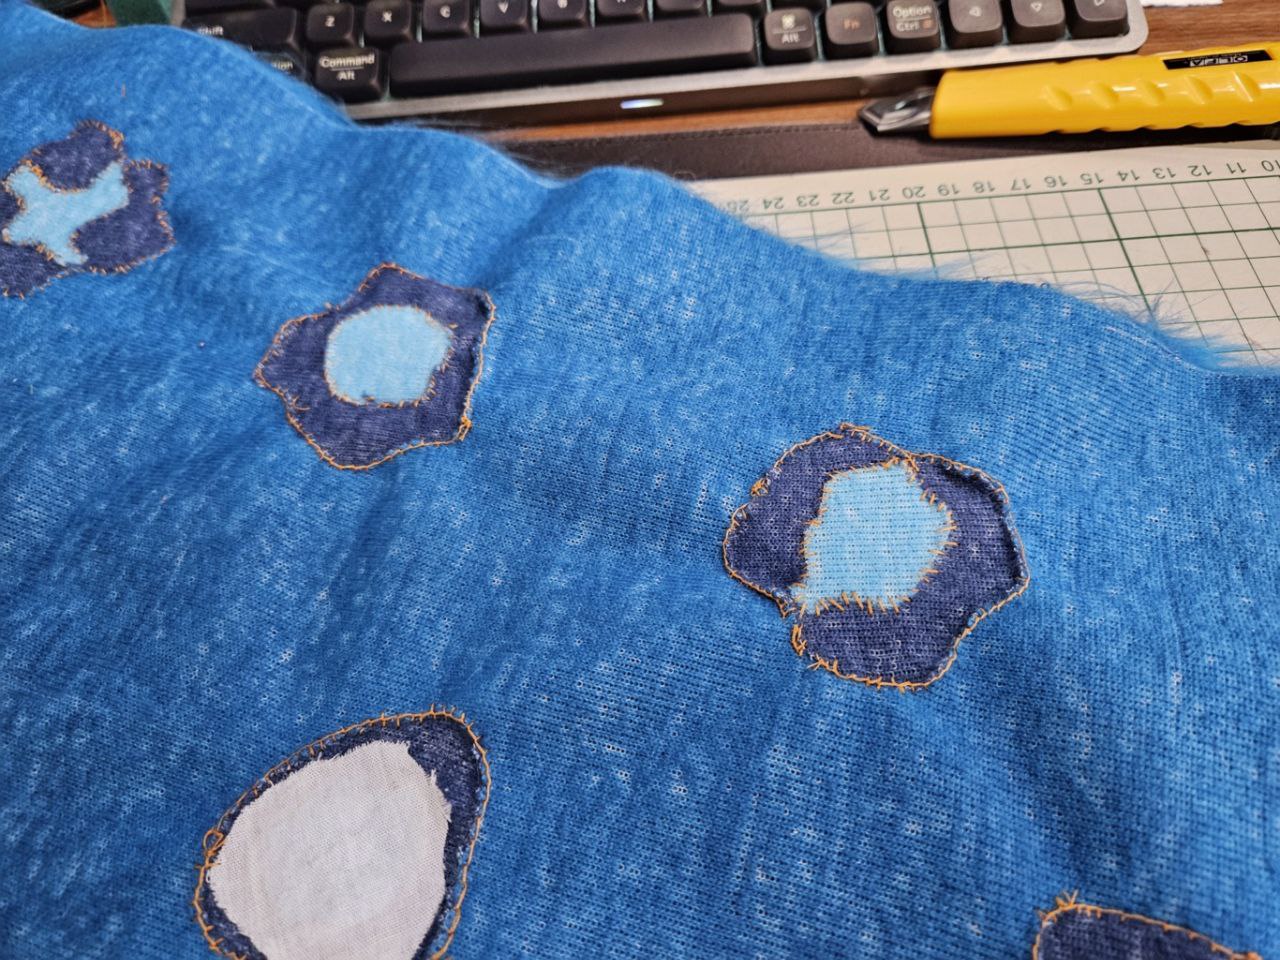
Got all the rosettes in, whew! I might re-do some of the rosettes on the original sleeve, as I'd figured out how to sew the rosettes better, and this sleeve has much fewer distortions in the fabric.
Also printed (what I hope is) the final paw shoe pieces, so that will be something I'll work on.
Finally, today is the 5th, which means there is only 4 weeks to go before scotiacon! The pressure is on!
I stayed up waaay later to fix the distortion of the fabric on the other sleeve. I finally found a way to make the rosettes sit with minimal distortion on the faux fur.
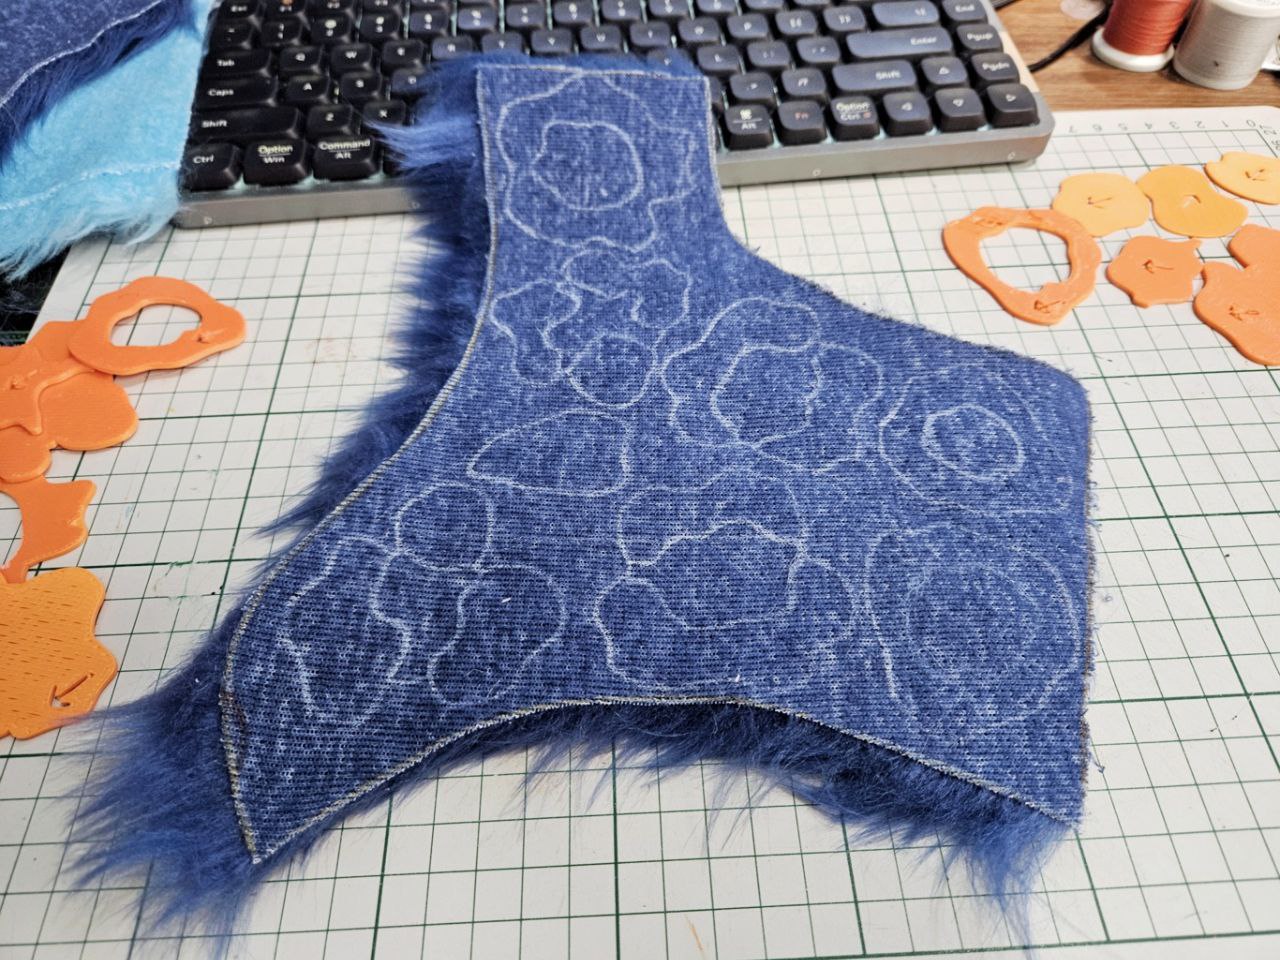
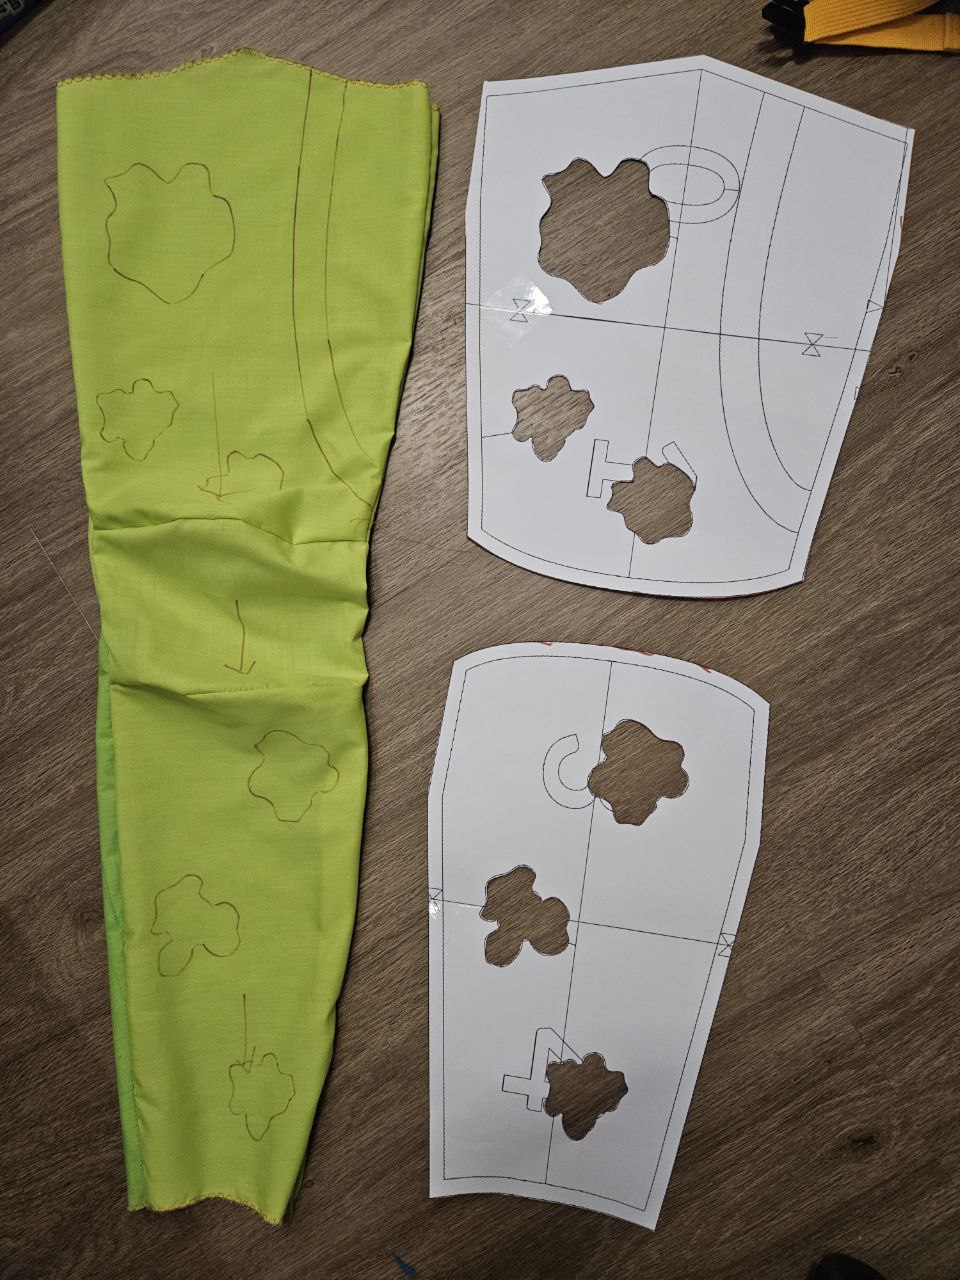
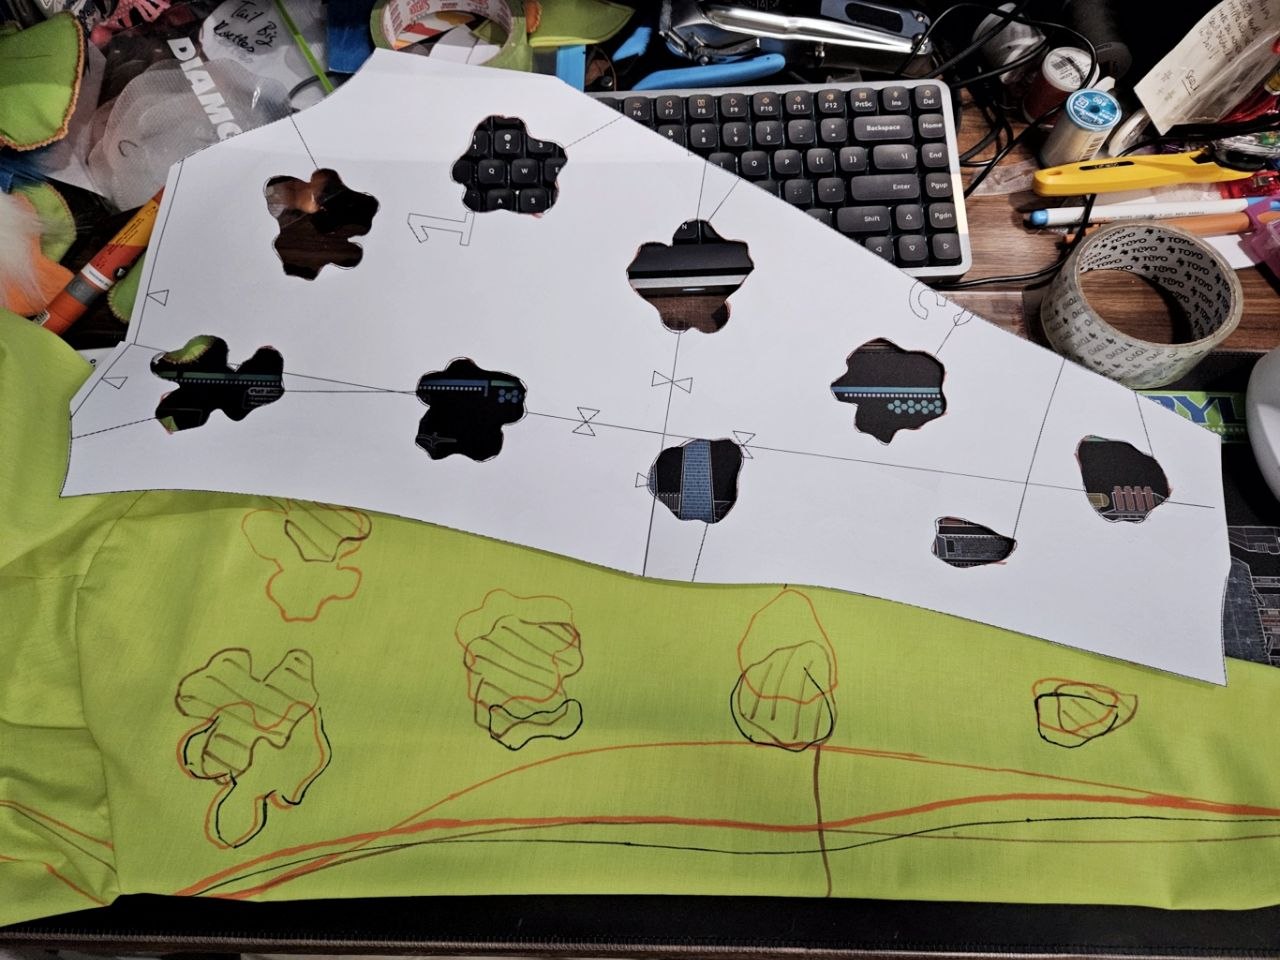
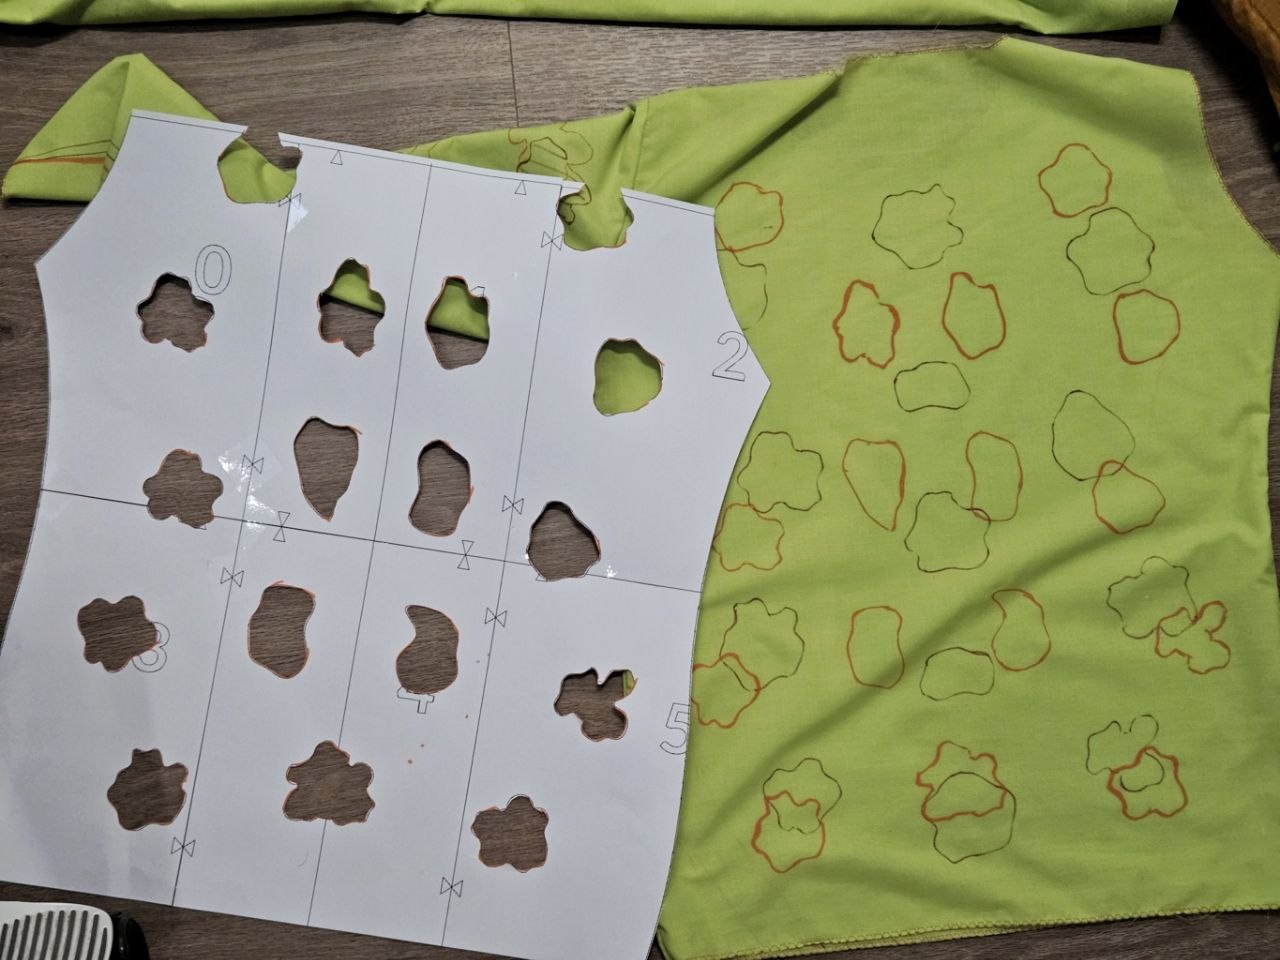
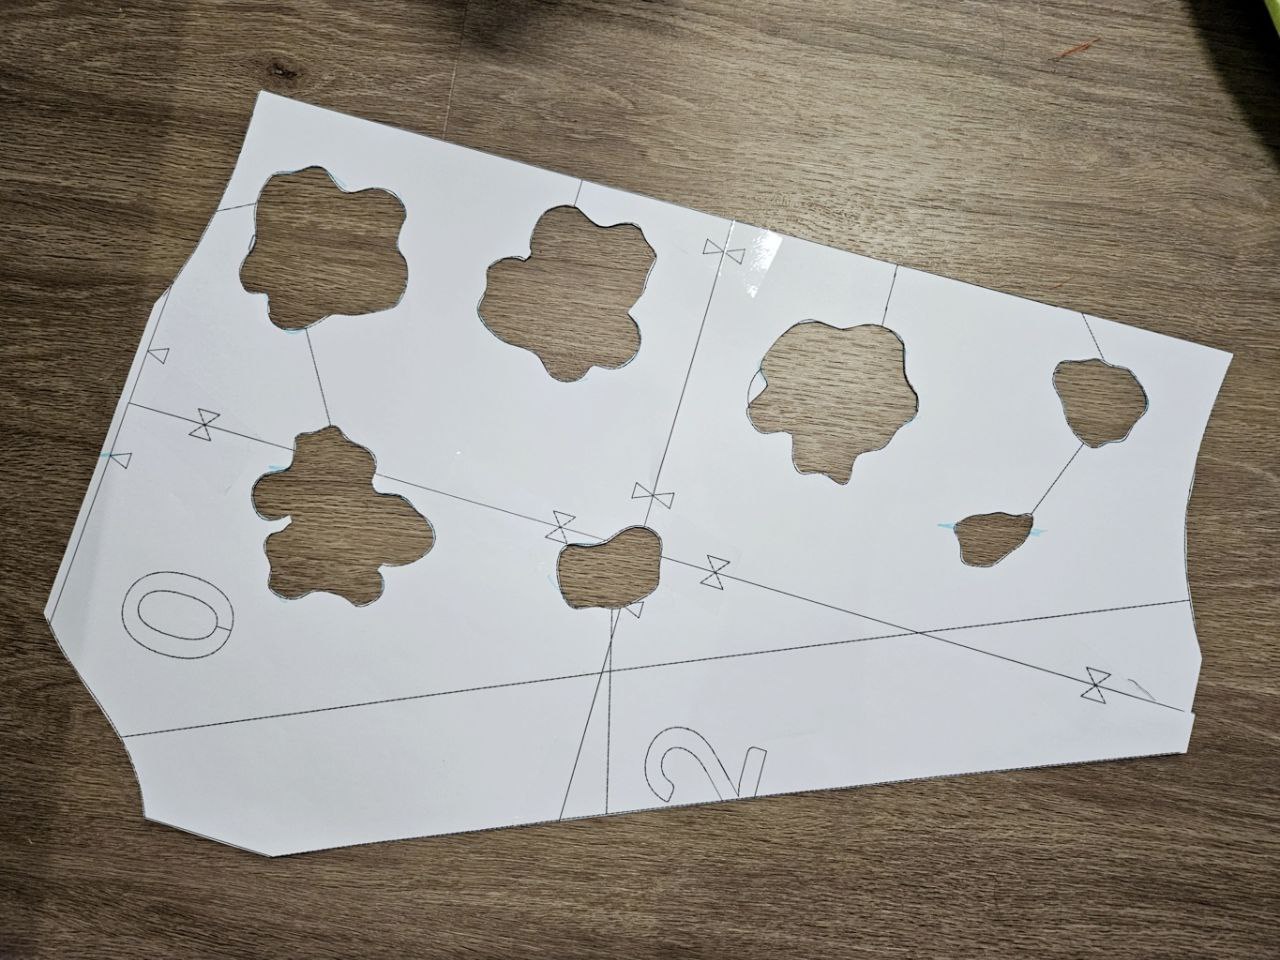
The 3d printed stencils are key - marking out the fabric with them, then using a penknife to cut those markings results in the rosette fitting in pretty closely, but I still use my shears to cut out areas that were not big enough to fit the rosette.
In addition, using a sharp tipped marker is key. Many rosettes I used an older marker with a blunt tip, so there was alot of a variance where I could cut the fabric. Not so with a sharp fine tip.
With this, you can see how much distortion is minimized, compared to alot of distortion on the following photo. I did not take a before/after of that specific rosette sadly.
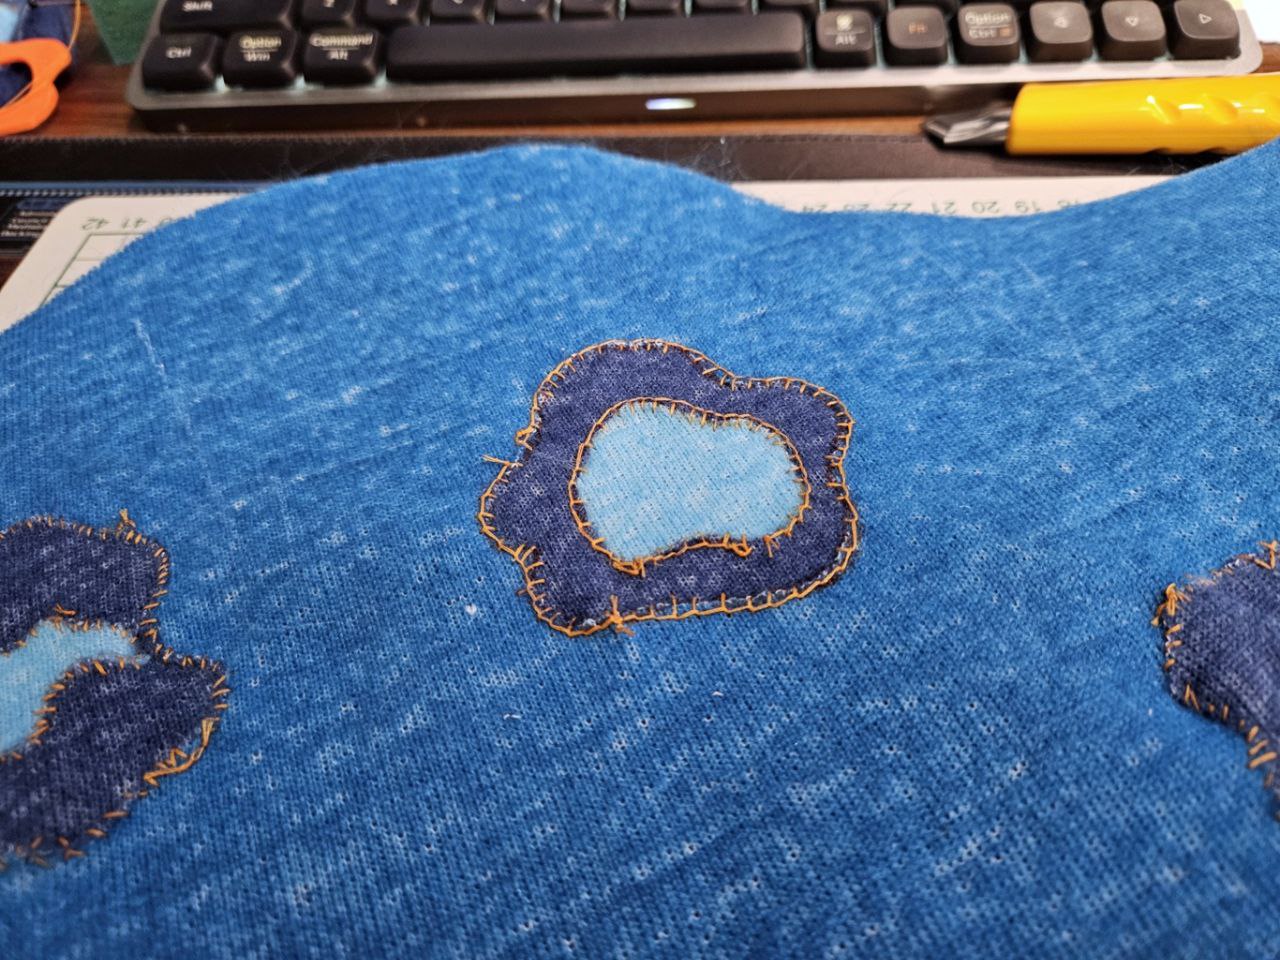
I'd also experimented with using the stencils as a guide for the penknife, but yeah sharp marker for precise cuts is the way to go.
Decided to work on the other sleeve!
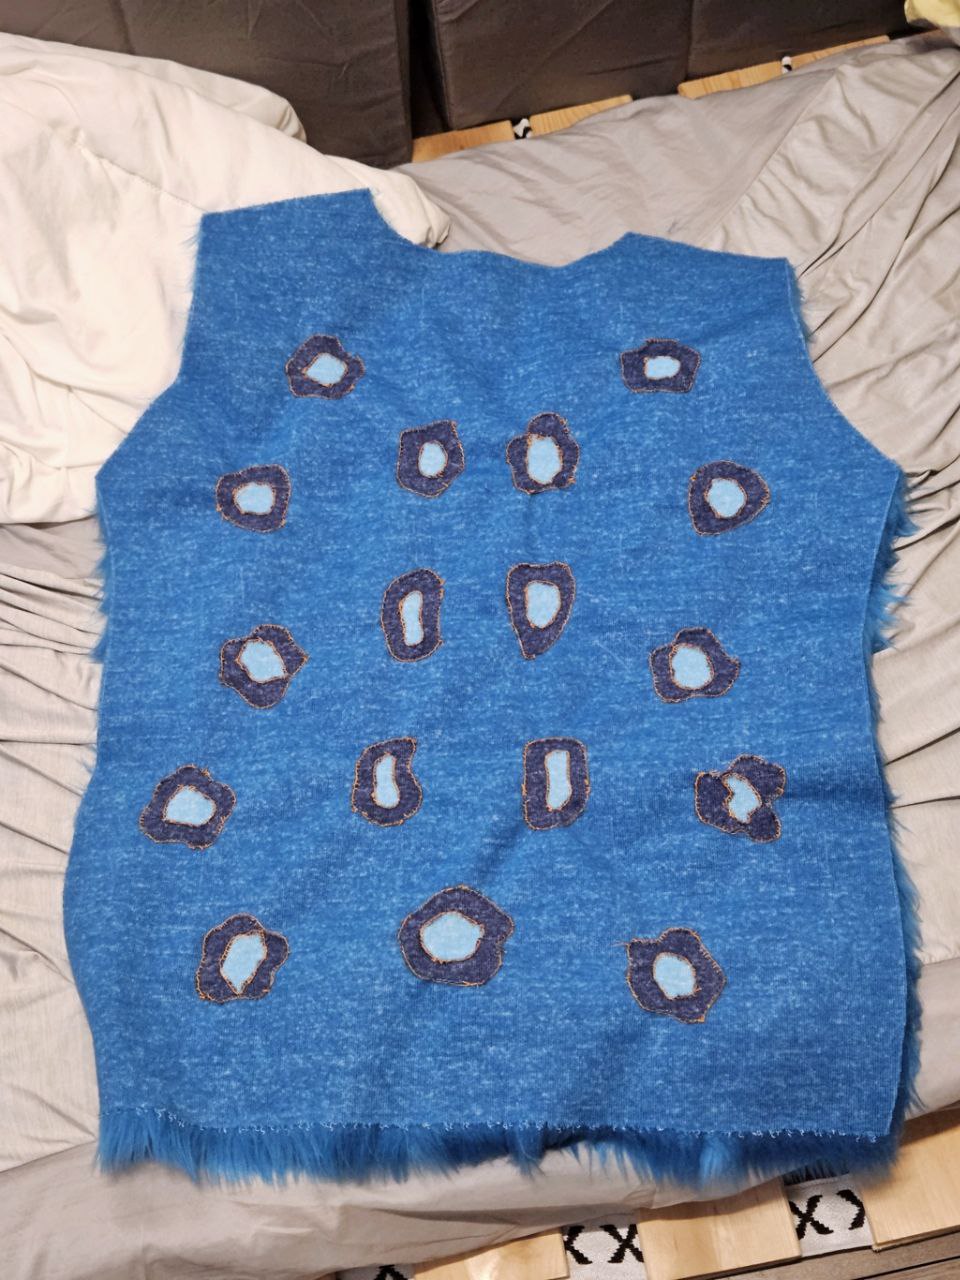
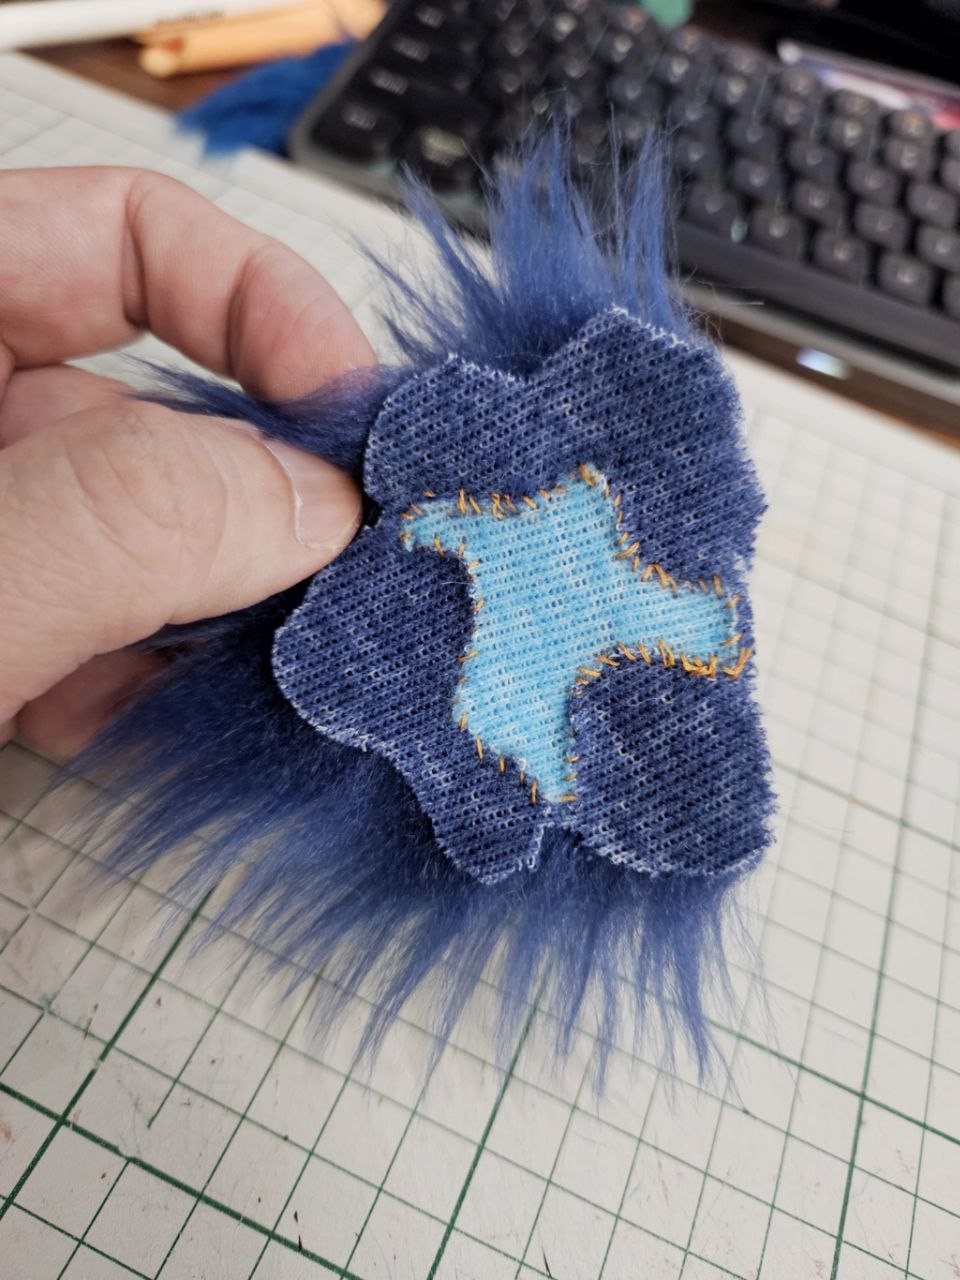
Urgh finally finished sewing the rosettes to the back panel. Think I'm gonna begin on the other sleeve. Also, this migth be a good time to bring up the stitches used. Originally I used a whip stitch, but later I switched to "blanket" stitch. I have blanket in quotes because I'm not entirely sure if it is a true blanket stitch.
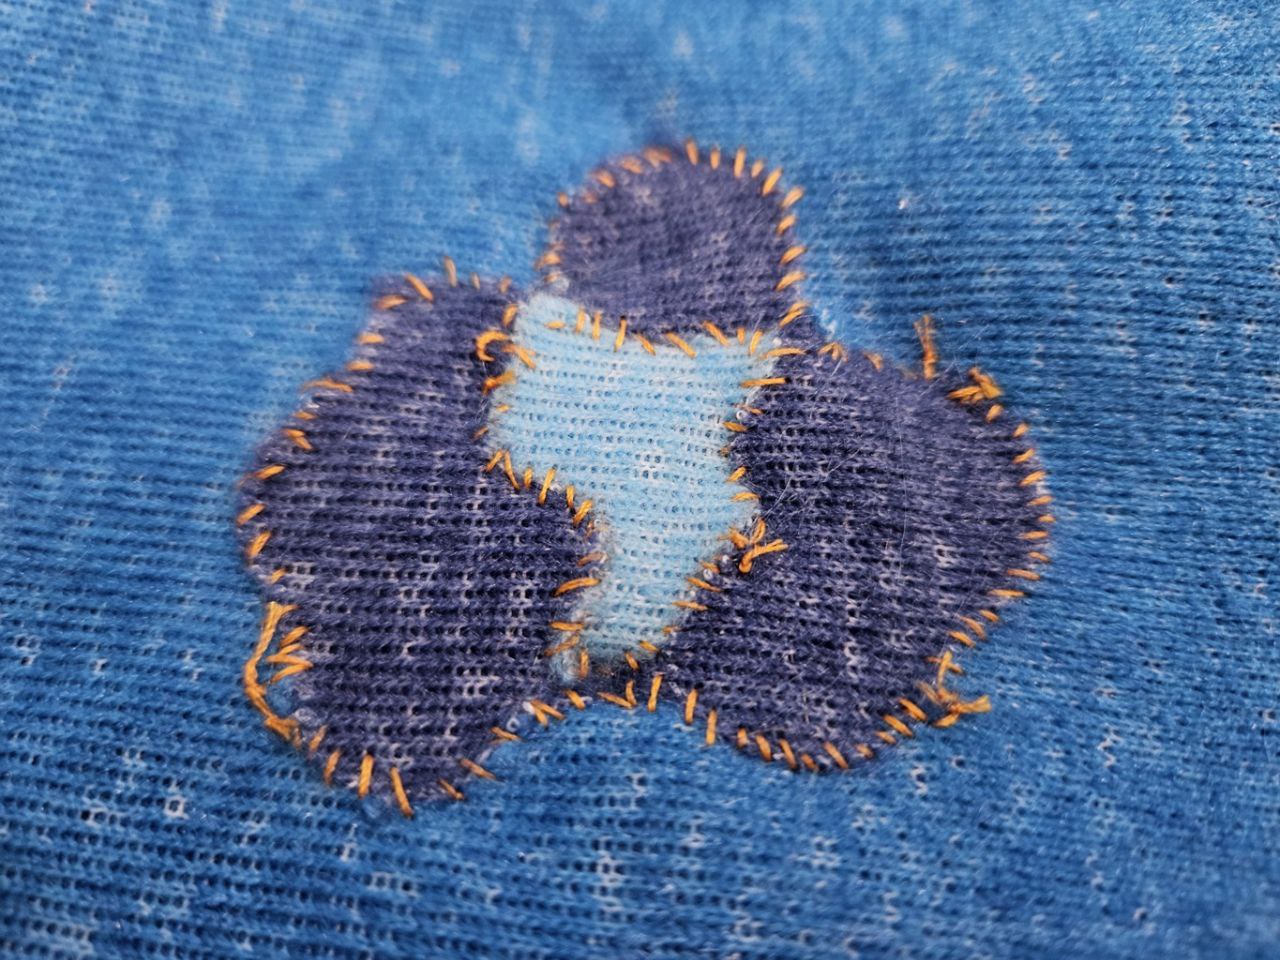

Originally I did this because I thought the whip stitch introduced alot of distortion into the panel. I think it's less the stitch more the rosettes not matching their holes in the back panel accurately enough, and causes these distortions. Either way, I do prefer the look of the blanket sticth, so kept going there.
Decided to work on something else today, so got on the rosettes for the back body panel. Only sewed up the rosettes made from 2 pieces, will work on those made from 3/4 parts tomorrow.
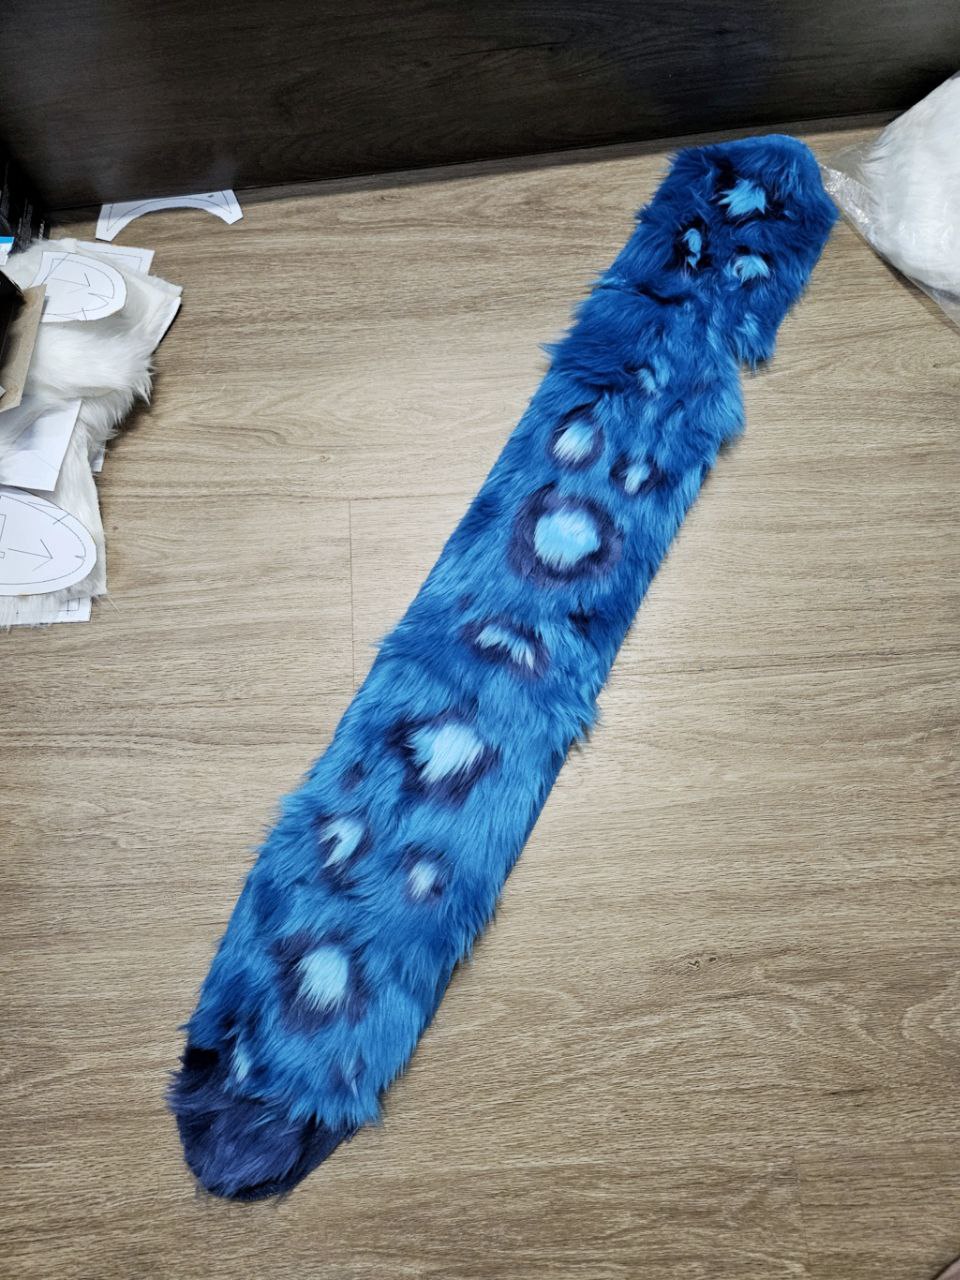
Attached most of the rosettes to the tail over yesterday and today. There is one rosette not attached yet because it is on a seam, that has two darts besides the seam.
After some thinking, I may skip it - that seam would be severely weaked by the rosette, so I'll figure something out later.
Spent the day cutting out the tail pieces, as well as removing the fur from the seam allowance.
And did a bit of sewing.
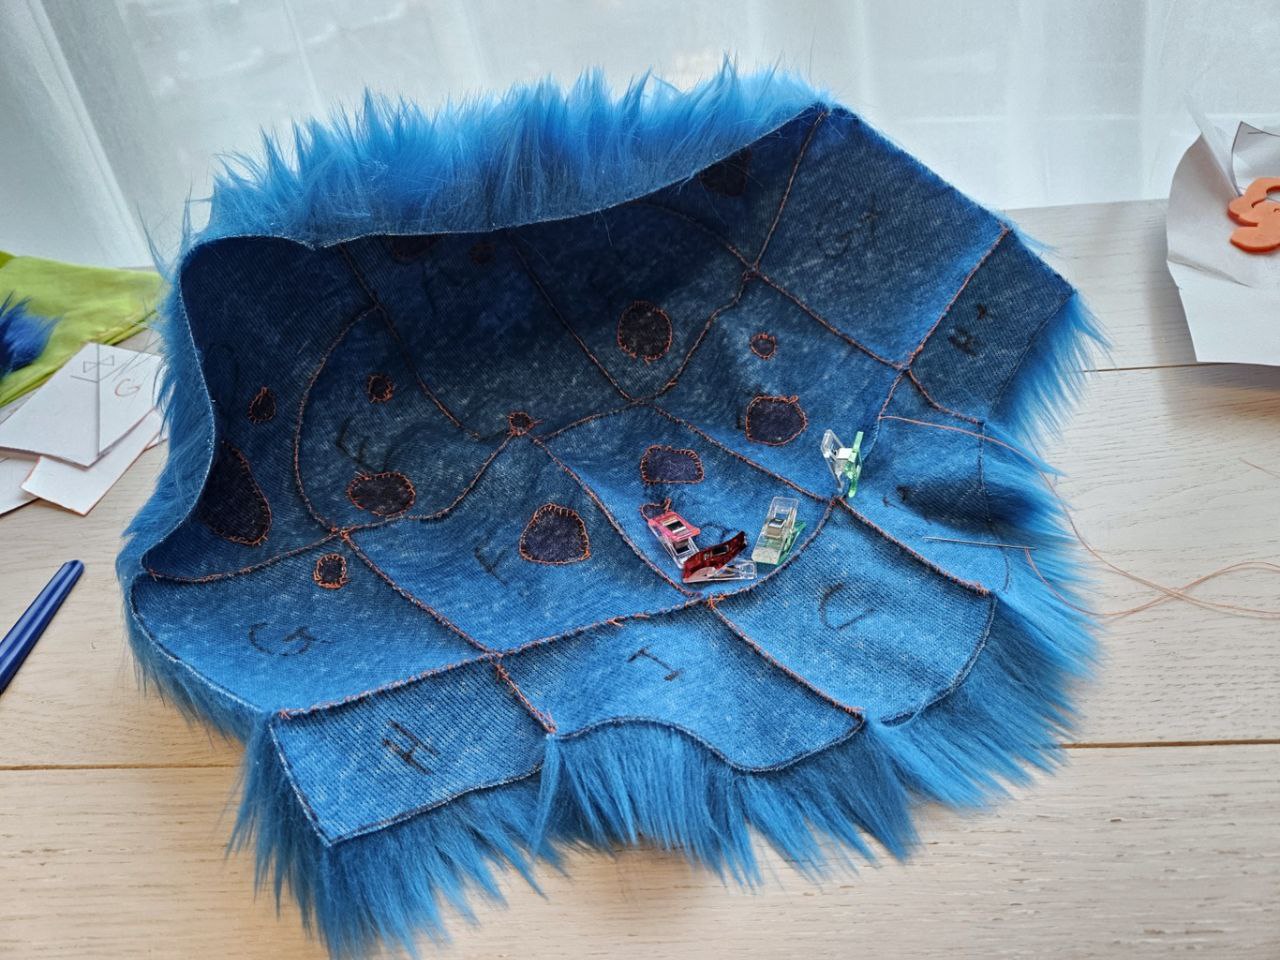
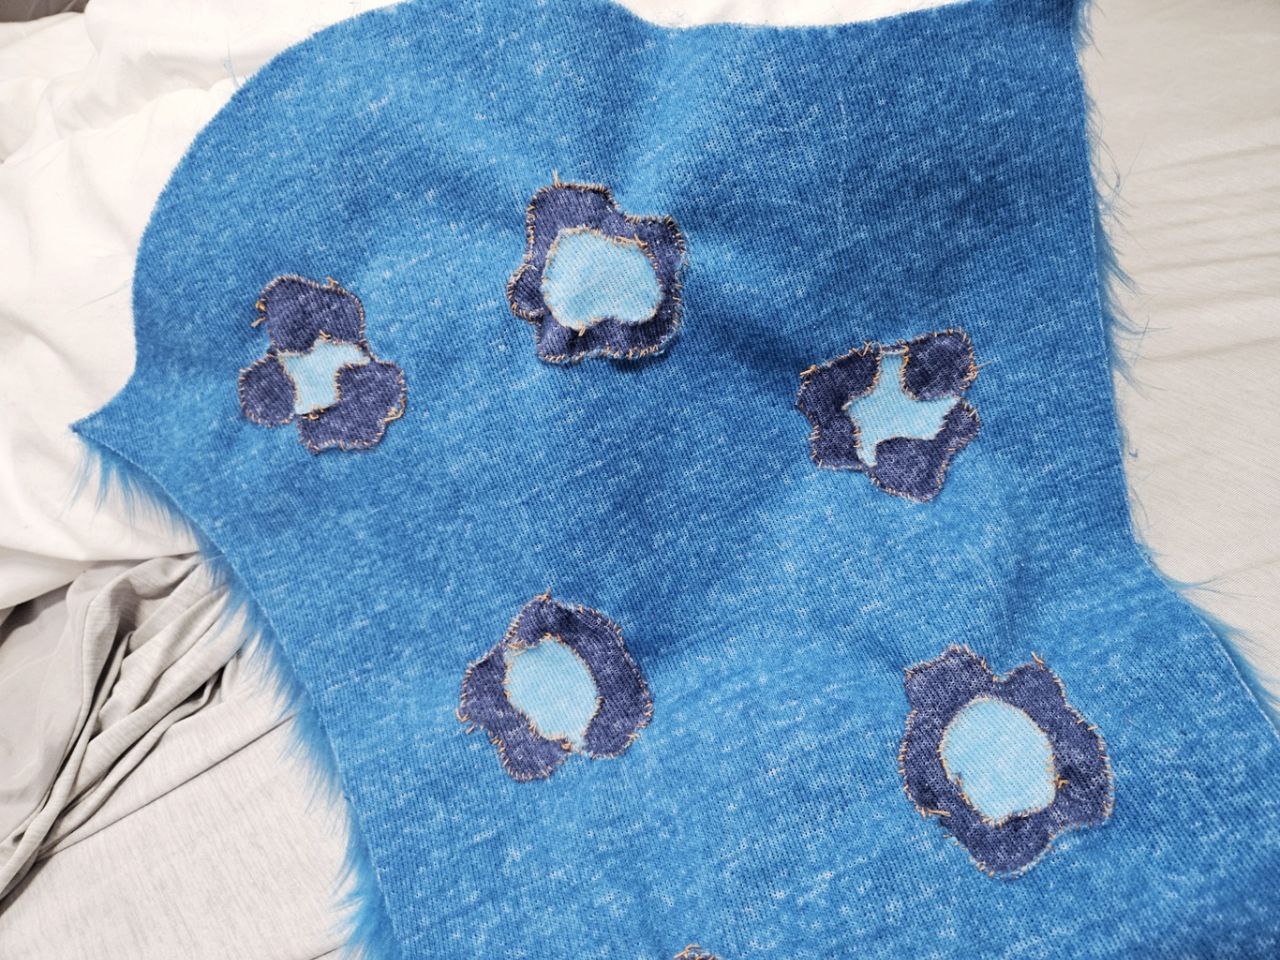
Blargh, the interfacing does not seem to stick to the back of the faux fur very well. I reason it's because the backing is covered with strands of faux fur, and that prevents a good solid glue joint. I ended up just hand sewing everything.
I am also wondering if all the rosette detail will be visible, right now they look more or less the same, hopefully after some shaving, the individual shapes will be visible.
This sleeve took about 10hrs just to cut out the rosette pieces and sew them to the sleeve piece. Already feeling tired thinking about the other sleeve, back of the body, and legs. AAAAAAA
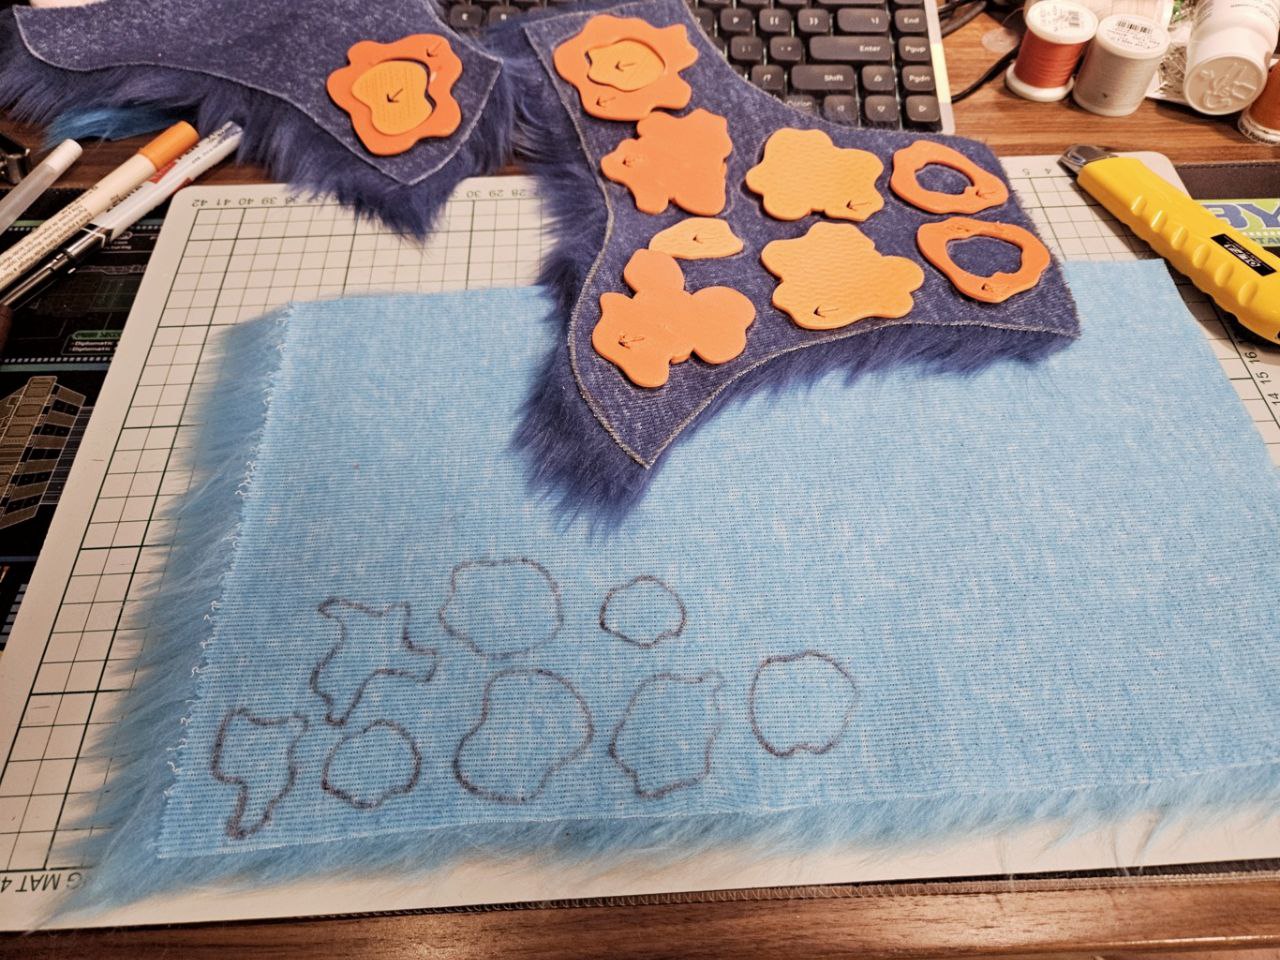
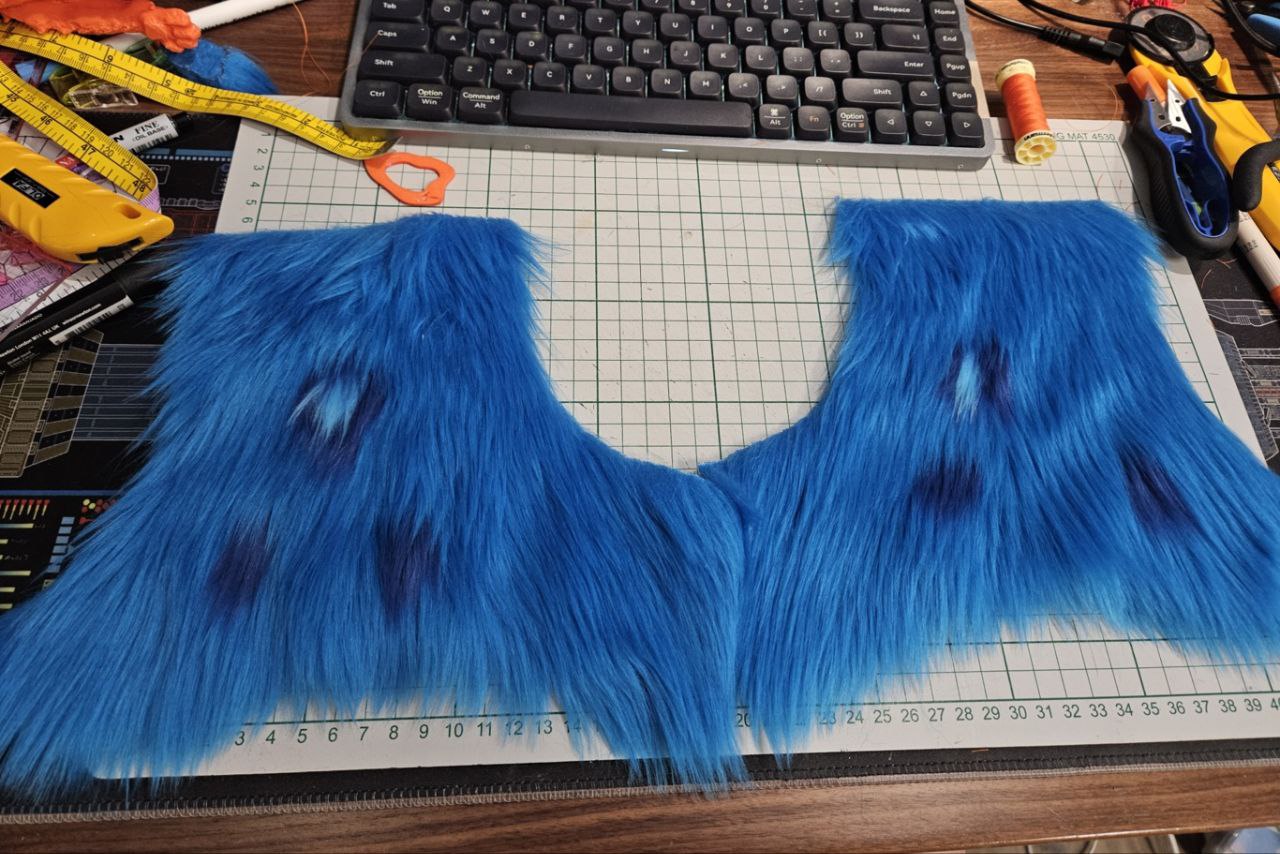
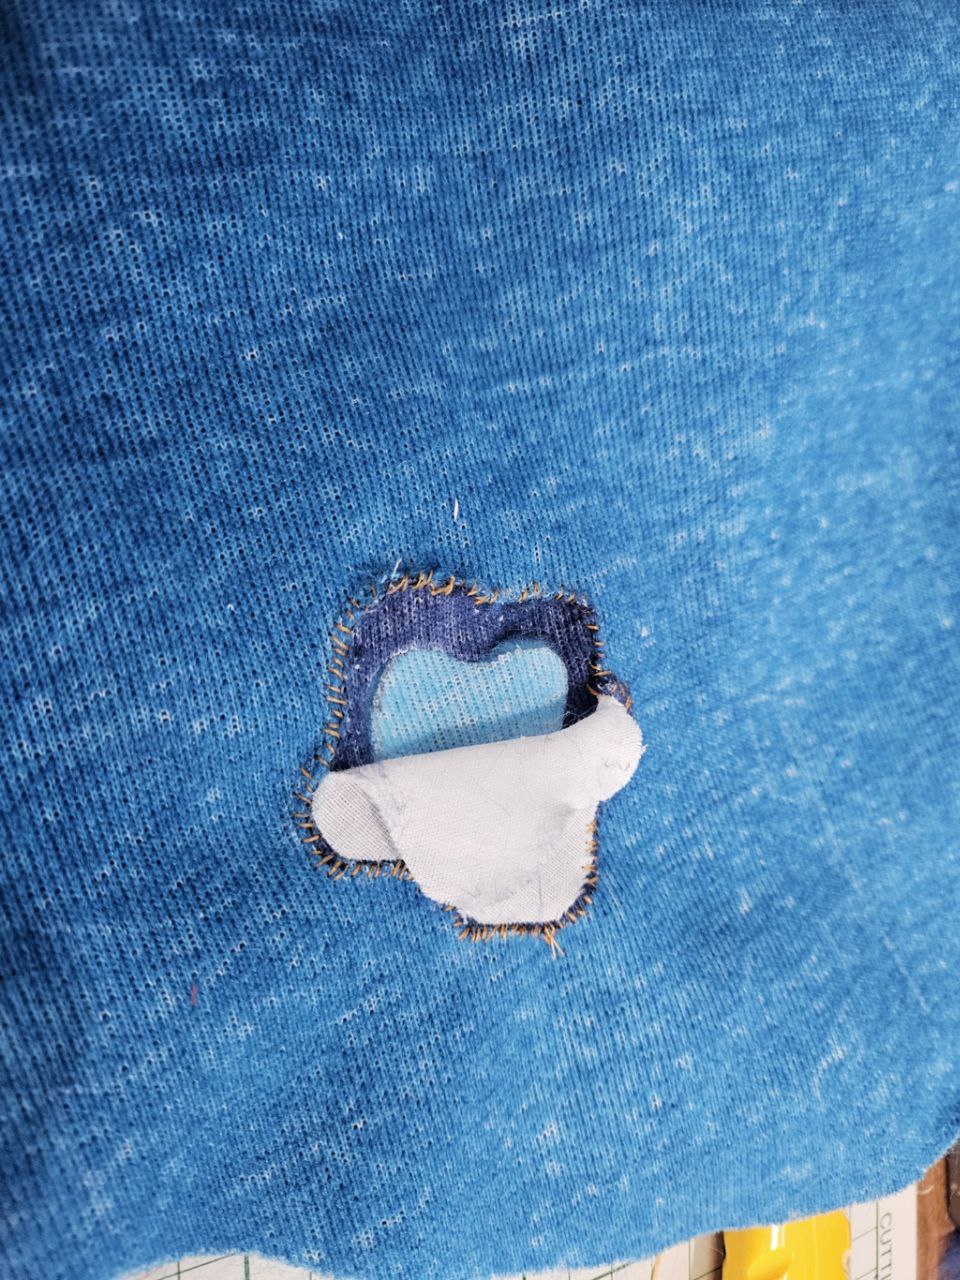
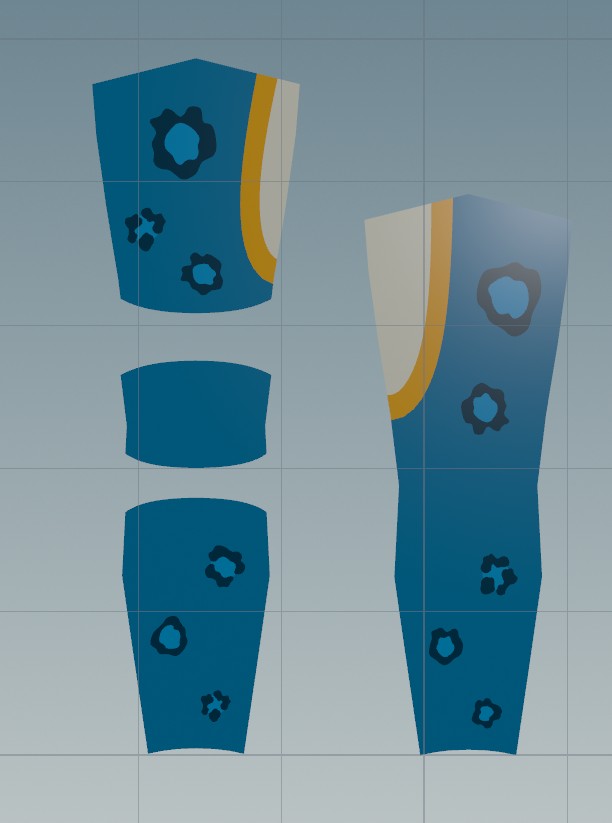
Started cutting out the pieces and decided that I should use just the arm piece to figure out how to sew up the rosettes.
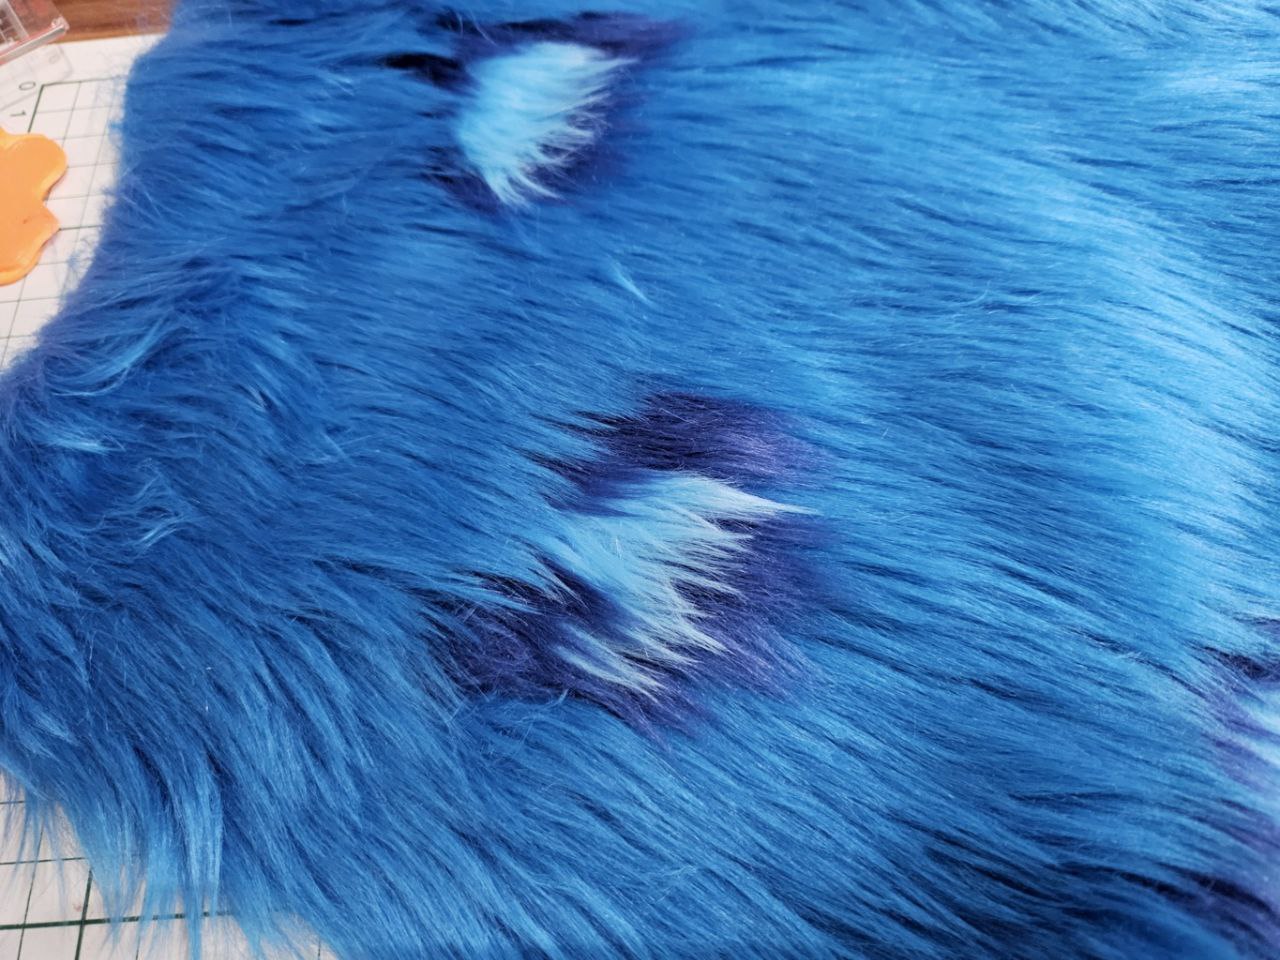
The photo above shows the rosettes marked out on the dark blue fur. I'm planning to cut out the areas where the light fur will be, then join the two using interfacing. I am not sure if I want to attach the rosettes to the arm sleeve with interfacing, I might try. One advantage of doing that is there won't be seams poking at me.
Now that the design is complete, construction can begin!
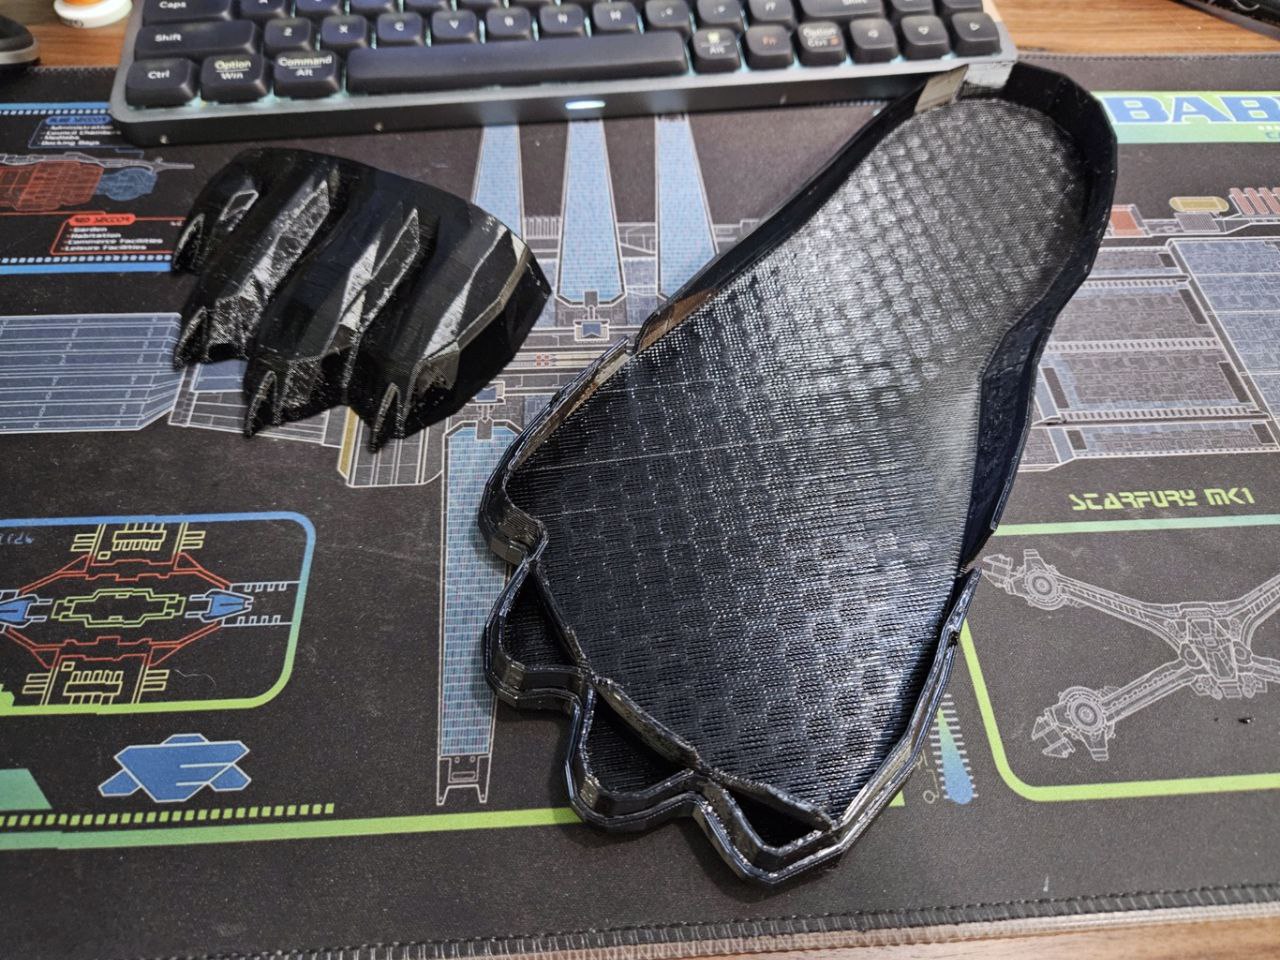
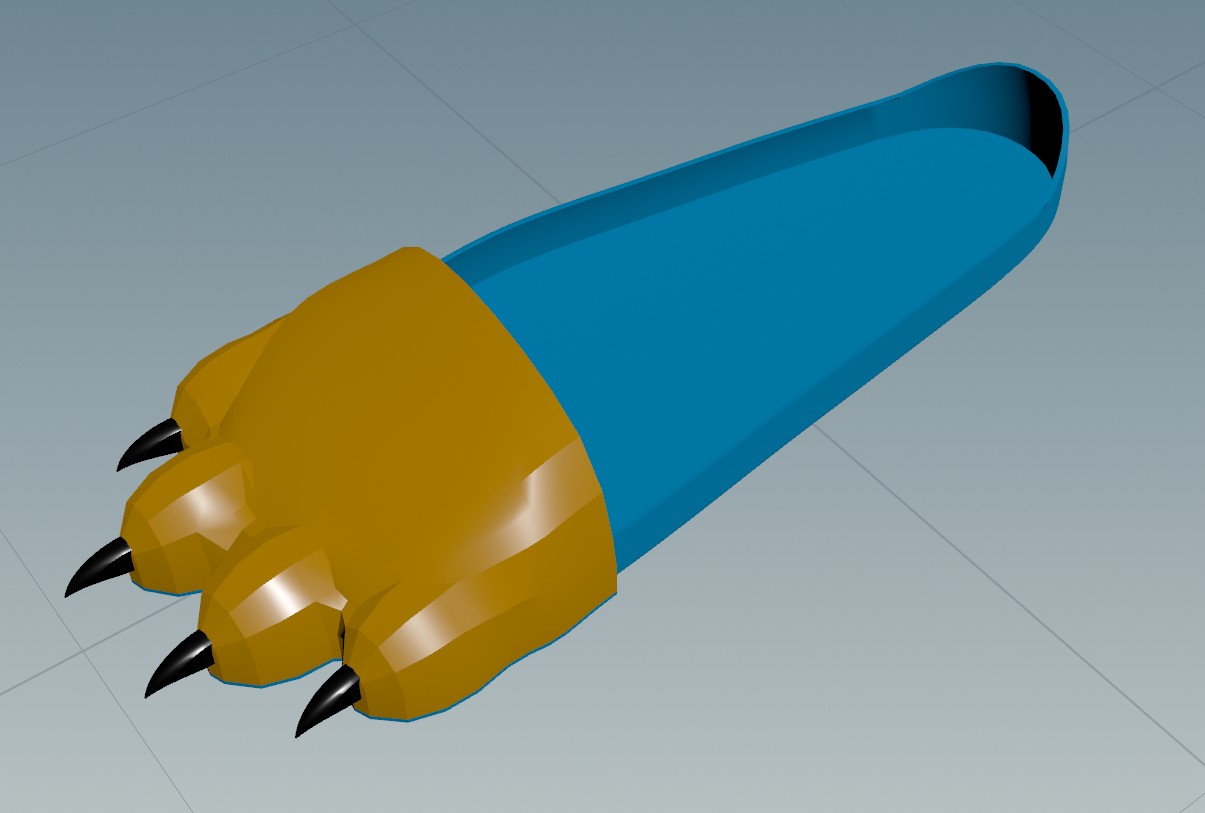
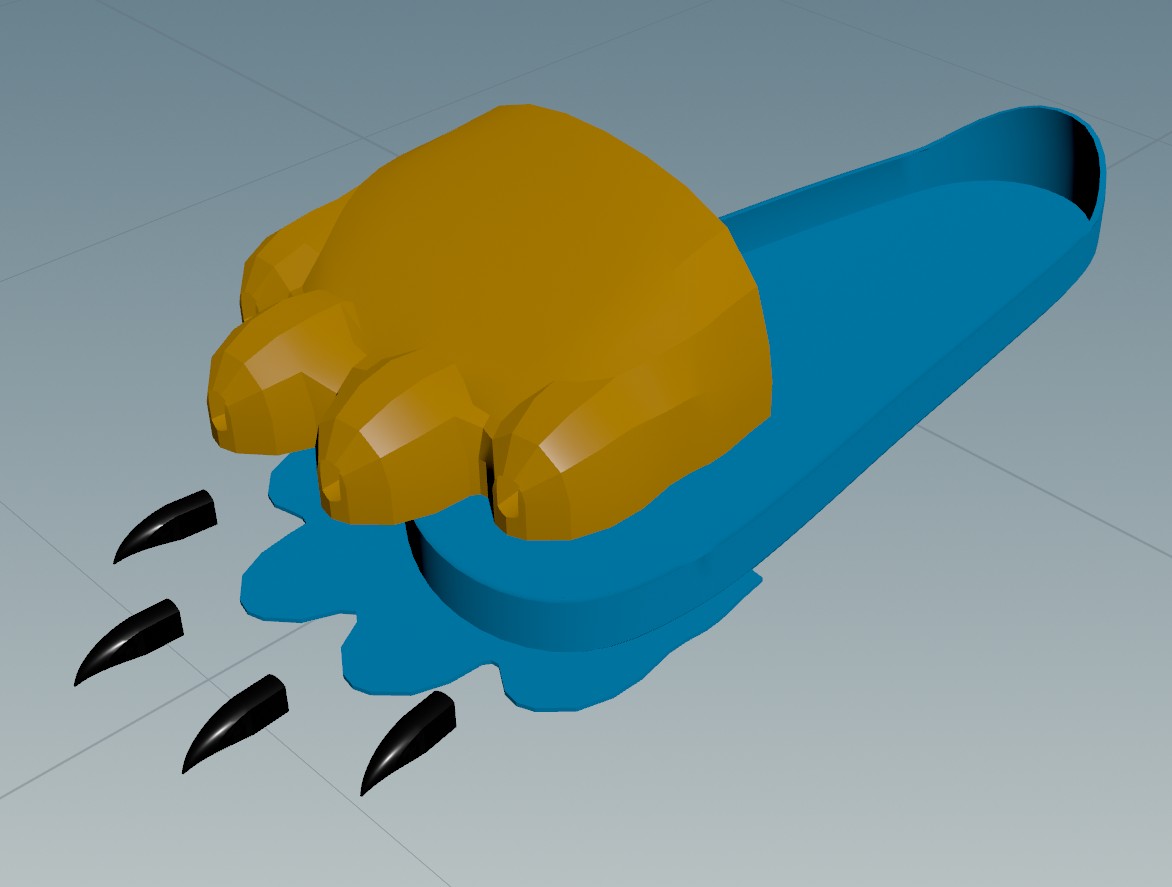
I'm taking it slower today, only printed the toe cover for the foot paws. I was trying to figure out how to add in the claws and decided to just embed them into the upper piece.
Sadly I do not have black tpu and have to paint the claws, oh well.
I re-thunk how to make the design simpler and came up with this. The base of the foot and toes will be tpu and made to glue together, while the fur on top will be split down the middle, making way for a zip.
The petg test print is mostly fine, just need to extend the heel back about 5mm.
Small adjustments done, and I've added in some cuts at where it bends, as well as some small holes to sew some reinforcement so its not only held together with glue.
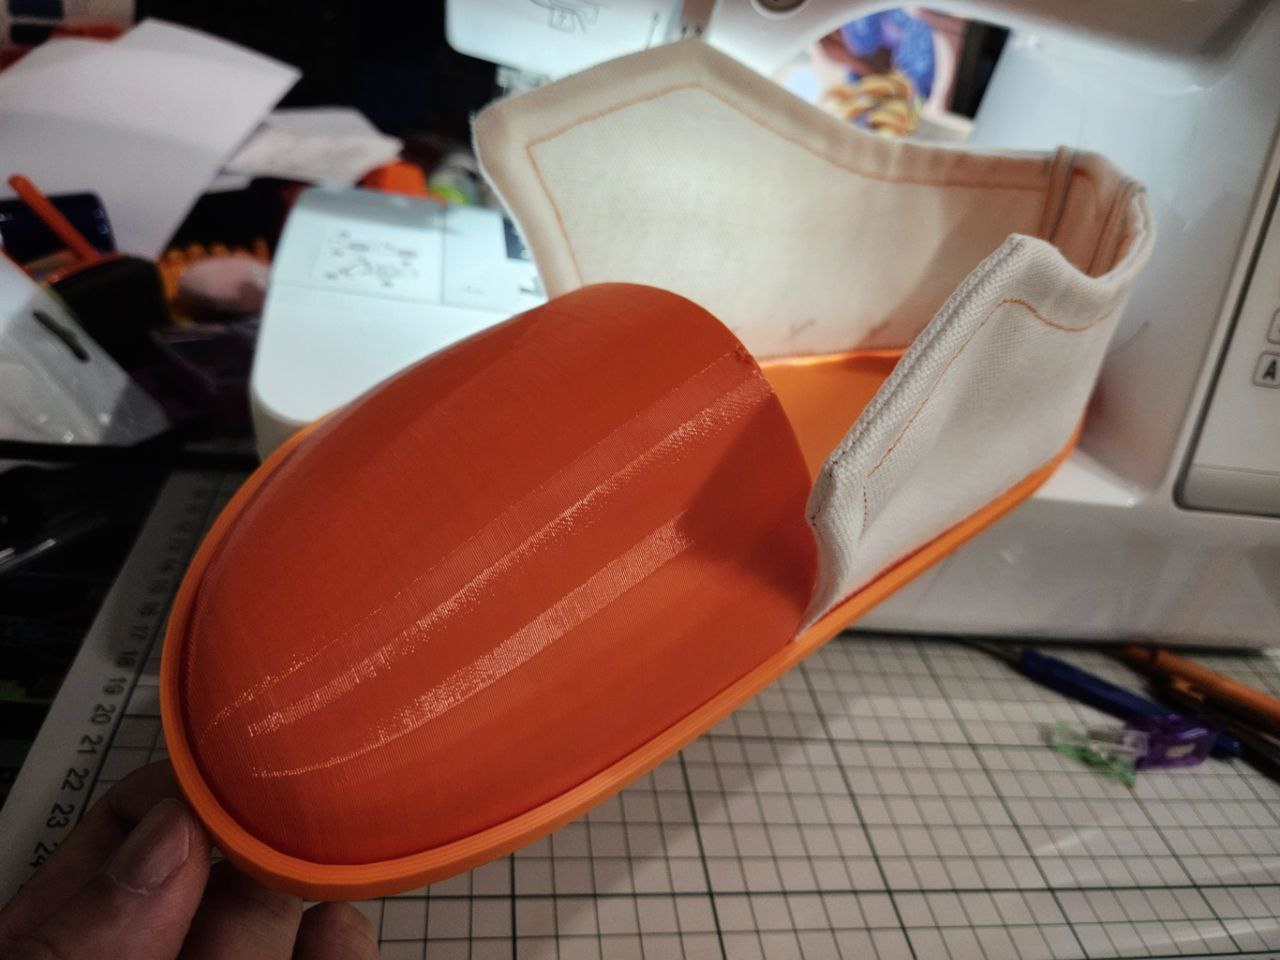
That seems to have gone more smoothly. My idea is that the canvas pieces will be used to provide a firm grip around my foot with velcro, so the fur will be able to "float" above it. One thing I've noticed with canvas is that it tends to stretch over time, so I think I'm going to be using some interfacing to reduce that.
Previously, I also constructed my shoe "properly" with two canvas panels to properly hide the seam. This time I'm not going to do that as that would likely trap heat.
I'm also trying to decide the easiest way to put on this design.
This seems to be pretty good!
Also started testing the base for the footpaws.
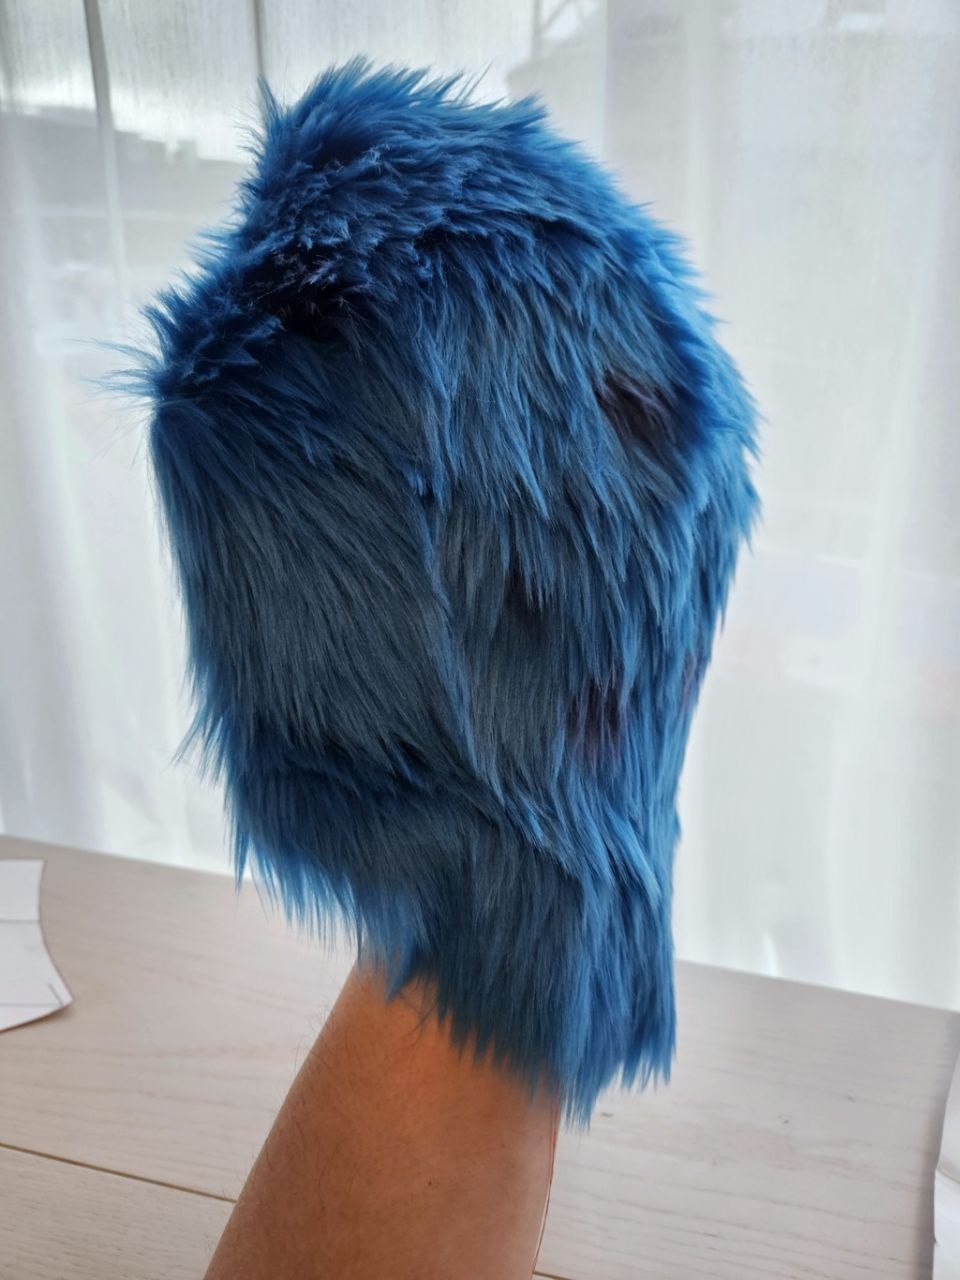
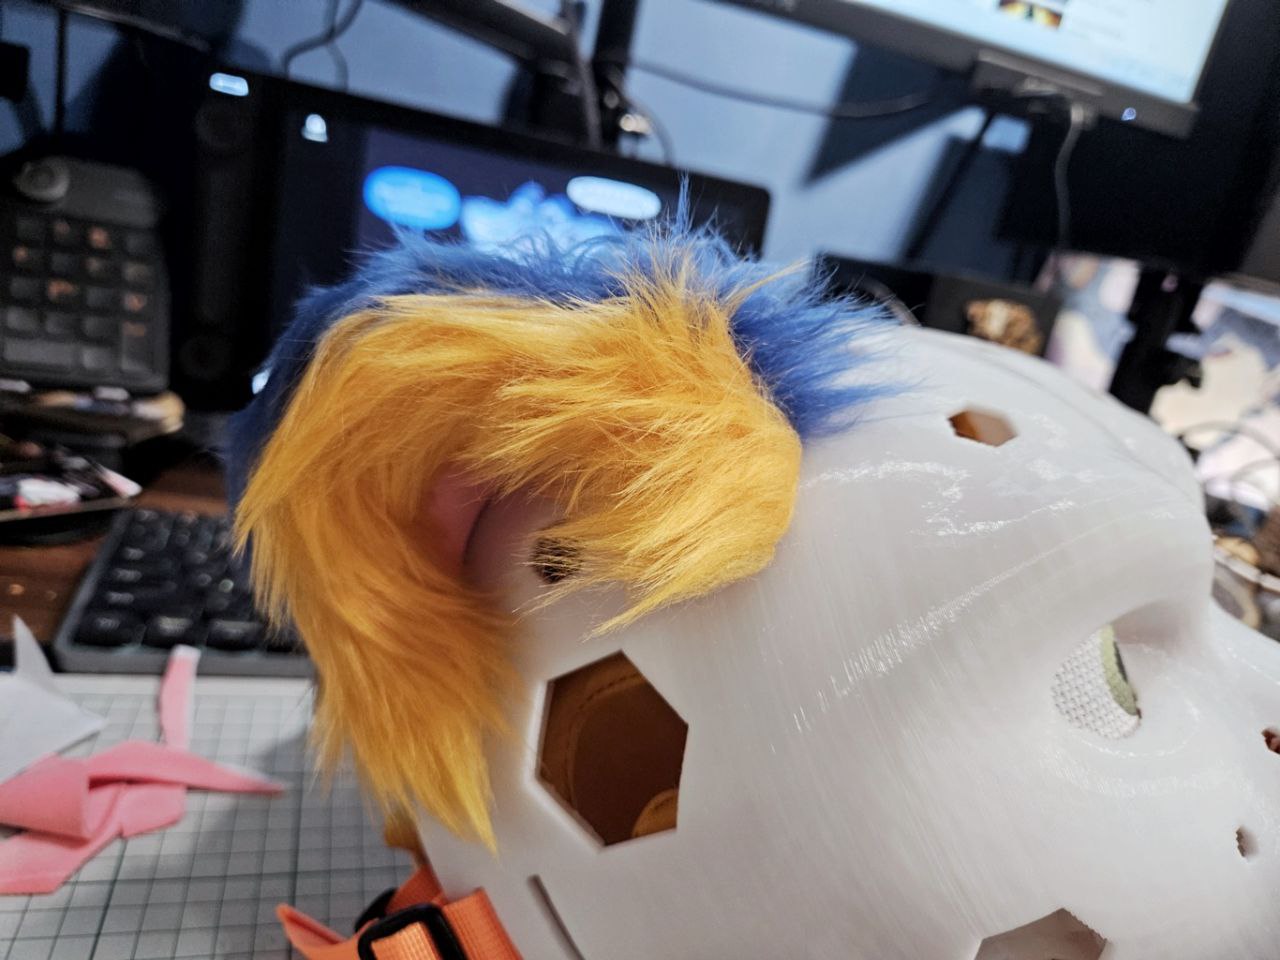
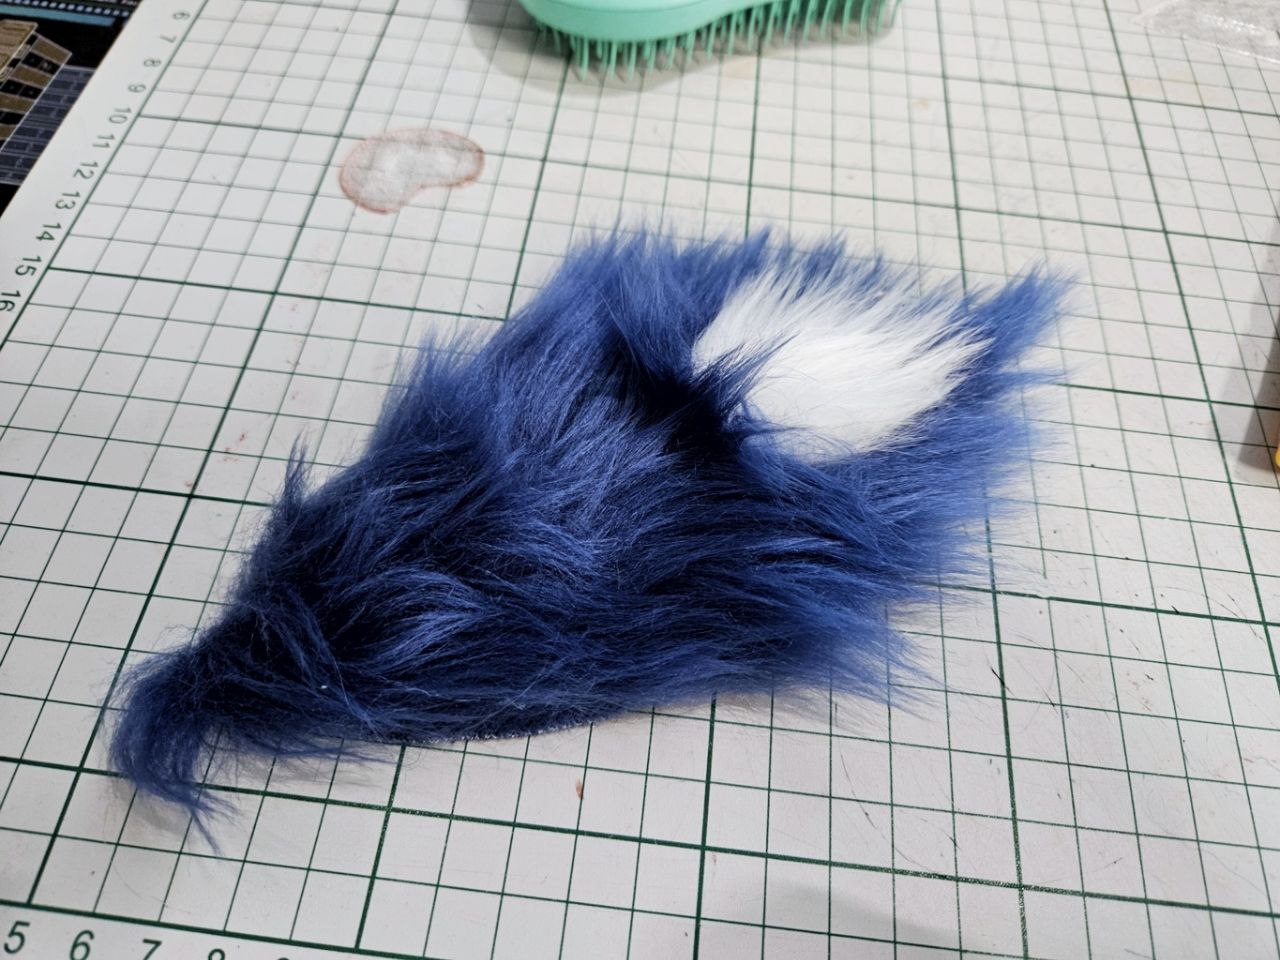
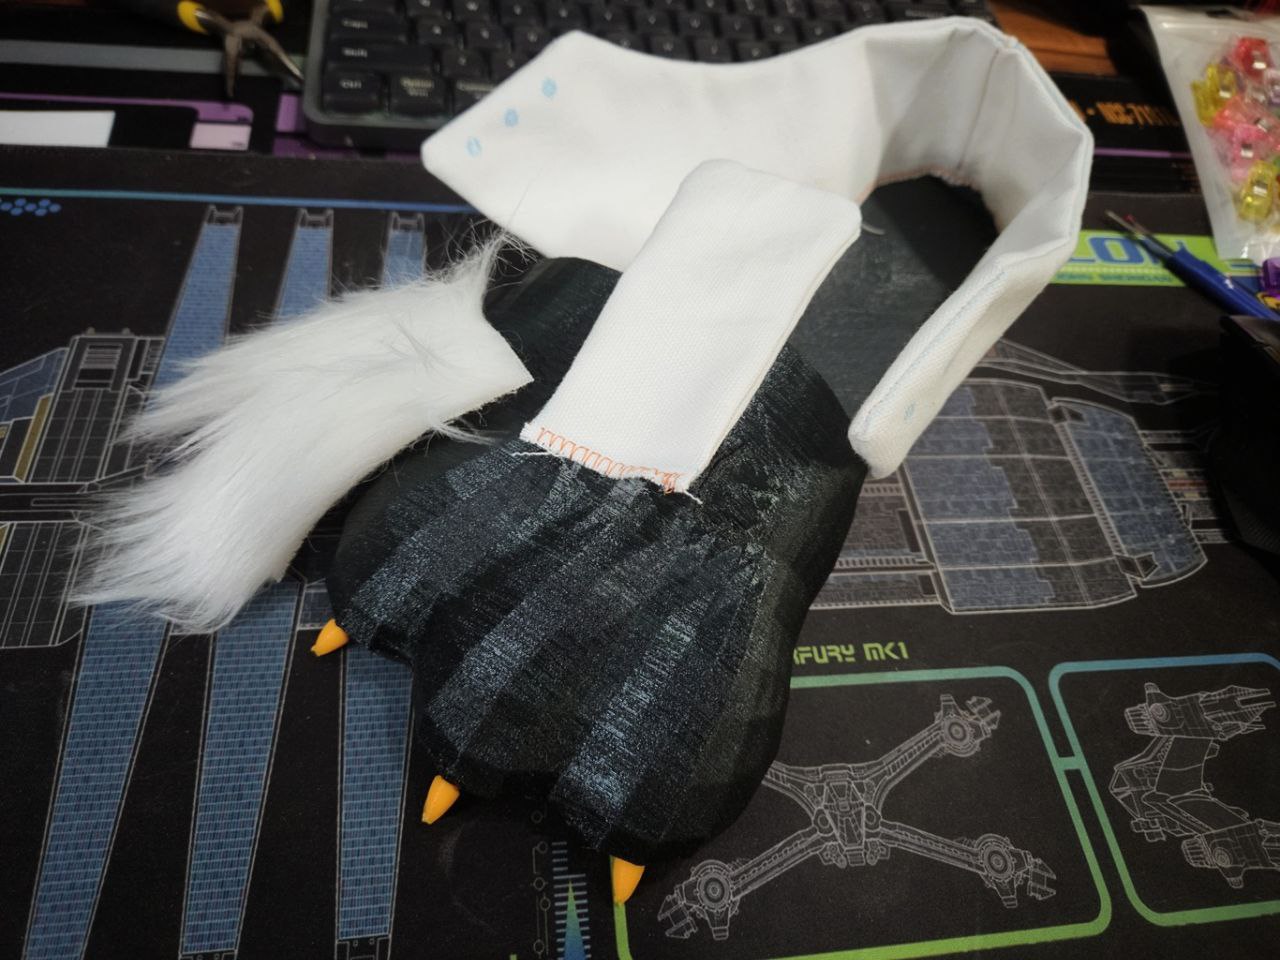
Today I mainly spent on figuring out the fur that covers the back of the head and neck. This is the first iteration which is way too short and not big enough with the back head support.
I've extended it downwards and made the head area bigger, sewing it up will be a tomorrow thing.
This is the second iteration. The first version was a bit too long, and made of too many pieces.
Also tested out the rosettes for the leggings and made some final adjustments, I think this works!
I think the final thing to design is covering for the back of my head.
I have concerns about the amount of time left before scotiacon, so I've decided to revert to the known good symmetrical design. I'll figure this optimization out in a later version.
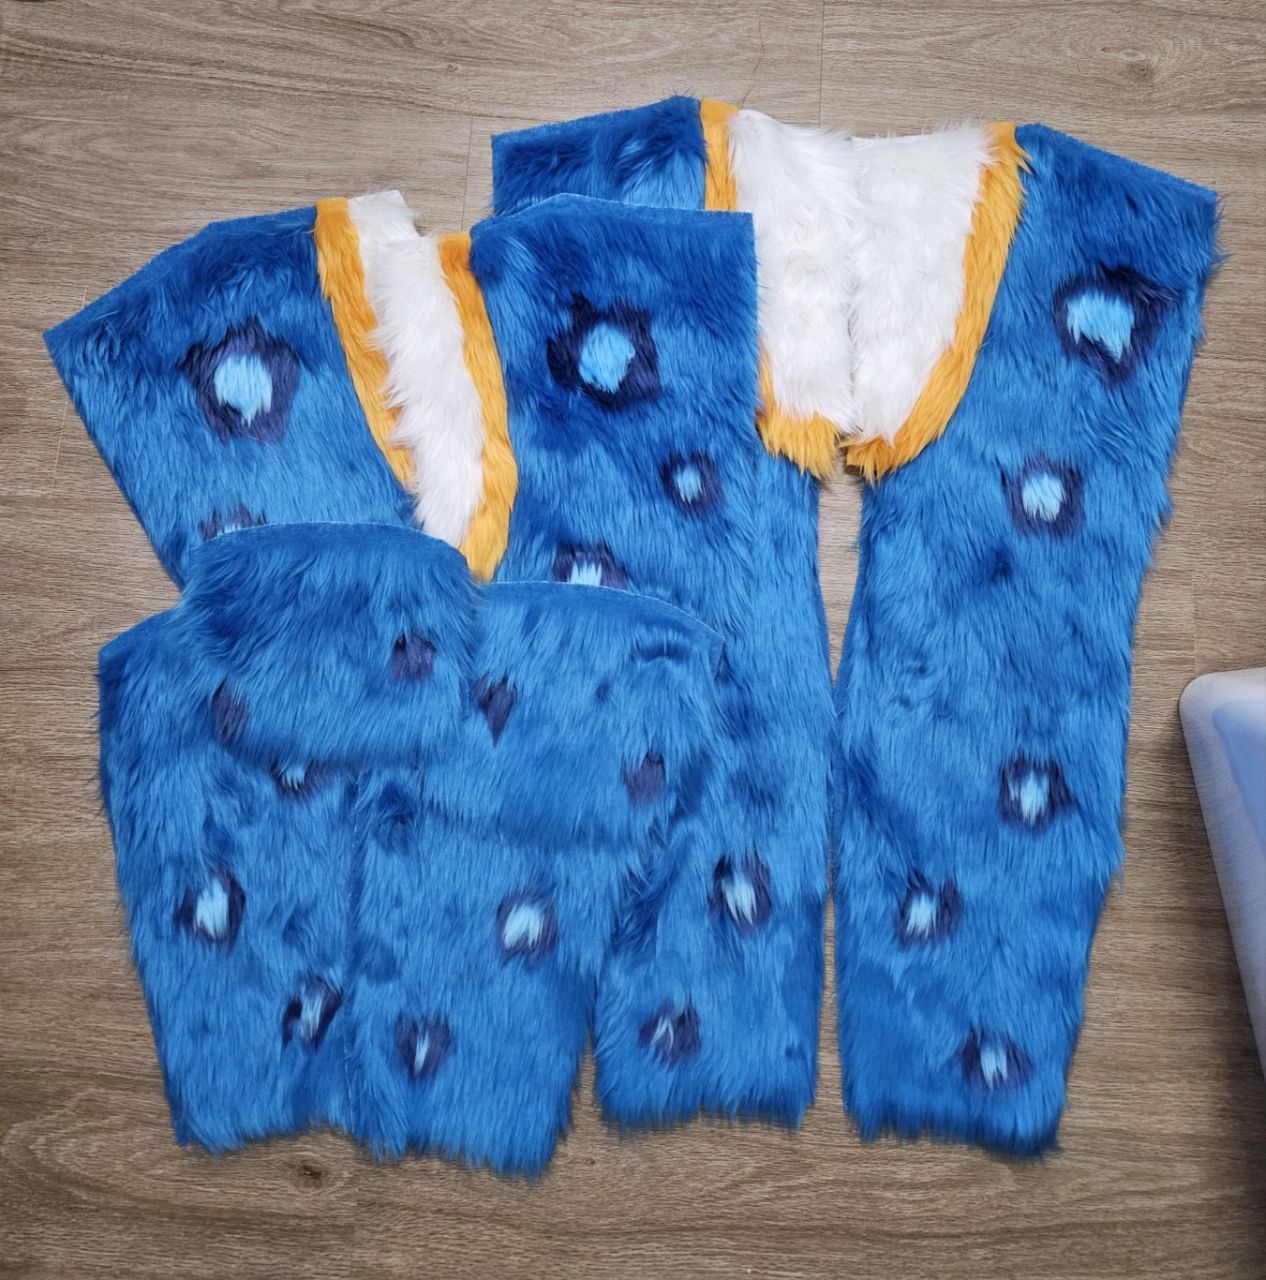
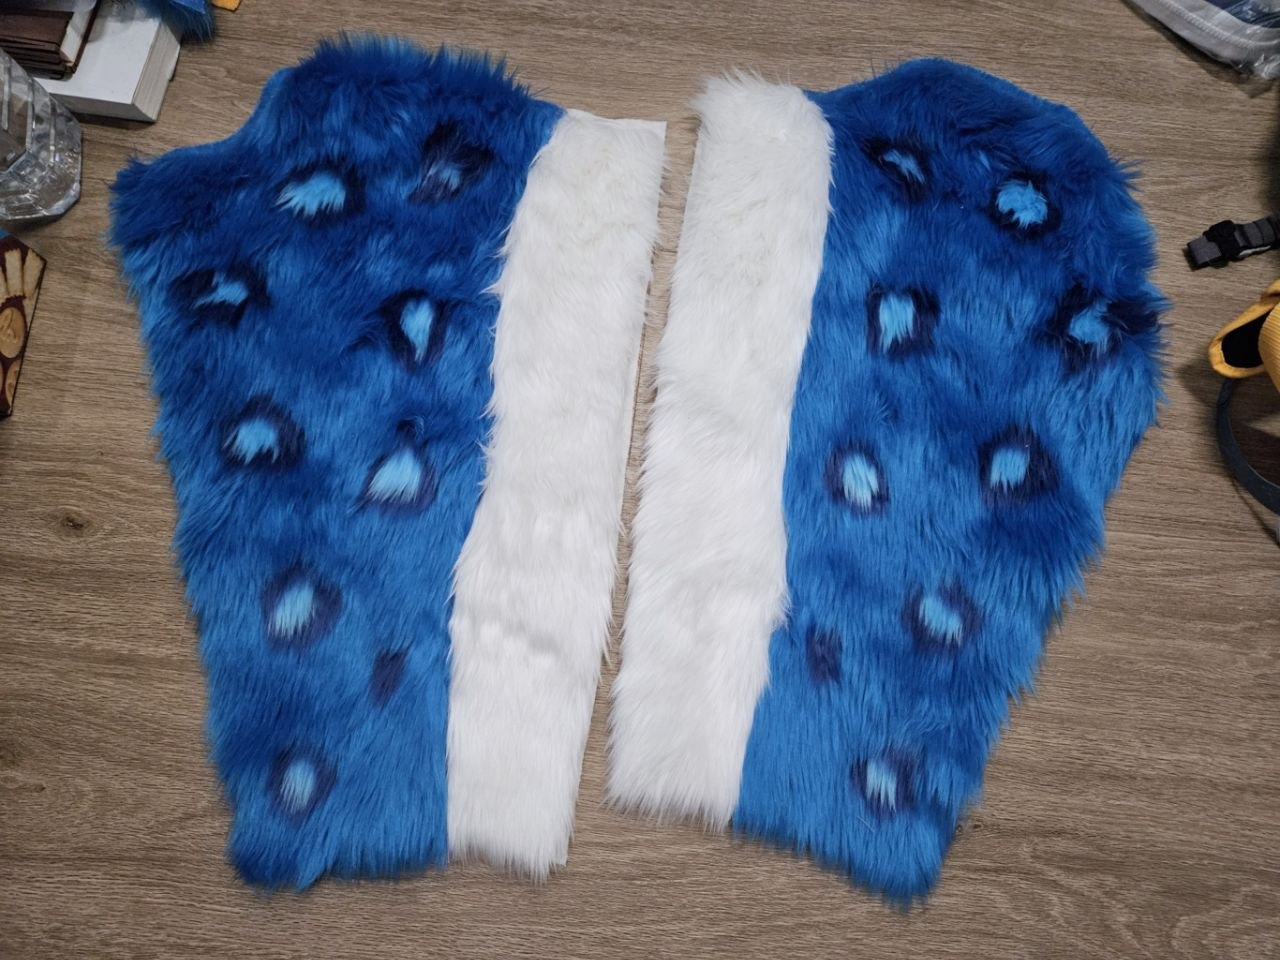
What I've done to have the arm sleeve be made from 2 pieces of fur is to make the white fur section cover the entire left sleeve pattern.
This also required changing the position on the main body section.
I spent a few iterations adjusting the position and size of the rosettes as well as adding in some curves between the blue and white fur.
Finally, experimented with a few rosette patterns for the back pane and I think this iteration is not too bad. Also, adjusted the sizes of the tail rosettes to match.
I'll likely add some smaller solid dark blue spots at areas I feel need them later on.
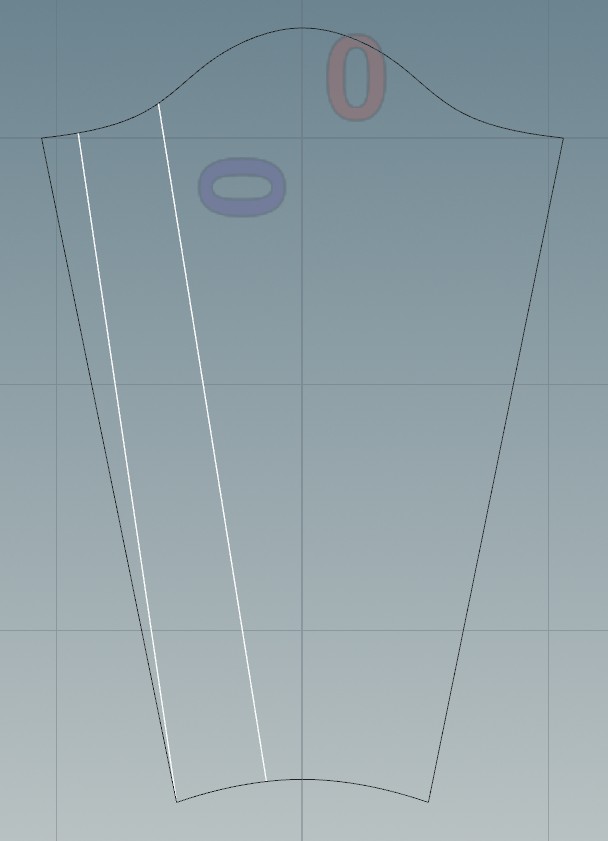
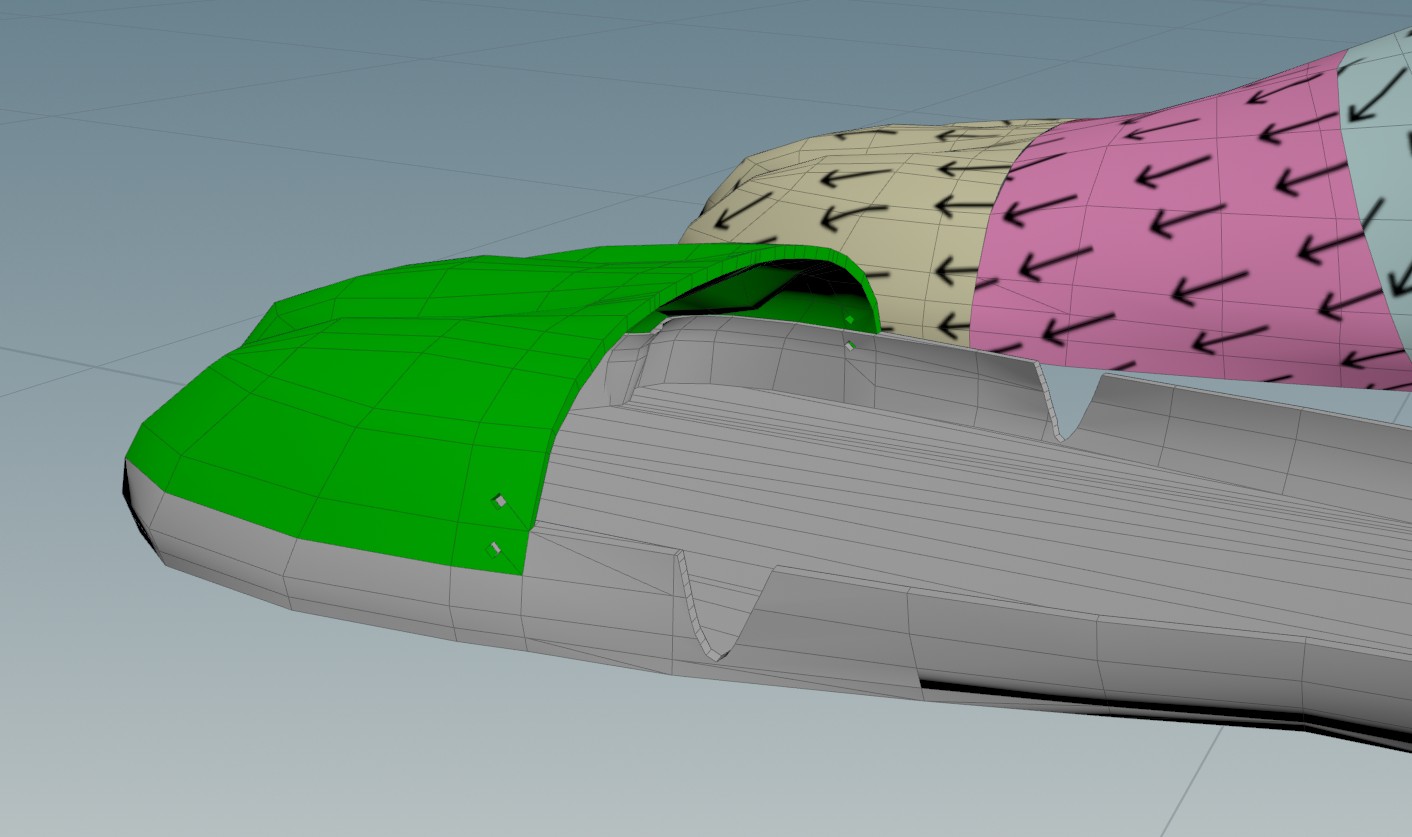
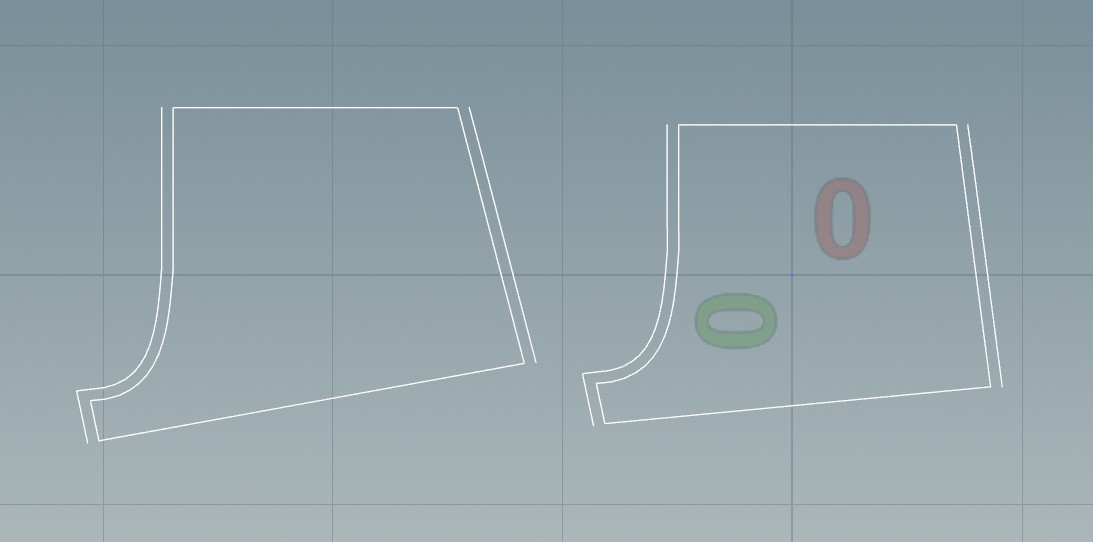
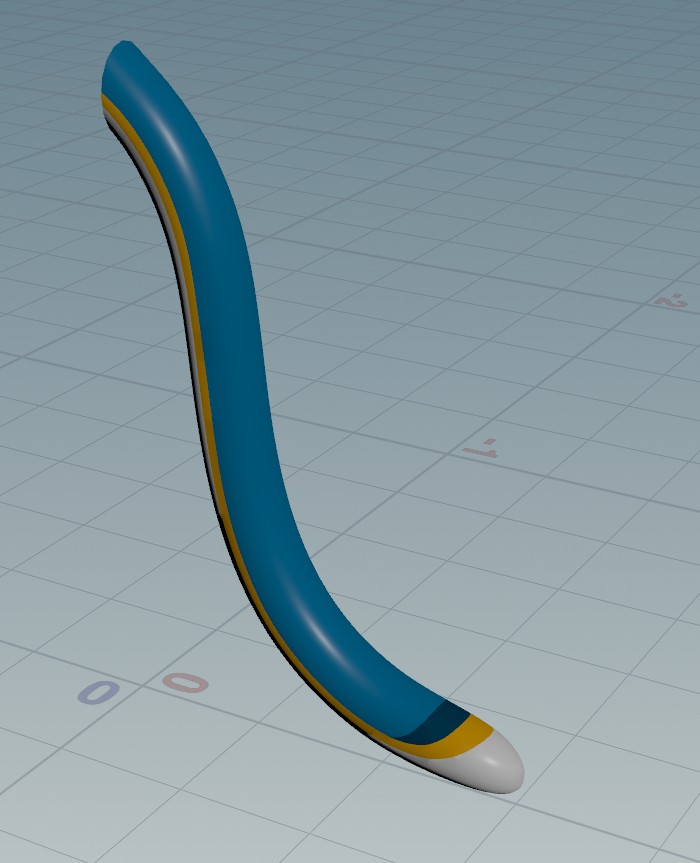
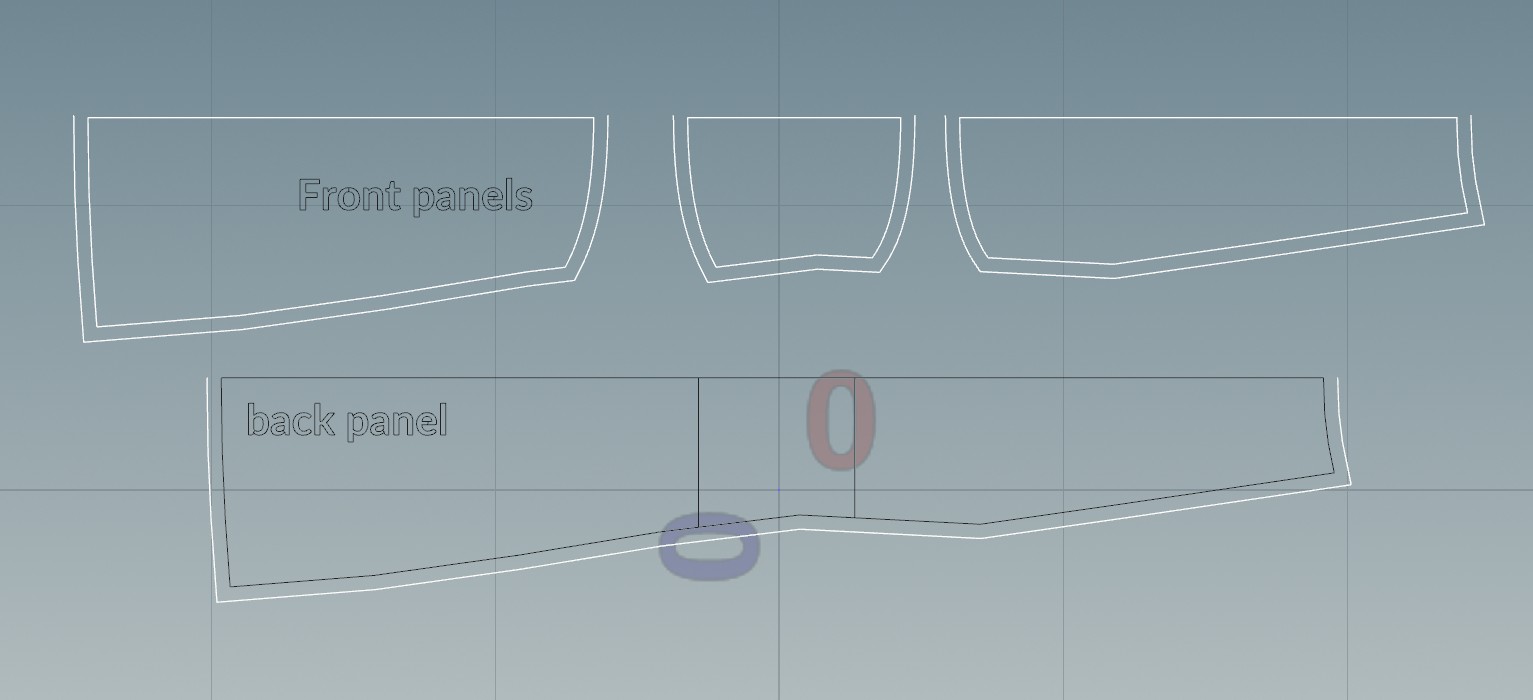
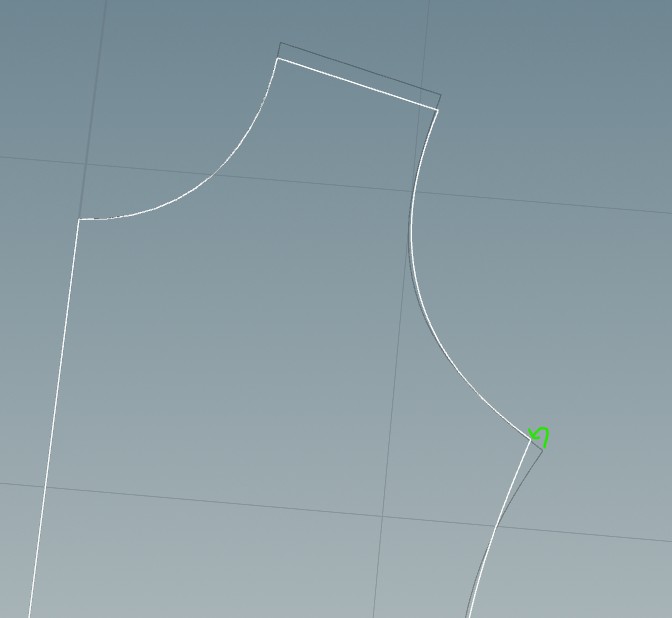
If I were to sew this up, it would require 2 piece of blue and white stripe of white. Those extra seams are extra work, and I don't think having a pointed section is good for sewing up/cutting. What I did was to then move the small triangular strip to the other side:
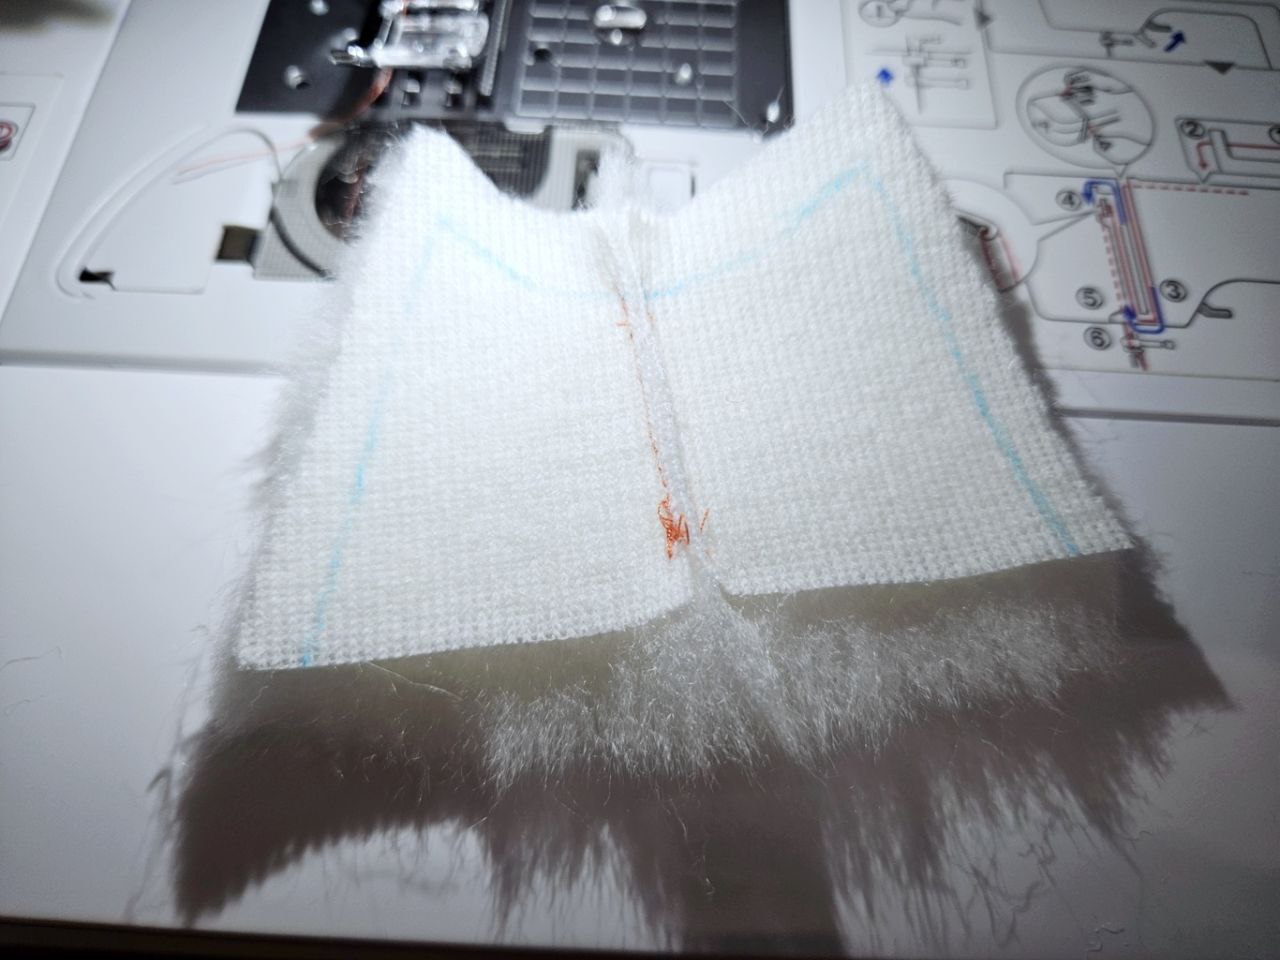
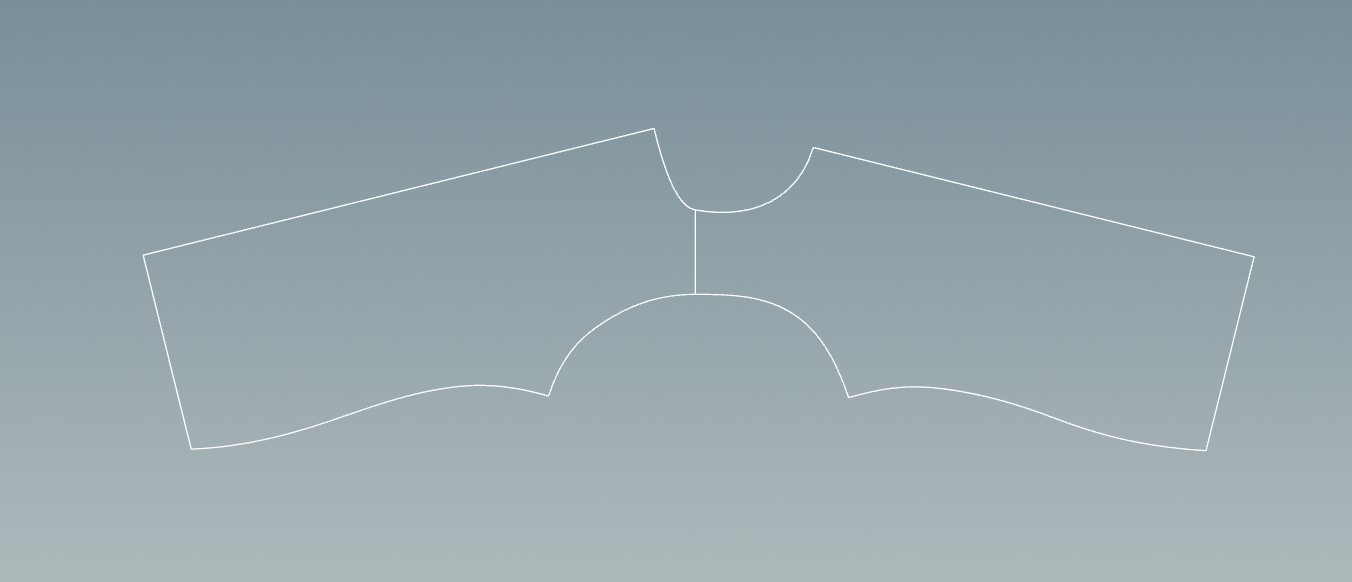
This allows me to cut just one piece of blue fur and one piece of white. However, when testing, there are some major unwanted creases. (Unfortunately no photos)
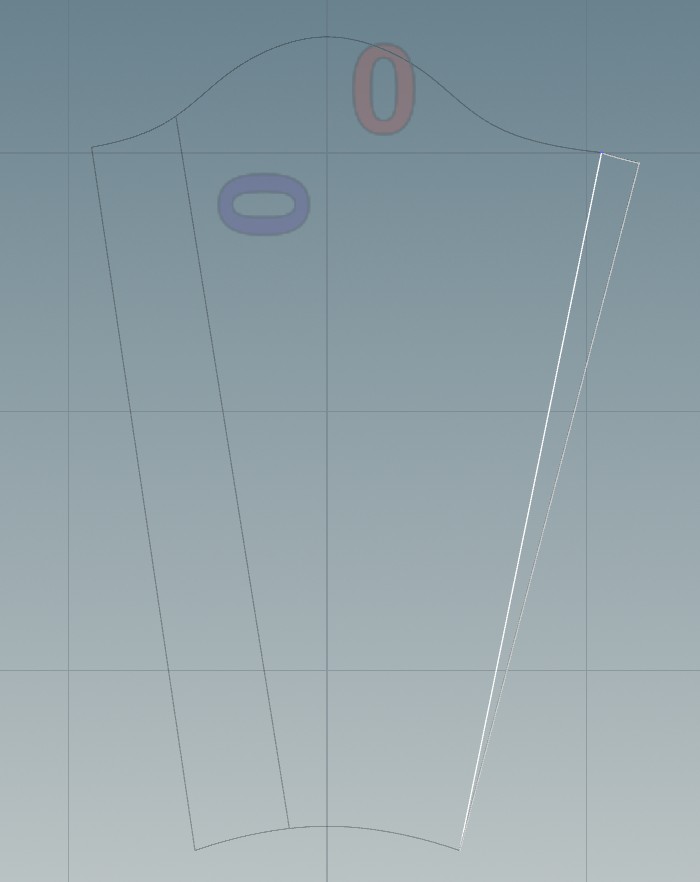
After some fiddling about I discovered this:
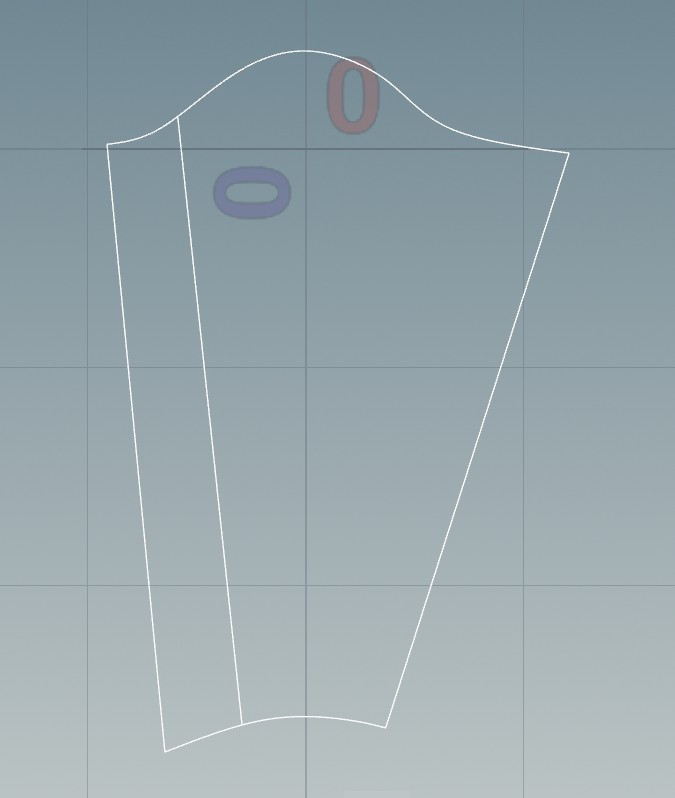
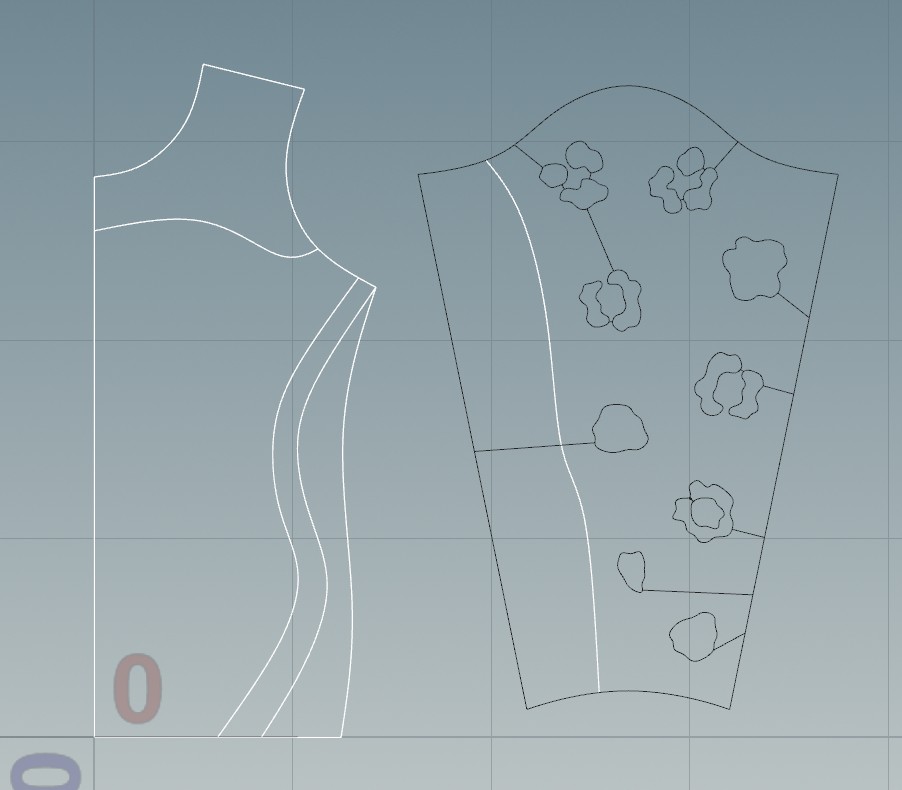
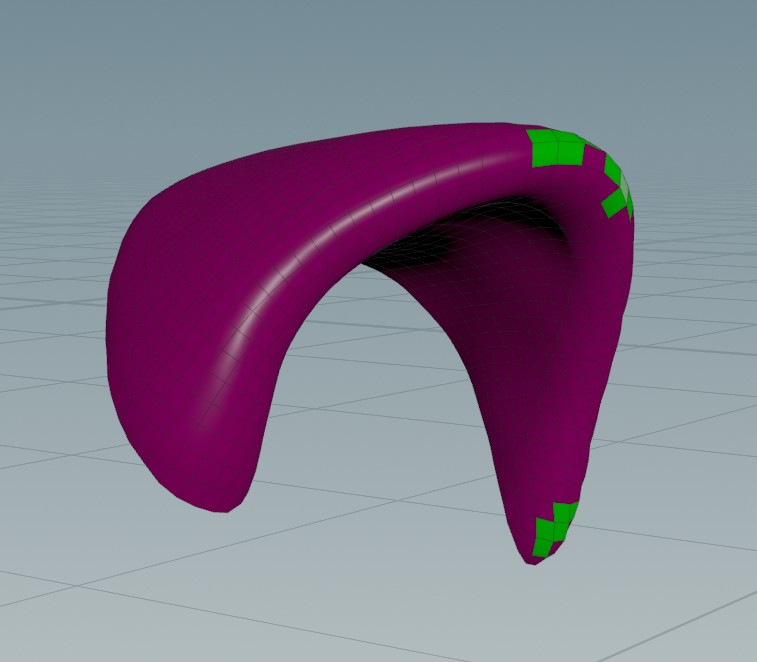
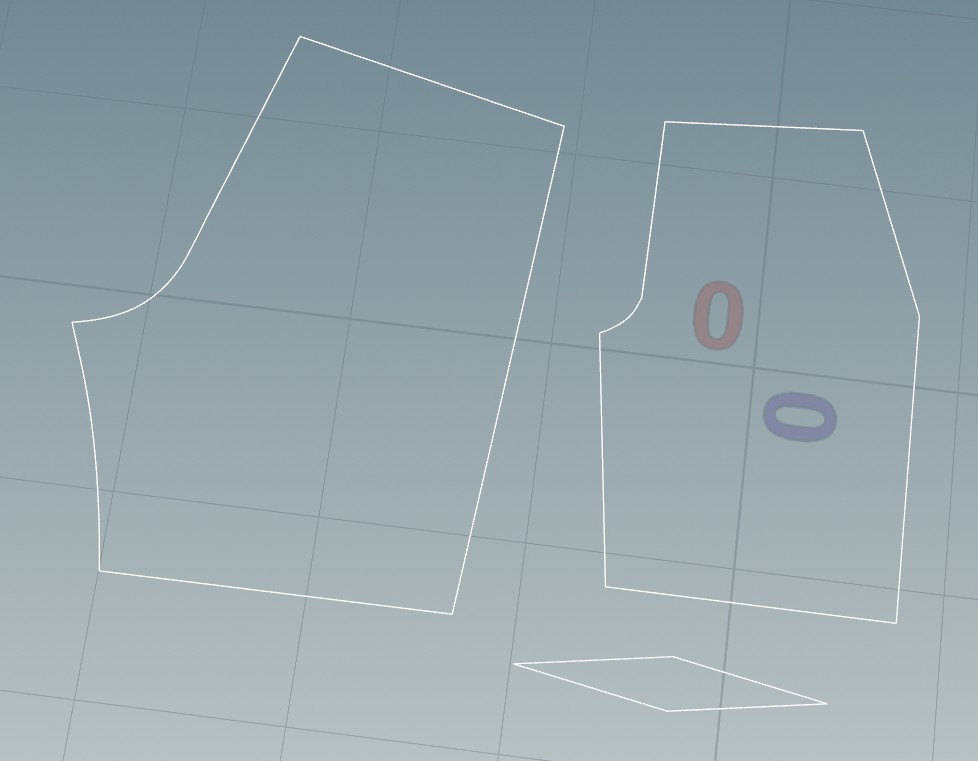
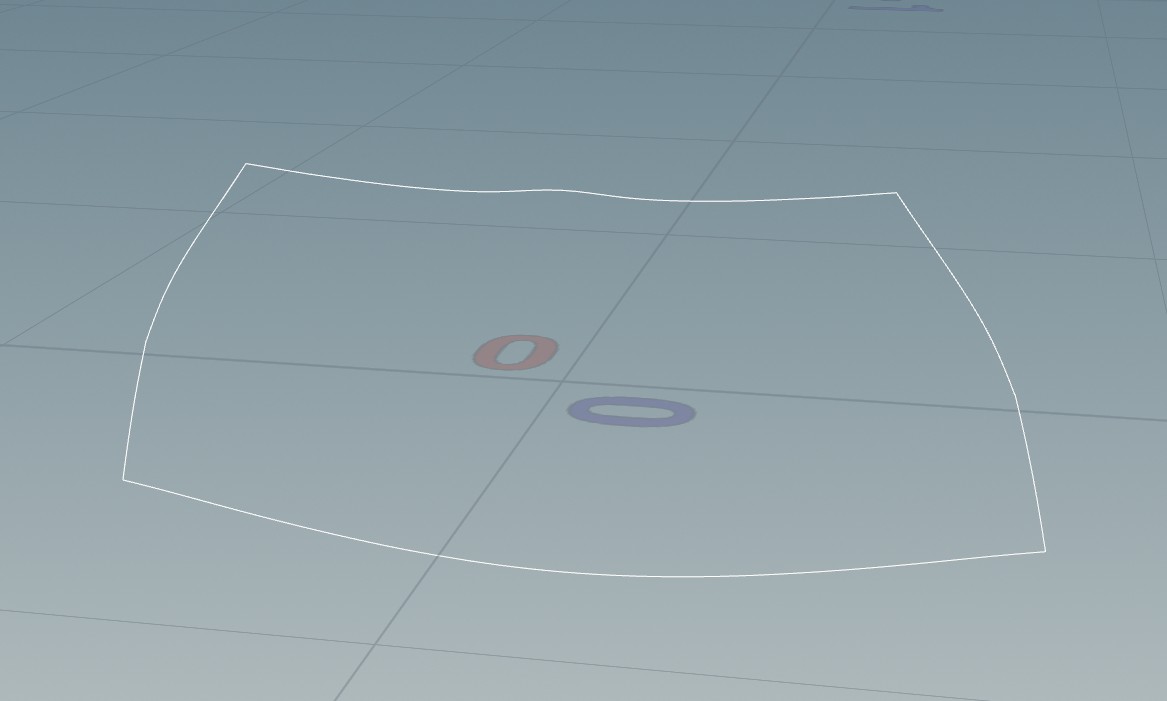
When I mirrored mirror the right side to the left along the original centerline, their edges don't match up at all.
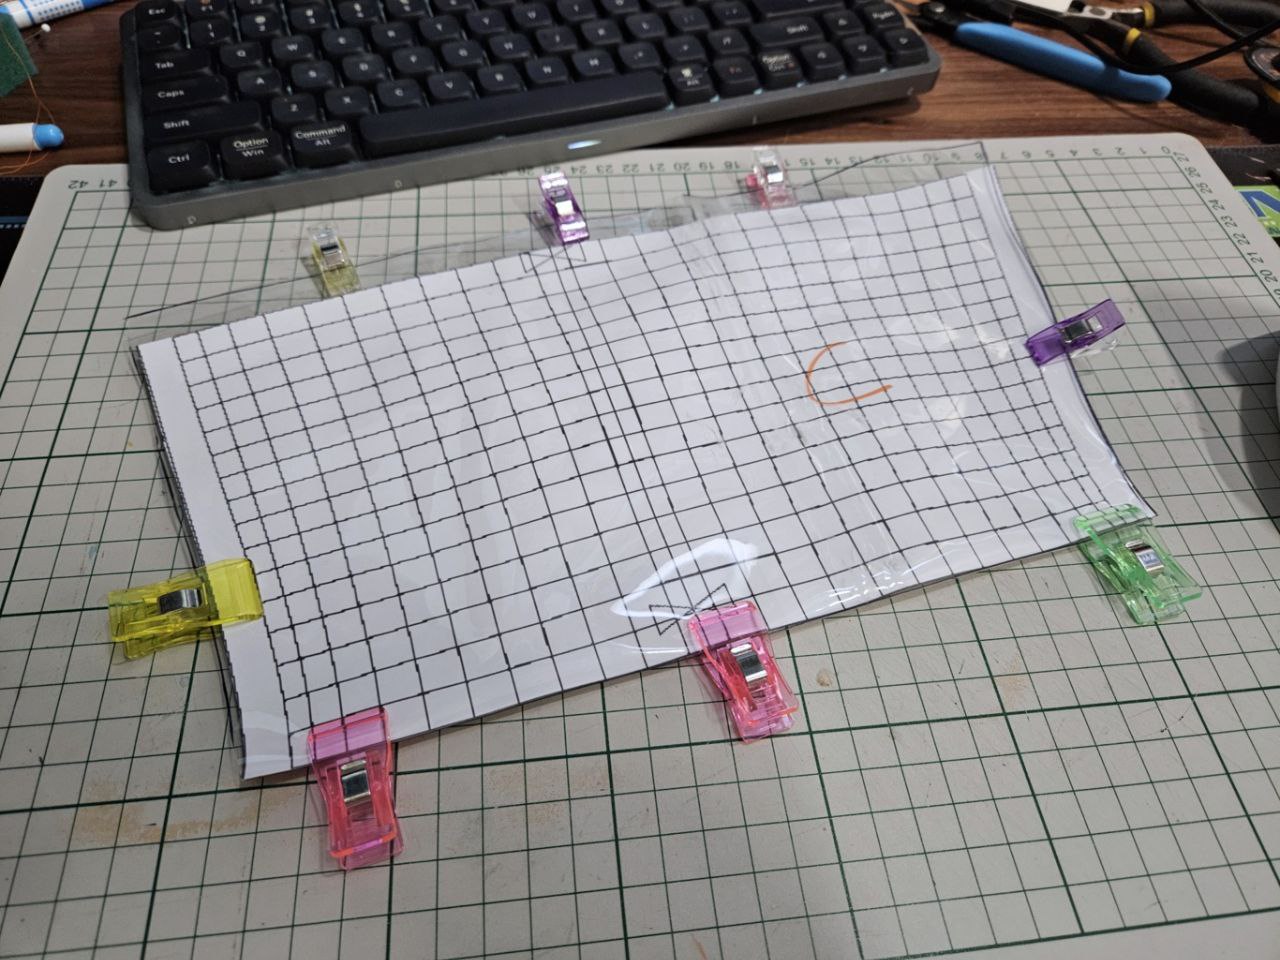
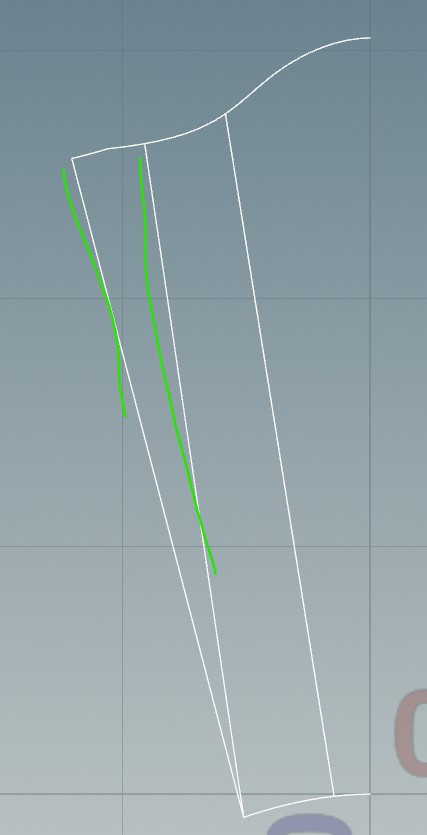
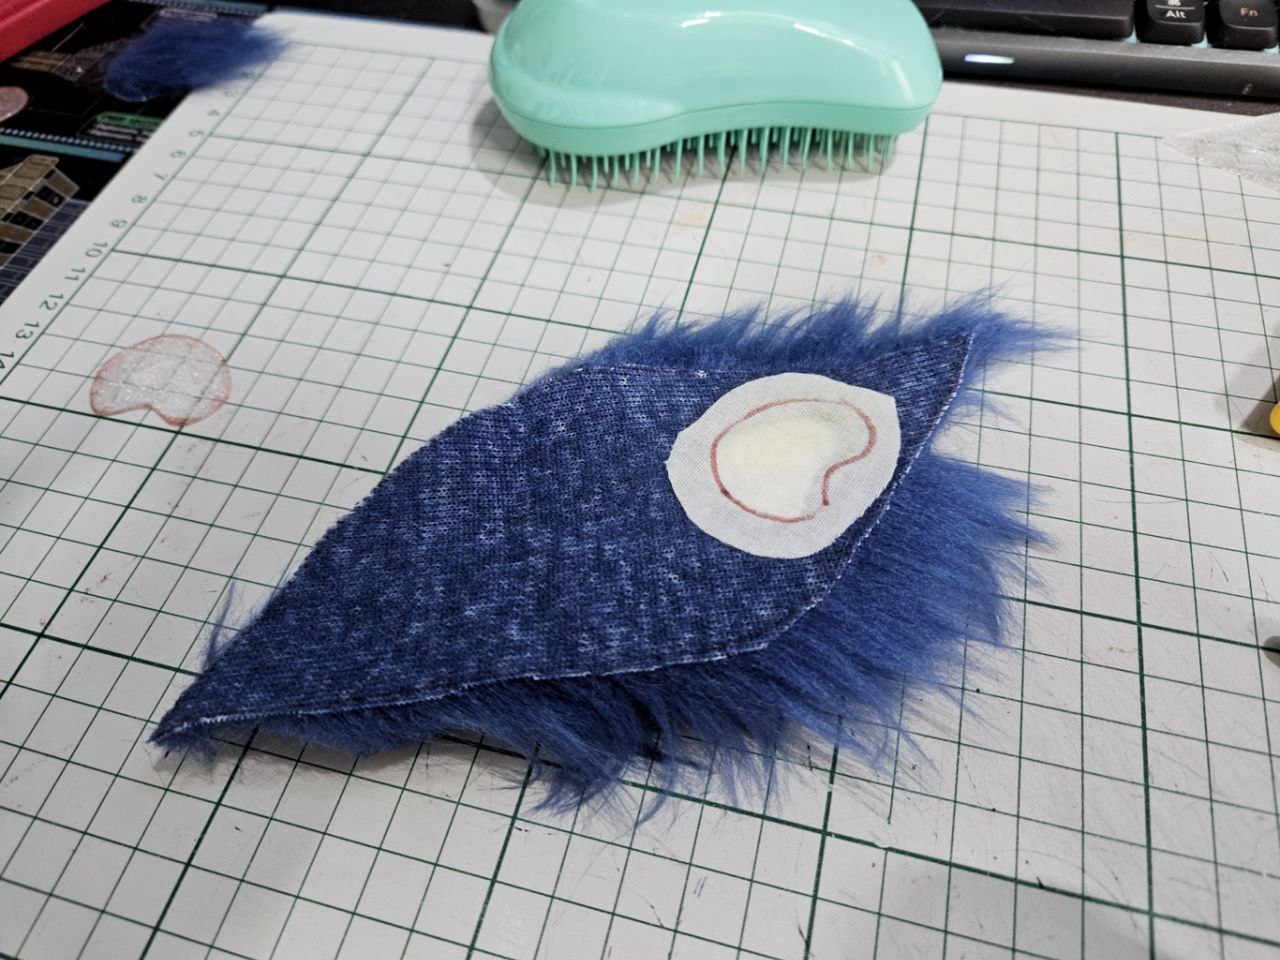
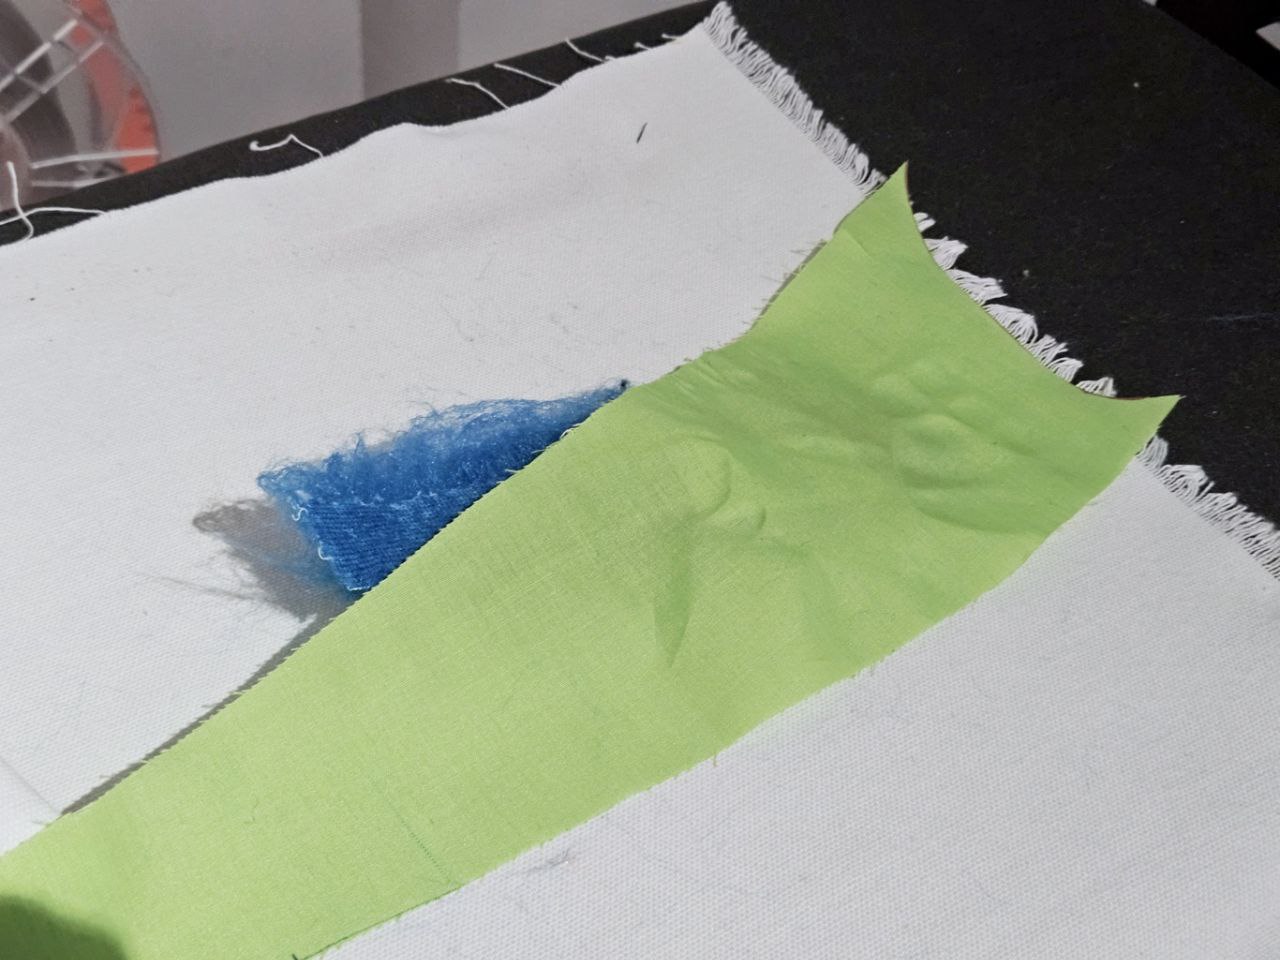
But why would that matter? Both edges are the same length, and I just don't understand why that crease would form. I then decided to make sure that both edges line up perfectly when mirrored, and so adjusted the pattern as such:
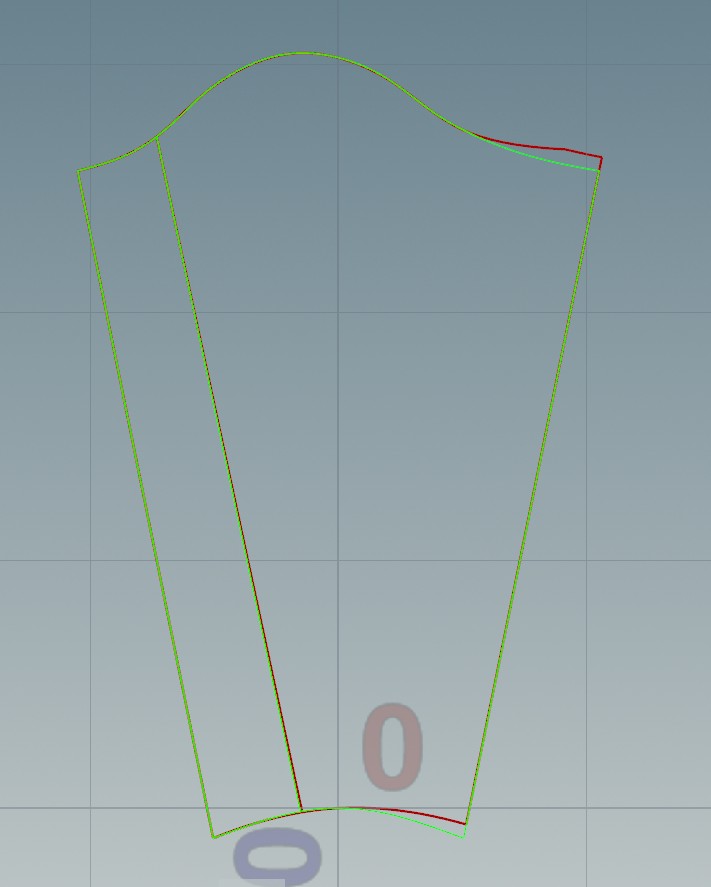
(Red is the design with issue, Green is the current one that stitches perfectly)
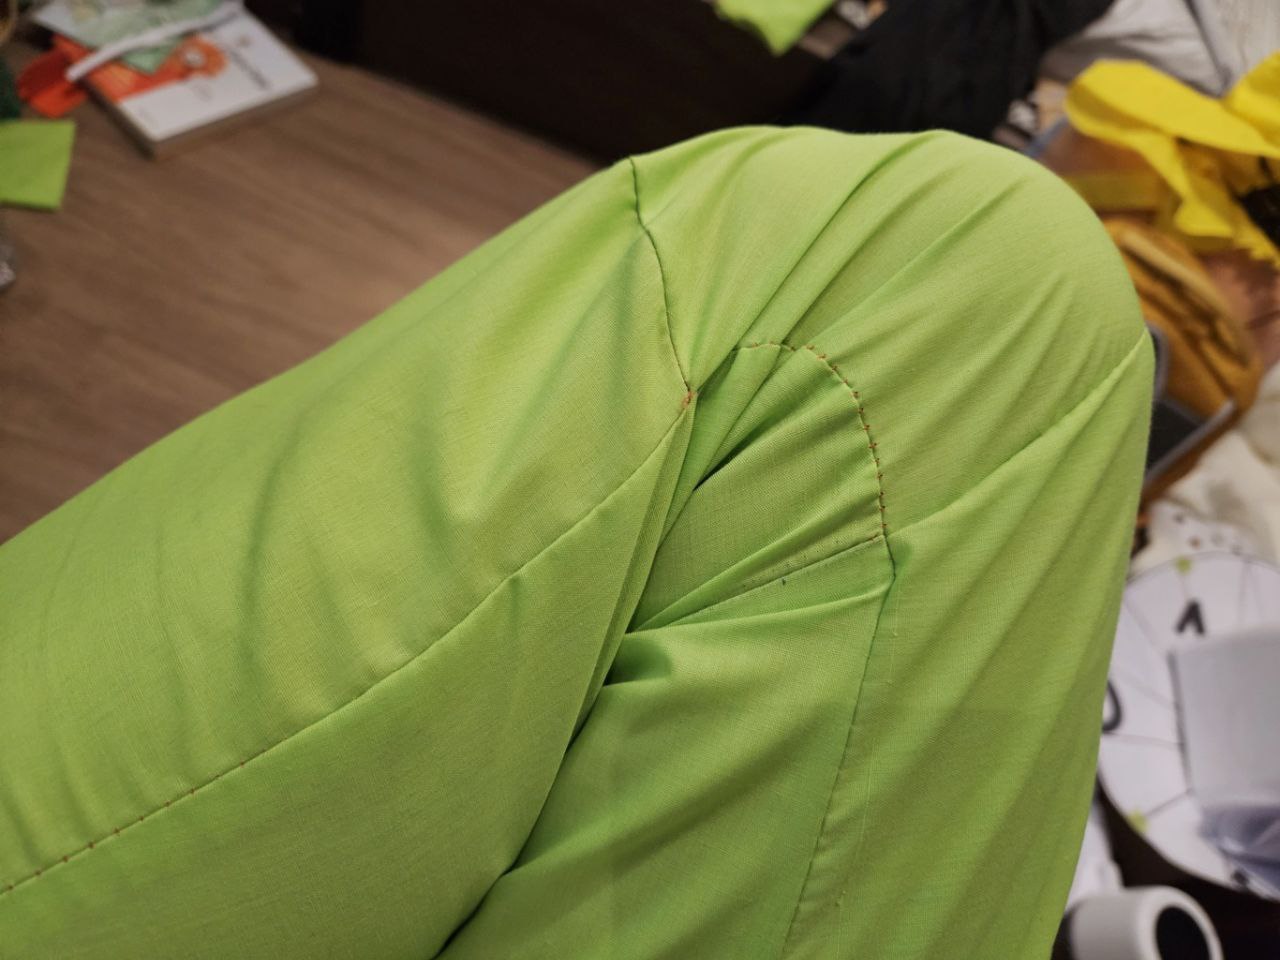
After making sure things are symmetrical it sews up perfectly.
Finally, all fur colours match up. This took waaay longer than I'd like.
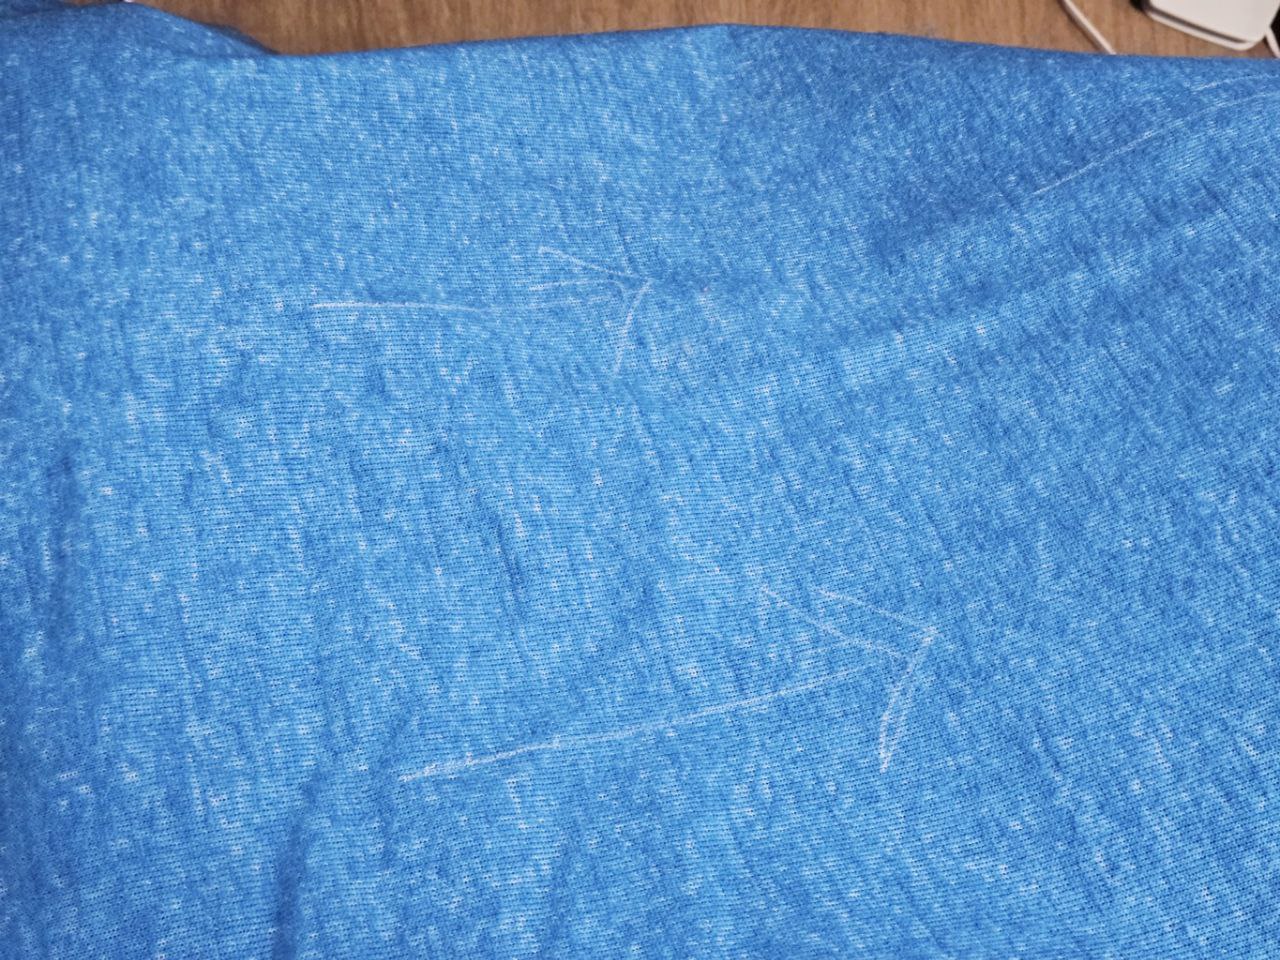
Right now I'm looking at the rosette placements, using blue fabric markers to draw them in.
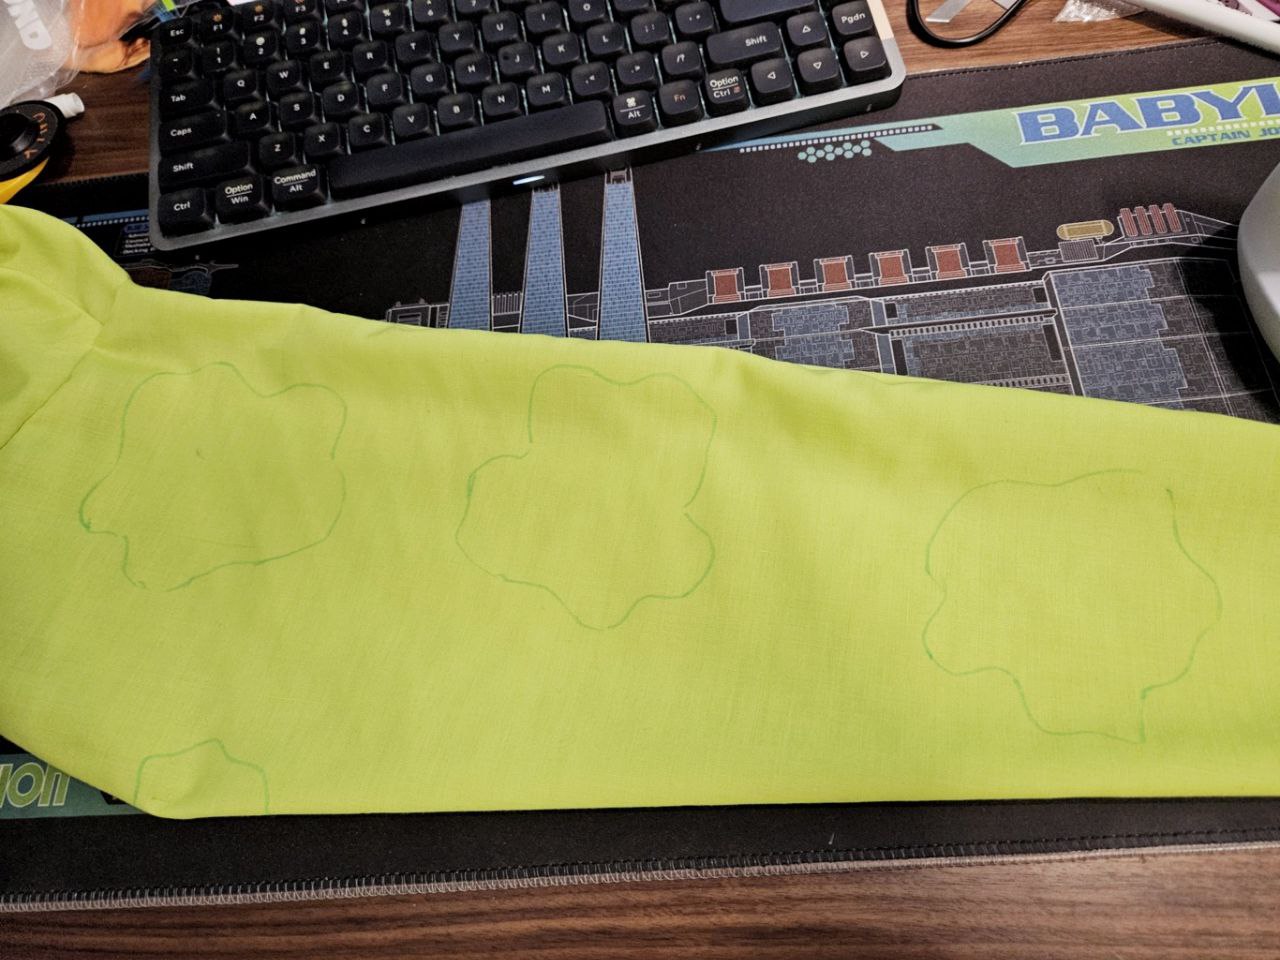
The ones I've got on the arm right now are waaay too big. I need to scale them down, so that's what I'll be working on today.
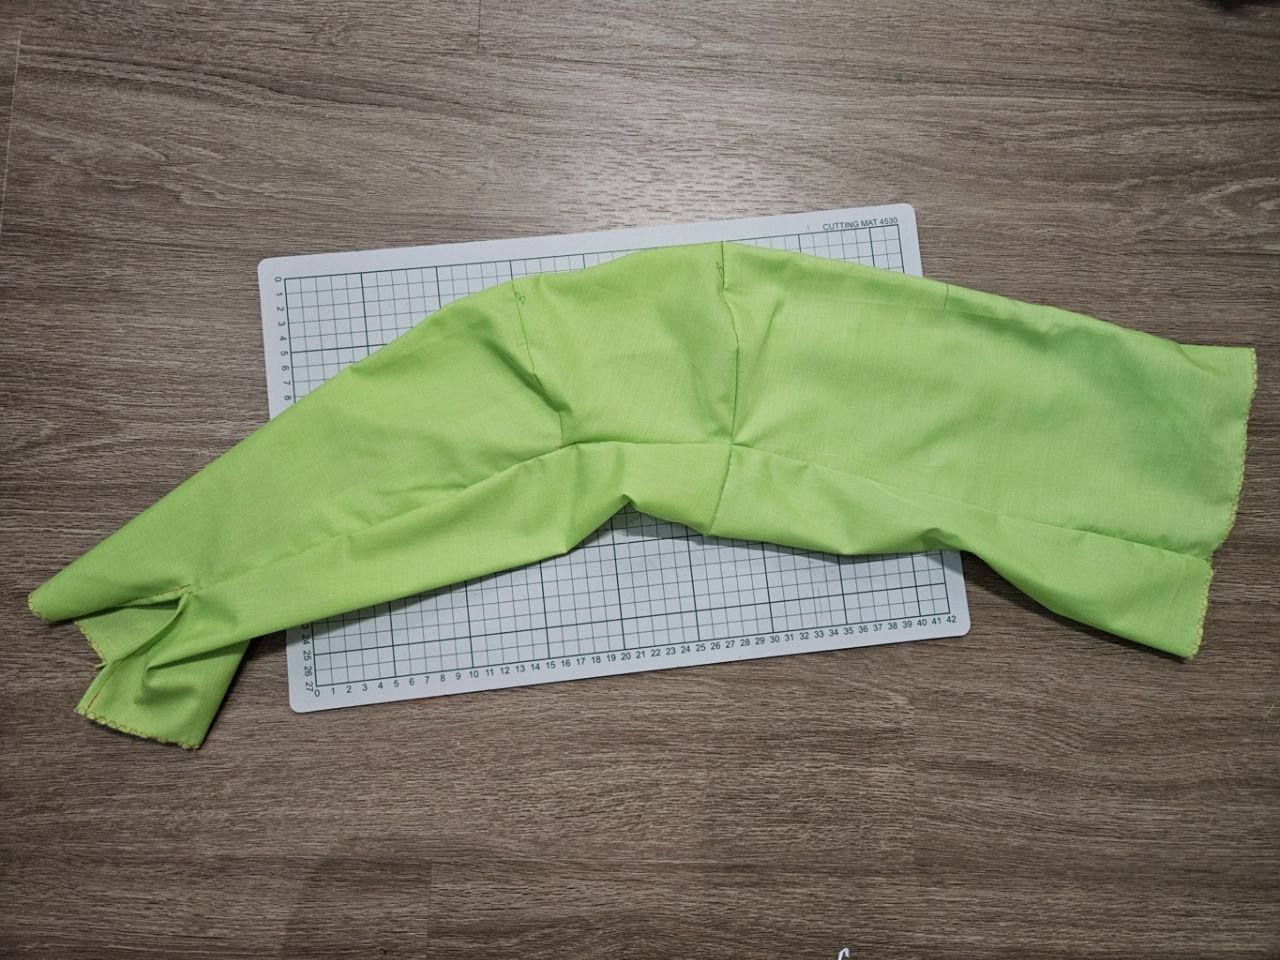
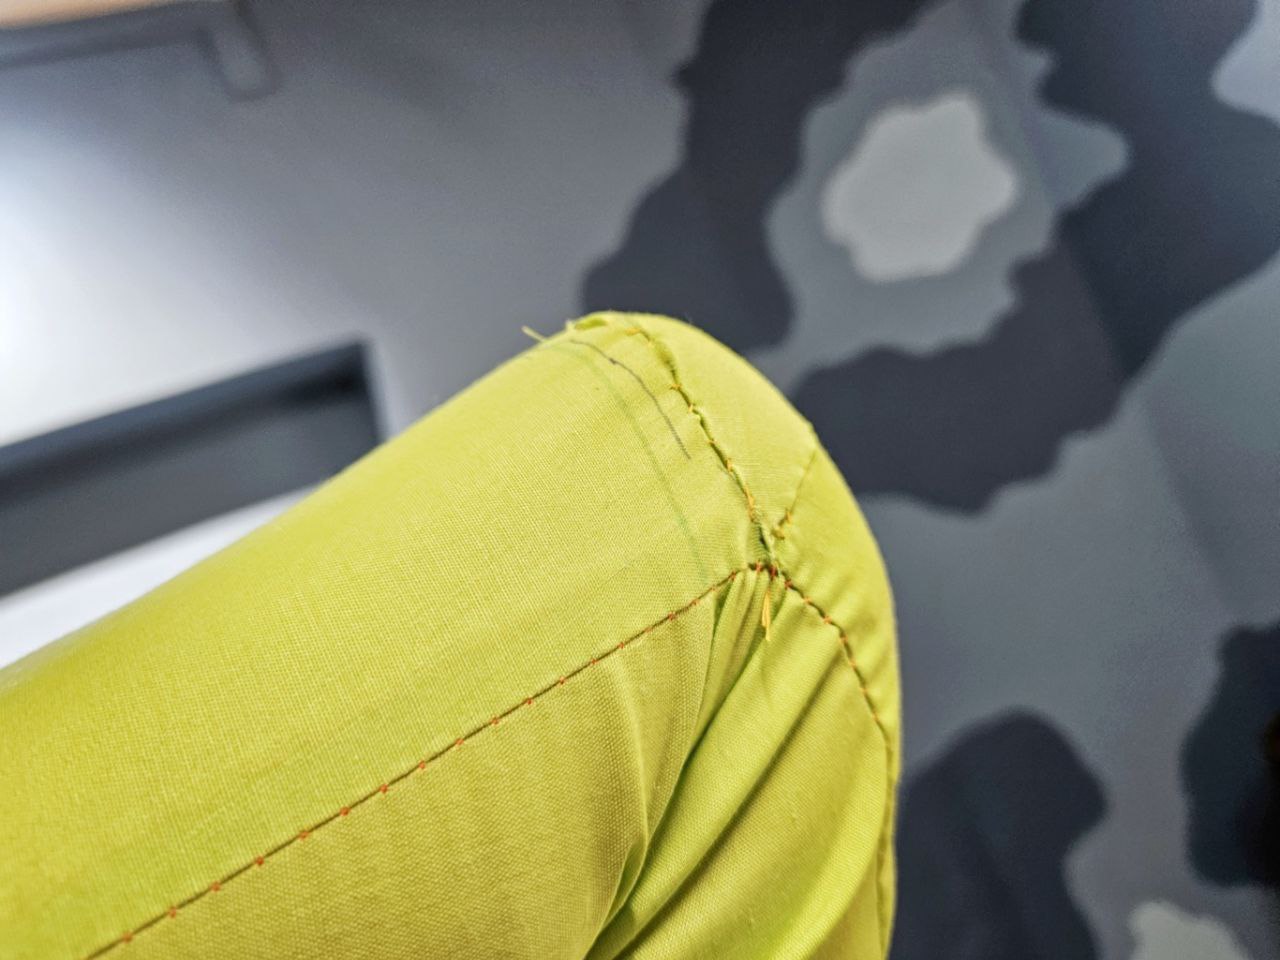
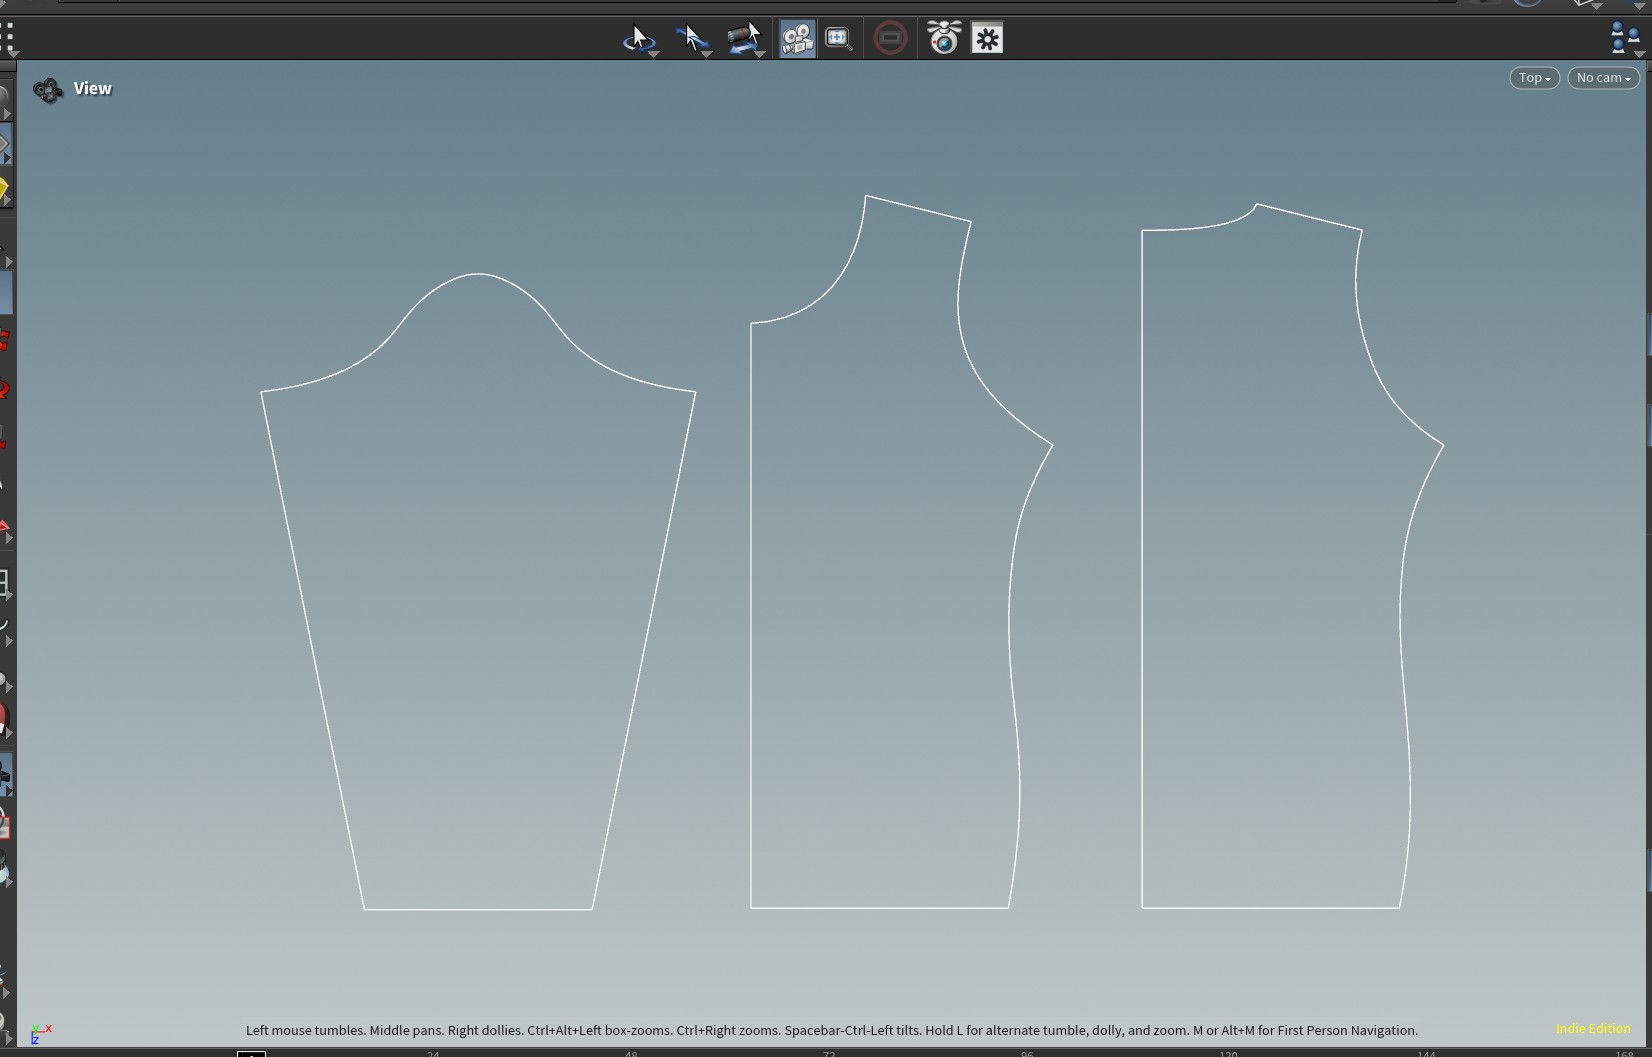
I'd spent the day sewing up a final test pattern and then realized I missed how the various fur colours meet at the shoulder and they were not correct. *screams*
I spent the rest of the day fixing that up, and I hope it works. I had to rework the sleeves, mainly so that I can cut the blue and white fur out with one piece each, instead of 2 pieces of blue fur and one white. This requires the seam to be shifted, which will likely have a knock on effect of where the sleeve's velcro opening needs to be, and moves the gusset away from the main seam of the sleeves. Not sure if good or bad yet.
Photo above shows the new sleeve patterm, which is no longer symmetrical. Rest of the night I cut out the new pattern pieces and overcasted their edges, will sew it up tomorrow.
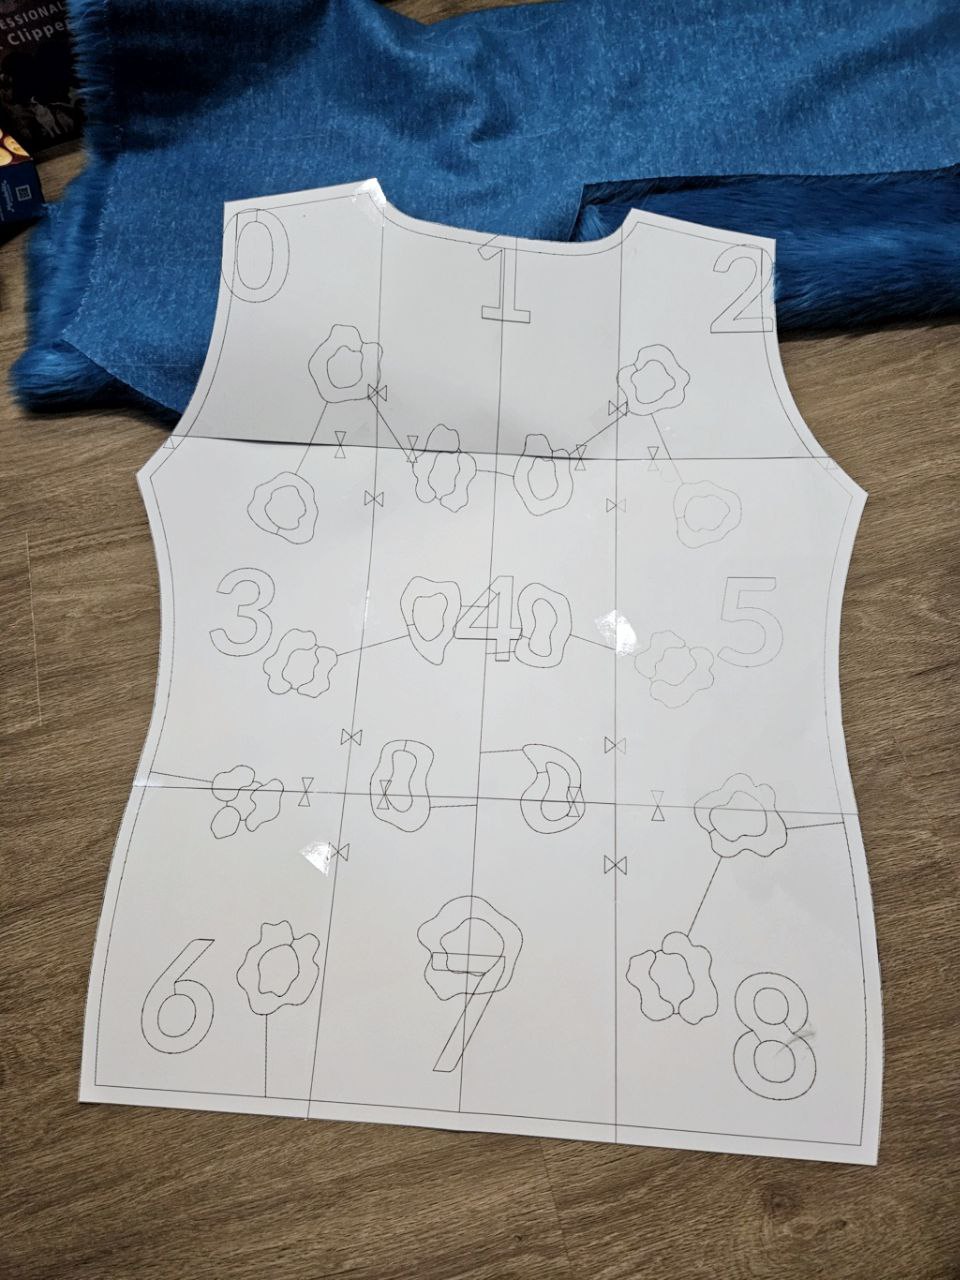
Looking into the rosettes on the back of the upper body, I want to balance between enough rosette coverage vs amount of sewing to do, especially since they will be hidden behind the shirt. I also want to connect the design down the centerline to the tail.
I decided that a series of rosettes will go down the middle, that will keep the pattern going down the tail. After some fussing around, I found that a symmetrical pattern seems to look good, but not perfectly symmetrical; individual rosettes slightly offset seems more organic. More smaller, darker spots would likely need to be added but that can be done ad-hoc.
Gonna let this sit for a bit to figure out if the pattern should have less light blue spots.
I finally got around to testing the pattern and found some issues with the stripes, and corrected them. Hopefully that is all! I've also been thinking about where to place the zipper. and decided that there is no need for a full length zipper, all I need is a zipper on the left or right side seam just enough to open up the bottom curve. Right now I can actually wiggle my way into the test pattern, but just in case I gain weight, the zipper will help XD
After looking at more commissioned art and photos of existing snow leopard suits, I decided to reduce the density of the rosettes.
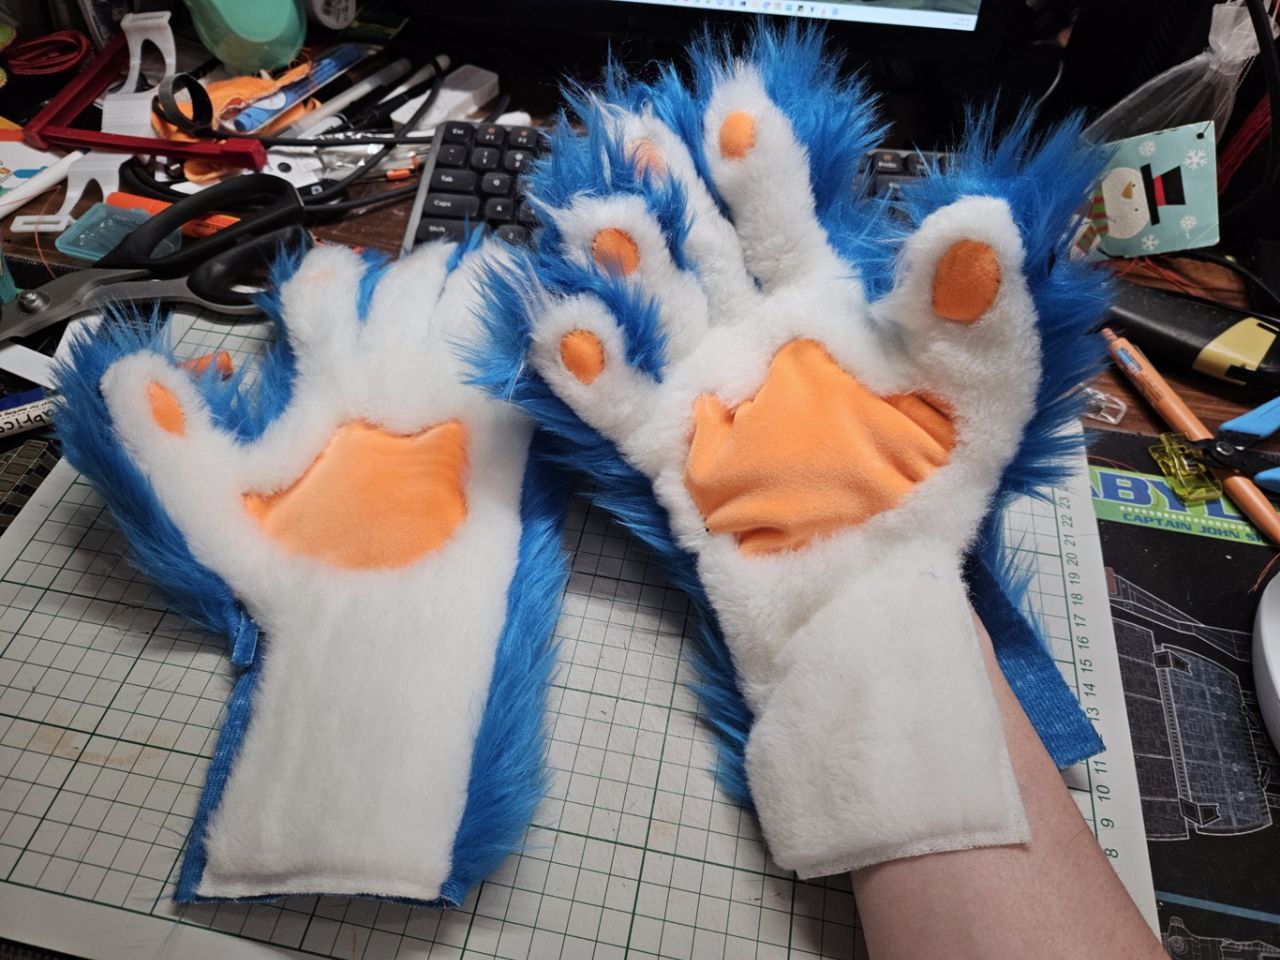
I originally did not plan for claws on my hand paws, but decided to put some in. I got some black minky fabric and it is nigh impossible to machine sew with at this size. I tried using interfacing and while that allowed me to sew the piece together, it was too small and nigh impossible to flip around. I then tried printing the pattern and sewing all the layers with it, and it works great!
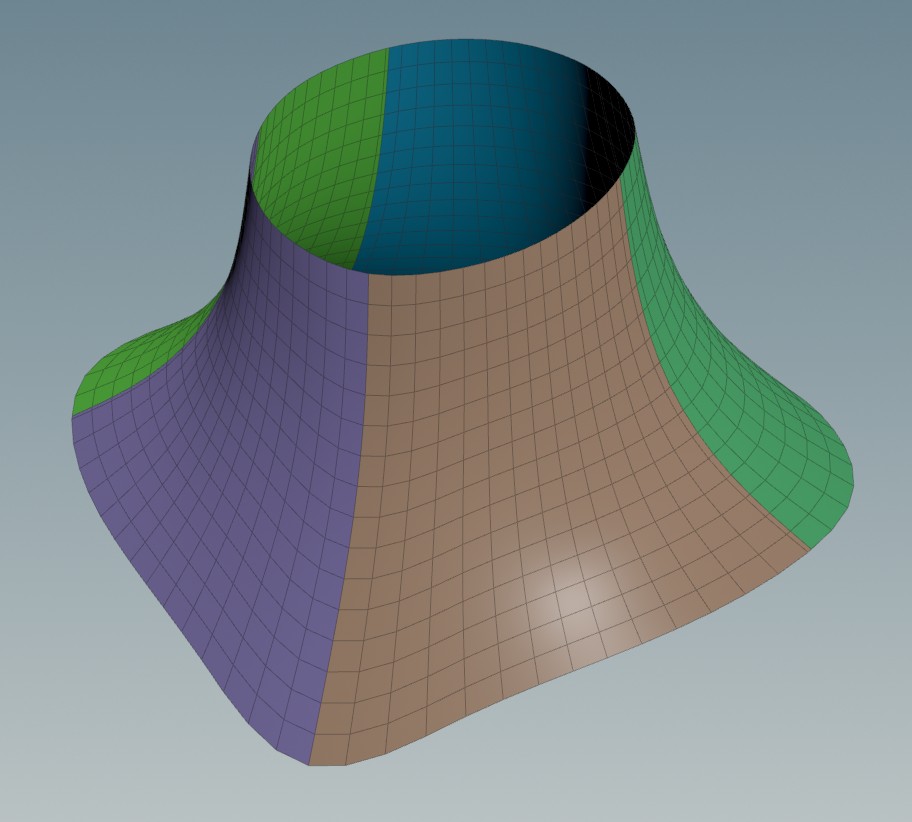
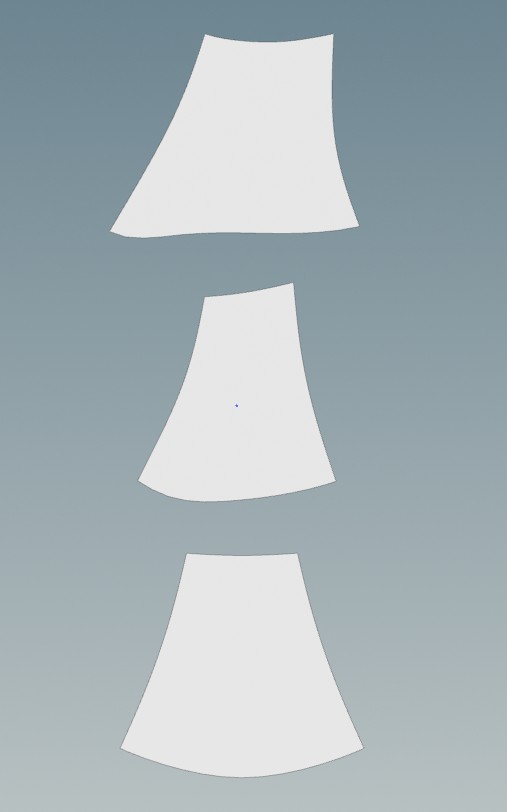
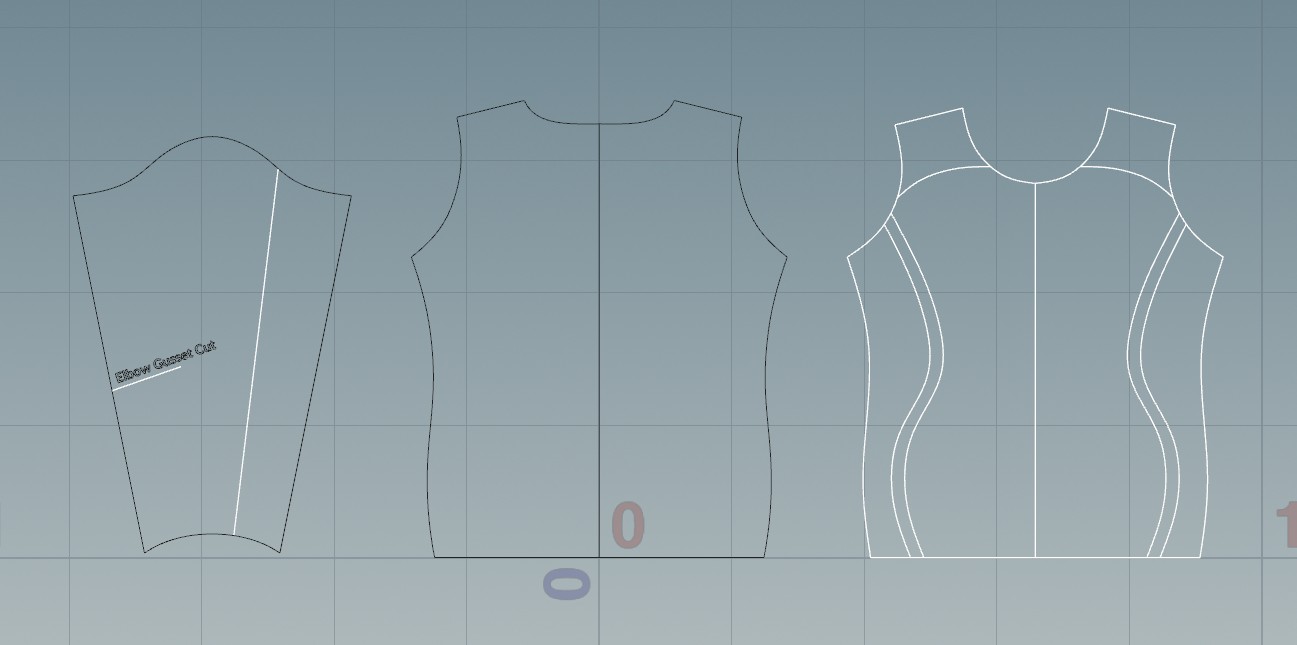
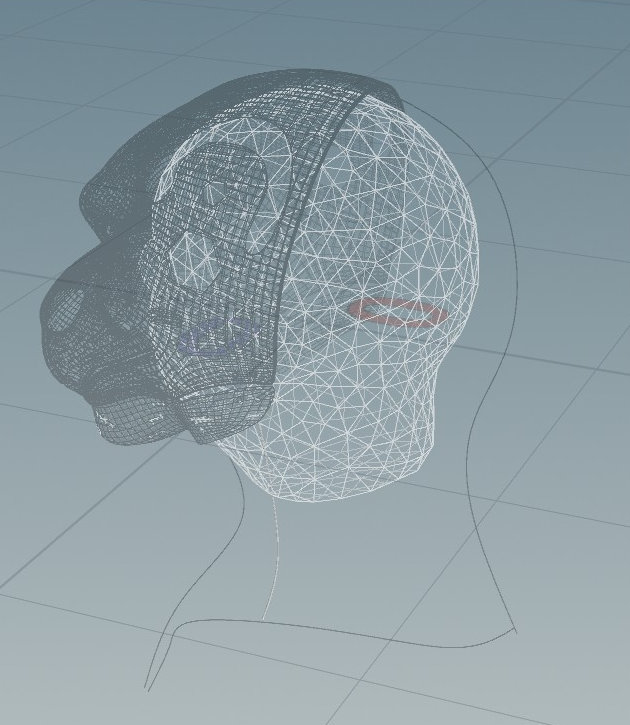
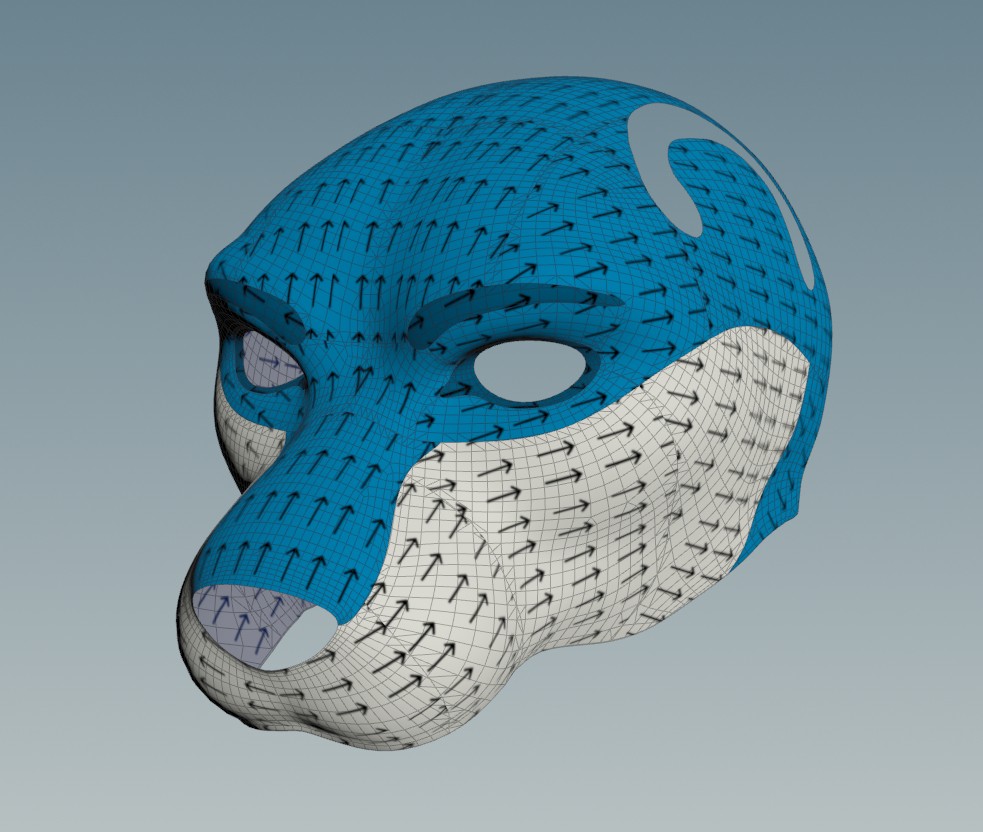
Green areas means the flattened polygon matched from 95% to 100%. Fully red areas means the flattened mesh is less than 90% compared to size of the 3d mesh. Using this tool, I was able to scale/make additional cuts to reduce the difference between the flattened mesh and 3d mesh.
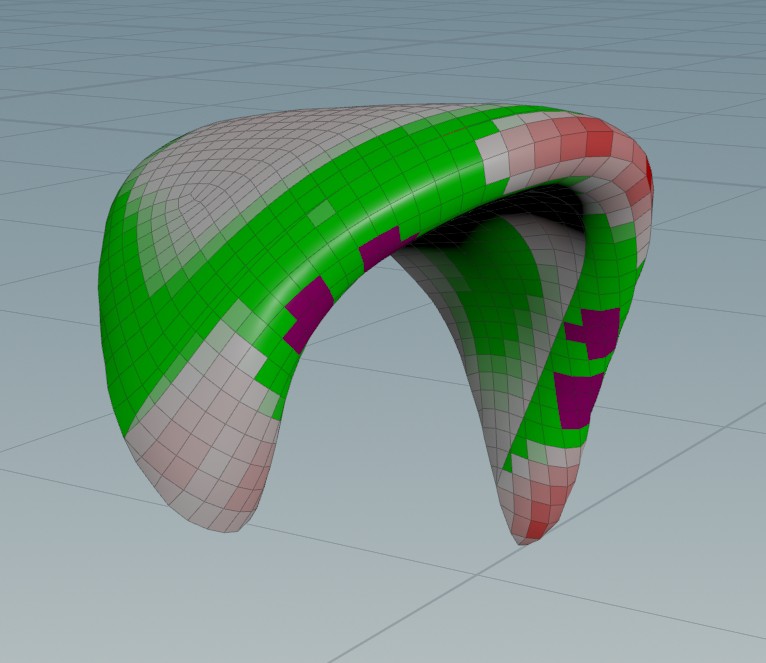
This fit much better compared to before.
Another thing I'm tried is to use interfacing to attach small sections of fur to larger pieces. It seems to work well! I used a leather iron to apply heat in more localised areas.
I'd cut the white part of my paws out days ago but when working on it today, I really did not like the texture. I'd shaved it down pretty thin, but the fur feels wrong. This was a new batch of fur that has a 3cm pile length, and denser. I tried using the previous version which was 5cm pile and less dense. It felt better, so I'm keeping with that.
The orange and blue fur are also 3cm pile length, which might be an issue as the head likely will be shaved short. I'll see.
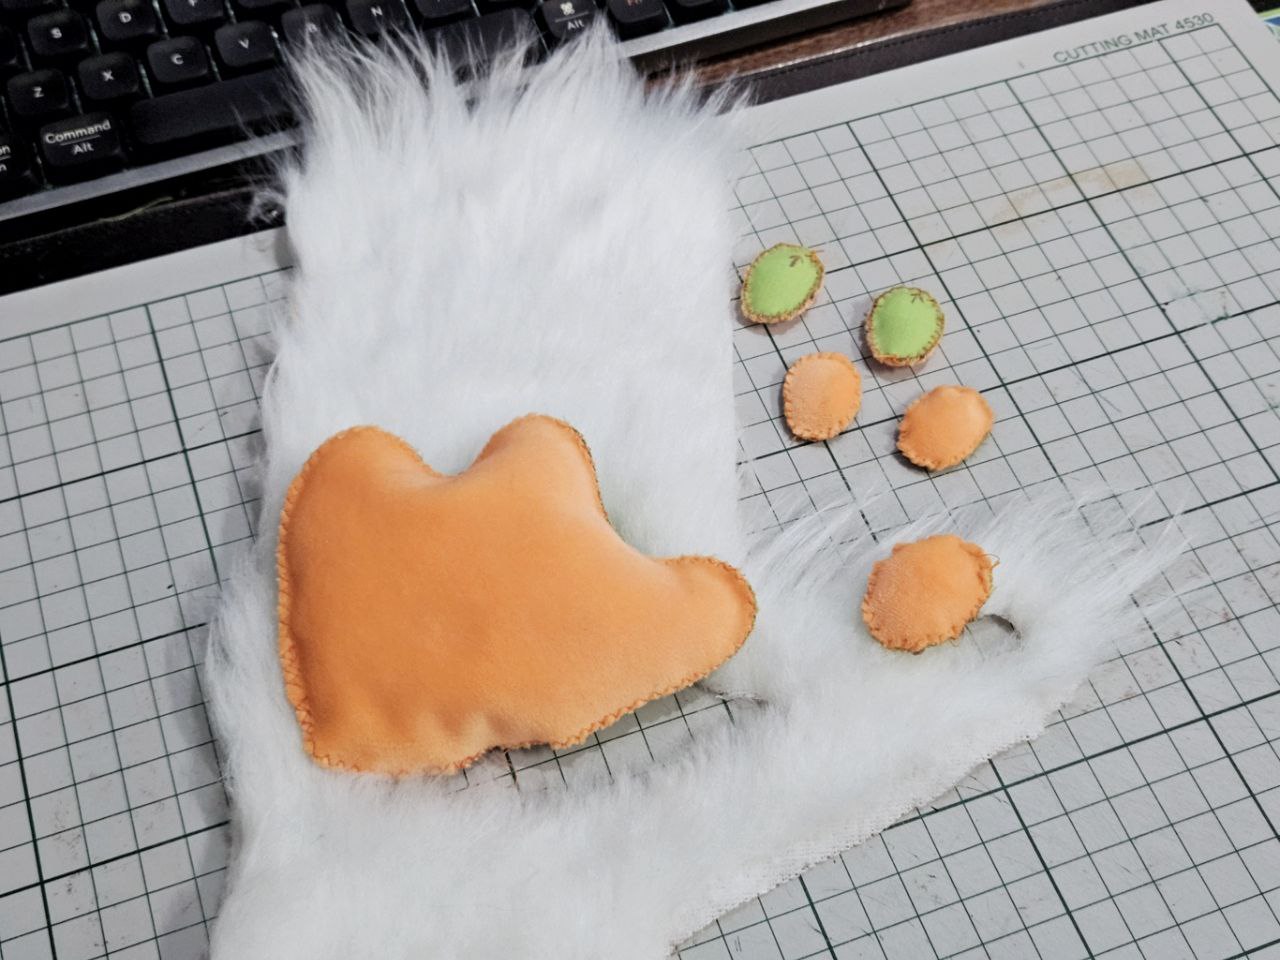
If not, I was just working on the paw pads. Once again using waste poplin for the back of the paw pads. Not too difficult, but I hand sewed them as they're pretty small, thus quite time consuming.
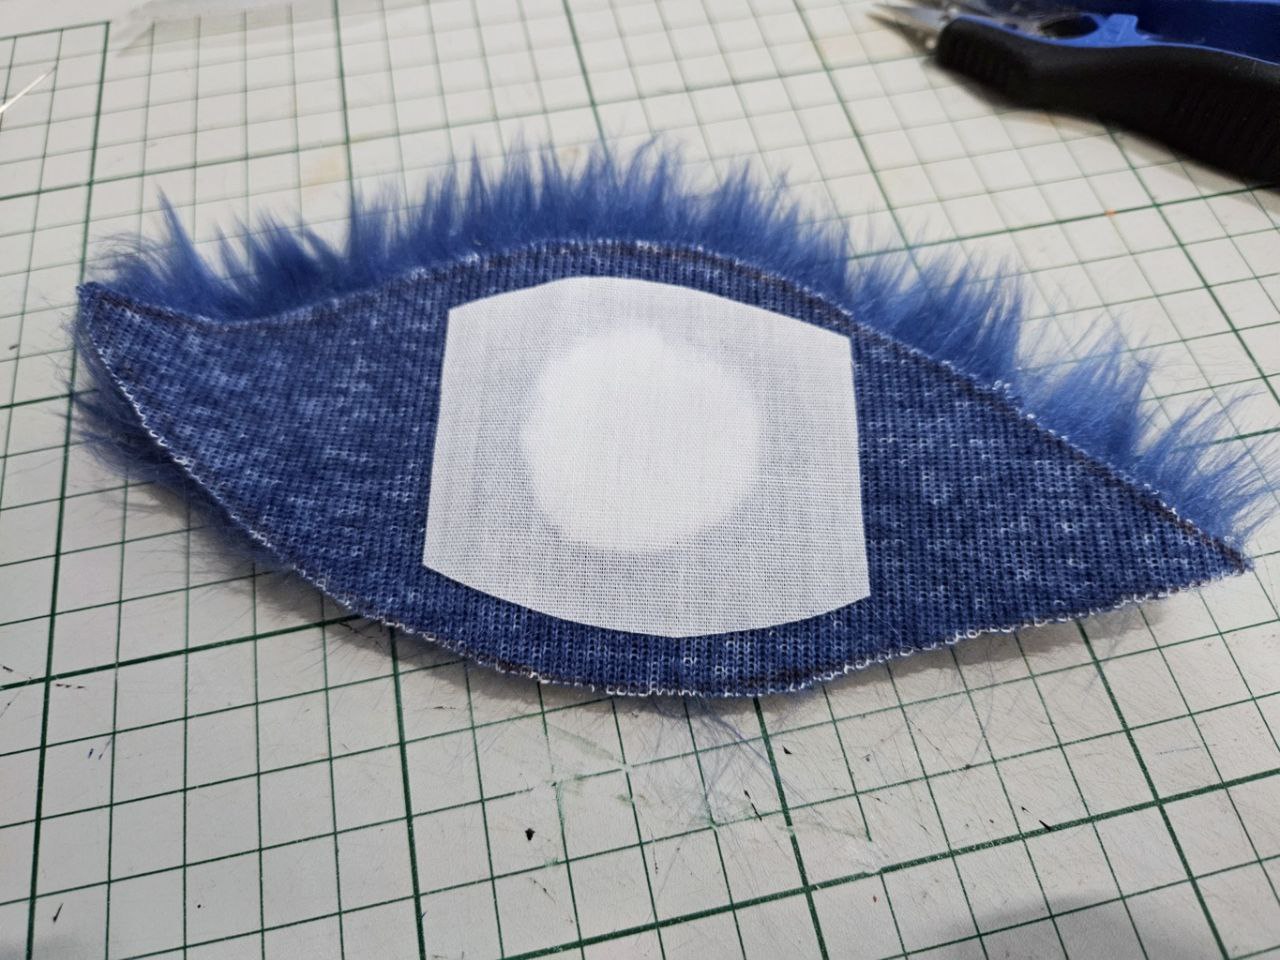
Also worked on laying out the pattern for the ears.
I totally forgot about the neck ruff and back piece, so started on that. I'm still brainstorming how to handle the moving jaw.
I also tested out using interfacing to join smaller fur pieces like spots. I did a test using the fur's selvage, using poplin to prevent direct contact from the iron. It seemed to work fine, so I tried it on the spot on my ears.
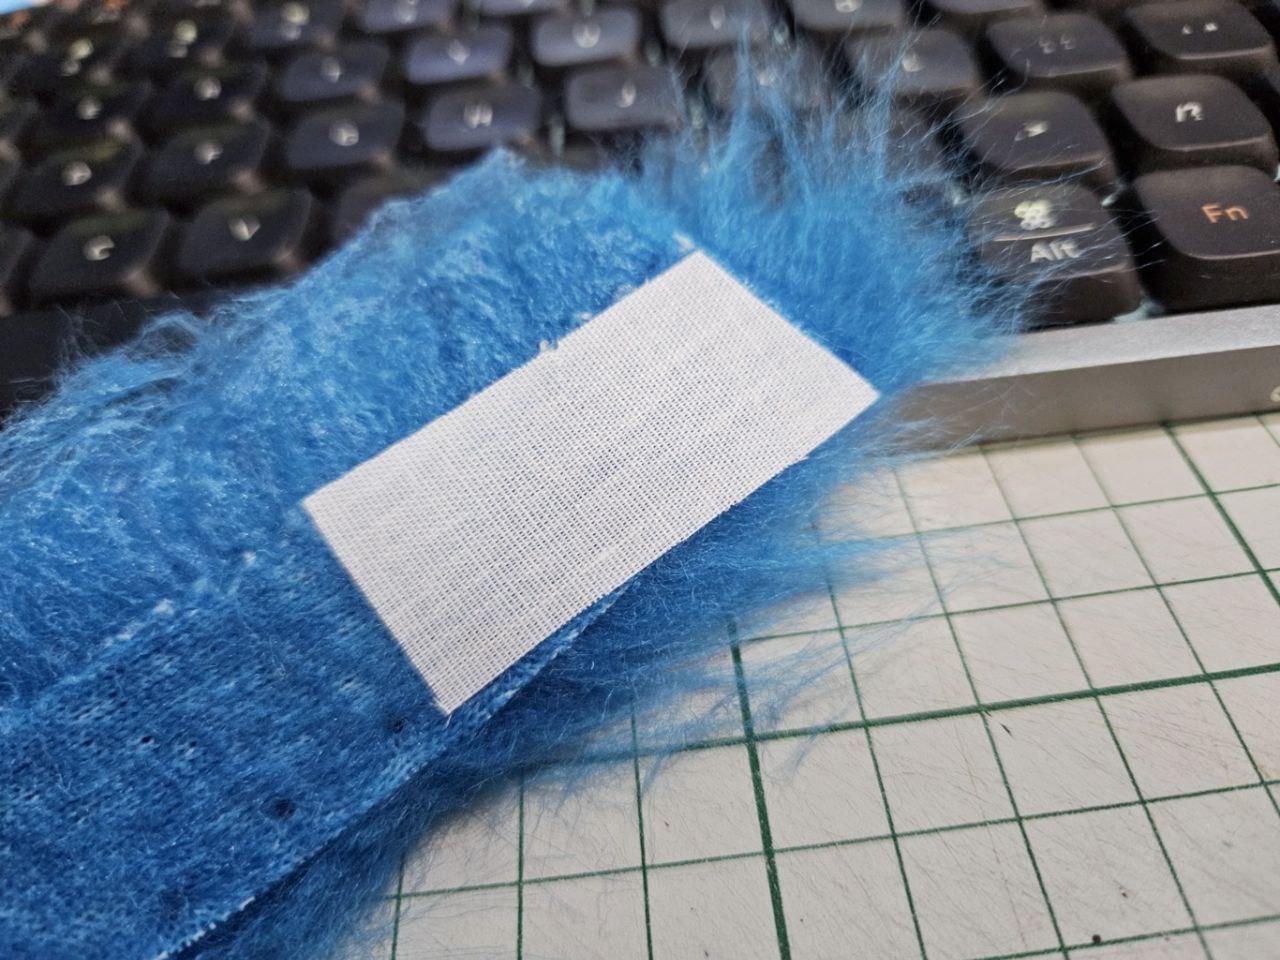
I have a leather iron, and I think that would likely work better as it presents a much smaller surface to the interfacing.
Finally, I've been editing the upper body panels to accomodate my orange hilight stripe but after sewing it up I think I made some errors where to place it on the pattern. The darts do work prety well around my belly, less so the ones around my chest.
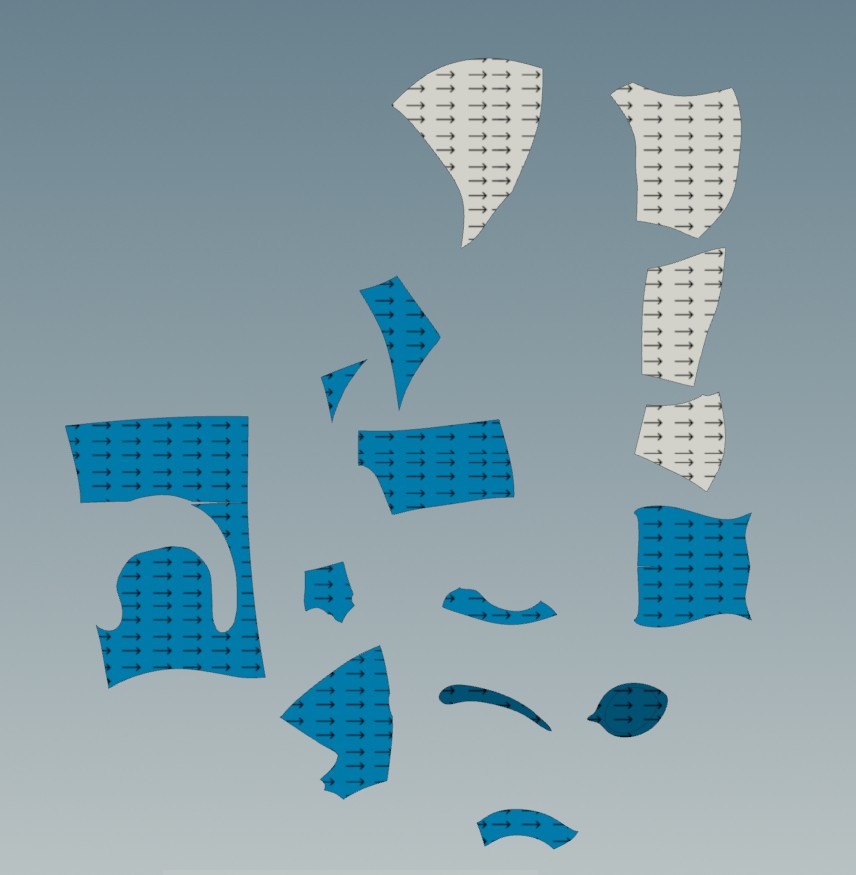
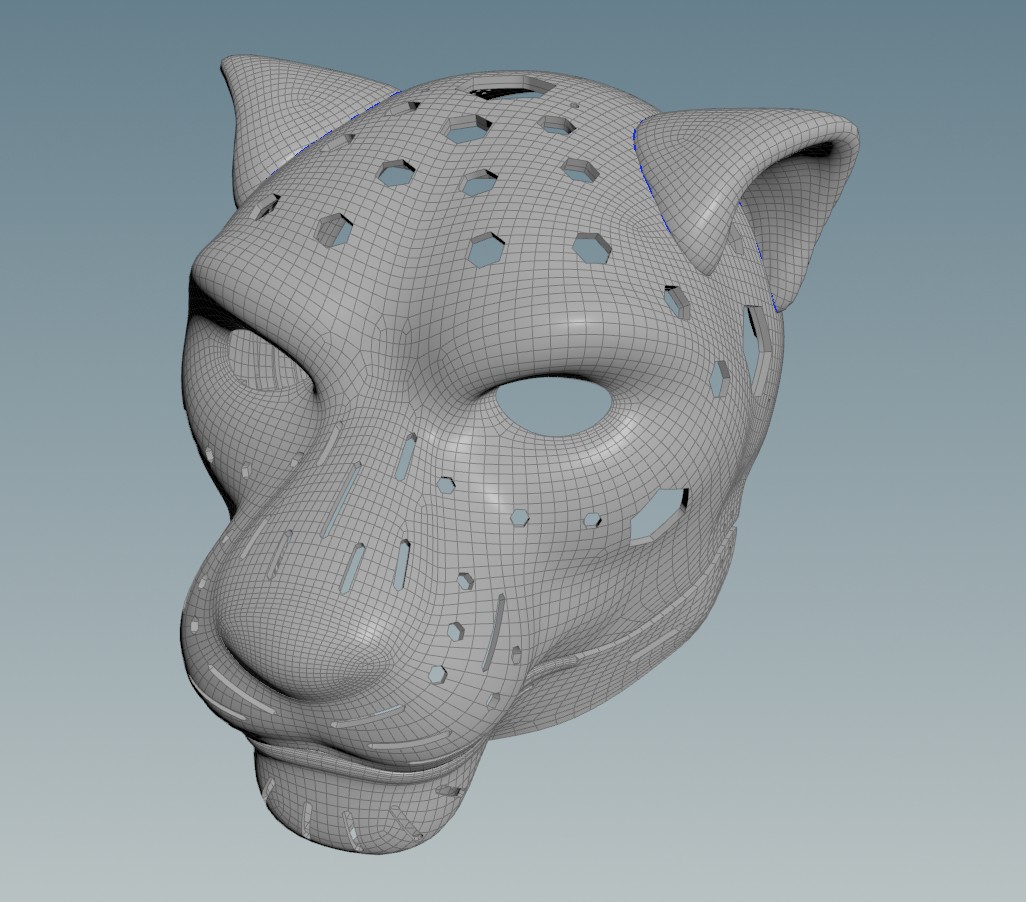
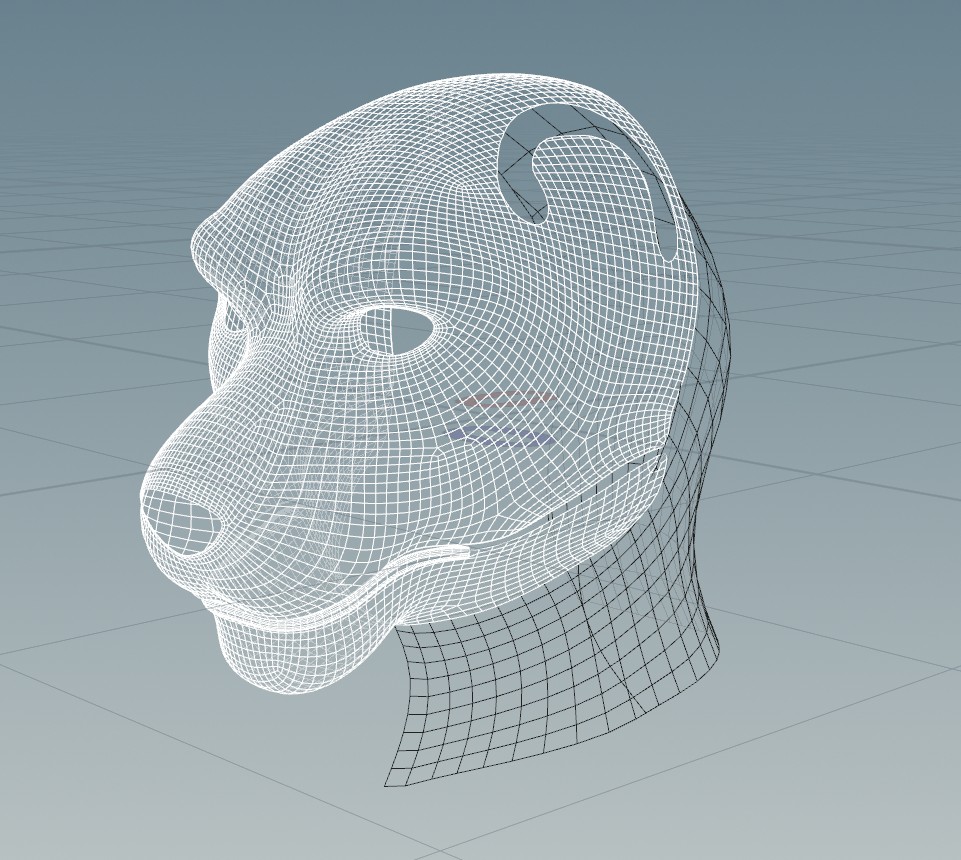
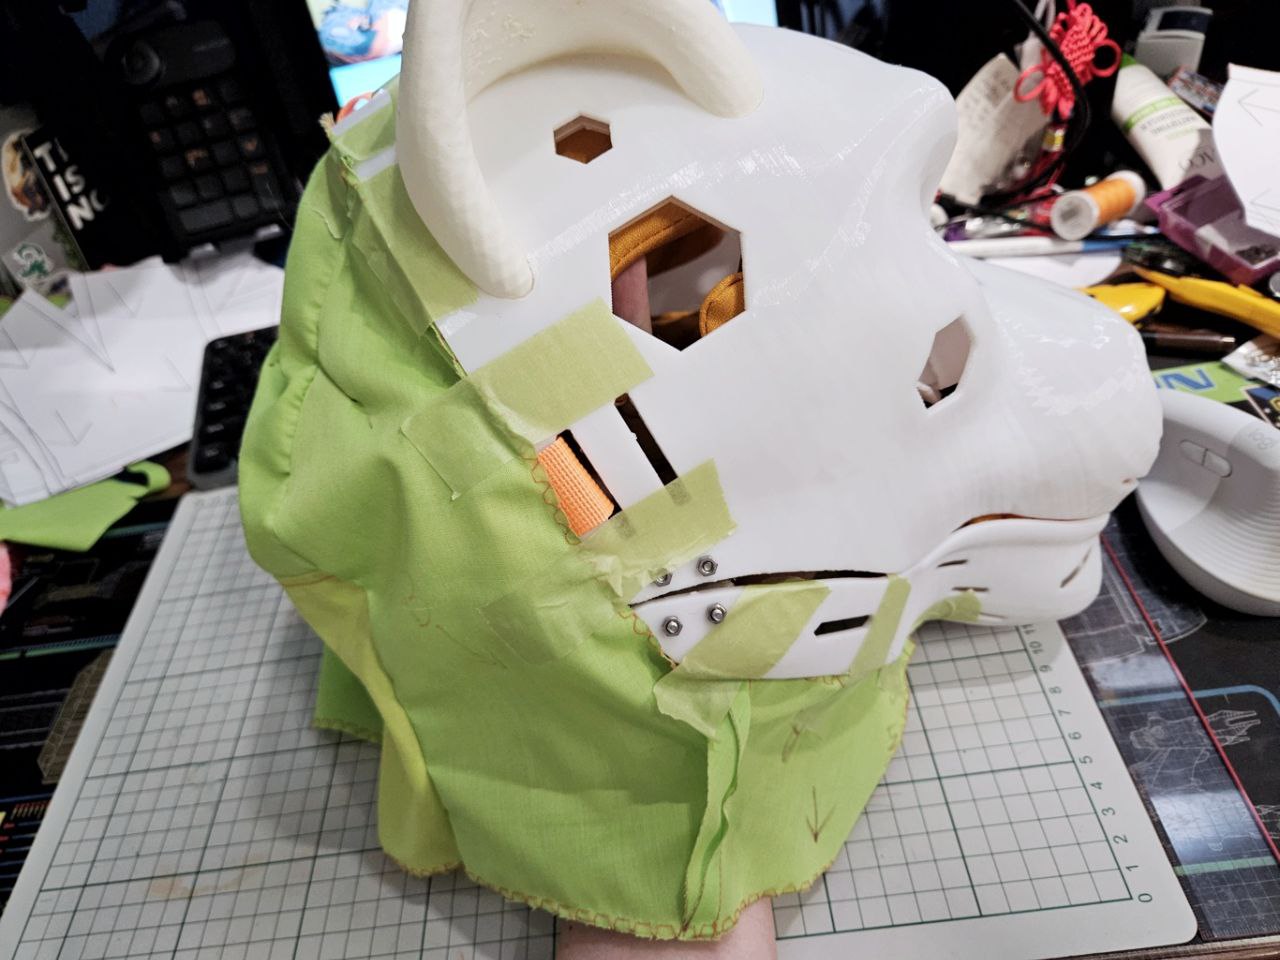
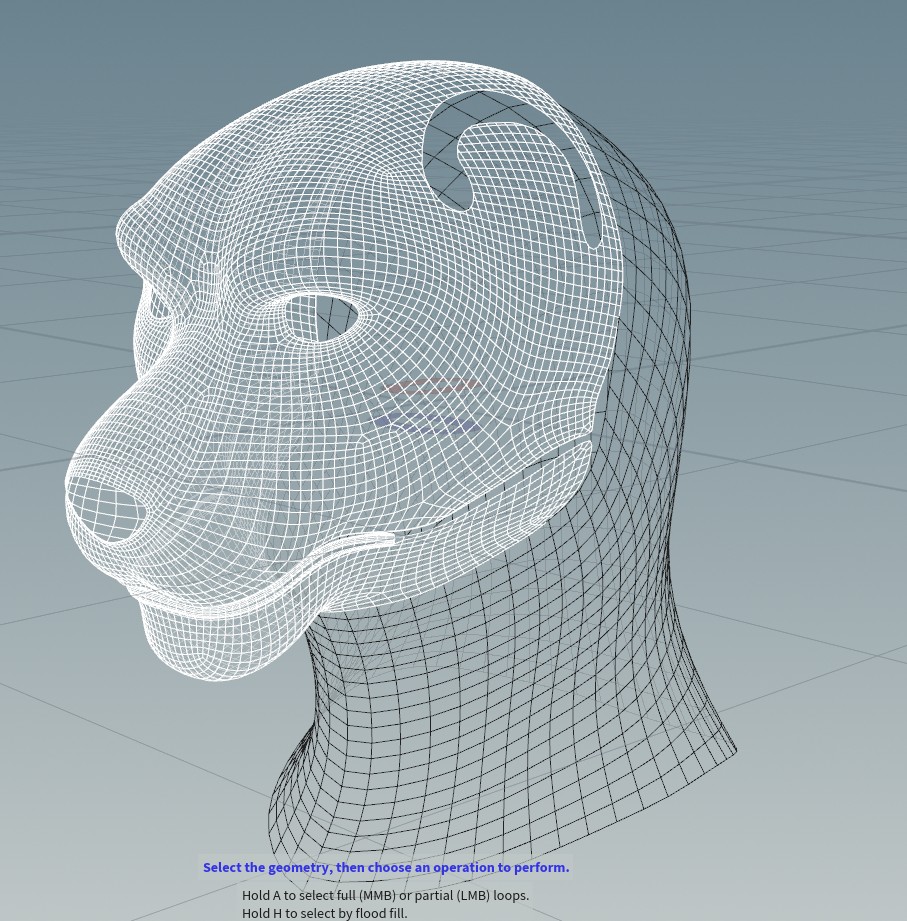
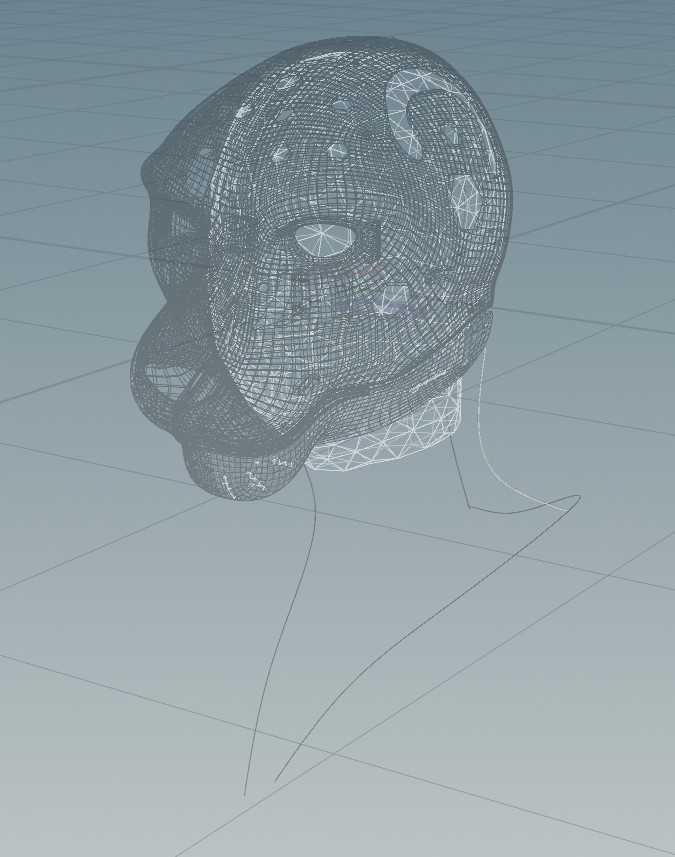
Jumped onto the head for a bit, experimented with cutting up the head and laying it out as a pattern. Some parts end at a point, or are of very complex shape, so I need to adjust the cuts.
Also cut out the fur for the paws, and decided to stuff the orange paw pads. The inner side I re-used the poplin I used for testing, should work? I machine stitched this with a zigzag stitch to make sure the poplin doesn't fray out.
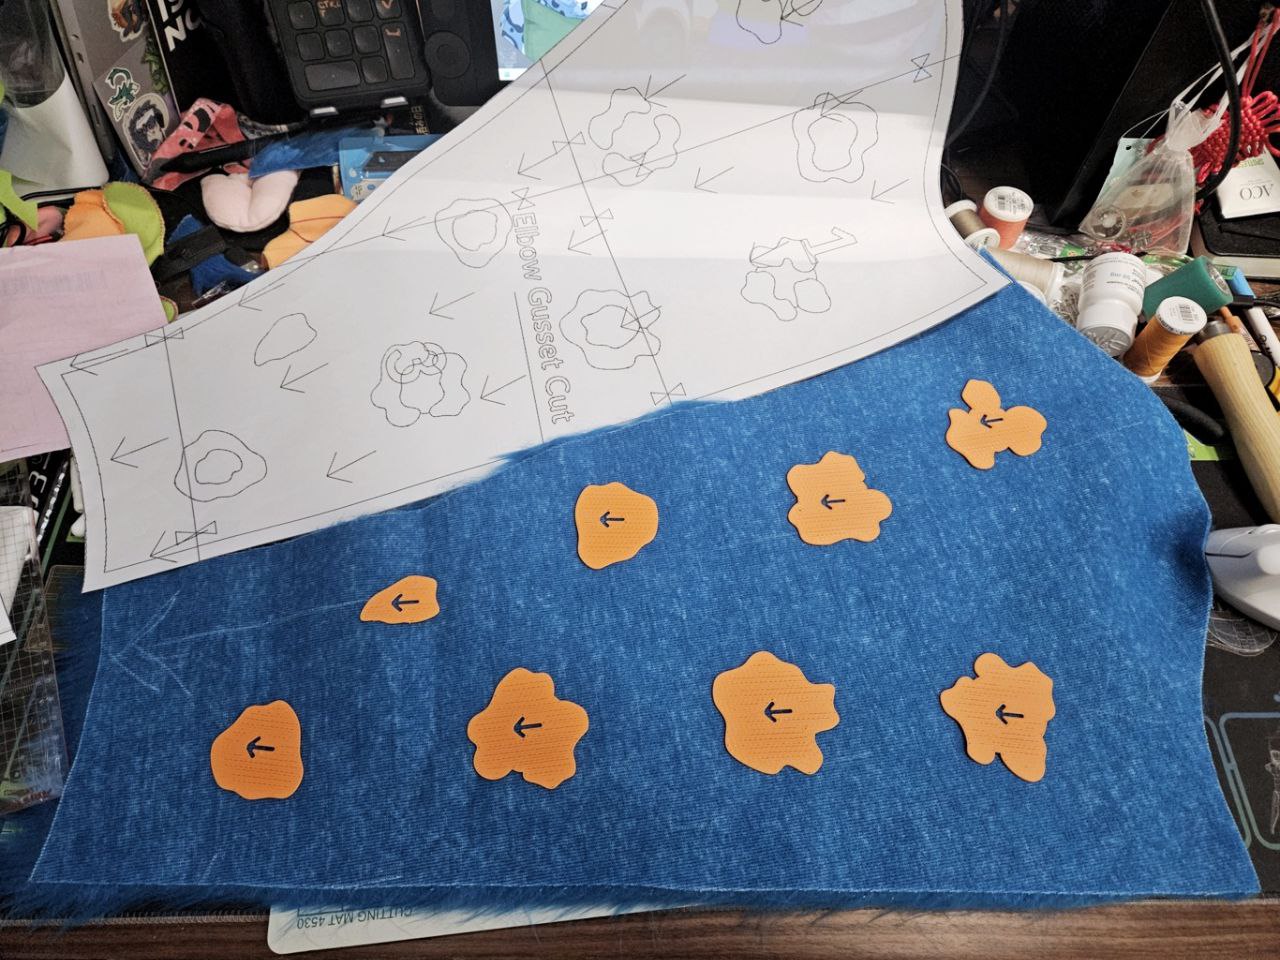
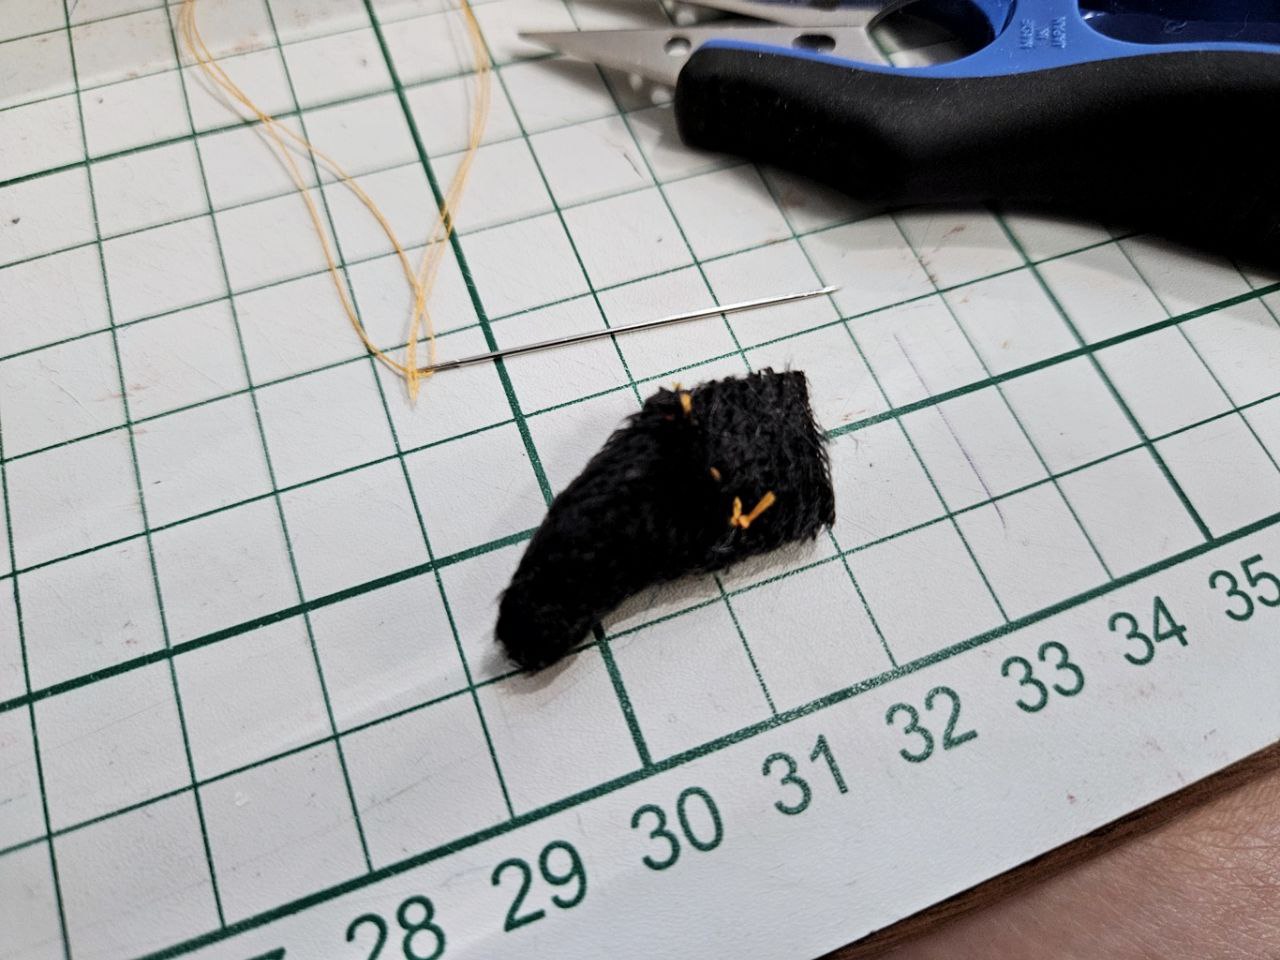
I found it quite difficult to mark out the pattern on faux fur, and tried 3d printing the pattern. This worked a treat! The prints are very stiff, so it pushes down over the faux fur (and minky!) pretty evenly, making it easy to run a fabric marker around them.
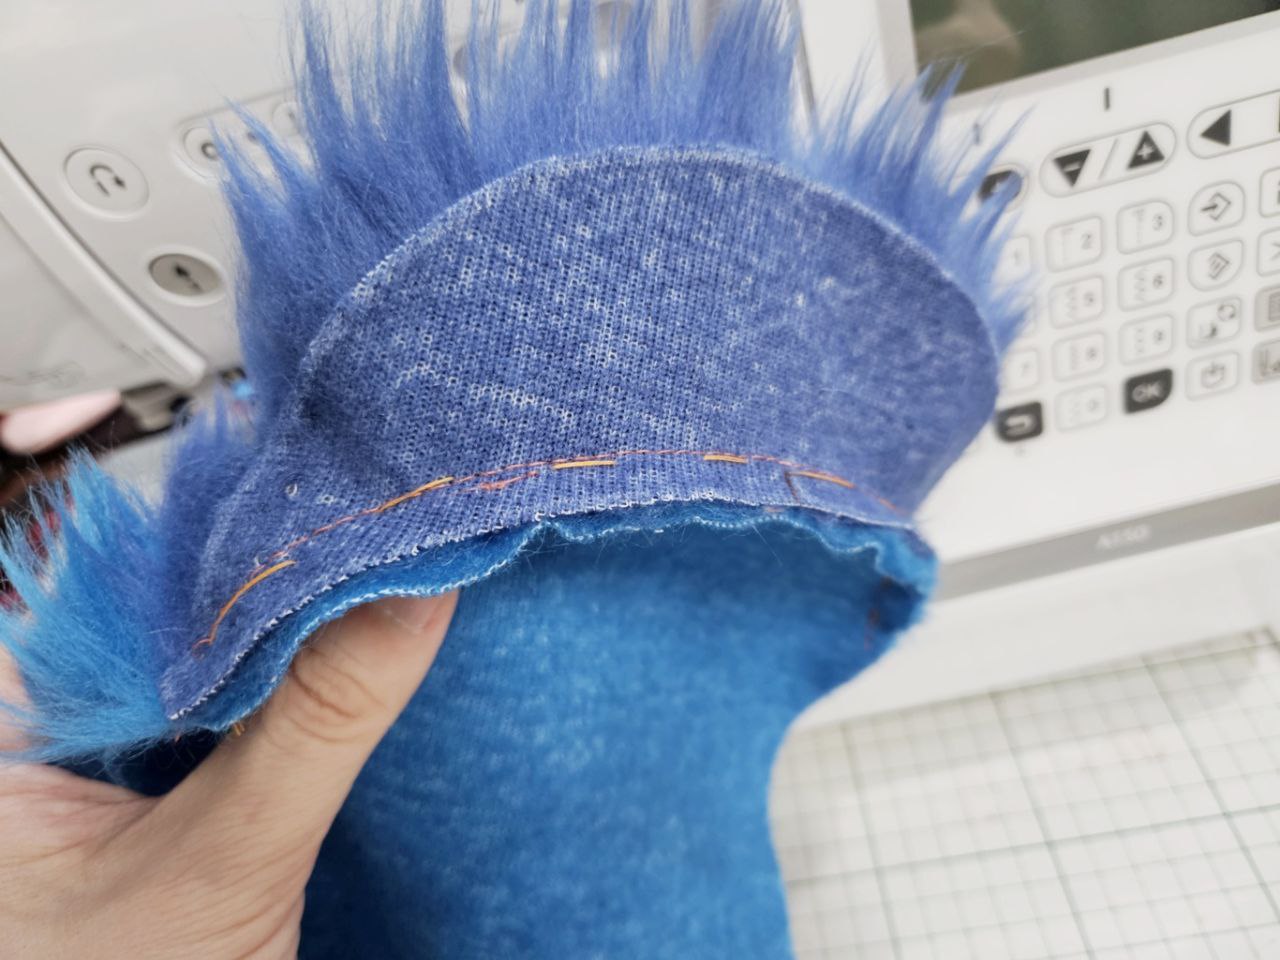
Another thing I did was to remove the fur from the seam allowance using the fur trimmer. I did not do this on the tail and the seams there seem pretty obvious. I'll likely take the tail apart, remove the fur and re-stitch
That data is then sent onwards to generate the preview.
I think the rosettes could be smaller, but I am already feeling very weary given how much hand sewing this is going to need.
Rest of the day I was jumping between various things, cut out the orange stripe around my tail, then thought I'd start on the hand paws.
Not much to say for the stripe, I just marked the fur with a fabric marker then used a penknife to cut the backing.
The paws though, I'd planned to use minky fabric. But they don't match at all to the rest of the white fur. After working on them for a bit I decided to skip the minky and go with faux fur.
My original plan was to use interfacing to remove the stretch in the minky, and attach the pads to the minky using a zigzag stitch, as an effect. I'll explore this idea again if using faux fur doesn't pan out.

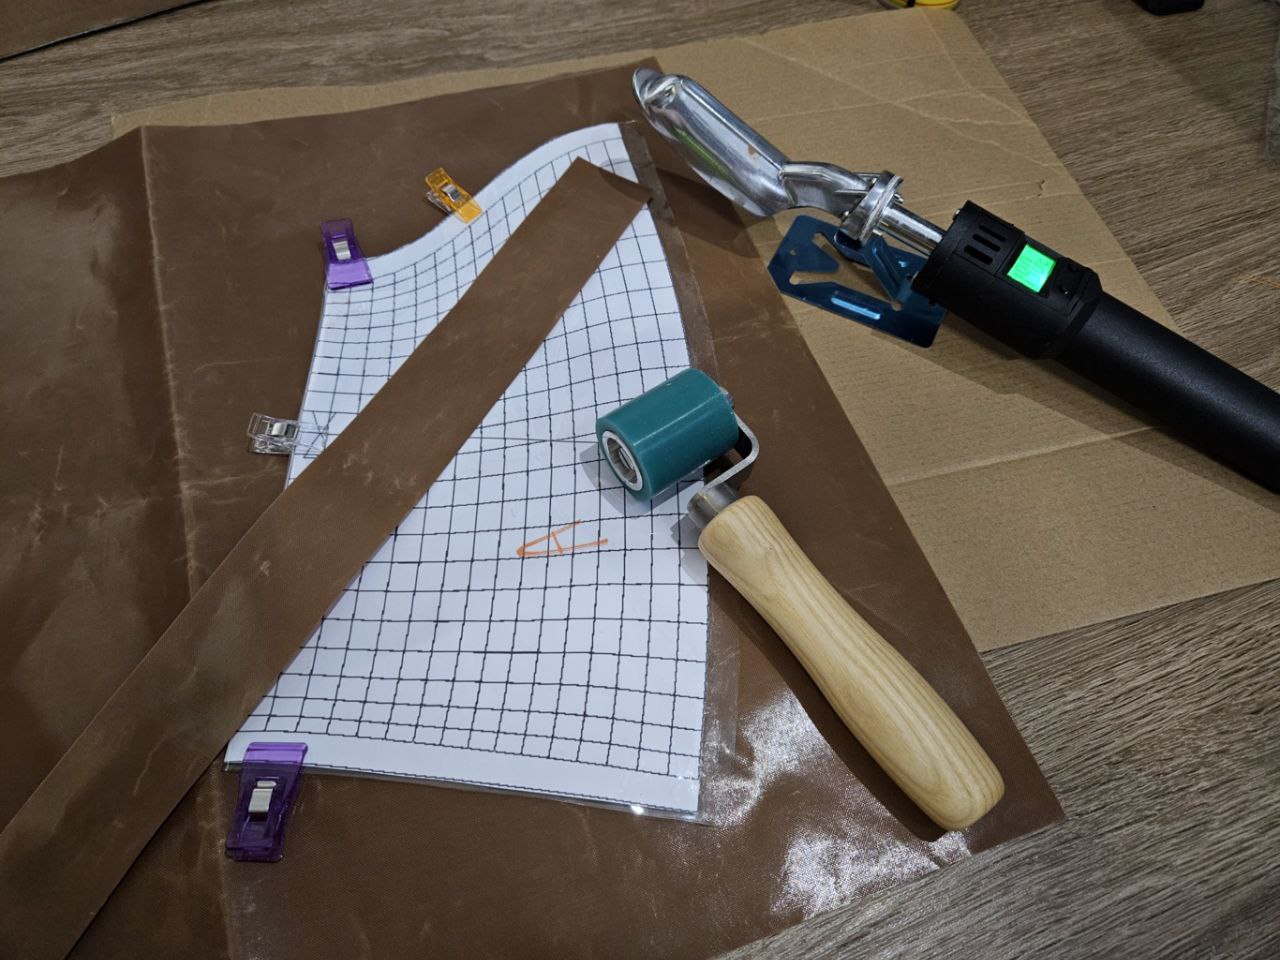
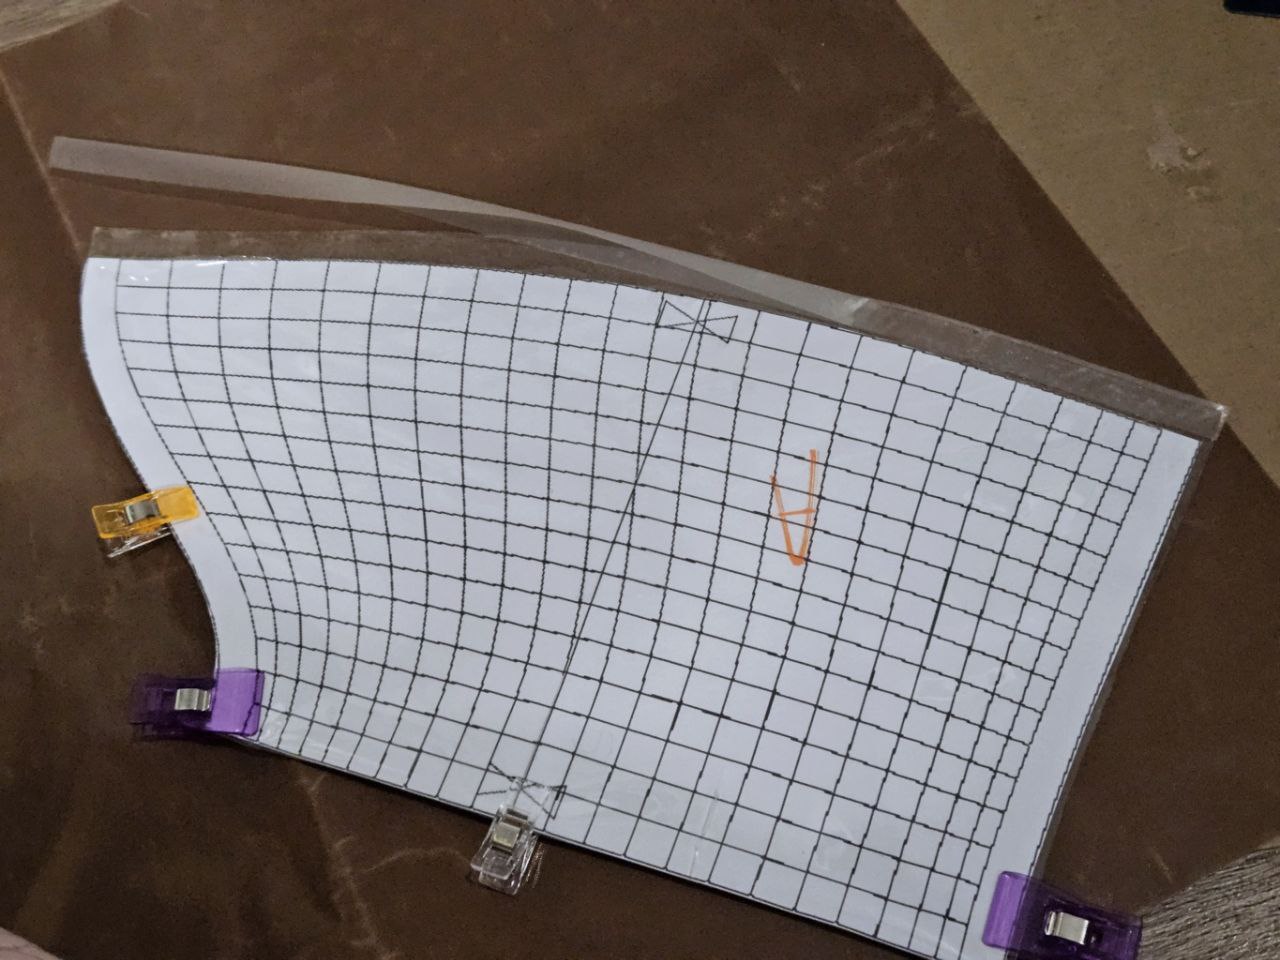
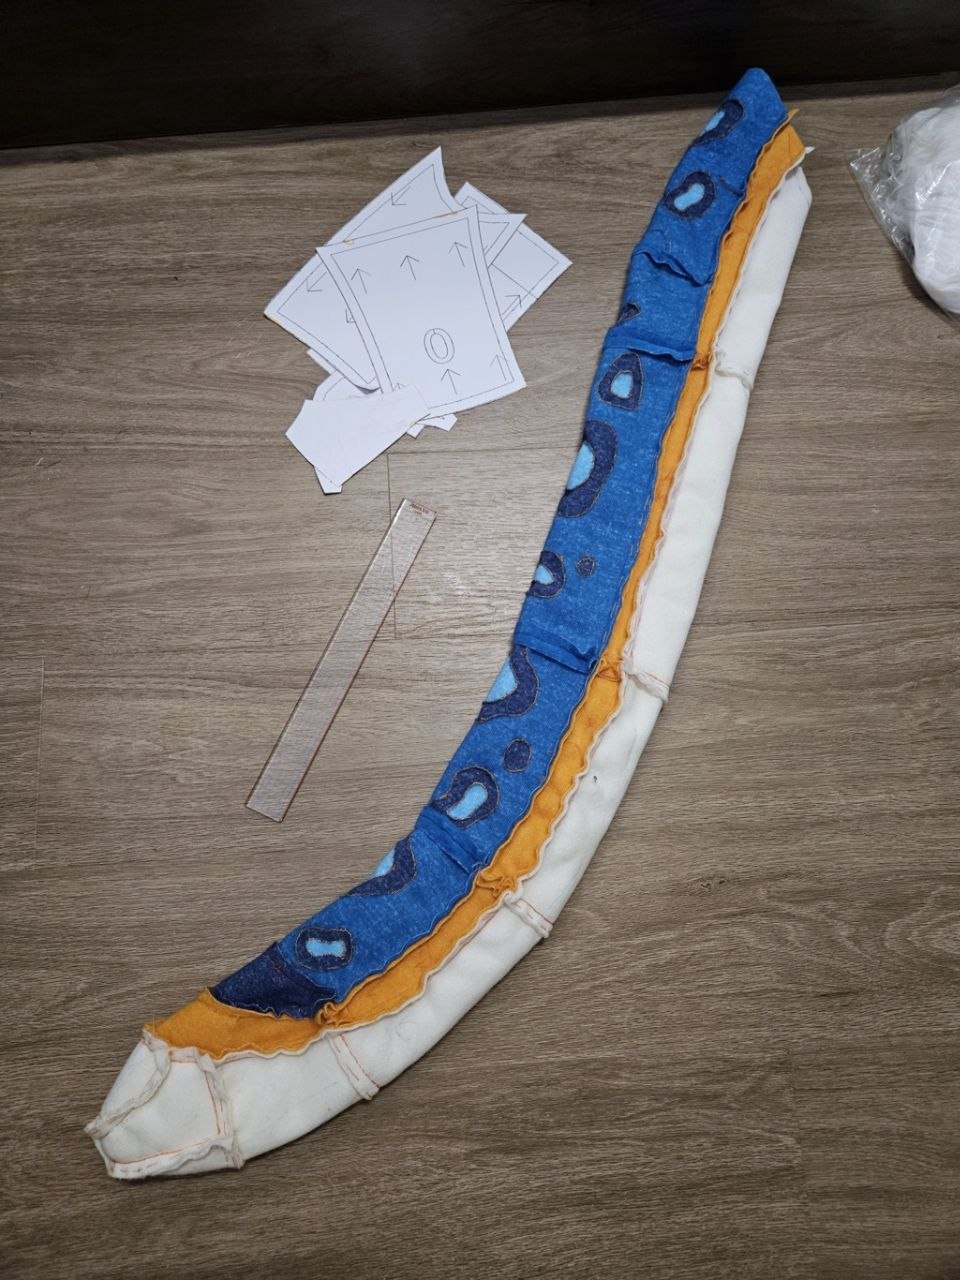
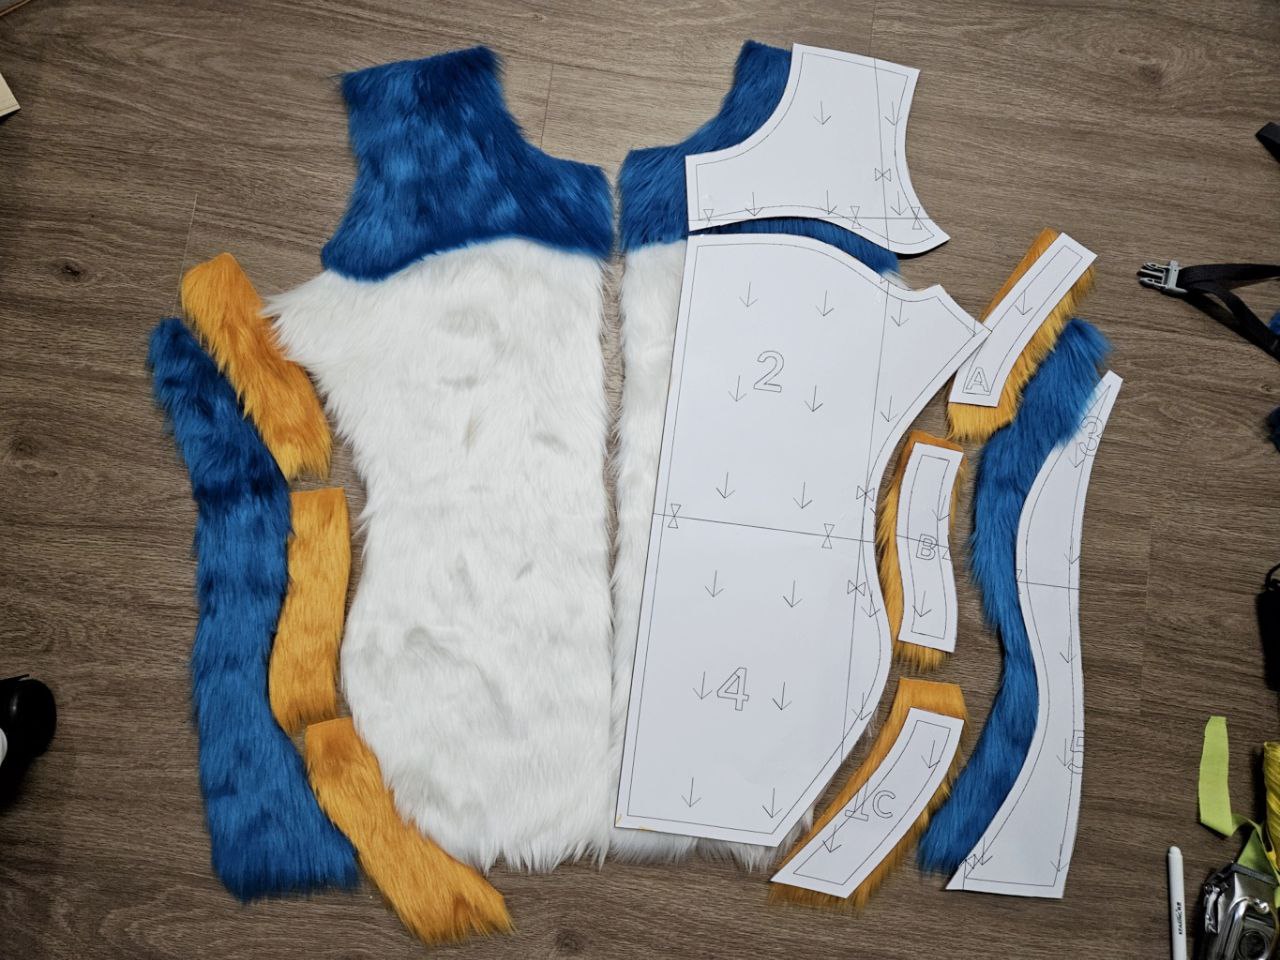
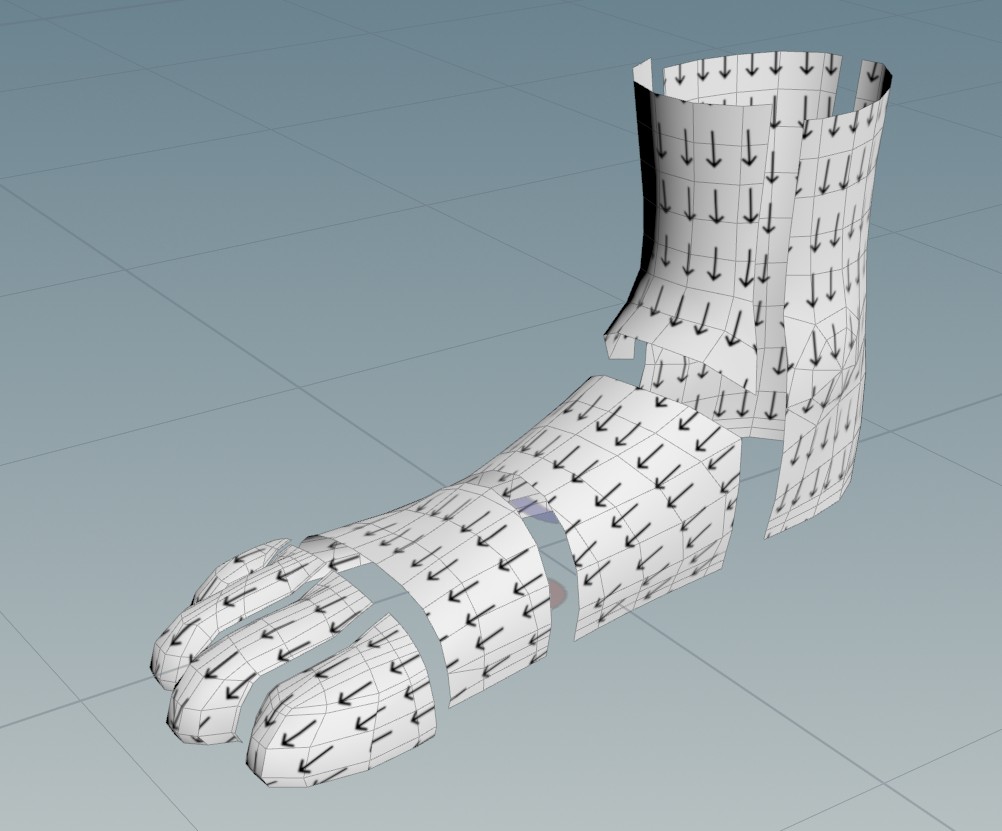
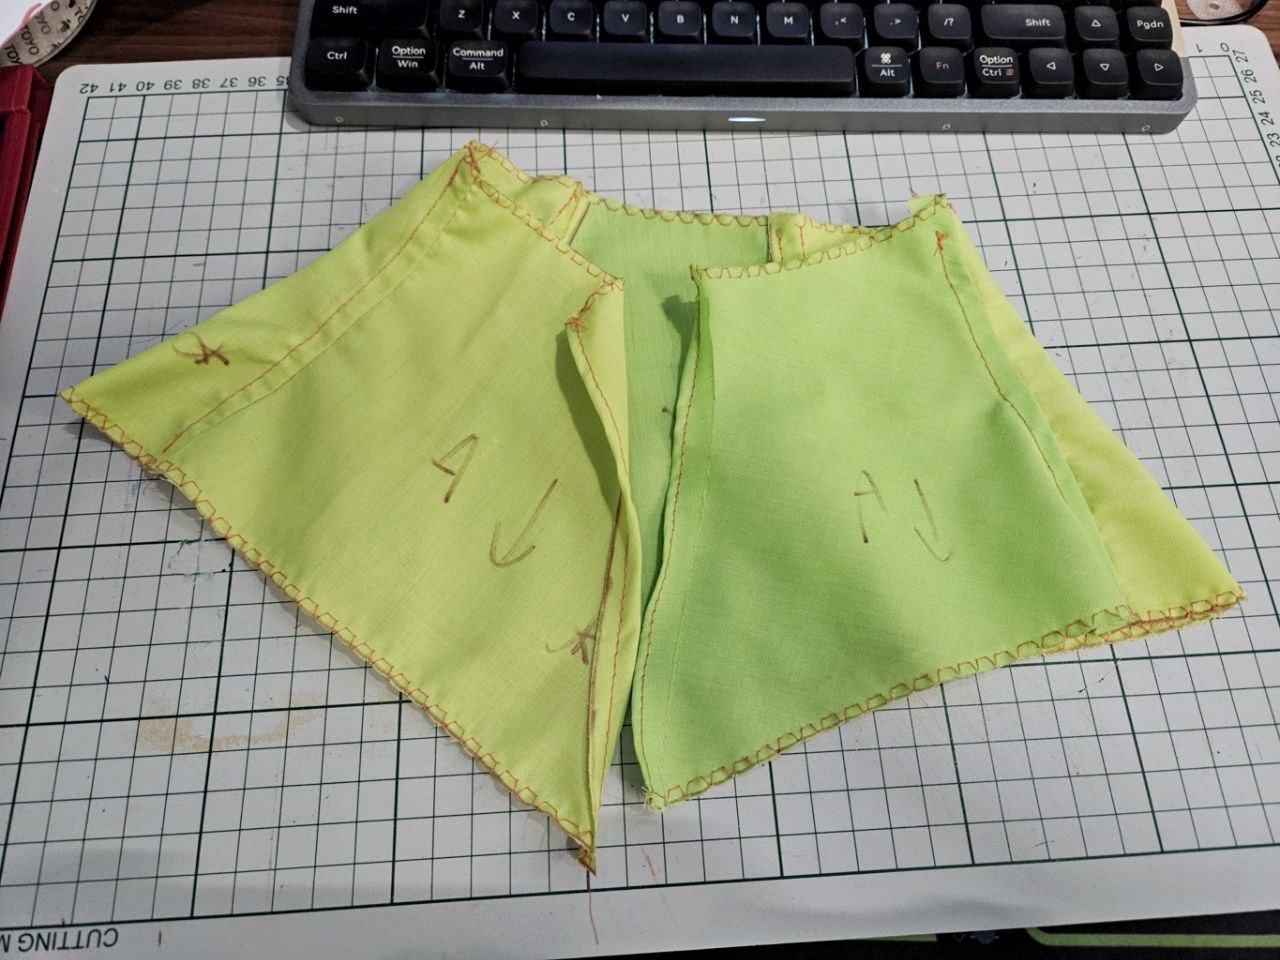
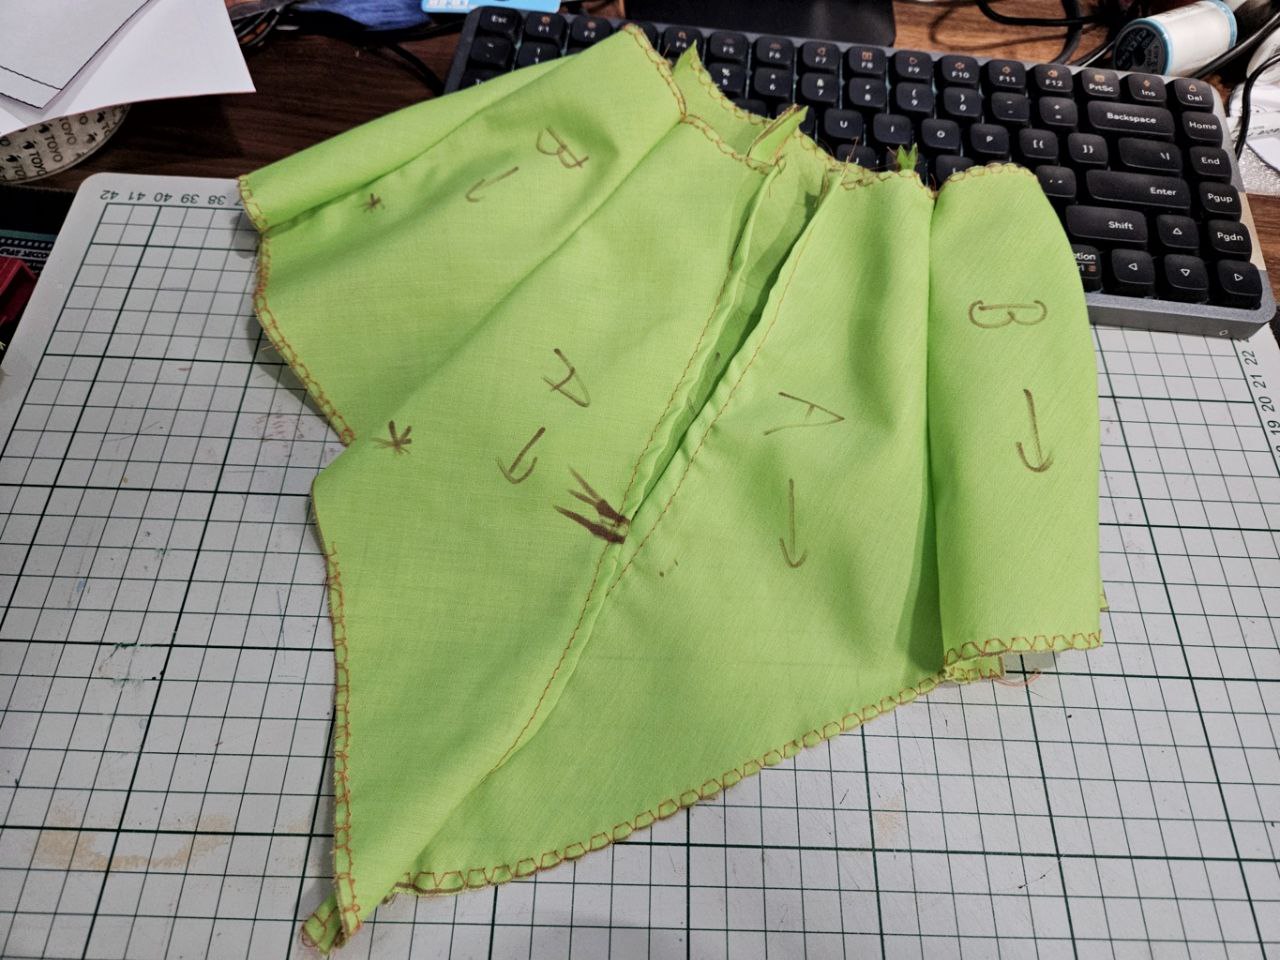
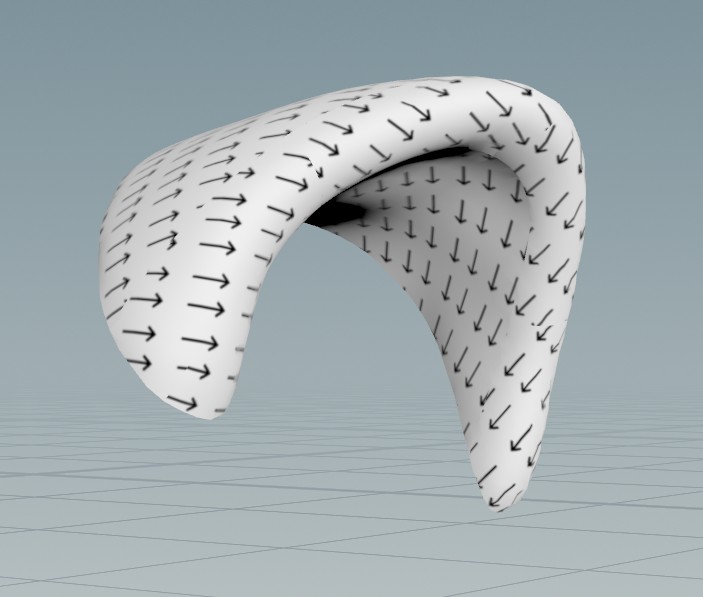
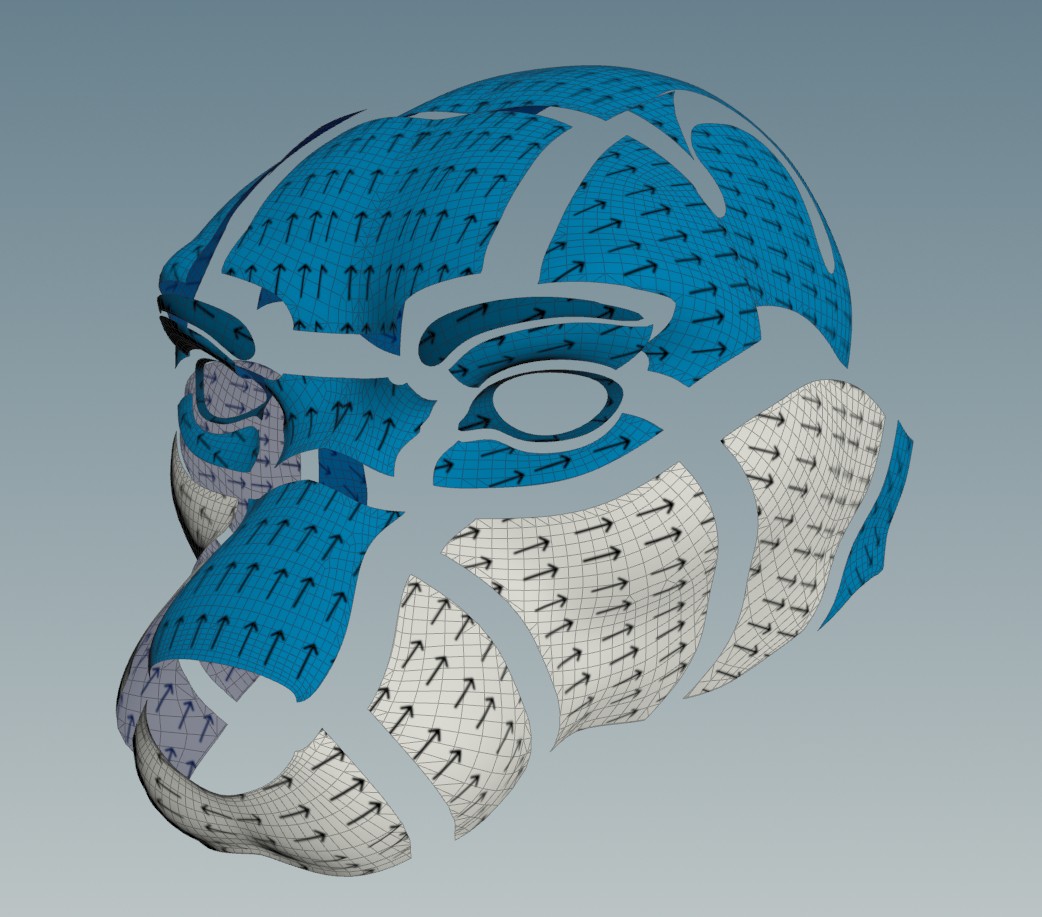
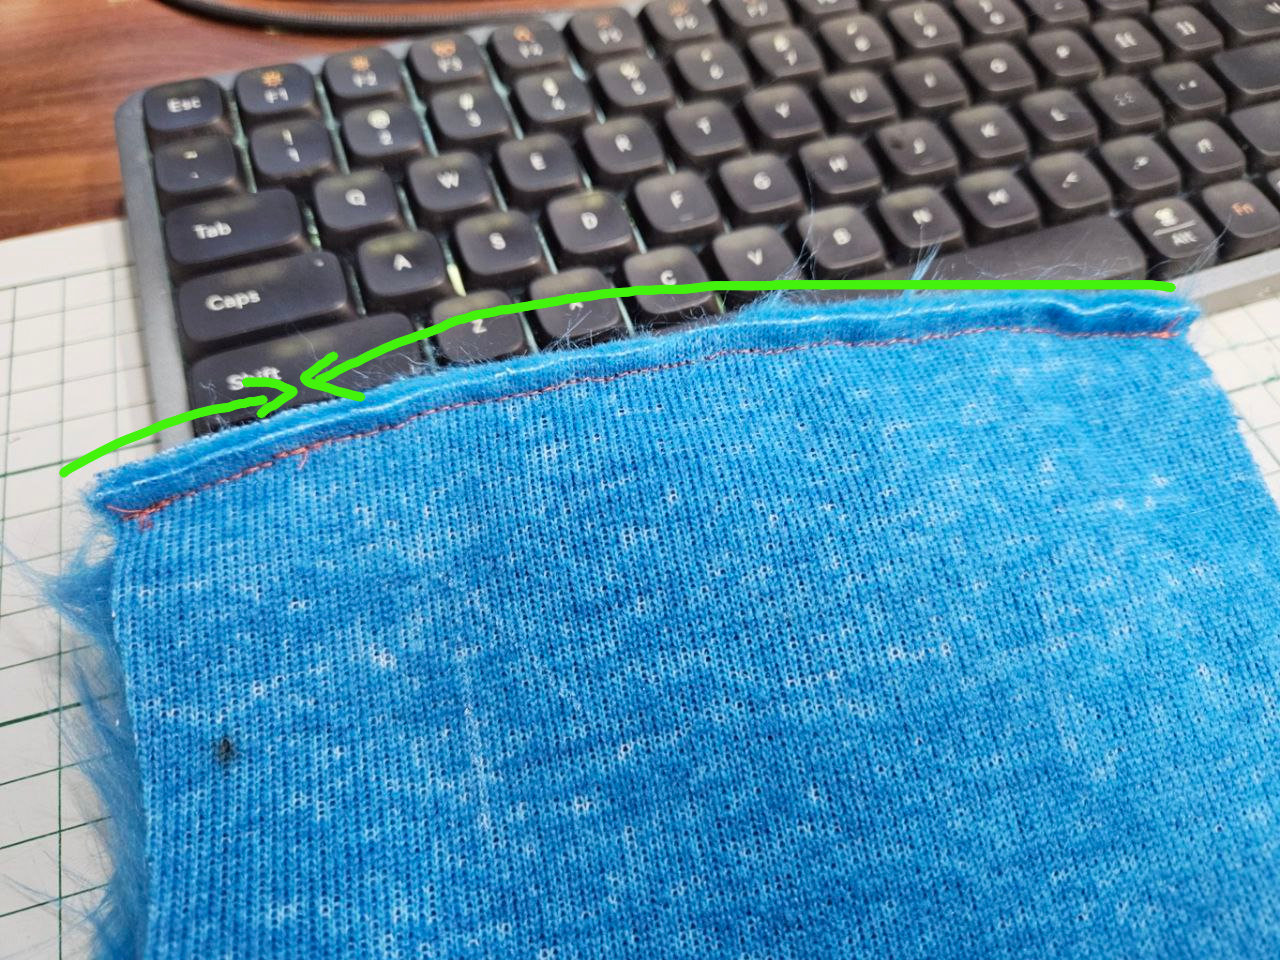
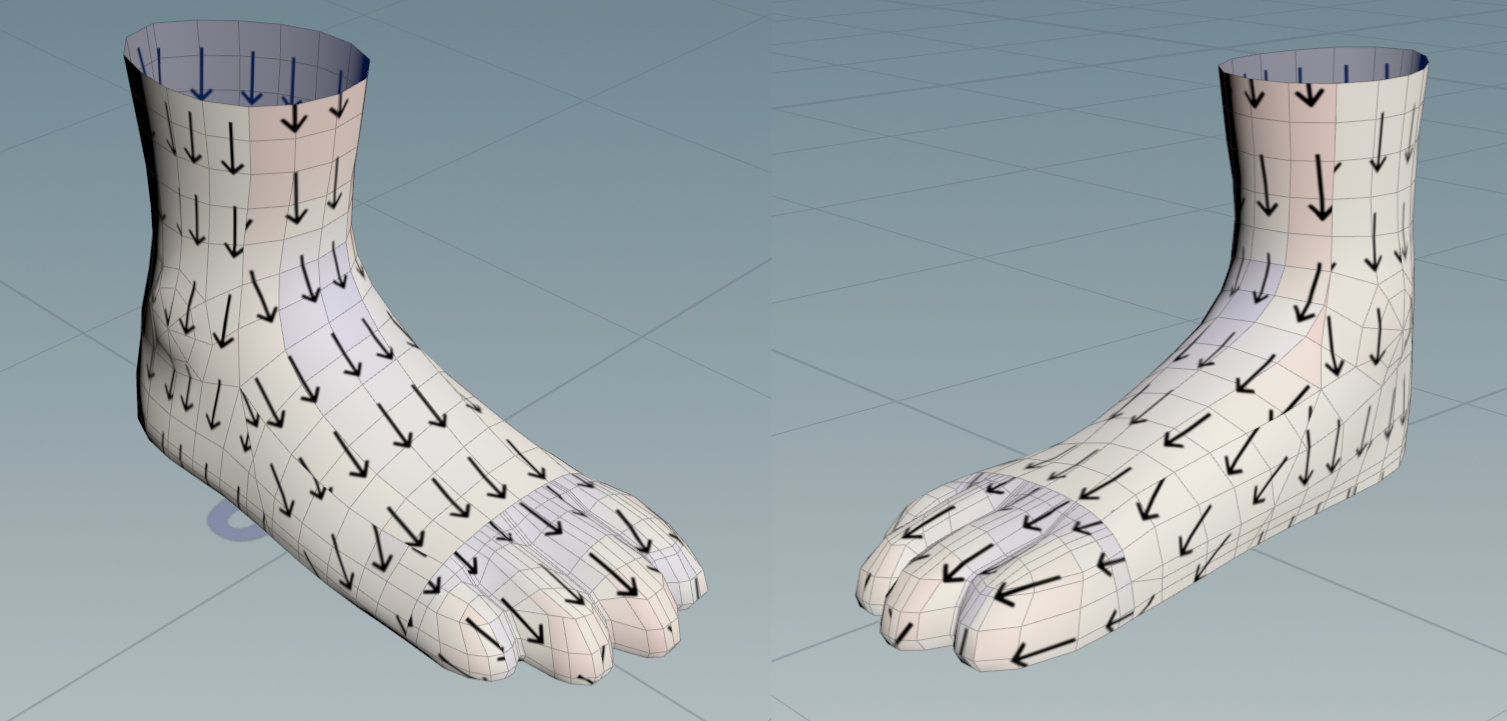
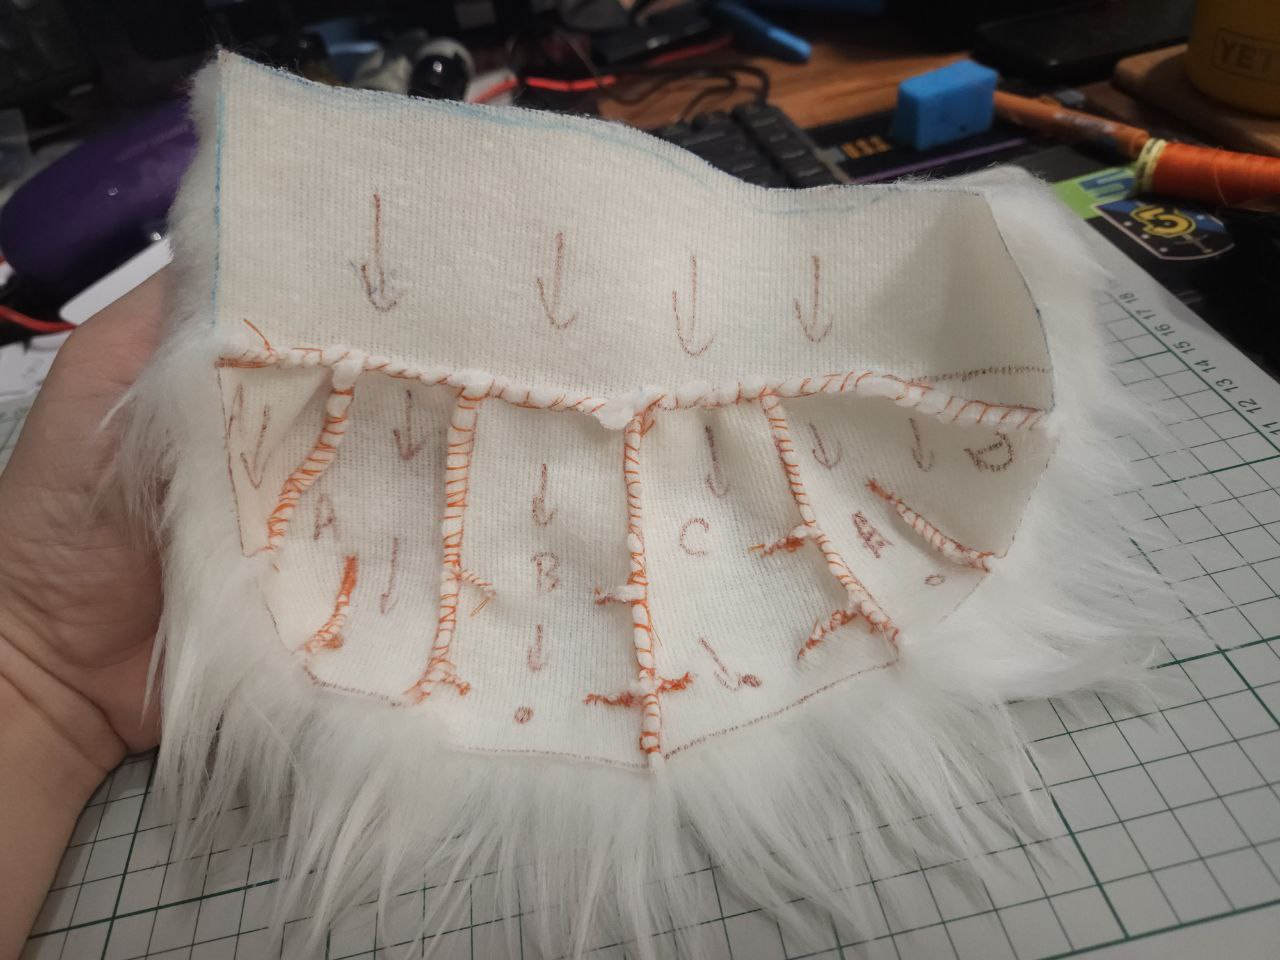
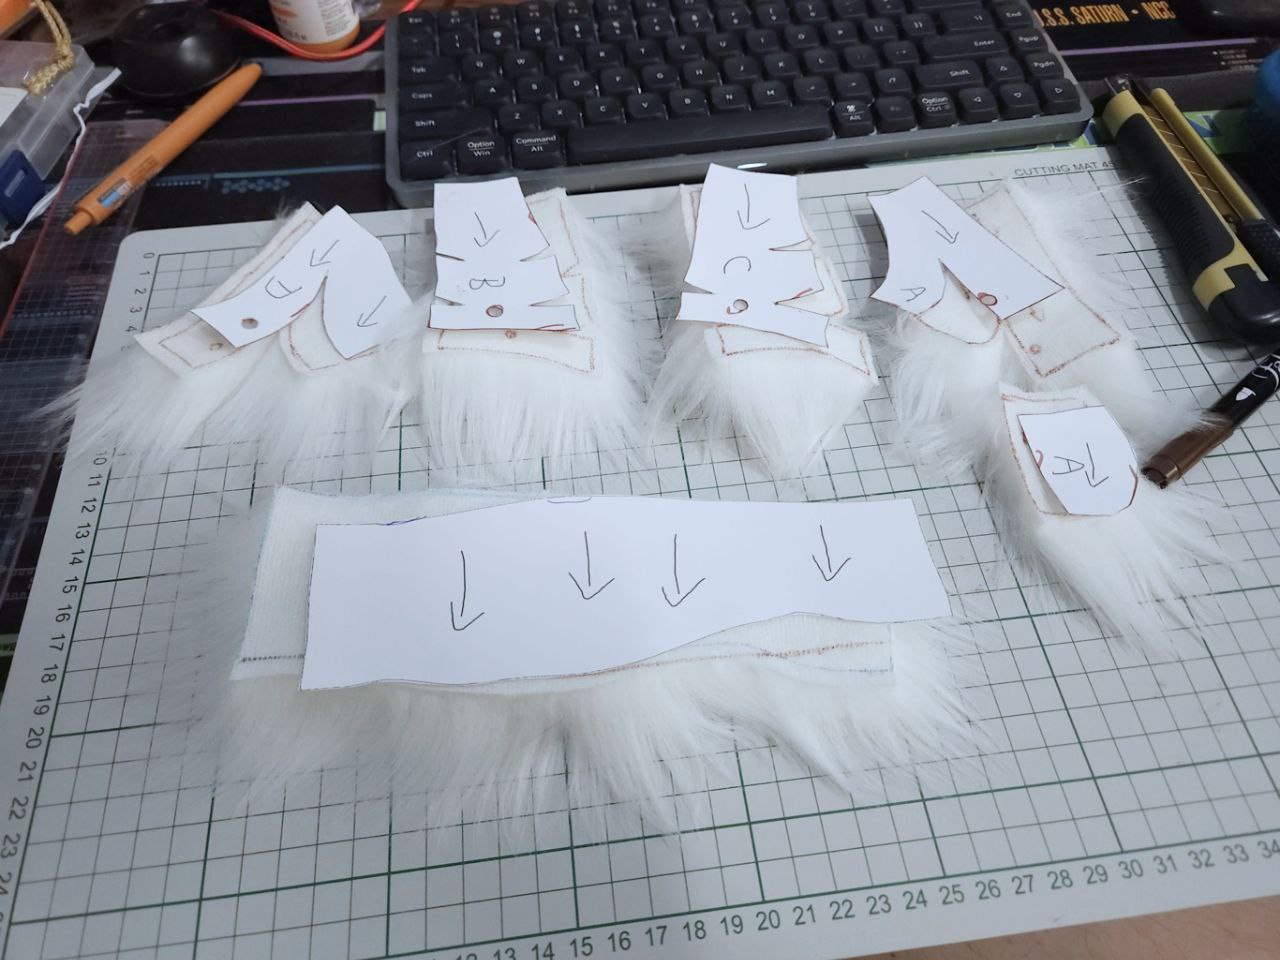
I first started out by marking the fur direction on the wrong side of the faux fur. In my original airbrush-everything project, I cut the tail along the fur, and I had to re-order so this will help making sure I don't mess up. I'd also added arrows into the pattern.
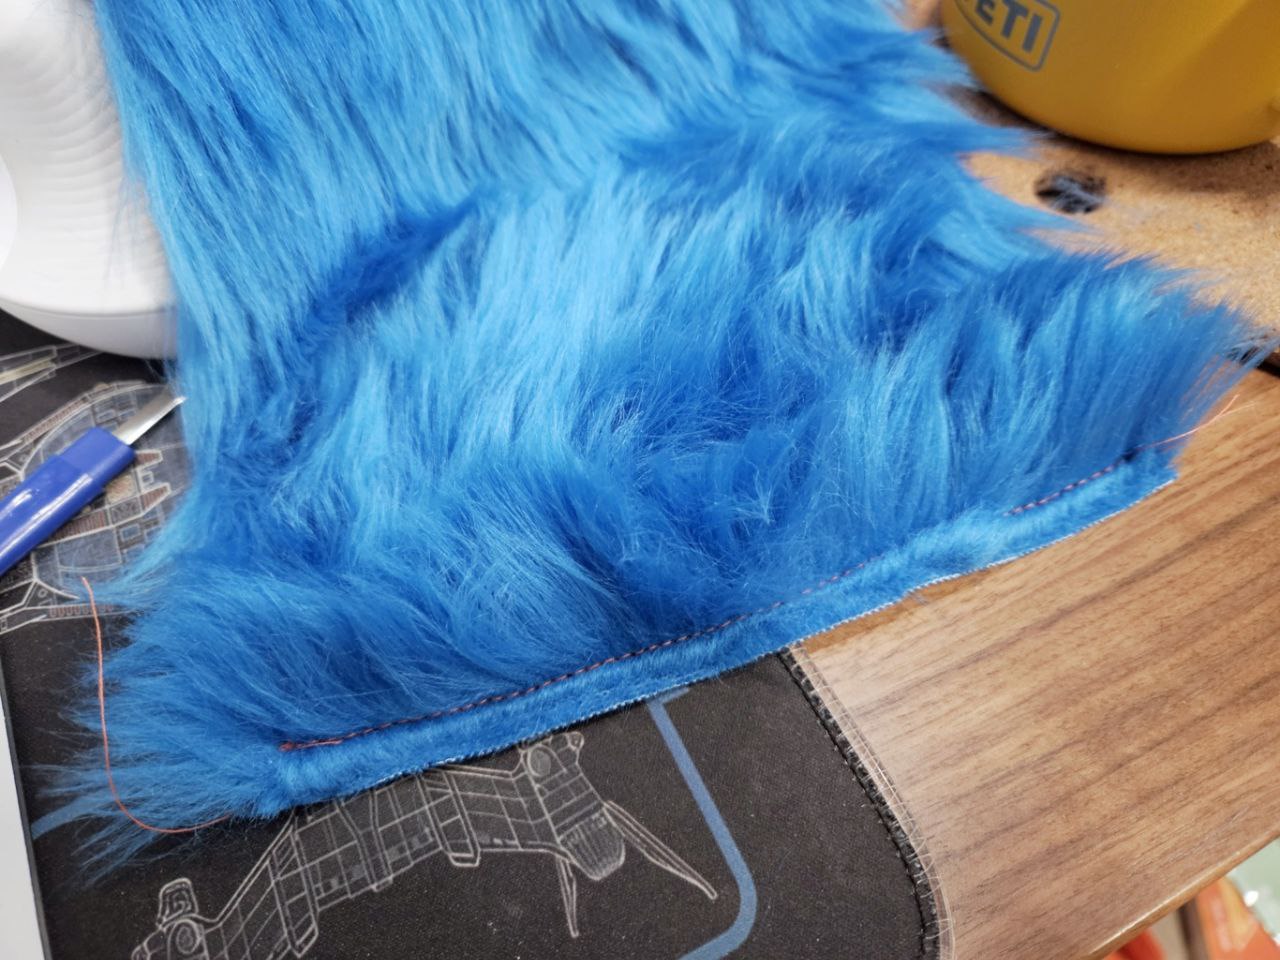
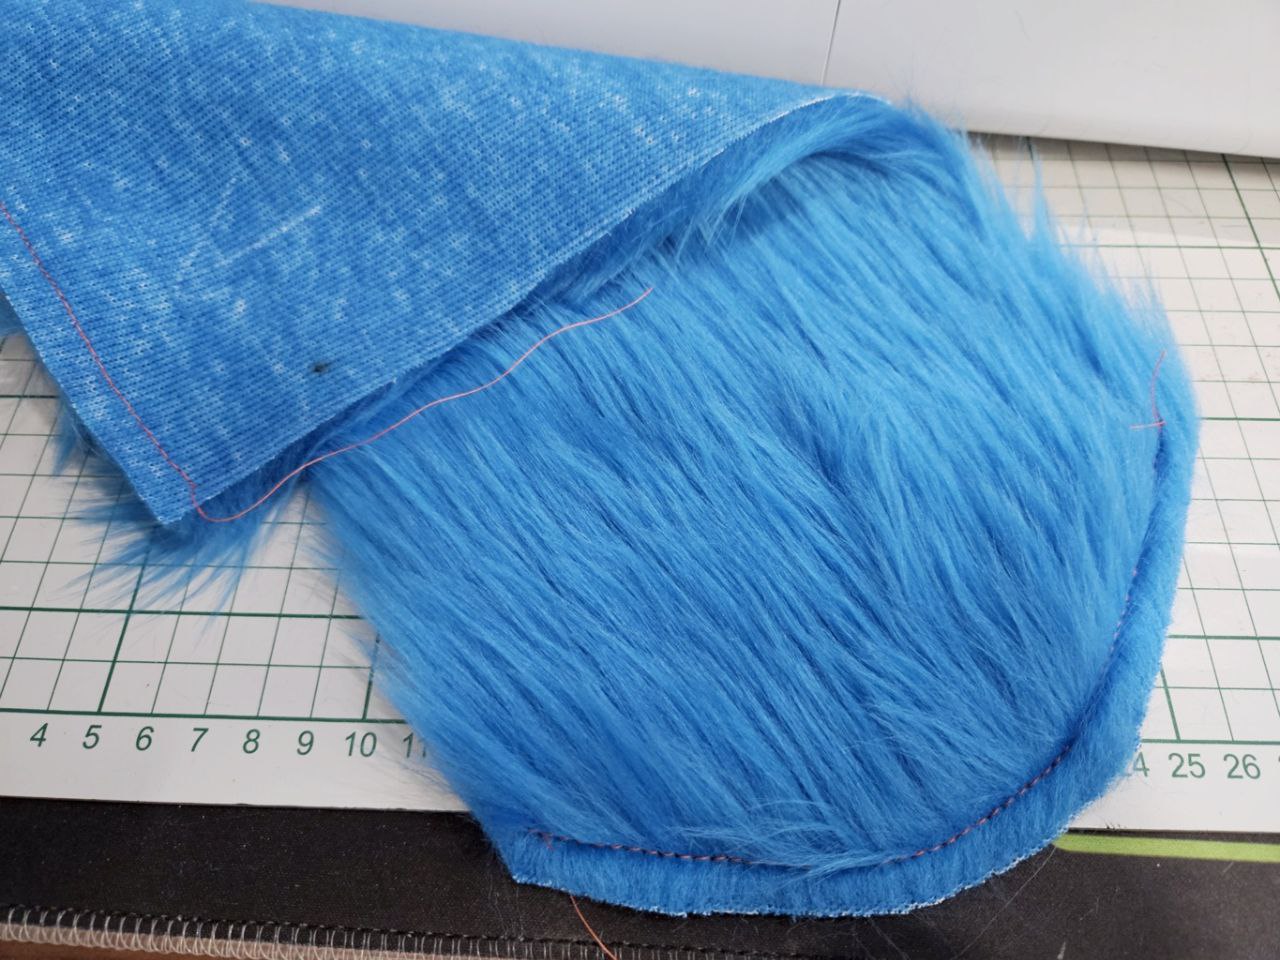
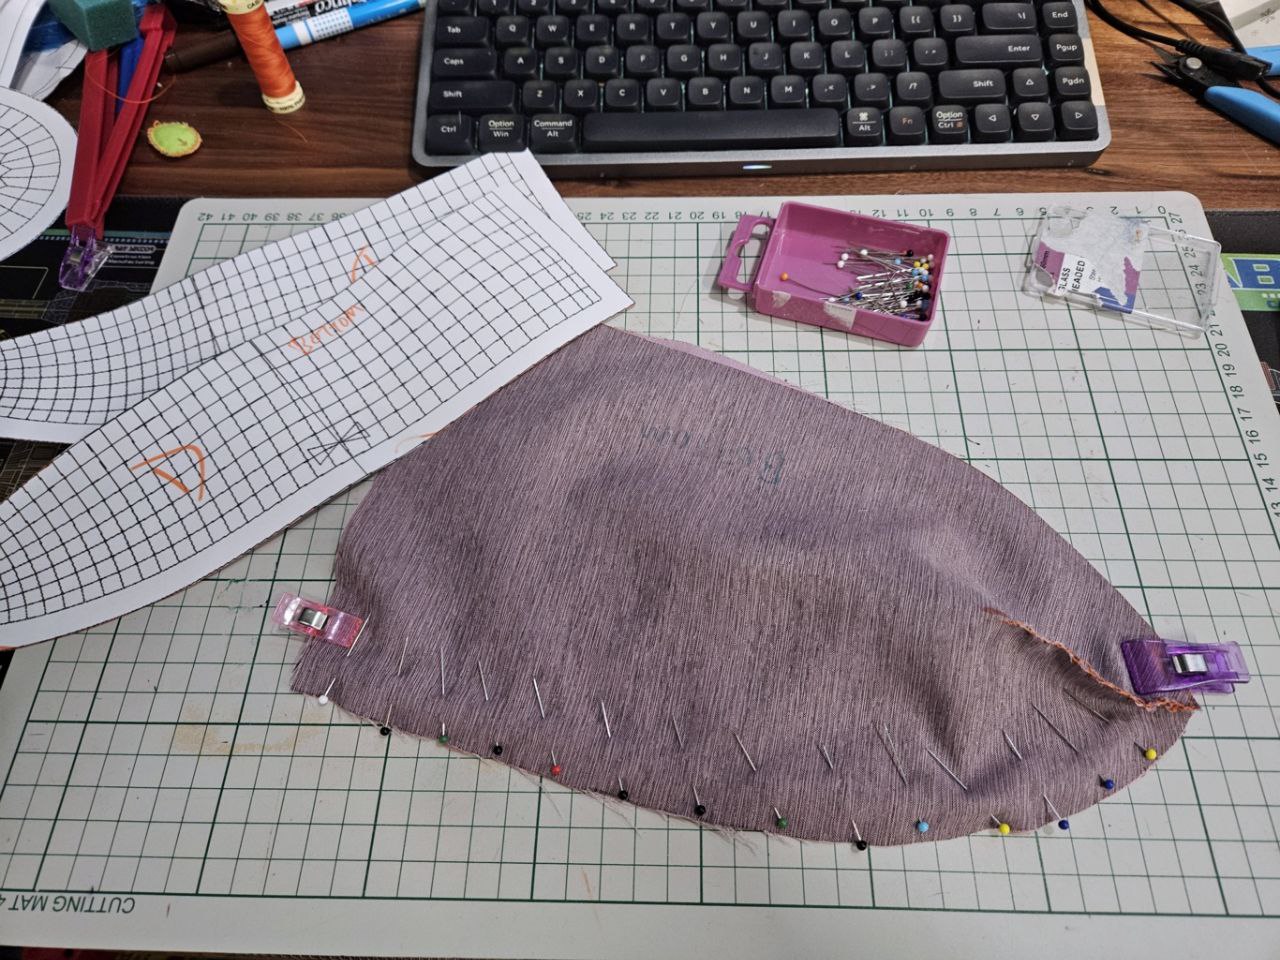
Next, I sewed a basting stitch along the edges to be sewn. This helps flatten the fur and keep it in check when sewing. I find this particularly useful when sewing edges where the direction of the fur is pointing into the edge.
The tip of the tail has a seam that has opposing curves and was a pain to sew. I tried several times to align it and sew it but they kept getting misaligned. I think this is caused by the thickness of the fur fibers combined with a very slight stretchy backing.
I also tried sewing out from the middle of the panel to the edge instead of just one stitch, to no avail.
I gave up and hand sewed a basting stitch, and sorted out the alignment issue.
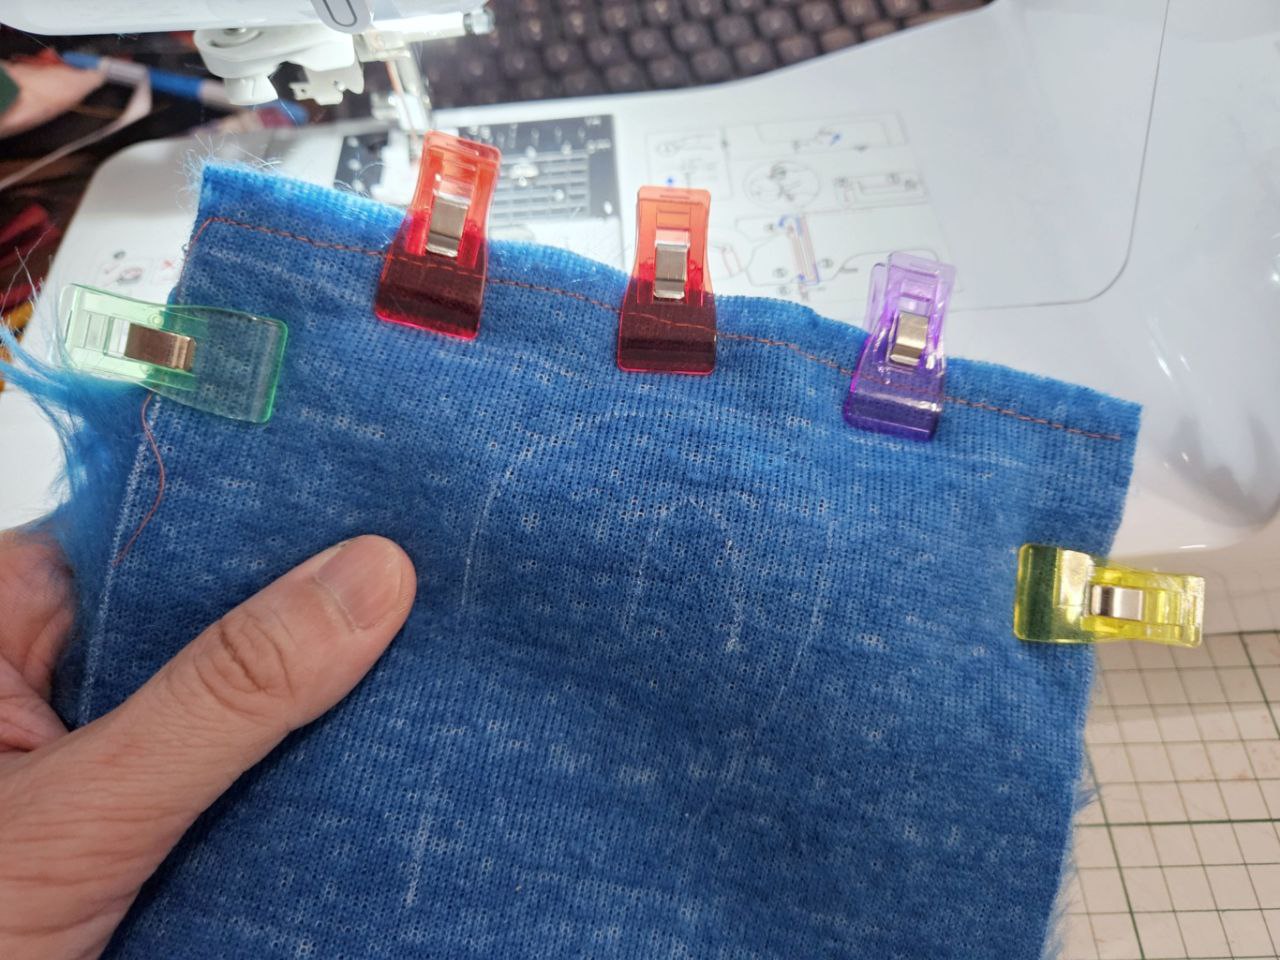
For seams with similar curves, just my usual clips did the trick. I did "lock down" one side by sewing for a few cm, then sewing from the other side.
I used a 3mm stitch length with 5mm seam allowance for these panels. I'm not sure how I want to finish these edges, I might use a blanket stitch or some overcast stitch. More for aesthetics, as I don't think faux fur frays.
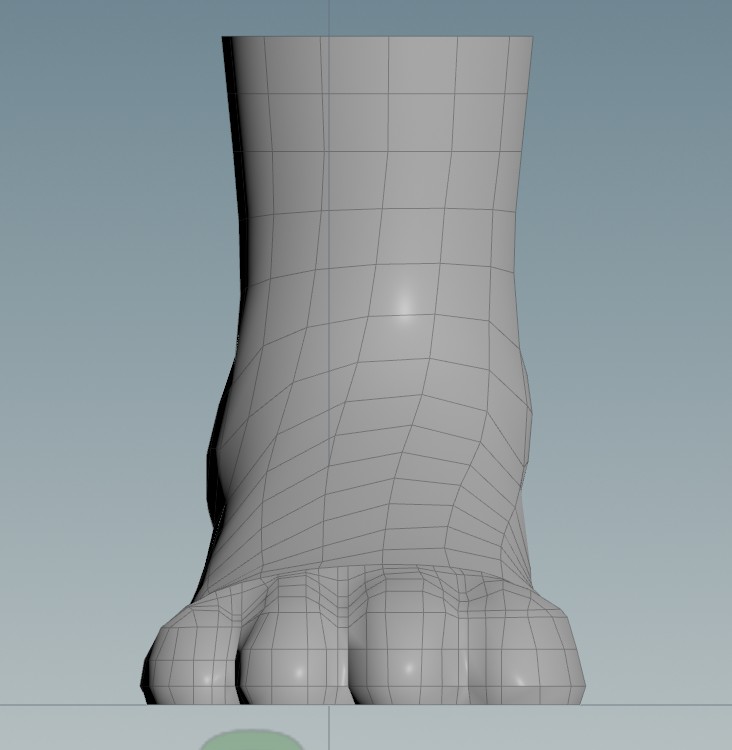
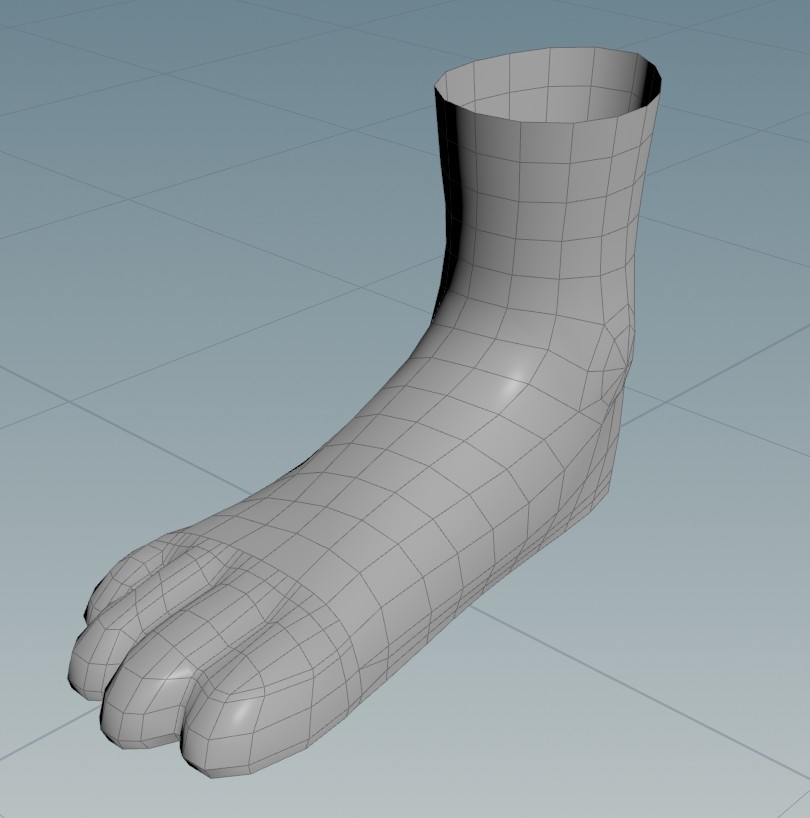
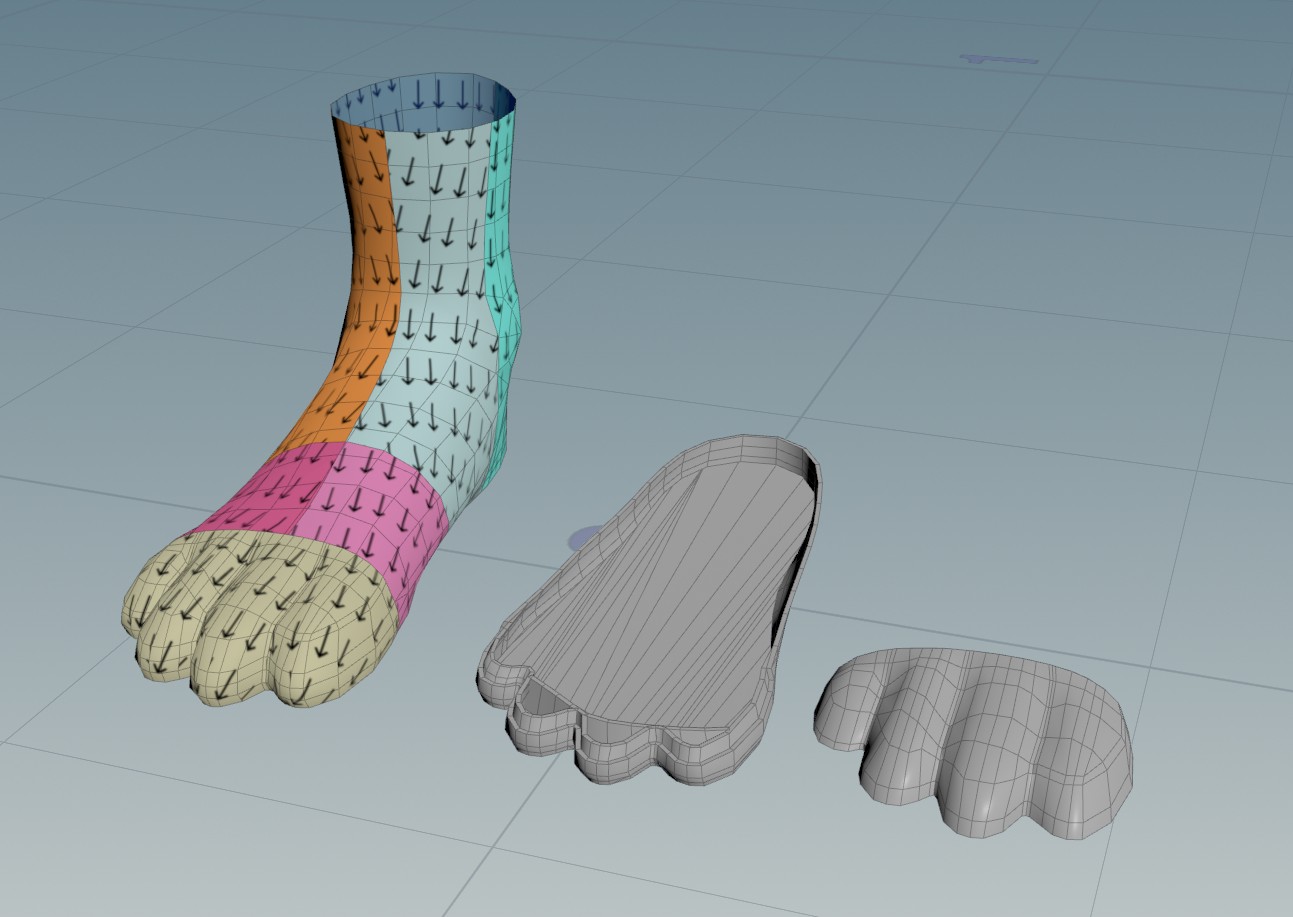
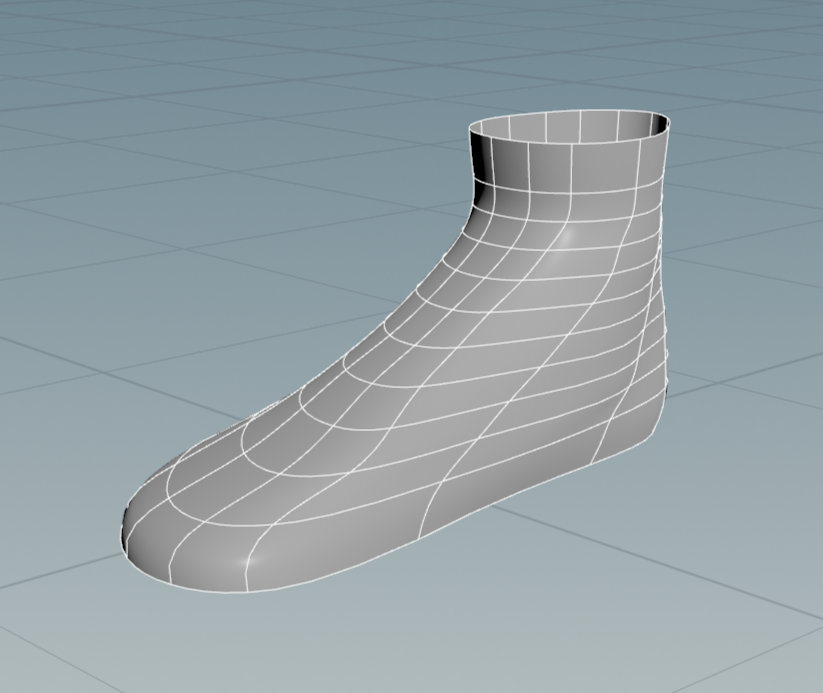
I adjusted the mesh to connect to the front paws, and made the ankle more pronounced. For this particular design, I'd actually expanded my foot mesh by 5mm, hopefully that will be enough to give enough flexibility.
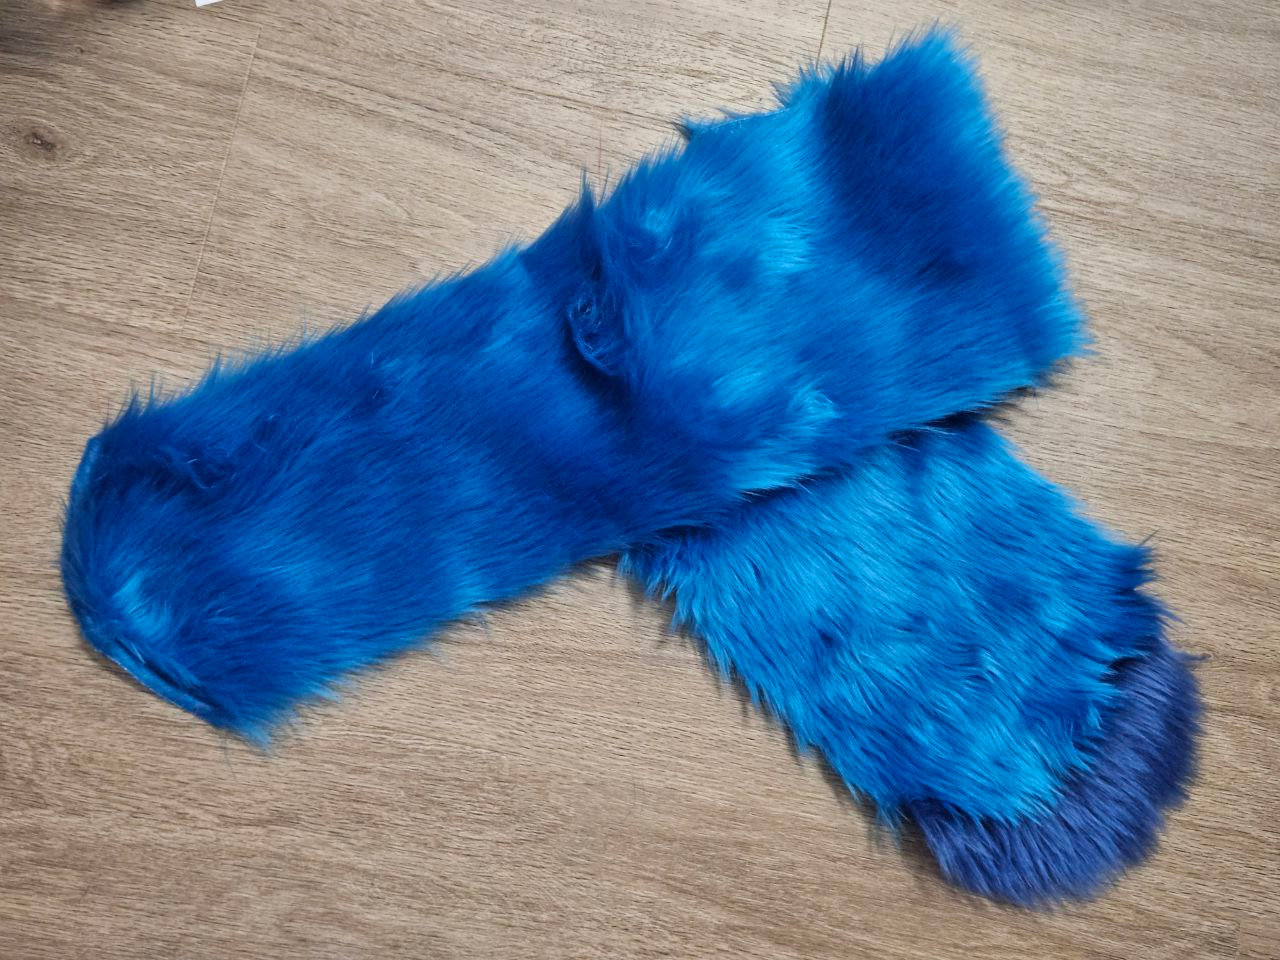
I'd been wondering what bias tape would look like to finish the raw edges of faux fur. First I used a basting stitch to hold the fur down, then stitched in the bias tape. Looks pretty good!
This could be used for say, the unfinished end of the handpaws.
I'm also wondering what piping would look like. Need to get some to try.
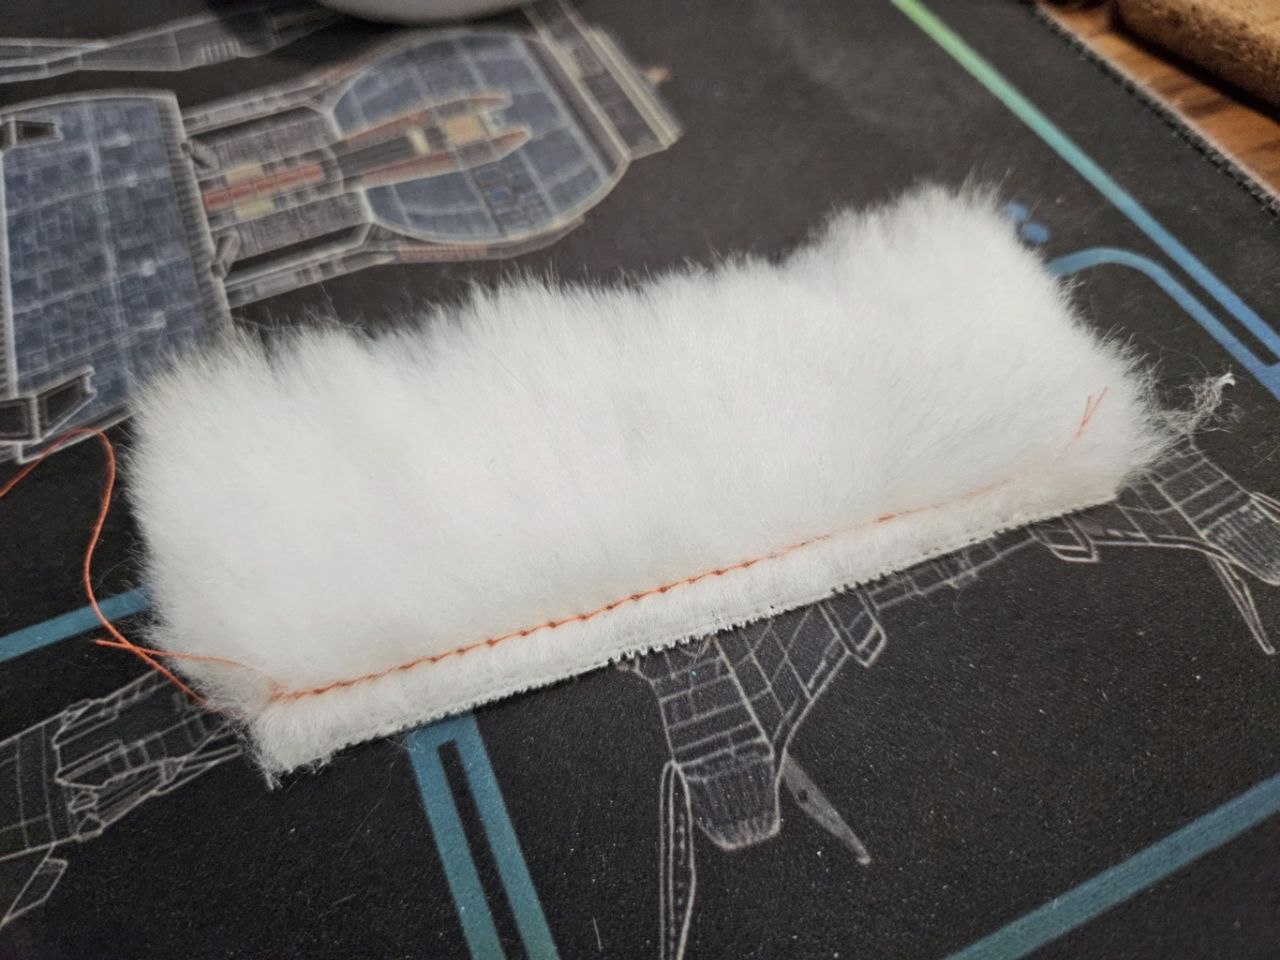
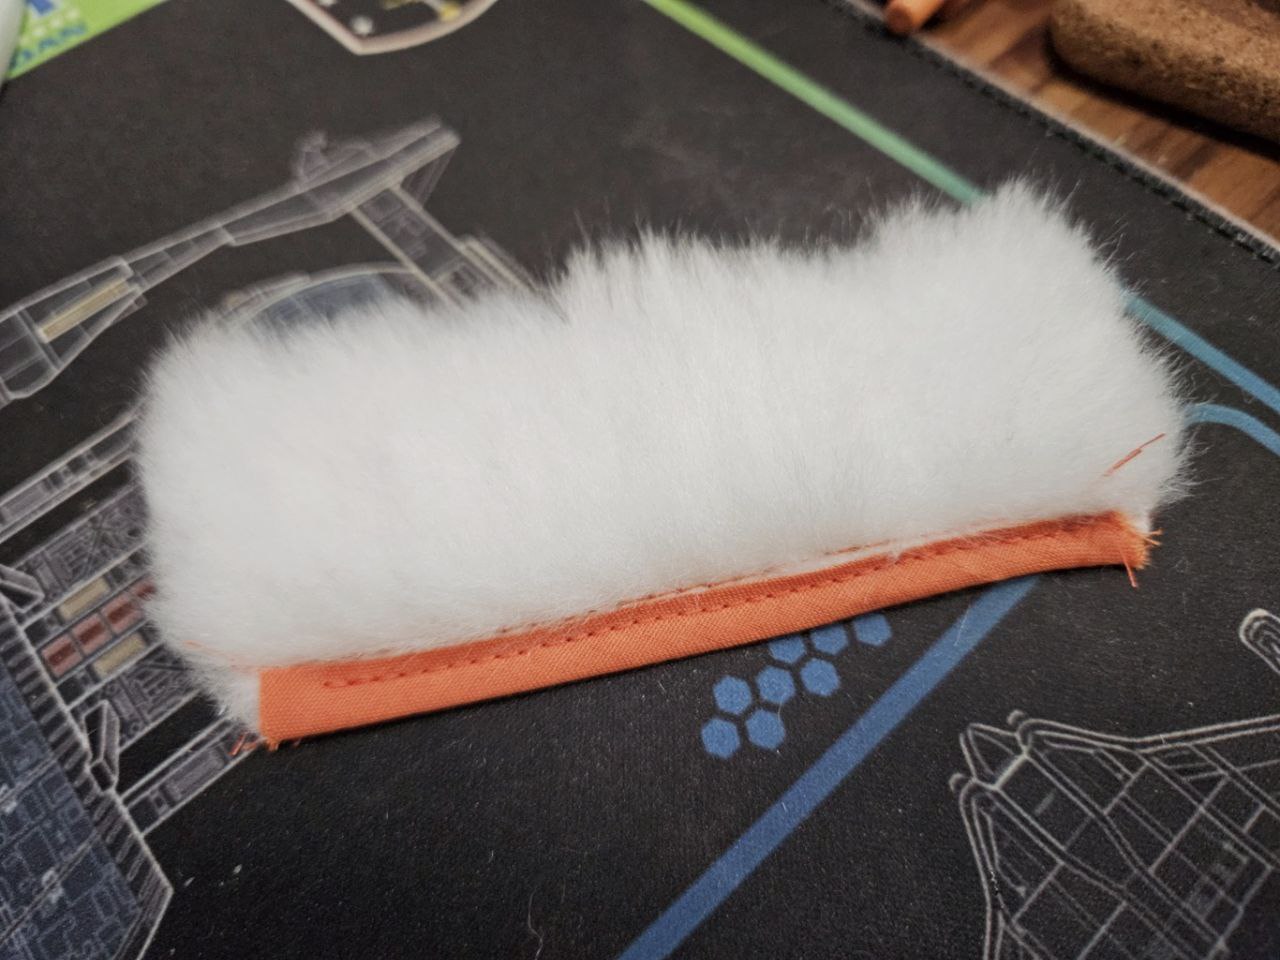
After some indecisiveness, I decided to start on the tail. This is just the backing that is used to attach to the connecting piece.

I wasn't sure if I wanted to start on this as I was wondering if I should use something more hard wearing like cordura. I decided that I'm overthinking stuff, and started on it.
I'd bought some orange cotton twill recently, so I went with that. It feels good on the the skin, and it's orange. It's very easy to work with as well. After cutting out the shape, I used an overcast stitch to prevent any frays from worsening. After, I attached some interfacing. As I'm writing this, I am wondering if my decision to not cover the entire patch with interfacing was a bad idea. The plain cloth will be attached to the faux fur.
Only way to really know is actual combat fursuiting.
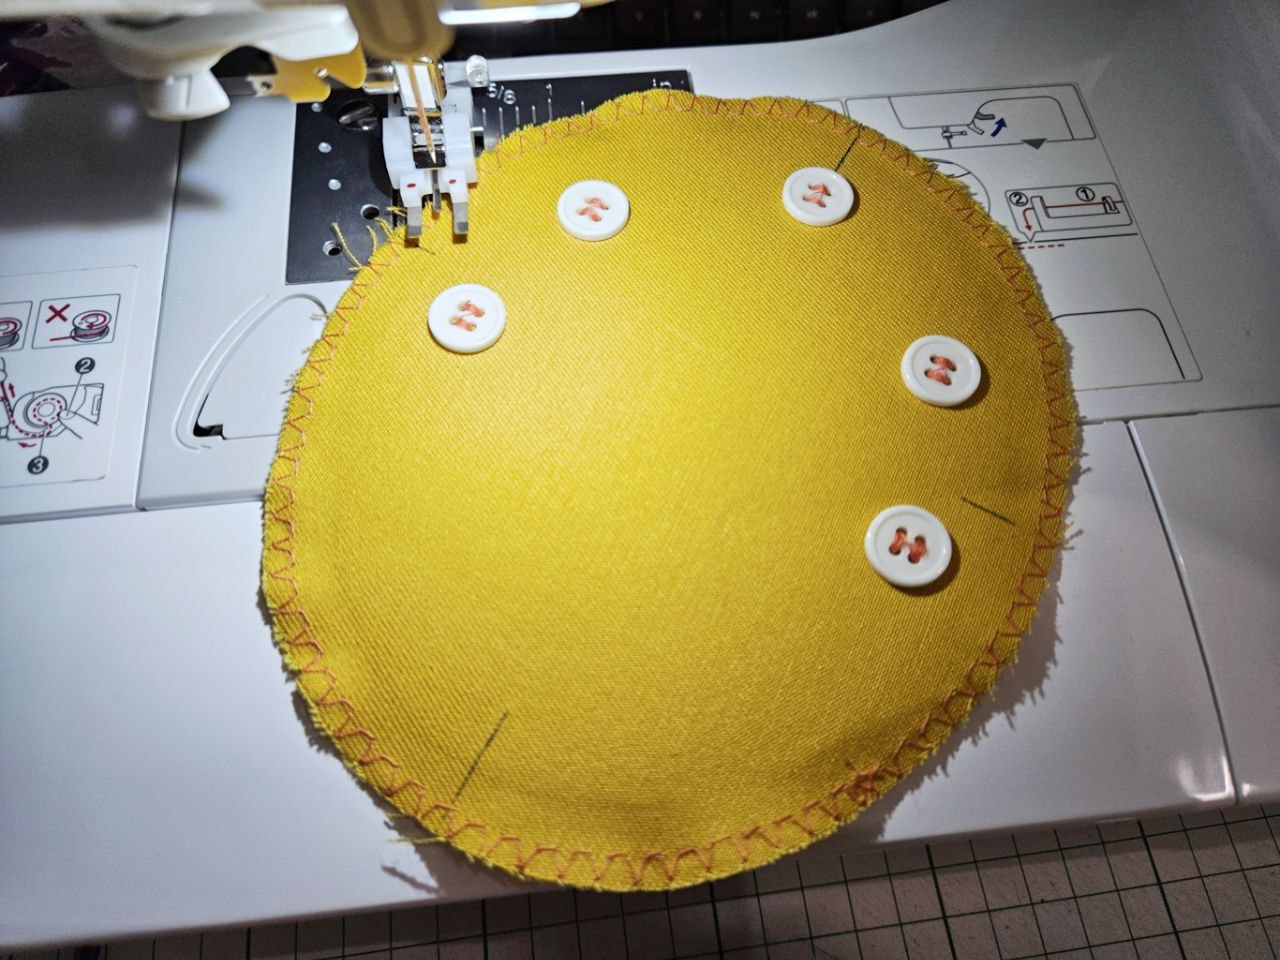
I did several tests with the button foot, and was not very happy with how loose the button was stitched to the cloth. This has plagued me before and I looked up the internet to no avail. I thought I'd read the manual again, and realized that there is a shank on the button foot that needs to pulled back when sewing normal buttons.
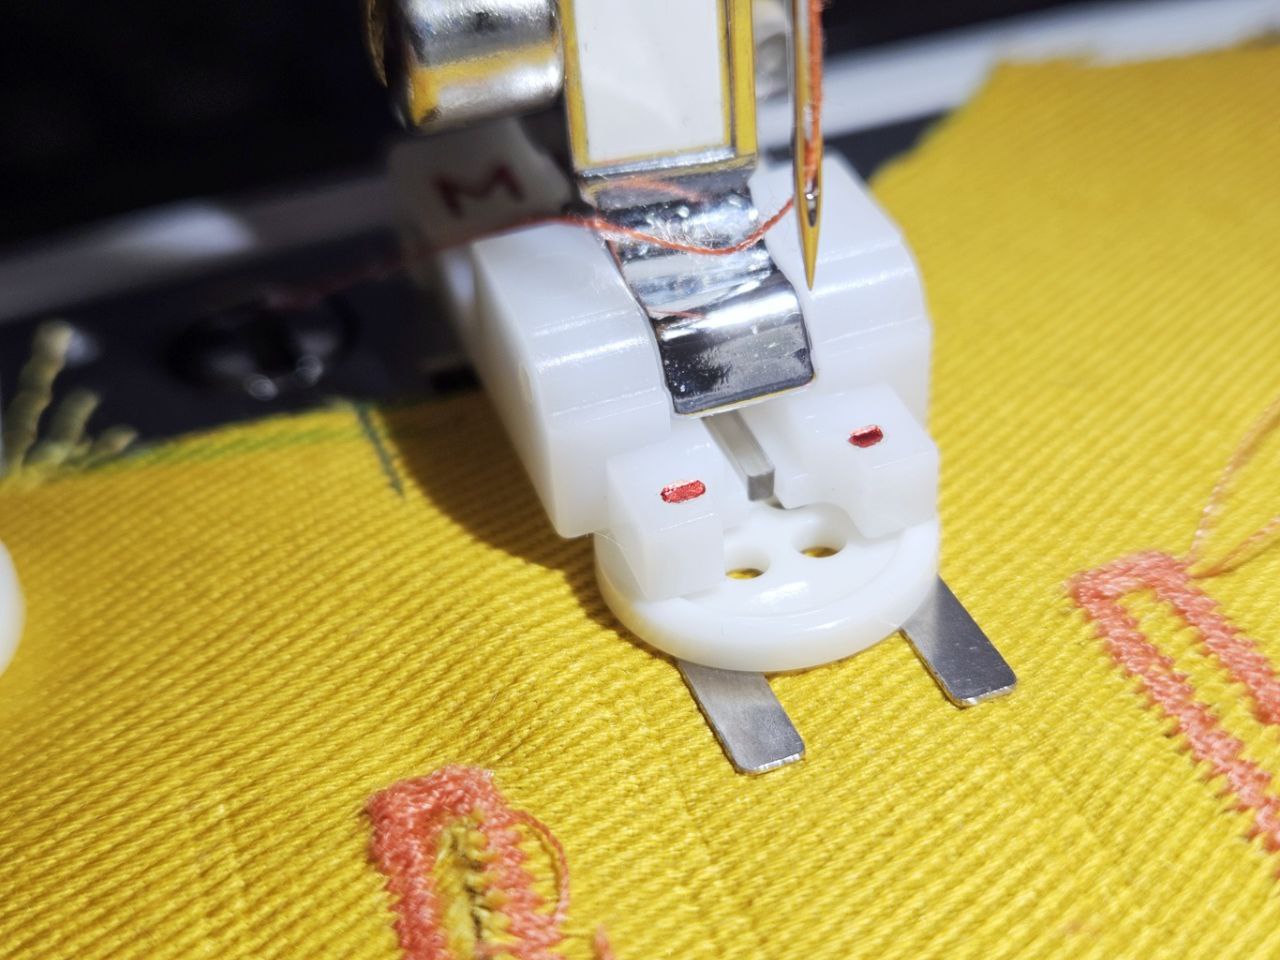
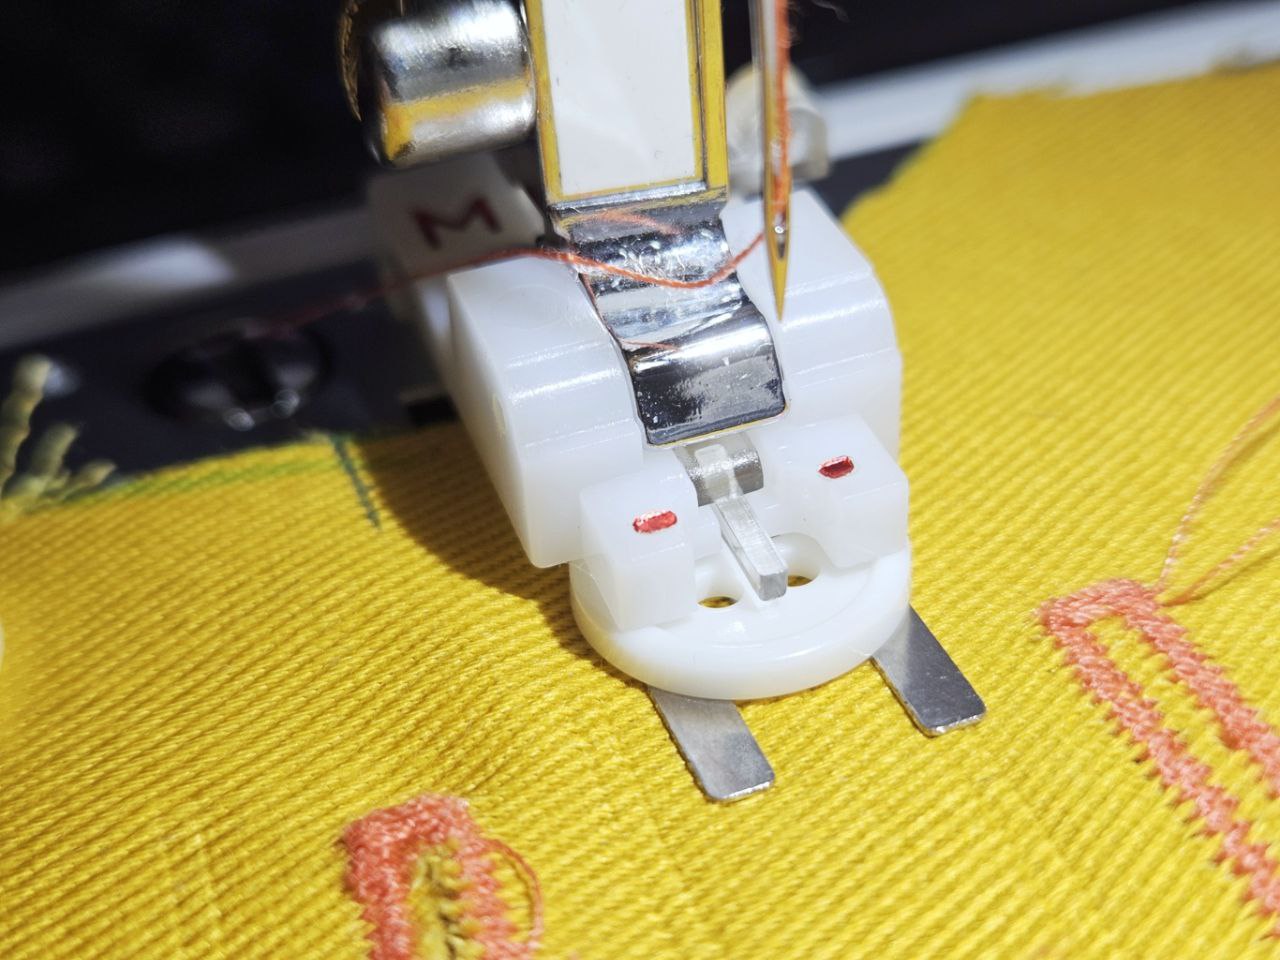
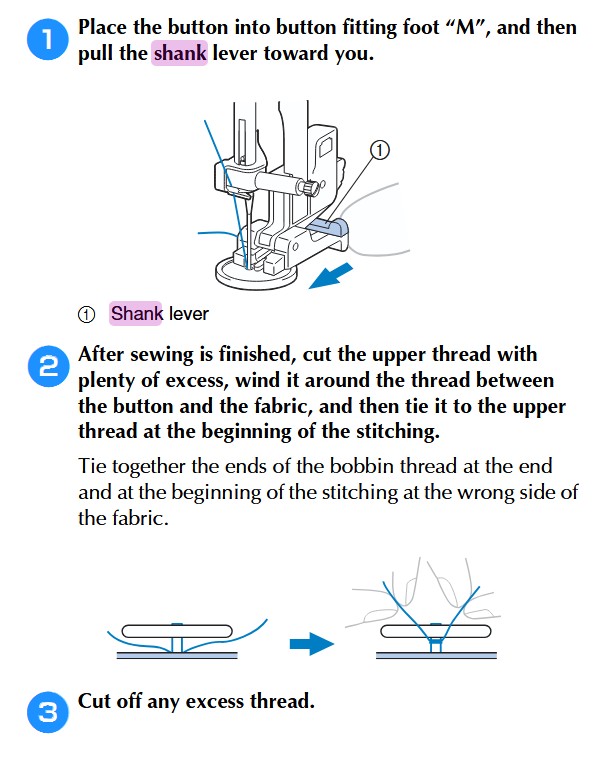
With the shank pulled back, the buttons were sewed nice and tight to the cloth! Evidently that shank needs to be in place for very specific button types. Unfortunately, this was only mentioned in the section for "Attaching a shank to a button", not in the main sewing instructions :/
Either way, I'm glad I learnt about this today, as this project will involve alot of buttons! I must say the button sewing foot on my brother machine (maybe other machines?) is very fiddly to align with. It's not easy to line up the holes with the markings, and after sewing the first stitch, it's pretty fiddly to adjust the position of the button on the foot, align that properly with the needle, and also with the markings on the cloth. I feel like it needs some kind of shifting mechanism so I don't need to move the fabric, just needle up, push the tray to the next hole, button down, sew.
Addendum: I looked into designing a foot that slides the button and realized that duh, the fabric needs to move along with the button. Still having a way to keep the button aligned with the needle would be awesome.
If not I've spent the day figuring out the middle piece that will hold the tail and connect the upper body and leggings.
I realized later in the day that I'd be wearing a skin tight suit for wicking sweat, so having another "pant-like" piece could prove to be very warm. I decided to drop this idea, and go for a different design to just hold the tail.
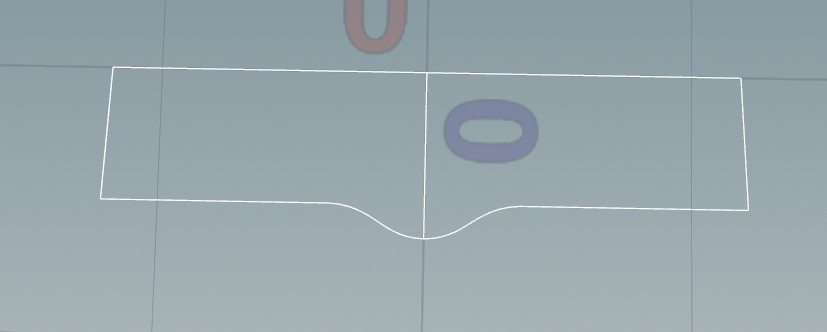
I came up with this idea but nixed it. Again. Will figure it out soon lol.
I'll think about that connecting piece later.
Next I continued working on the leggings.
Based on yesterday's prototype, I extended the leggings by a few centimeters, and added in gussets at the knee. It was no longer super tight! Done for today.
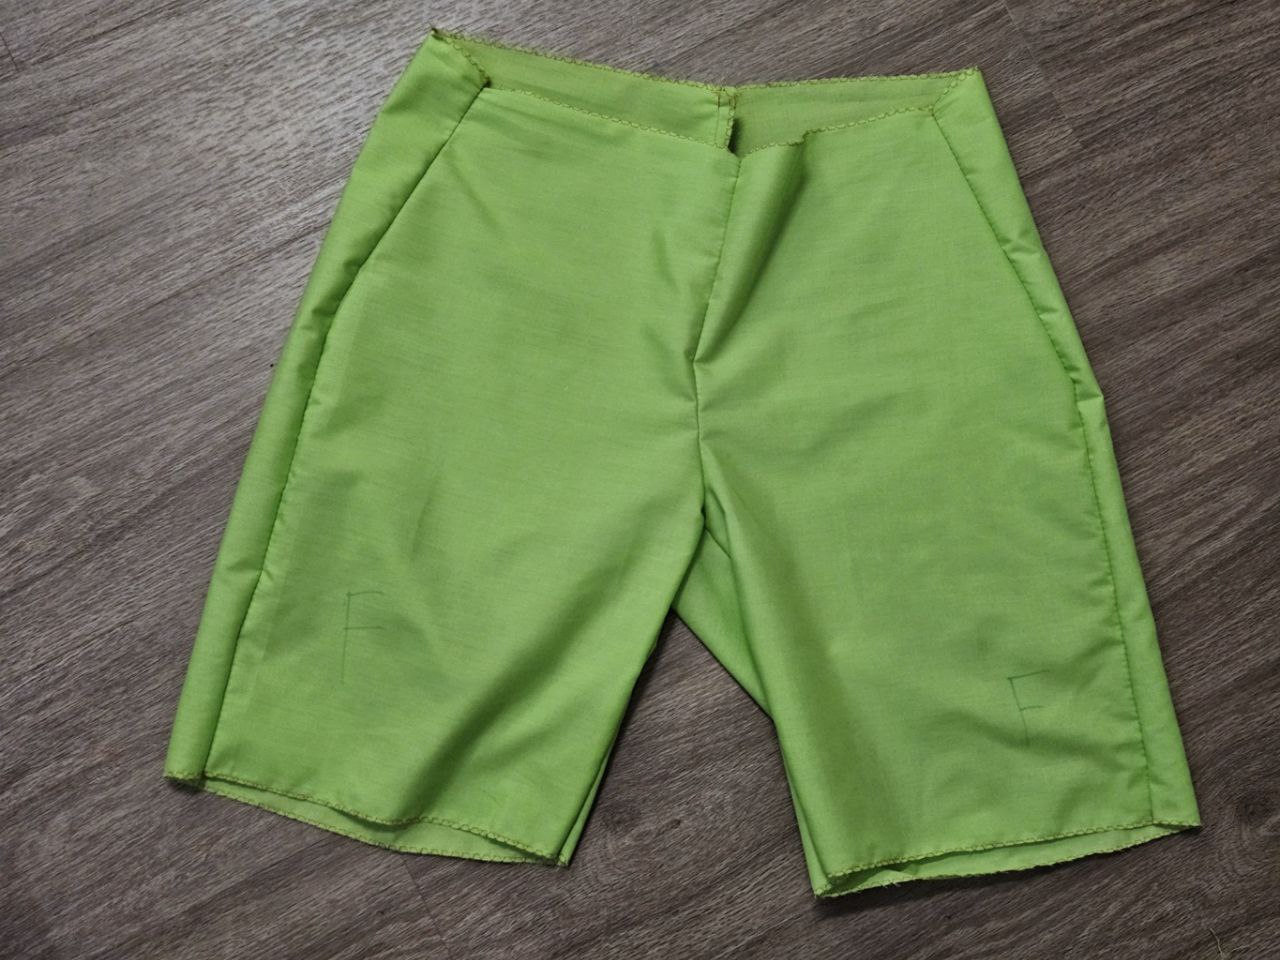
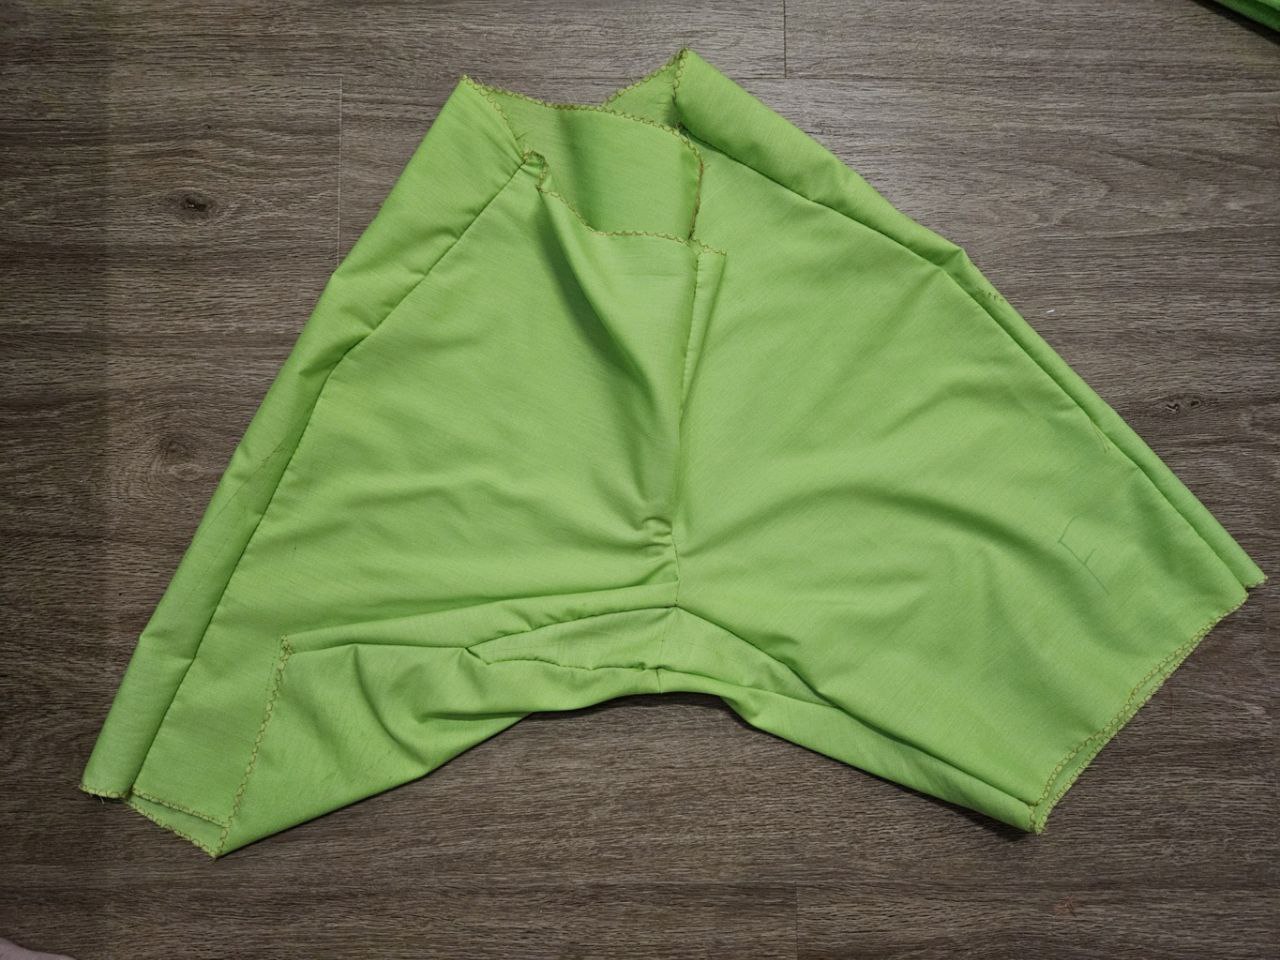
I experimented with adding a crotch gusset and it worked very well, making them much more comfortable when squatting.
However when I added darts to fit the garment closer to my upper thigh, I noticed how much the back side fabric slid upwards along my leg when I squatted. The original, baggier version without darts allowed for that motion. But the baggier look would look awful for a plantigrade fursuit.
I had another idea how to accomodate this sliding motion but first I started with the leggings. I used some elastic bands at fixed widths along my leg to get an idea of the circumference at each position.
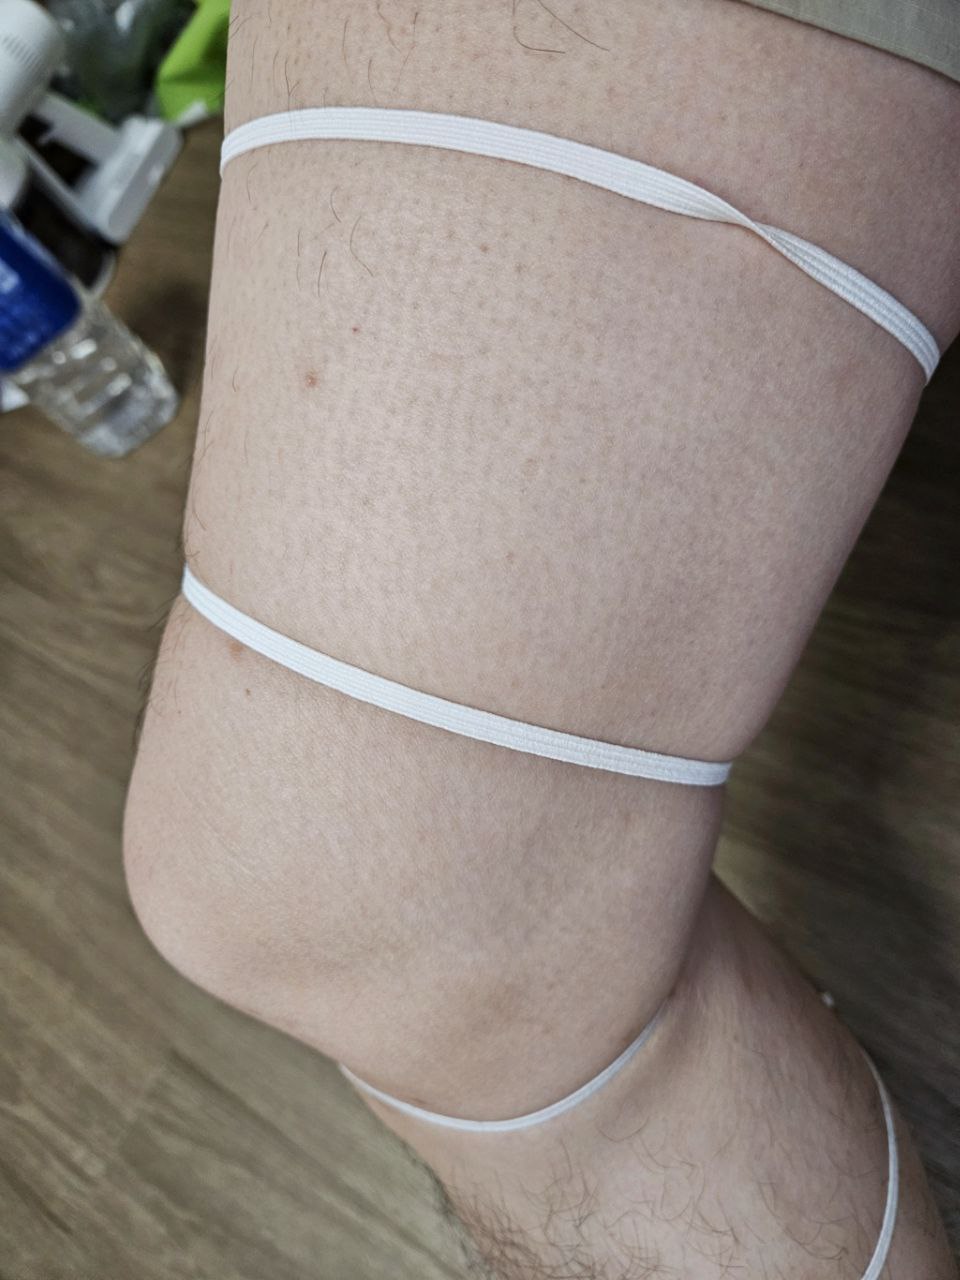
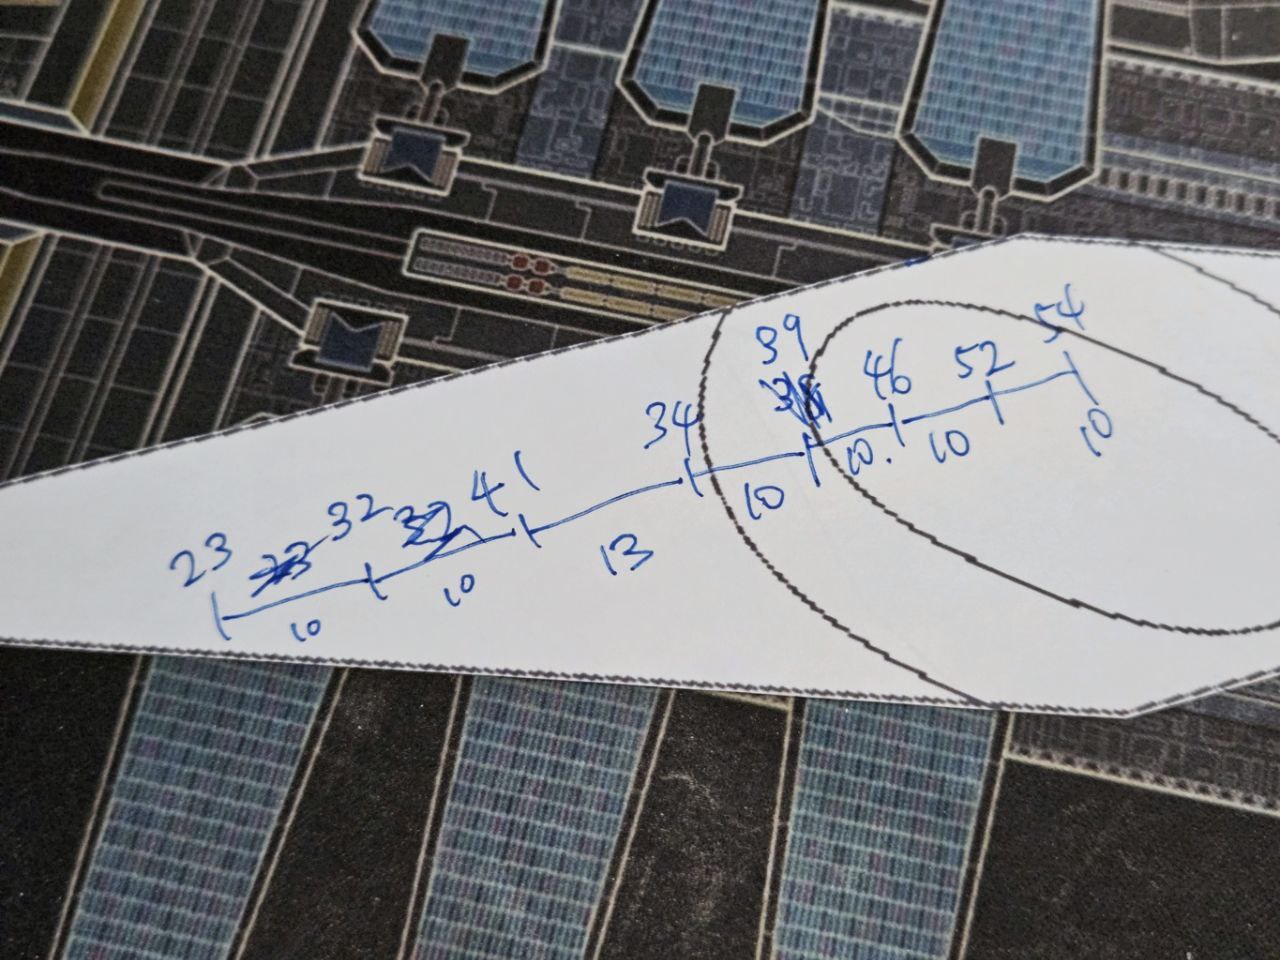
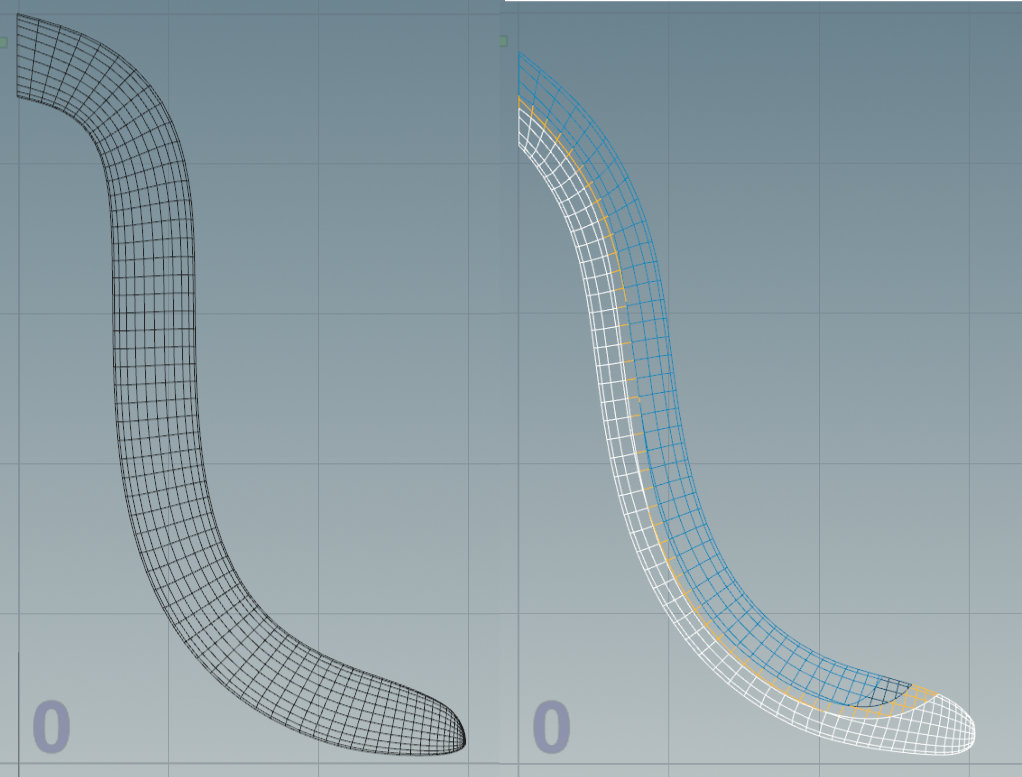
This allowed me to create a rough version of my leg in 3D, of which I flatted into a pattern.
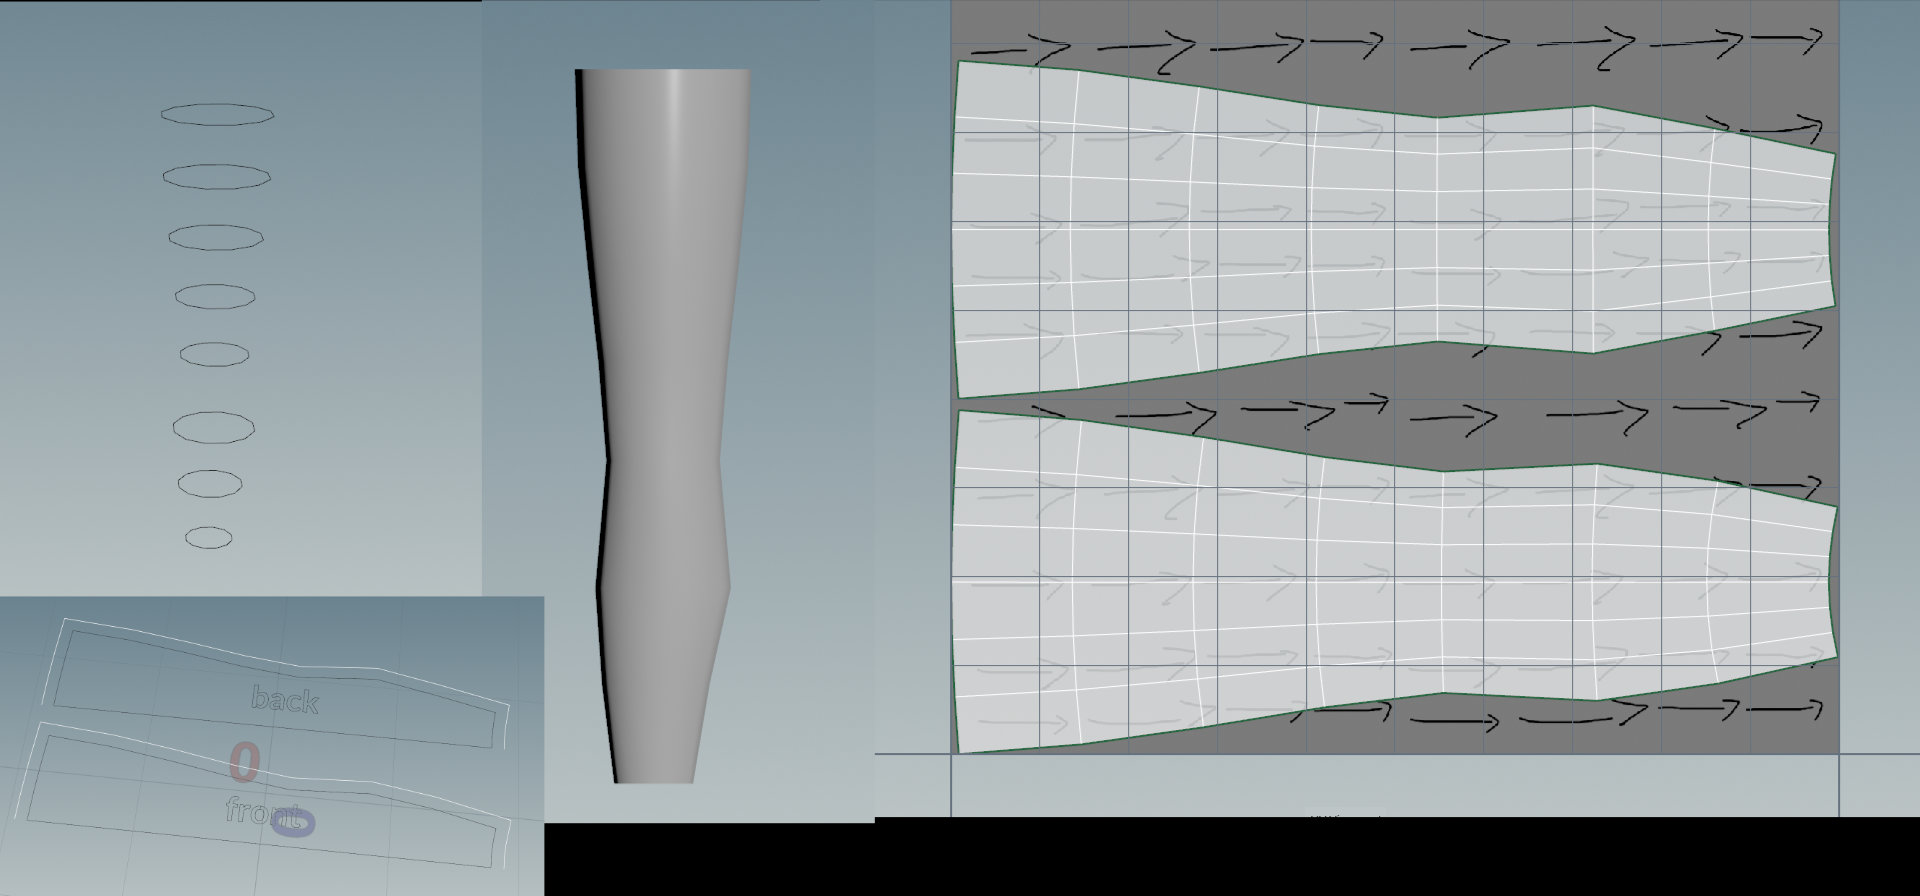
I cut the pattern oversized so I could adjust it.
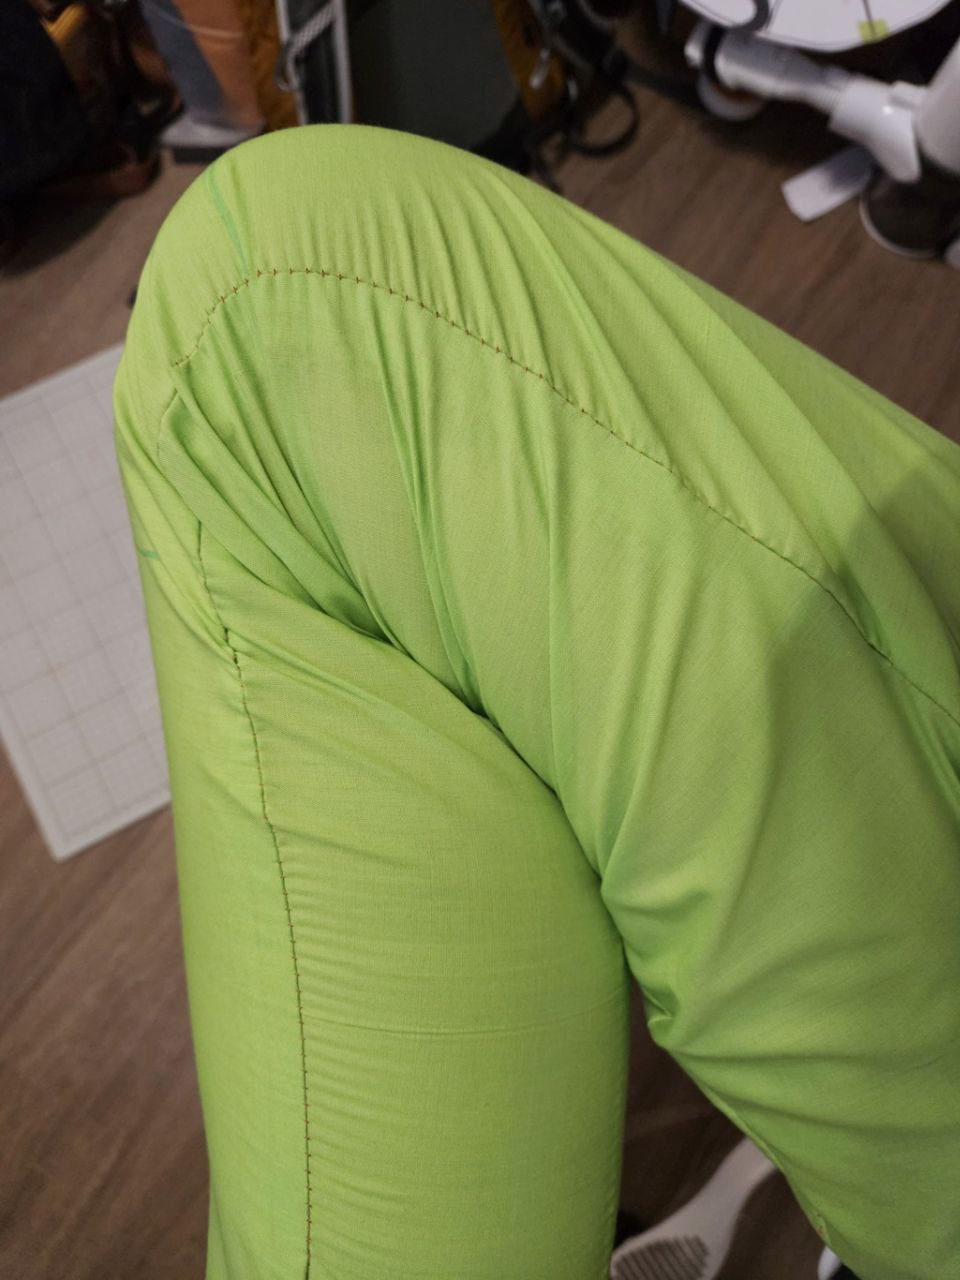
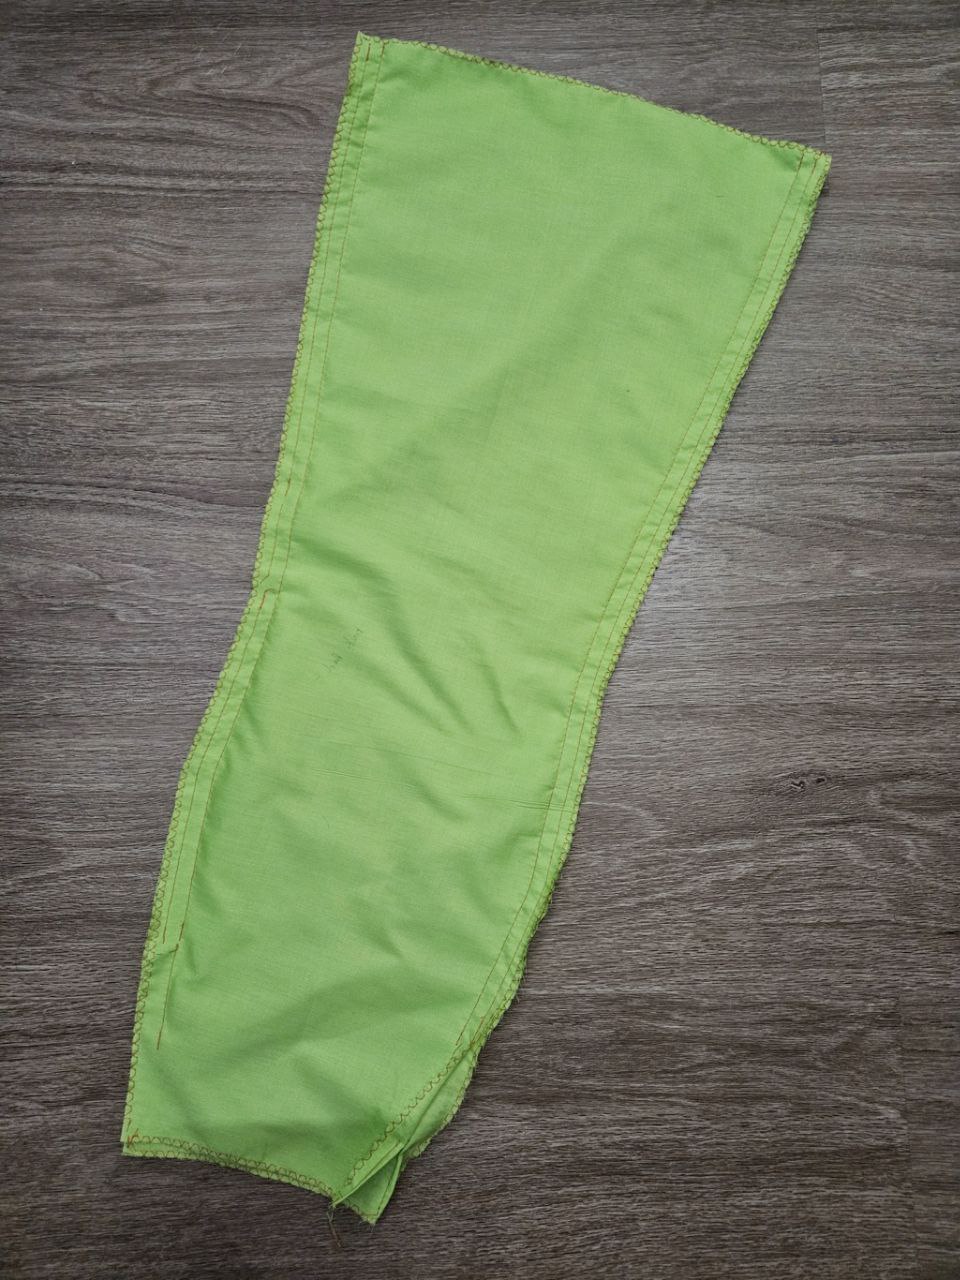
The leggings fit well after some fittings! But it was very tight around the knee, but that's tomorrow.
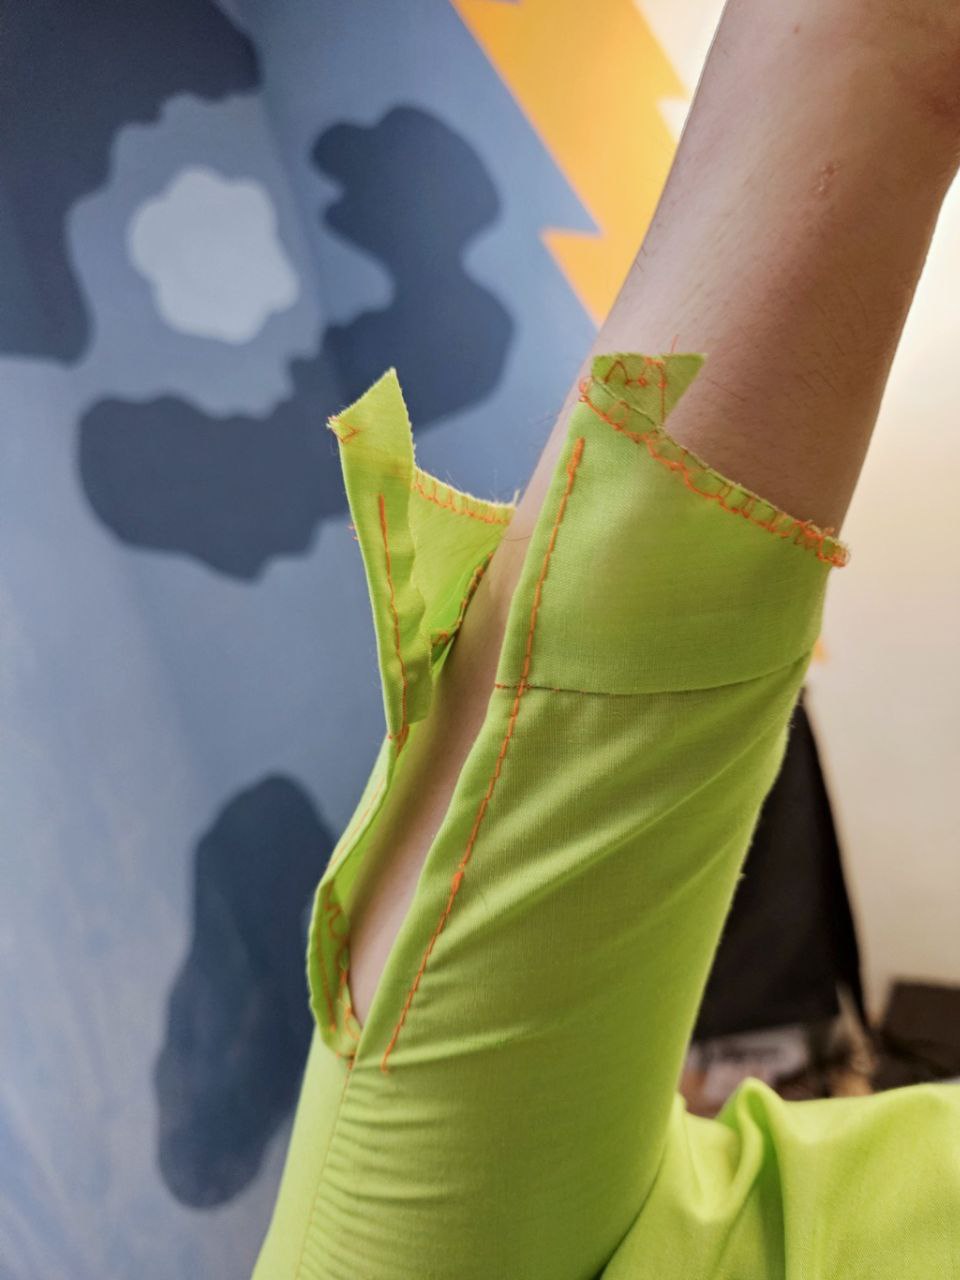
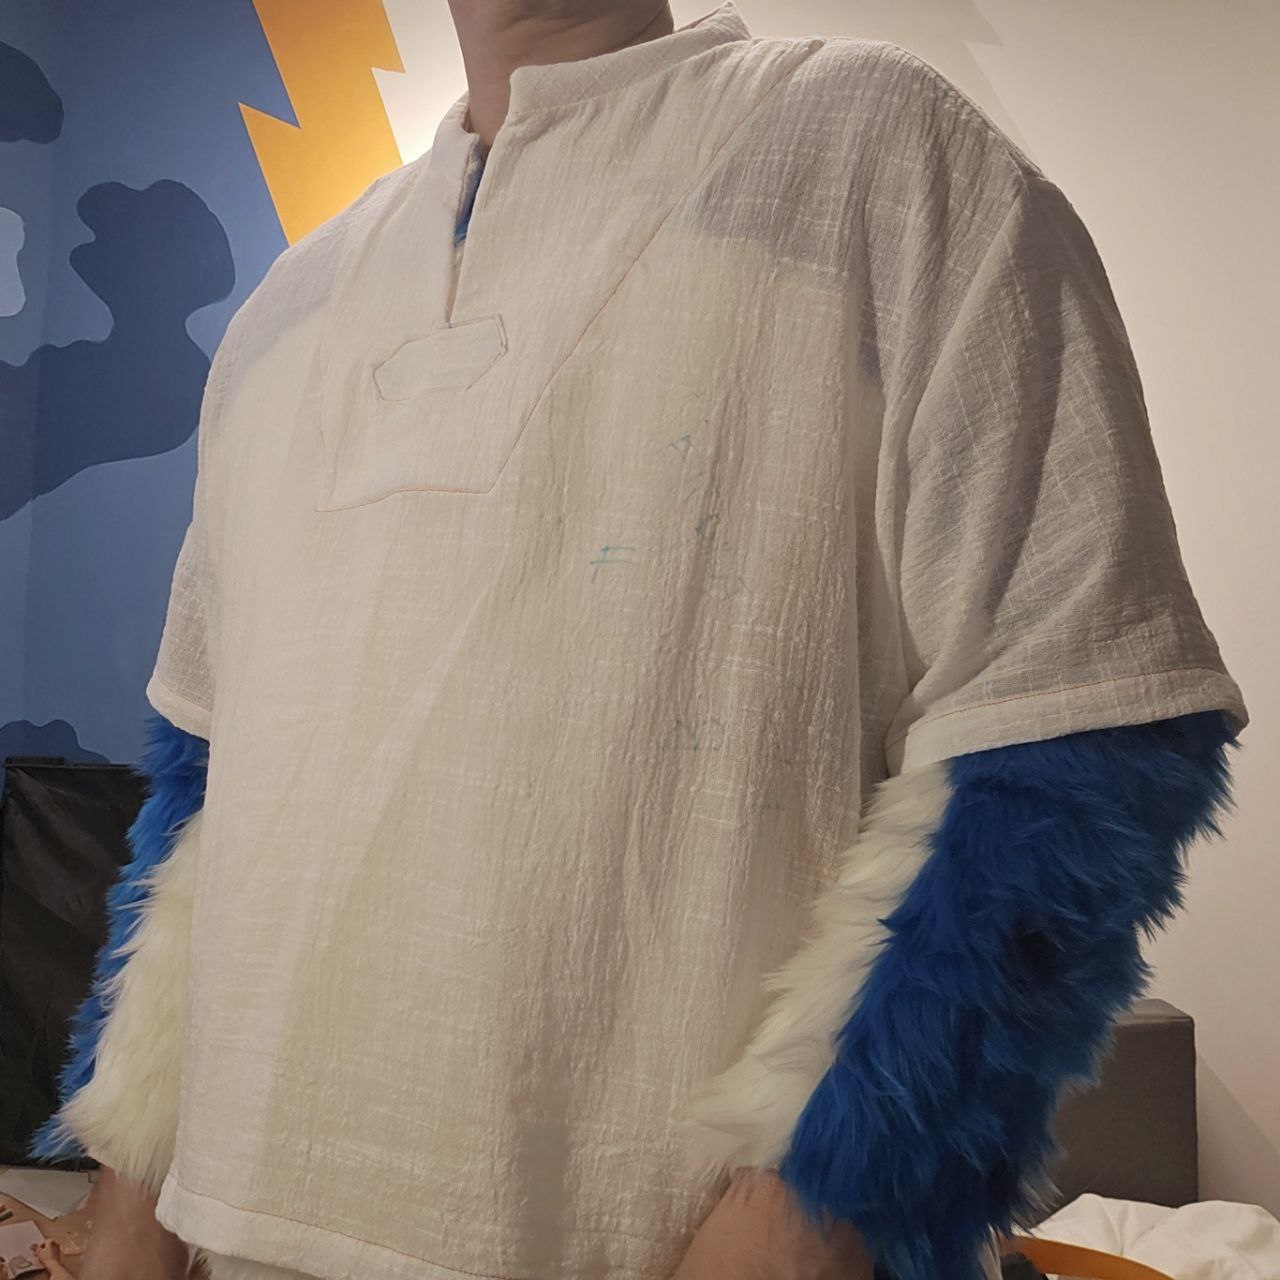
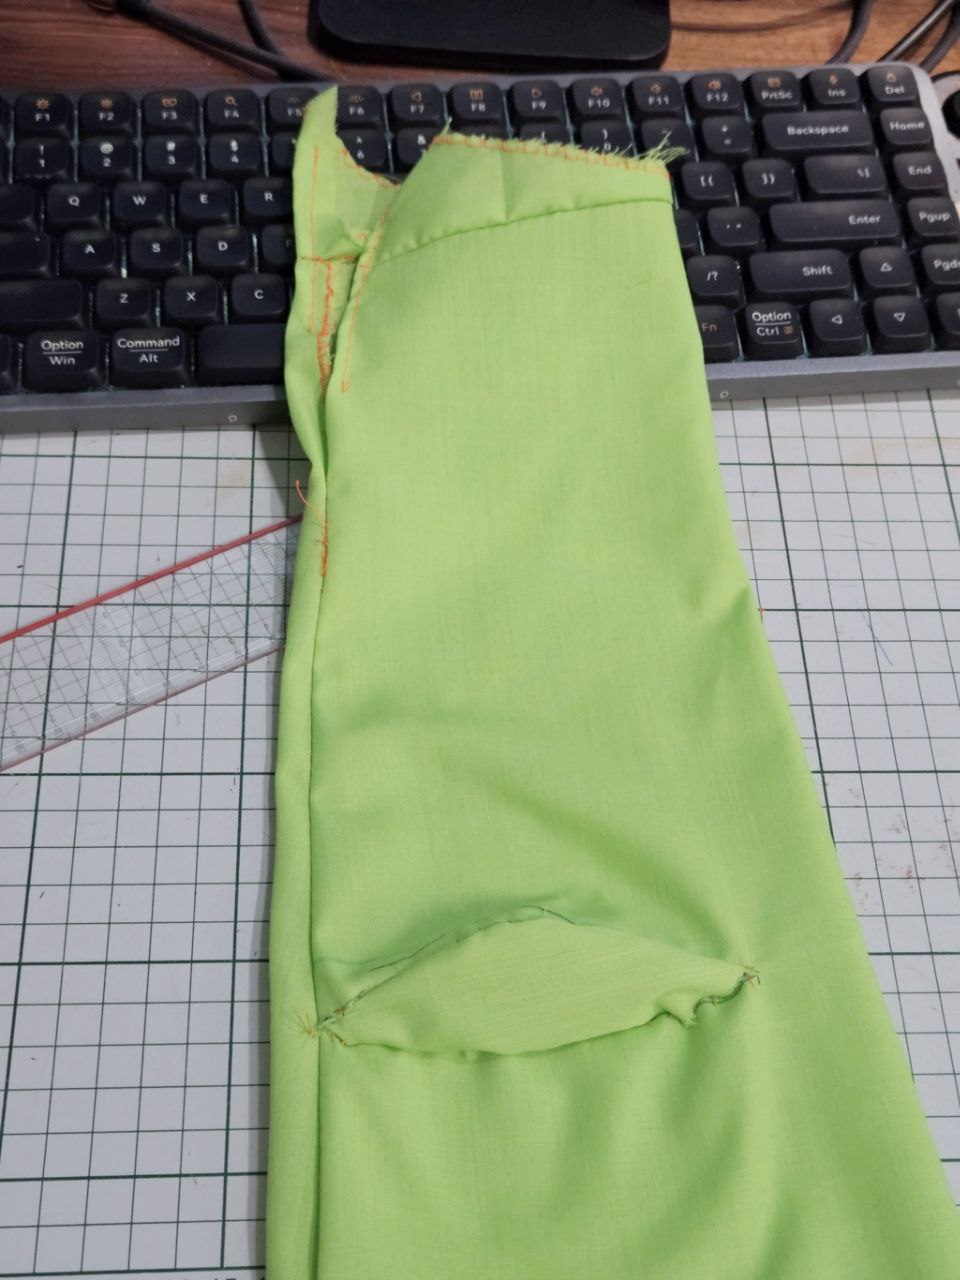
The last photo shows the slit to allow my paw to slip through, as well as the cloth patch used to make the arm exit hole parallel to my arm.
I'd actually modified the pattern so that the lower arm hole is brought in and that has improved the mobility of my shoulder alot!
I'm going to look up if there are ways to improve the mobility of my elbow, else I can use this as a guide on how to cut the fur out.

I saw this idea to use an oval shaped gusset and tried it out. It works great!
Unfortunately I can't remember where I saw this idea from, I looked through my history and I couldn't find it.
Next up I want to work on the leggings, but I saw this article on how to join faux fur seamlessly and thought I'd try it.
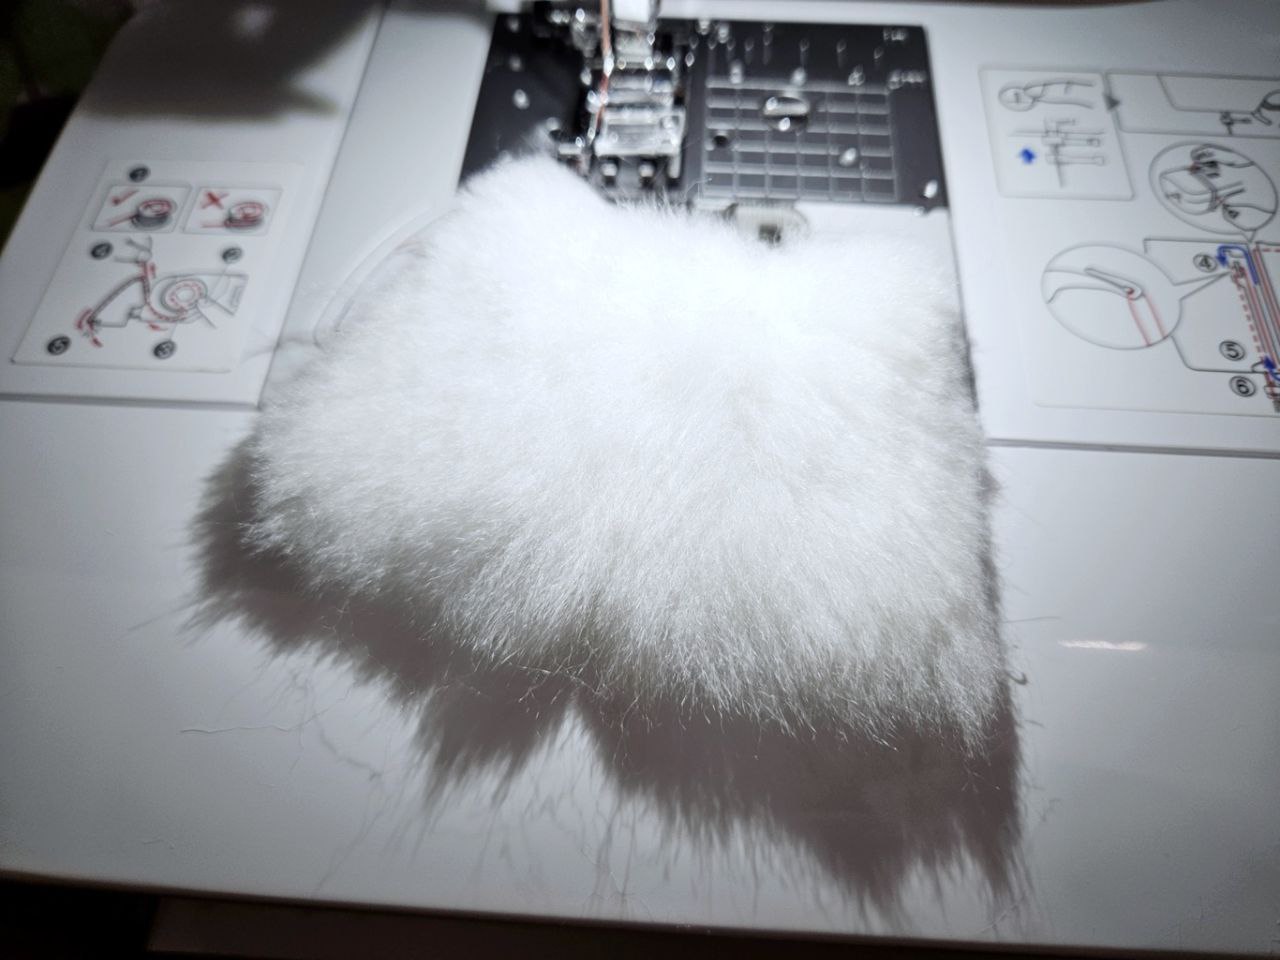
Basically, use a basting stitch to hold down the fur along the edge, sew the seam then remove the basting stitch. Works very well!
ARGH just discovered this way of making the arm sleeves more articulated, by adding a dart to the sleeve pattern.
And more information about gussets. Jutland Sew-Along: Extra - Adding a Gusset and Removable Knee Pads
Sleeve Patterns Made Easy + How to Draft Them
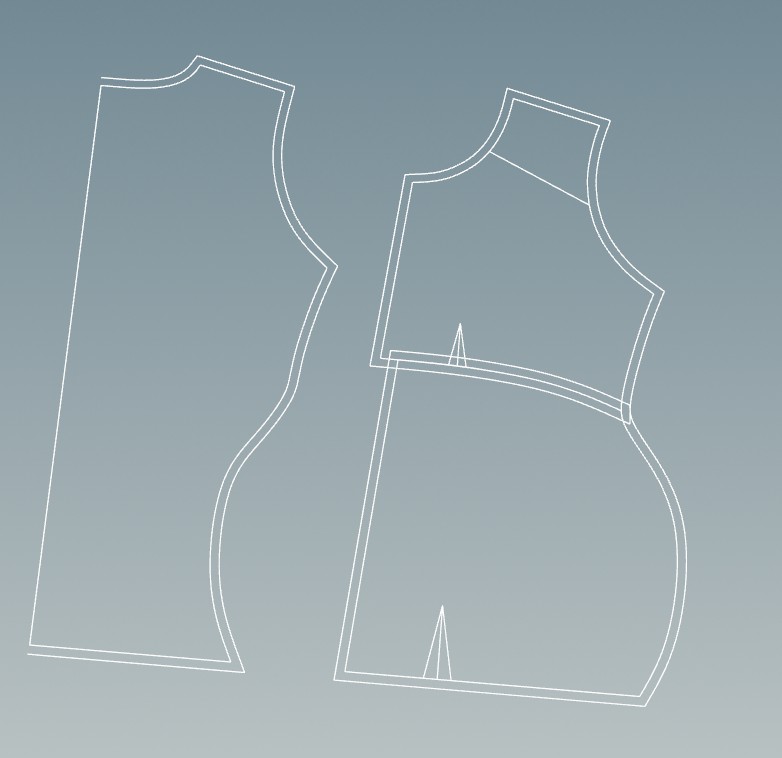
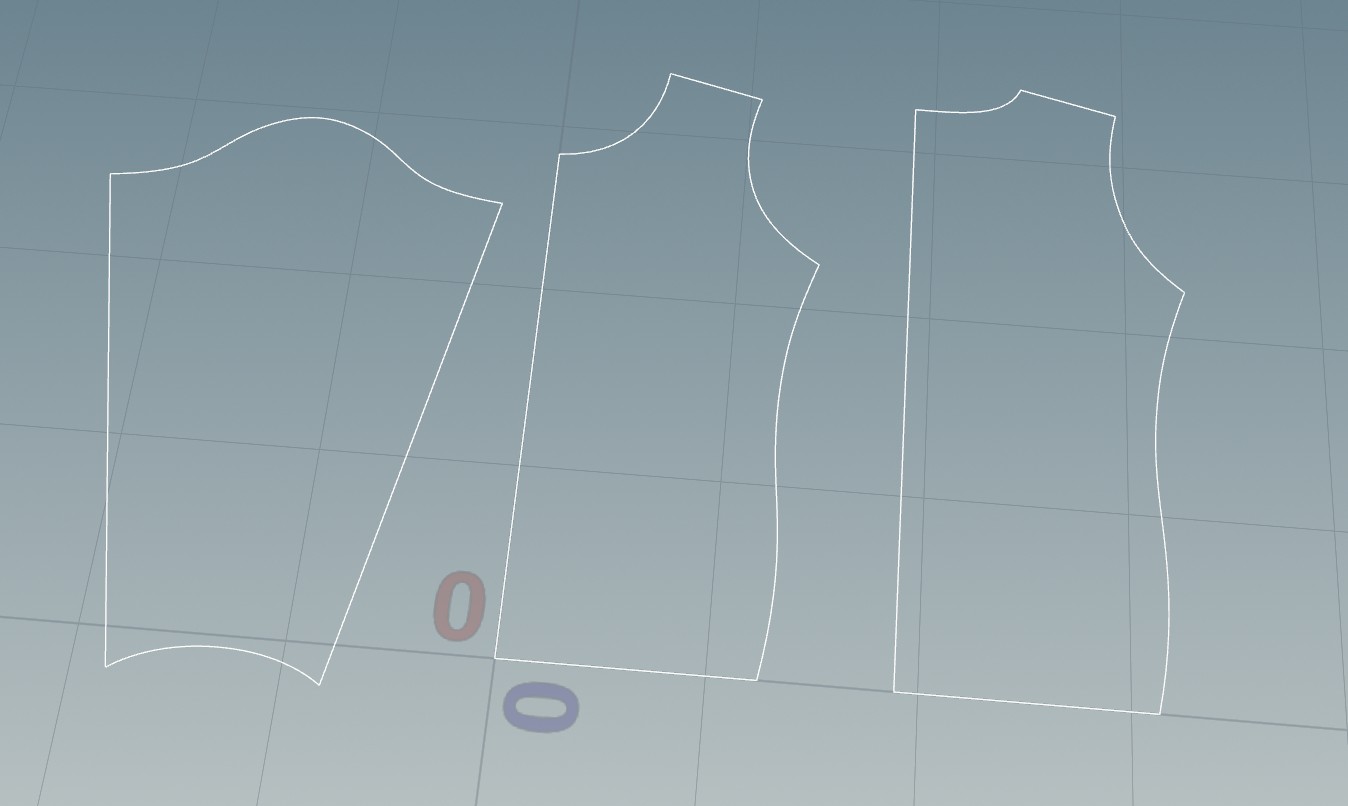
This makes things so clear now, and he has other videos describing how to draft your own shirt. Using this knowledge, I made modifications to the upper body suit to fit my build.
I adjusted the pattern to give more shape to my chest and belly, hopefully this will work when translated to faux fur!
The sleeves I started from scratch and they're a bit too horizontal and is quite tight around the upper arm, so tomorrow I'm going to try angling the sleeves down.
A few things about the sleeves (and leggings) is I want to have some shaping so it does not look like I'm wearing a tube. Looking up ways to improve articulation I found out about gussets. I haven't had time to properly look into them, though I did find this video that uses darts to shape the knee. Another wonderful resource is How to Modify Sleeves for Better Arm Mobility
Here, they demonstrate how to improve mobility by raising the bottom of the arm hole, as well as using an oval gusset.
Also, this is from a few days ago and did not post; started on the paws.

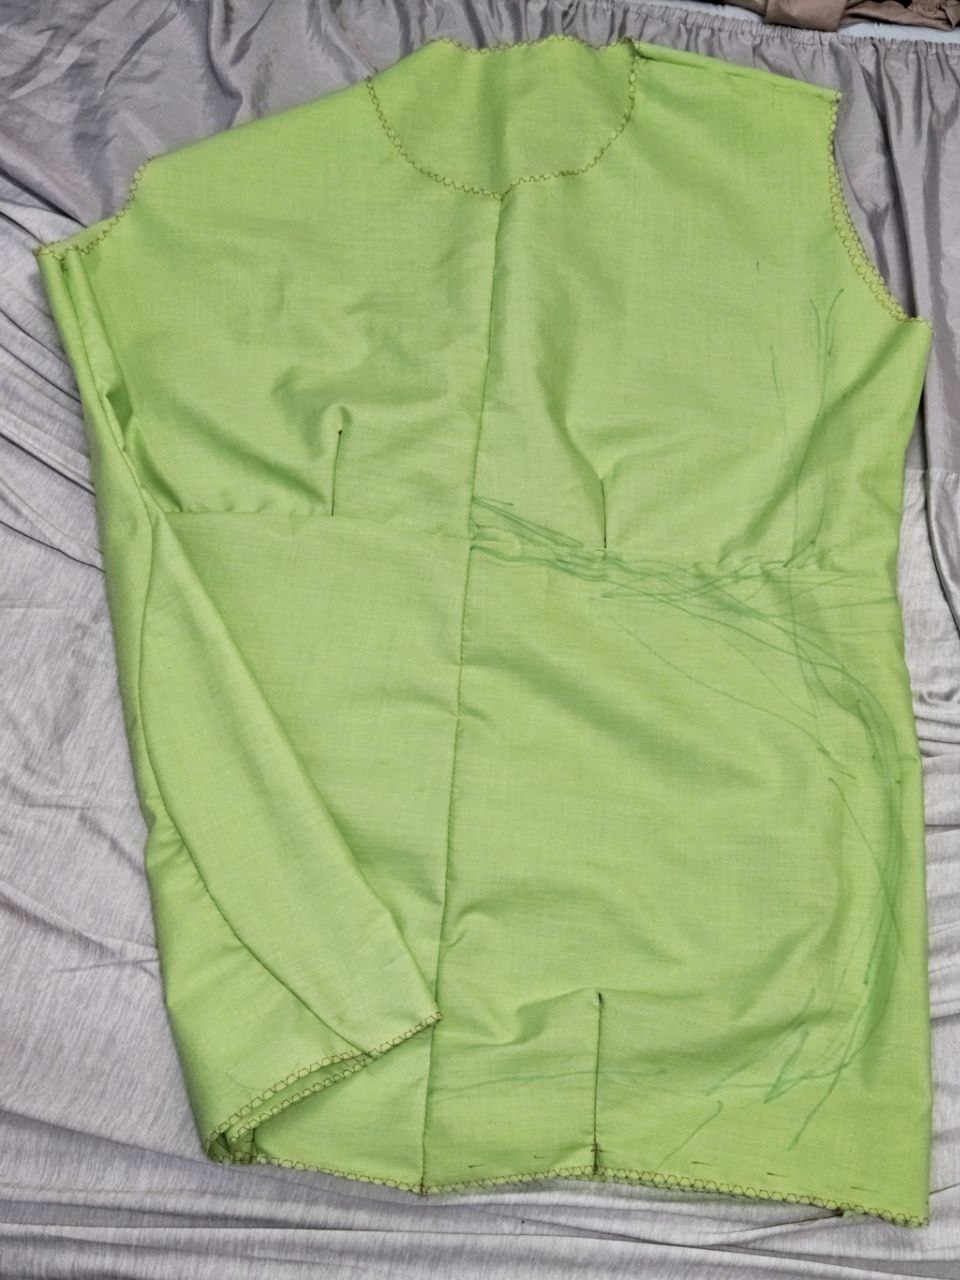
I focused on my torso first. I got a pretty tight fit, then expanded it by 5mm just in case. I experimented with sewing different seams to give some shaping around my chest, and I added in a dart at the bottom to give more definition around my belly.
This worked well, so I can modifify the actual pattern to this design. Netx up the sleeves!
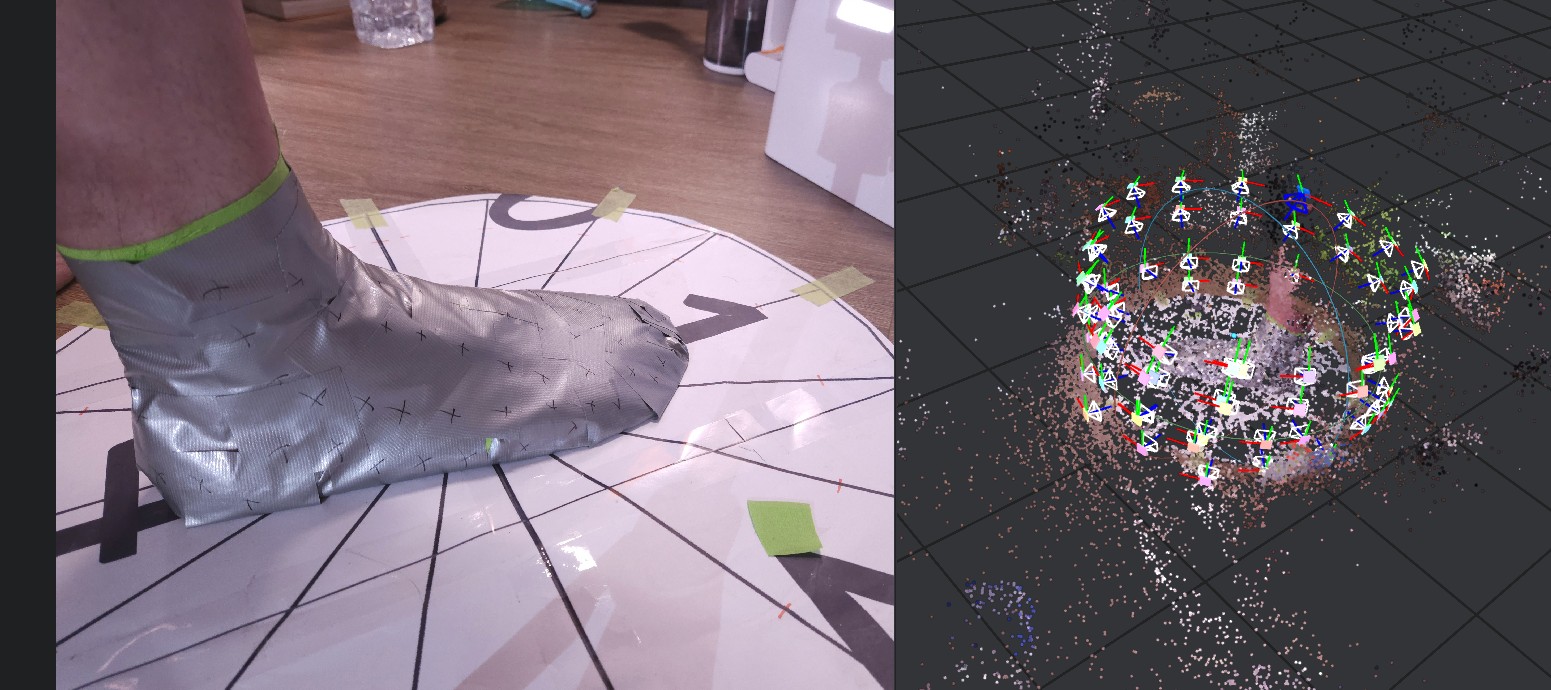
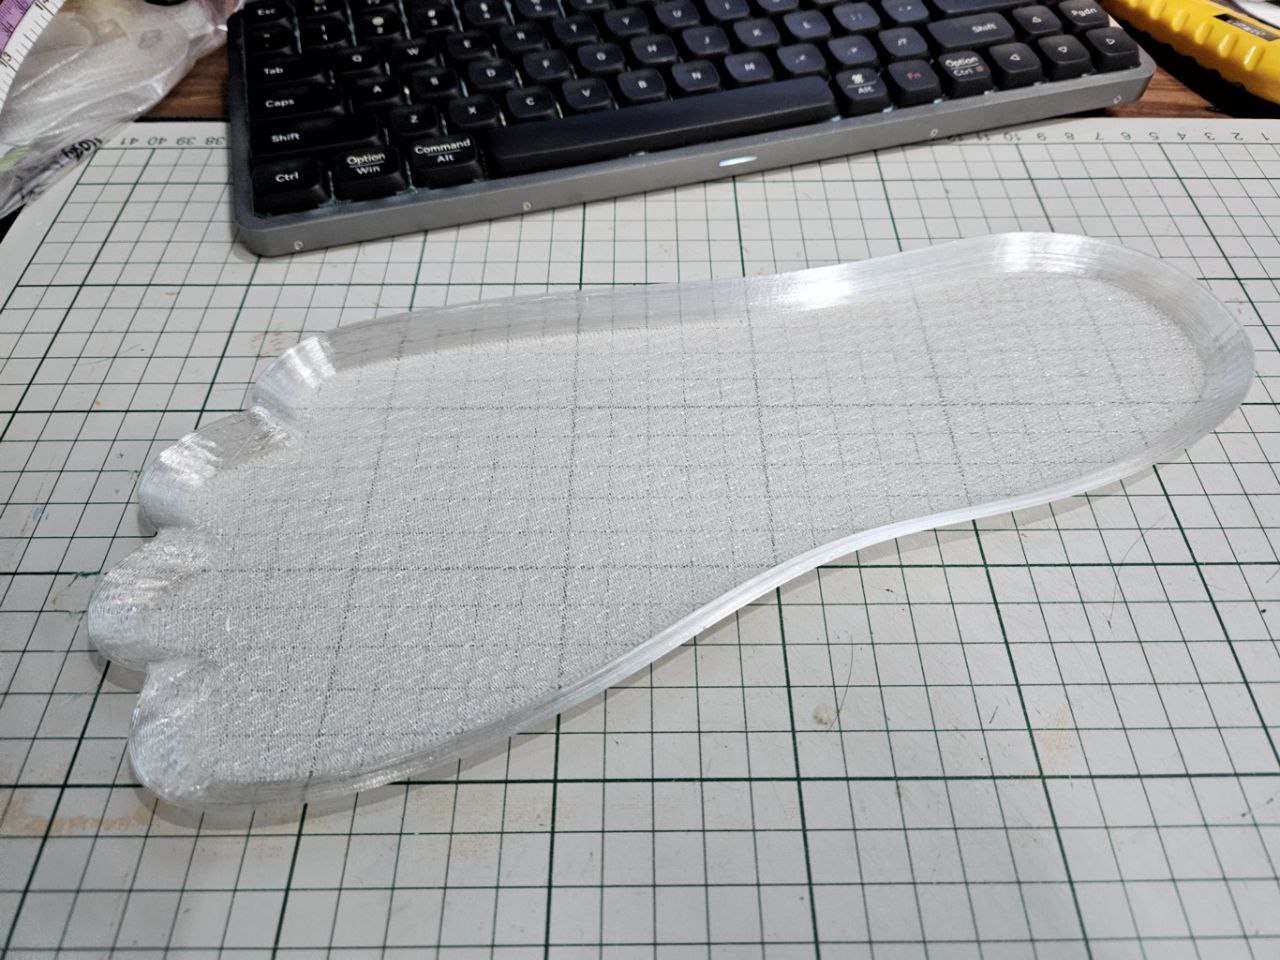
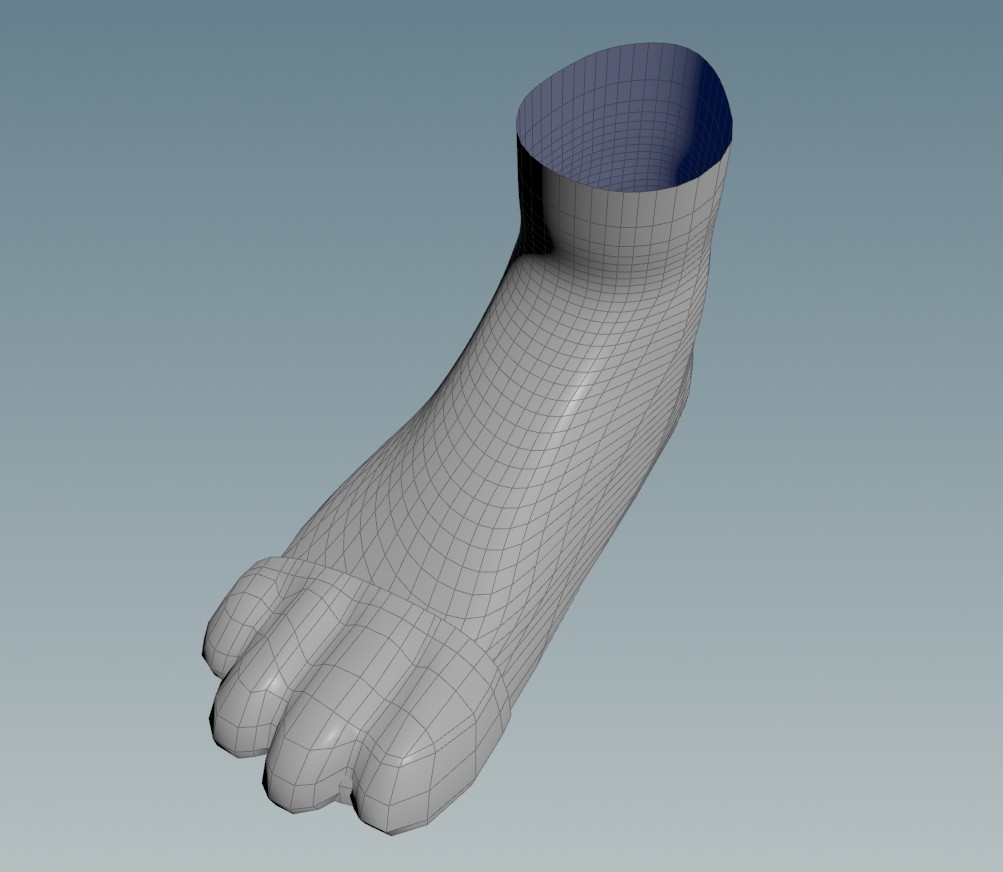
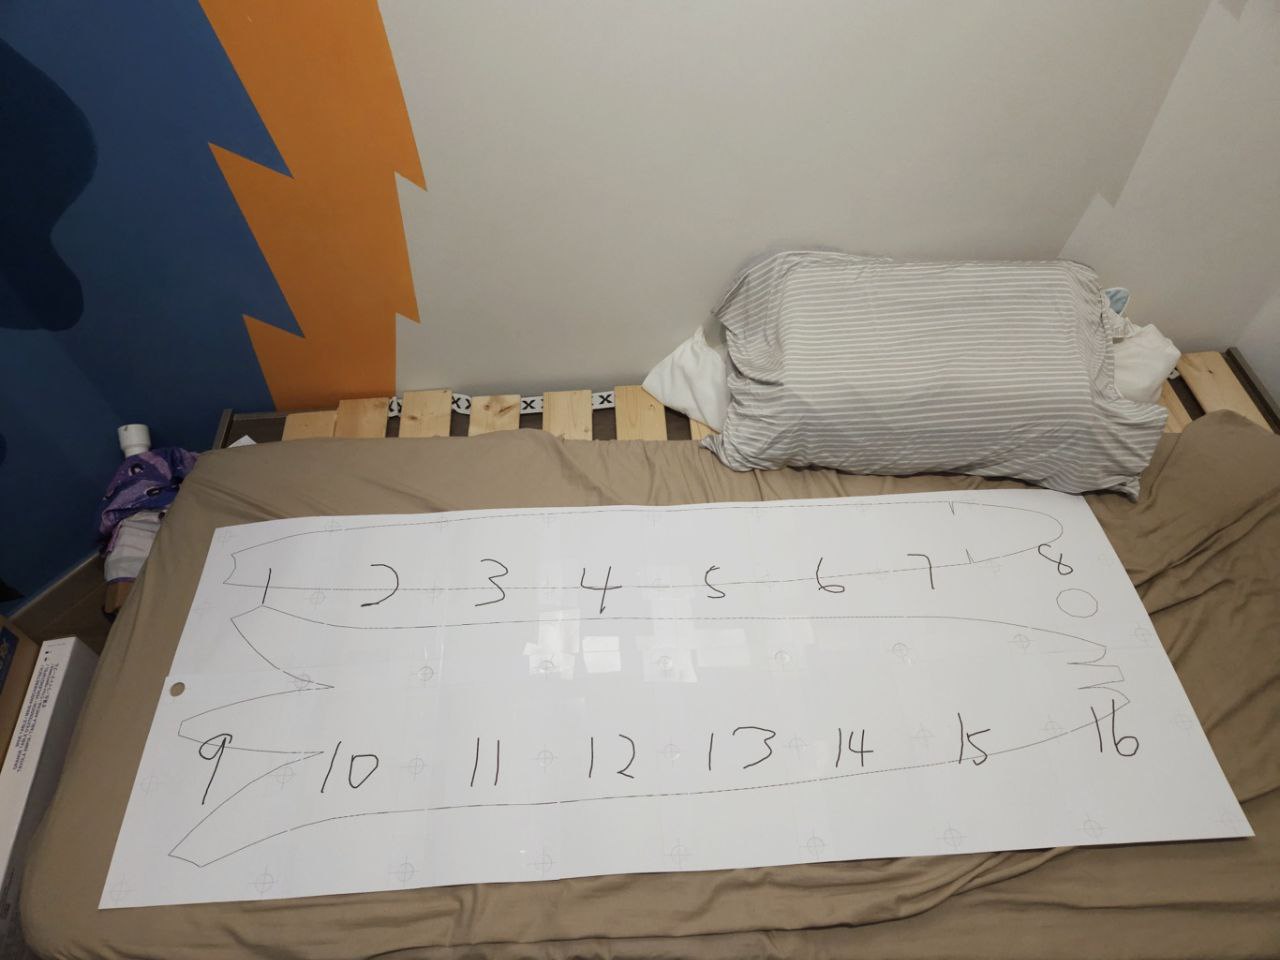
The paper circle has spokes I used as reference of where to take photos at. For the duct tape dummy, I first taped scrap cloth around my foot, then wrapped duct tape around it.
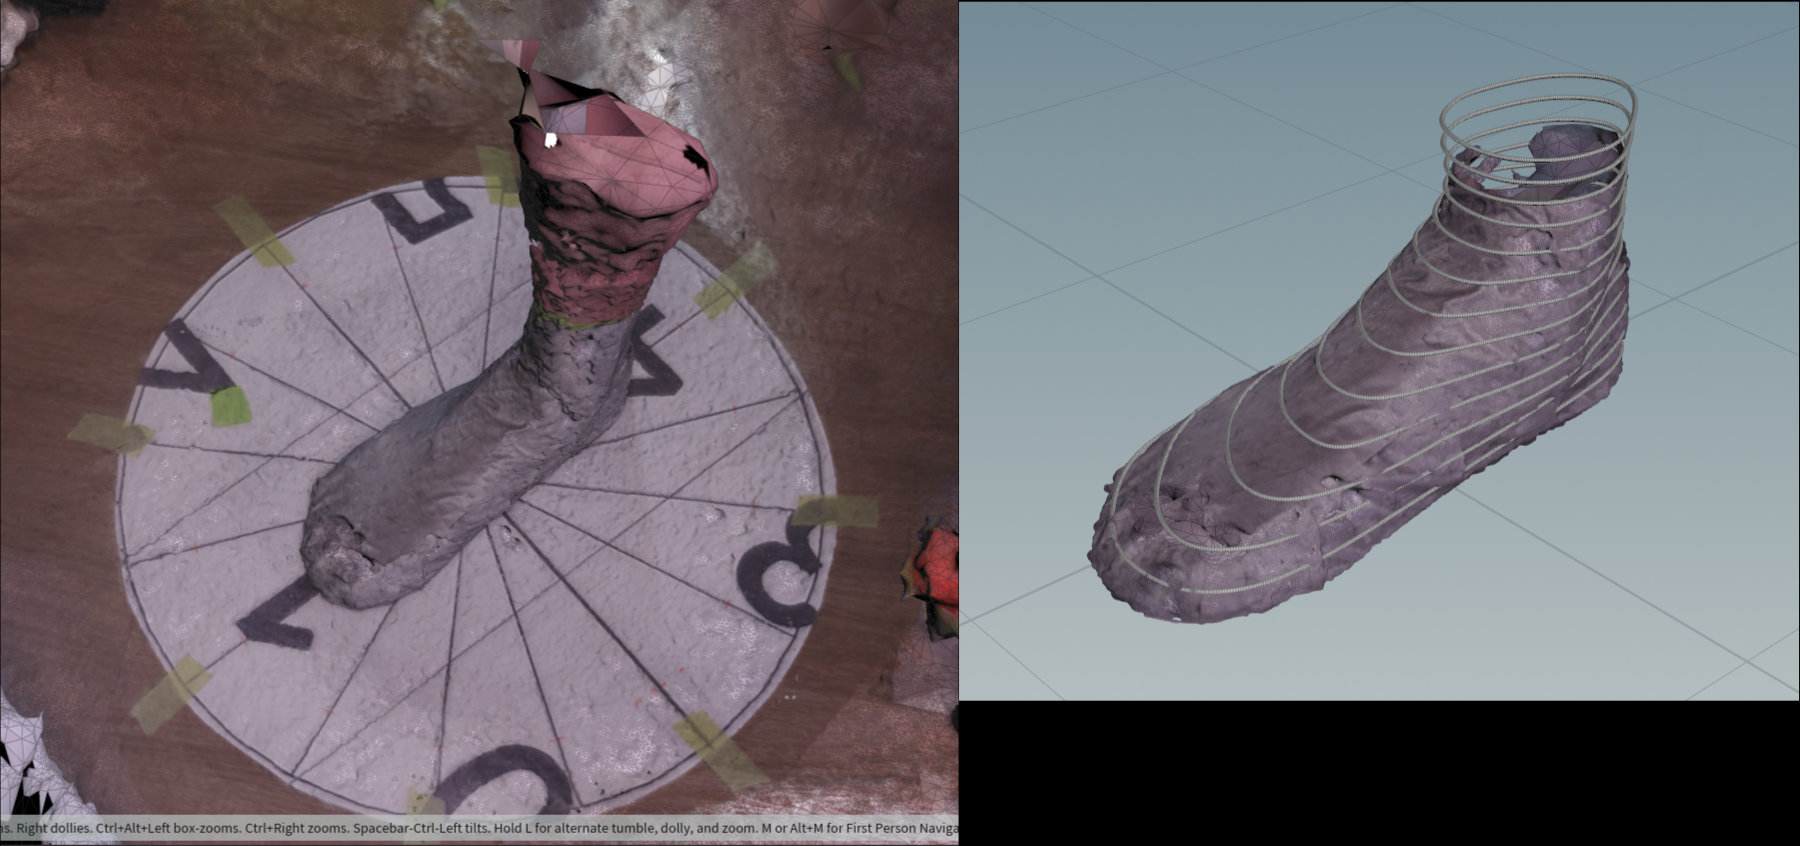
A total of 78 photos were taken, and meshroom was used to generate the mesh. This was then brought to houdini, and I used a series of curves to get a rough outline, before skinning those curves into a rough shape of my foot. Note that at the bottom of my feet I had a 2mm thick 3d printed shape of my foot.
Next I'll need to integrate the paws into this design.
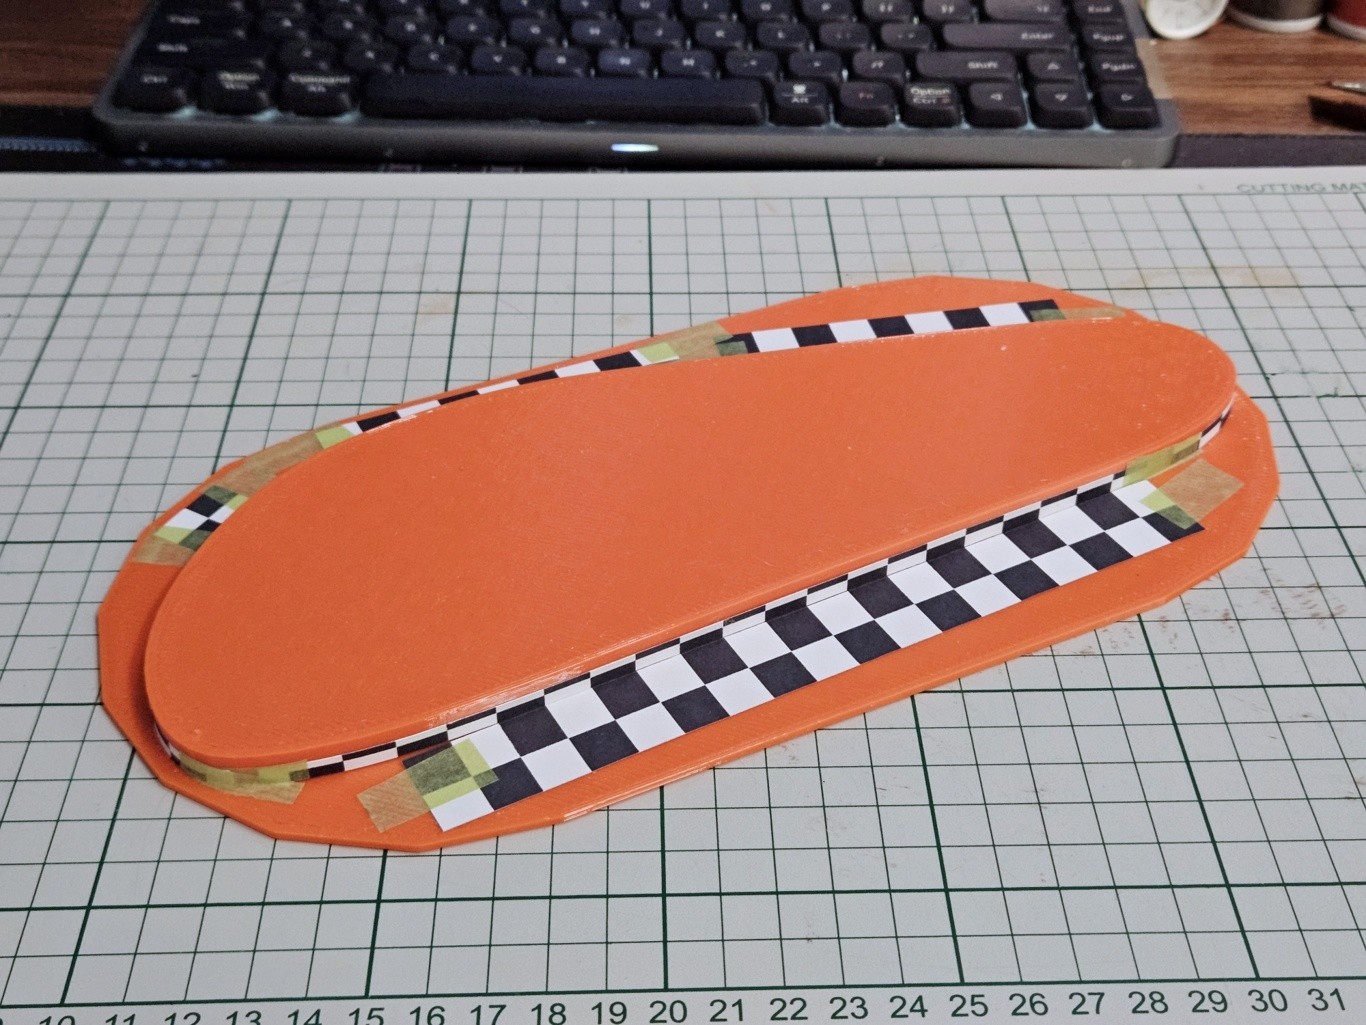
Note that the duct tape is quite shiny and not ideal for photogrammetry - matte surfaces are the way to go. Even so, this is enough for a start. One other thing I forgot to add is a proper length reference. I'd made up a checkerboard pattern but forgot to use it :/
Other thing I worked on was an updated pattern for the hand paws, unfortunately I sewed them wrongly, and just used them as scrap for wrapping my feet. But I'm almost there for the handpaws pattern!
This is working very well, and next I'm going to add patterning for the forchettes.

Now that I understand how to make this, I'll make another version that will accomodate the tail.
Last 2 days I was back on the handpaw pattern. The fingers are good now, but the range of motion for the thumb could be better, so I'm figuring out how to make adjustments.
I'd also experimented with making darts for the upper fingers for shaping, but that has caused a crease by the thumb. I think I'm gonna just airbrush some details.
This is taking faaar longer than I'd like :/
I've also been thinking about the foot paws, and I think I want to make something that has a lot more form, instead of just a shoe with fur on it. Some examples:
I decided to try photogrammetry again, but this time, have a way to scan the arch of the foot and ankles accurately. I came up with this platform:
In theory I should be able to rotate my foot while the camera stays still, and adjust the camera to different heights. I'm waiting on a remote shutter before I can test it.
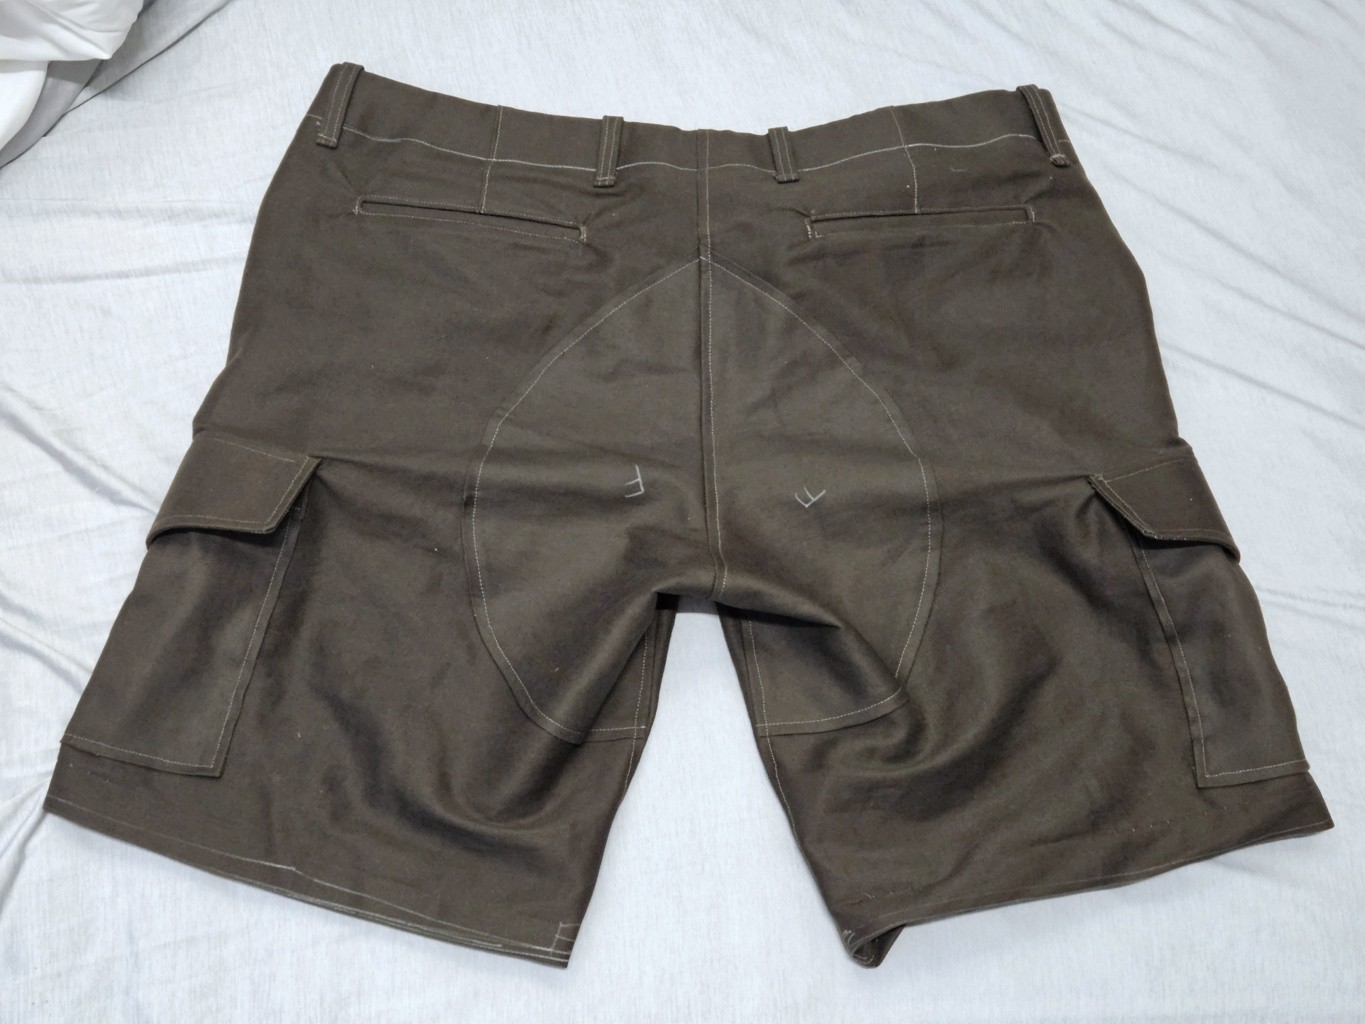
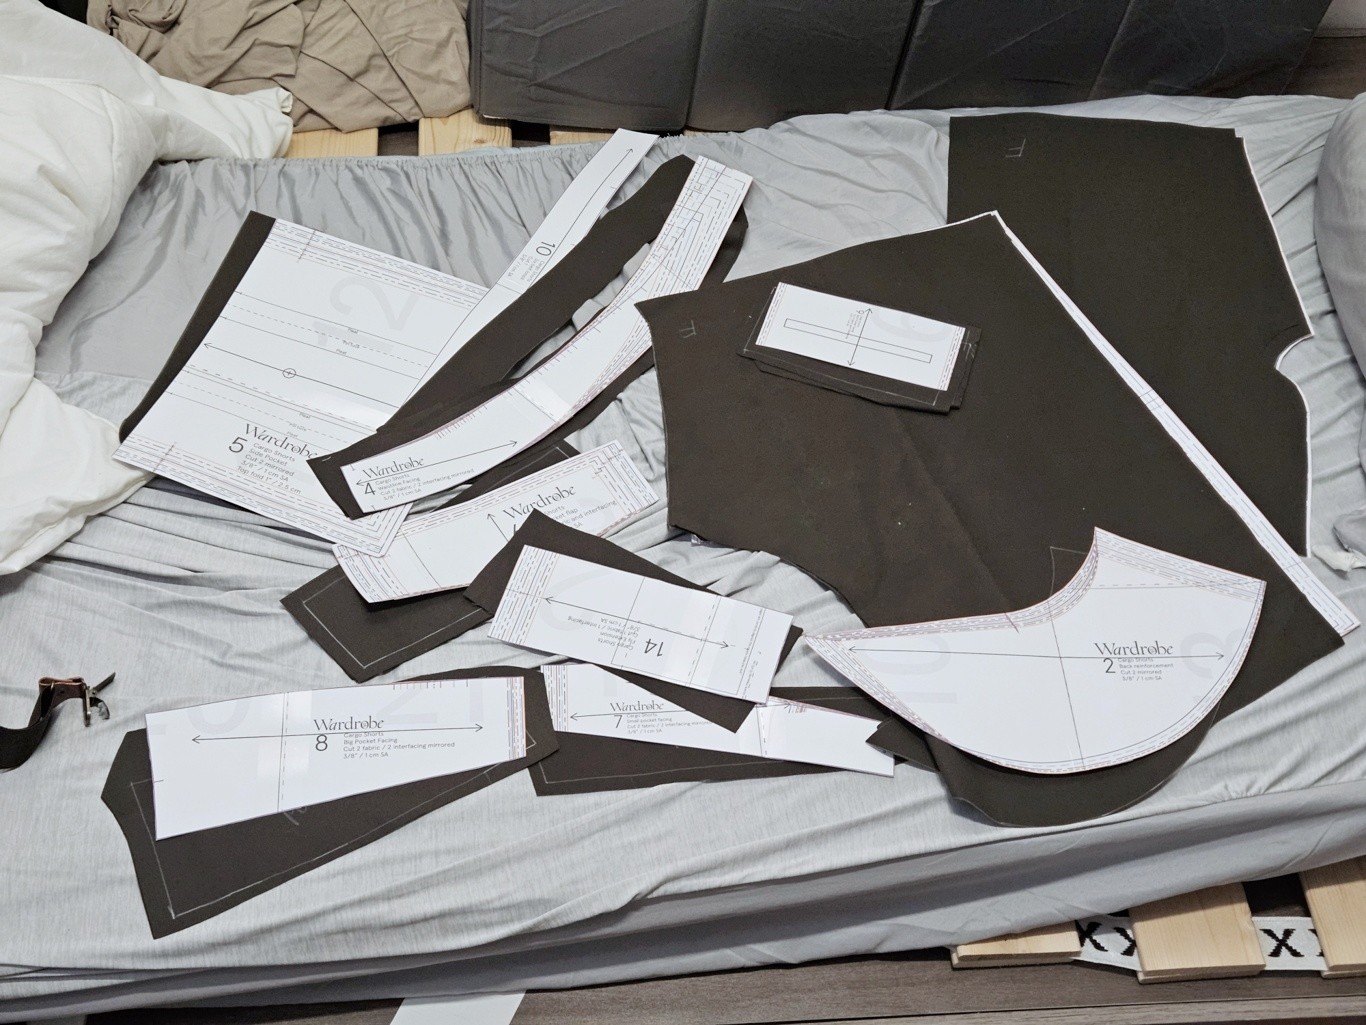
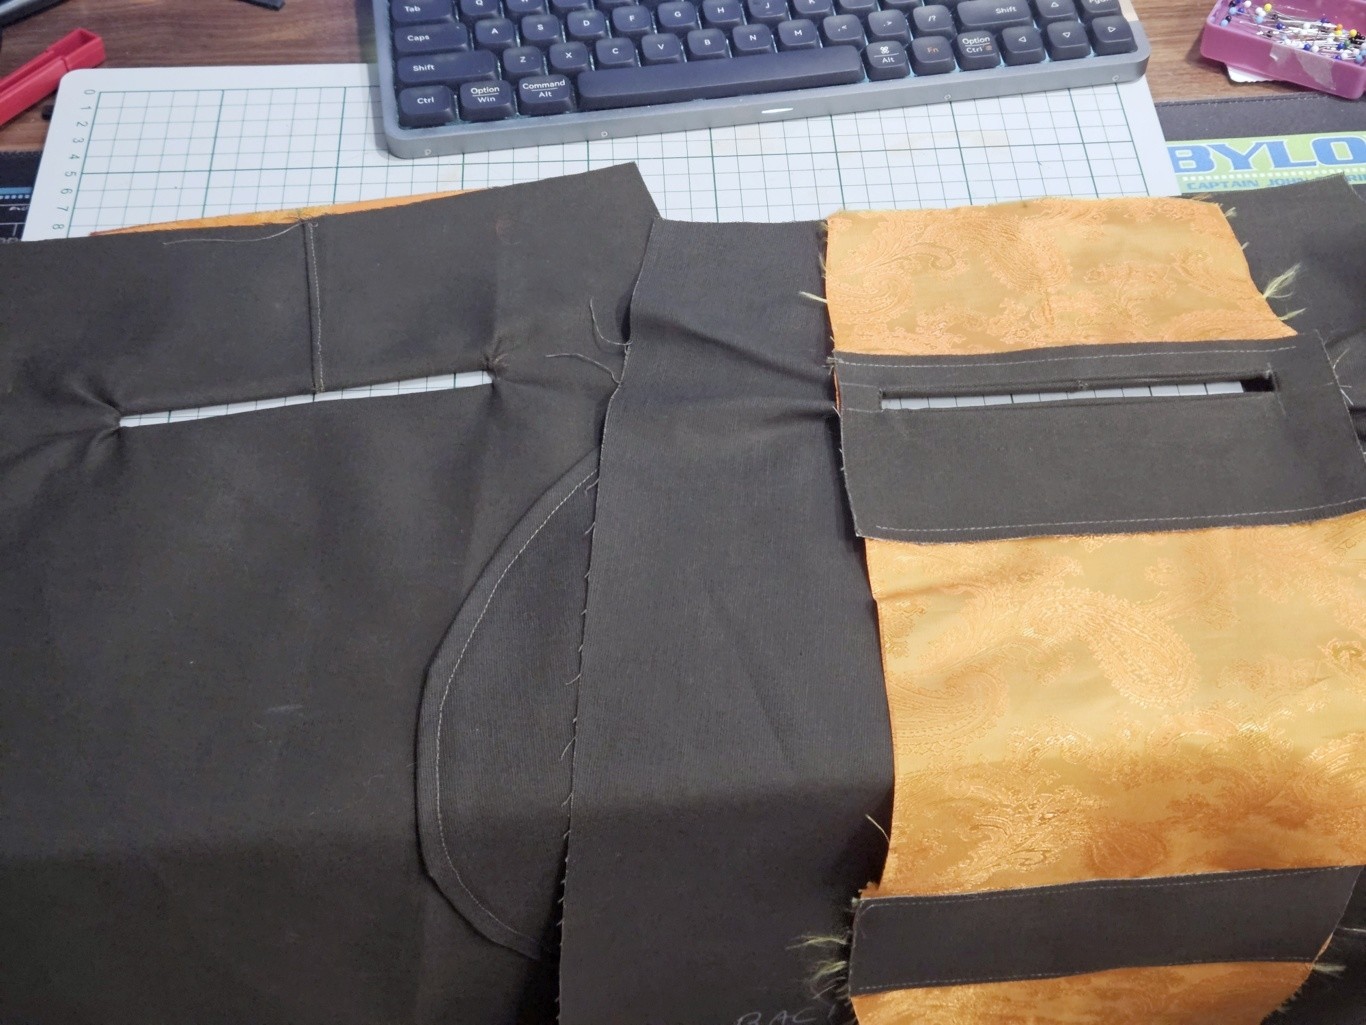
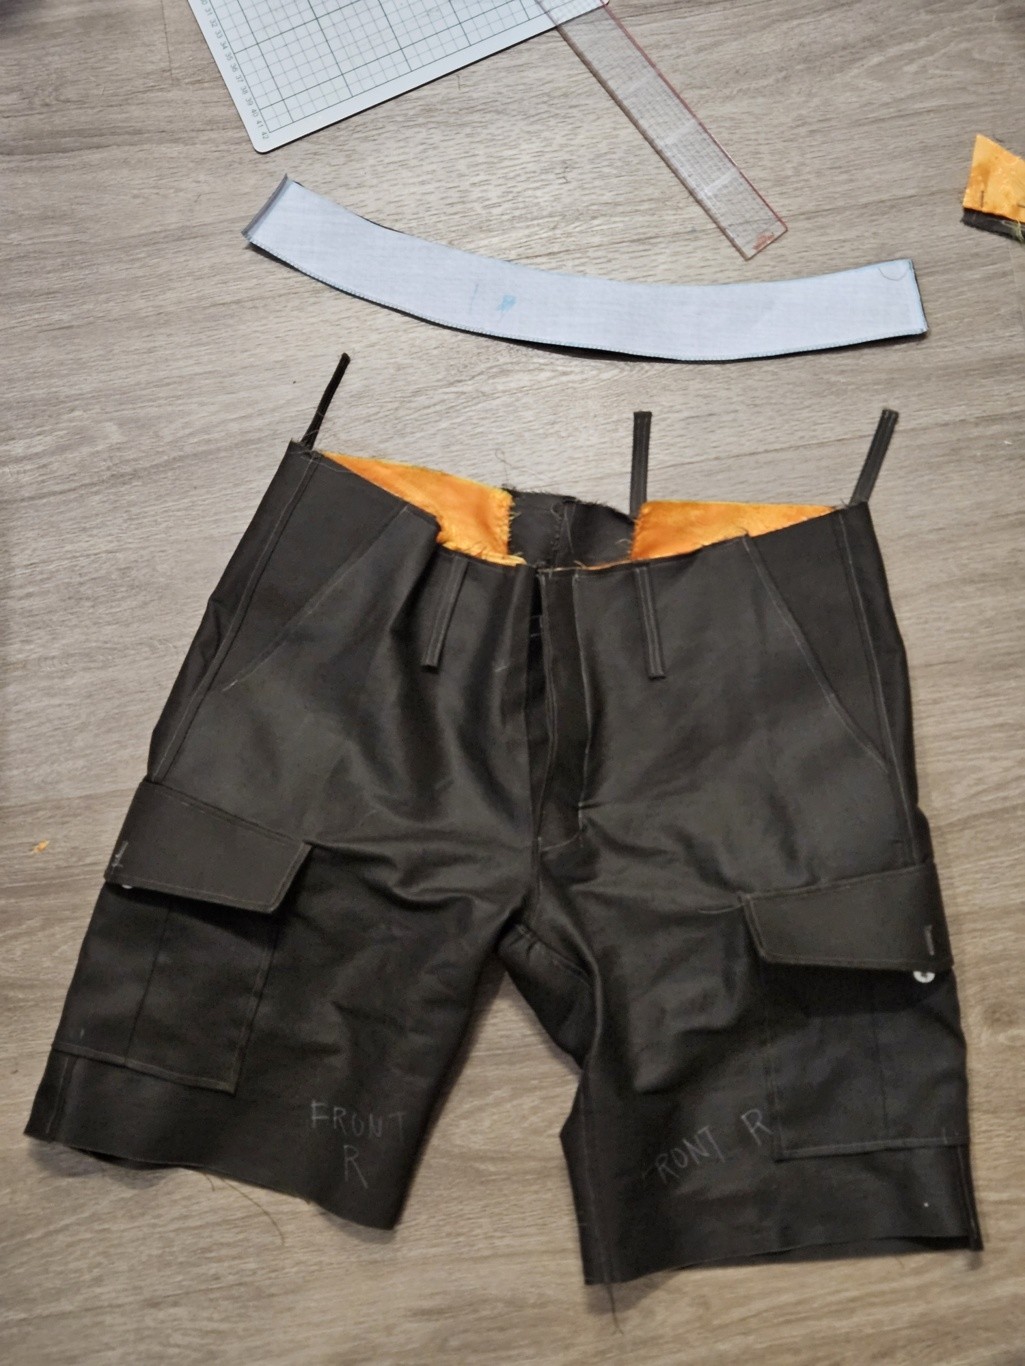
Today though, I will be cutting out fabric for the cargo pants.
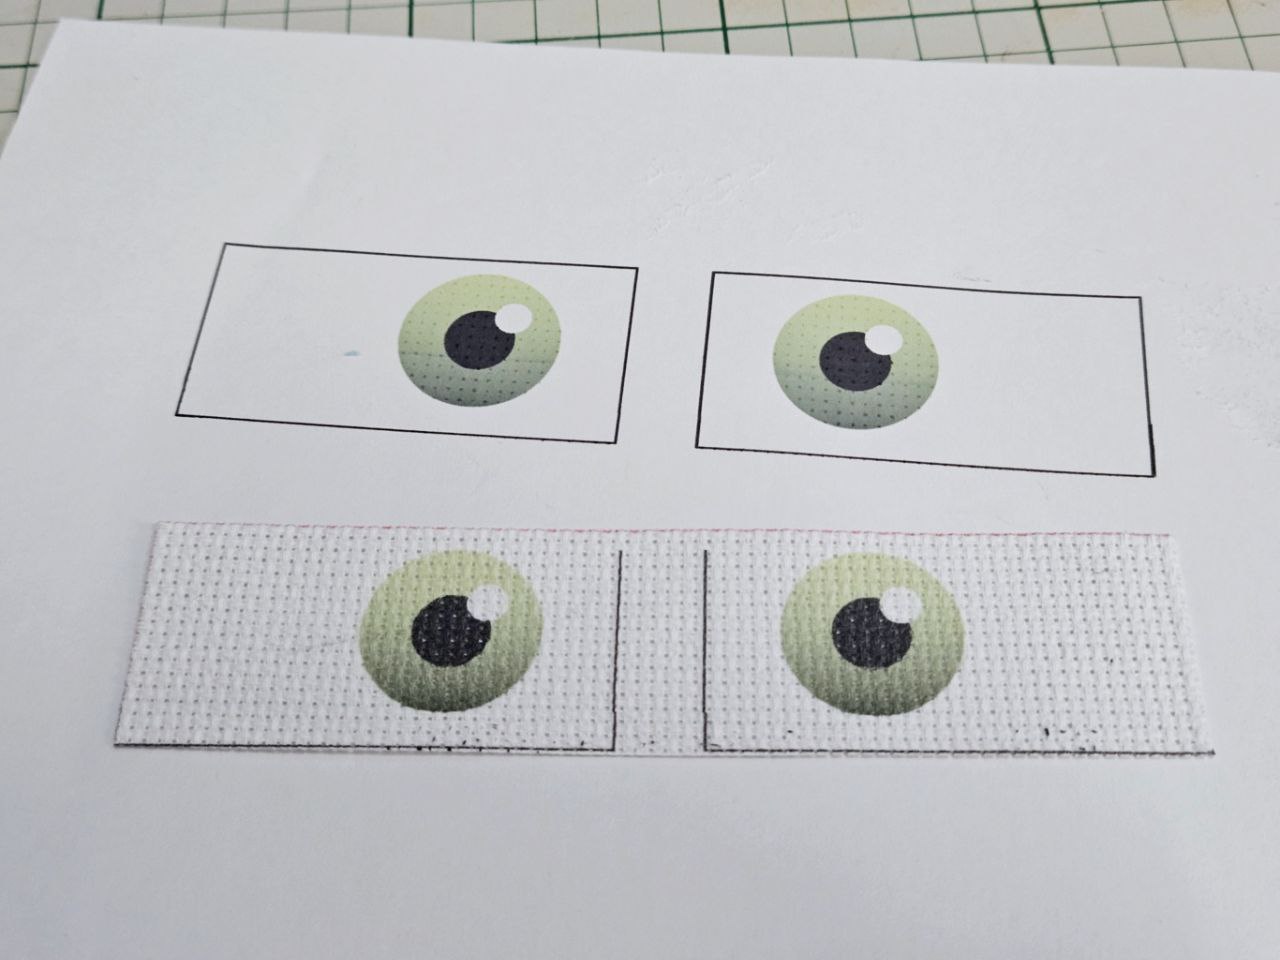
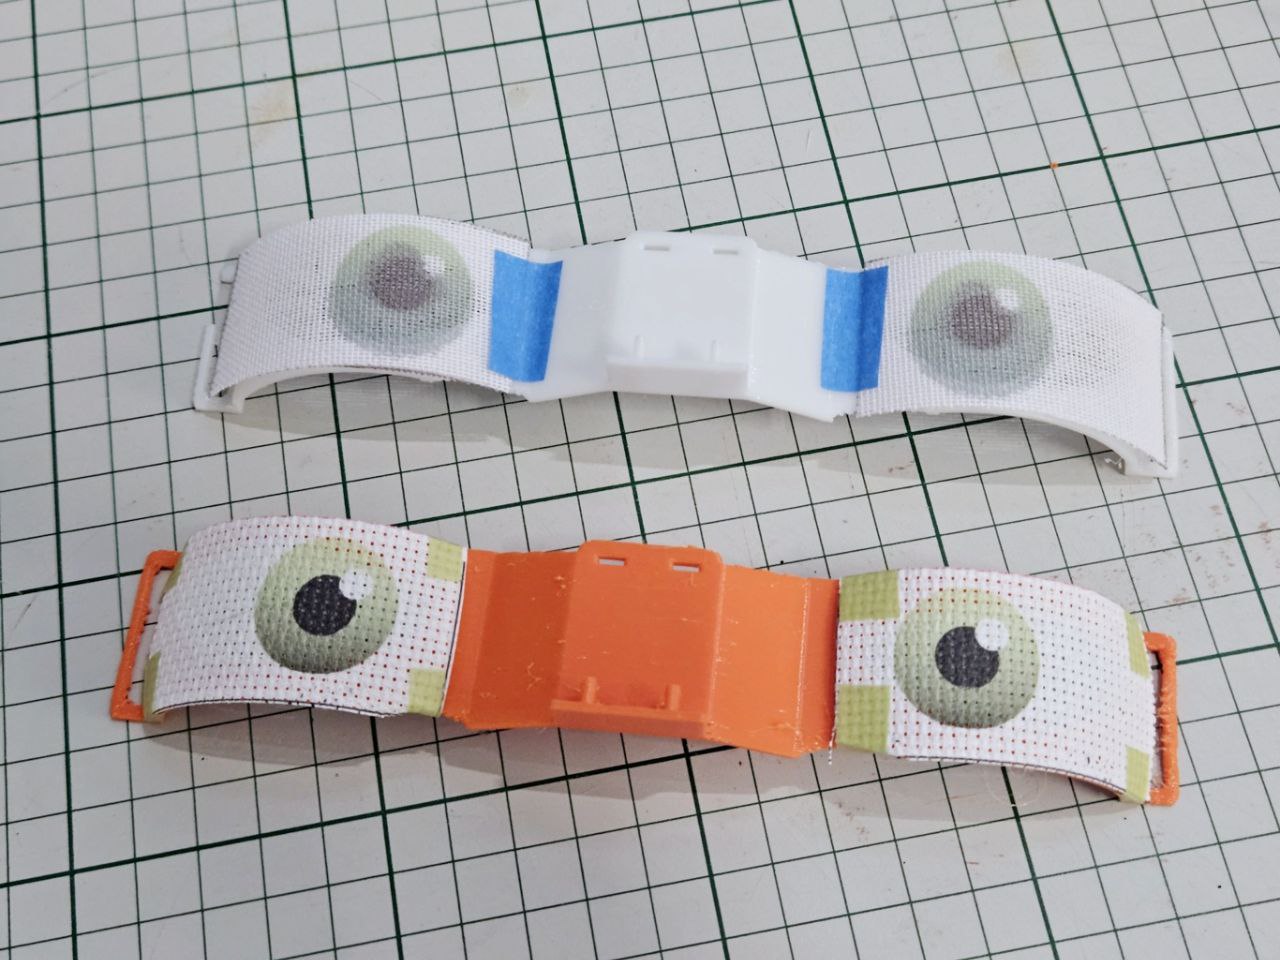
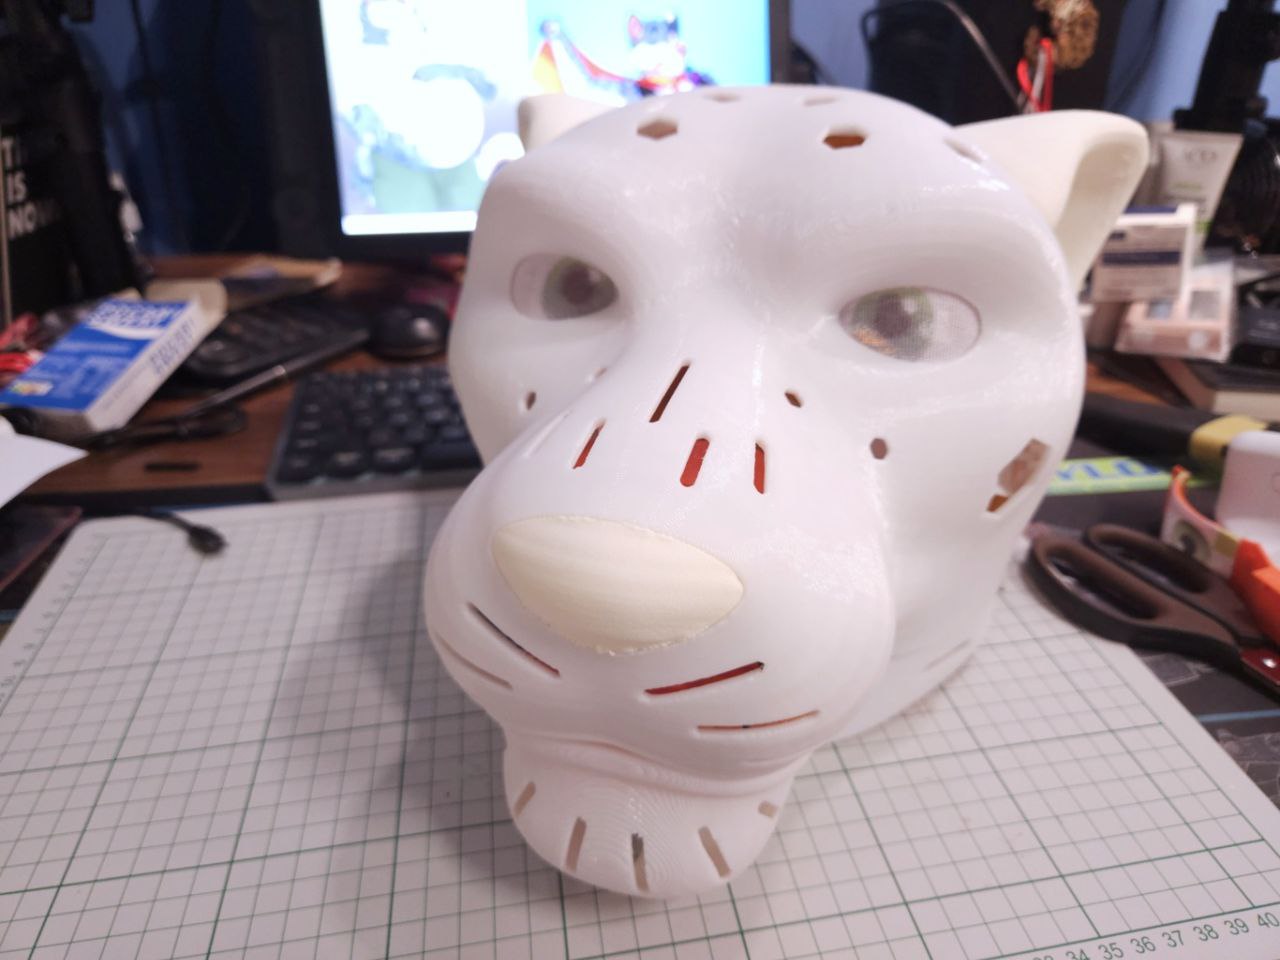
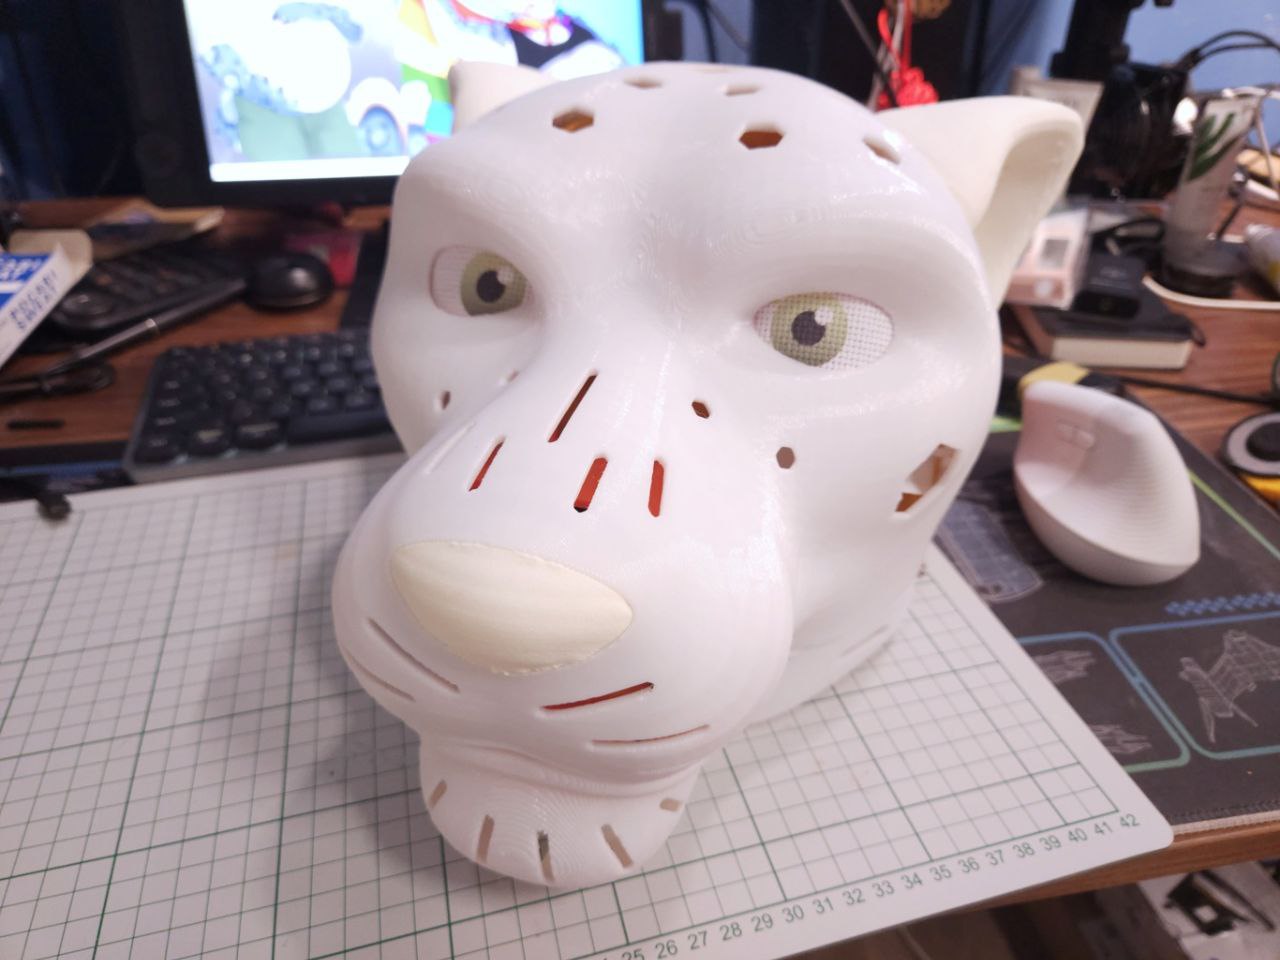
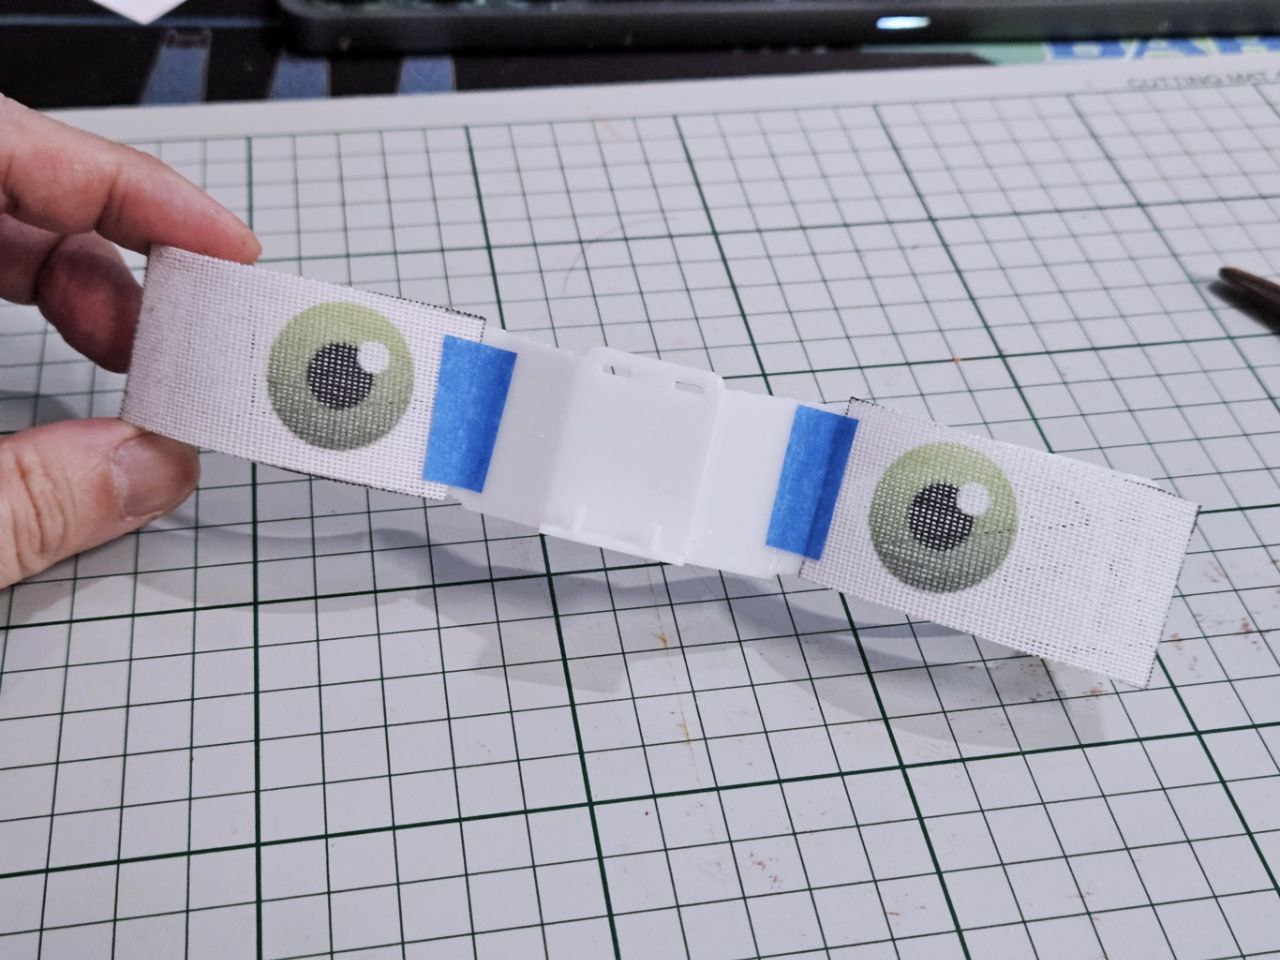
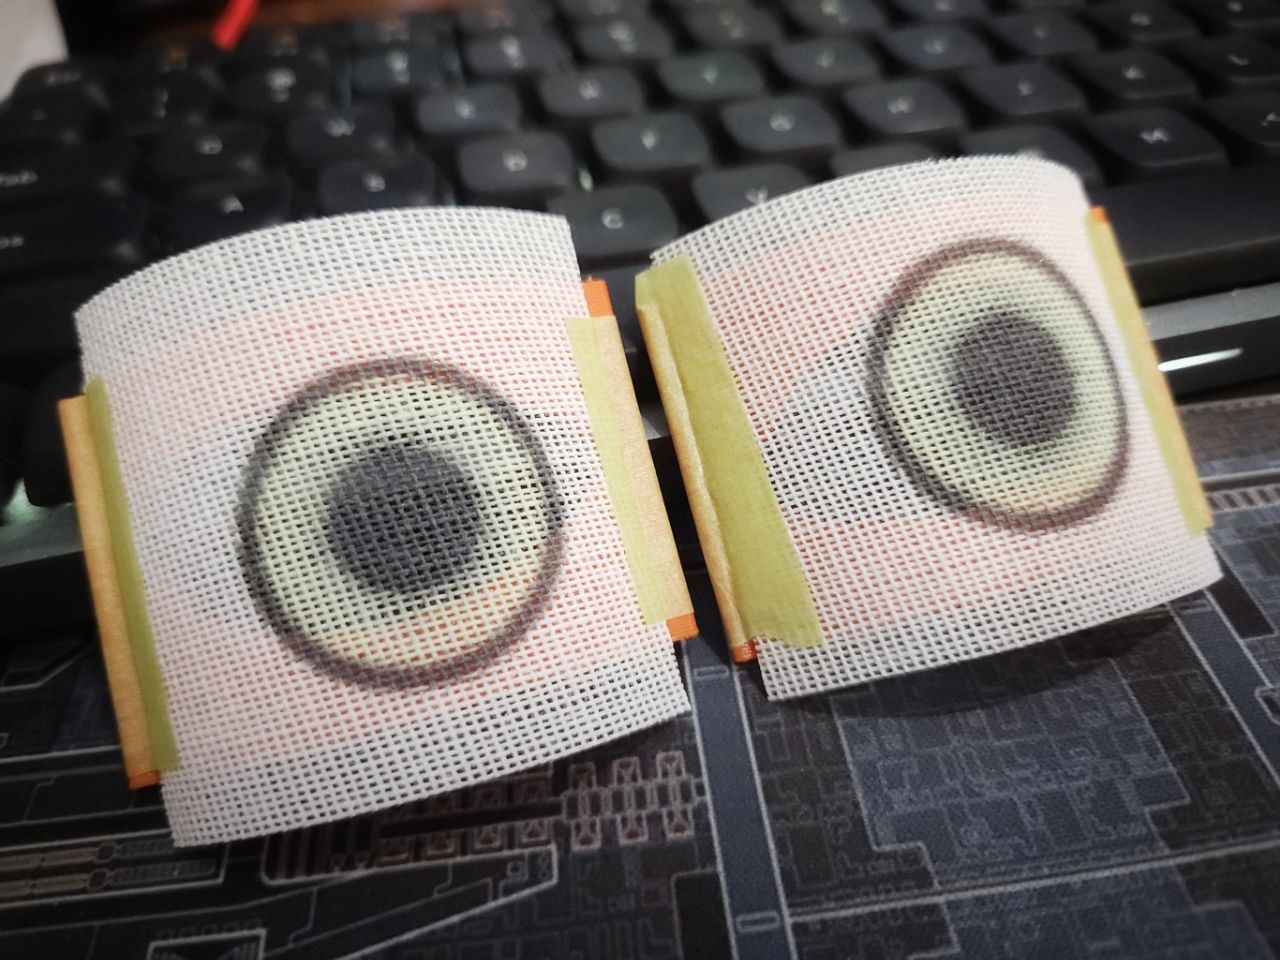
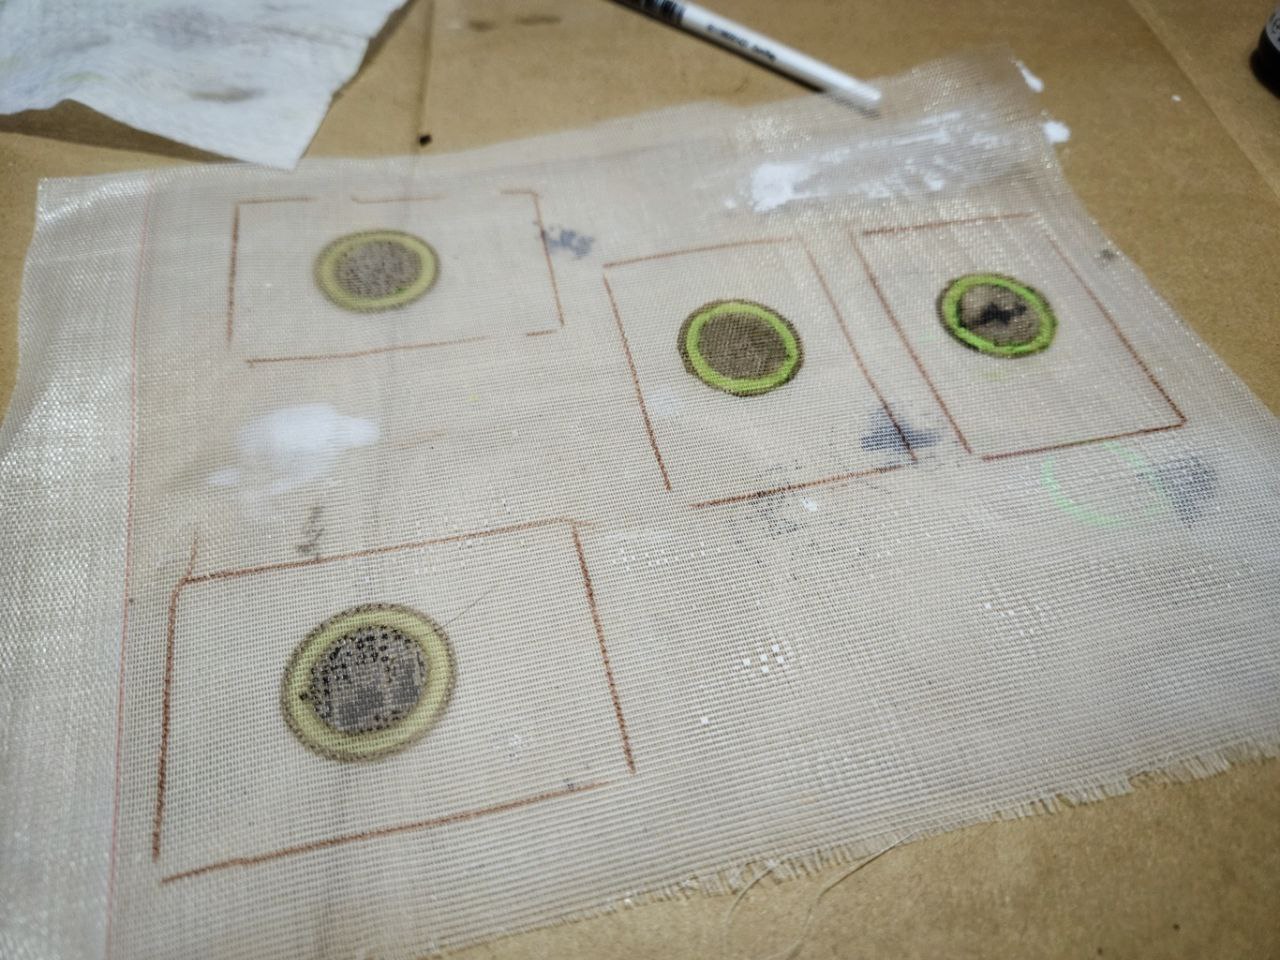
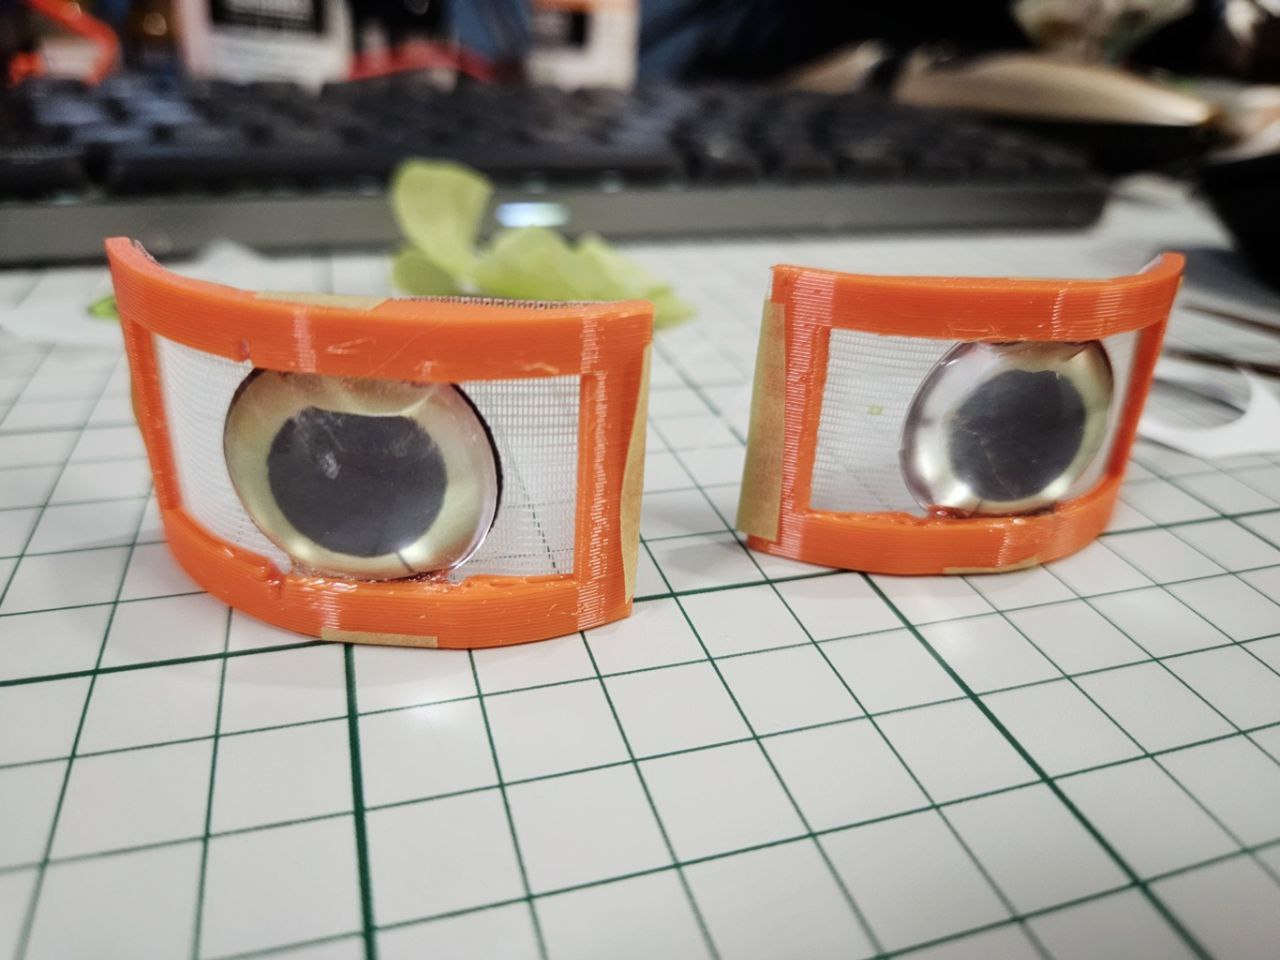
Ops decided to test out some new material for the eyes. Originally I was using some fabric interfacing, but I read some folks using 14ct Aida fabric (?!?!), it's used for cross stitch.
According to wiki, it can fray, and washing it will contract the fabric. Hmm. Maybe I need to use some fabric glue to stabilize the edges. Anyways, here's a comparison of the
eyes using interfacing vs the aida fabric. The aida fabric is attached to the orange eye mount, and is far brighter and the eyes are much more visible.
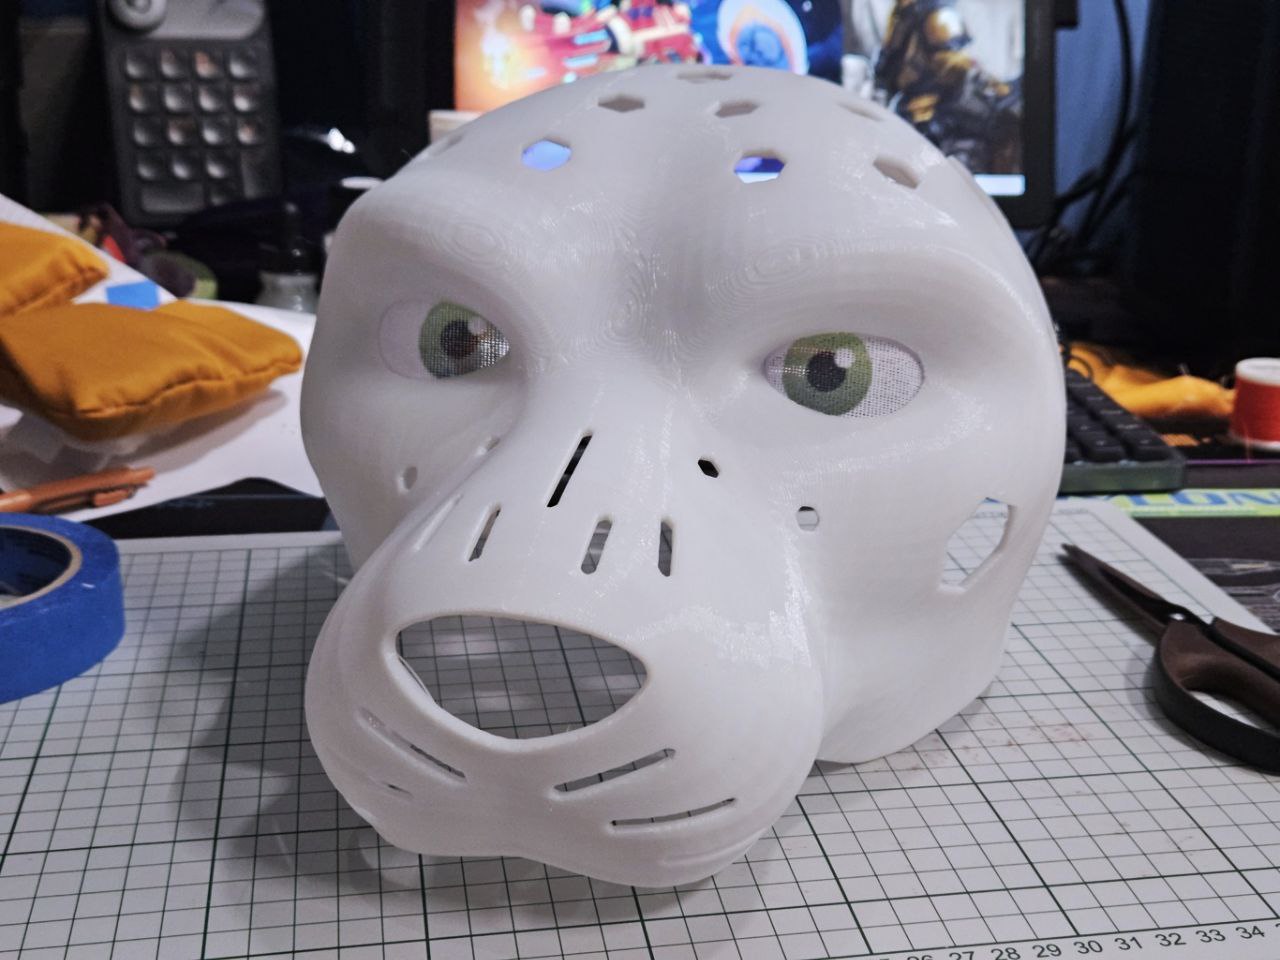
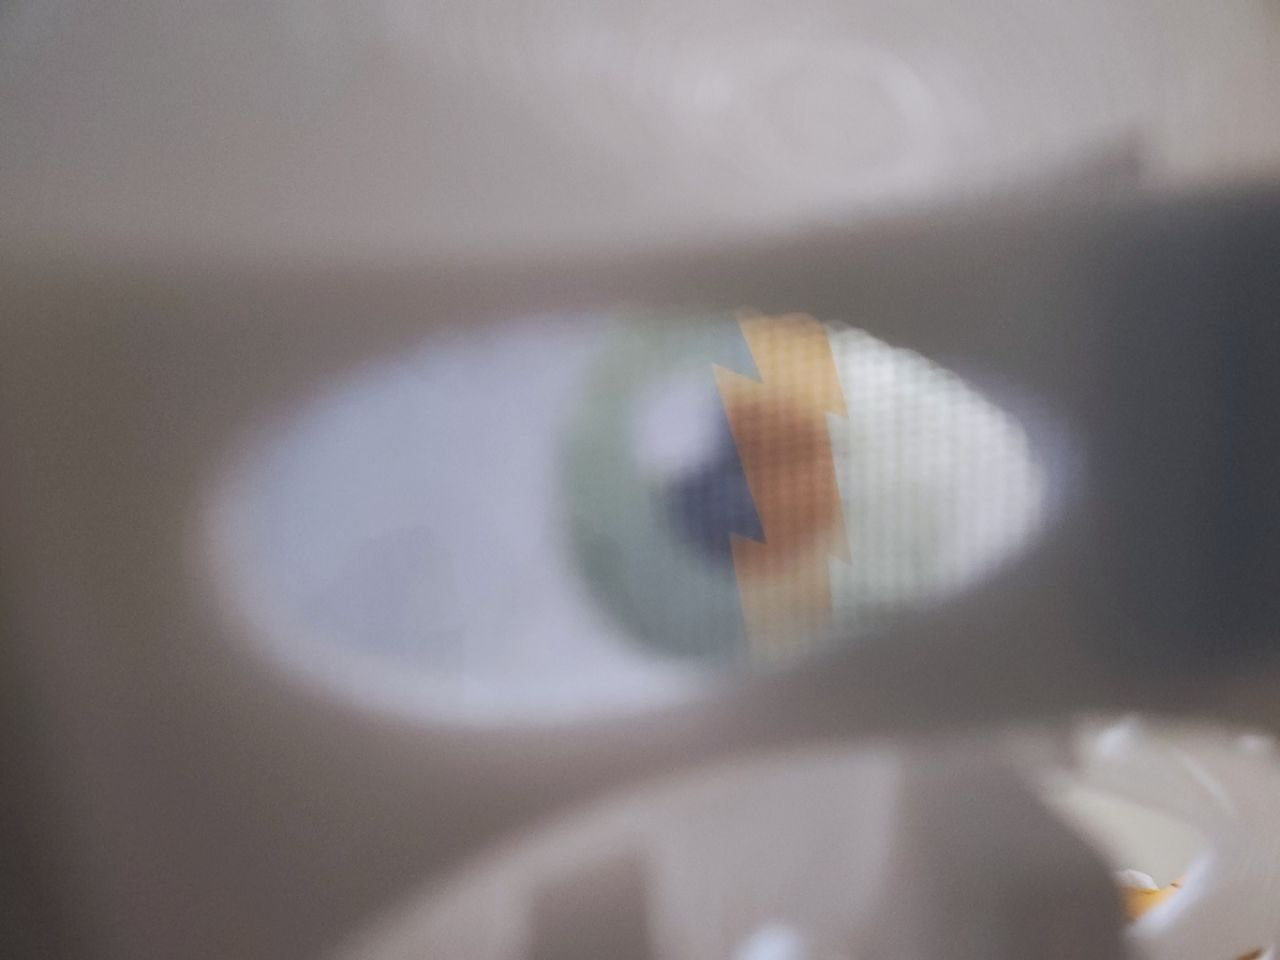
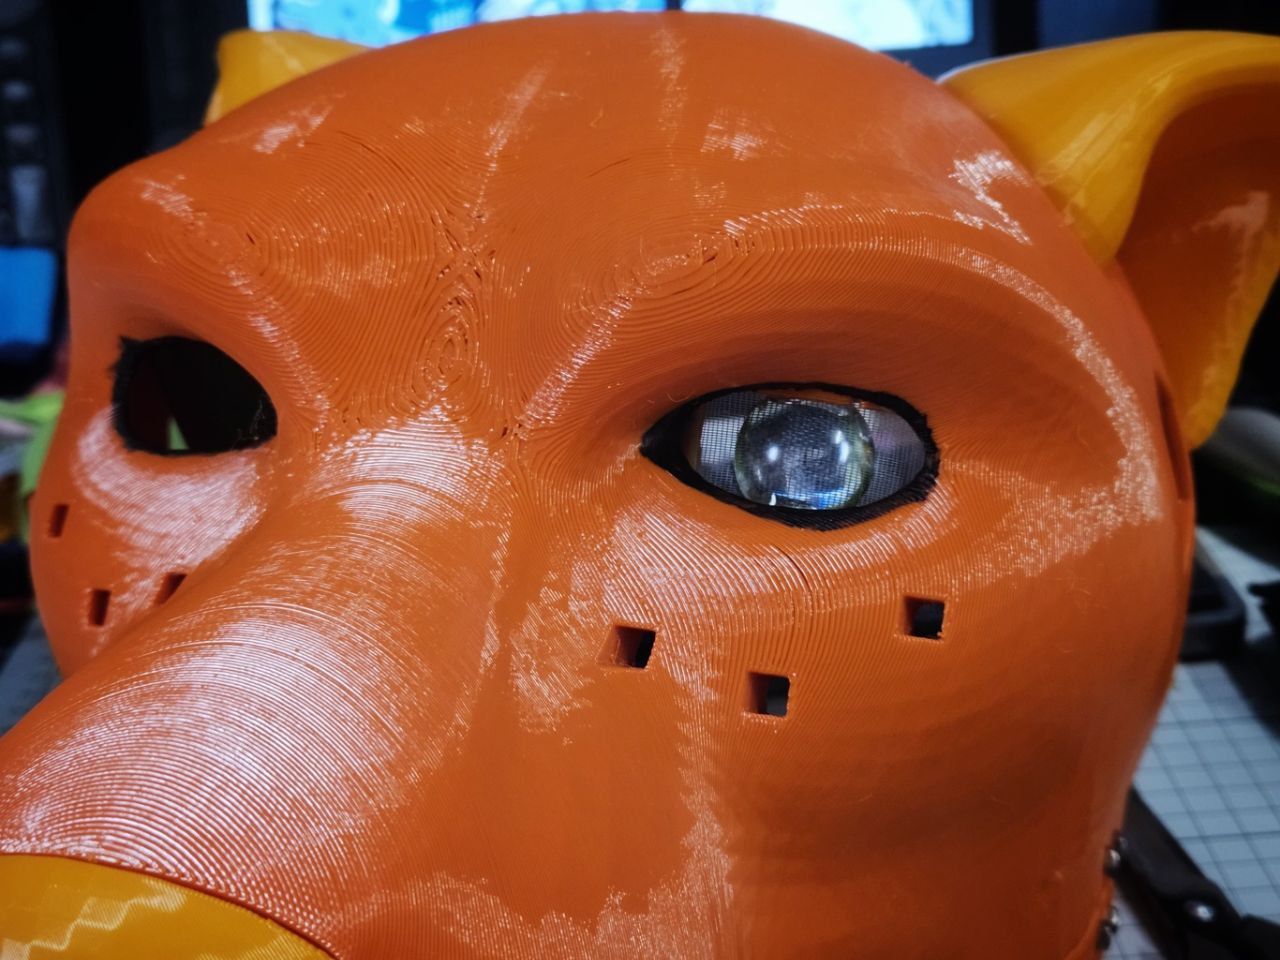
Wearing the head though, I can't really tell the difference.
https://www.seamwork.com/sewing-tutorials/a-guide-to-elastic-shirring
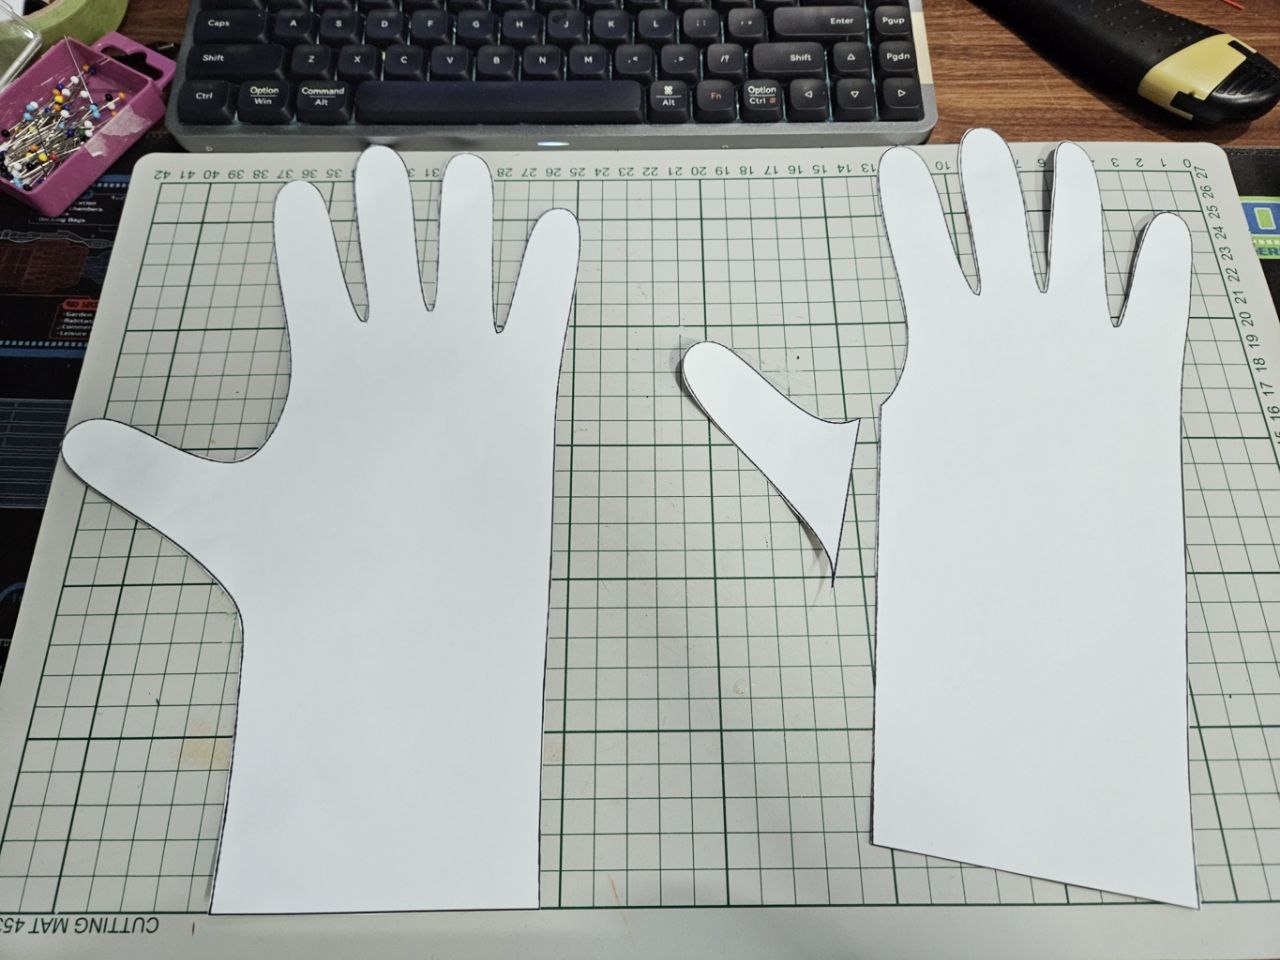
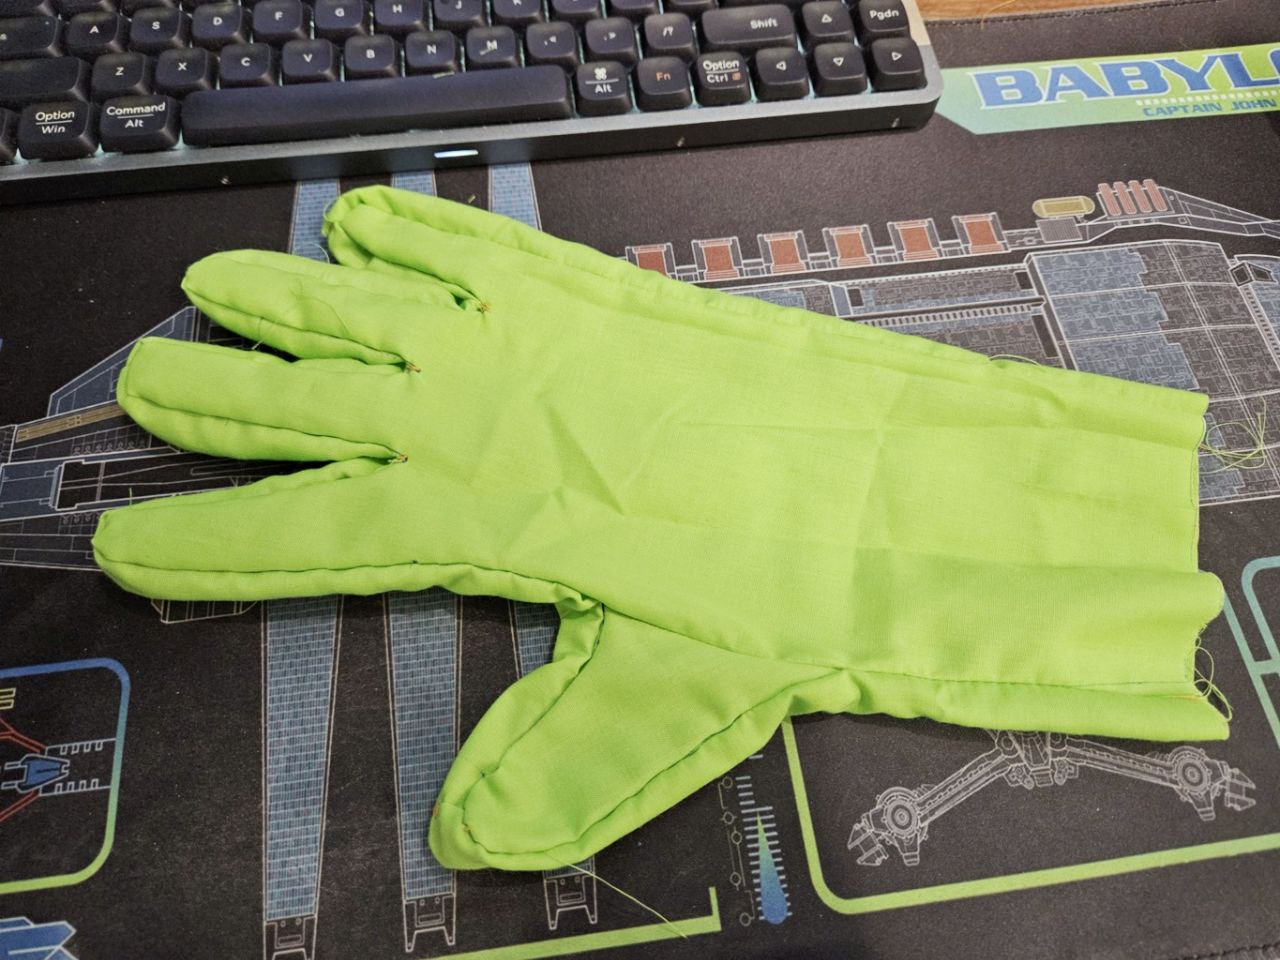
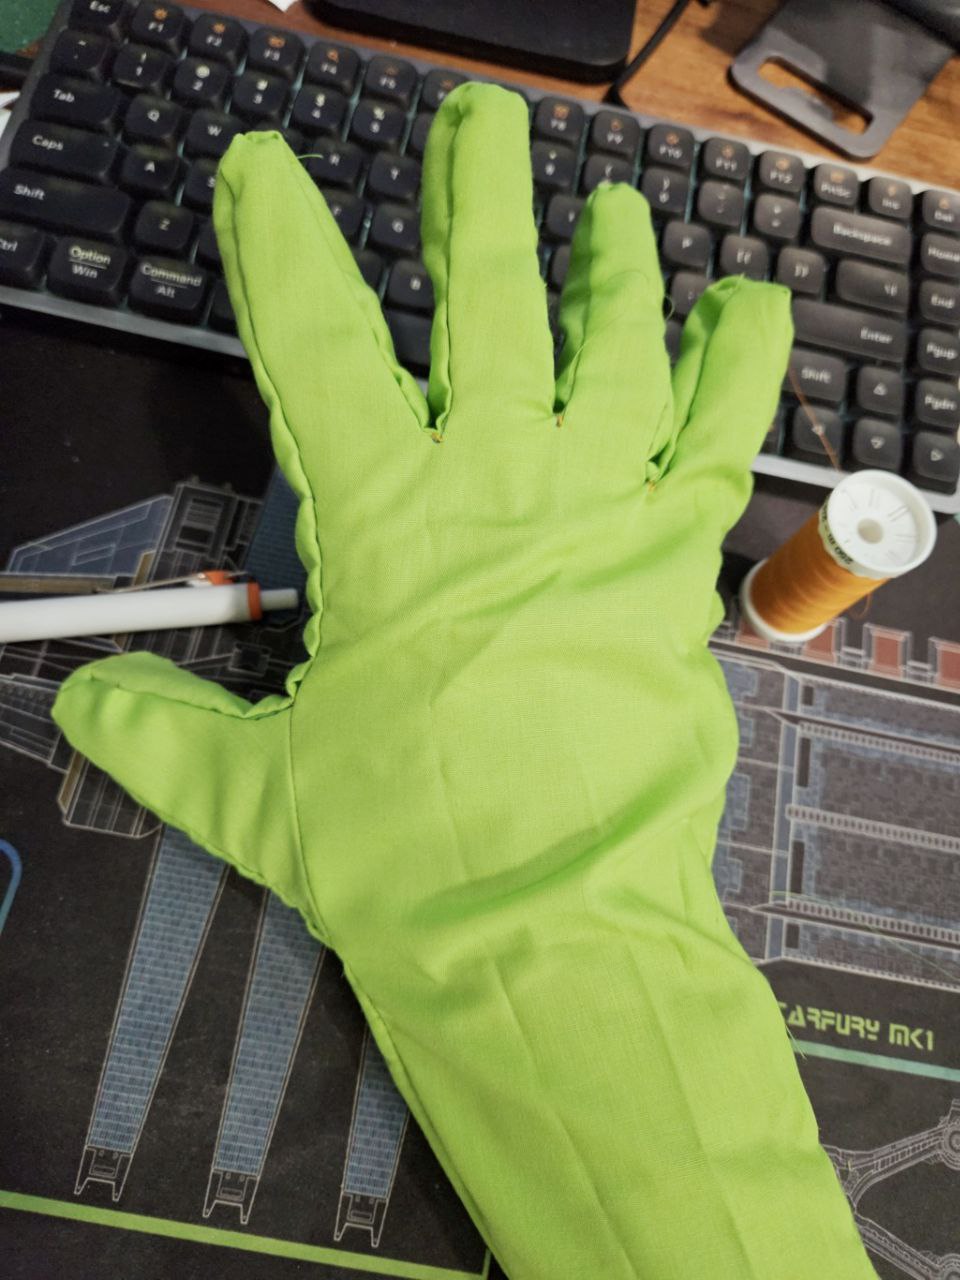
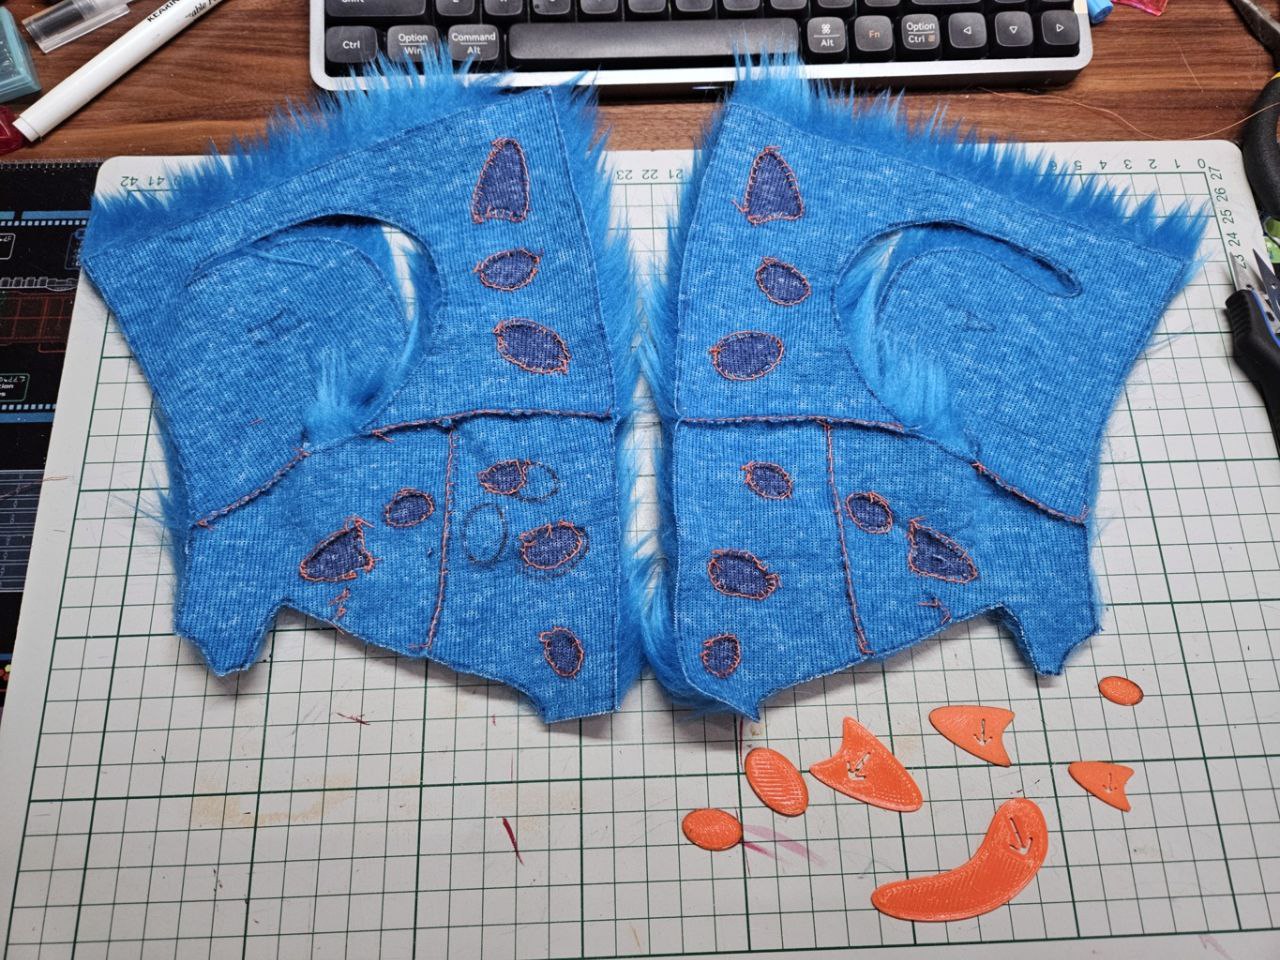
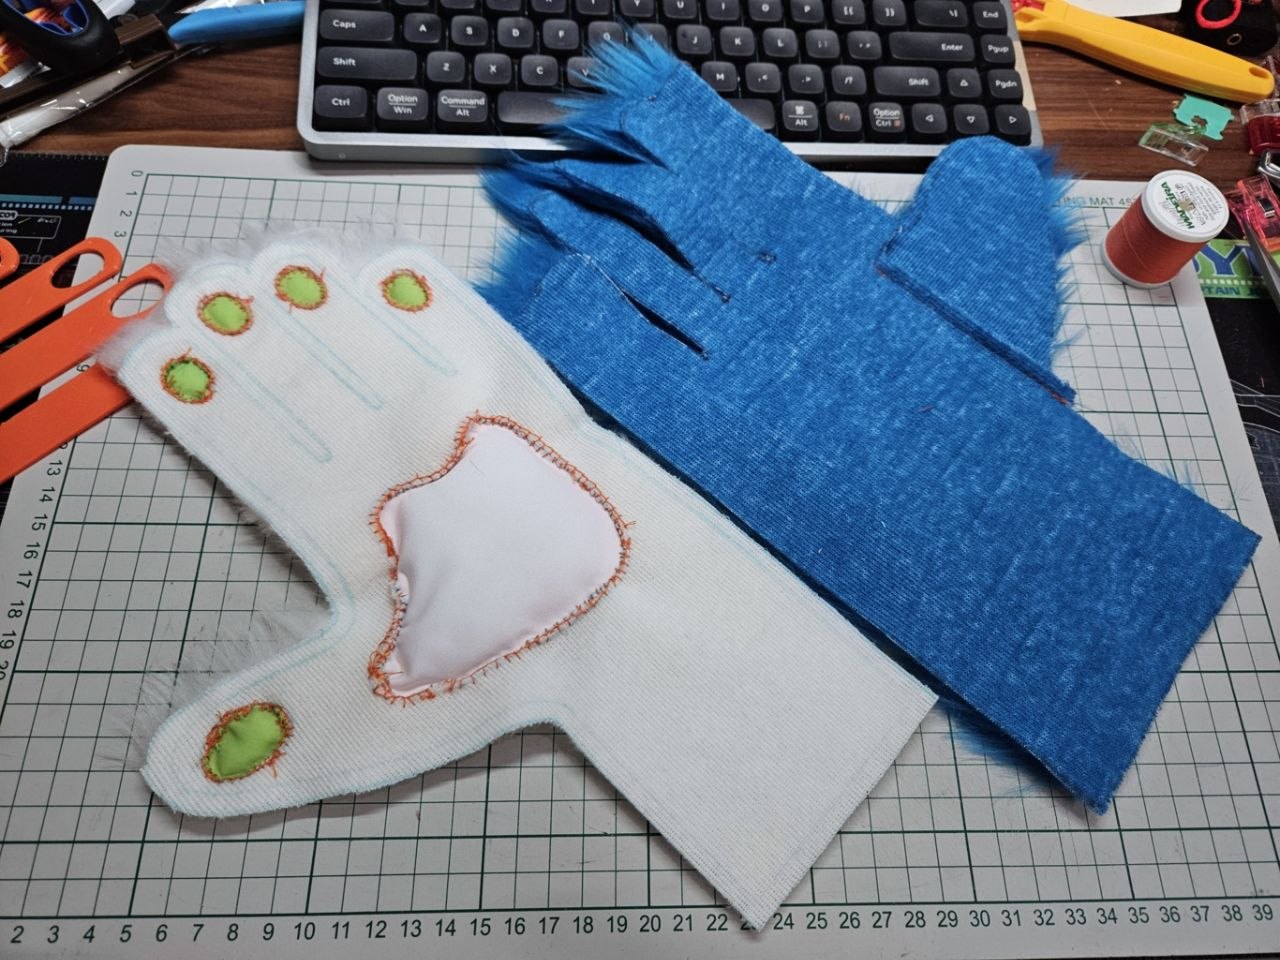
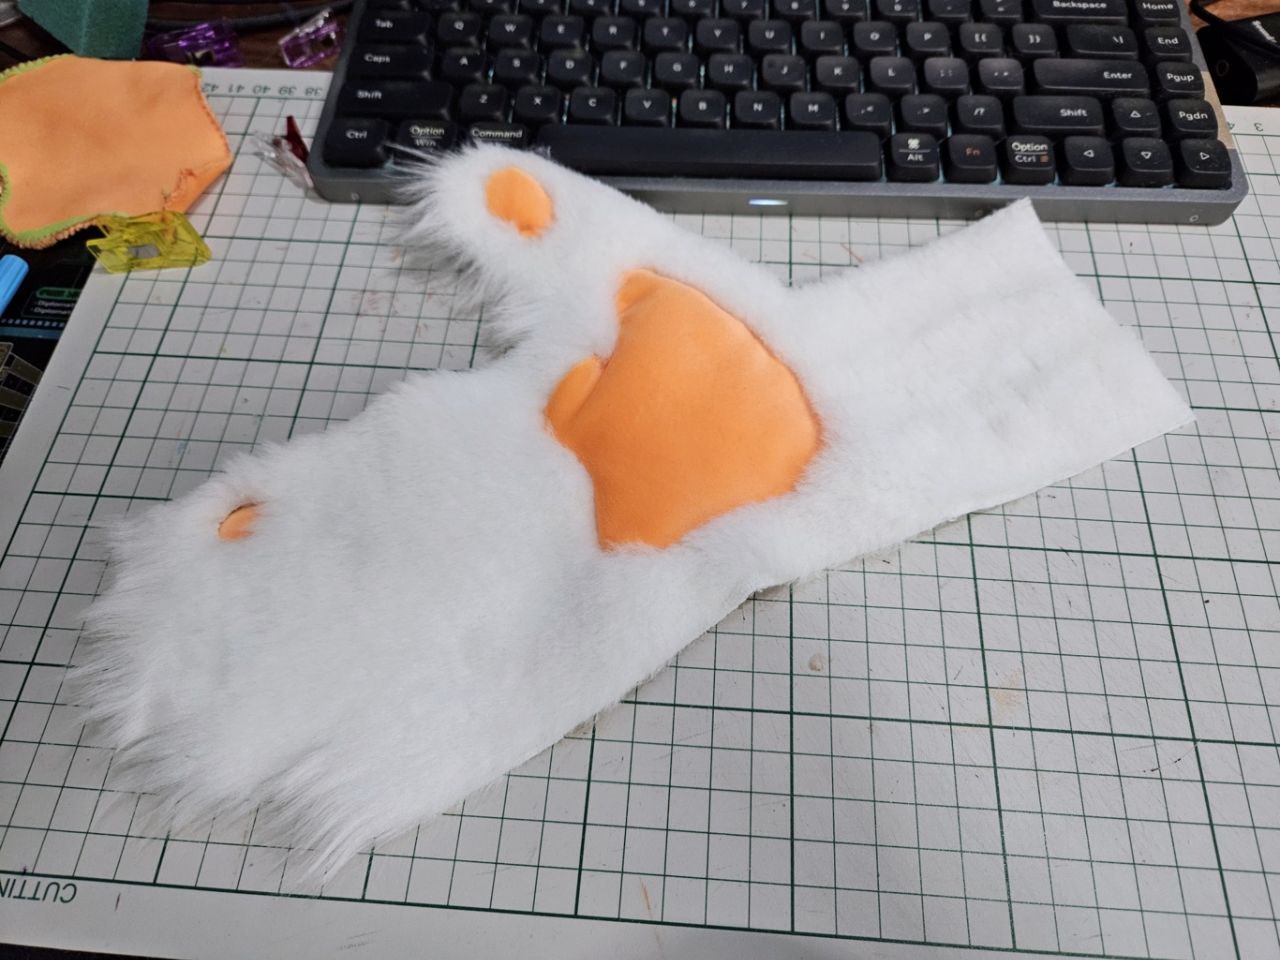
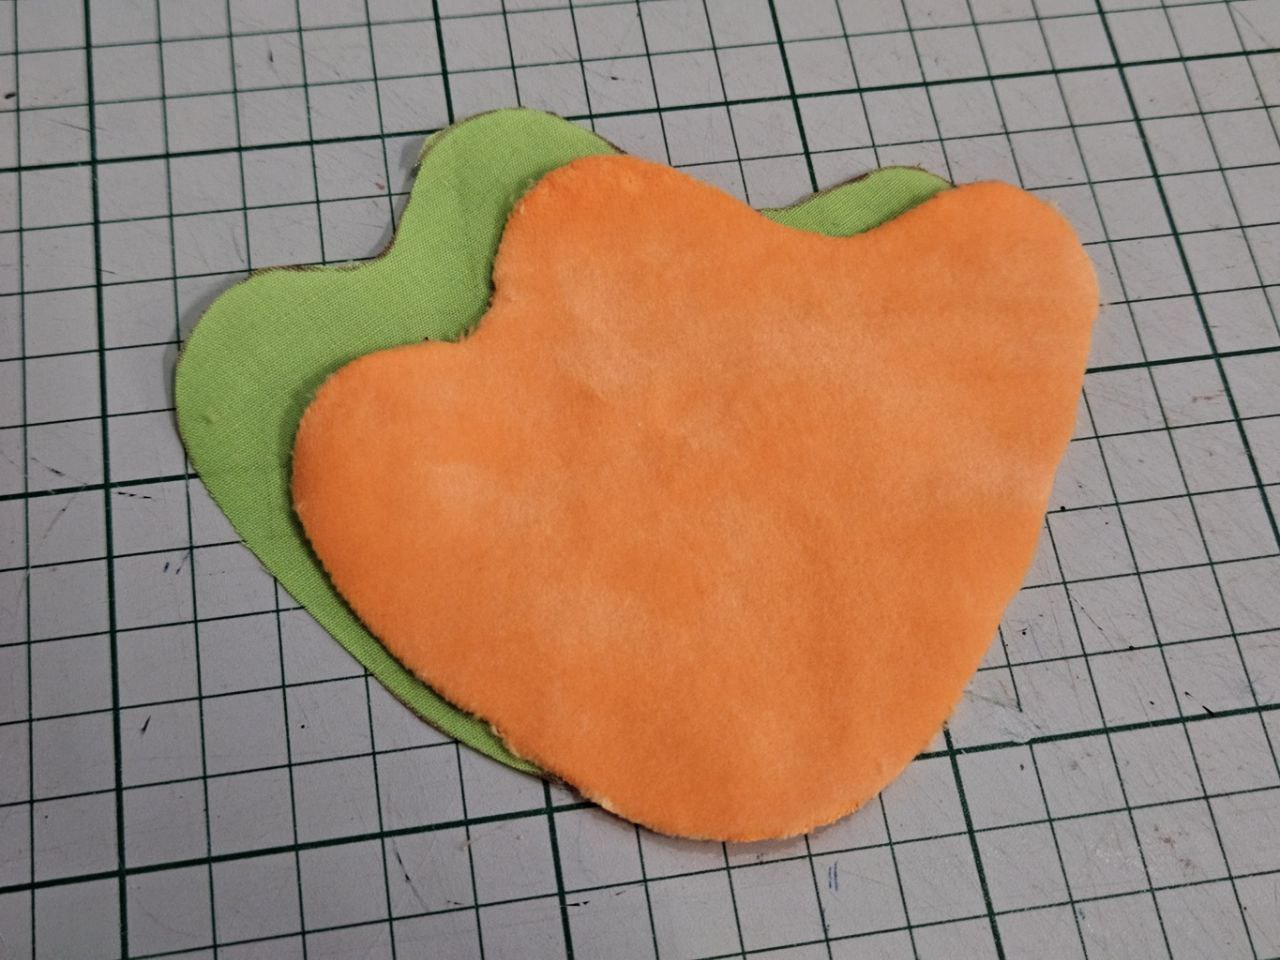
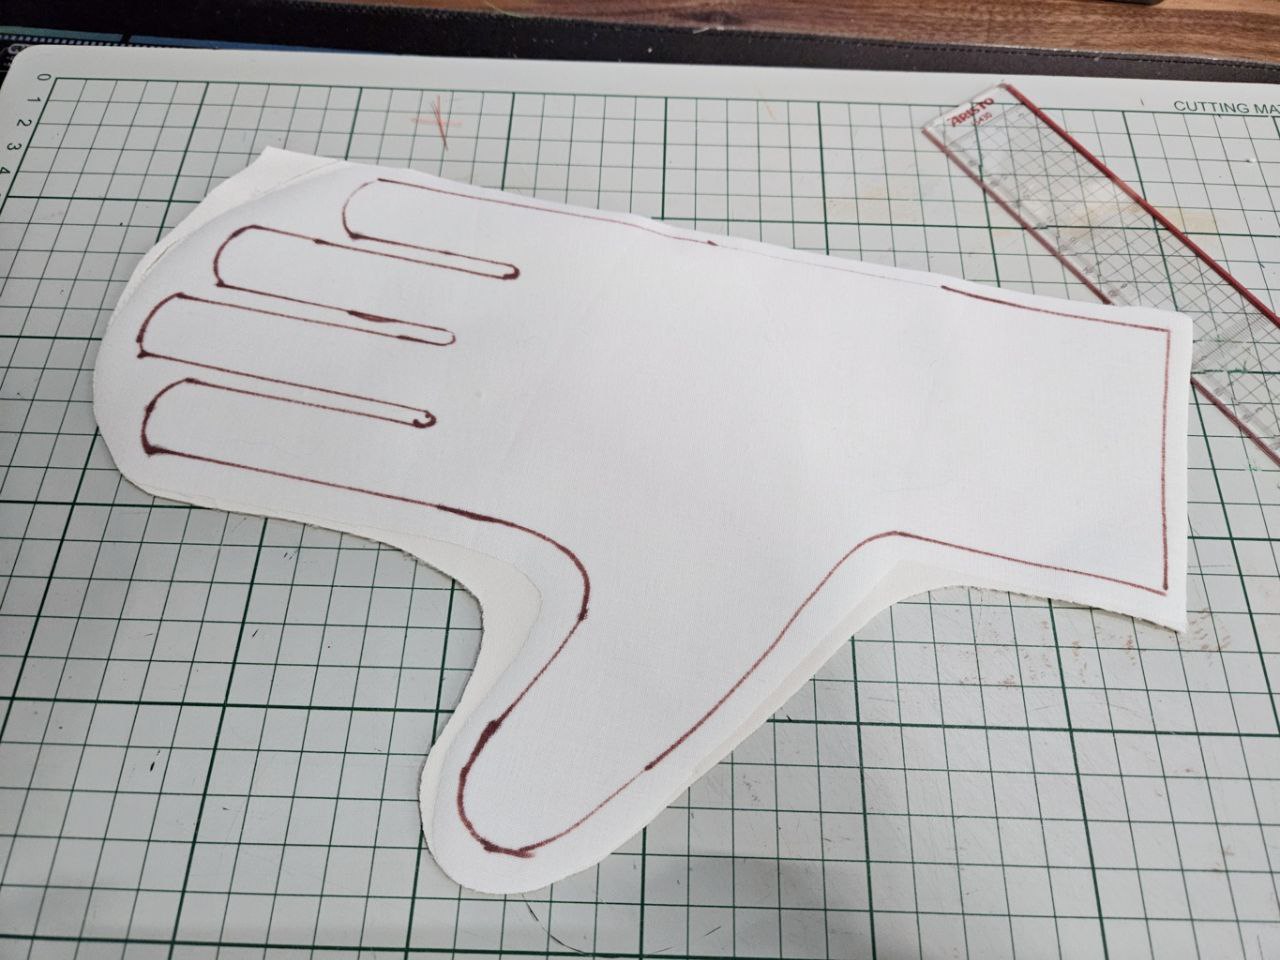
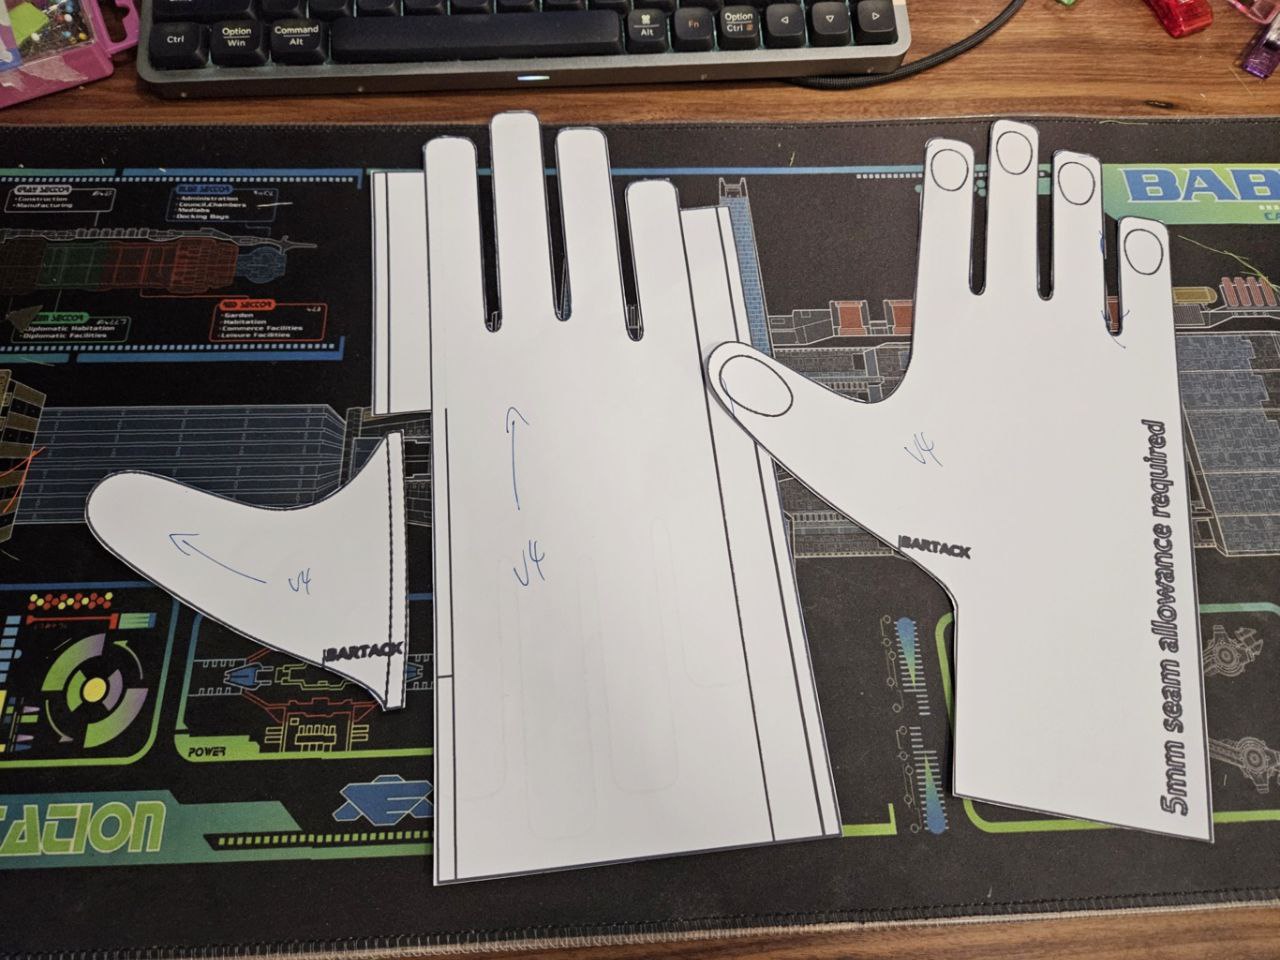
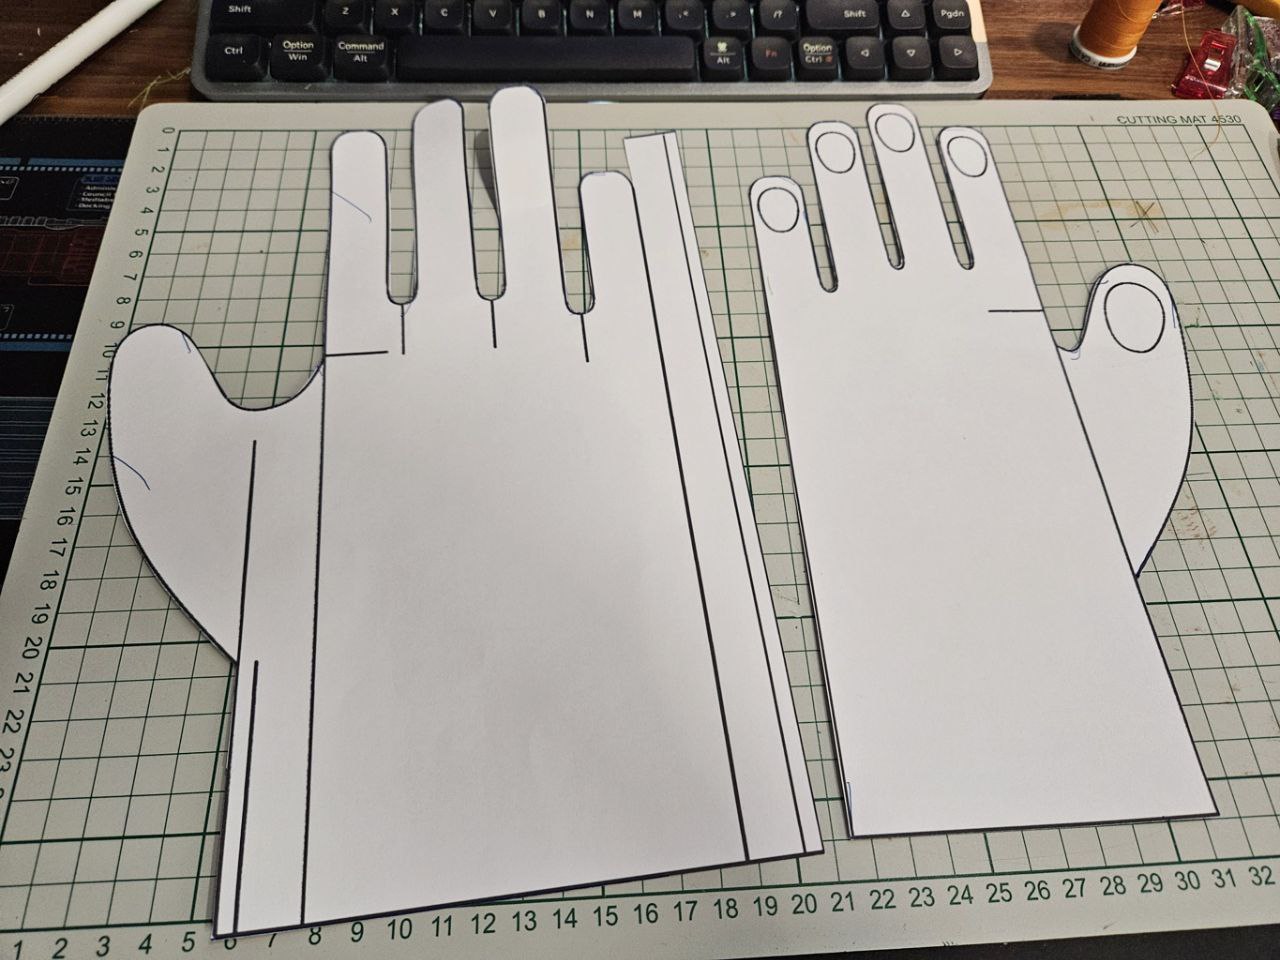
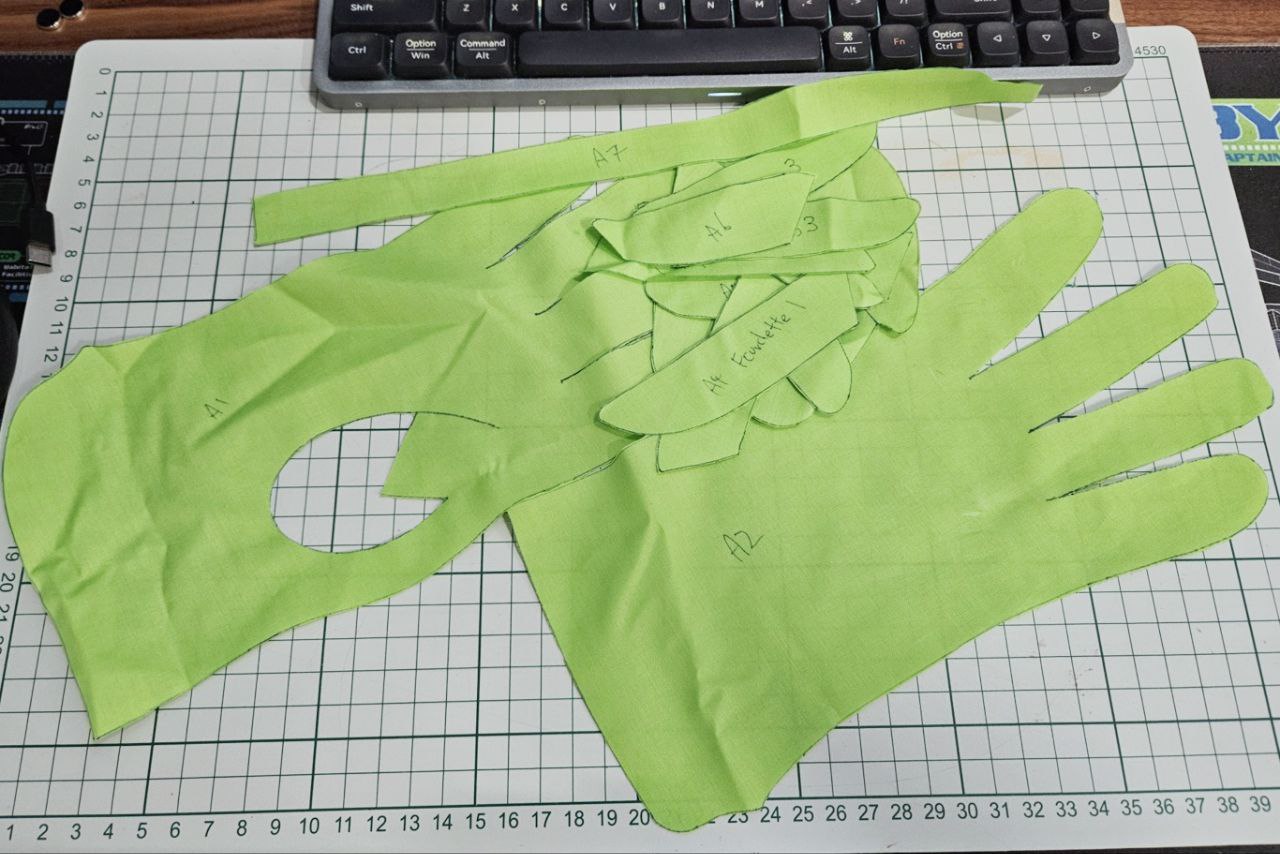
I am so tired today, hand sewing does take a lot out of me. In any case, this is my attempt at a glove pattern. The left pattern is for the front, and is going to be made from cream coloured minky fabric.
The right pattern is to be cut from blue faux fur. The thumb is separated, for the proper fur direction. A 2cm strip then connects both pieces.
This works ok, but there are some improvements that need to be made:
Quick search shows several glove tutorials, this one looks promising: Tutorial: How to Make Gloves (and fingerless) for Anime Costumes
Another one that is very detailed: Exploring How to Make Gloves from Scratch
The later is very similar to the pattern I have and a bit too advanced for me. I'll likely pick ideas from both to design my hand paws.
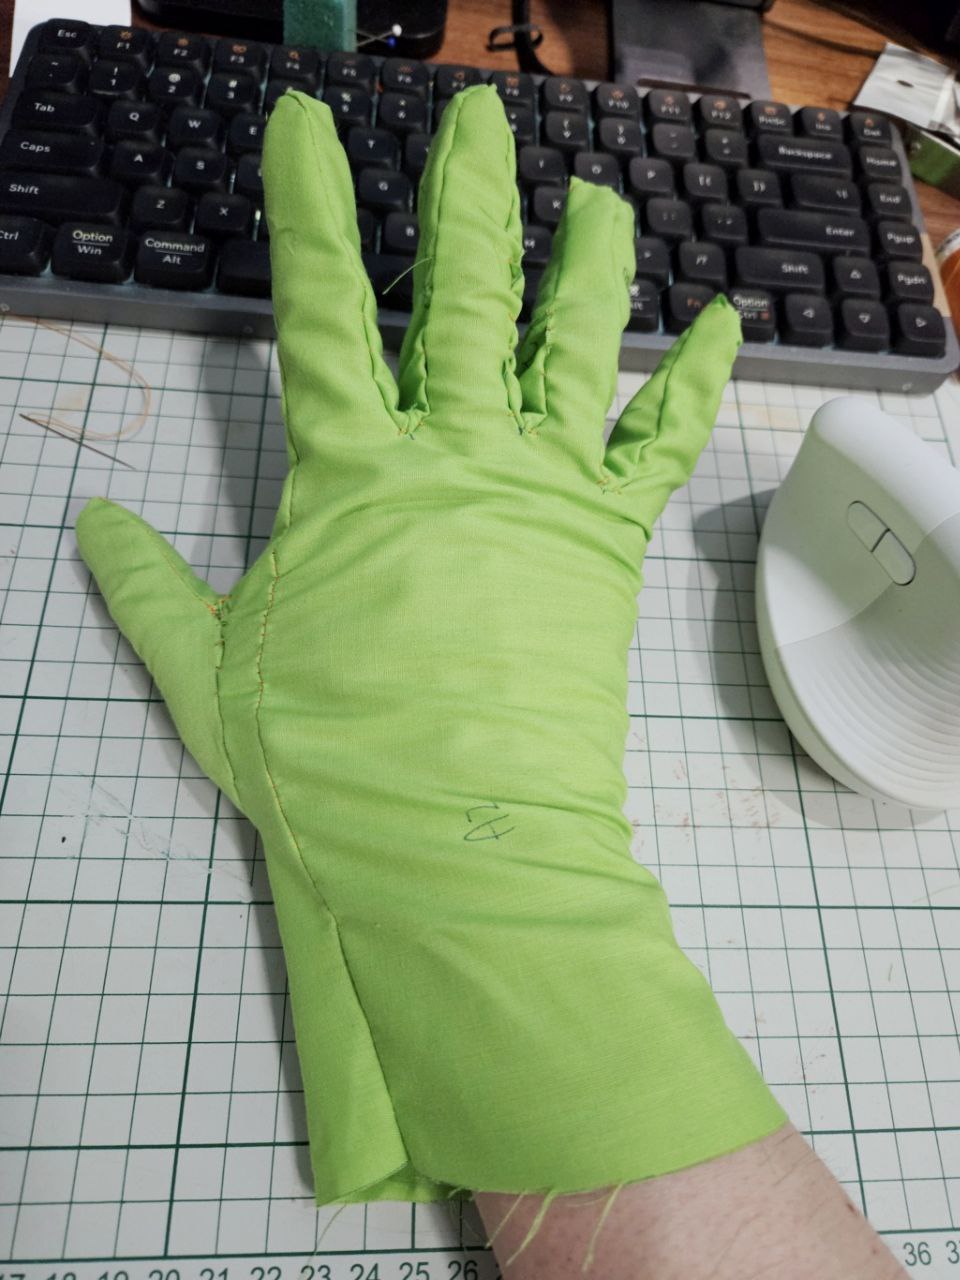
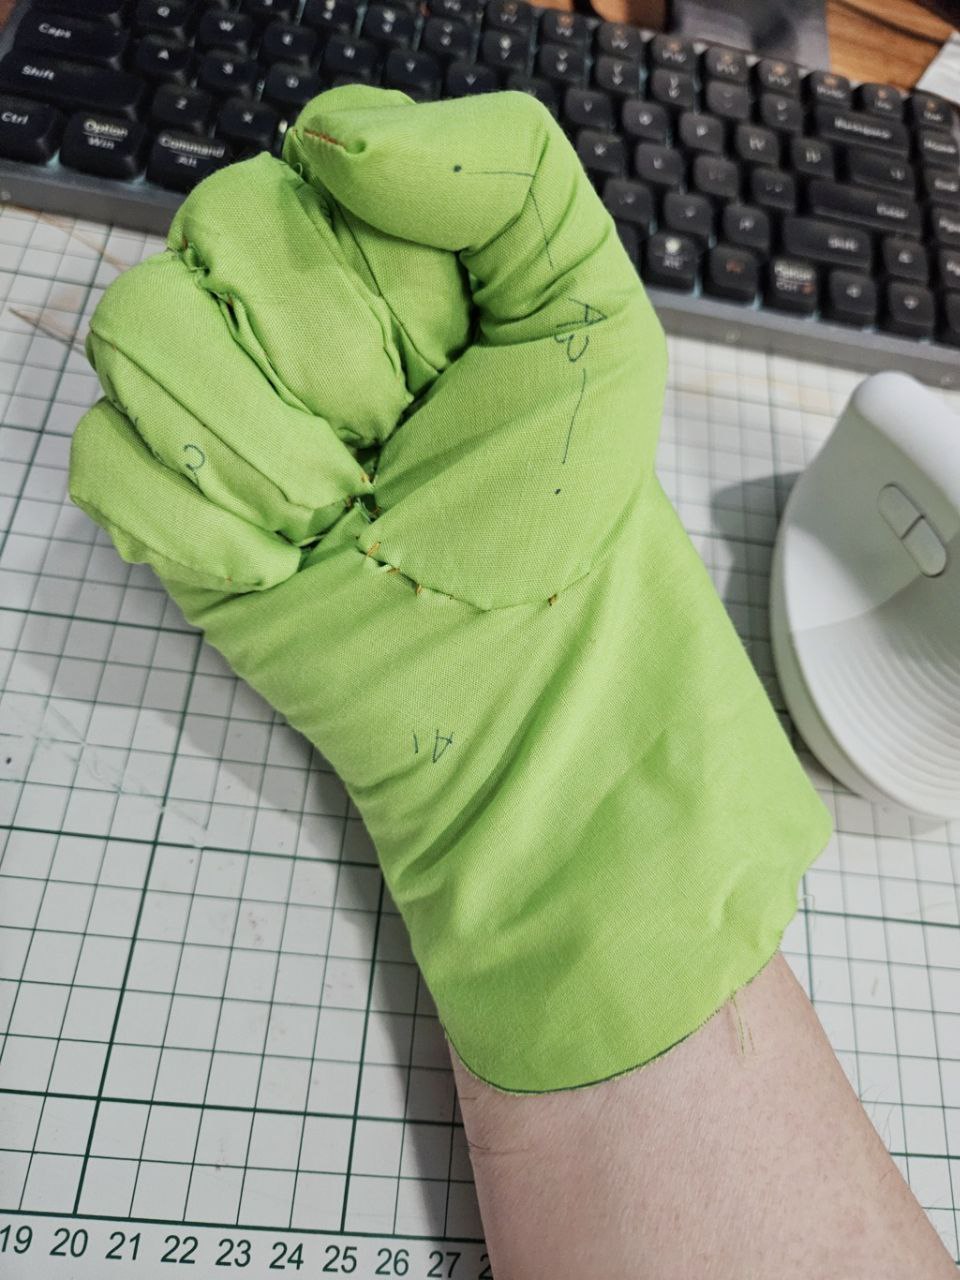
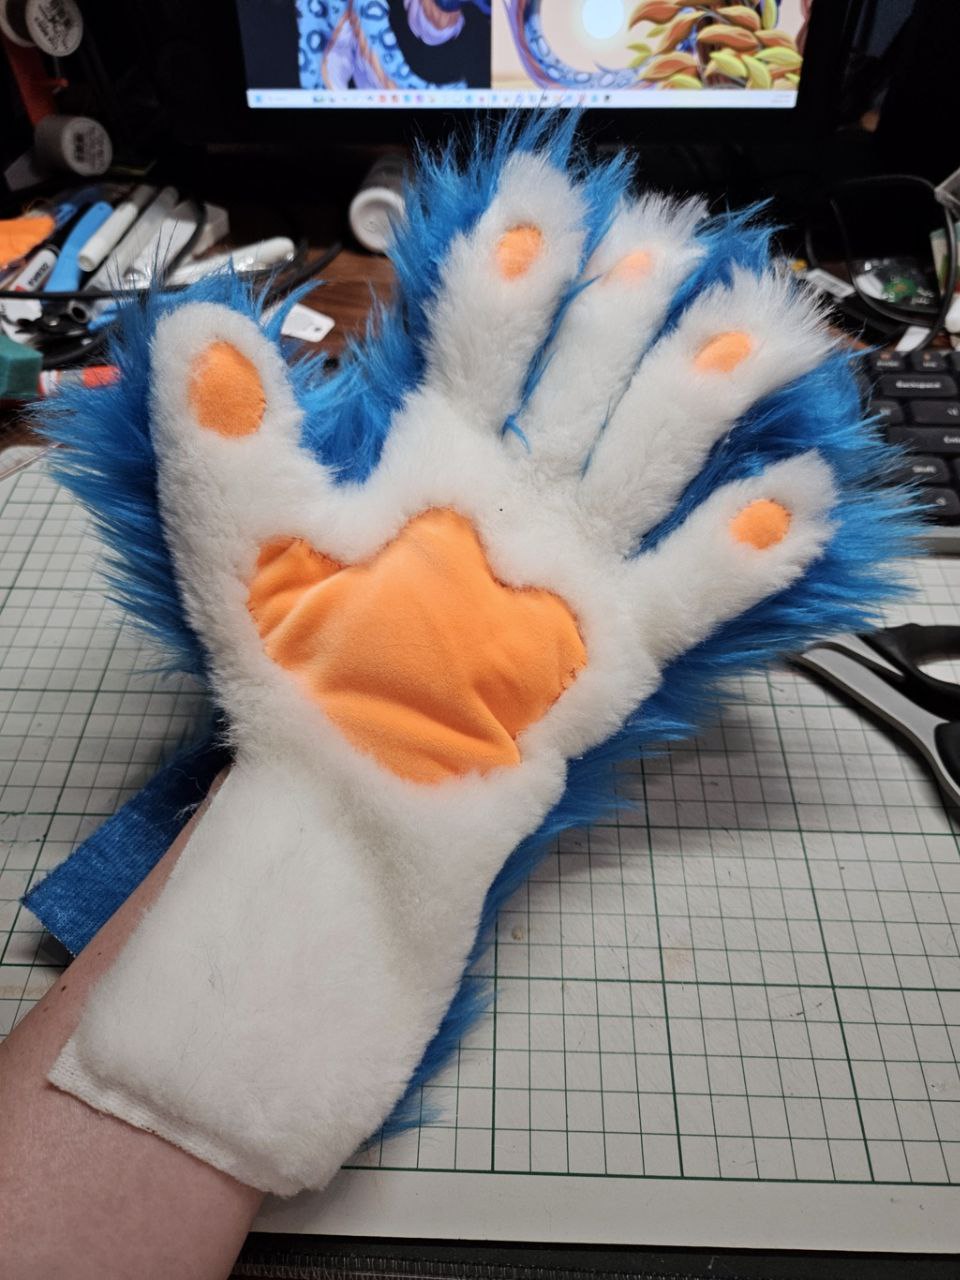
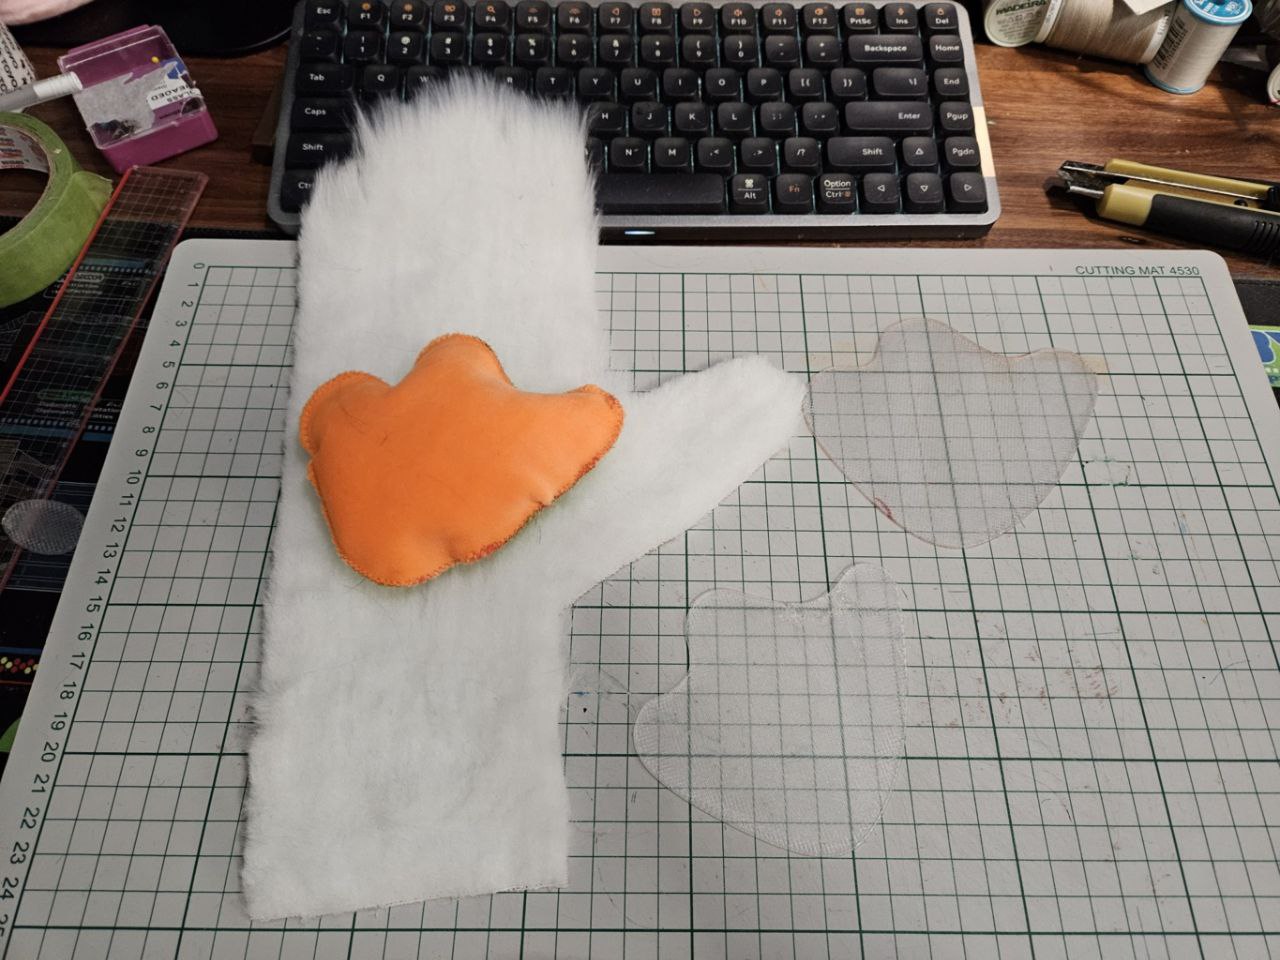
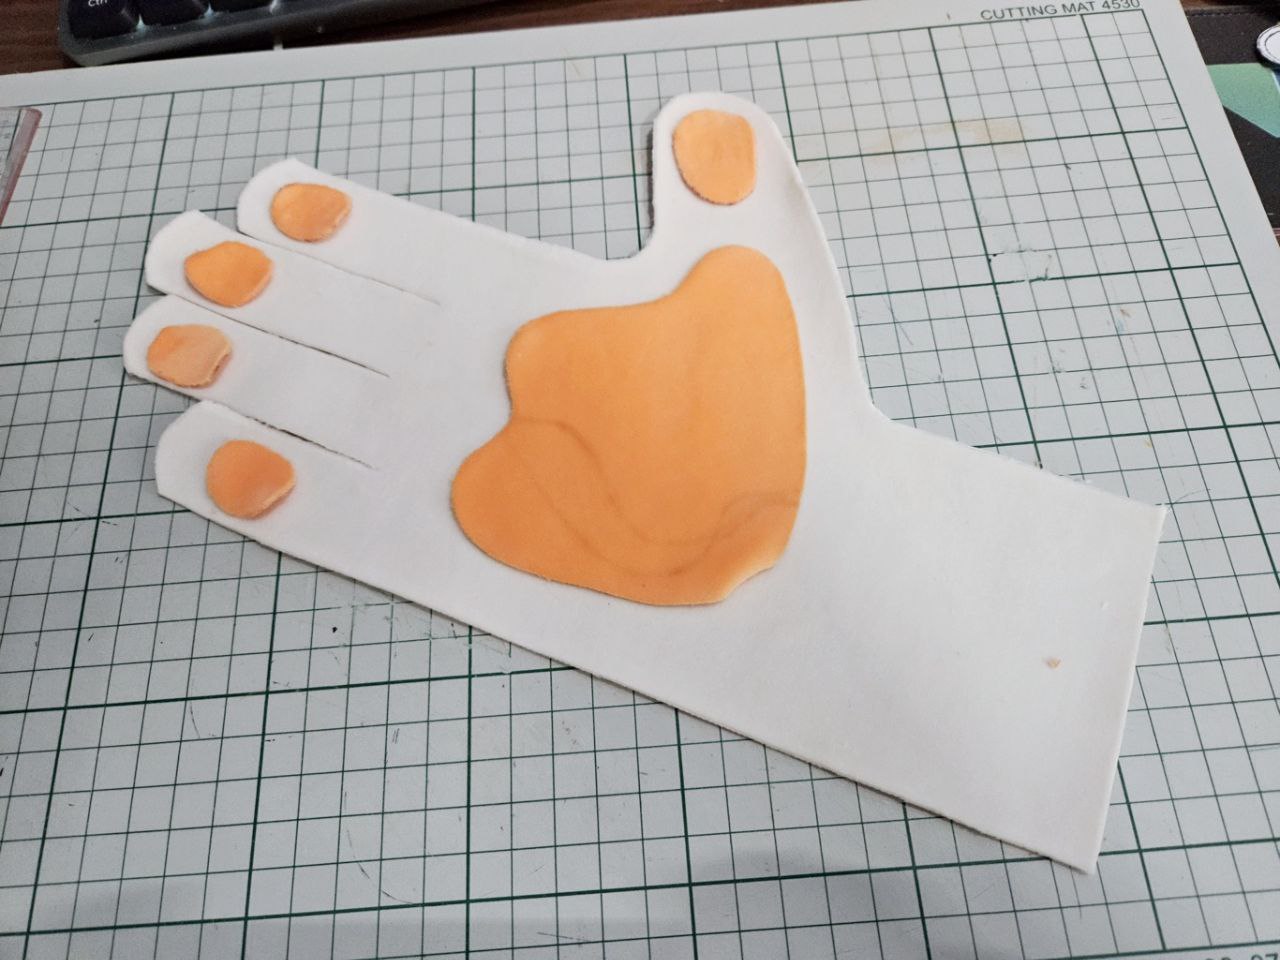
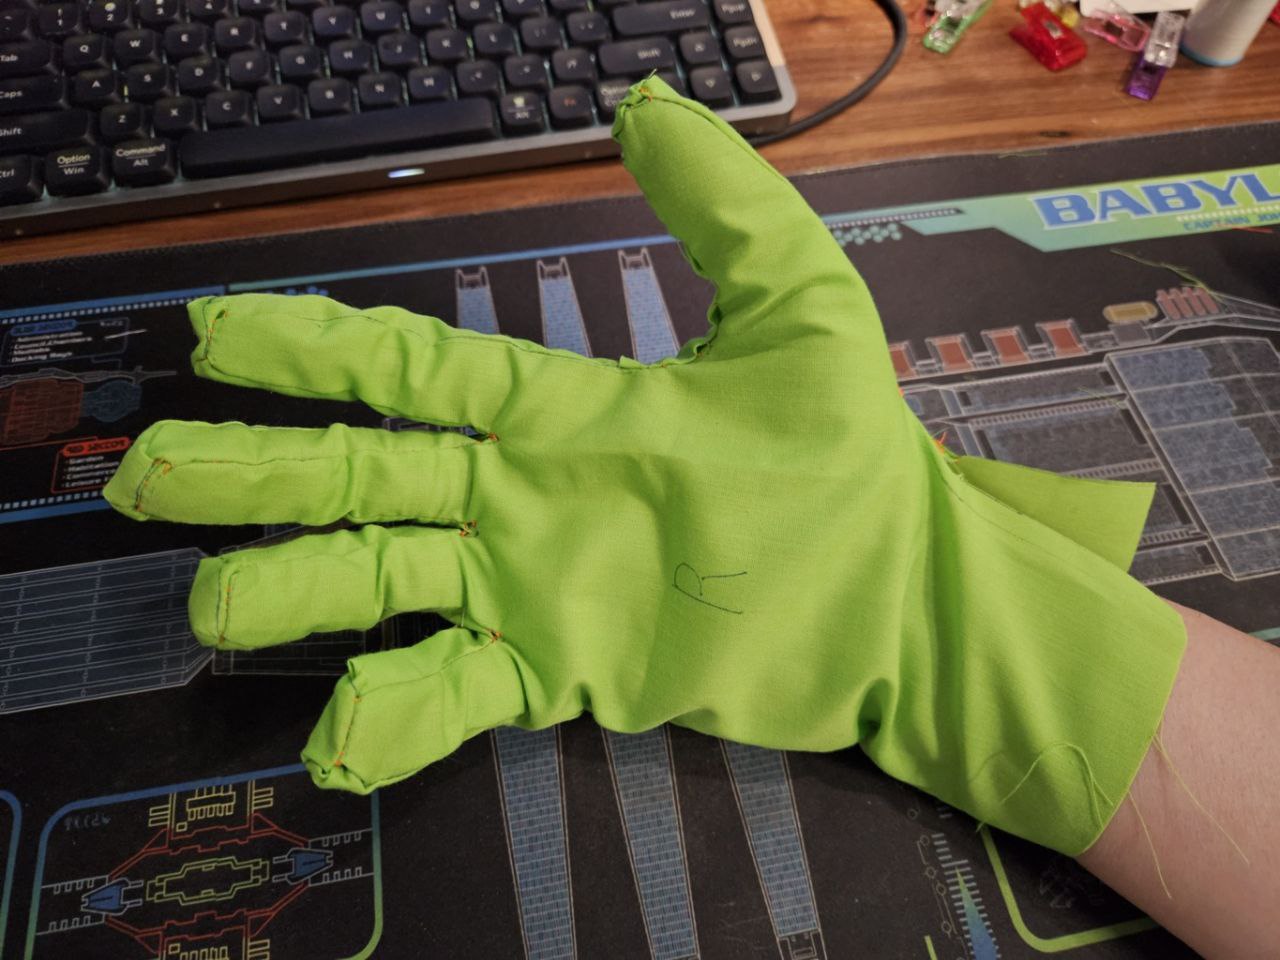
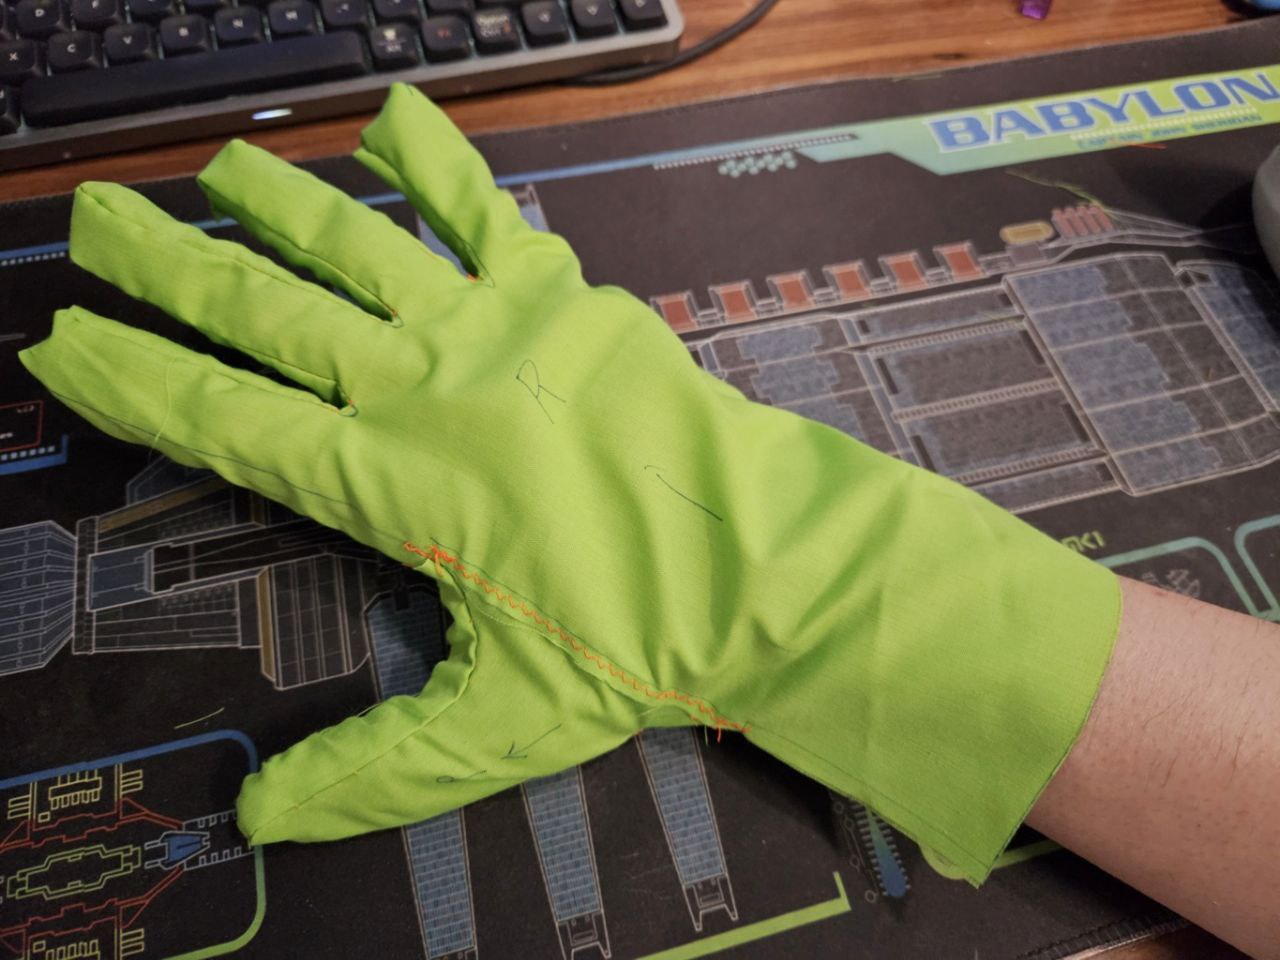
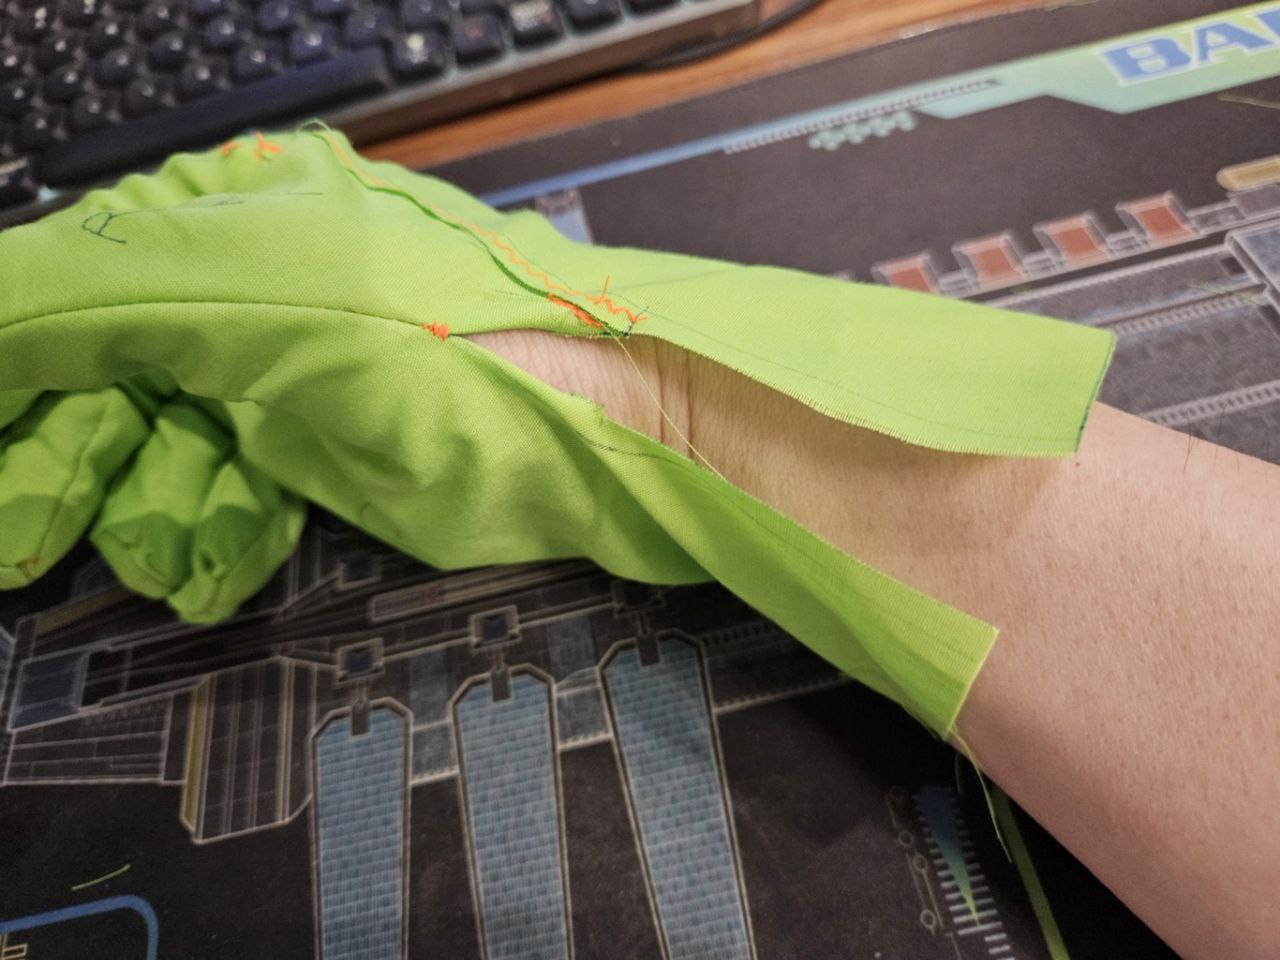
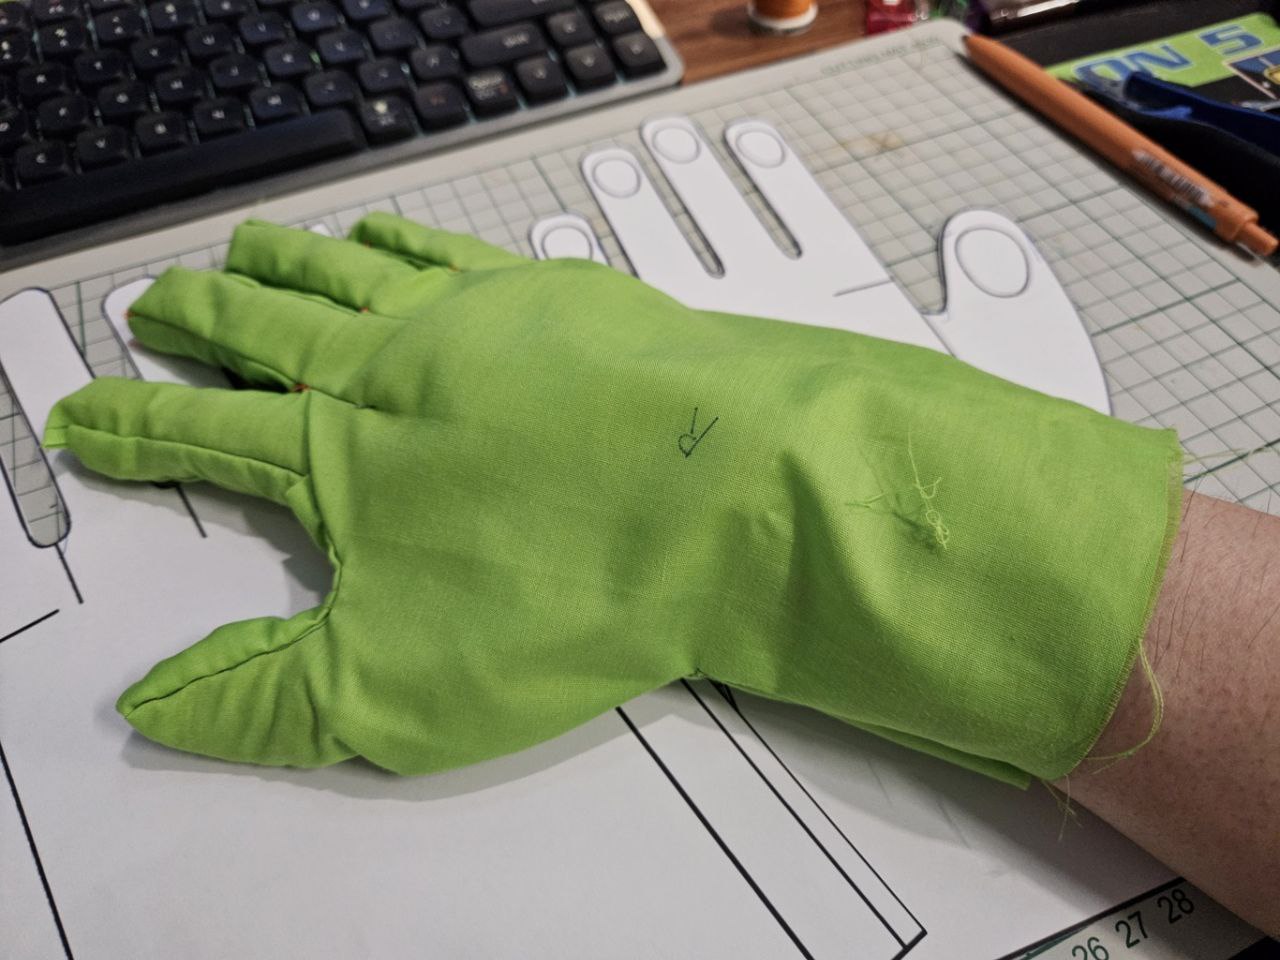
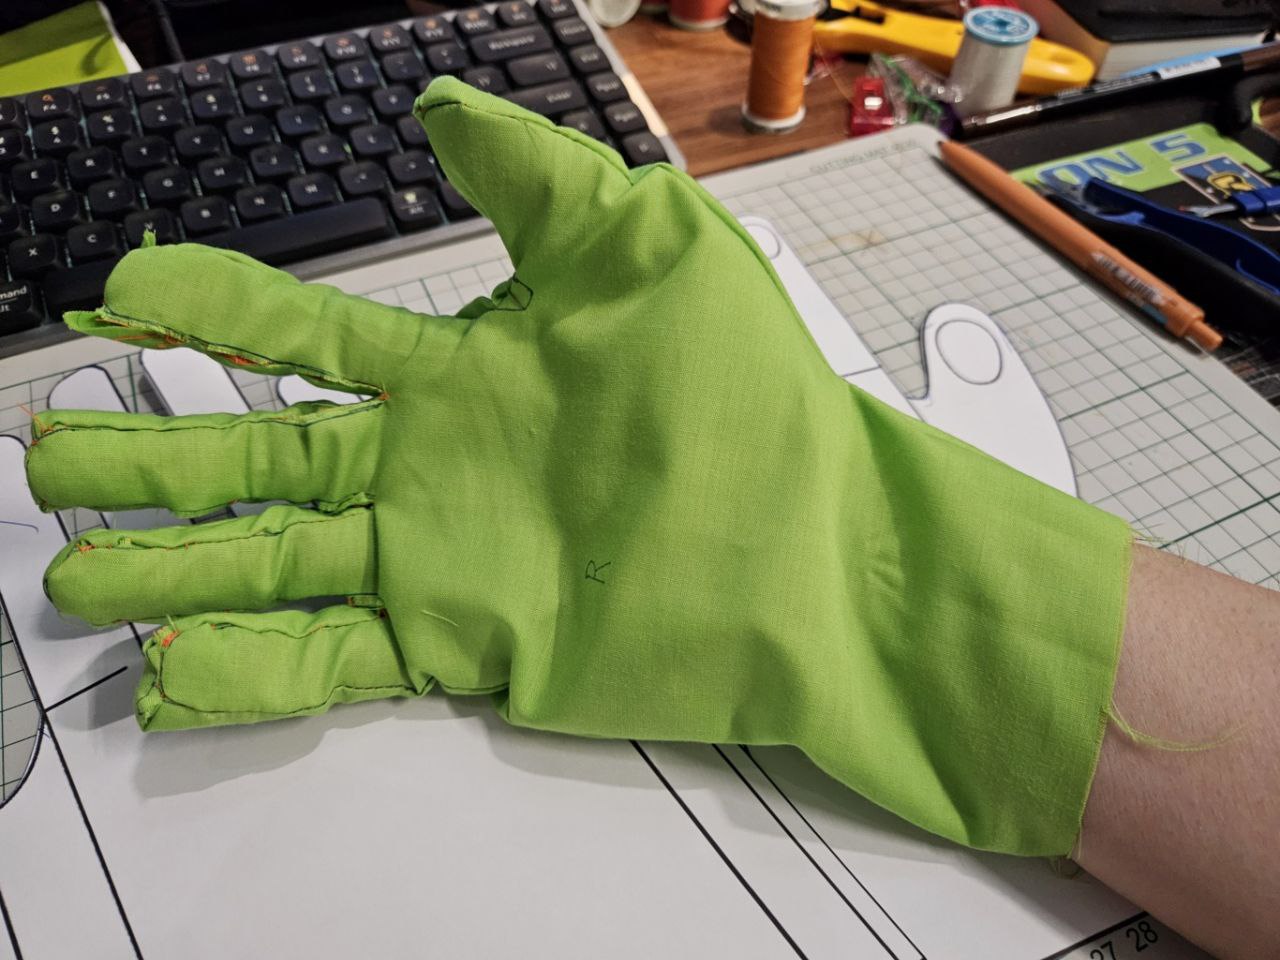
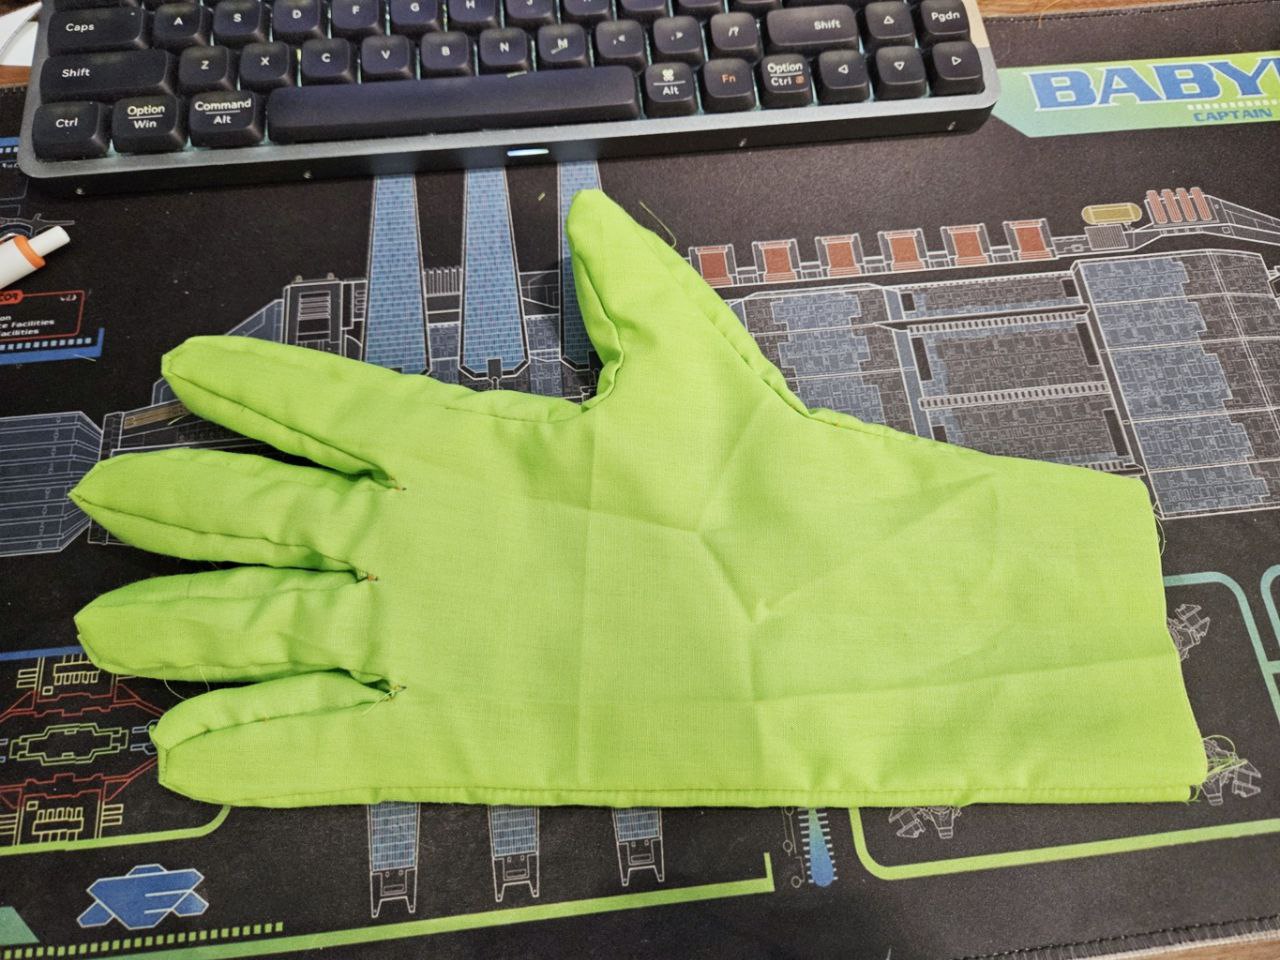
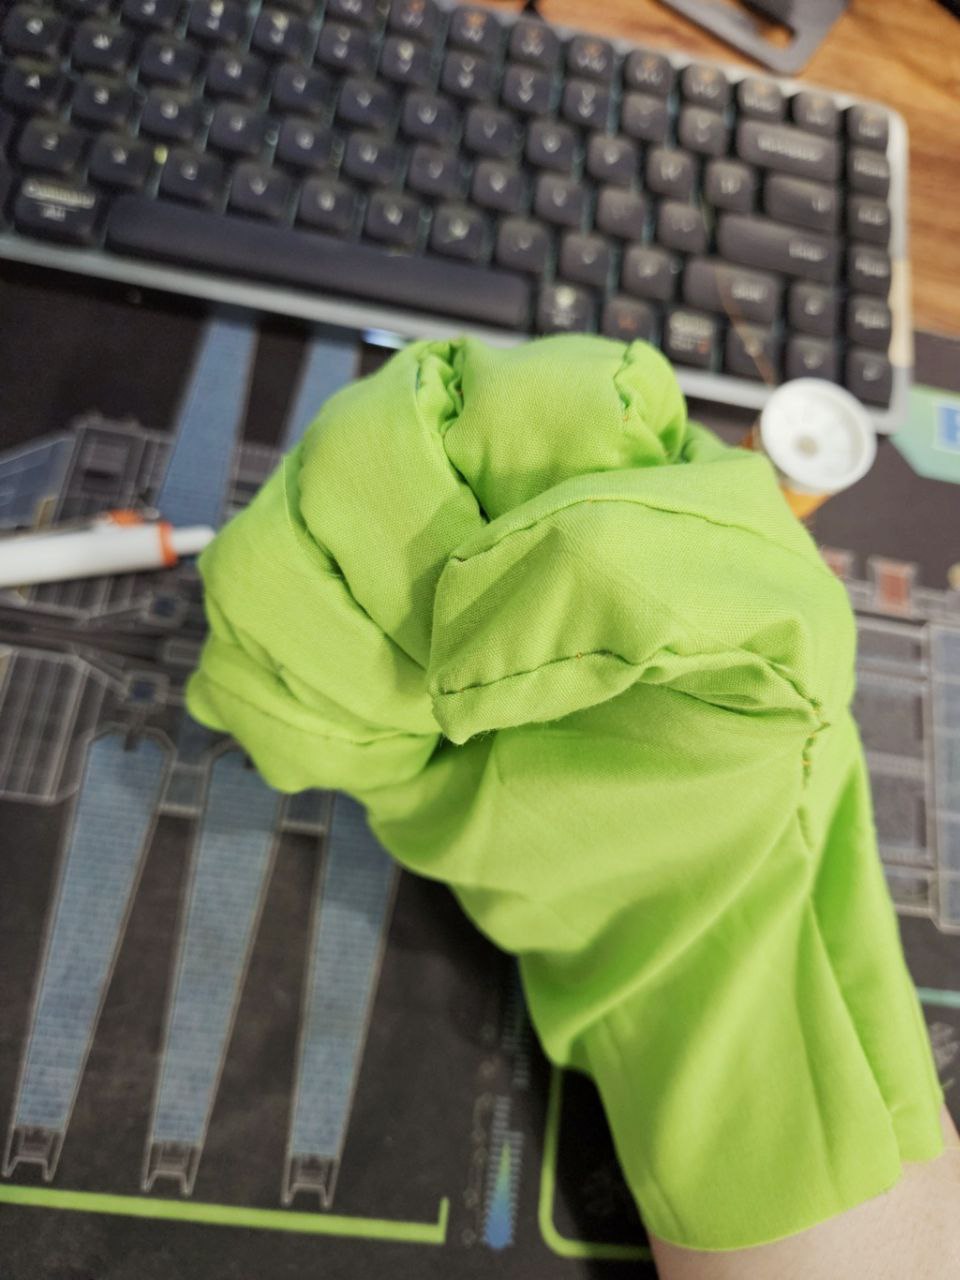
Today I assembled this glove pattern to see if it'd work for the handpaws, and I think it _should_ work. The thumb is a bit tight but that might be me overusing the seam allowance - this glove pattern is designed for leather and the instructions do not require the seams to be sewn with the right sides together. The back end of the glove is also not long enough, and needs to have an elastic to hold it down so that's something I need to alter for the paw.
The pattern for the thumb may also need some modification; the thumb is sewn from a single patch of material that is folder to cover both sides; I need blue fur on the back and white fur in my palm.
Other modifications I want to add are the orange paw pads. I'm undecided if I want claws...
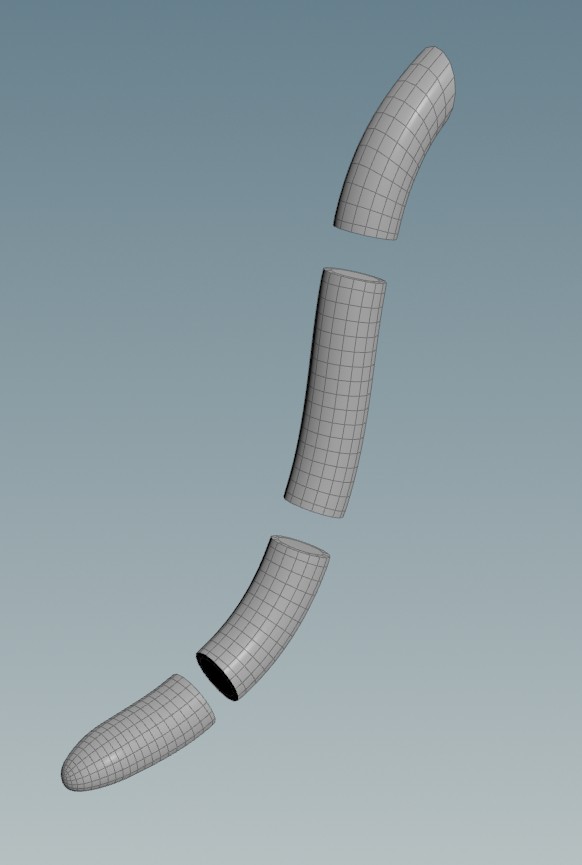
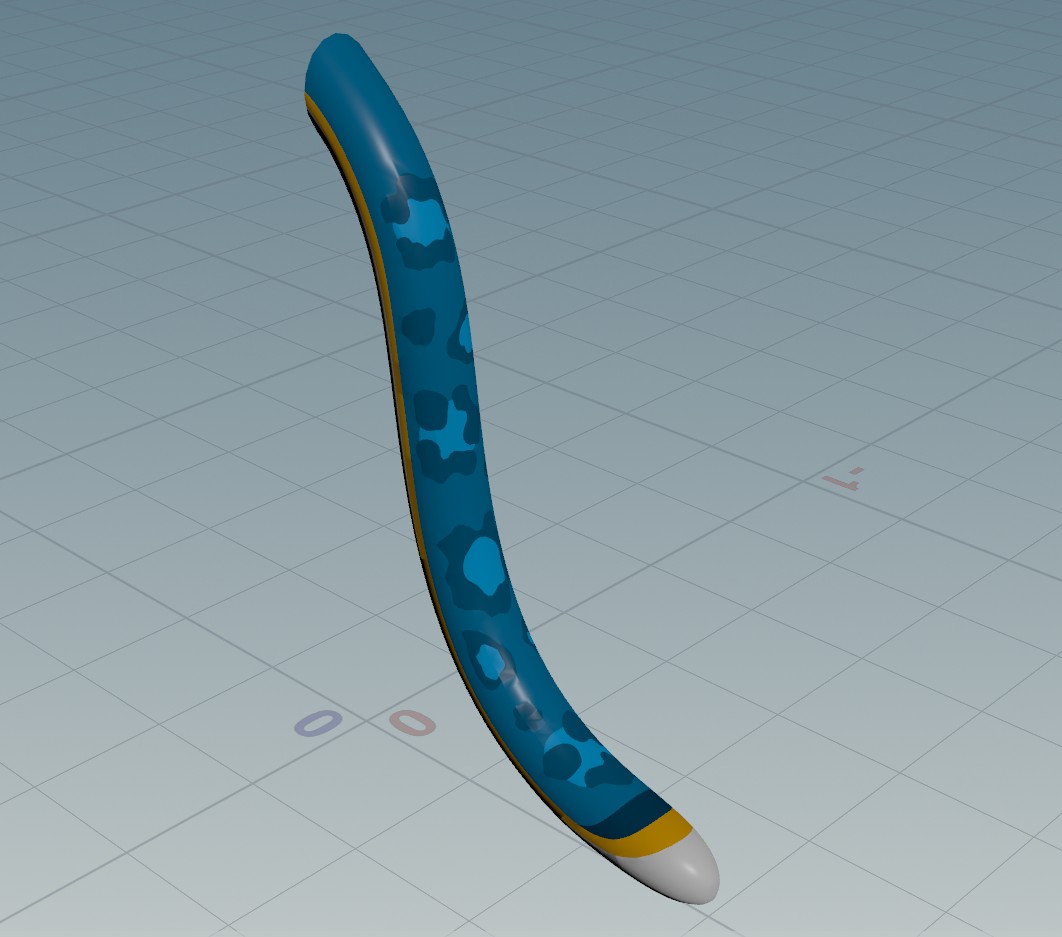
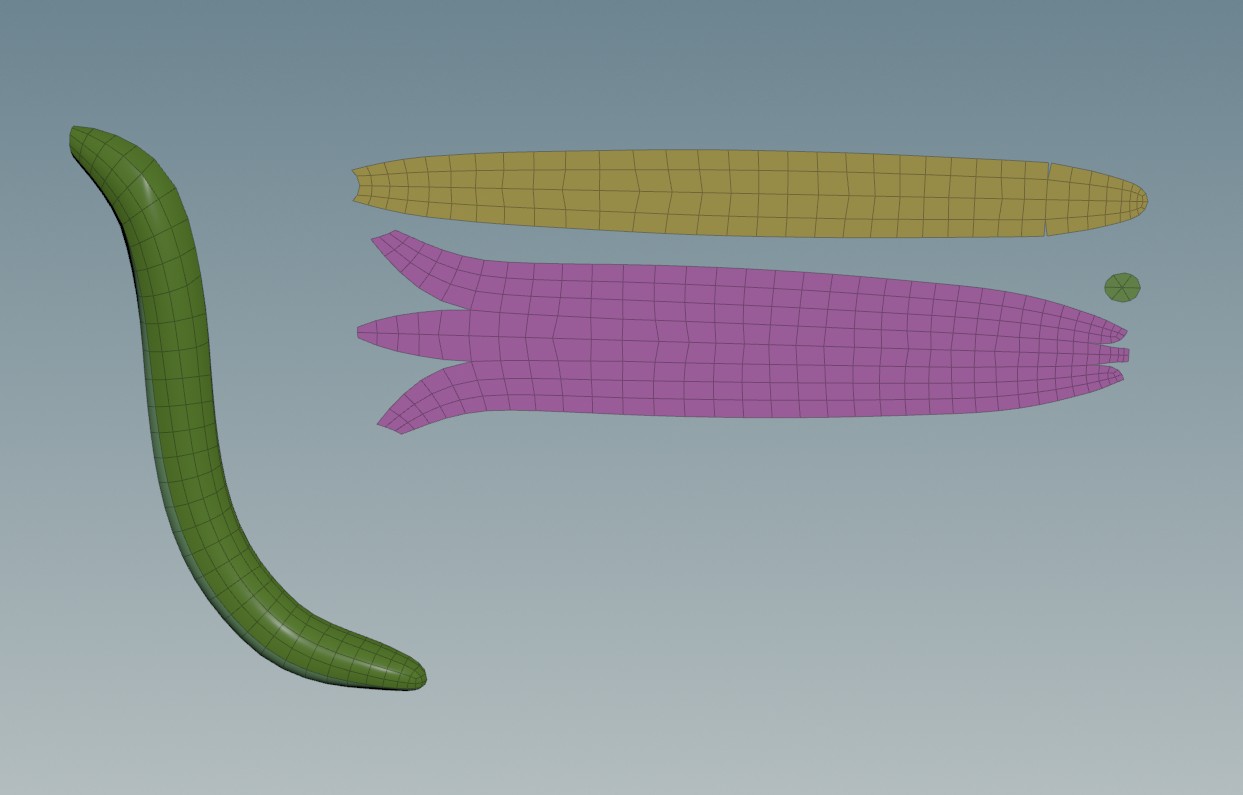
Also decided to rethink the tail, make it simpler to sew? It's now more tube-like instead of having varying dimensions along its length.
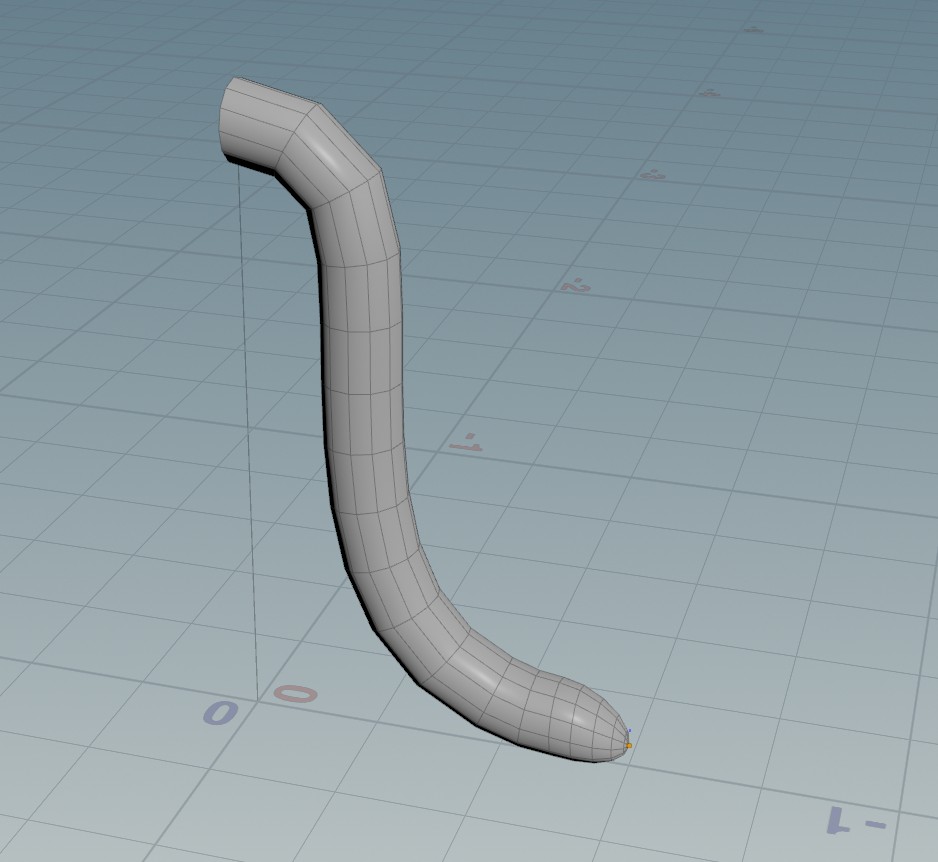
I've also made a decision for the circumference of the tail to be equal to the widest part of my lower leg. Feels like the right size XD
Another thing I've been thinking of is how to do the leg "sleeves", I don't want to do like, a pair of furry pants, of which I put on XL pants XD
My current idea is to have the leg sleeves attach to the pants by buttons, and the pants themselves are held up using suspenders. The leg sleeves can then go over the paws. Seems like alot to tackle in 3 months, and I haven't yet
figured out the hand or foot paws. GAH.
However, I now have to prepare for ScotiaCon, and I have so much to do for that:
In my mind, that would always be how I'd be dressed.
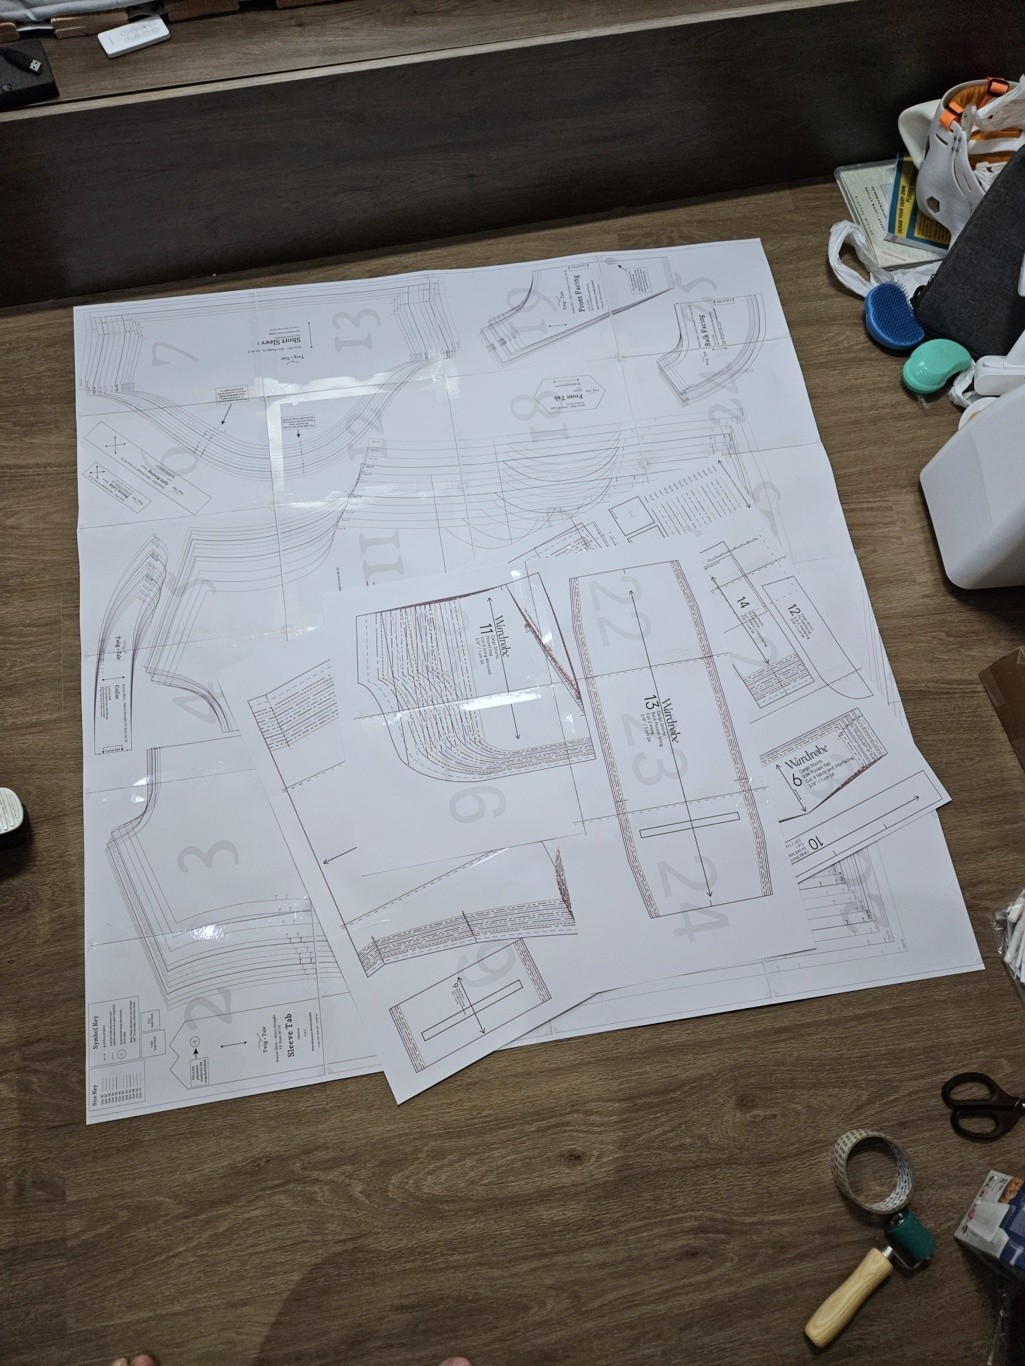
For a start, I have gotten two sewing patterns:
For the moment, I don't intend to wear anything under the linen shirt, but down the road would be fun to make a fake belly :P
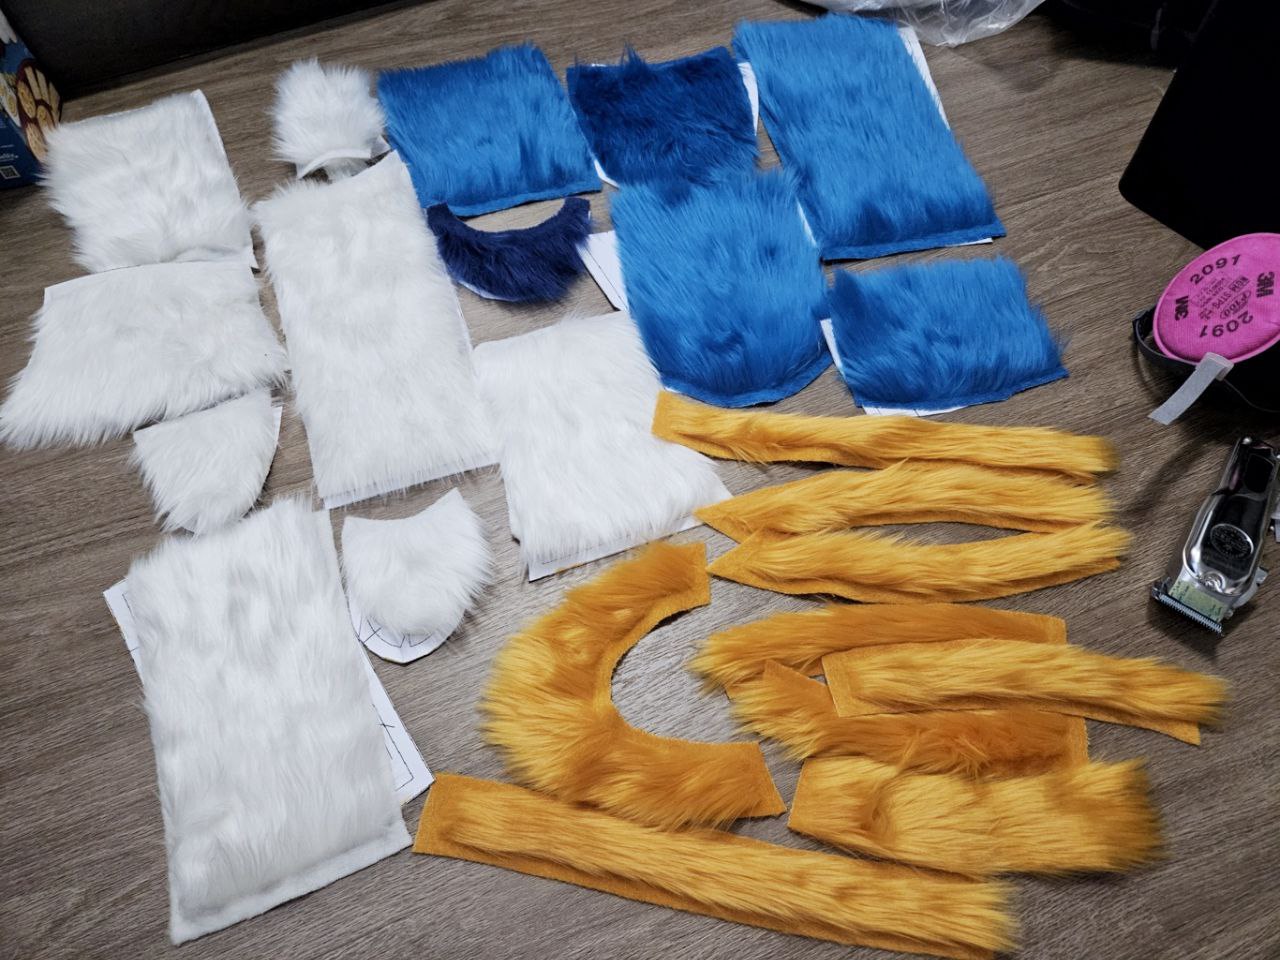
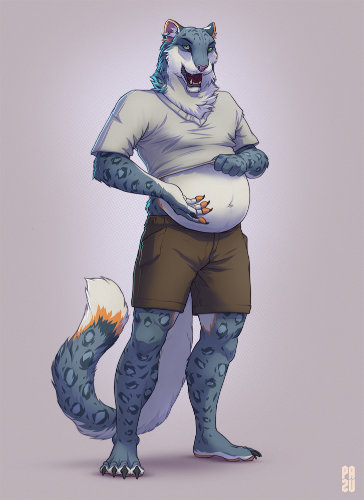
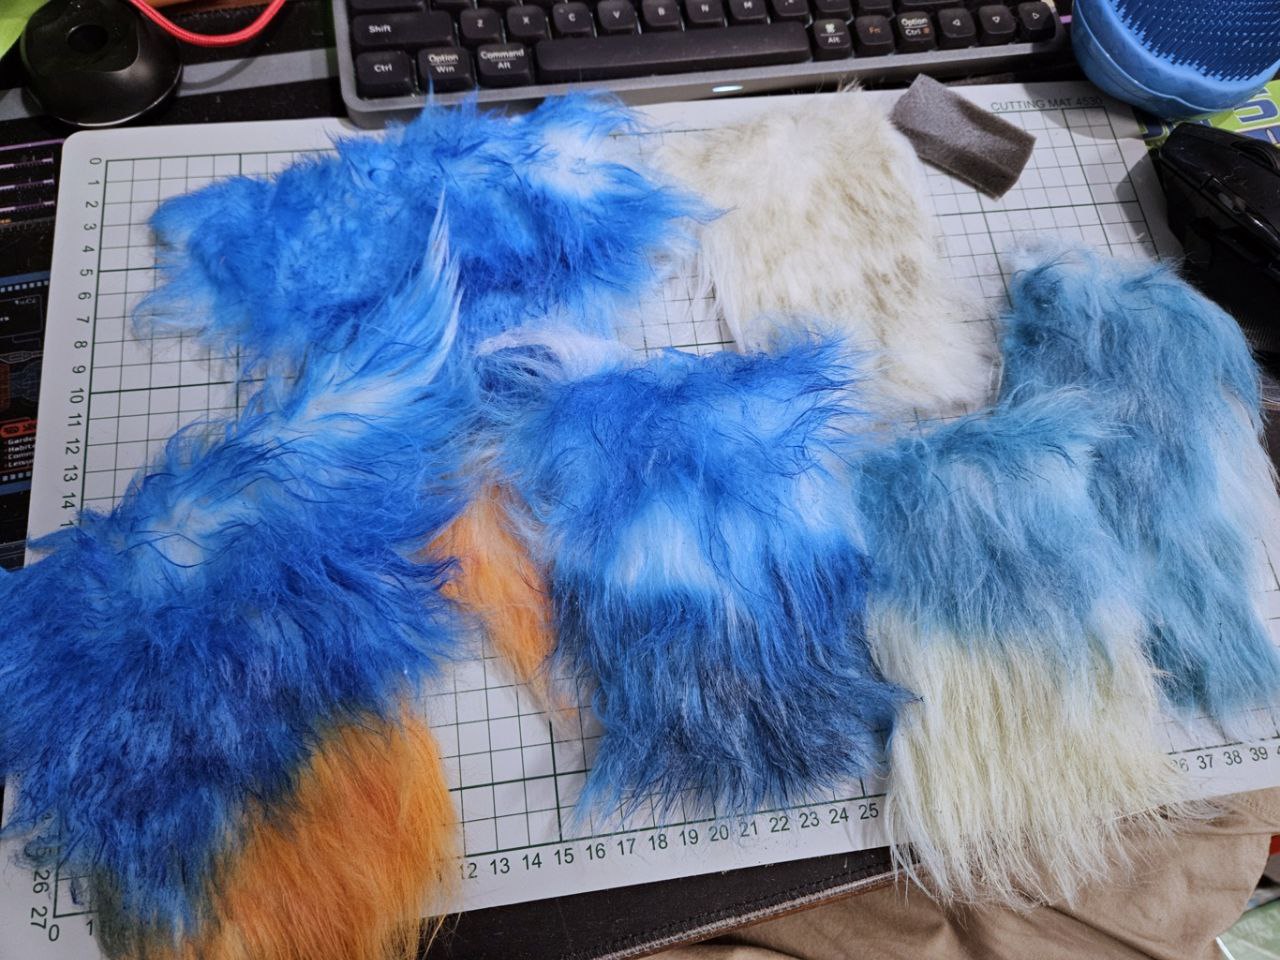
Anyways, the first step is fur, and I'm opting to get my fur from miemiefur as I think they're good enough for my level of fursuit building.
These are the best colours I could find from their swatch kit. This is something folks making their sona should also consider - fur colour if they're planning on getting a fursuit. I'd never planned for that and its biting me now XD
Earlier, I'd spent tons of time experimenting with airbrushing fur. However, this is not permanent and the paint can be washed off. This worries me. if I was very sweaty, I might transfer the paint onto other people. So, with a heavy heart, I decided to buy the individual colours. Which are quite far from my fur tbh.
One idea of mine was to use blue fur for the bulk of the fursuit, then use airbrushed fur for the rosettes. But that's just an idea for now.
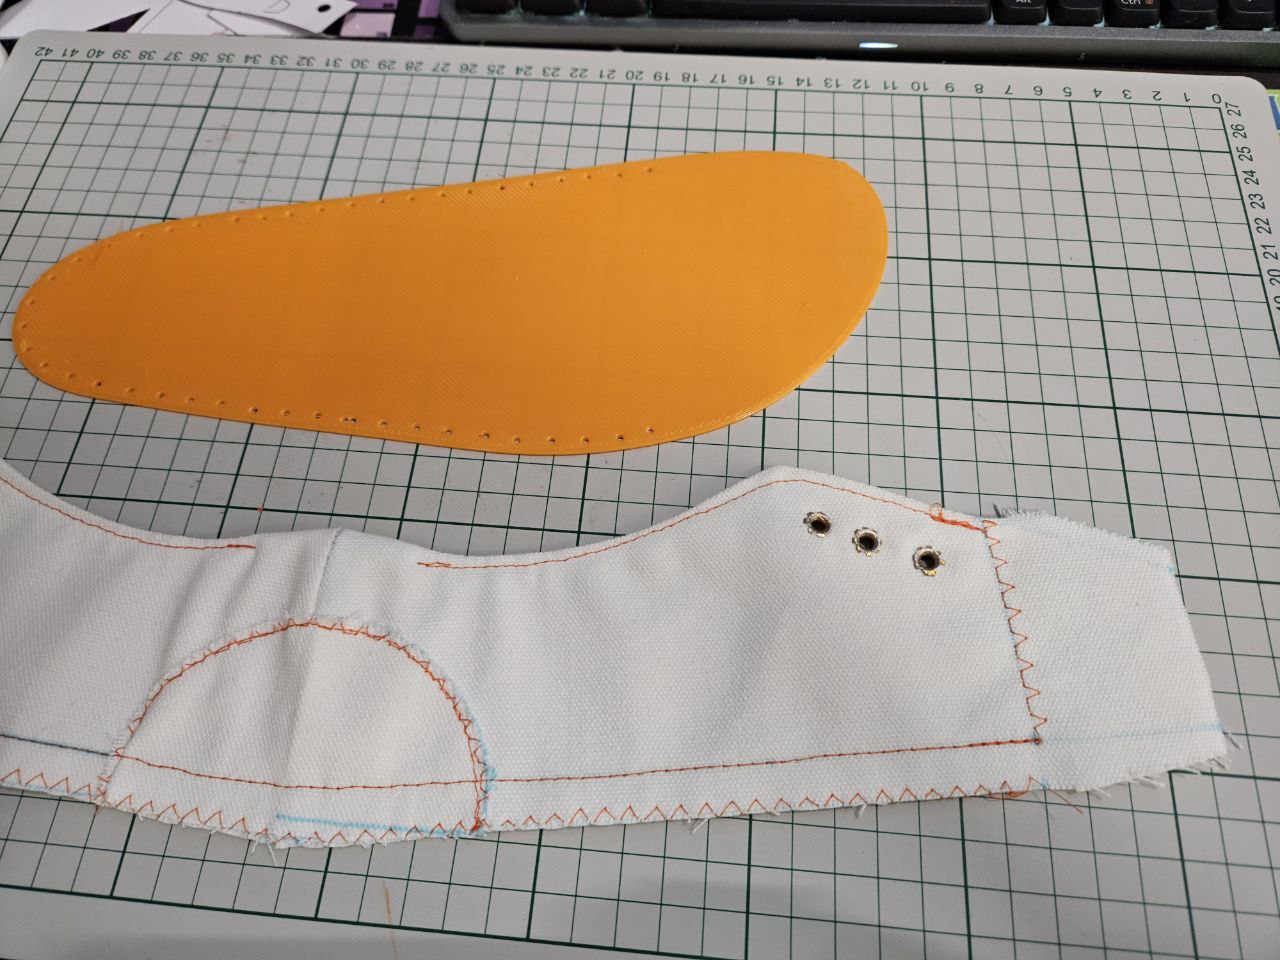
Looks pretty ok, so I went for the actual thing. Painting the canvas took faaar too long.
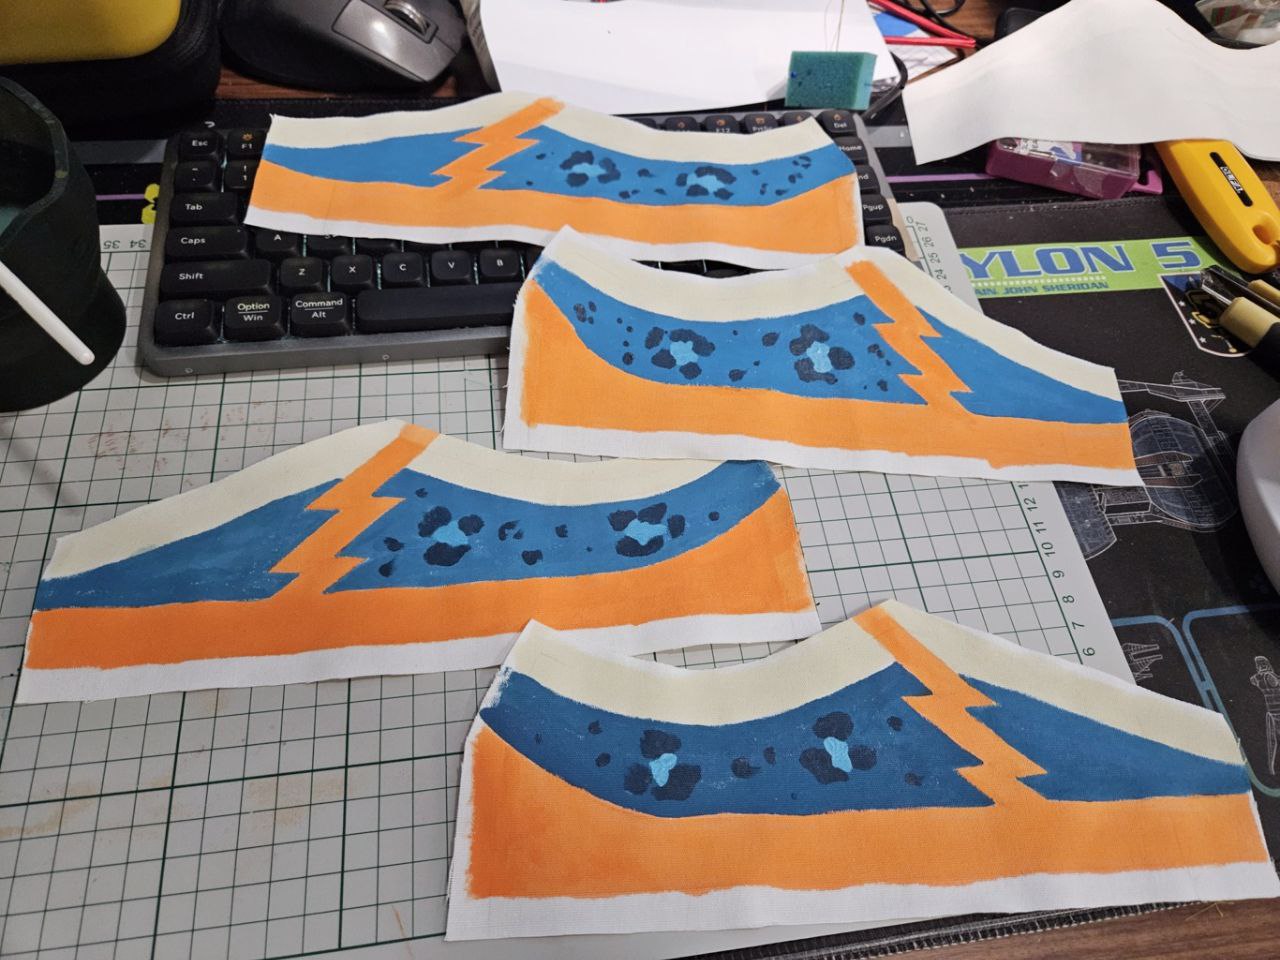
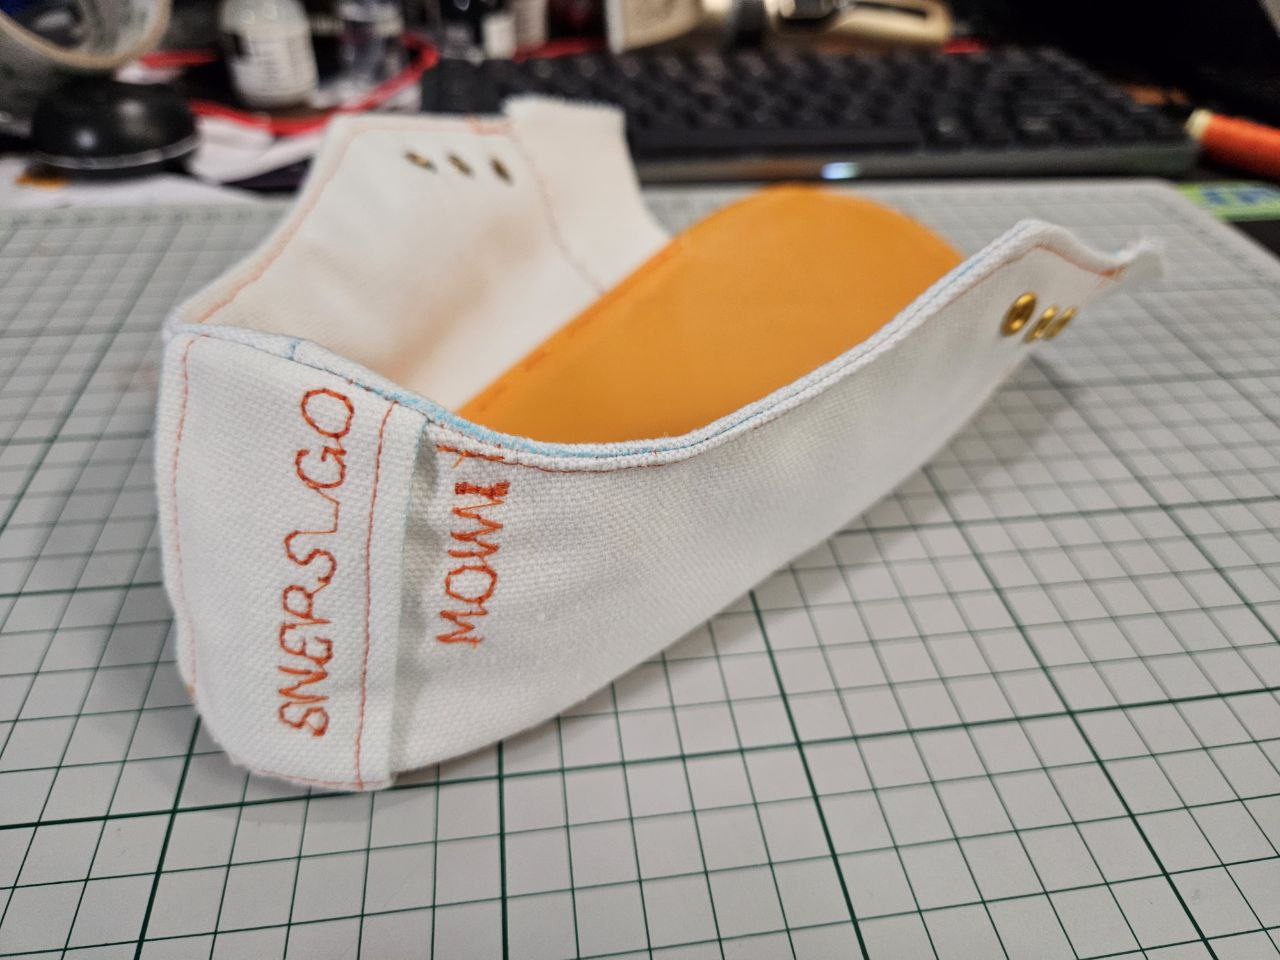
Sewing the shoe uppers to the "upper midsole" was pain. I'd finished sewing one side.... twice, because I'd had a slight offset. Only then did I realise... I forgot to sew the highlight stitches as well as creating fake damage on the front. Ripped off all the stitches, did the stitching and damage then sewed the shoe uppers to the upper midsole again.
On the plus side, now that I've done it so many times (see all the previous prototypes) I'd gotten into a rhythm how to sew the stitches. Note: I pushed a pin through the upper midsole and canvas as a guide for when the needle needs to come from the canvas side.
The tongues are done, forgot to take photos of them. But yeah, almost there!!!
Little more info - the fur I originally bought had a 5cm length, the one I am using now is 3cm length. I think I like the 3cm length fur more, it's more dense and when cut, doesn't have a massive amount of
small strands floating everywhere. Still has, just lesser. I did not shave the fur down originally and this is what it looked like:
Touch wise, I did not enjoy the 5cm fur after it was shaved down, but the 3cm fur still feels good. From what I understand from the supplier's description, the 5cm fur and 3cm fur both have the same weight per meter, but the 3cm fur is denser. Likely this explains why it still feels good after shaving.
I originally shaved the fur down using the #1 guard on my shaver, but it barely shaved anything. The shaver itself has a 2mm offset setting, and I used that for the shave in the video.
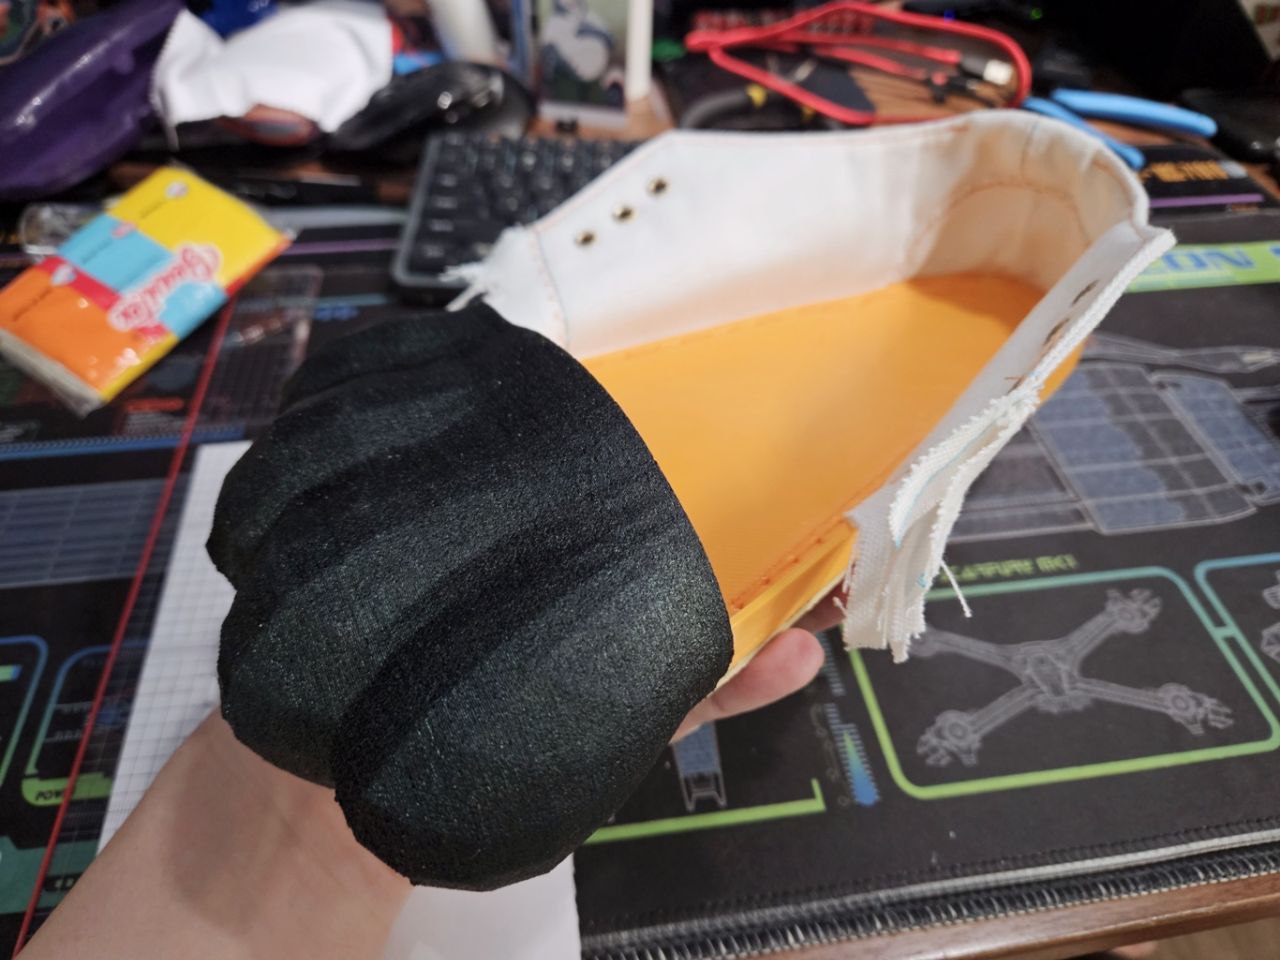
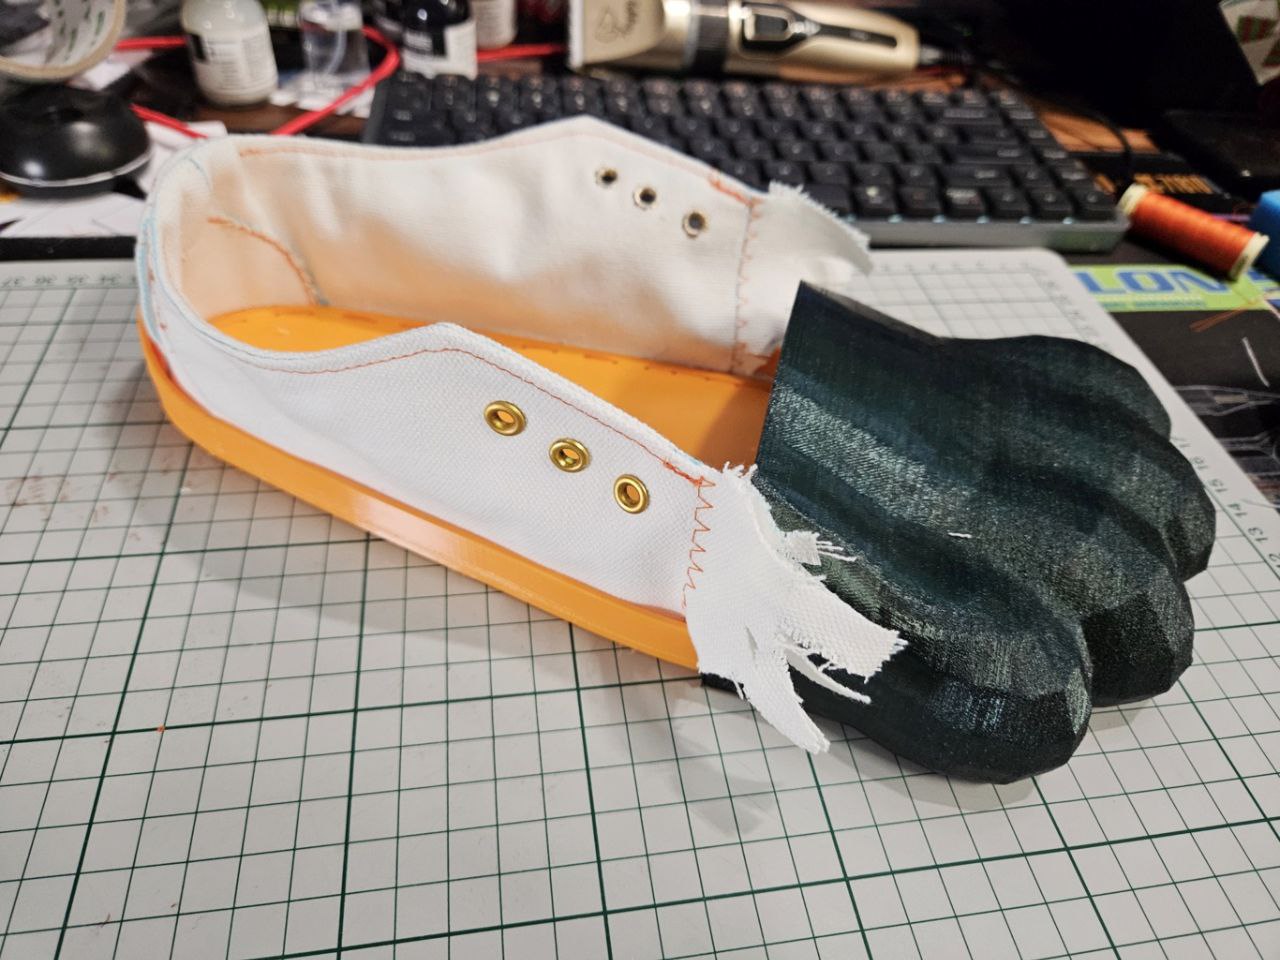
The shoe's front paw/midsole is also 3d printed using FilaFlex Foamy TPU, a specialty filament that has a different softness based on the temperature its printed at. The black TPU you've seen in earlier posts, I got sick and tired of it jamming up randomly. FilaFlex Foamy prints really easy, and I decided to just go with it. It is bloody expensive though.
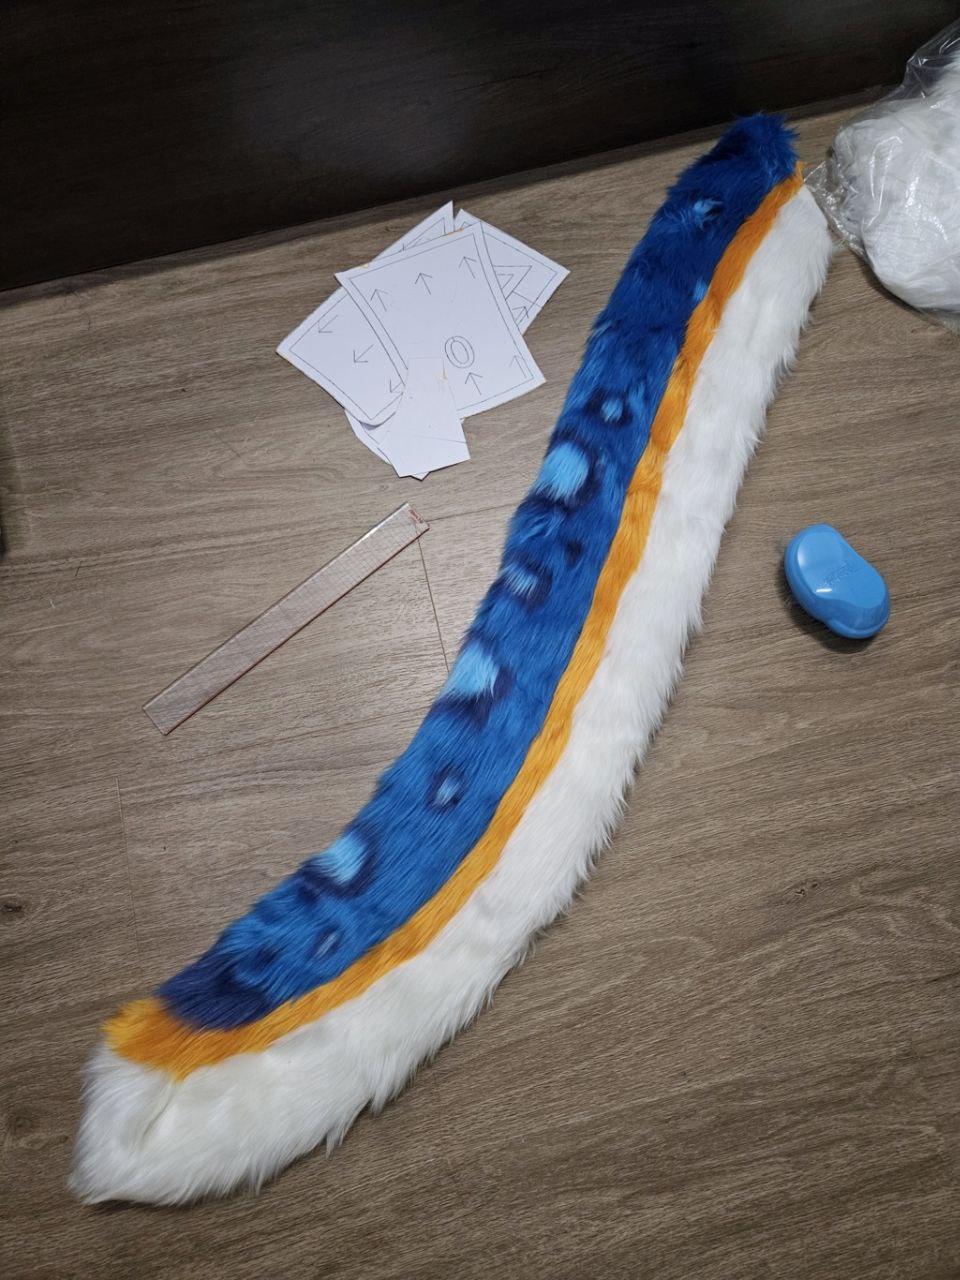
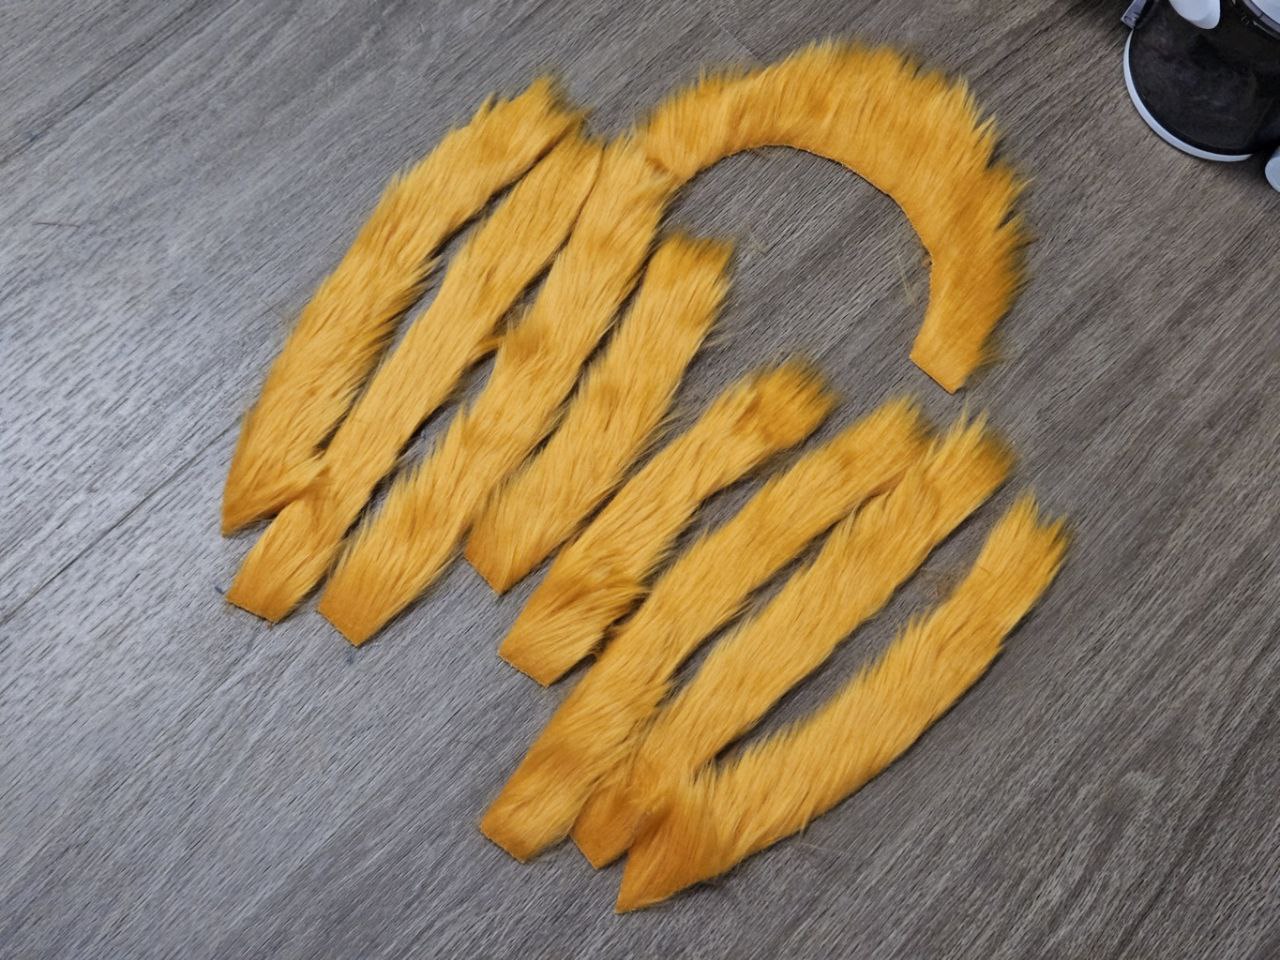
I've also re-cut the fur for my tail, gonna shave it down a bit then paint it next.
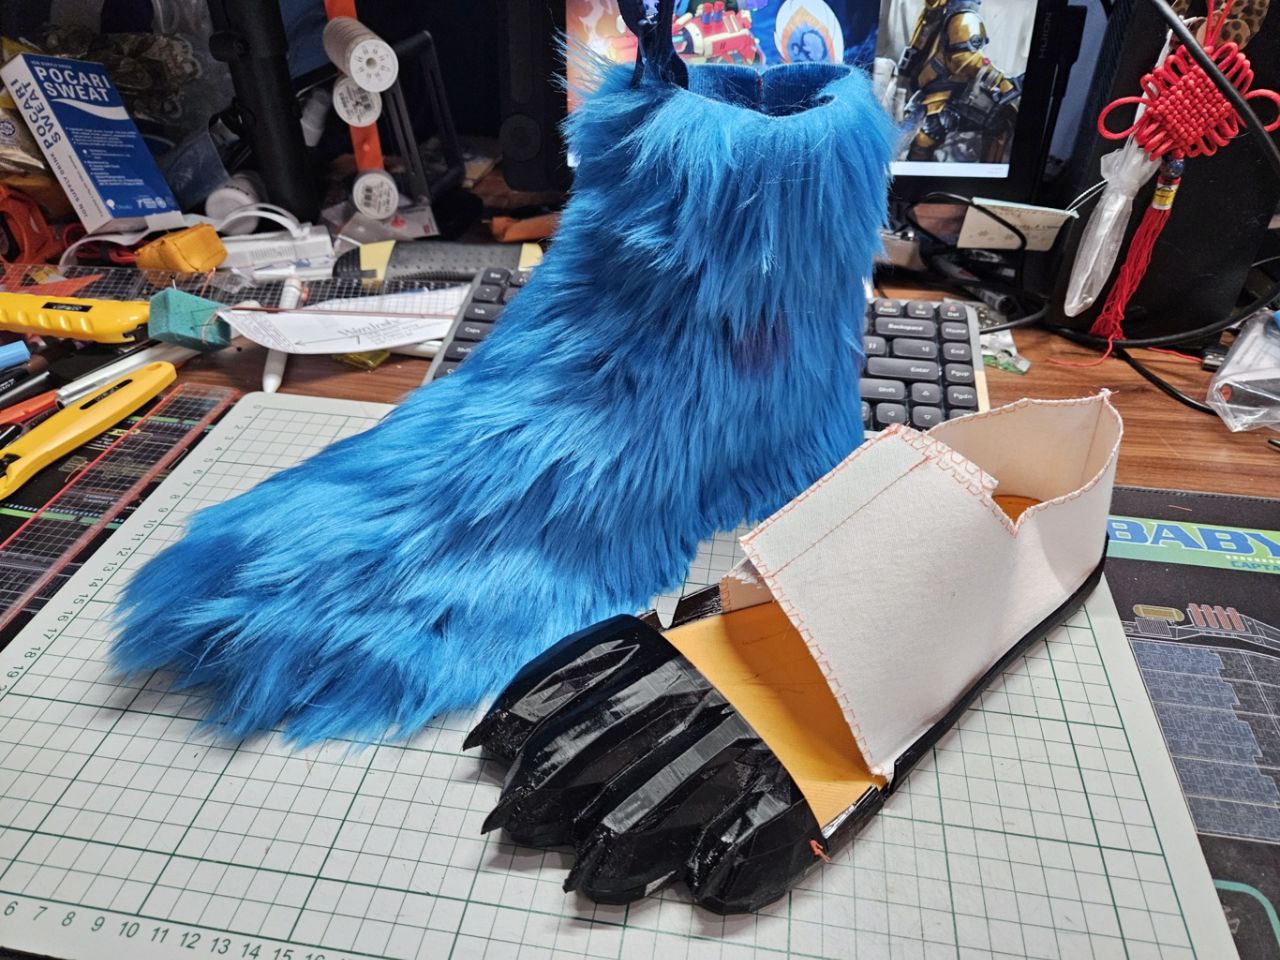
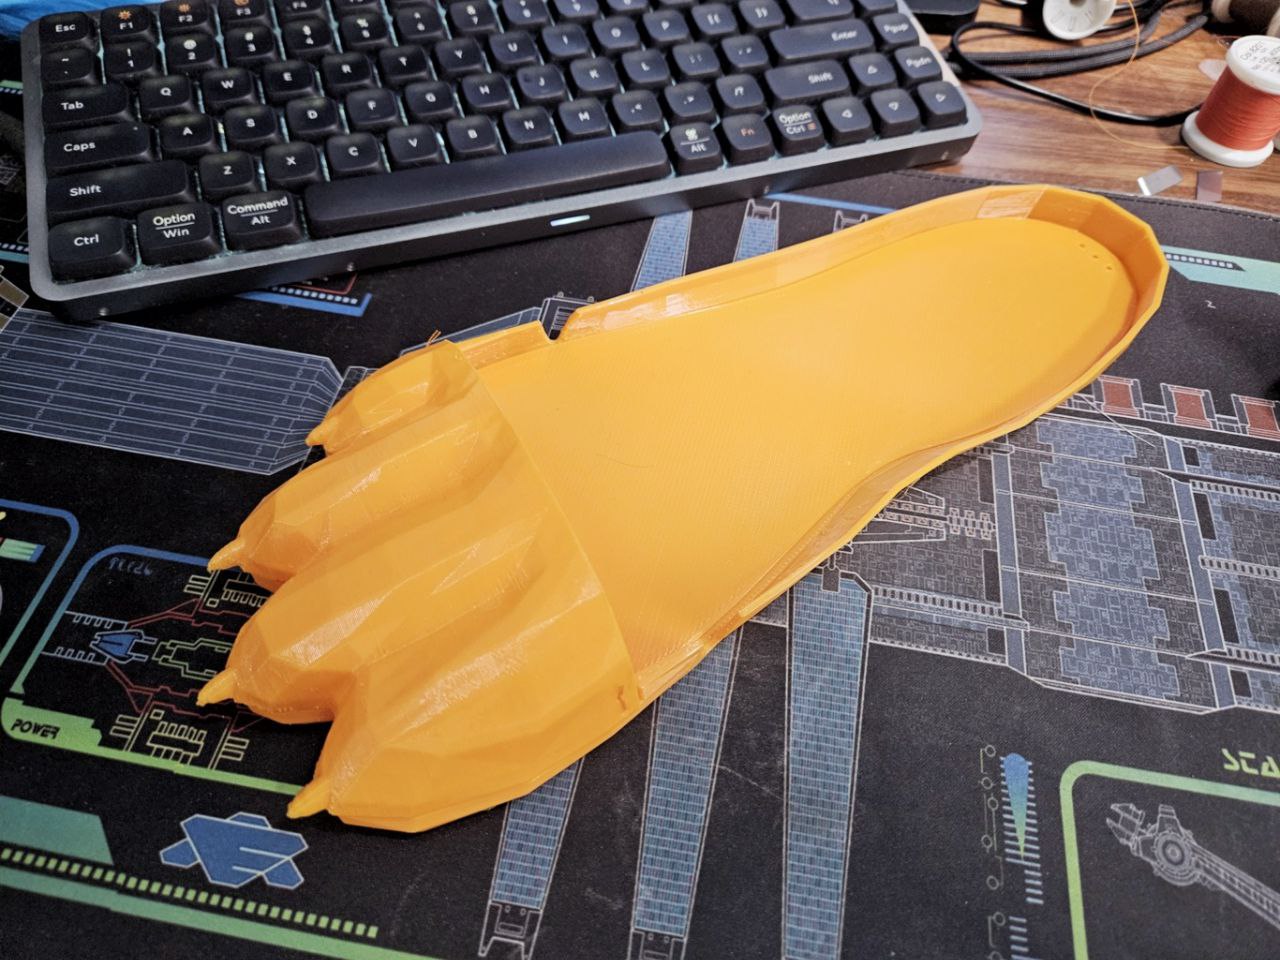
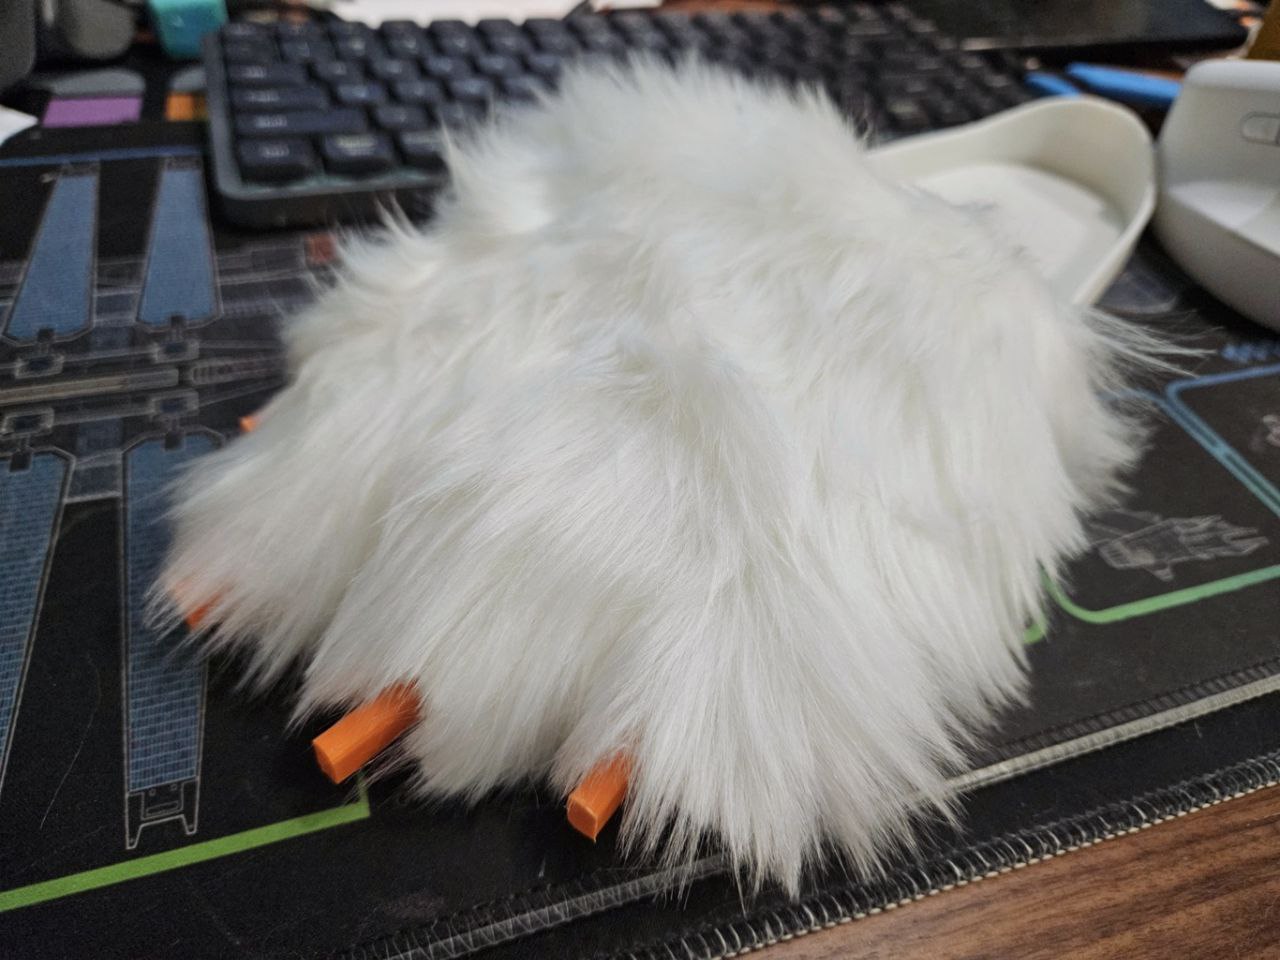
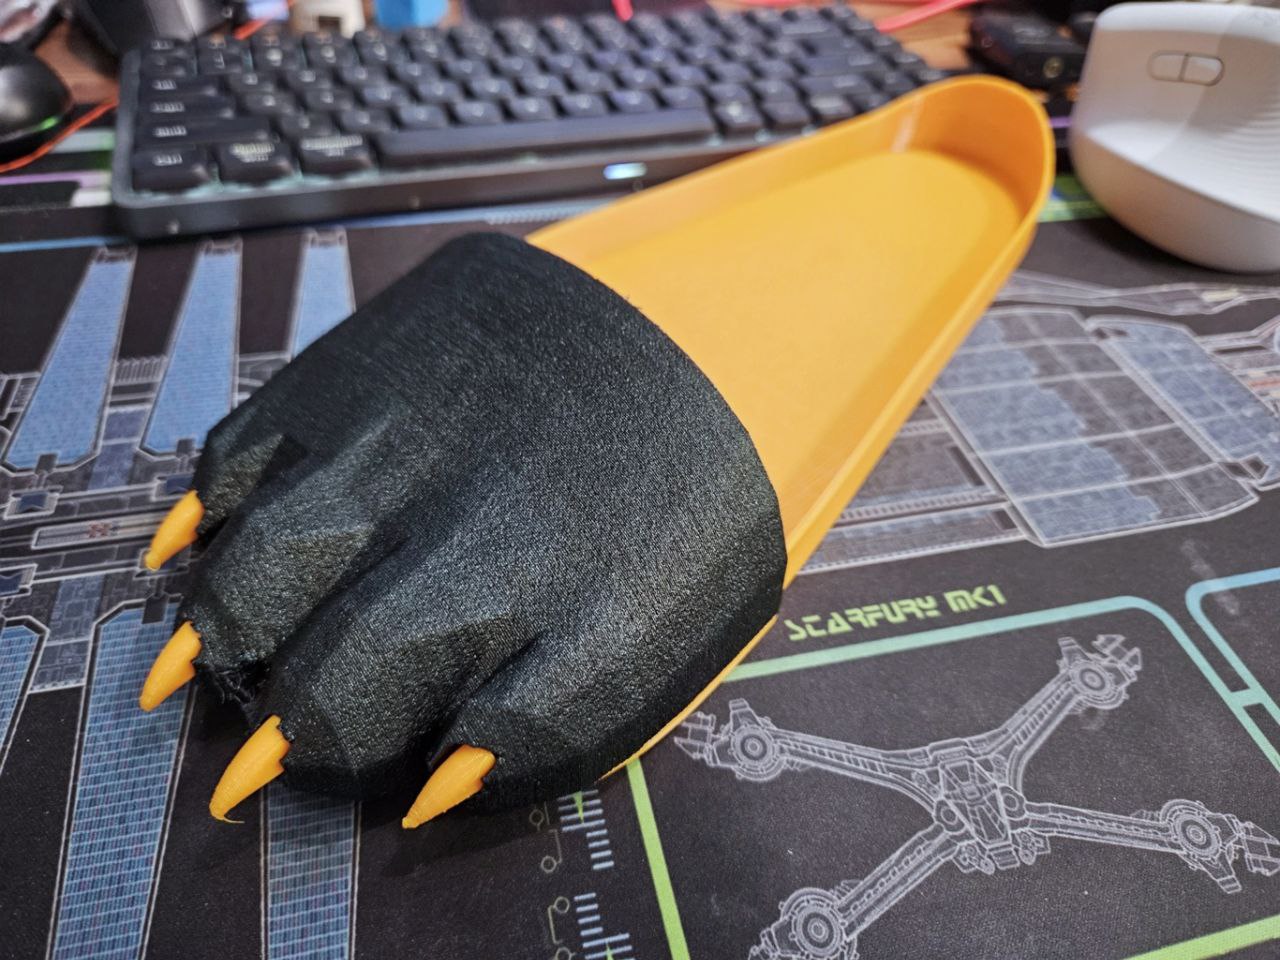
Finally back on this, and only 10 days till I fly to Eurofurence! This will work but I am still not happy with how well the toes are defined and I spent yesterday and today re-making the front paw design. This time though, I referenced IRL snow leopard paws. Whether this will work after being furred... I'm gonna use it.
Prints are done, next up is to sew up the canvas and cut out the faux fur pieces.
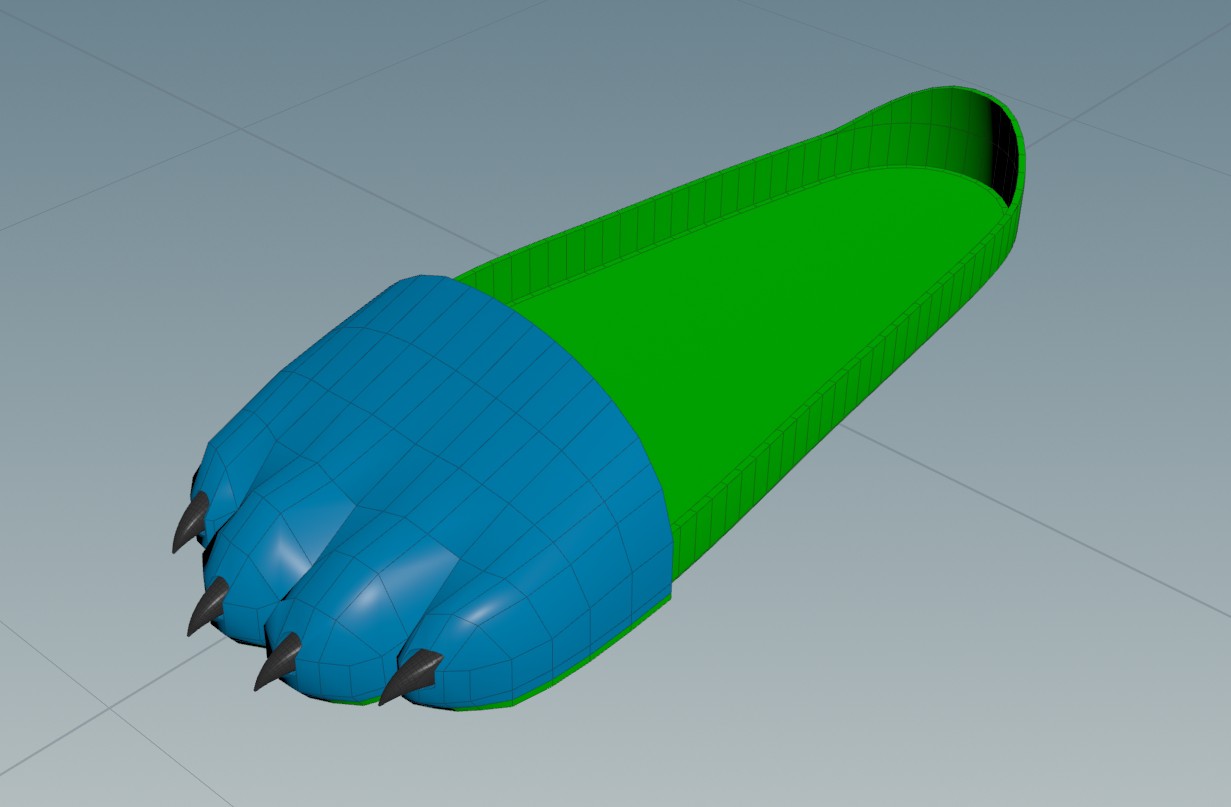
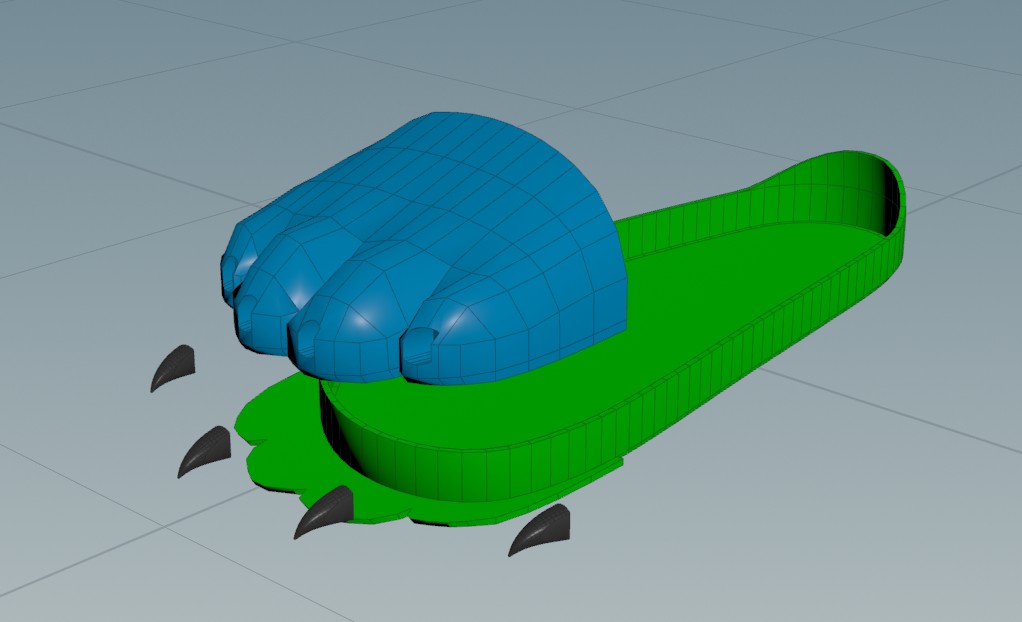
Finally finished redesigning the paw, made it more narrow. In addition, I made the claws much bigger, and the midsole has been modified so it has a lip, giving more surface area when gluing together. Hope this works better!
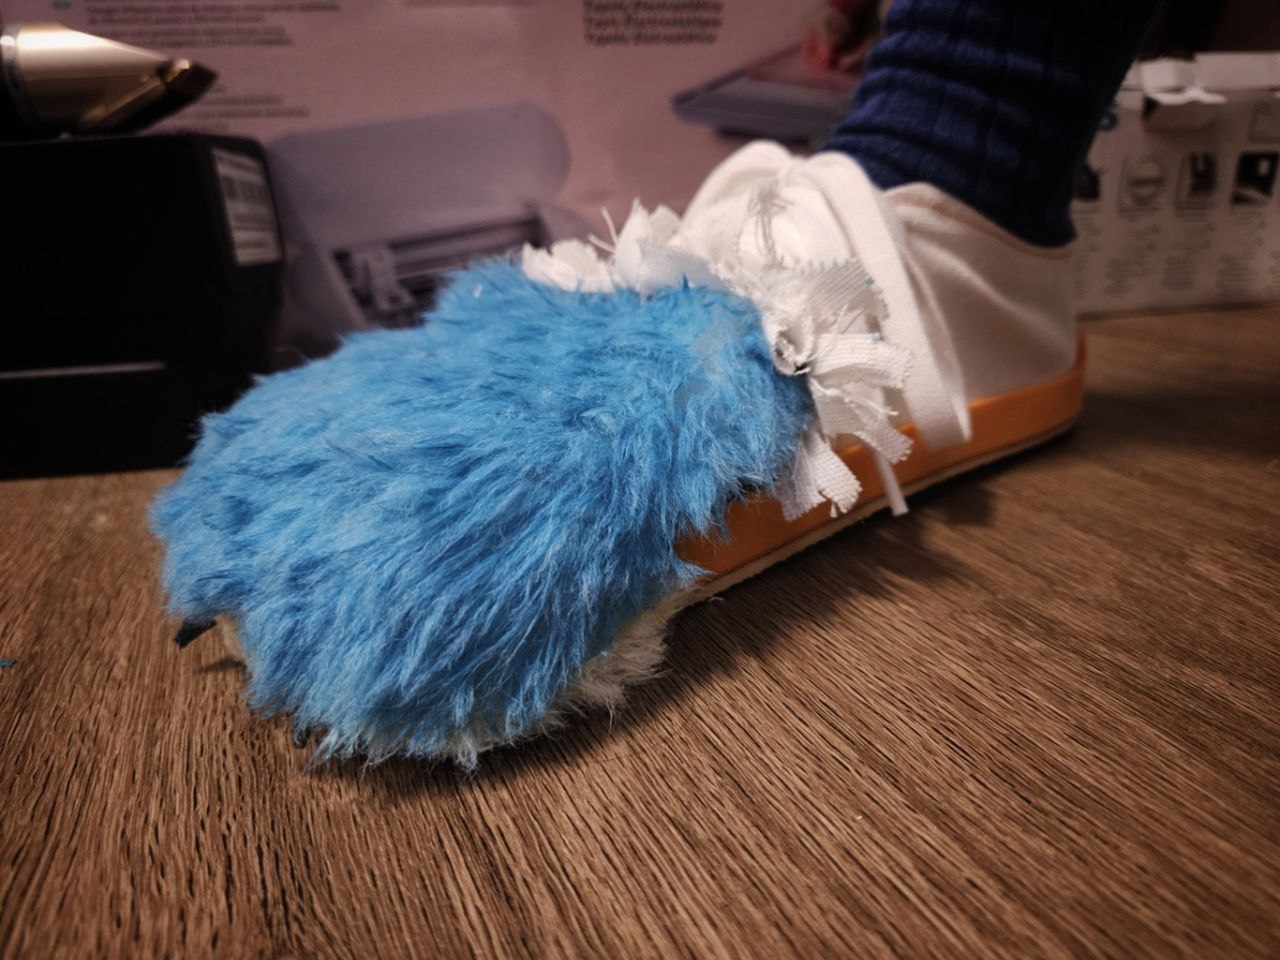
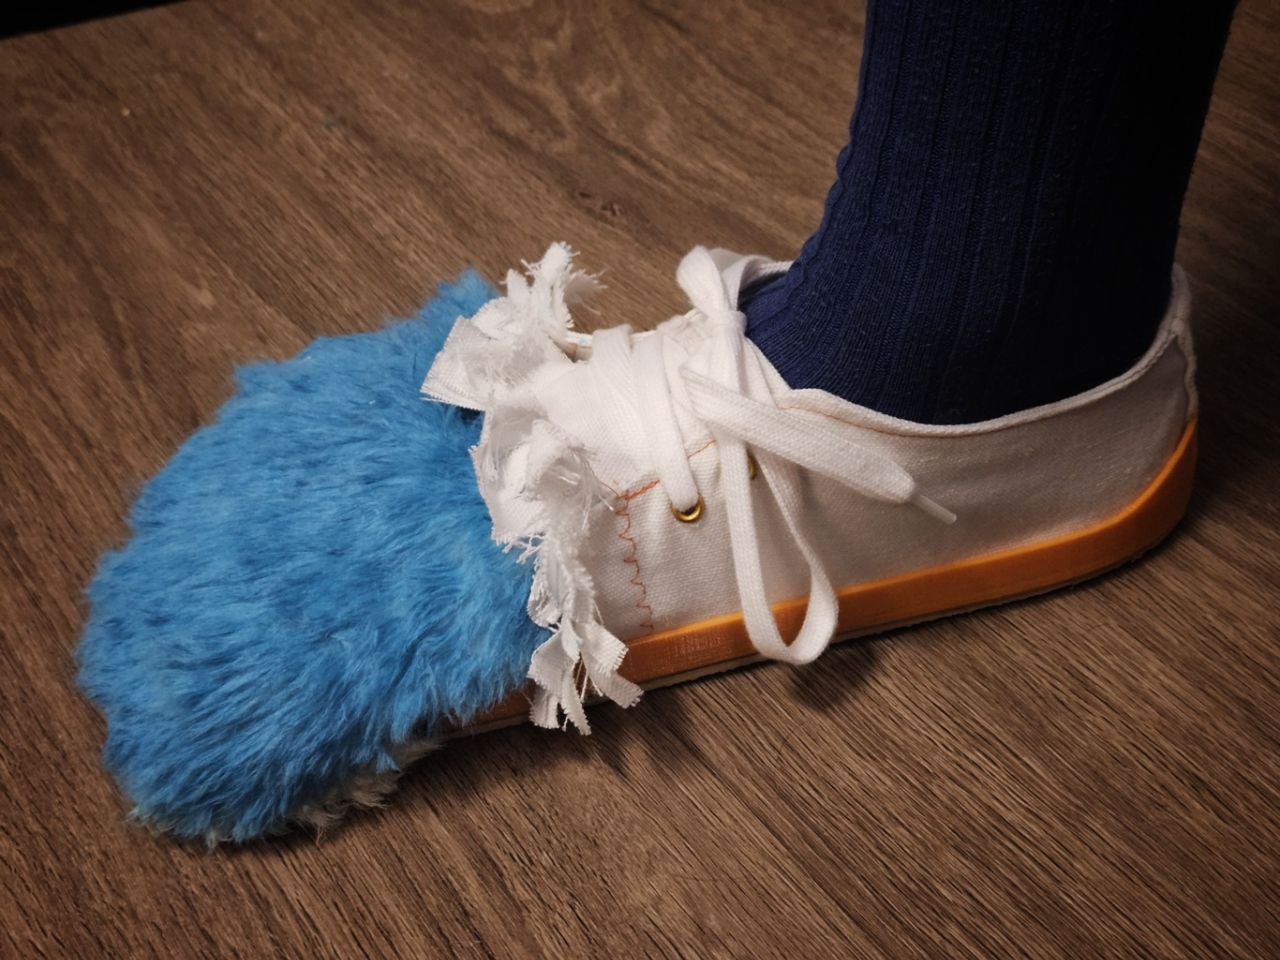
Gonna call this prototype 1 and done. As a shoe it work pretty alright, the very tip of my toes are slightly uncomfortable as it needs more space, but other wise it feels very light and works well indoors. Visually it looks terrible, there is no shape at all.
I also want to note that I only wear barefoot shoes/sandals, and I land on the ball of my foot not the heel.
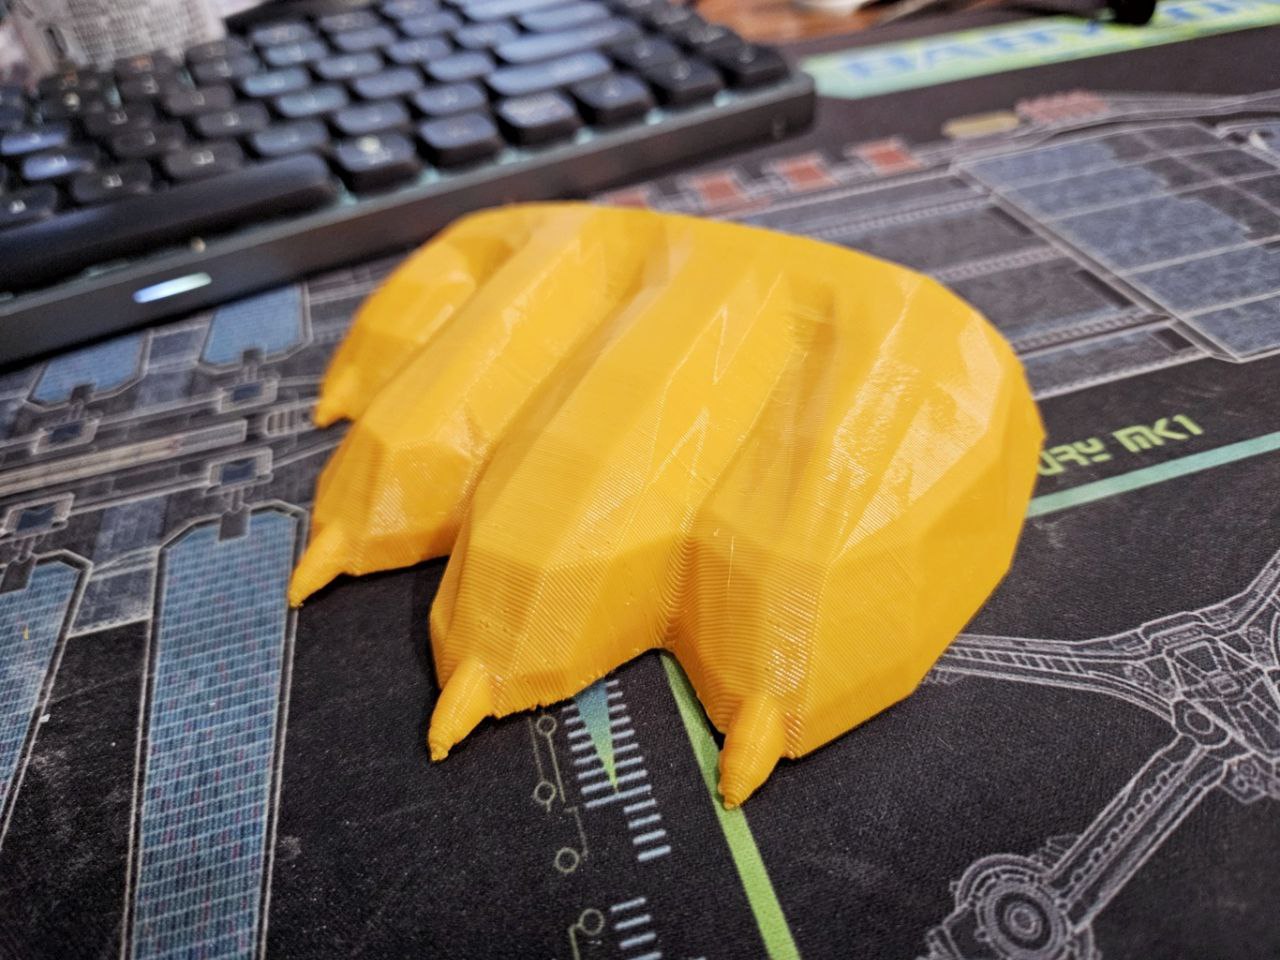
For the next iteration I'm just going to re-scrulpt the paw area. Right now, with the fur its very wide, don't want it to be. Also, I think shaping of each.... toe? Needs to have more depth. The claws are barely visible either, and I think I'm going to make those reaaallly big and visible.
Got around to gluing all the parts of the shoe. I think I forgot to mention that the 3d printed paw parts have been shortened; I noticed that it was extending over the part where the shoe flexes alot so made it shorter. Need to get the fur sorted out next.
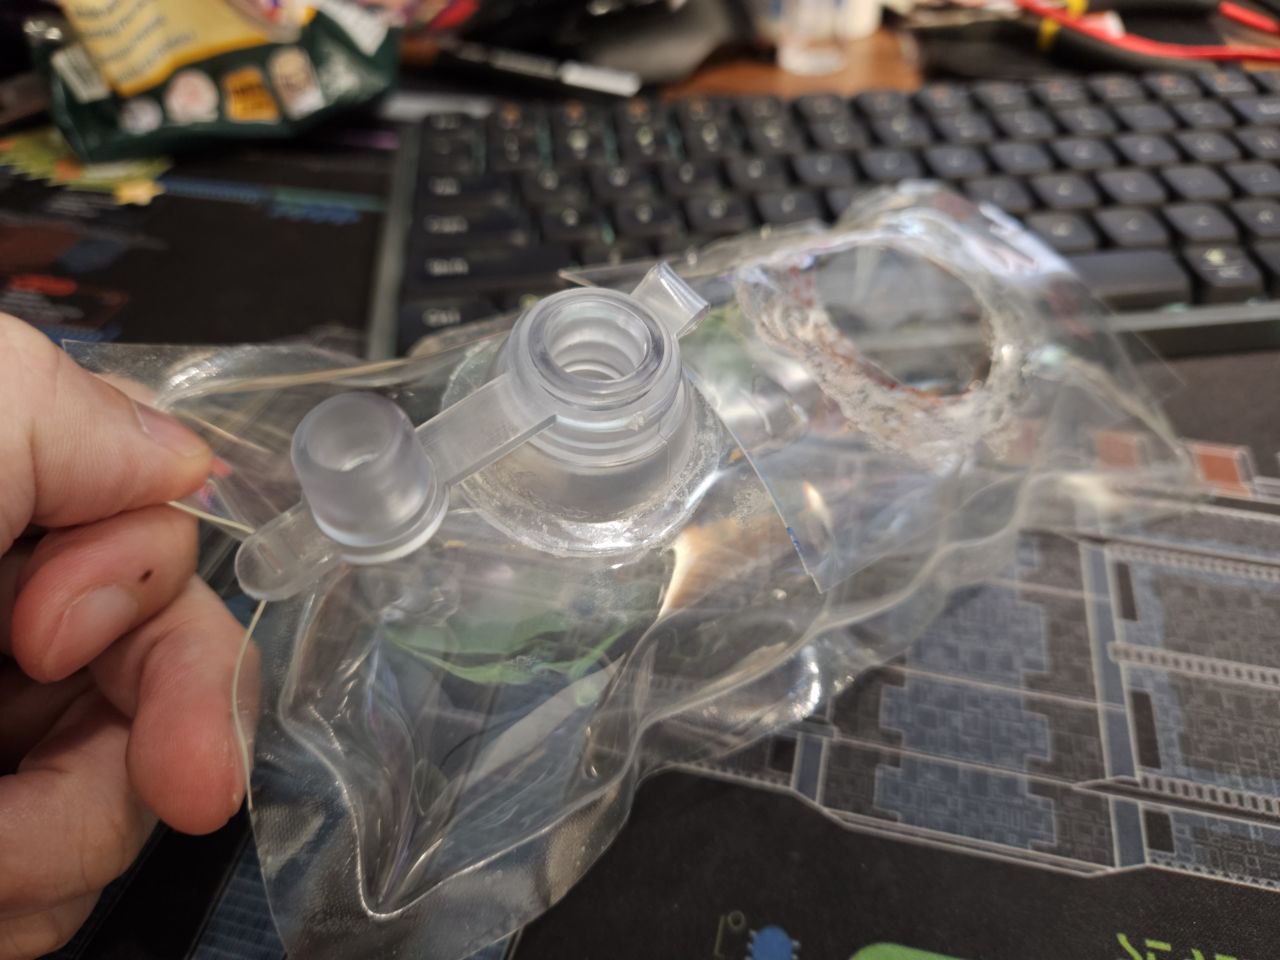
Had some inflation valves come in, it's bigger than the one I had before but this one has a rudimentary one-way valve, as well as a quick air release. Seems to work fine, so when I get on my tail this will be used.
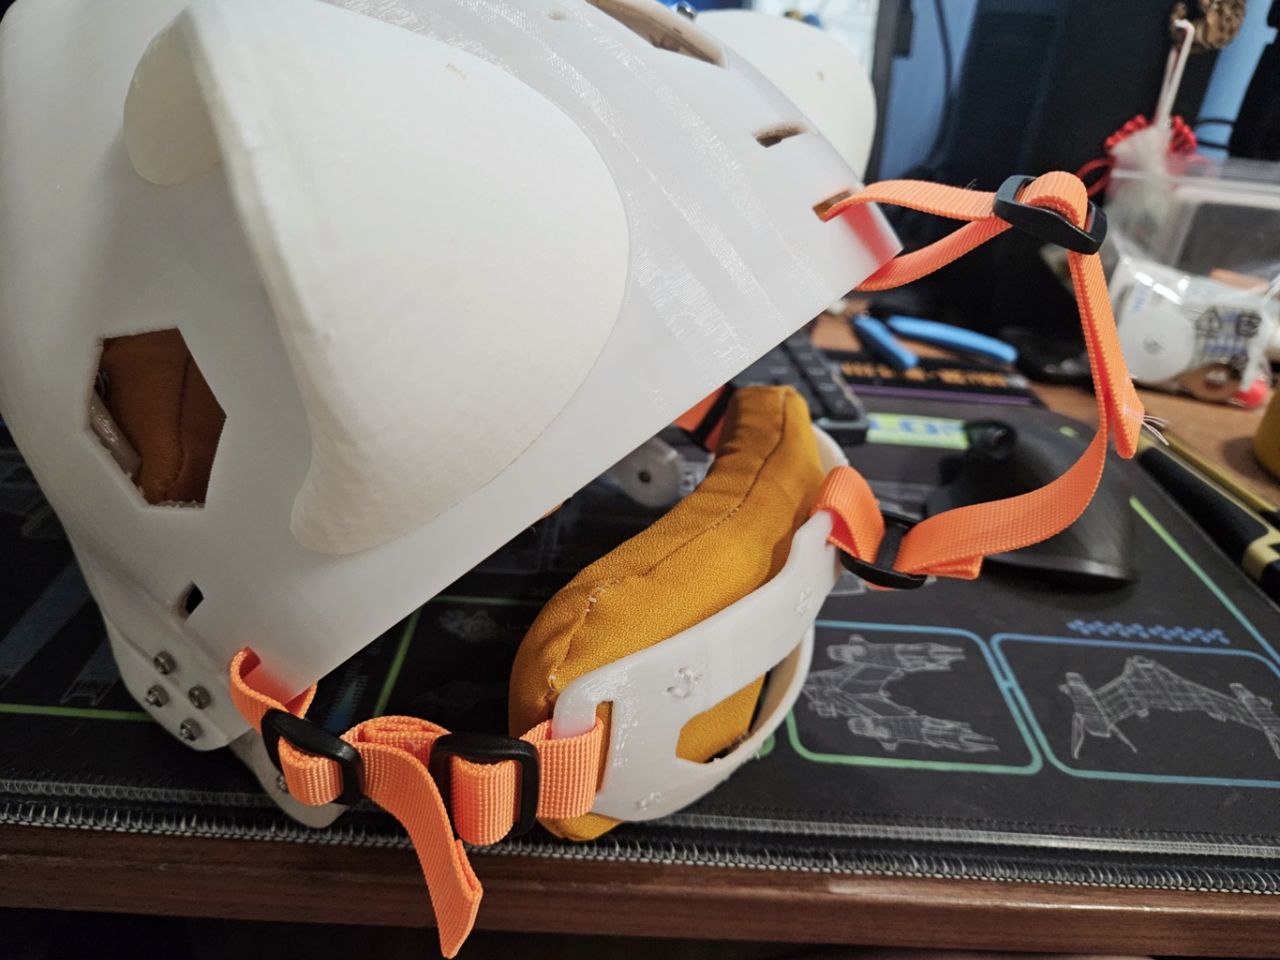
Was out yesterday to meet an ex-colleague and took the opportunity to get some buckles and straps from SMHCraft. I don't think I'll need to use any buckles, the flexibility of the back strap and foam allows me to just push my way into the head XD
I also went to start on the tail when I realized I cut the fur wrongly!!! I'd cut the pattern against the direction of the fur instead of along. GRAAH.
It's not too bad, I can use the fur for the shoes or paws. Did make an order for a new bunch of fur, hopefully it arrives in time.
Anyways, progress is going very well, some parts need to be resized in the final version else its going swell.
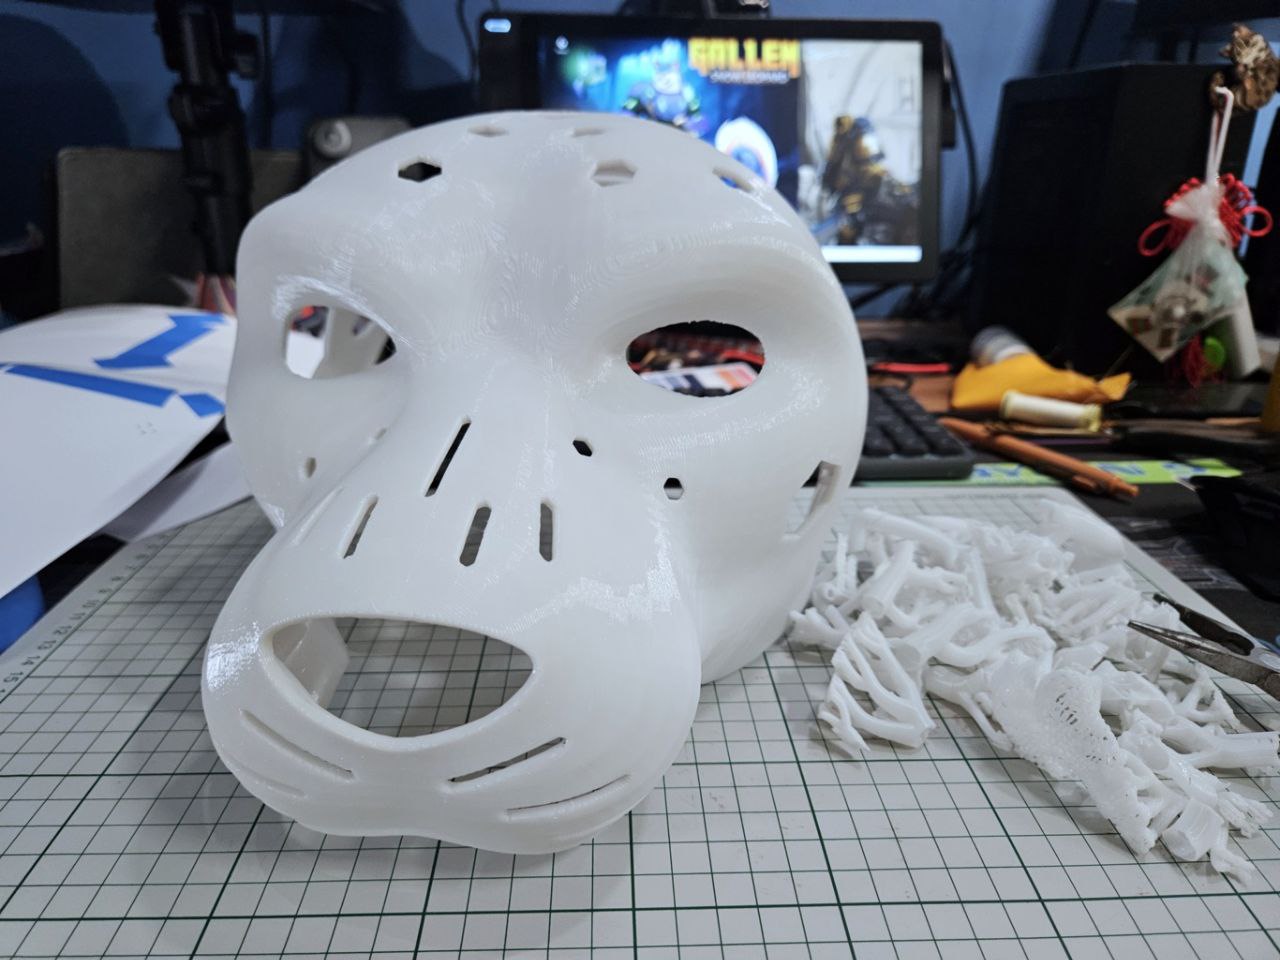
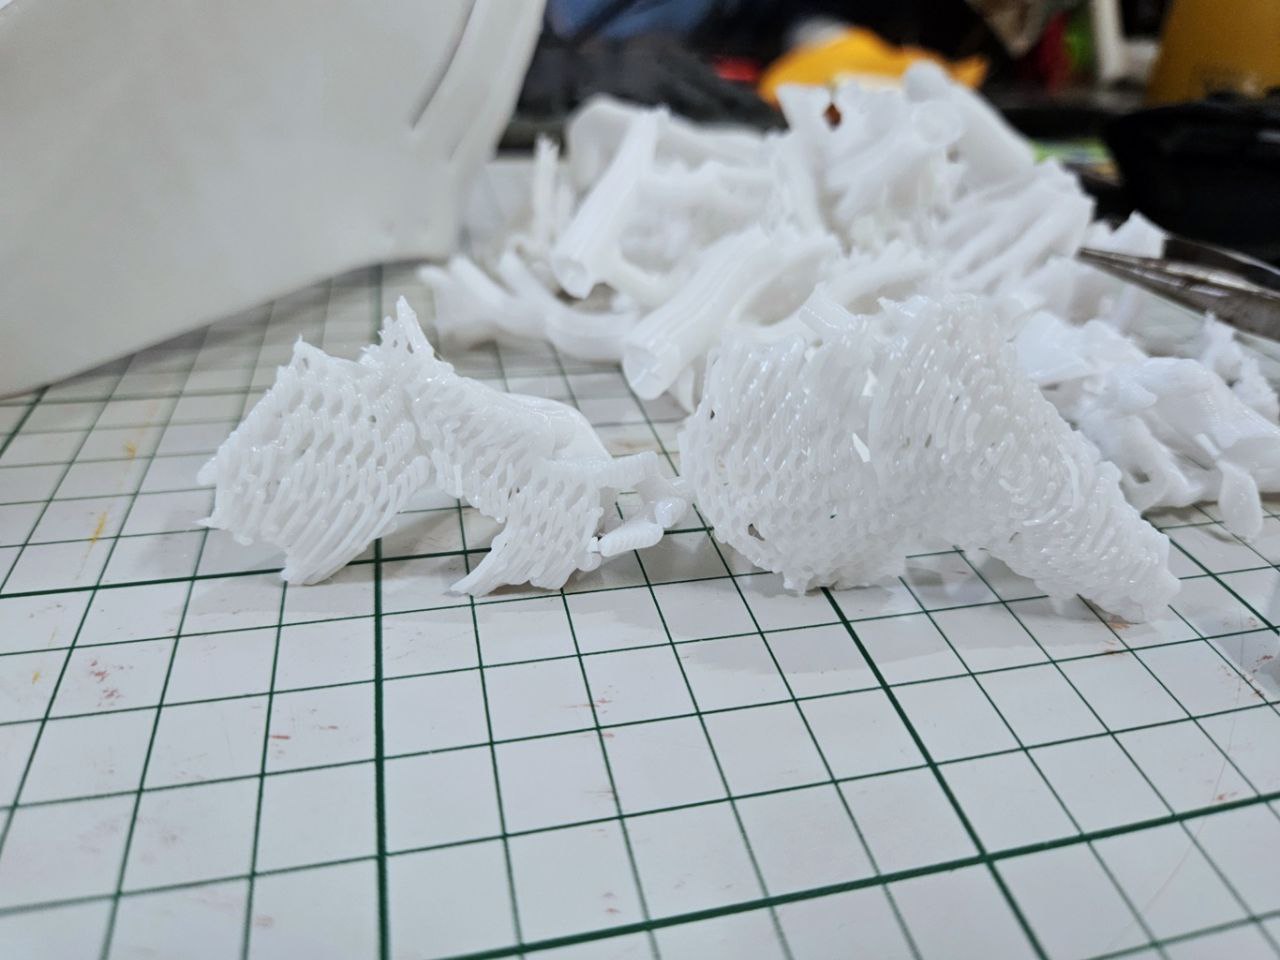
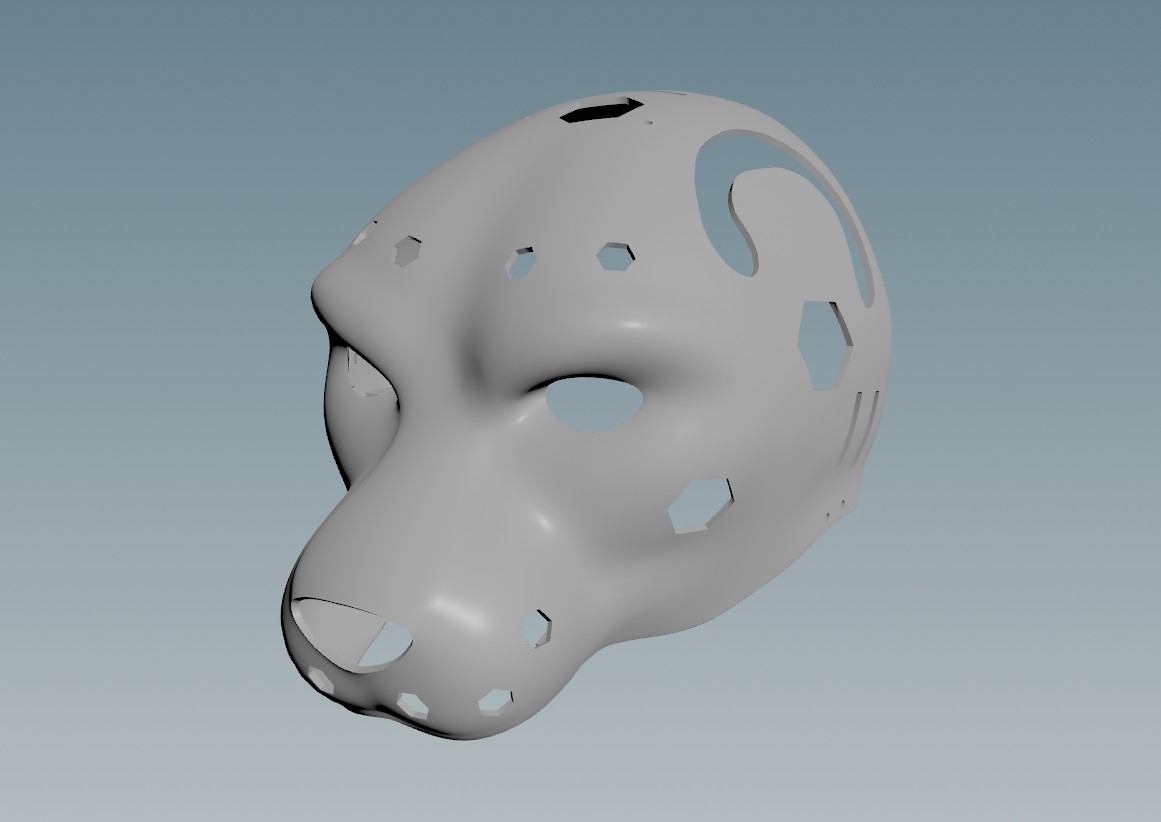
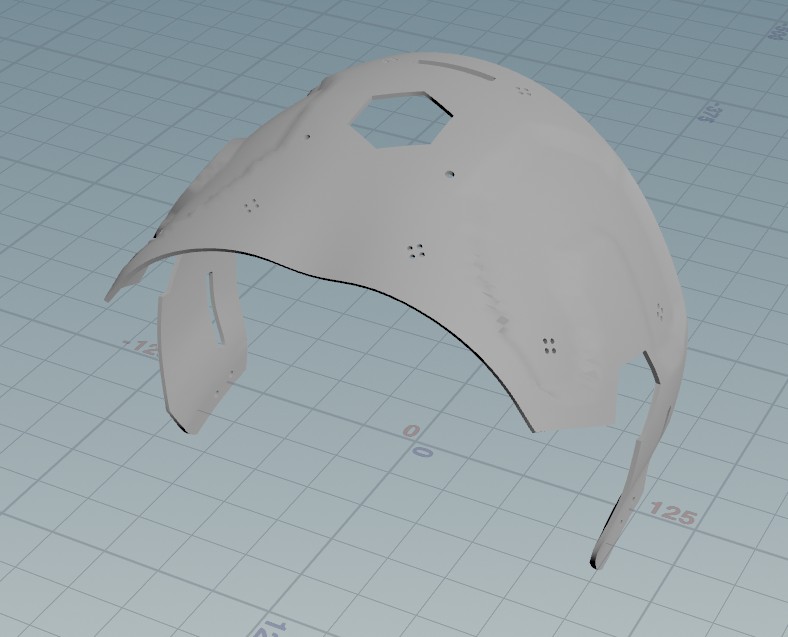
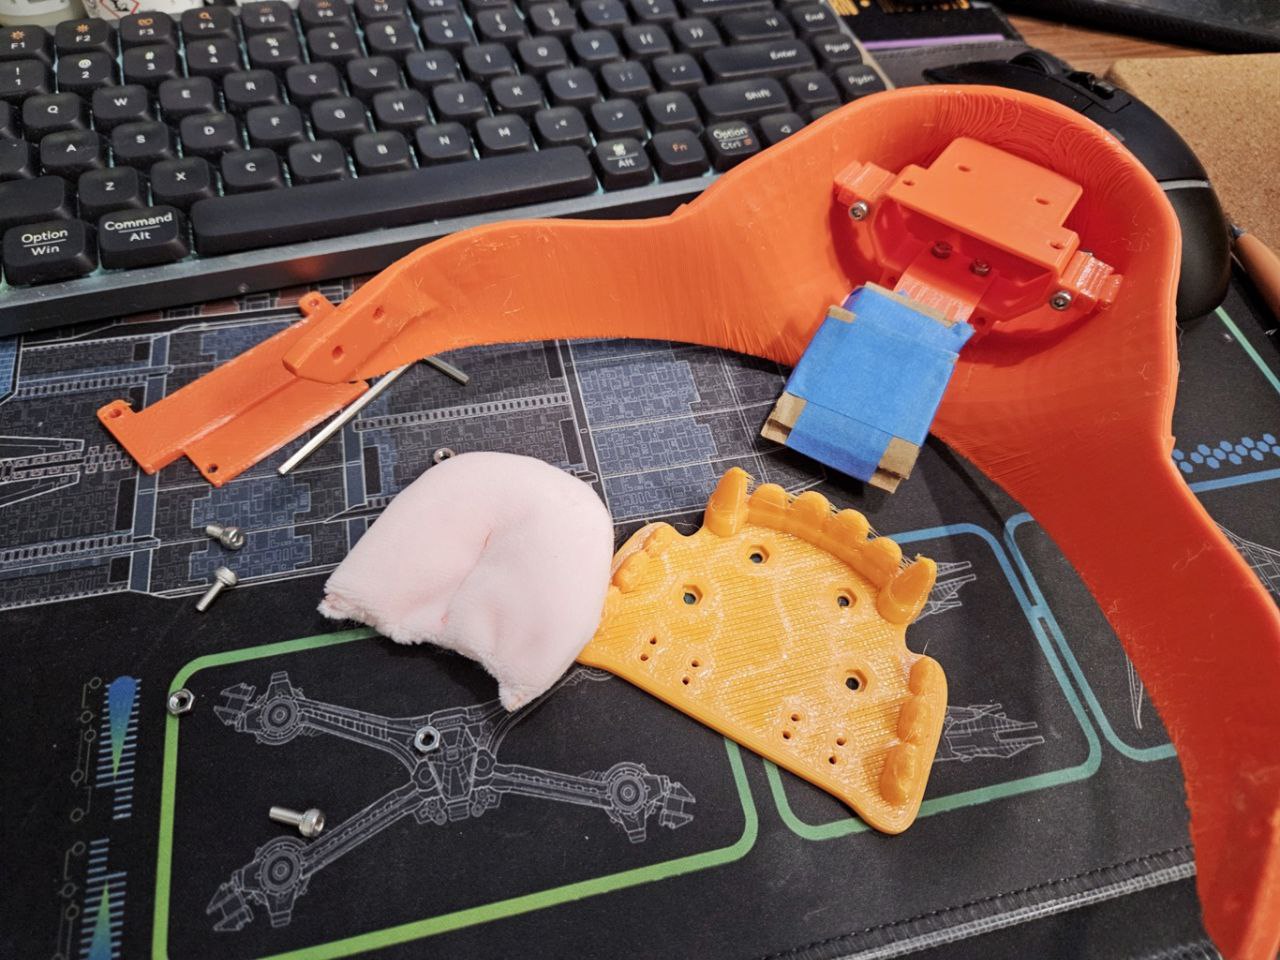
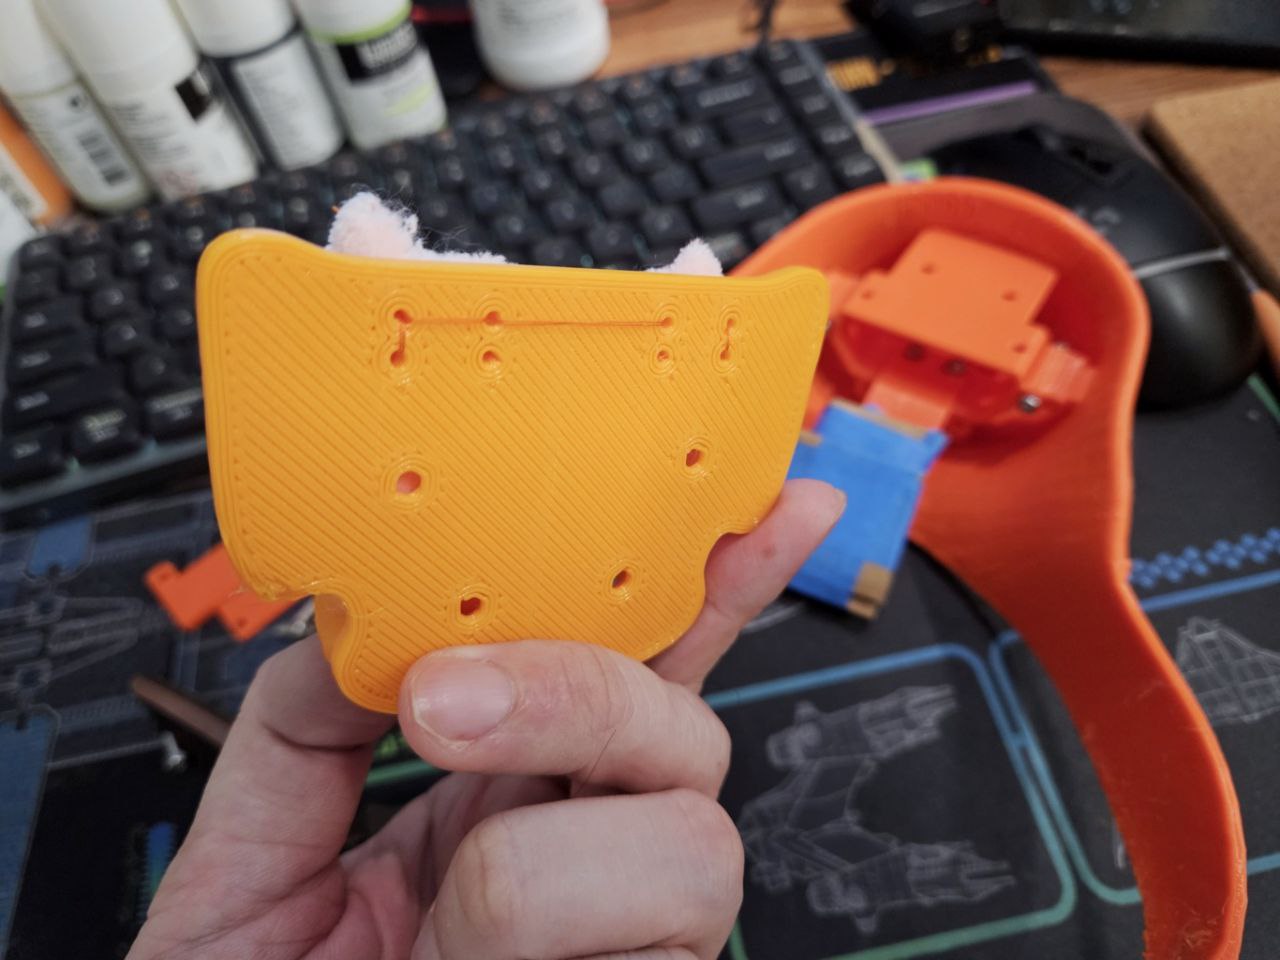
Upper headbase printed with no layer shifts (whew), and supports popped off very easily.
Eye mounts are working very well! The mesh holder has mounting points in the middle and either sides. The middle mounting point is perfect, but the sides need to be beefed up - already cracked one side.
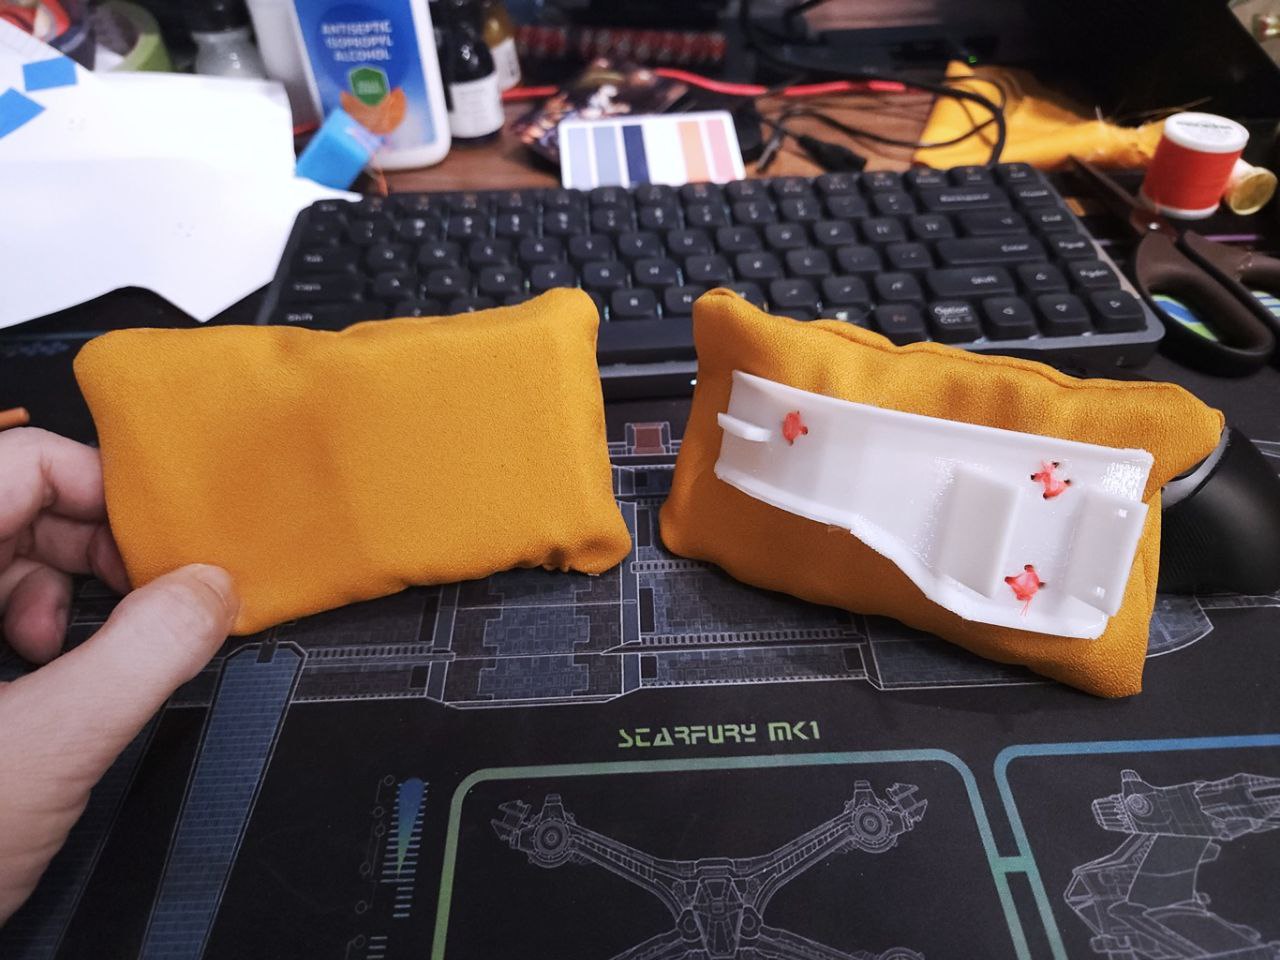
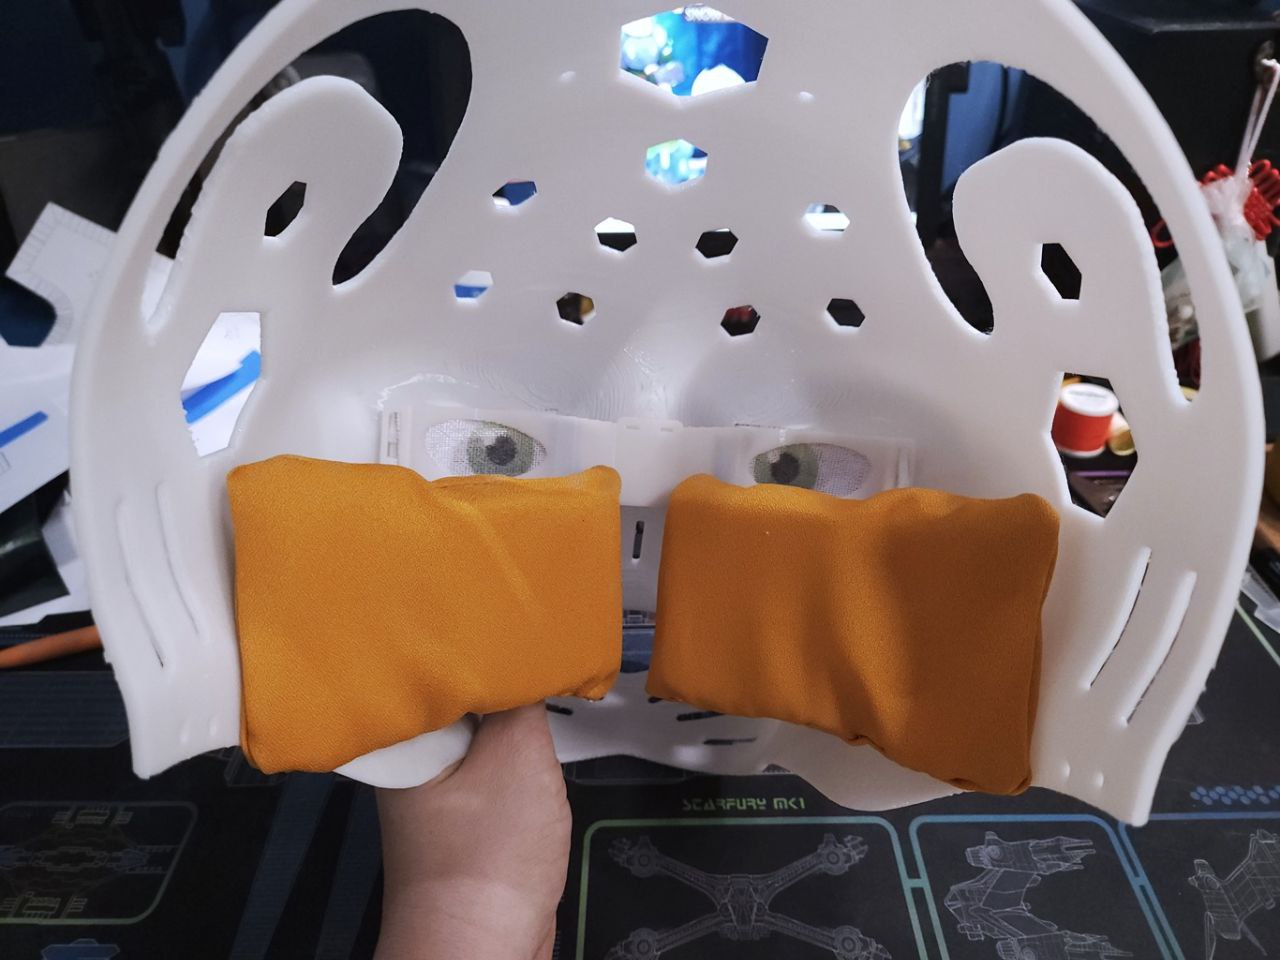
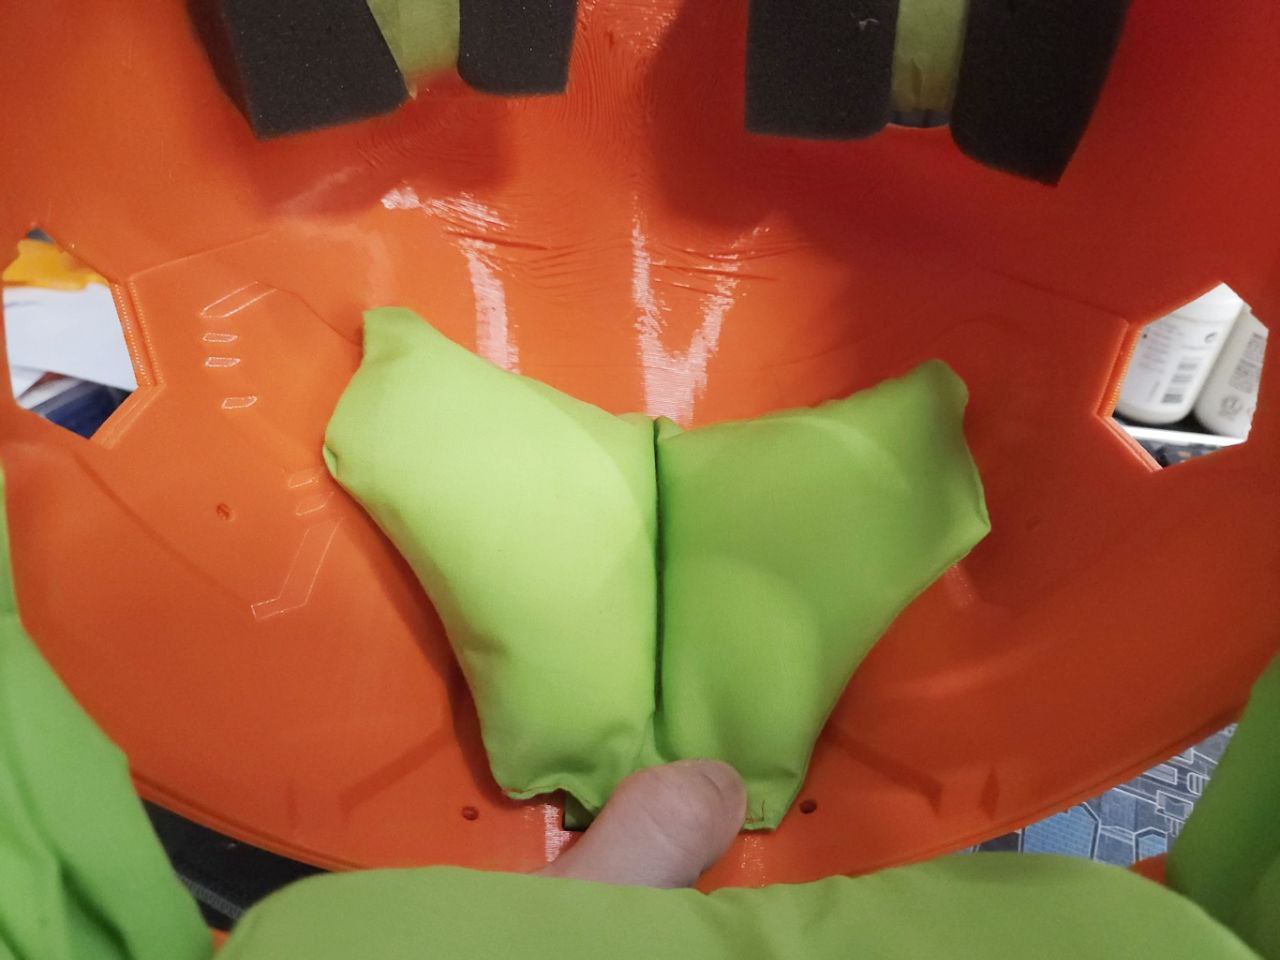
The cheekPadding mount had to be re-printed just to make the prongs slightly narrower, once that was done they worked perfect! The cheek padding themselves are a bit too big and the foam inside moves around alot. Definitely need to make it more form fitting.
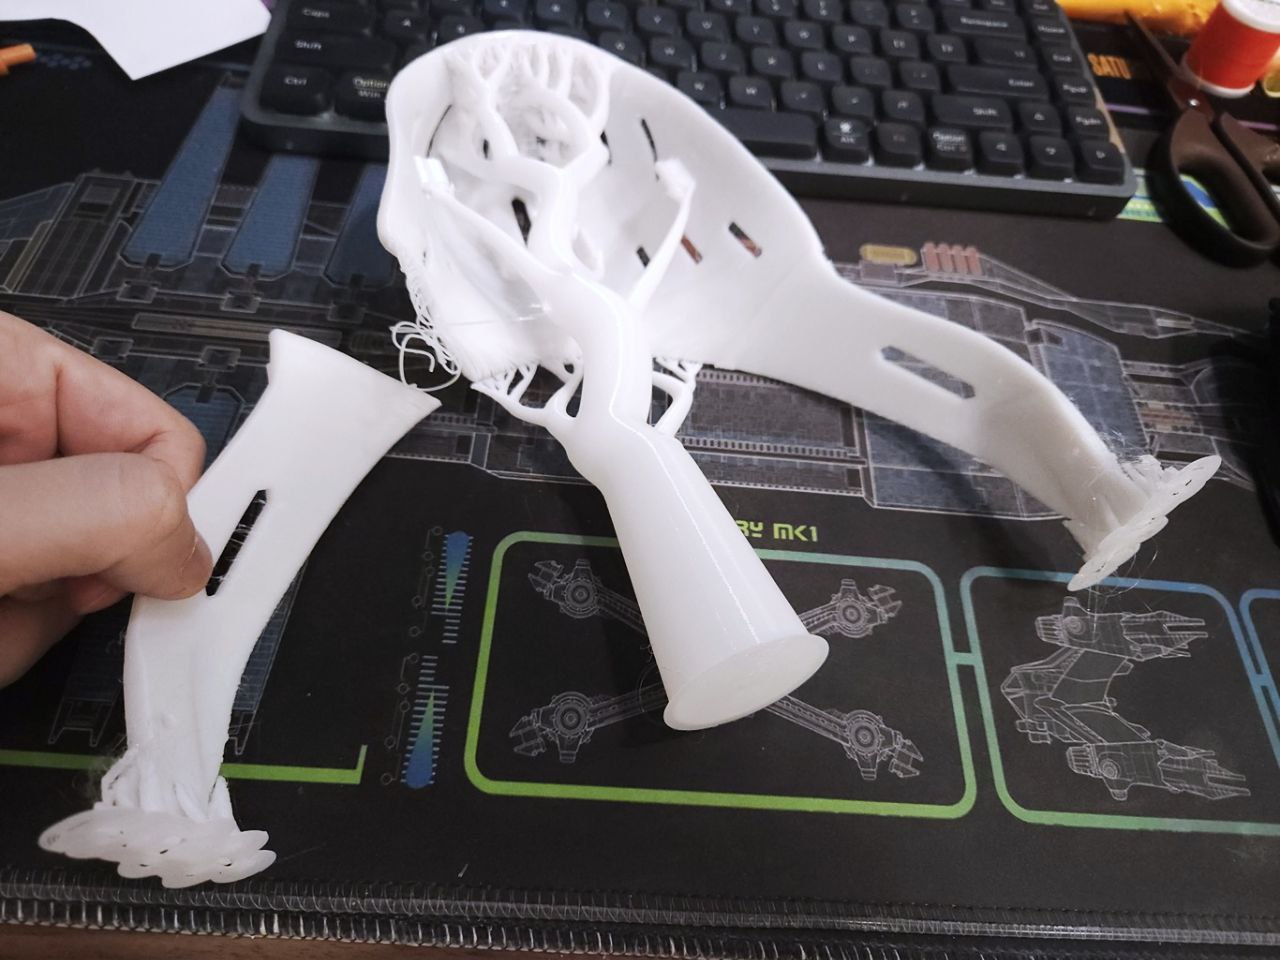 *sigh* got a layer shift printing the lower jaw. If you look carefully, the screen right part also has a layer shift line there, and it broke off easily in my paws. BLARGH.

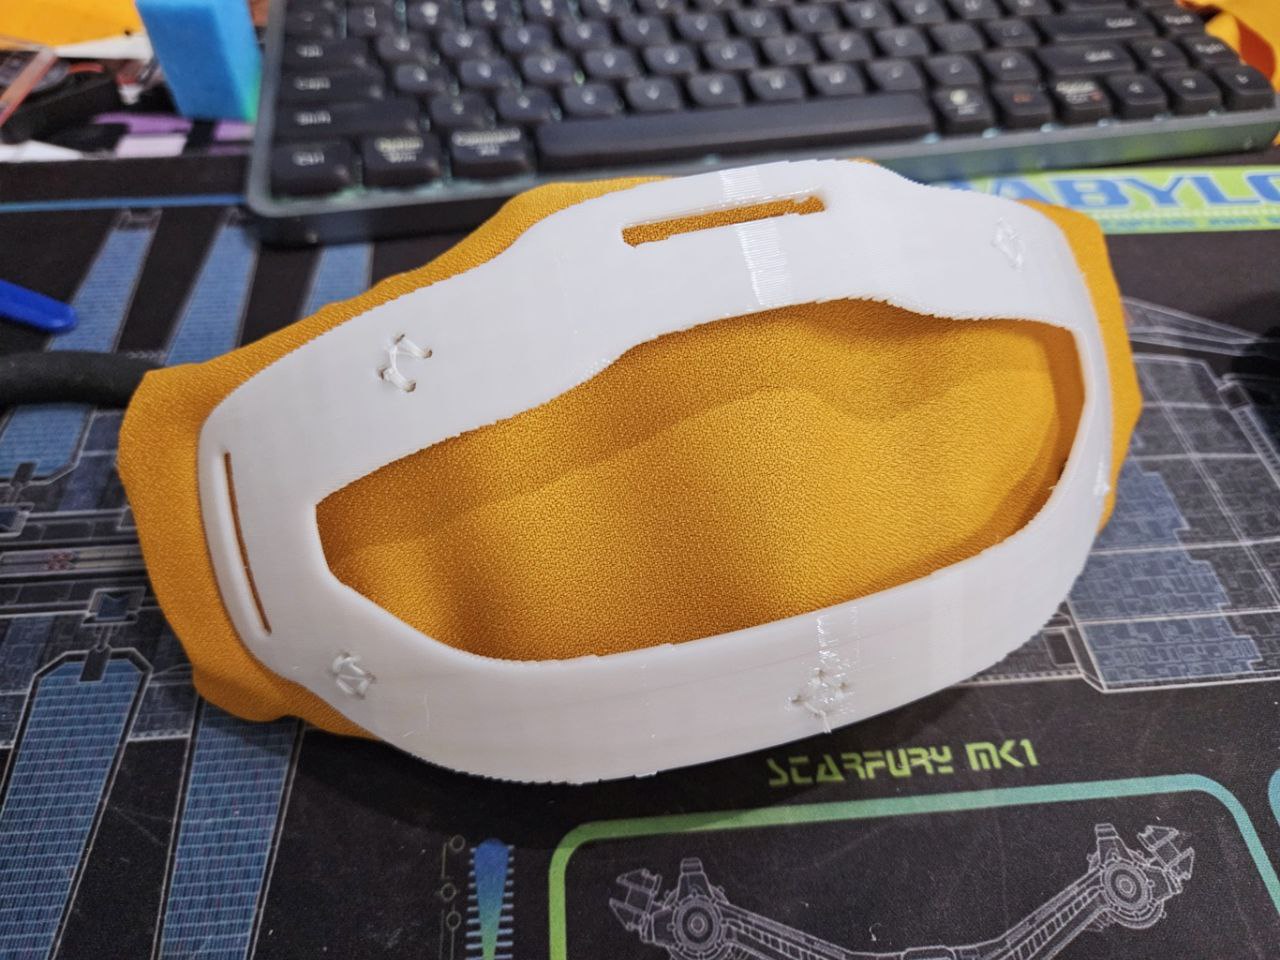
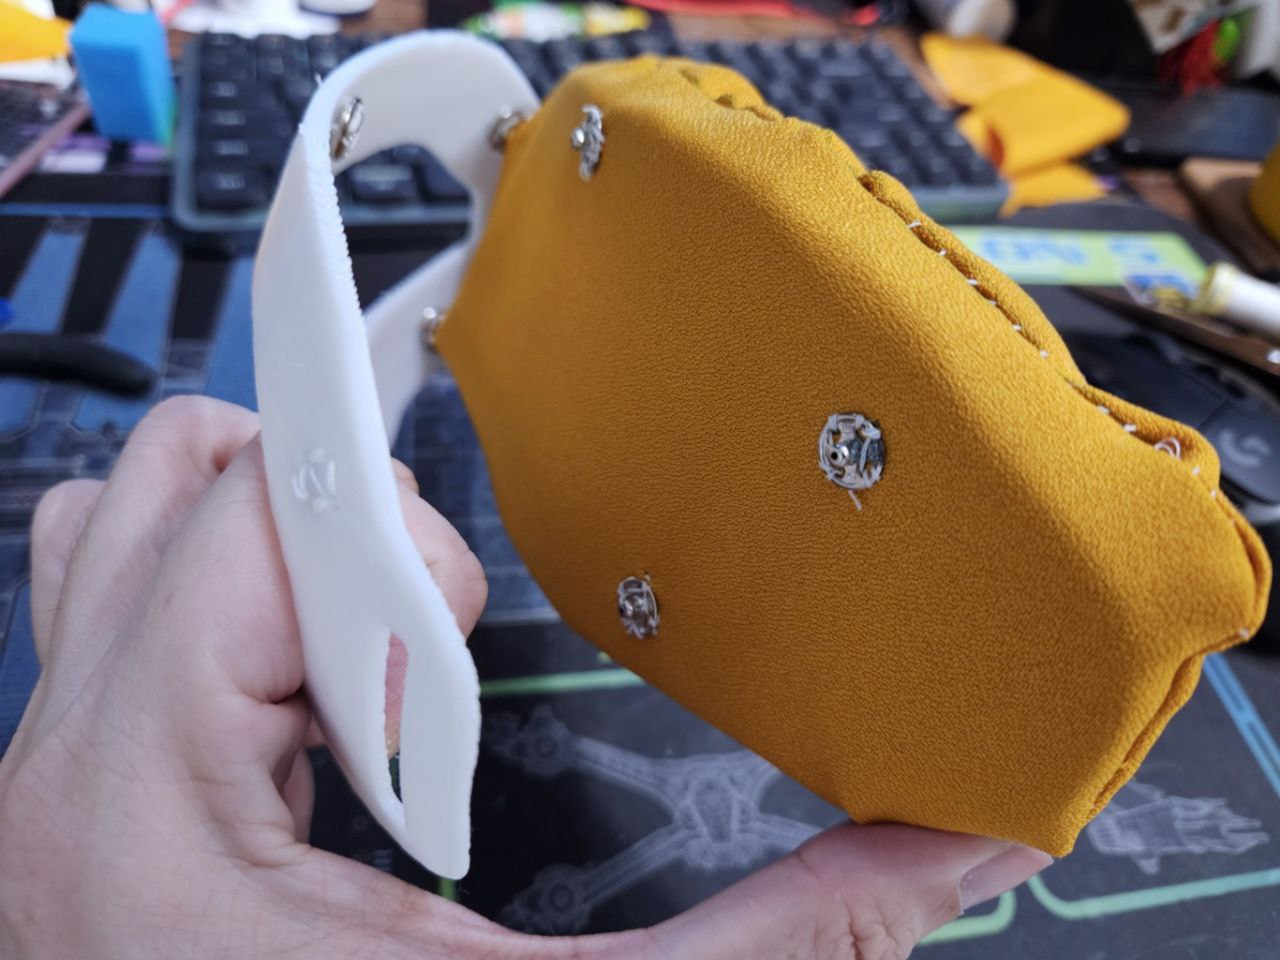

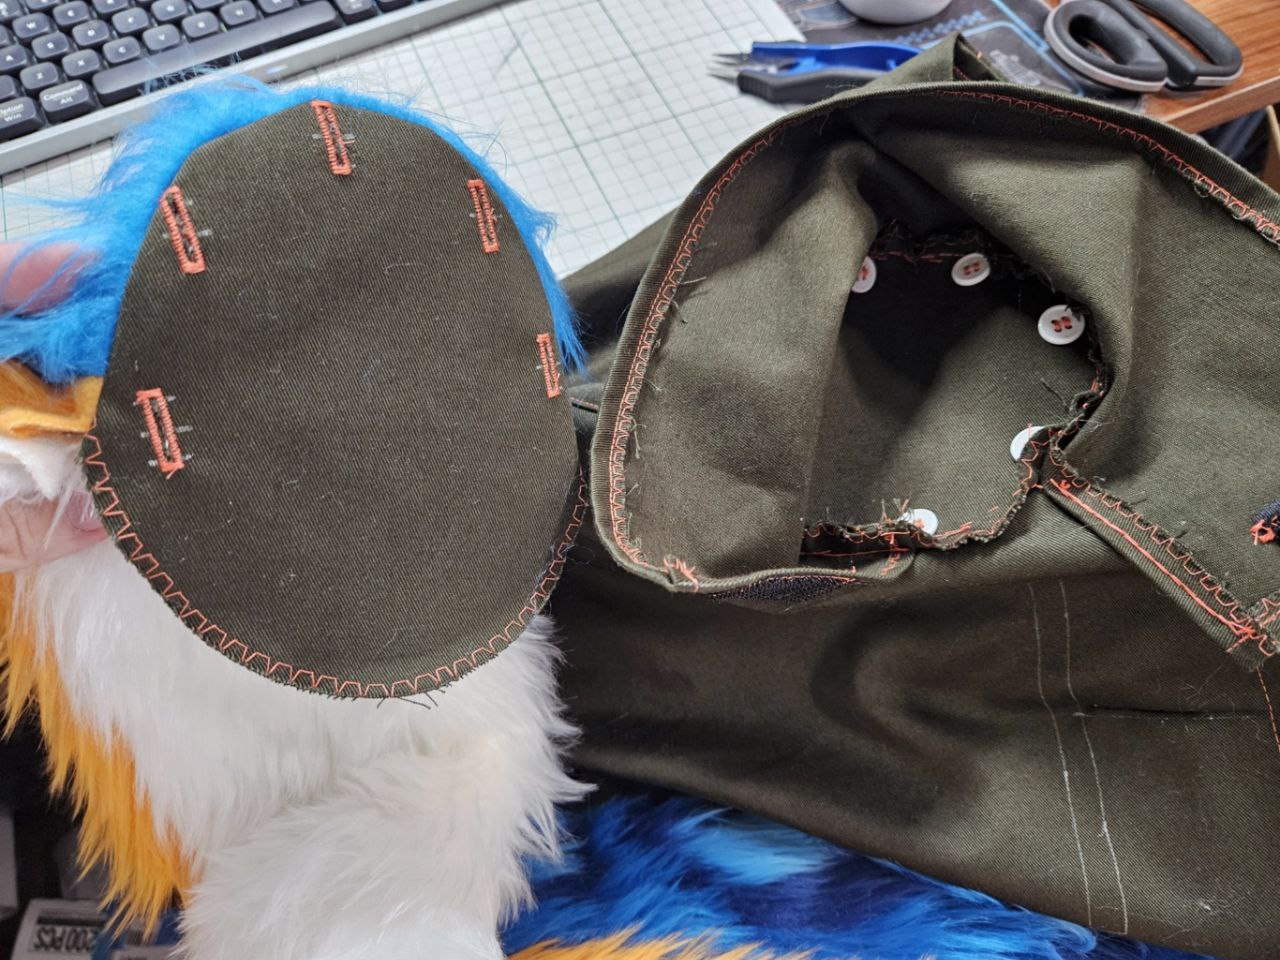
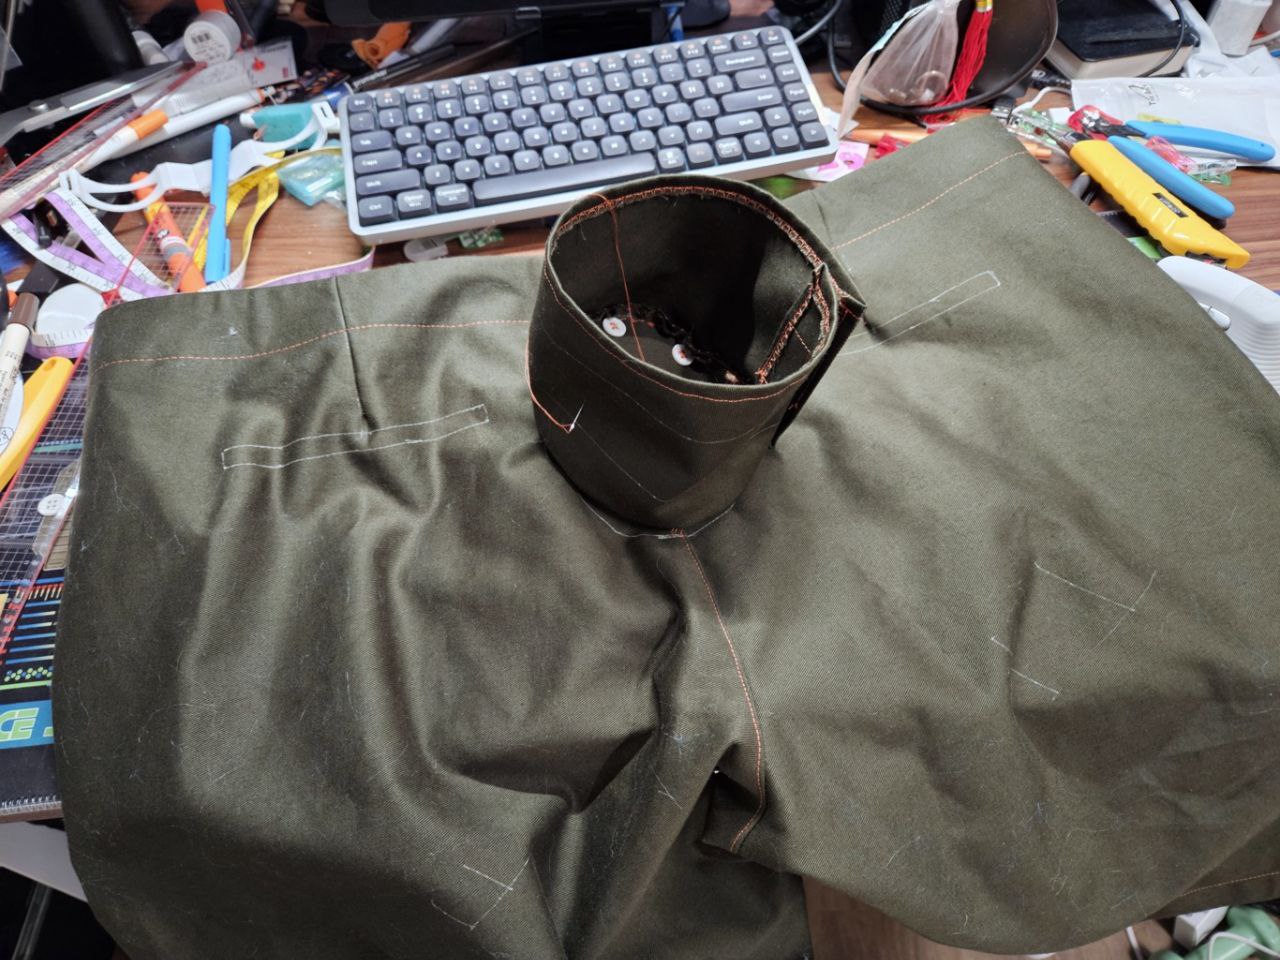
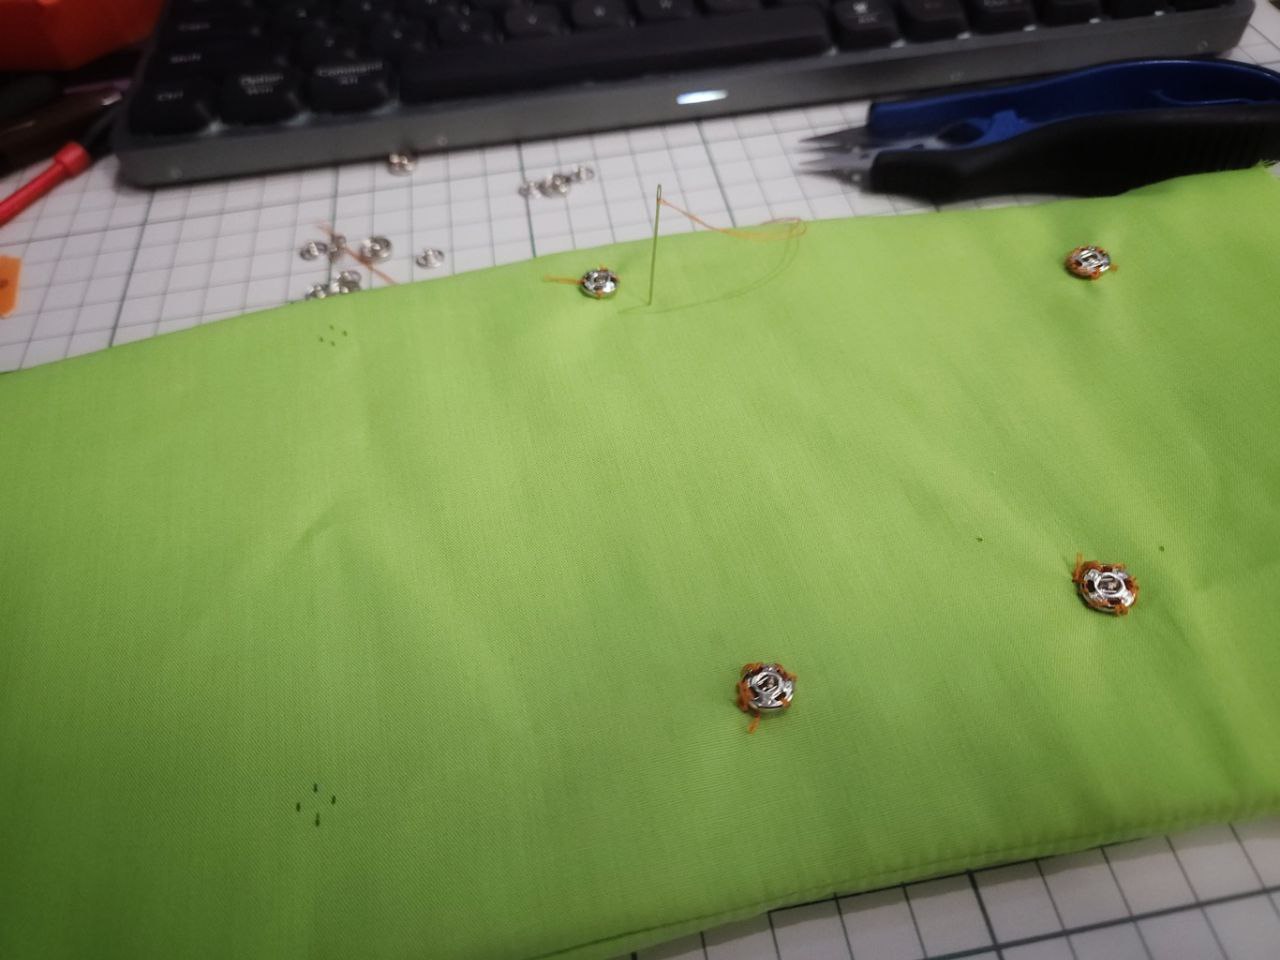
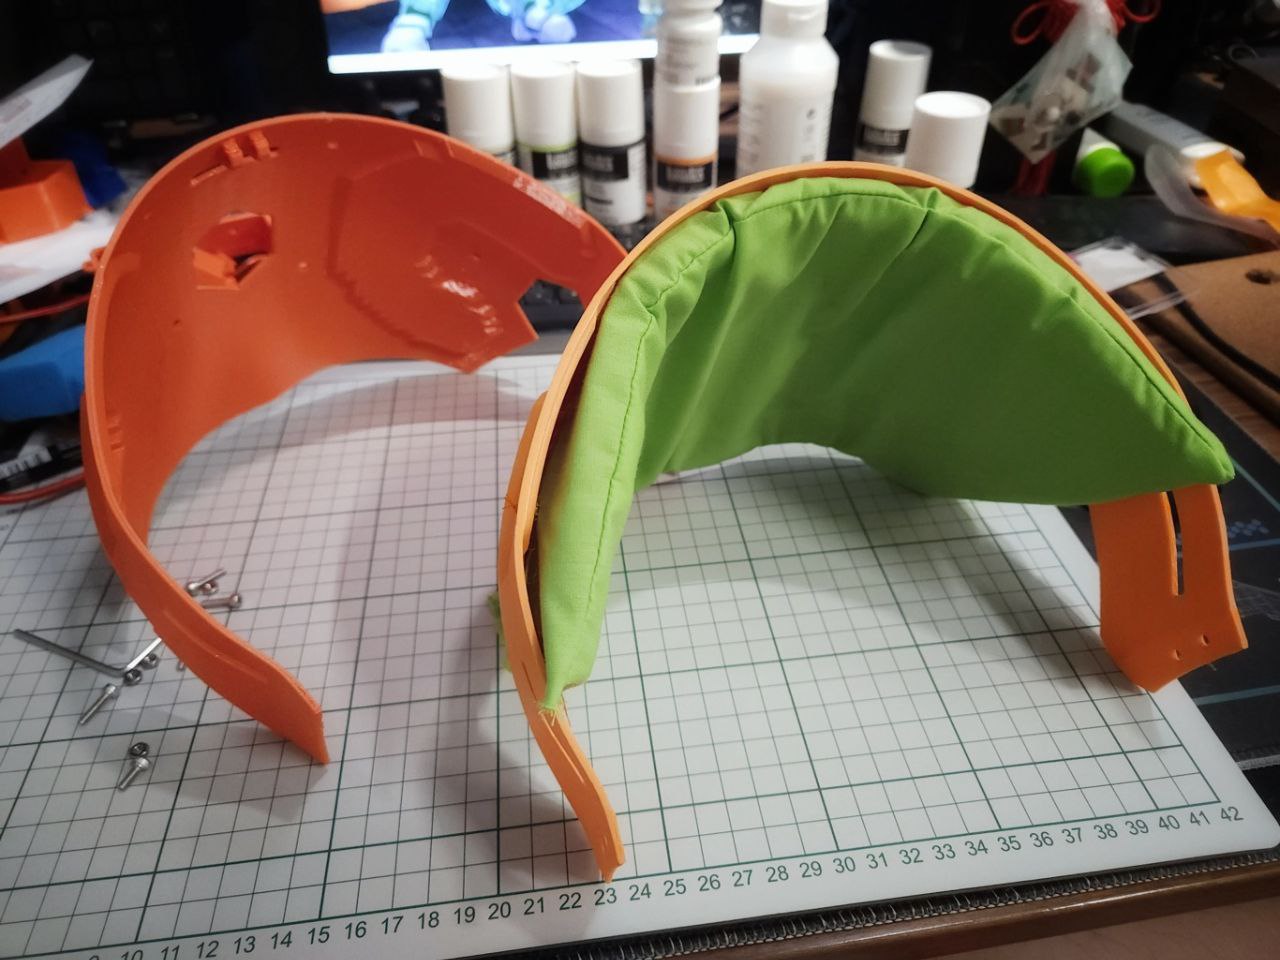
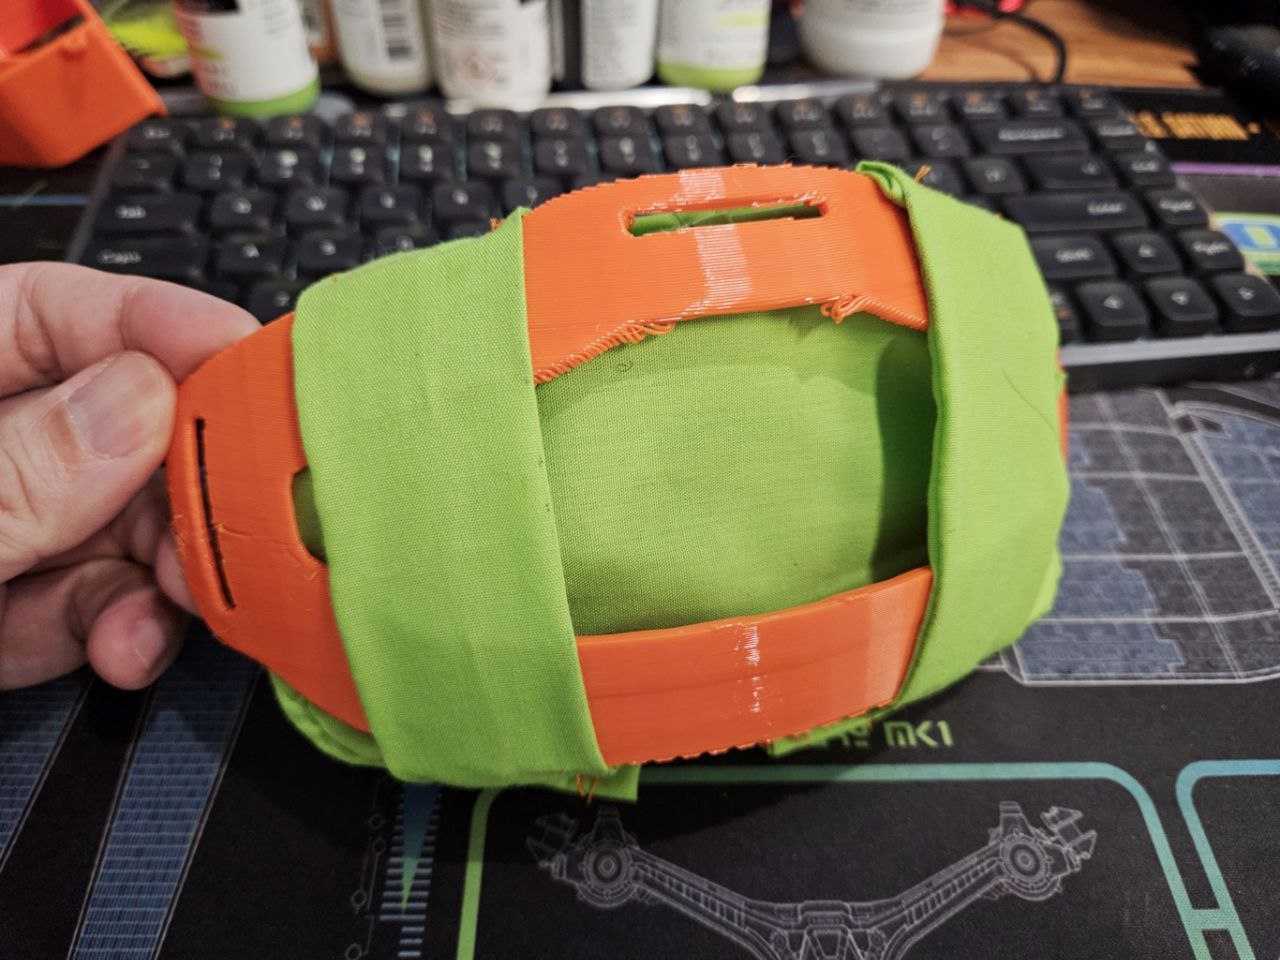
Yesterday was mostly printing some smaller parts and making the padding for the back of the head. The material I'm using is "Como Crepe", a kind of polyester fabric that is supposedly good to wear in hot and humid climates. It's pretty easy to sew with, not stretchy but very flexy. The kind I got frays much more than the green poplin you see in my earlier photos!
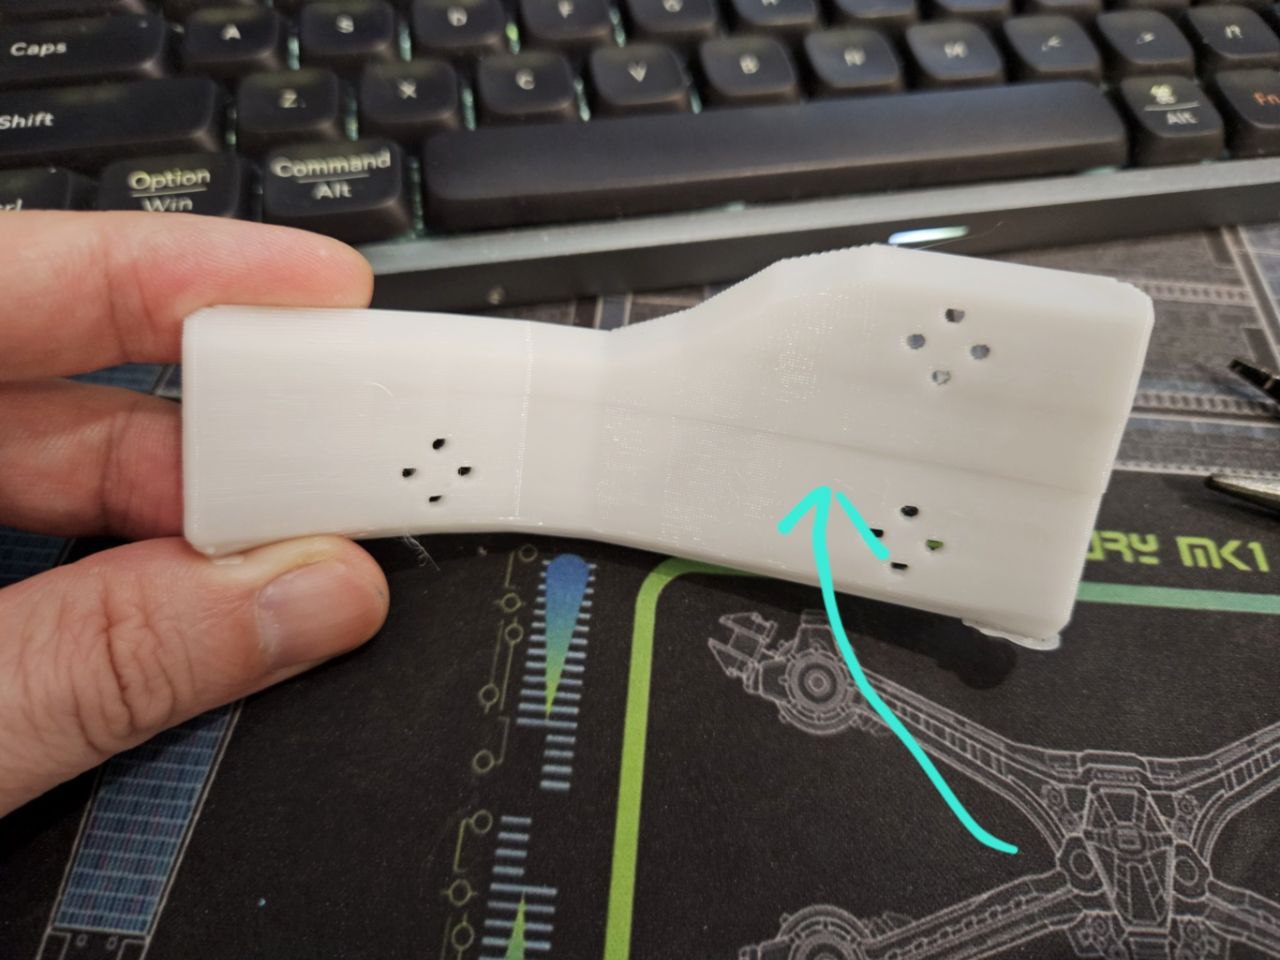
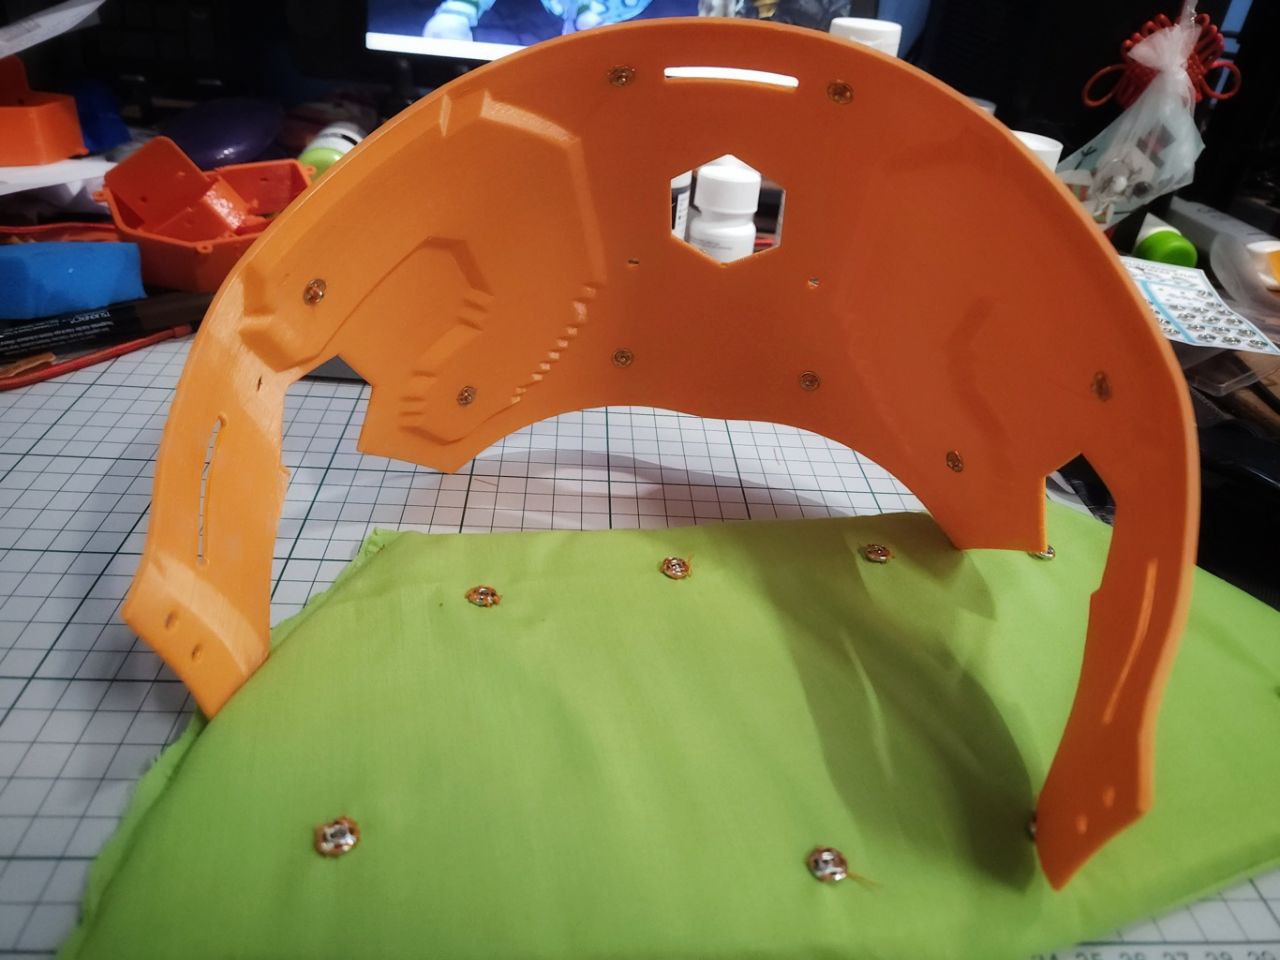
After I finished sewing up the press studs, I realized that there is alot of space between the padding and its holder, and I increased the number of press studs. Also, I simplified the designs of both the holder and the holder - the holder now has a longer, flat section at the bottom, and that reduces the amount of support material required. The padding I also simplified the pattern, so it now has less corners and easier to sew up.
Little note on how I sewed the padding - you can see in the first picture I used a lightning stitch for most of it, and the opening for the foam I used an overcast stitch. Once its revered and the foam placed in, I then use a ladder stitch to sew it up. The overcast stitch is to prevent fraying should I remove the ladder stitch to remove the foam. Thinking about it now, maybe I should sew like a zipper or something. Will consider, might be a good skill to learn too!
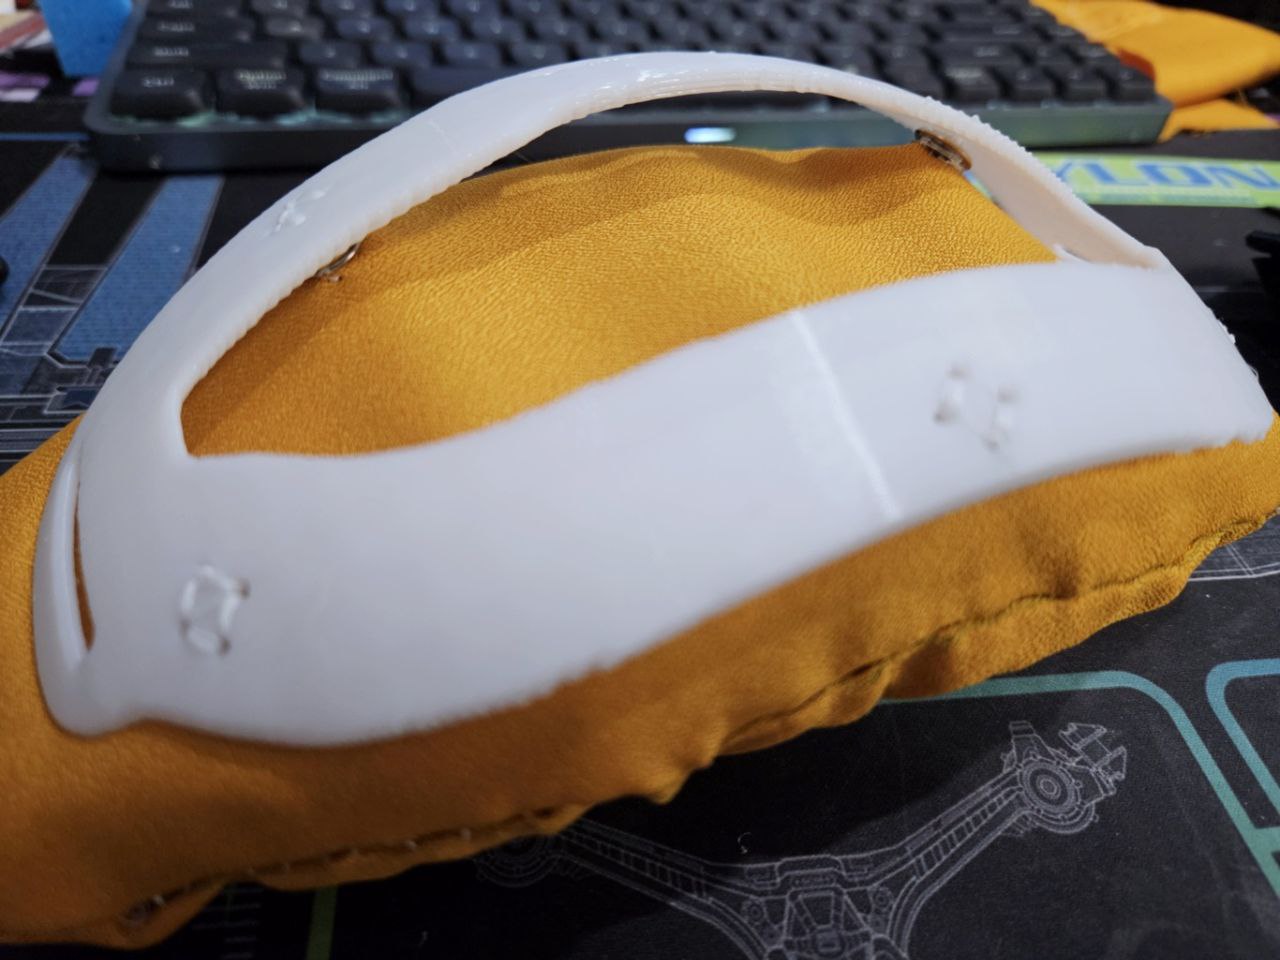
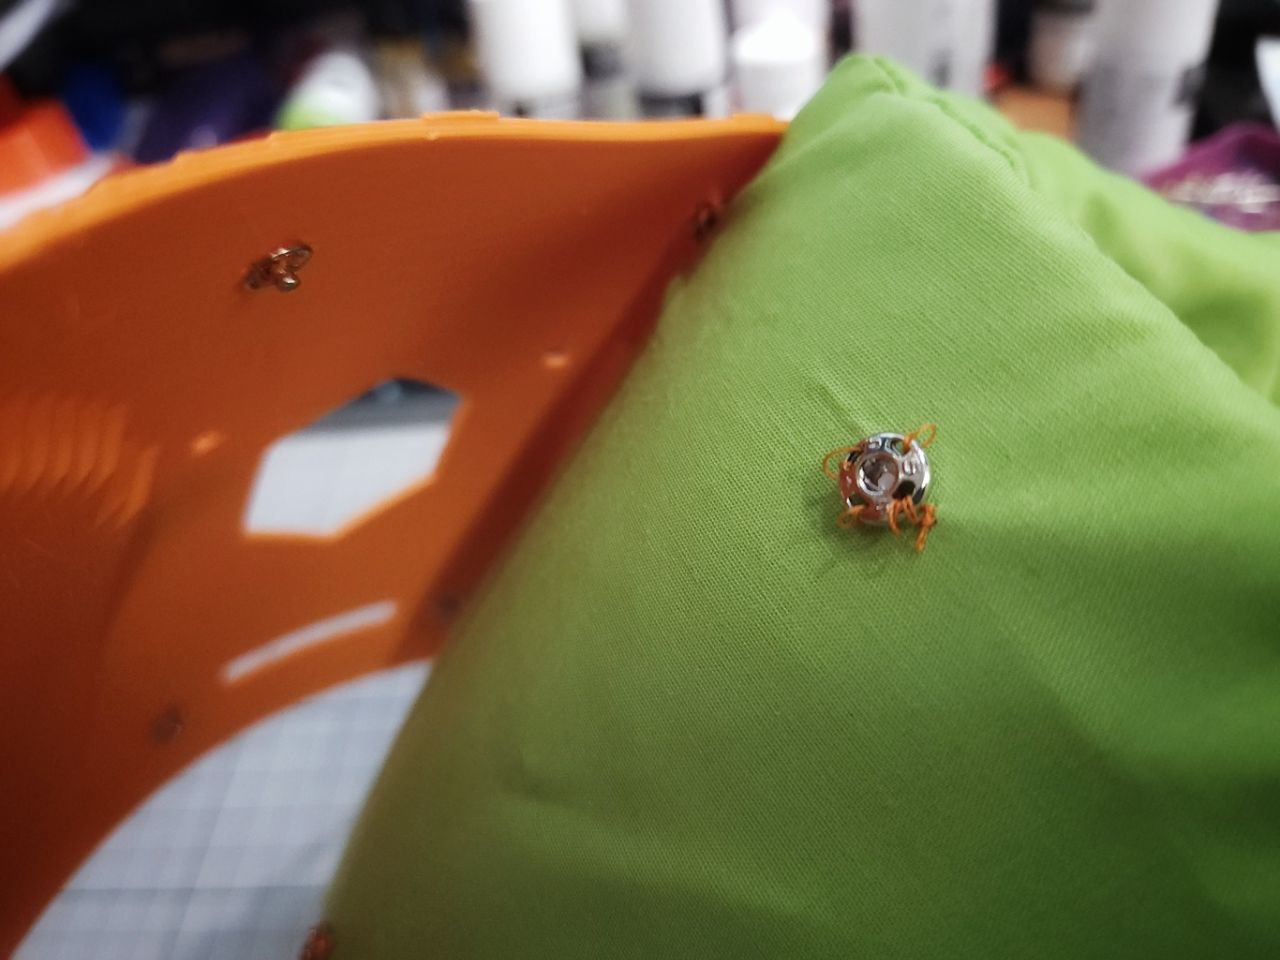
The last photo shows the new model with extra press studs and while not perfect, works much better. I'm also using 11mm press studs now! These are waaay easier to sew versus the 8mm ones from before.
I unfortunately bought wrong sized nylon straps and buckles that connect this padding to the headbase, so I'll need to get some soon.
One last note mostly to myself, the foam I am cutting out with scissors and its not the most accurate or nice looking. I really should consider like a wire foam cutter of sorts.
Next up, the cheek support piece kept getting random layer shifts. This is quite concerning... so far, I've never experienced a layer shift with this printer. The shift is also only on part of the model, not the whole layer, leading me to wonder if its a model thing not printer thing. In this particular piece, I flipped it 180 in orca slicer and it printed fine... but I'd printed this piece several times before that and the layer shifts were random. At the time of this writing, I'm printing the upper headbase. That takes about 500g of material and nearly 15 hours of print time. Hope that doesn't have a layer shift else I'd be a very sad cat.
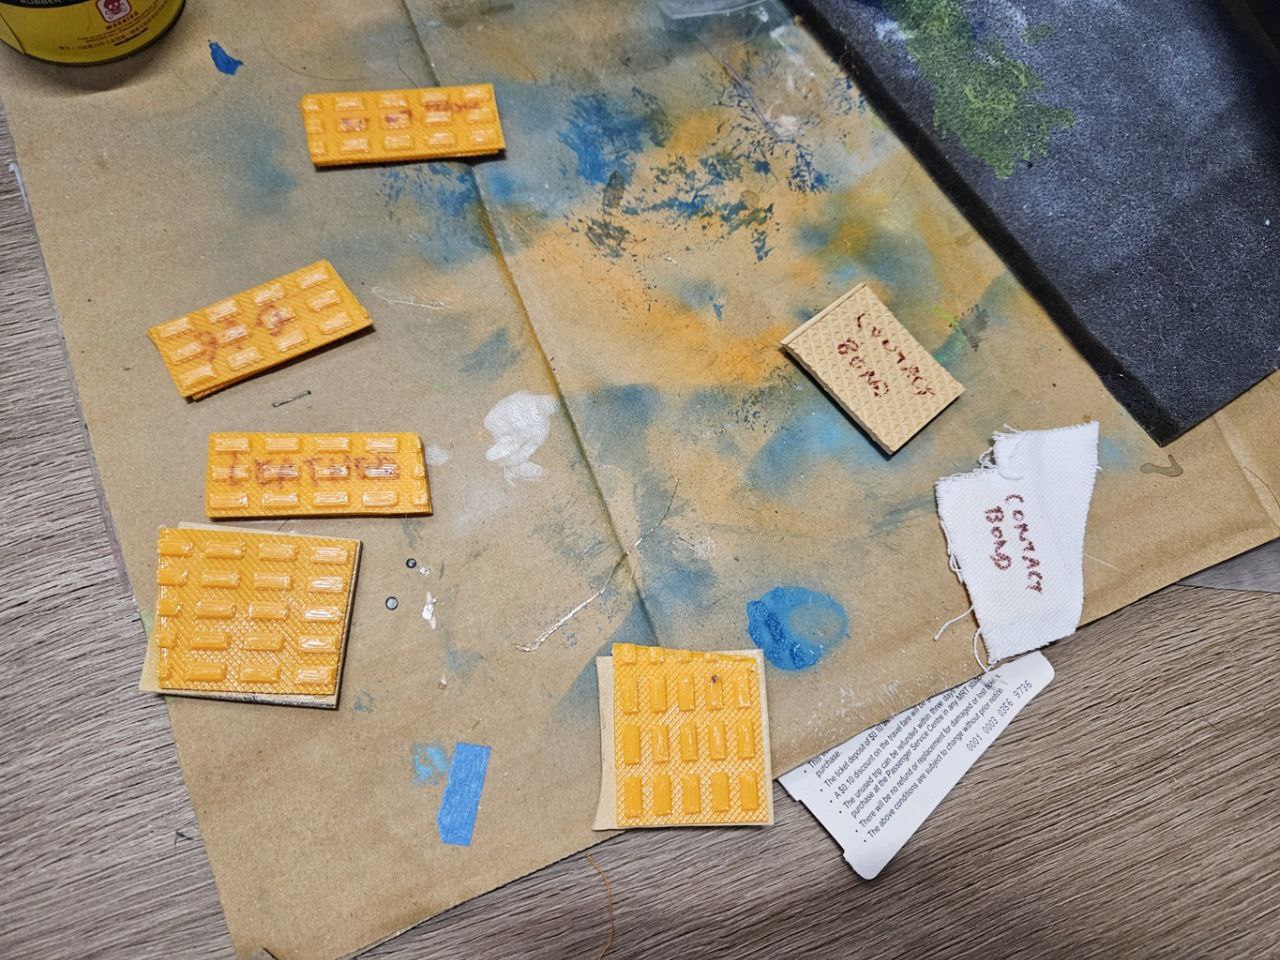
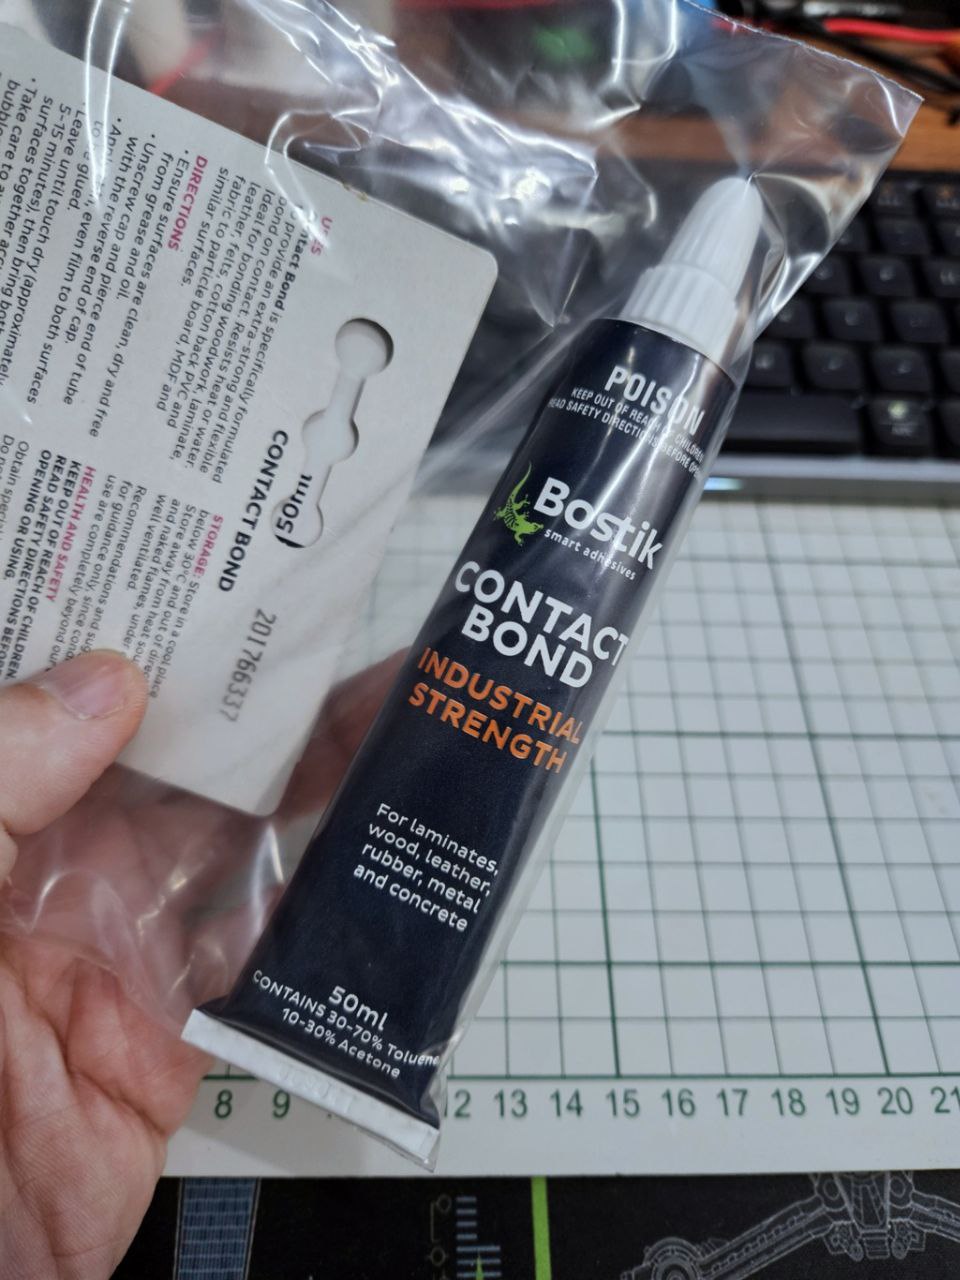
I also had some glue arrive, Bostik Contact Bond, Bostik Leather Glue and PVC Glue. I also have a bottle of generic contact cement, as well as Bostik Soft Plastics Glue.
PVC glue I've read works for TPU, but the one I got was useless with both TPU sheet or the printed tpu.
The generic contact cement was mostly useless. Everything I glued it with tore apart effortlessly, the only exception was gluing faux fur to tpu. That worked ok, but the Bostik Soft Plastics works very similarly (or better) and doesn't have that strong glue smell.
The Bostik glues are the ones going to be used. According to the data sheets, the Bostik Leather Glue and Soft Plastics are largely similar, and in my tests they are indeed very similar. I tested:
Another thing, Contact Bond might be an import from Australia - it does not show up on the local Singapore website. The glue gives off alot of fumes, I had bit of a headache after using it.
I still haven't tested one kind of glue used by fursuit makers worldwide: HOT GLUE! XD
Personally, I am not a fan of using hot glue - heck adhesives in general - my head base was originally designed for fasteners. And even though the current headbase is designed for adhesives... I've not used any as the parts friction fit together quite tightly, and the zipties prevent them from sliding apart. I will use it for the final build though.
One other thing, the bostik glues mentioned _seem_ to be contact glues - you're supposed to apply to both sides, then squish the two sides together once the glue has become non-tacky.
I noticed that I got stronger bonds with the soft plastics glue when I joined the two pieces together when the glue no longer sticks to my fingernail, which was just a few minutes (glue would look dull, not shiny). Previously I'd followed the instructions, and they mentioned to just wait 5-10 minutes before attaching and I usually waited 10mins for that.
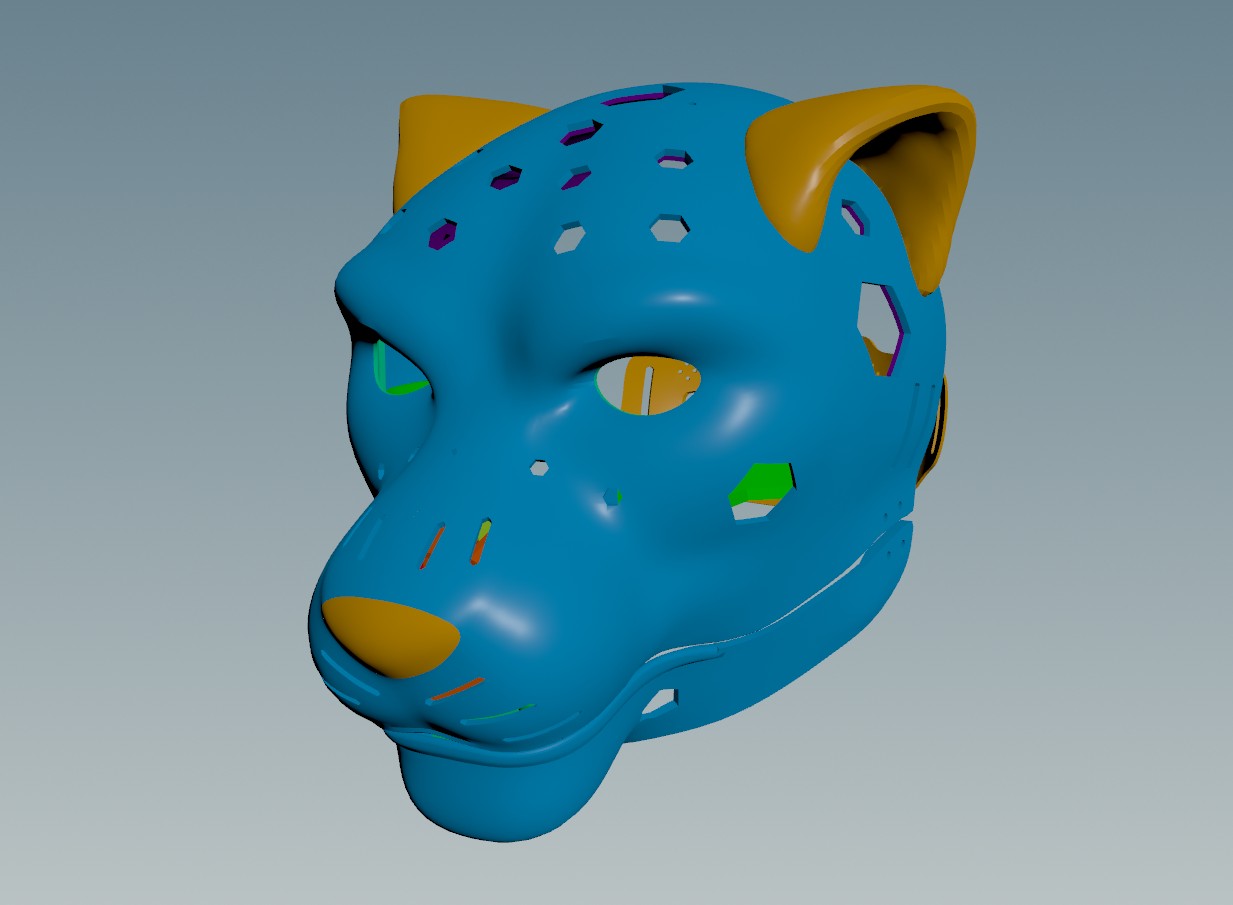

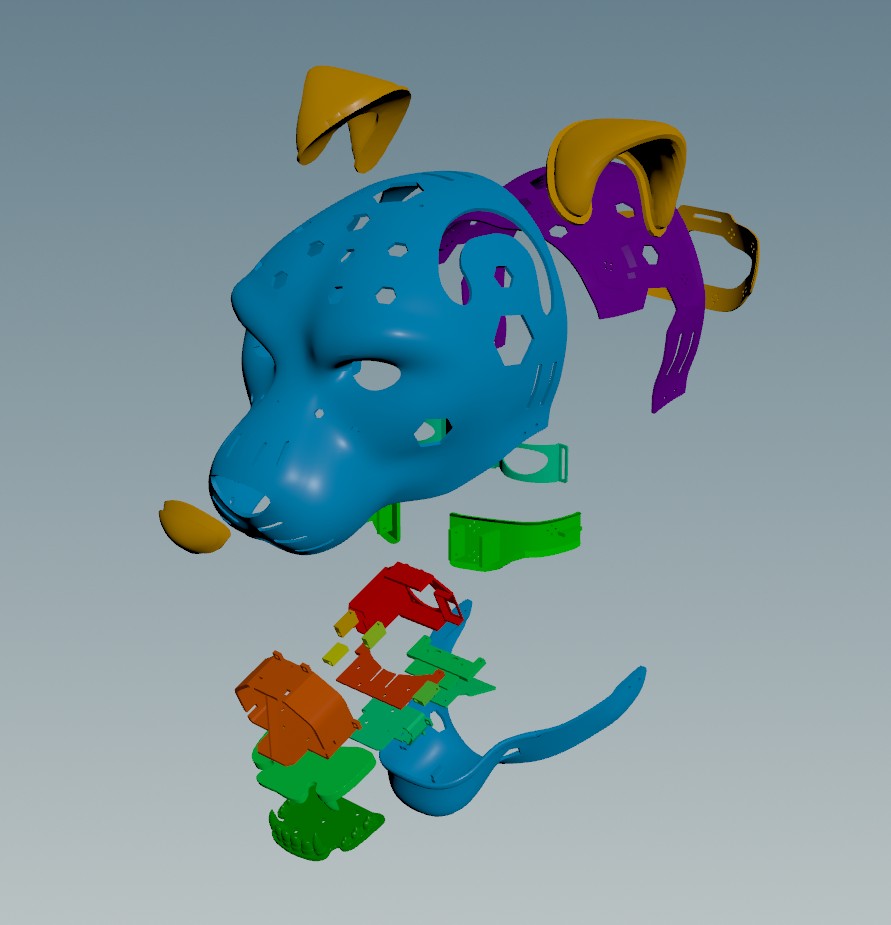
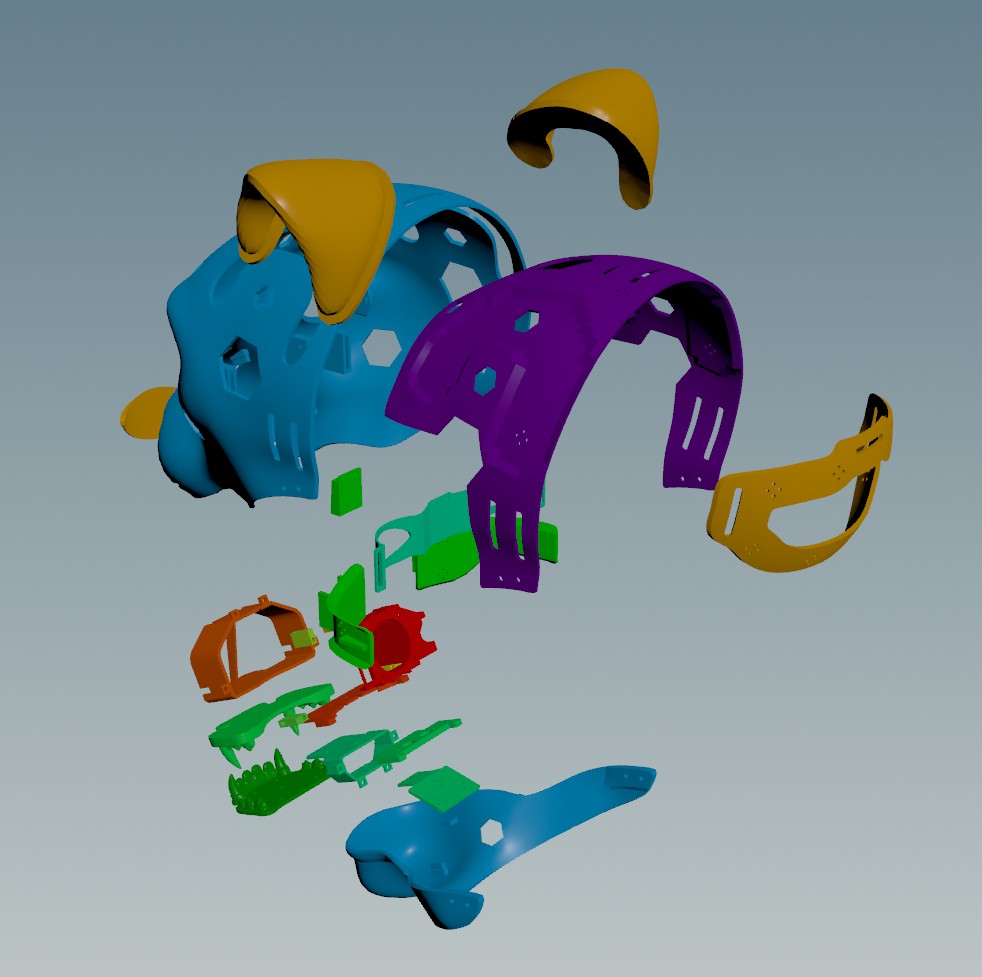
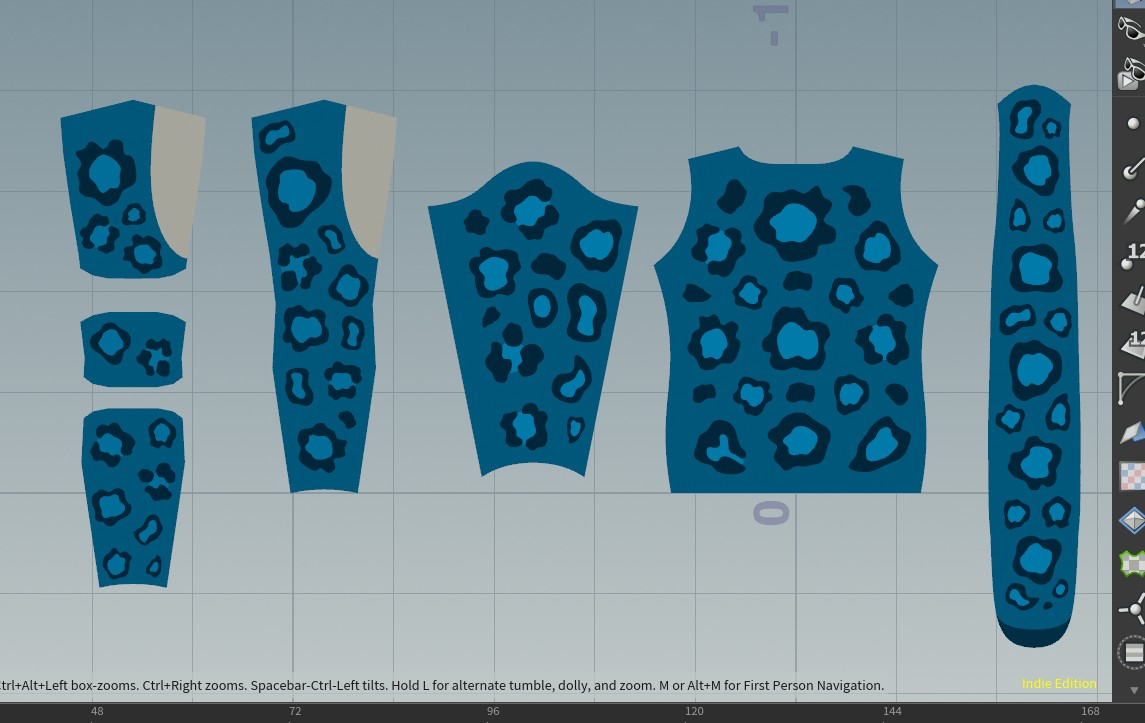
Finally, got some screenshots of the various parts I've created over the last 2 months. While this build is what I'm calling the 3rd prototype, lots of parts have multiple iterations.
I'm still waiting for some tools to arrive before I can glue the shoe together, and the tail... well it needs to be painted and I'm scared of messing that up lol.
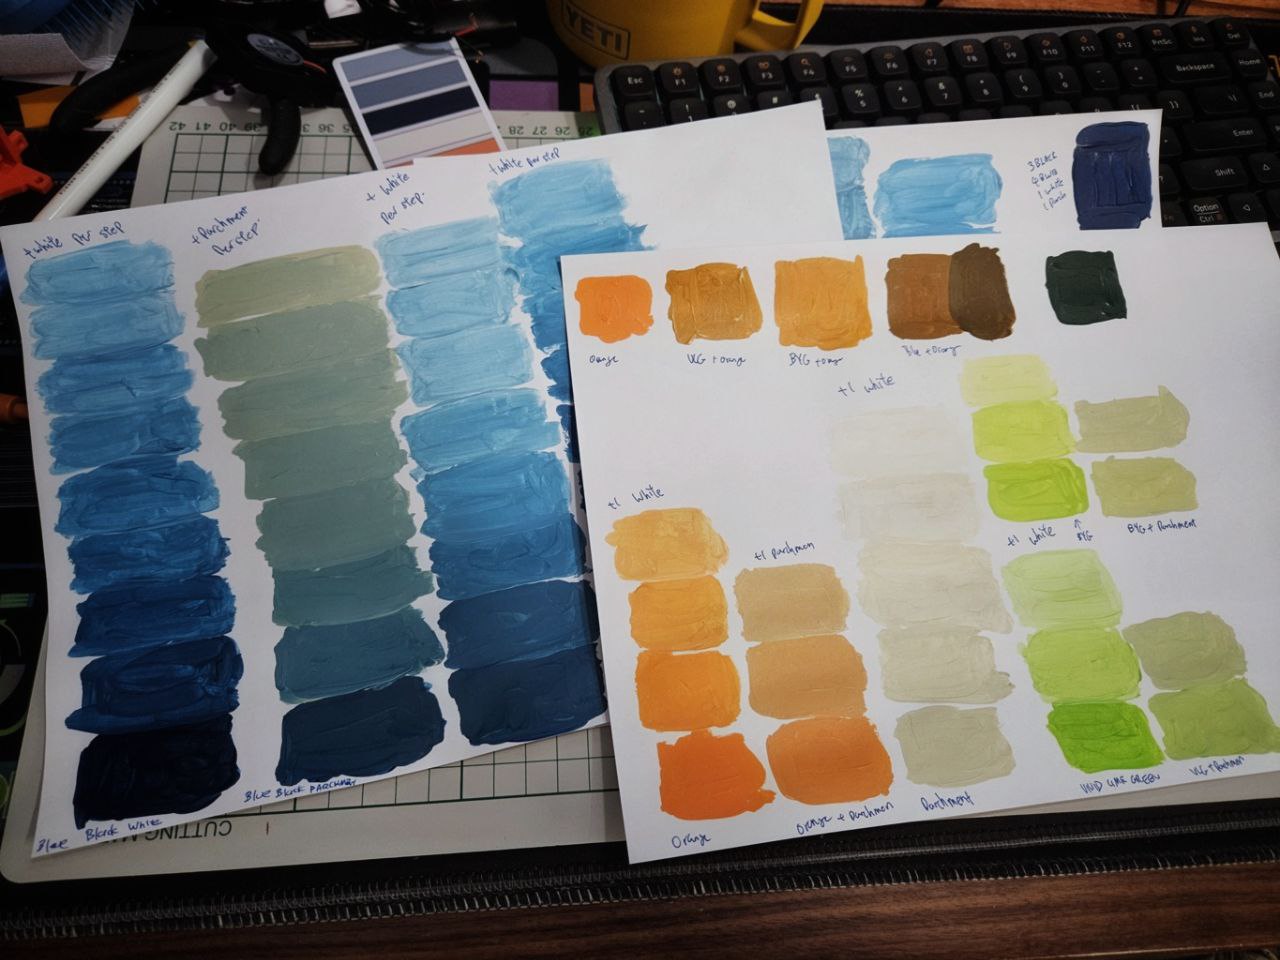
Finally got around to swatching and mixing the colours that I have. I think I've found a mix that I like for the blues. They're not that close to the actual colours of my fur but they will do for now.
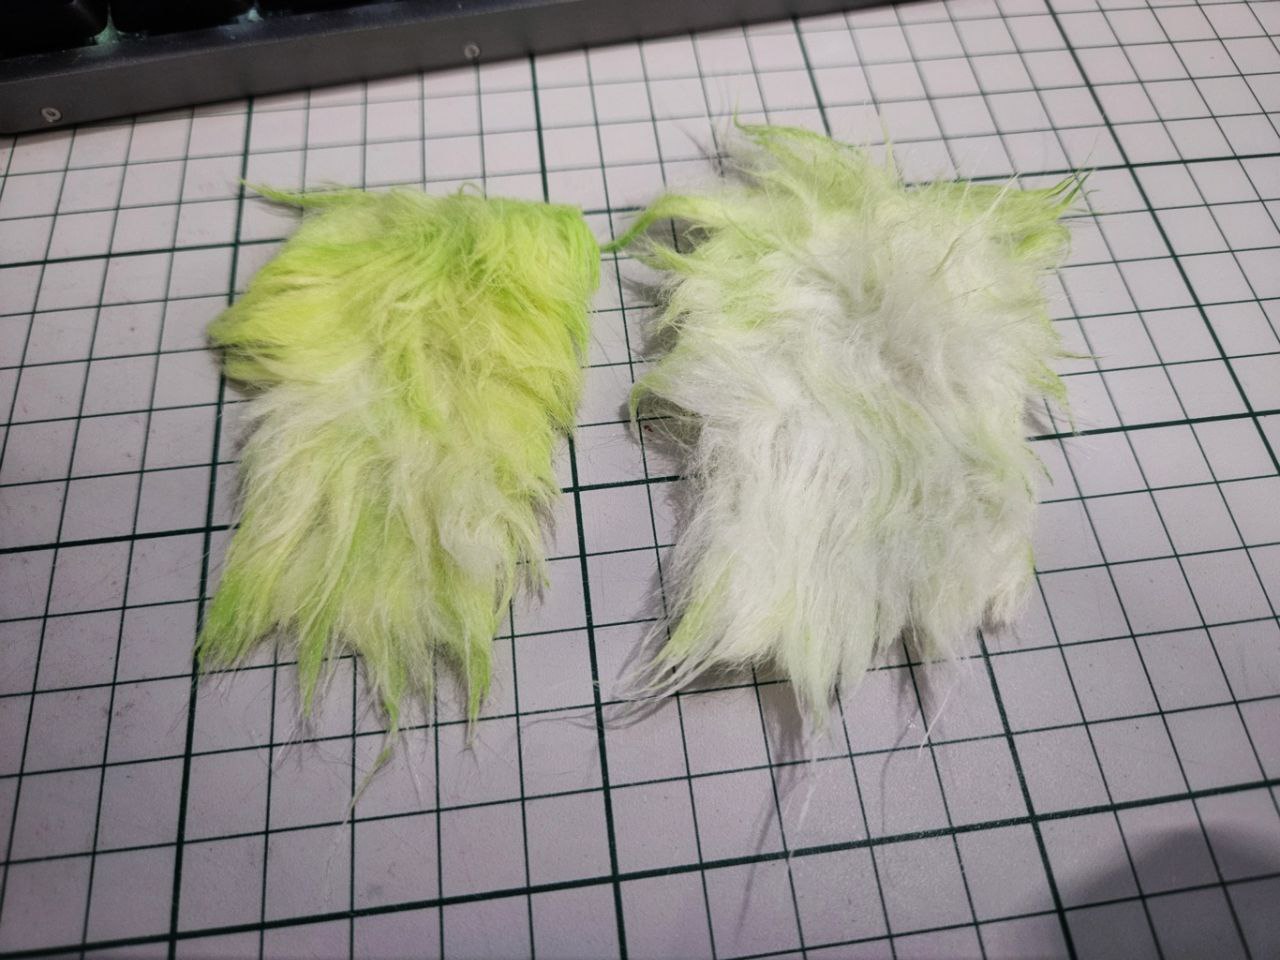
I mentioned yesterday that using a brush to paint the fur worked really well, and this time I tried it using the paint with fabric medium to see if it helps stick the paint better to the faux fur.
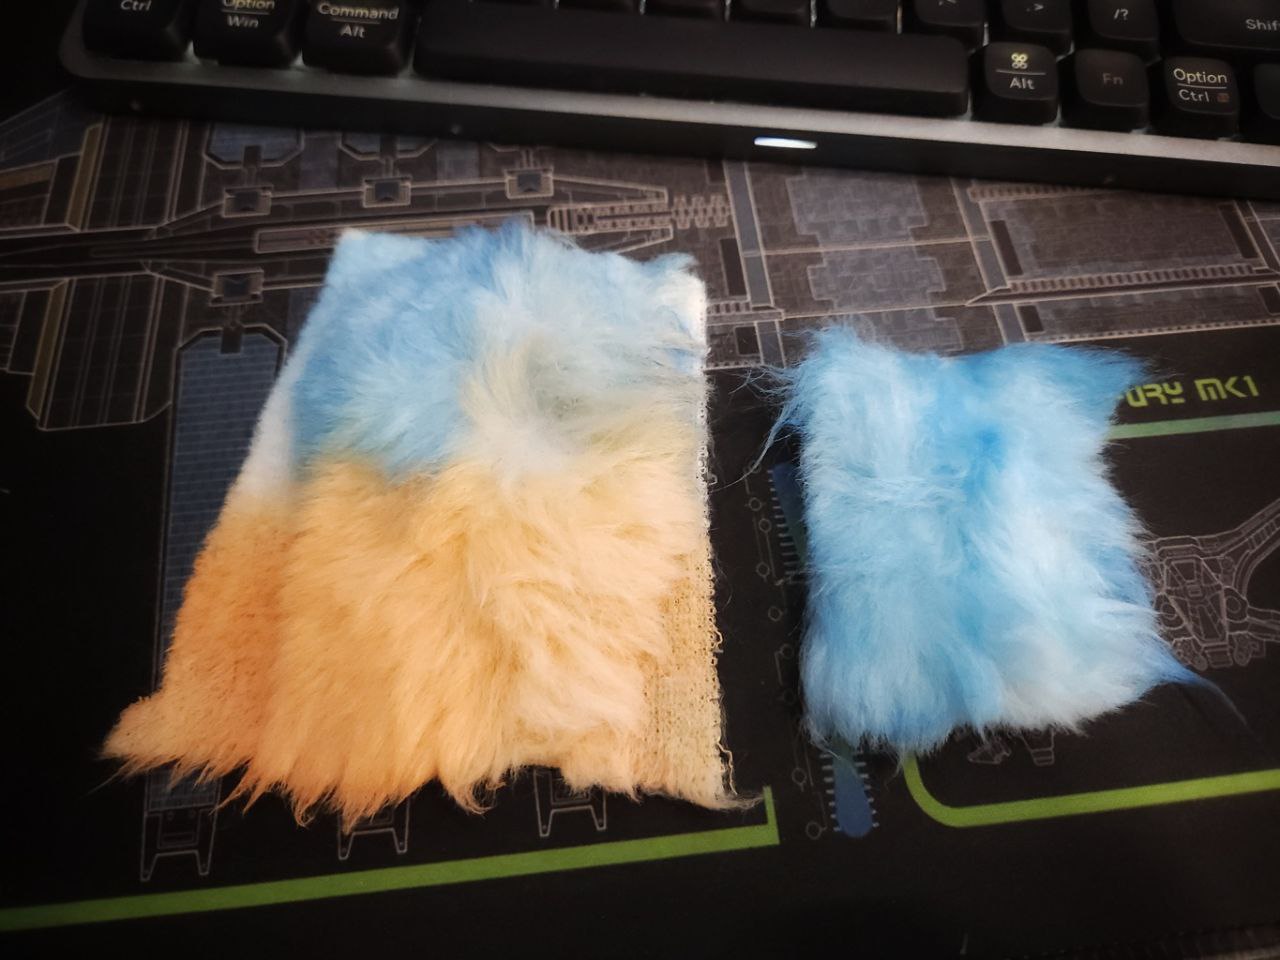
Unfortunately, I forgot to take some before photos :/ The fur swatch on the left has paint mixed with fabric medium and water applied, and the one on the right is only paint mixed with water.
In addition, the watch on the right dried much lighter than the one with the fabric medium. These were washed at the tap, and I used my paws to scrunch up the lower half of each swatch.
I must say, more tests need to be done but I do think the one with fabric medium _appears_ to hold the paint better after washing. Also to note, the swatch with fabric medium, the fur does not seem as fluffy as the fur with pure paint. The fabric medium version dried with the fur sticking together, but separated pretty easily with a metal brush followed by a tangle teezer. The pure paint version only needed the tangle teezer to regain its fluff. I'm likely going to use the fabric medium from now on as it _feels_ like it helps the paint adhere better. Maybe someone with a better test regiment could try this test down the line.
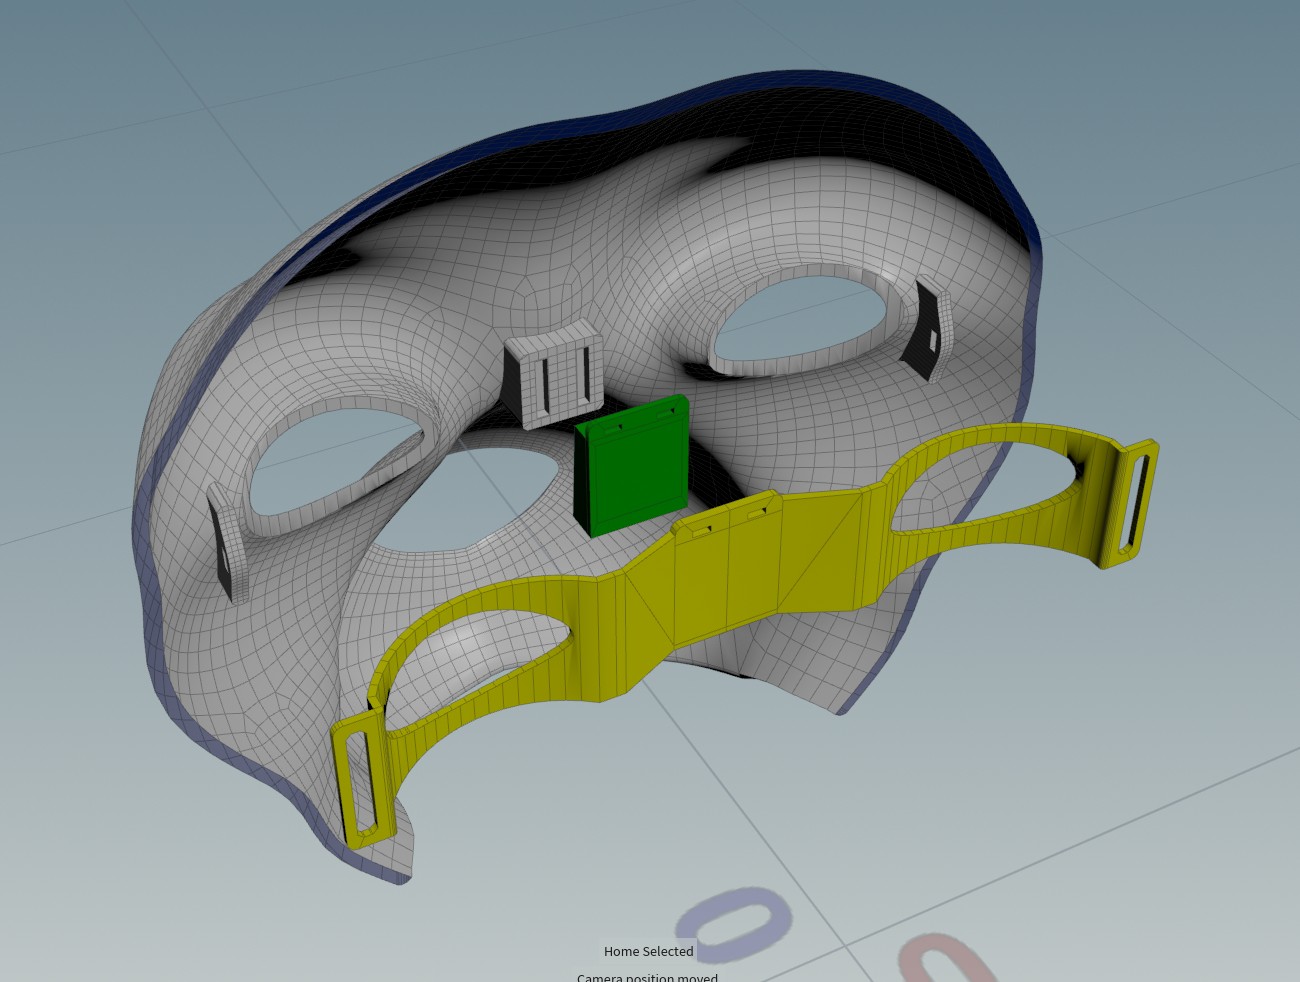
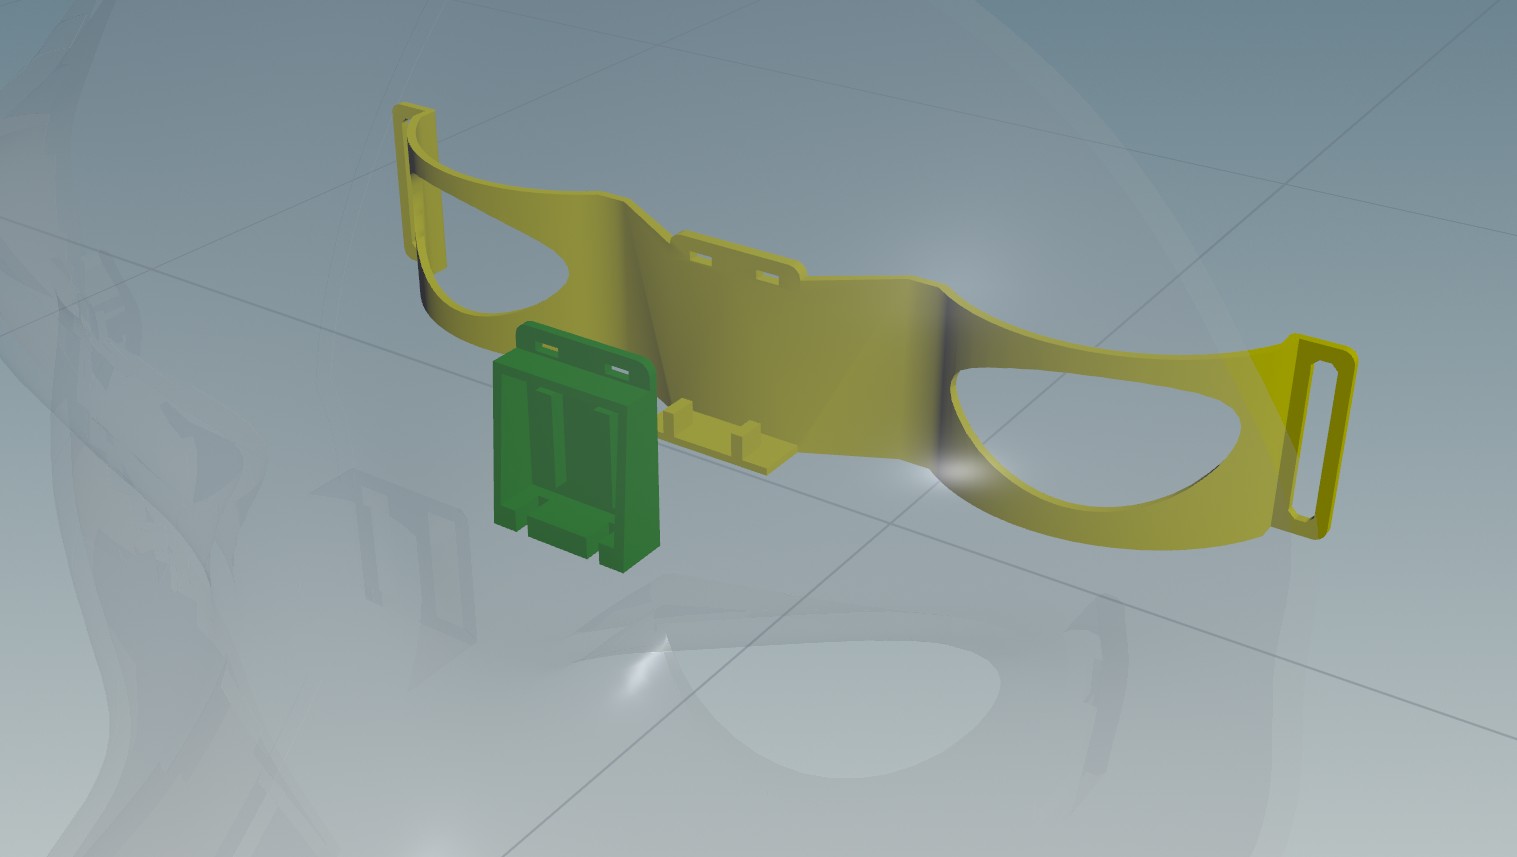
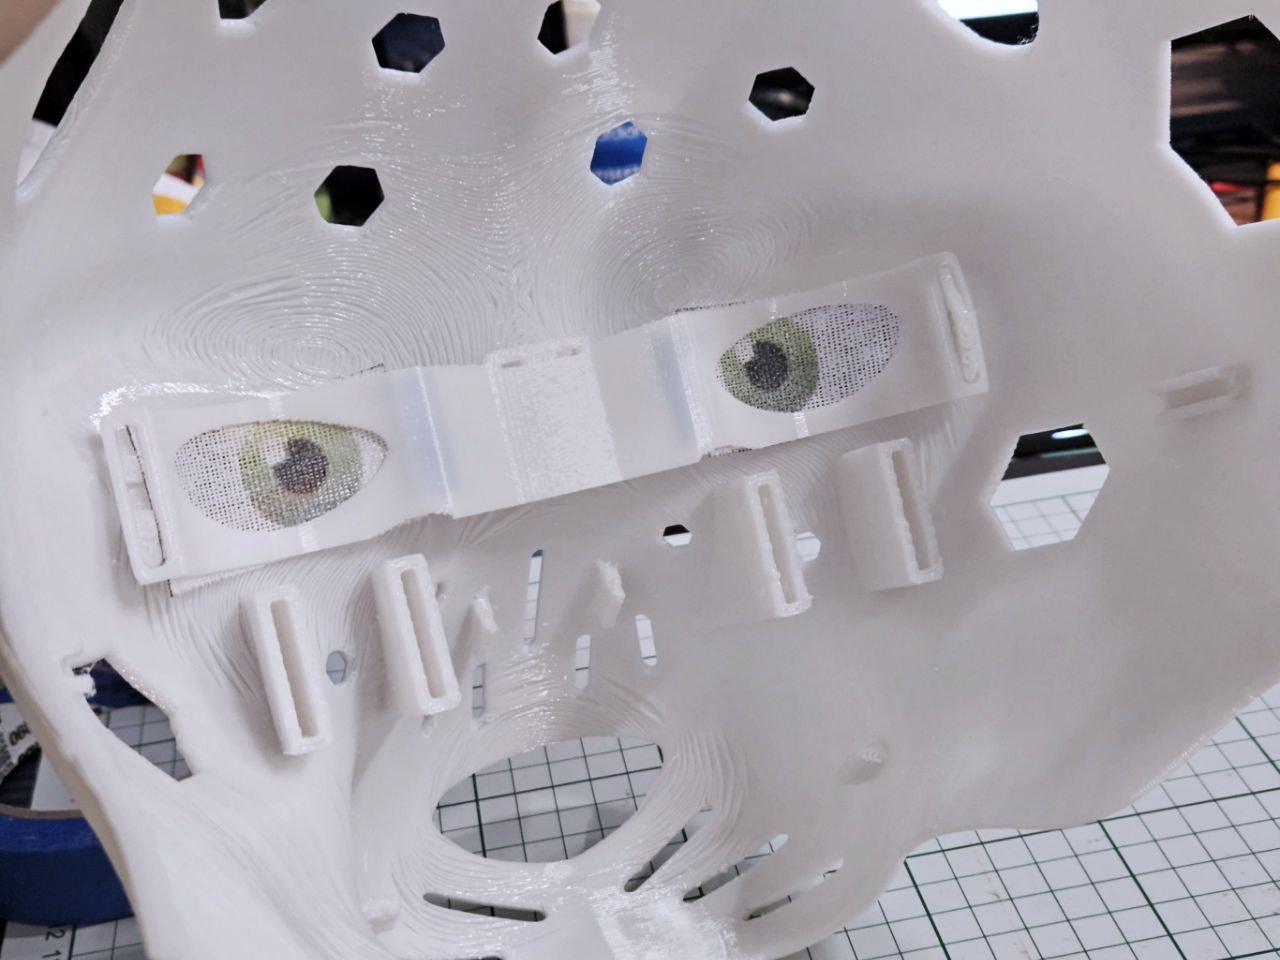
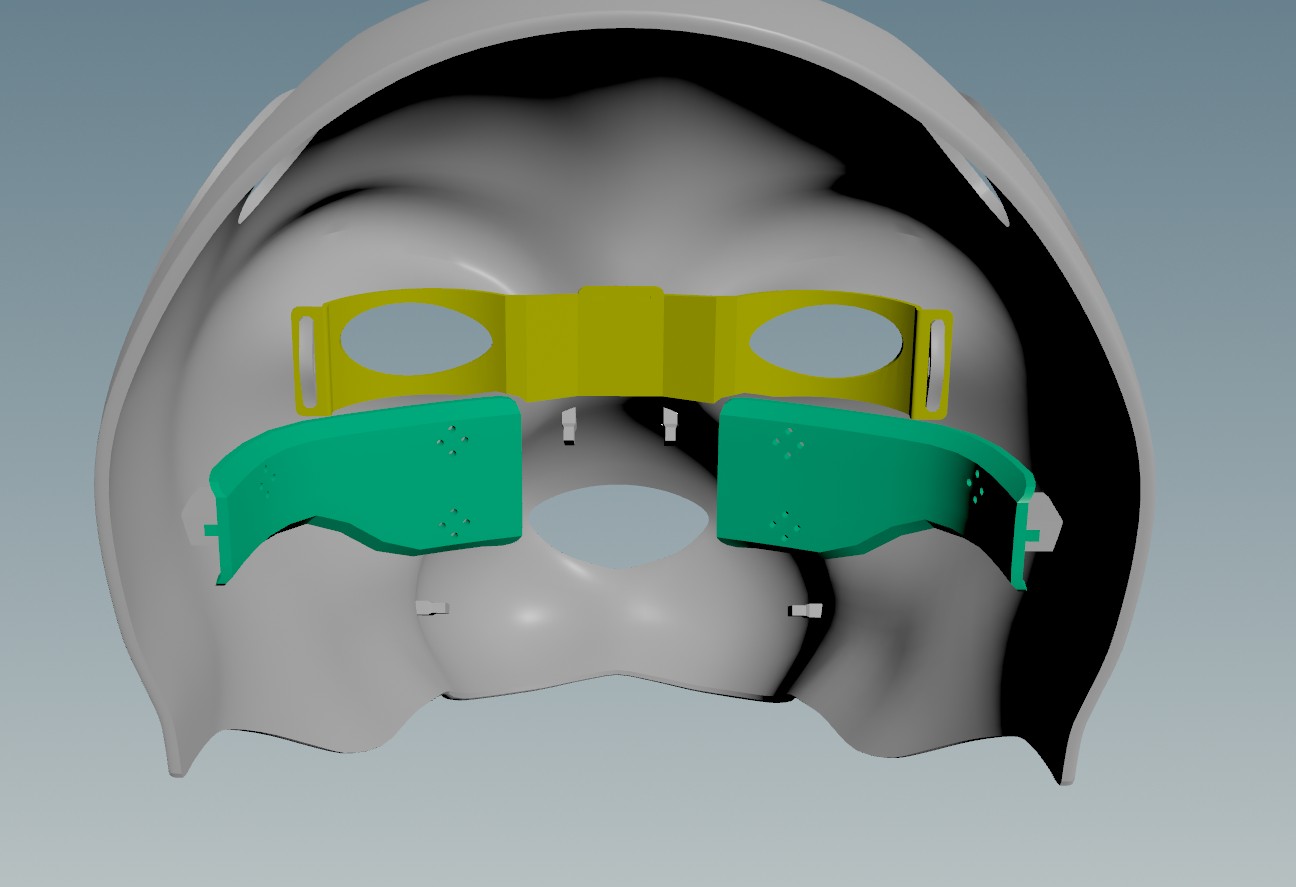
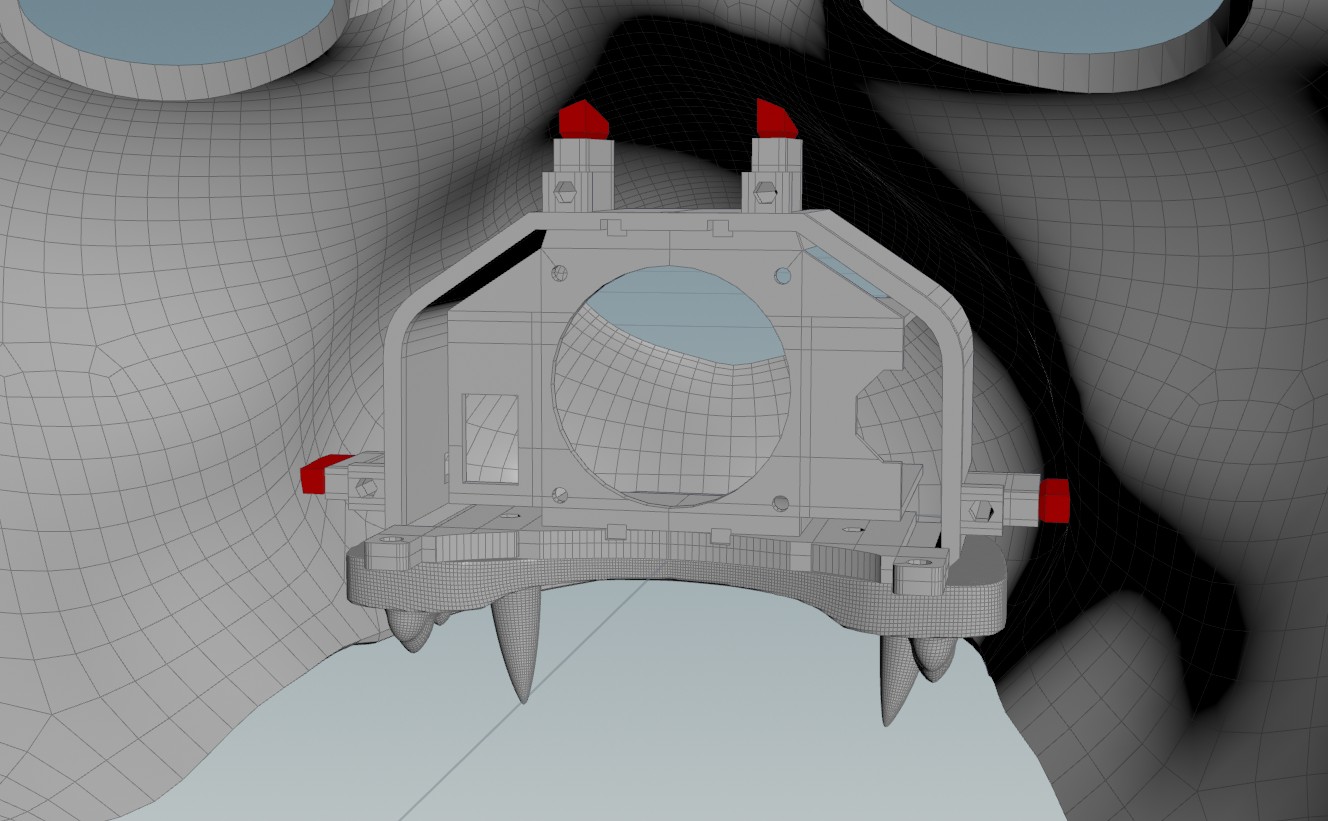
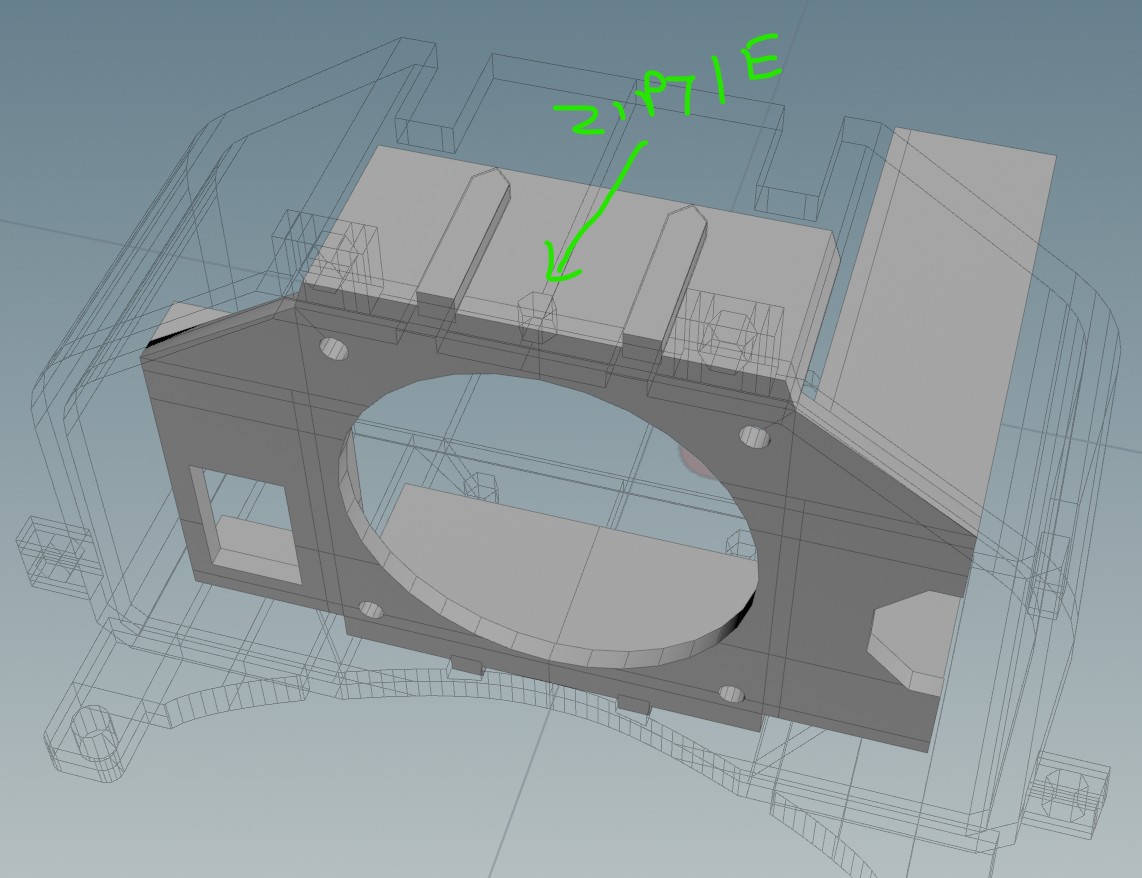
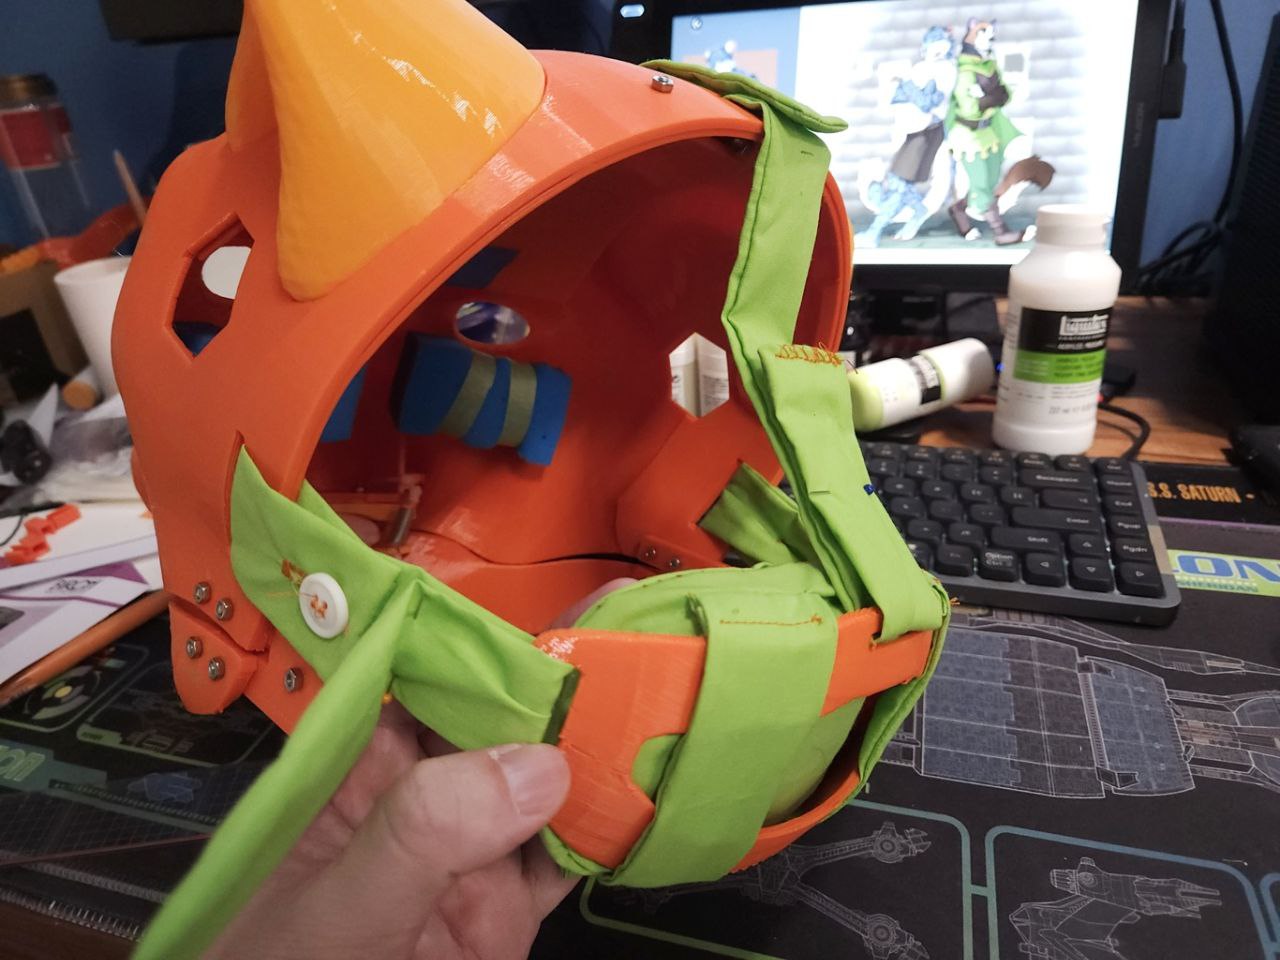
Finally, I think I have a reasonable way to mount the eye mesh - the green piece will be glued to the headbase, and the yellow piece is designed to hook into the green piece, and it has holes in it for zip ties to keep that hooked state. The opposite ends of the eye mesh mount slips into two prongs that also have a hole that allows a zip tie to lock them in.
I don't think this is the most elegant of solutions, however I've spent so much time spinning on it with nothing to show for it, and it does allow the eye mesh to be replaced/repaired easily.
I also finished up the padding mount. This will allow the padding to be moved closed with different pieces.
This is the upper head base with some extra air holes cut in, am thinking of using the nylon mesh that I've no use for to cover those holes. Alright, let's go!
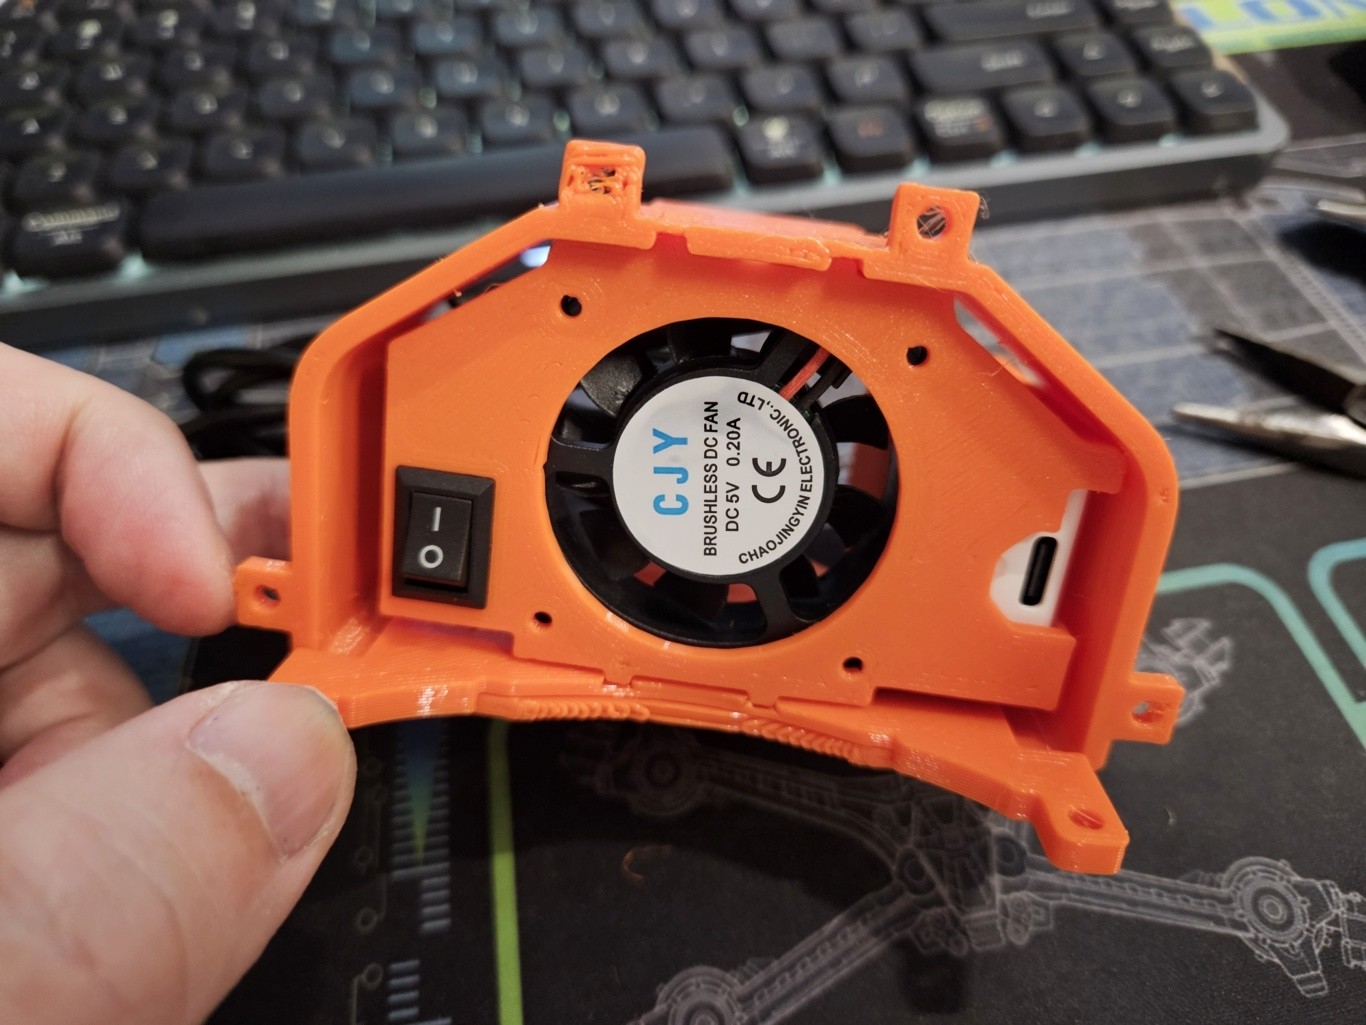
First print of the fan mount! Seems to be good! I really need a pair of calipers - I used a ruler to measure the dimensions of the battery and added some padding but in the actual print, there was no padding for the battery and it fit in snug and perfect. That works but it was pure luck :/
Making some adjustments to the print like expanding the hole to the usb port - my thicker usb cables do not fit in.
Unfortunately, I forgot to buy some heat shrink, so can't really solder the parts together. Oh well.
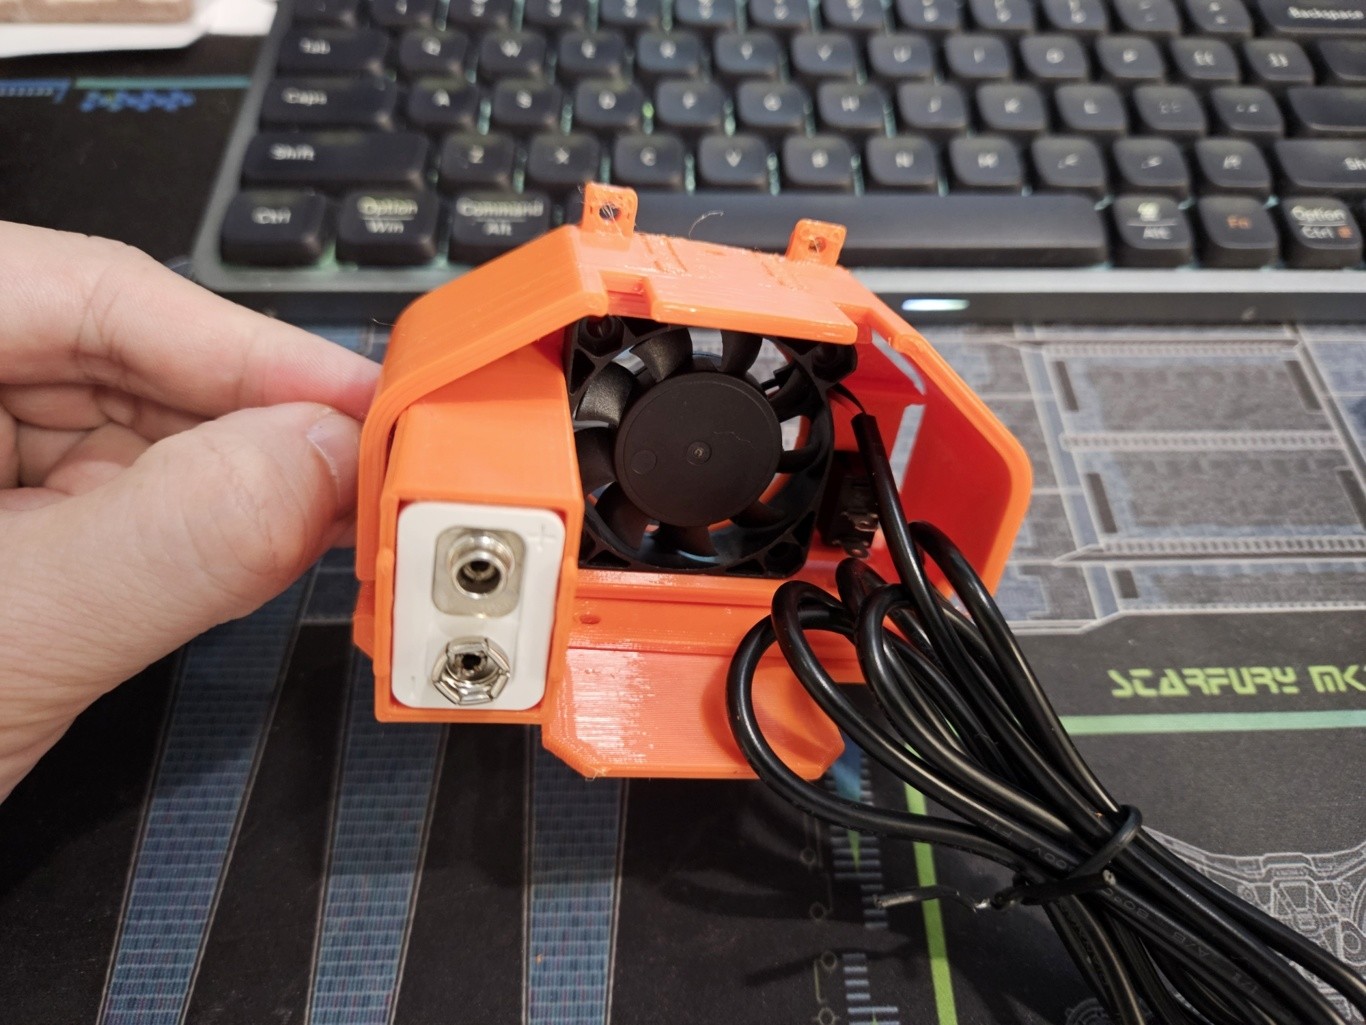
One other note: I did design this for use with those 9v batteries that can be charged via a usb cable. I don't think this is the safest, mounting a lithium ion battery in front of my face - I would suggest using multiple nimh AAA cells for this. No excuses on my end tbh.
 Did some glue testing today, I still haven't got a hot glue gun yet :/
But I tested the bostick soft plastic adhesive and some generic contact cement and both turned out pretty good attaching the faux fur to the tpu. I'm a bit more biased towards the bostick adhesive as the contact cement smells :/
Had the last of the parts arrive today, so got around to making a mount for the fan. I want this to be removable, so I've made a design that has 4 rails and troughs, letting the fan mount slide in. To secure it in place, there is a hole on the top that I can thread a zip-tie through that will stop it from reversing out. I should do something similar for the bottom but I'll see how it goes.
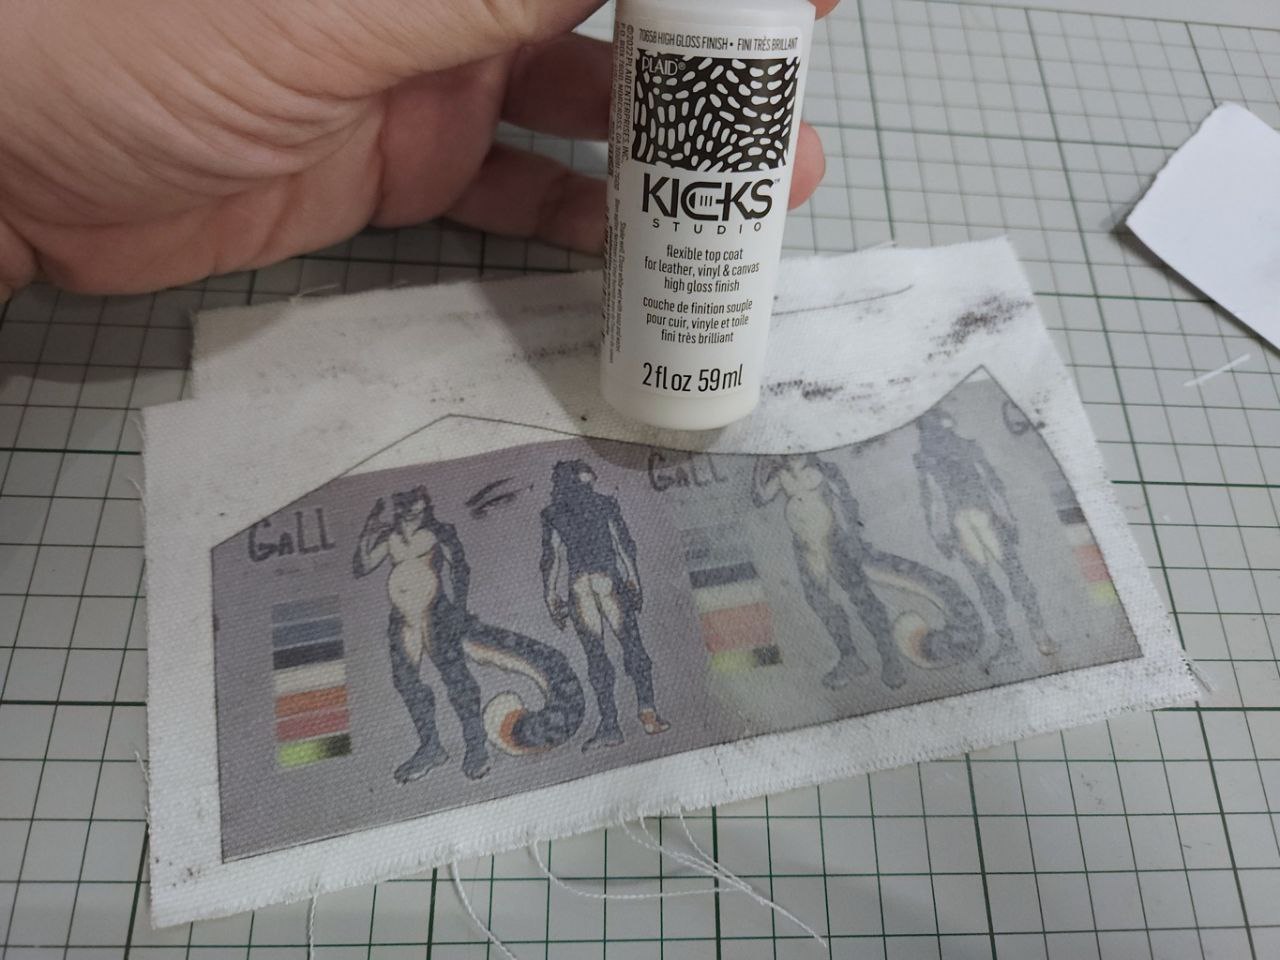
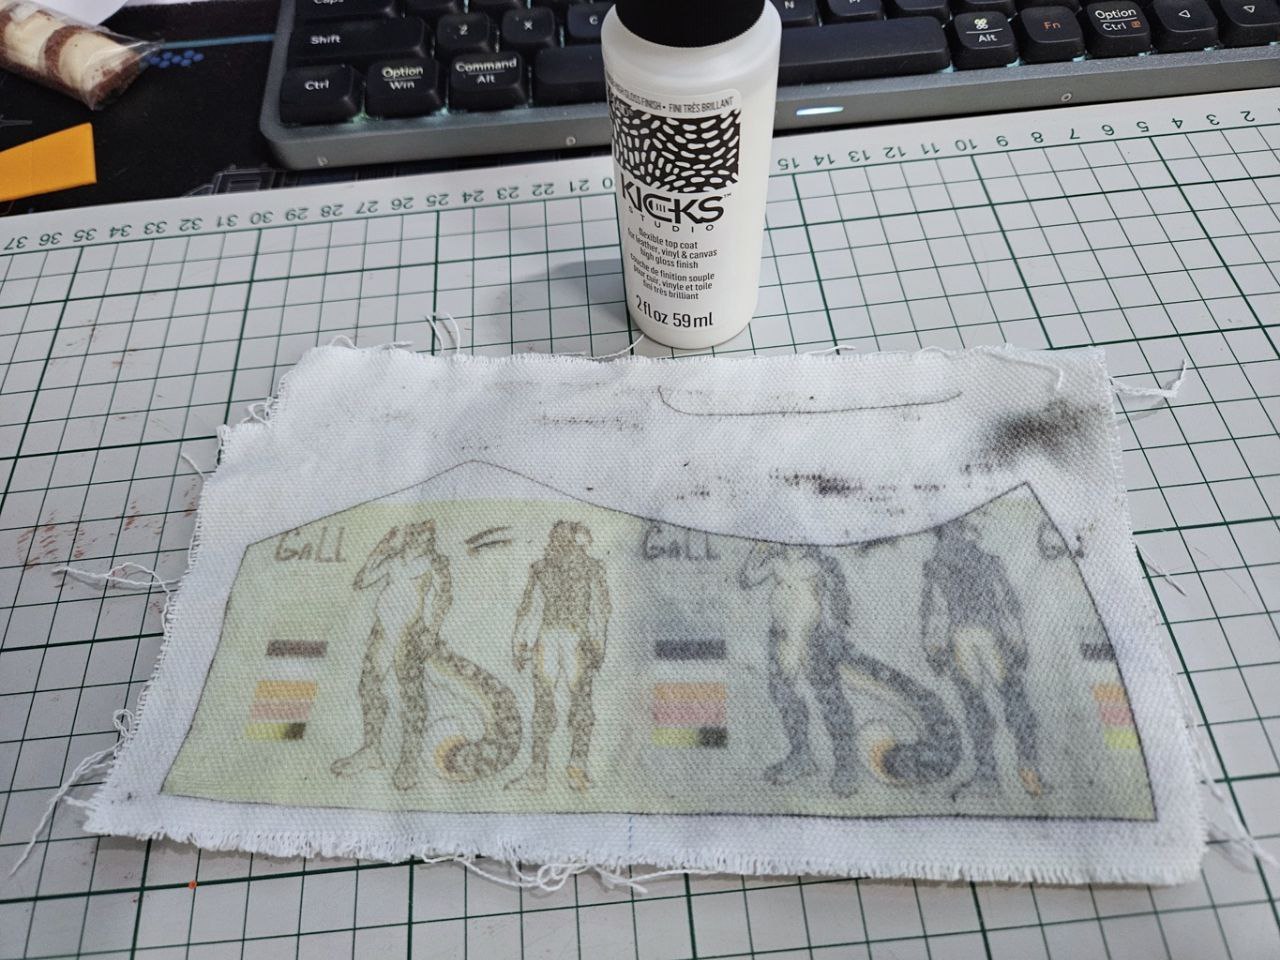
Since the test print on the interfacing fabric for the eyes went well, I wondered if the printer will print on canvas. It does! However, after the print the printer started printing lines and I had to do a head cleaning which thankfully sorted it out. I don't think I'll print thick fabric through my printer again XD That said...
I recently got a flexible high gloss coating that I wanted to use on the claws. I also thought this might be useful to waterproof the prints on the canvas, and I covered half of it with this flexible gloss coating. The coating added a slight colour cast and made the print more fuzzy.
After washing the print (this was after a day of drying btw), the uncoated portion lost alot of colour but the coated portion seemed to keep most of the ink - to my eye the washed portion seemed to lose definition, likely because I was scrunching the canvas up and the fibers moving about would (possibly) cause that. Forgot to mention that I applied this gloss coat to both sides of the canvas.
If I was to do this again, I would like to try first ironing the canvas to make it flatter, then coat the back side with the flexible gloss coat, print, dry, then apply the flexible gloss to the front. I still haven't gotten around to getting an iron, and am curious if ironing would "fix" the ink. I doubt it though. My next text will be to try airbrushing the canvas.
I don't think I want the shoe uppers to have _that_ detailed designs, just want something to represent my fur colours and a rosette or two.
Not shown, but this canvas was taped to a thick sheet of copy paper (140gsm) before going through the printer. I'll bet feeding this directly to the printer would cause jams immediately XD
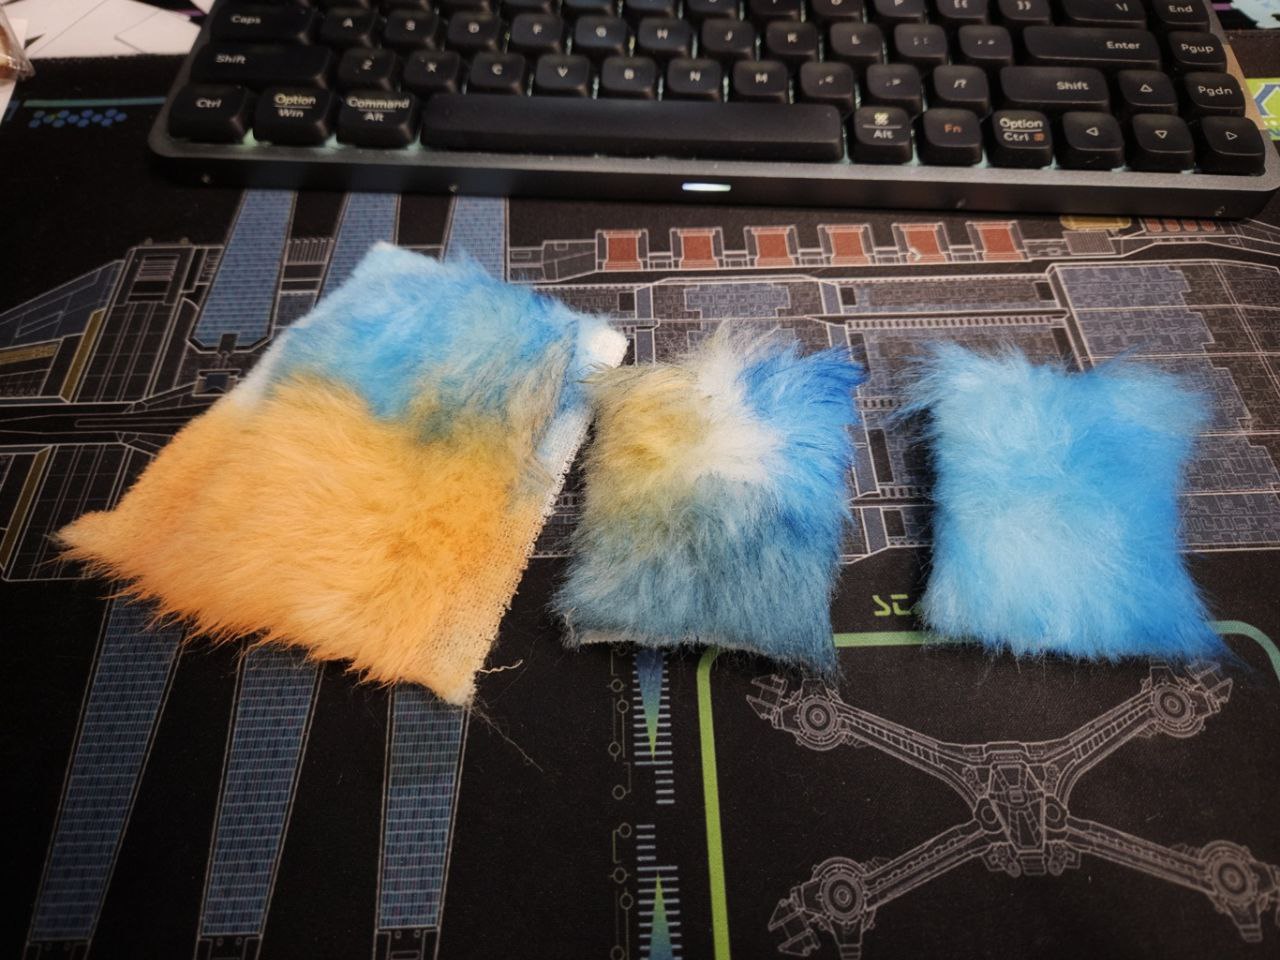
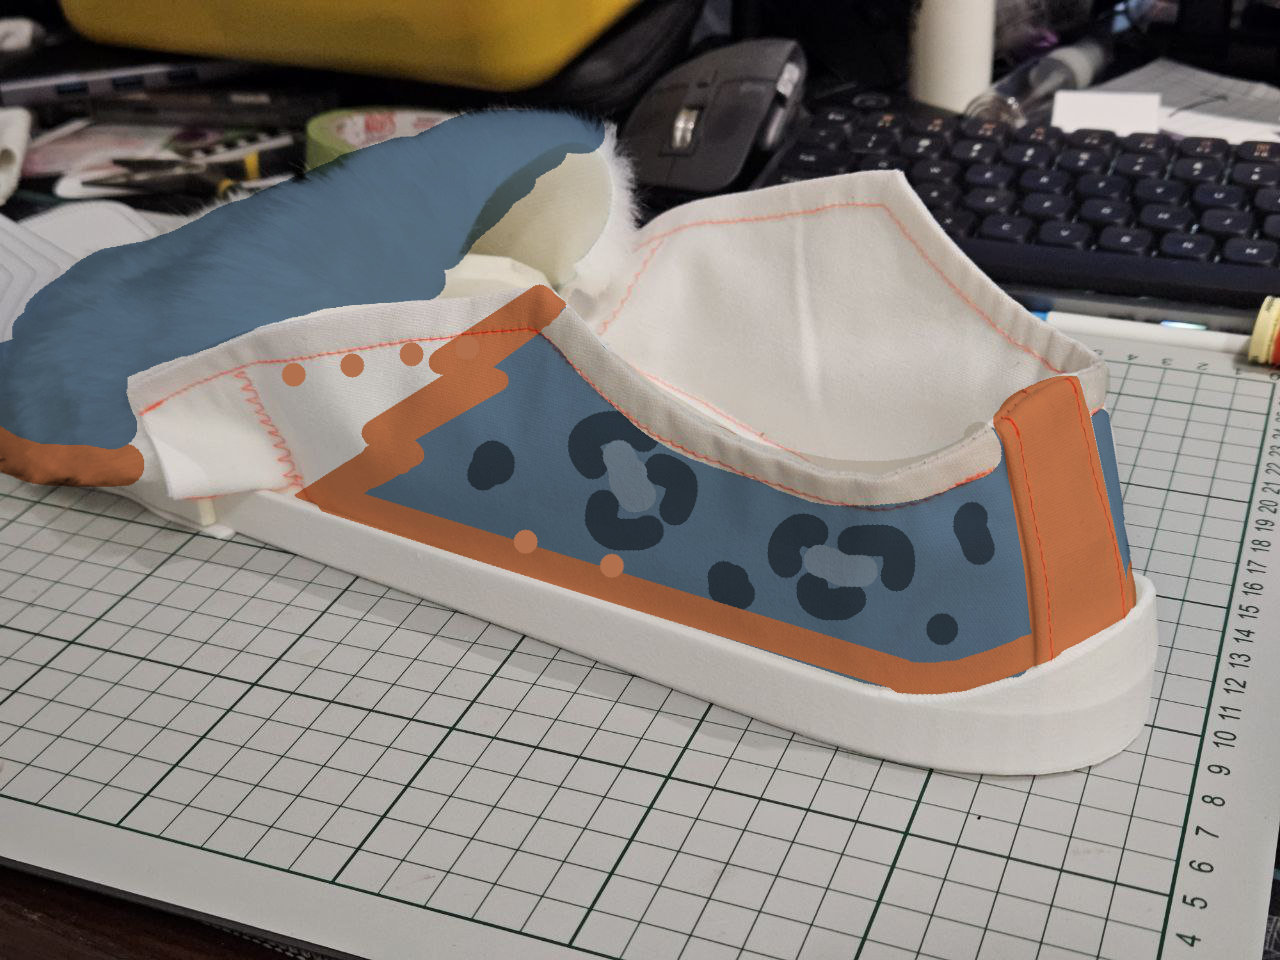
This video came across my feed, it showed someone painting their faux fur shoes using a brush. I decided to try it out and it worked really well! The first photo with the 3 fur swatches shows just one pass of the paint I let dry overnight.
The orange patch I had saturated it with the paint, all the way to the backing, and I thought it would be super stiff.
However it was still quite fluffy, and after going over it with a brush (I used a tangle teezer) it felt really good!
The blue patch on the right I only dipped the brush in the paint solution once, and just kept pushing the paint around with the brush. In this case the paint did not cover much of the roots of the fur, and the fur feels just as fluffy as the orange patch.
Overall I think this is likely the way I will go forward with colouring fur, the airbrush doesn't penetrate to the roots of the fur, and I need multiple passes to do that while combing the fur to show the roots. Another technique I tried was using a sponge to dab paint on the fur, that kind of worked but the fur didn't feel as fluffy as this techique and required lots of brushing. The brush was the cheapest nylon brush I could find btw, 60 cents sgd lol. I'm sure an old tooth brush would work fine. The bristles on the brush I used are pretty stiff, not sure if that matters for the fur of this length.
The 2nd photo with two fur patches is after washing. I ran water on half the swatch and used my fingers to mush up the fur. It's not that obvious in the photos, but the half of the orange fur that I mushed up did lose some paint, likewise for the blue patch. Even so, I think this works great! For the next test I will try putting some fabric medium in to see if it helps the paint adhere better.
Last note, the fur is shaved down, and I was using the number 1 guard on my shaver. Kinda pointless since my shaver is like some random cheap thing off. but just in case.
No pictures here, but I also did lots of testing gluing various materials I'm using together. I'm sad to say the neoprene resisted any of the glues I have. As such, I went back to using tpu for the "upper midsole".
This time I went all out and sewed up the full shoe uppers. The 95A tpu I used here is really difficult to punch through with my hole punch. But I got it done, used a basting stitch to hold the shoe uppers in place, after which I used a straight stitch to firmly attach the two pieces together. Unfortunately, I am unable to sew the heel area together - my presser foot does not have enough space for the canvas.
I looked online to see if there are any narrower presser feet but did not find any for my Brother machine. I think a free motion embroidery foot would work. If not, I think sewing the heel area through the holes used for basting it would work?
The next step would be to glue all the pieces together, which I'm kinda reticent to do because... fear of failure. But heck it has to be done and these pieces aren't the ones I wanna bring to EF so.... I'll get around soon.
I do think I need to create a way to clamp the pieces together, probably just PLA pieces shaped like the inside of the shoe and outside to apply force evenly while the glue dries.
Got around to shaving the fur and sewing up the fur. The stitch I used is very thick, for the final version I'm going to use something flatter.
I also have some 1.5mm neoprene arrive waaay earlier than I'd expected, and used to to make the "upper midsole*". I punched some guide holes so I could use a basting stitch to attach the shoe uppers to it.
This worked great! I can sew the actual final stitch without worrying about the canvas squishing up.
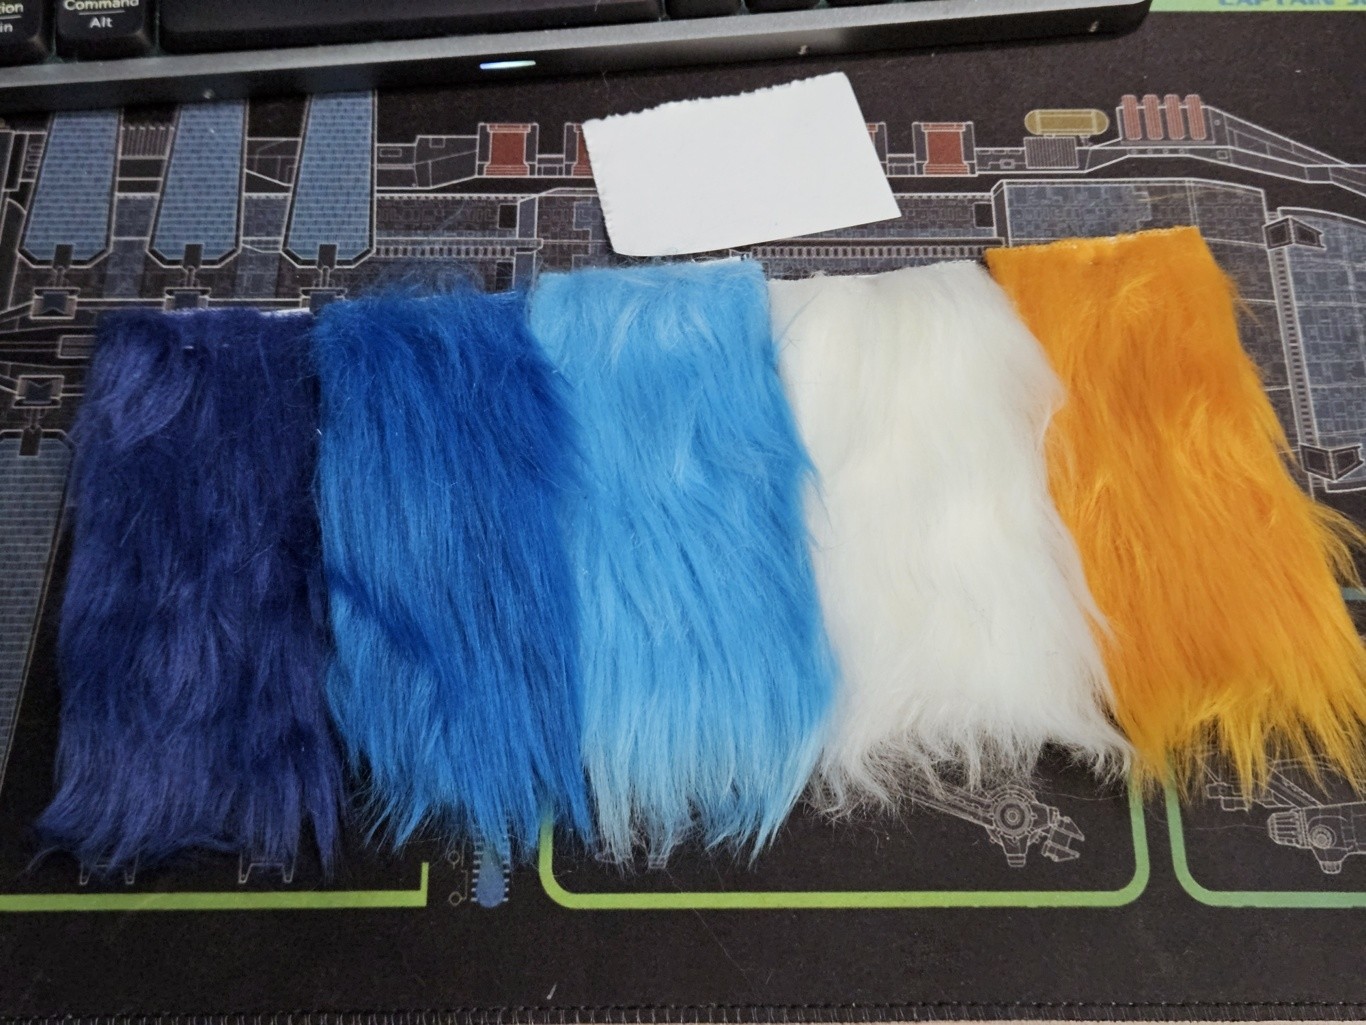
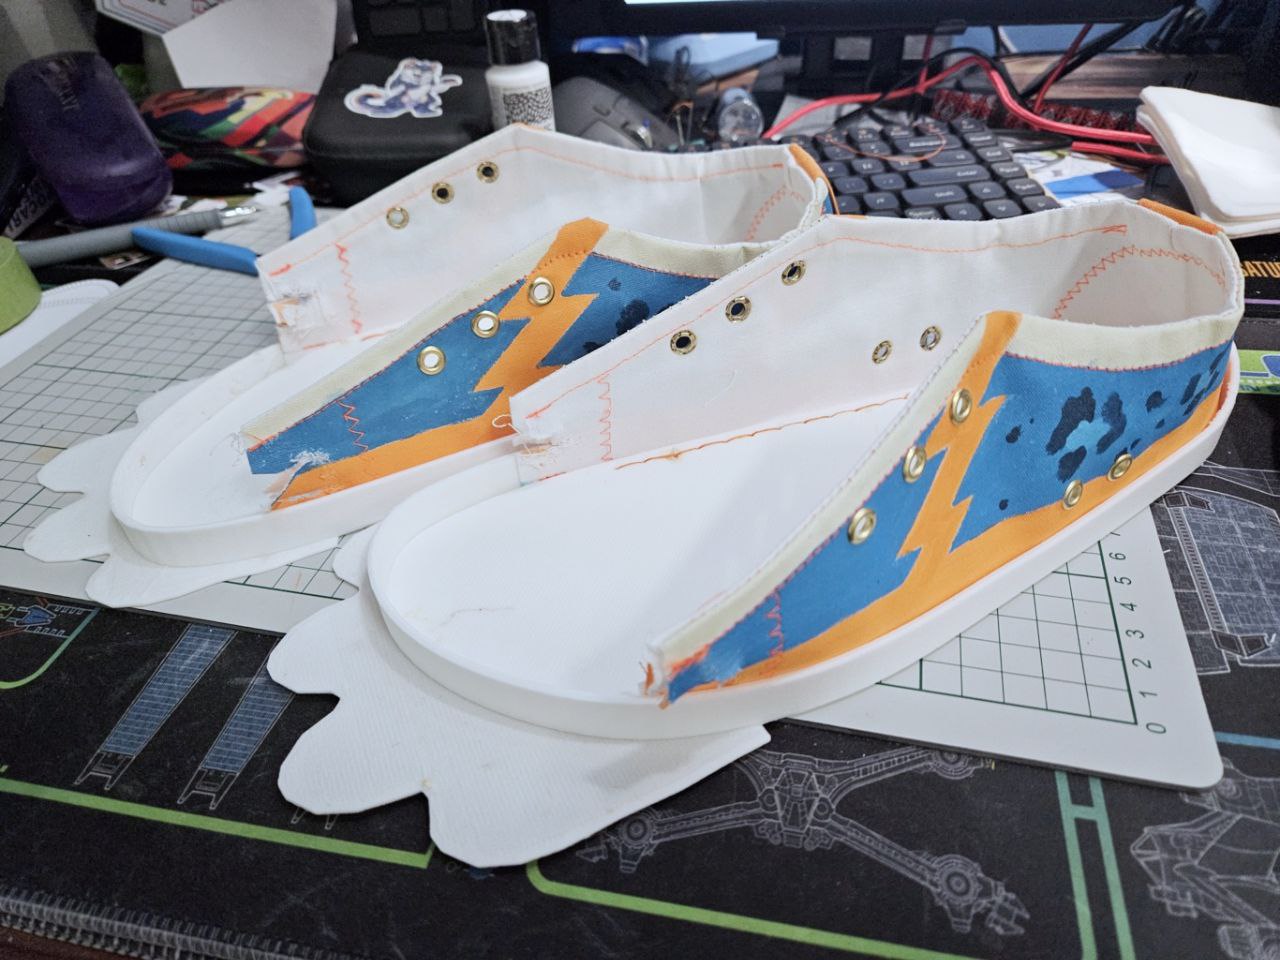
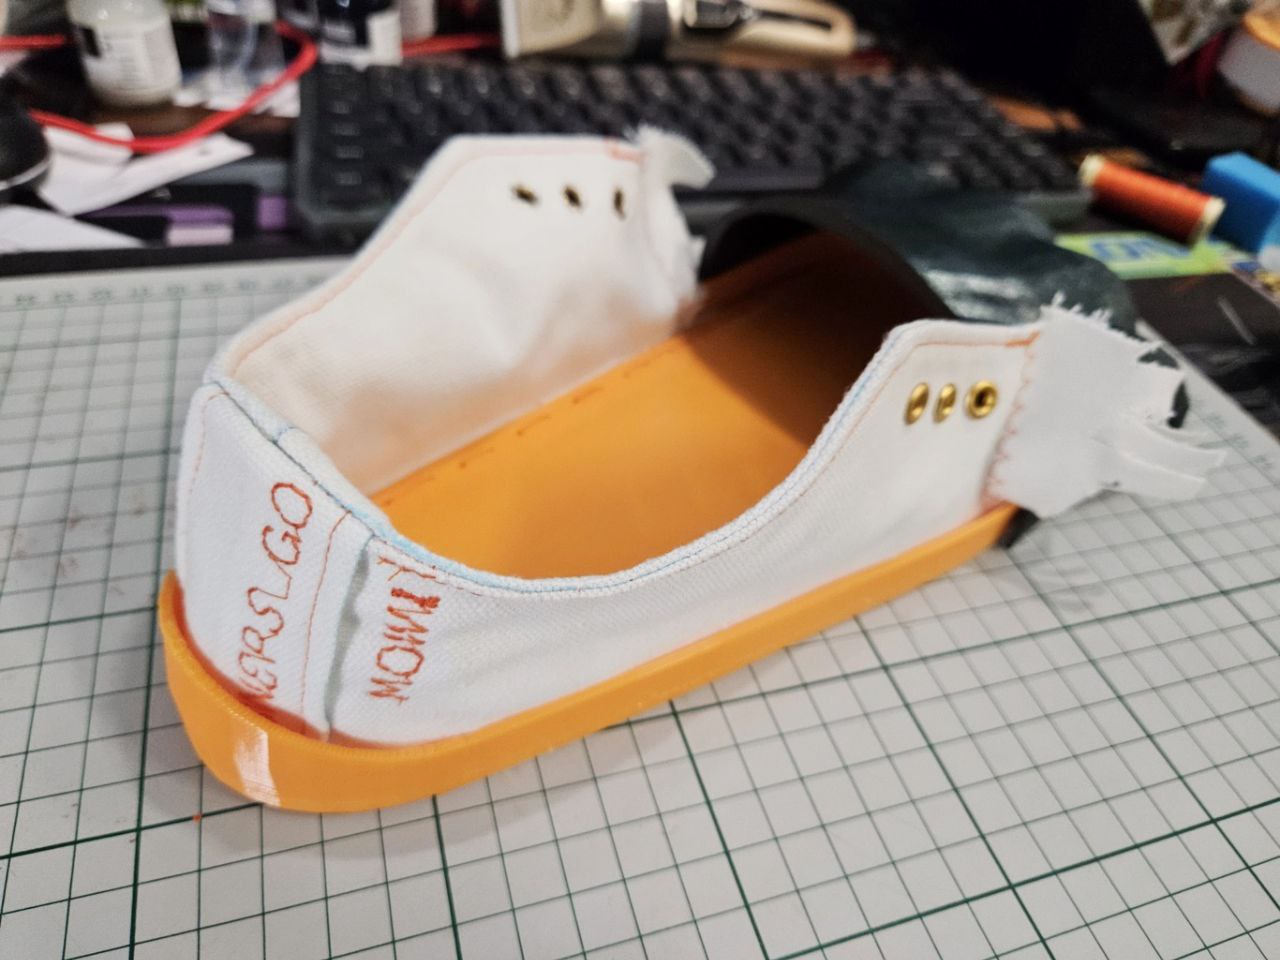
The final photo shows the dry assembly and see where I'm going with the shoe's uppers - I want them to be frayed in the final version, giving the appearance of a foot paw bursting out of a shoe.
The middle photo above shows some of the stitches I sewed in that I hope will prevent the canvas from unravelling lol. I need to make some cuts and tear the canvas up tomorrow to see if they will work. I also need to get a large spool of thread, these tests eat up thread really quick.
* I have no clue wha the proper name is. It's the piece where I'm sewing the shoe uppers to, after which will be glued into the mid sole.
Primarily making modifications to the shoe today, almost there with the canvas but I'm having difficulty sewing it to the tpu piece that will be glued to the midsole.
Thought about it for awhile and decided to make some holes in that tpu piece to allow me to sew a basting stitch. Hopefully this will allow the canvas to be sufficiently secured before the sewing machine makes the main stitches.
Also painted the claws black but er, I'm yawning and it's the orange claws from yesterday, painted black. So no photo. XD
That said, yesterday I randomly found a company that sold varioshore TPU (82A-60A!!) and I ordered some. I did not expect it to arrive just a few hours after ordering! So I got around to testing that TPU. I just went straight for the 60A hardness by maxing out the temperature and it worked off the bat with no issues - I thought this was a local brand but it was actually filament from Spain, from a company called Recreus, and the filament is called Filaflex Foamy.
They have an excellent page detailing the settings required to print this tpu and these settings worked off the bat. One thing I noted that I thought was odd, was the flow rate - the larger the nozzle used, the higher the flow rate should be. I was like... eh? I always read that tpu needed to be printed _real_ slow but no, this danged varioshore tpu printed perfectly fine with the flow rate set to the suggested 7.9mm3/s (0.6mm nozzle). I was super chuffed as that was double the slicer's default flow rate of 3.5mm3/s, very close to petg flow rates.
I then wondered if these settings would work with that frustrating roll of 85A filament that kept jamming. I tested the day before, setting the flow rate to less than 3mm3/s and it did help, but still jammed.
Surely using 7.9mm3/s would just... jam on the spot? I shrugged and tried it. Somehow, it worked! The 85A tpu that kept jamming printed out the front of my shoe at the first go!
The settings included a 248C nozzle temp, 0.3mm layer height as well as not having any part cooling at all. With the front of the paw printing fine, I sorted out printing the other
pieces and cut out some canvas pieces for the shoe's upper.
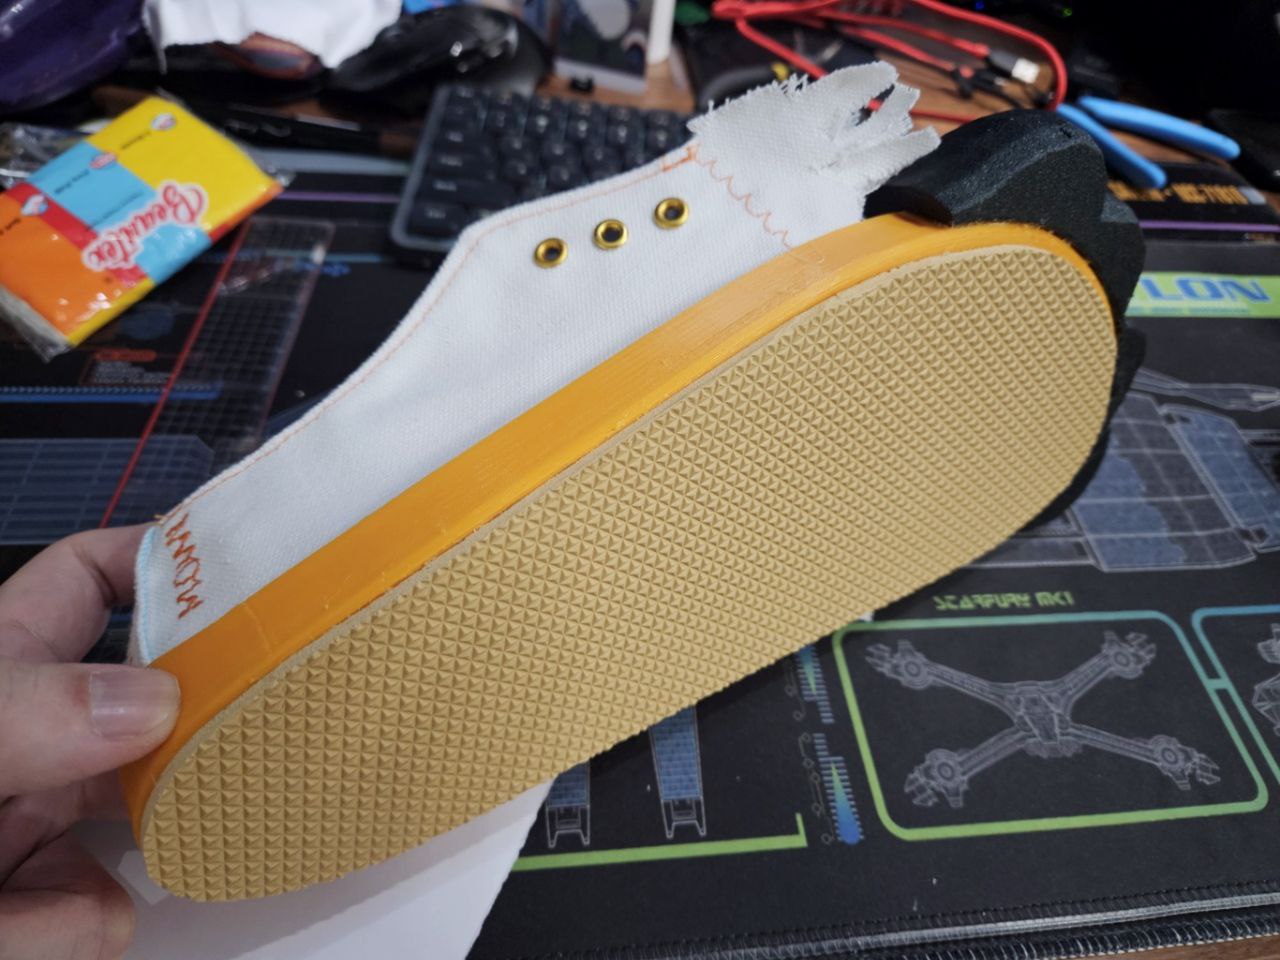
Unfortunately, the shoe uppers don't fit the way I hoped they would from the simulation and tomorrow I'll be doing some paper test prints before going down the rabbit hole of cutting and sewing canvas. I forgot to mention a few days ago I also 3d printed a sole from 95A filament and it was far too slippery to use. I thought if I were to use IRL I'd best get actually sole material with proper tread, so ordered some and that will take a week or so to arrive.
The midsole feels alright using 85A filament, though I think my design might need more thickness for durability. For the moment, the varioshore will likely not be used for the shoe.
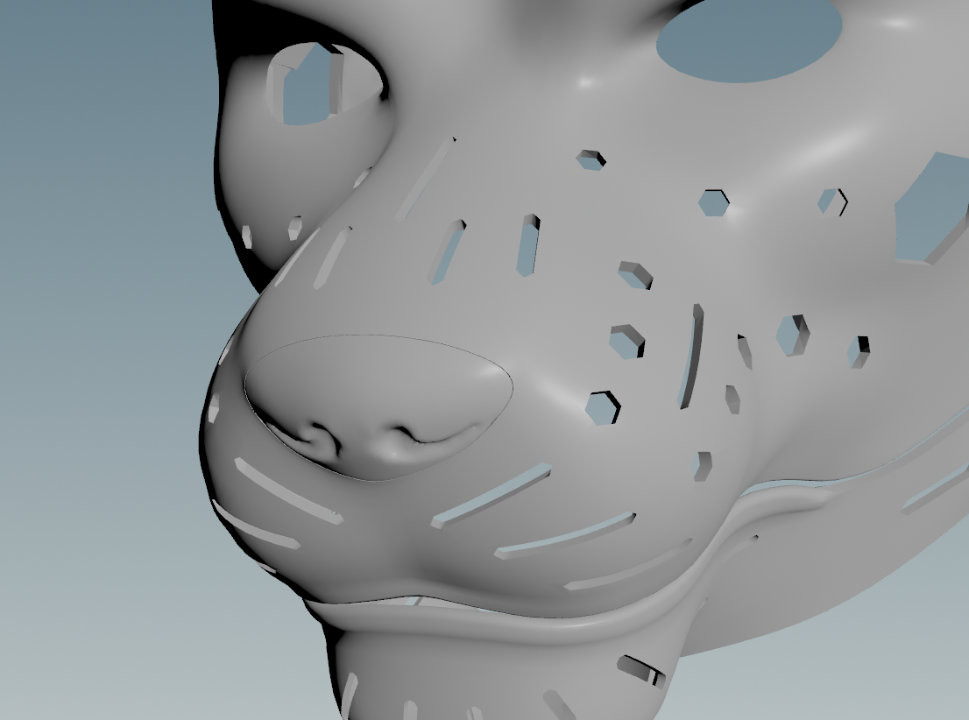
One thing I did try was use it for the nose. This design has some air holes.
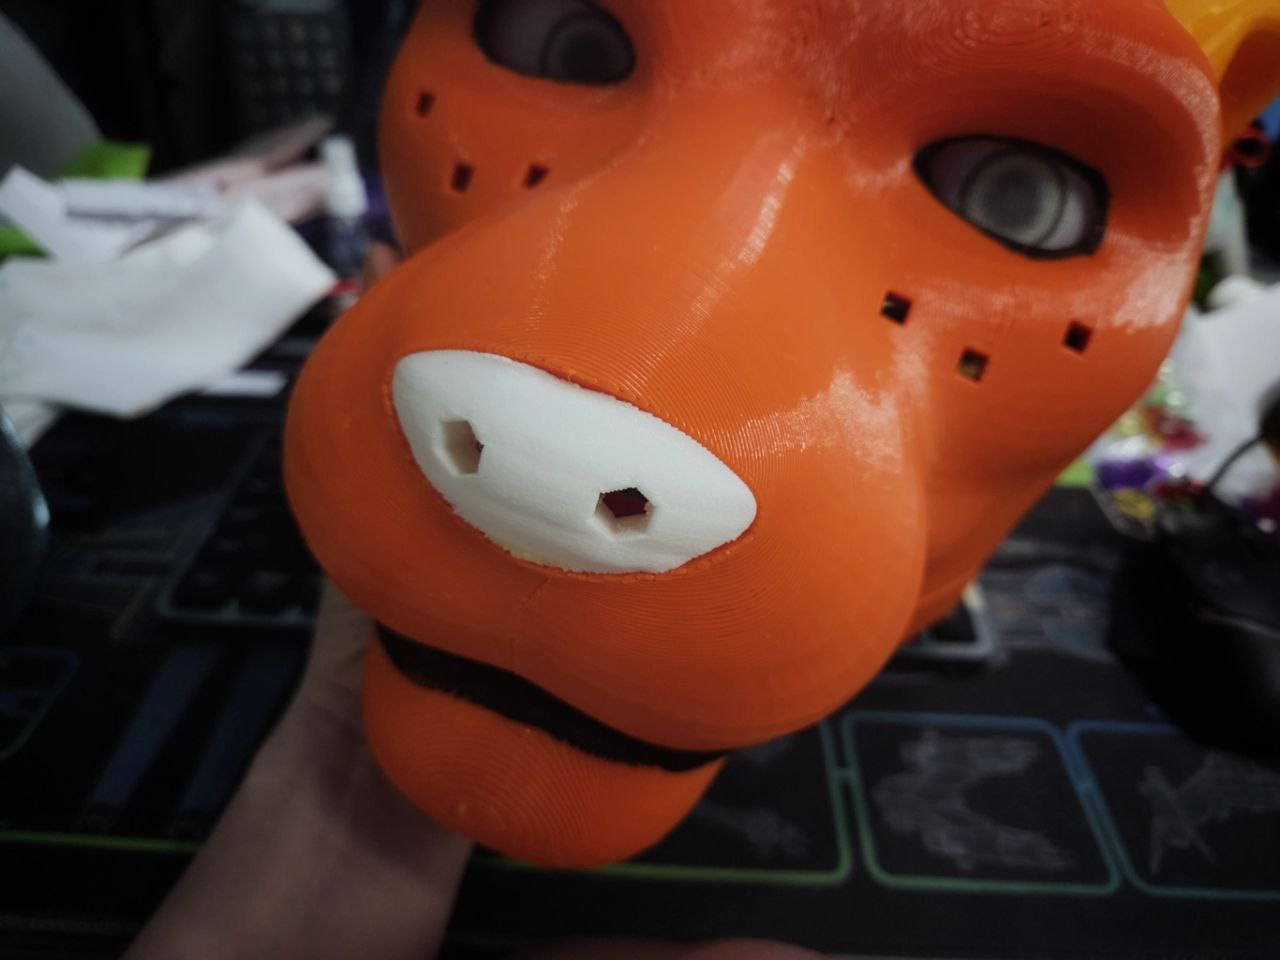
The air holes makes the nose significatly harder, so I will be moving those holes off the nose and onto other areas - can't have a snep nose be hard! Gotta boop! Oh, and will probably print the ears with the varioshore too.
Varioshore filament is extrenmely expensive - 1kg of petg is SGD14.4 at the time of this writing. The varioshore I got is SGD62 for 600g! OUCH! This is slightly migitated by the fact that for the 60A shore hardness, you only need an extrusion multiplier of 0.75. I'm going to be pretty picky for what this is going to be used for.
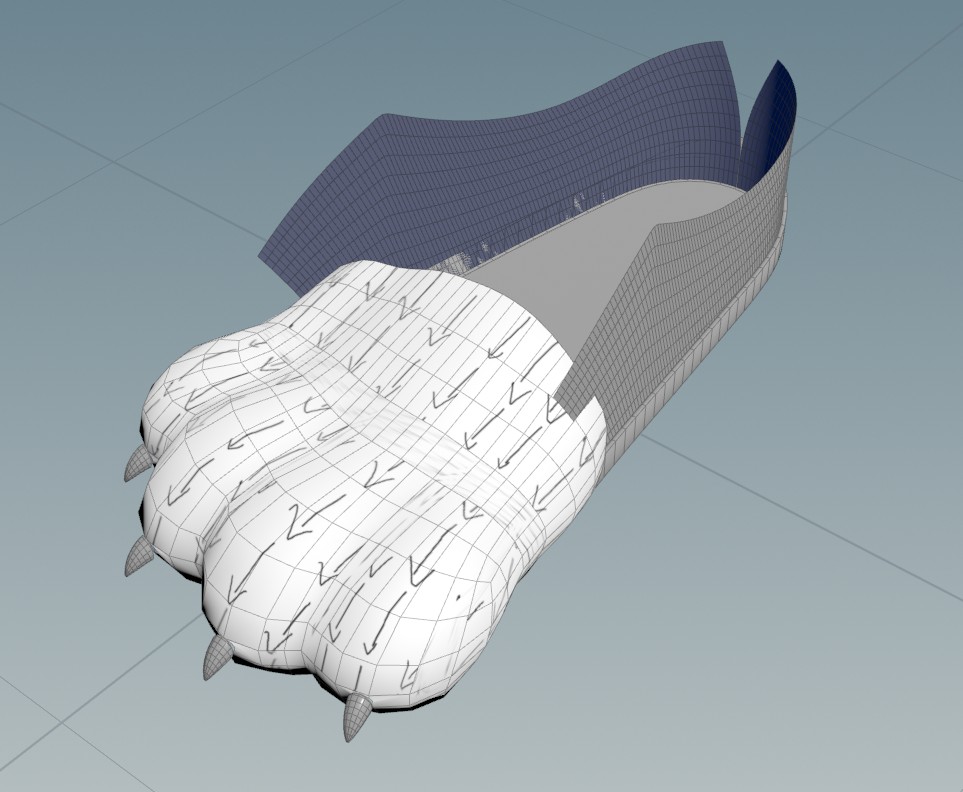
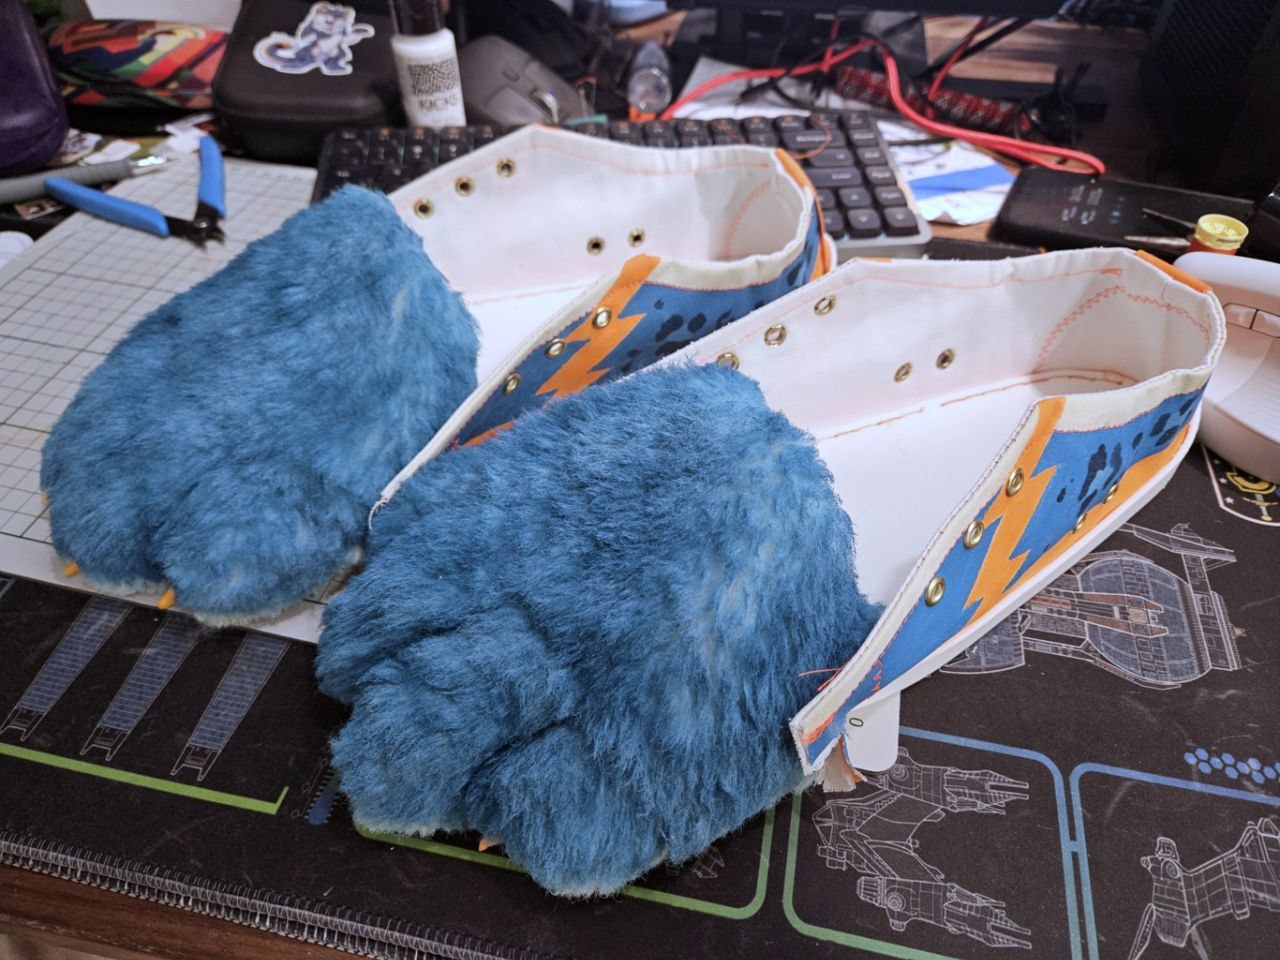
Finally got around to integrate the front of the foot paw into the shoe, making a pattern then cutting out some fur. Right now i'm making a prototype for the right foot only.
Very small updates today, mainly just modifying some parts to use bigger 11mm press studs.
(1. Liquitex Soft Body Colors Referenced Next)
(2. The following text is more of a reminder to myself)
(3. Mixing IRL, subtractive mixing, can be done using RBY or CMY, I am choosing RBY as that is how I mix my watercolours.)
I think Parchment works very well with Transparent Mixing White, on its own it feels a bit too saturated and dirty looking. Pthalo Blue GS is far to saturated for my taste. Mixed with Ivory Black and a dash of Parchment gives a pretty good result for the darker rosettes. Cadmium free orange is also a bit too loud and yet part of me wants it too be loud since its my highlight colour.
Tests mixing Pthalo Blue GS with Parment result in a blue that's more muted with a greener bias (parchment is yellowish off white, and combined with a green shaded blue would push it green). I like this colour! It is not the right shade of blue for mid-tone blue for my fur but if I can't find the blue I like, this would do.
To get closer to the blue I want I need it less saturated - I need to add red to it since red reduces the contribution of yellow and blue (RBY mixing). I don't have red but I do have Cadmium Free Orange, I should try mixing those two.
Another idea I've considered is using Parchment as the base for ALL the colours going on the fursuit, I've seen some artists on youtube use one colour to as a key colour for a "unifying palette" and that is osmething I should try. I really should, as all the colours I like are mixed with Parchment and the out of bottle colours are a bit too saturated.
The new airbrush I got comes with a 0.5mm needle, it's the cheapest I could find (20sgd). Super basic - fixed paint cup, dual action, limit stop for the pull back action. That's about it. The rear half of the body is plastic. It flows much better and handles thicker paint without any clogs.

Also, hole punch arrived and it takes alot of effort to punch through canvas. It's one of those you see with a rotating ring of punches. I think one of those hand held punches that you slam a hammer into would be much easier to use though its noisy and could result in injuries if you miss the mark! The eyelet punch, thankfully doesn't require a supreme effort of strength to work. The shoe is almost ready for its first prototype to be created - day before yesterday I was figuring out a shoe cap (trial and error) that would fit me irl as well as settings on my sewing machine that would allow me to sew through canvas and tpu at once - just need to increase the tension on the machine and that sorted out the birds nests.
.... so I did do stuff that day, just forgot it. And too tired to write it down. GRAAAH. Oh well, guess I didn't do that much on my fursuit yesterday, because I was sewing up my first (under) garment.
I'd printed the eyes on a piece of regular A4 paper, then lined up the cotton mesh on the paper then sent that again for print. Did a colour print to make sure the printer works fine and it does.
Right now I only have some parts that hold the mesh eyes which are they taped down inside the head. Gotta design some mounts next.
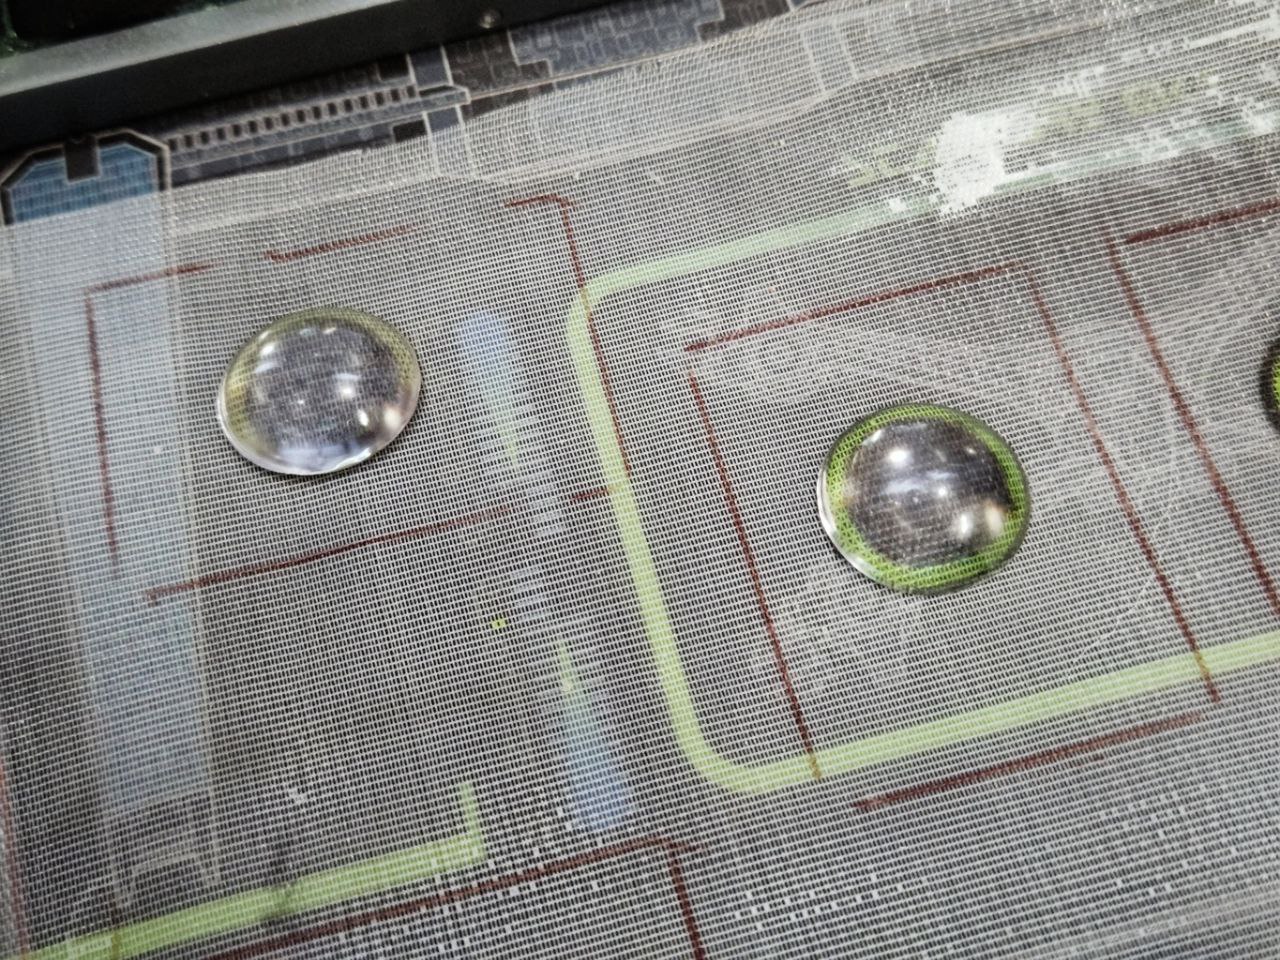
Had an idea today, instead of painting in eye detail into the resin, why not just use the resin purely to catch highlights and have the eye detail painted on some nylon mesh? I tried this out, the horizontal ones are done using a painbrush.
The stencils for the eyes are just 3d printed. I don't think I have the right paint/airbrush medium mixture yet, the airbrushed version is much fainter. Good enough for testing though!

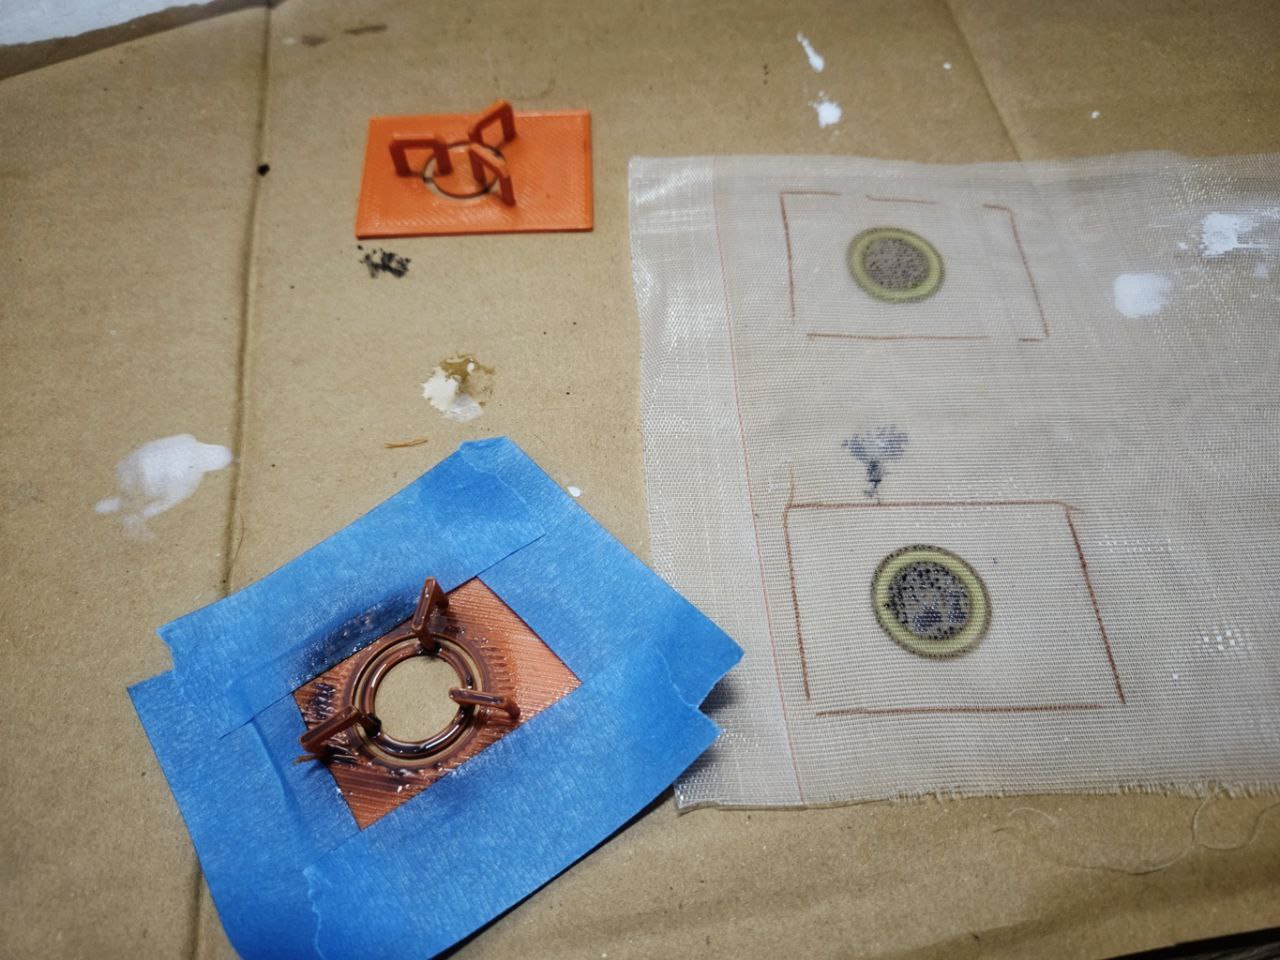
Got around to making a quick holder for the resin eyes as well as a frame to hold the mesh. 2 part epoxy was used to hold down the resin eyes to the frame.
The painted mesh backing unfortunately did not work at all! I can barely see the colours through the resin eye. More importantly, the visibility through the mesh+eyes are essentially useless, so I switched over to printing some paper eyes to use as a backing. This seems to work pretty well! Tried a few sizes and found the ones with the larger iris more appealing.
Next is to get figure some way to mount the eye frames to the head base, and update the cheek padding to use press studs.
Really happy with this! The press studs work really well to hold up the internal padding! One of my goals for this head base is to have the padding be easily removable for washing, this works! I'll be working to update all the padding to use press studs.
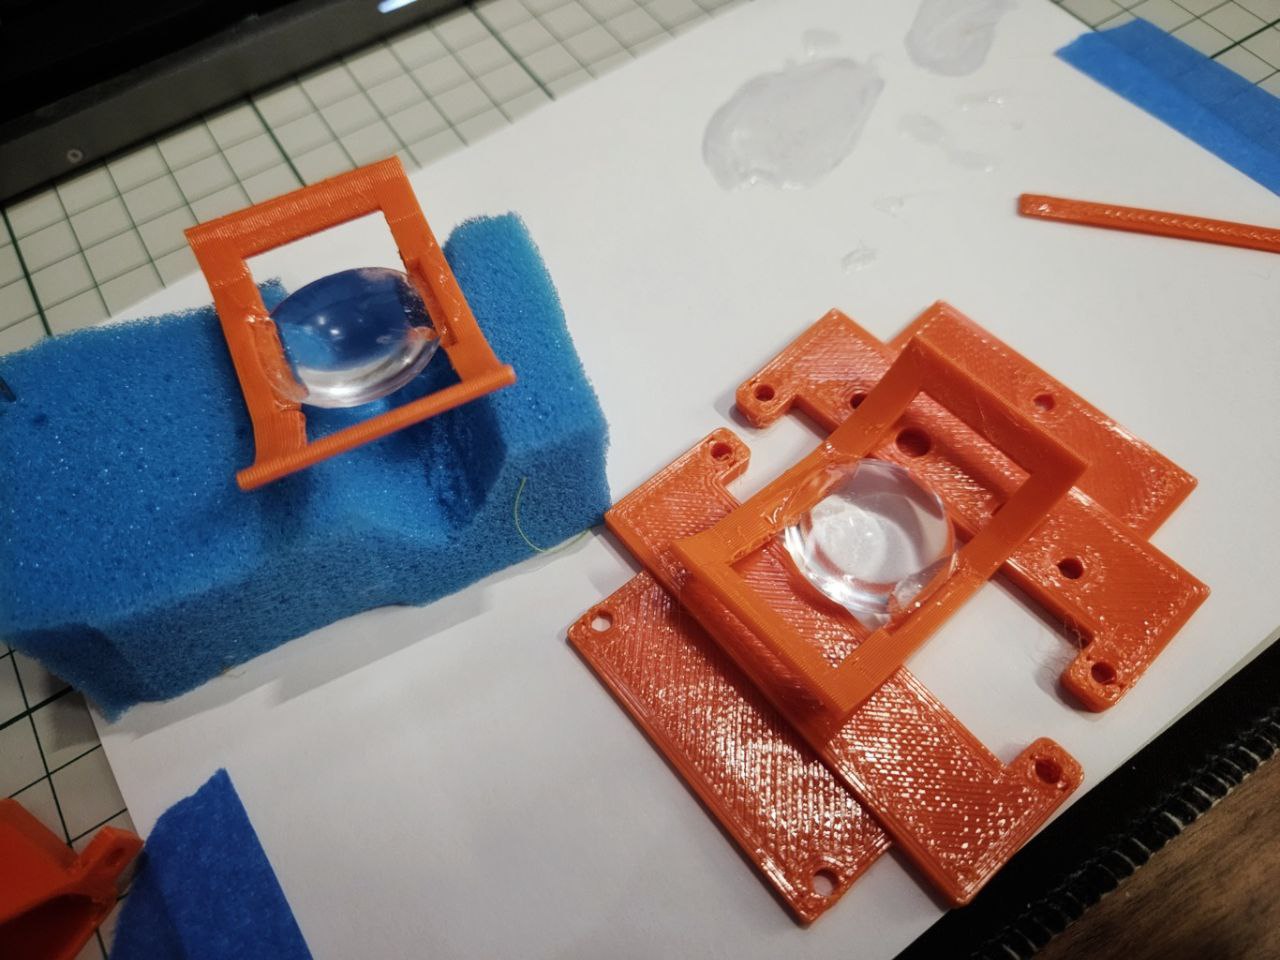
Resin stuff came in, did a quick test and it turned out pretty cool! That eye was done using the biggest mold (3cm diameter). I then did a version with 2.5cm diameter, which was the size I'd designed for, and this is what it looks like:
I'm not sure I like it. Gonna sleep on it. Likely going to cast the eyes in 3cm and see which I prefer. Oh, the photo above I also painted the lips and eye sockets black, can't wait to see that on the final version :3
Urgh not very productive today, been trying to get the 85A tpu to print... keeps jamming for some reason, and I am wondering if it's these little kinks in the filament :/
Had some 8mm foam arrive today, and it's the perfect thickness for the padding up top! Just need to figure out a good way to mount it.
So gonna try this concept, the internal support has multiple small holes that that I can sew some press studs into. The 2nd image shows the pattern for the padding. Should work!
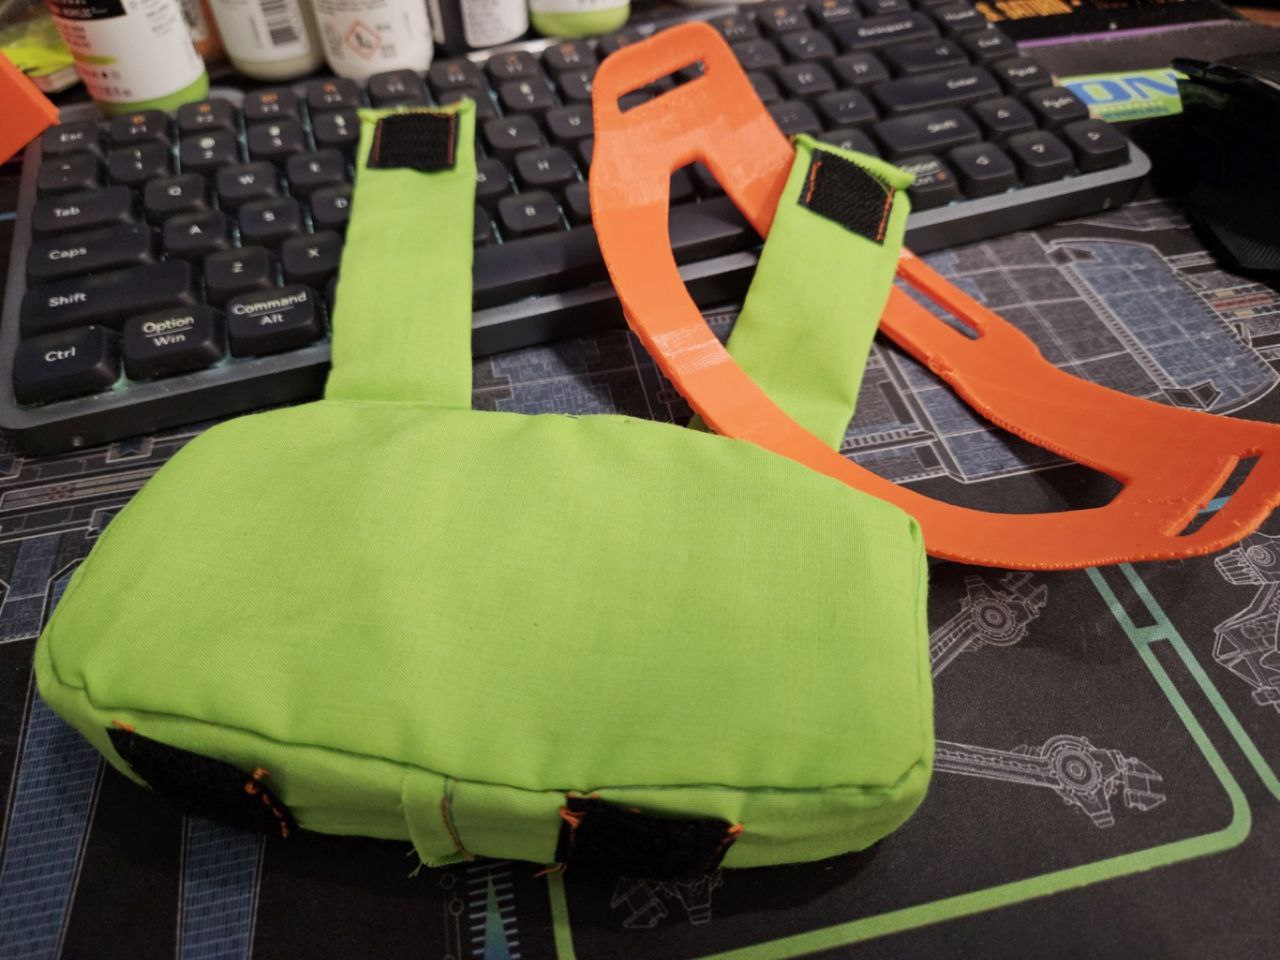
 Sewed up some straps with press studs as well as some new designs to hold those straps in. These did not work as well as I'd like, the padding does not stay where it needs to stay
in the base, so I'll have to think up something else.
Sewed up some straps with press studs as well as some new designs to hold those straps in. These did not work as well as I'd like, the padding does not stay where it needs to stay
in the base, so I'll have to think up something else.
Also got around to figuring out how to export patterns directly from houdini, it's actually quite straightforward - 1cm = 118 pixels. That's it.
Sewing up the uppers was pretty straightforward, need to figure out how to attach them next.
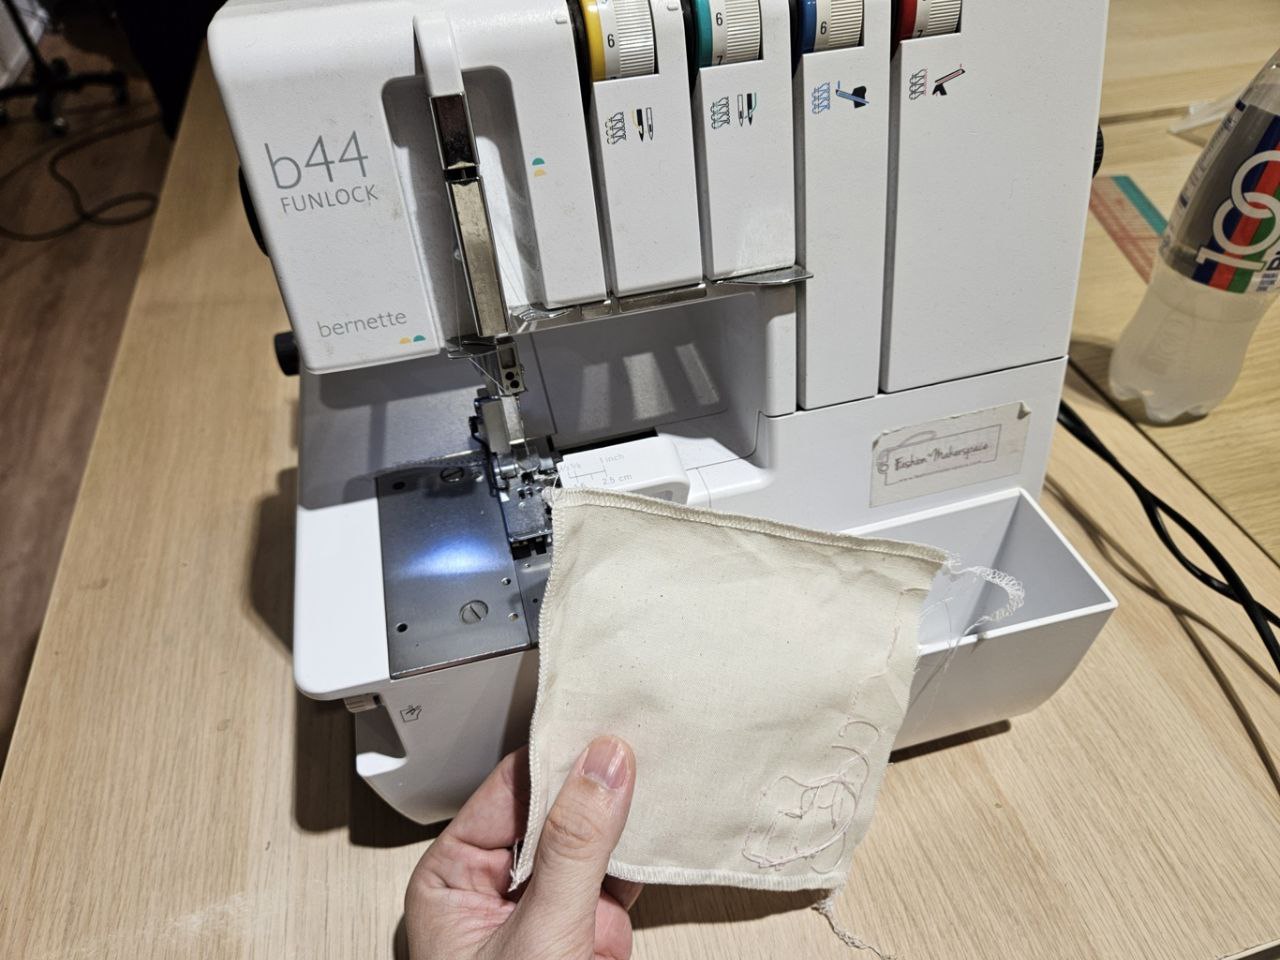
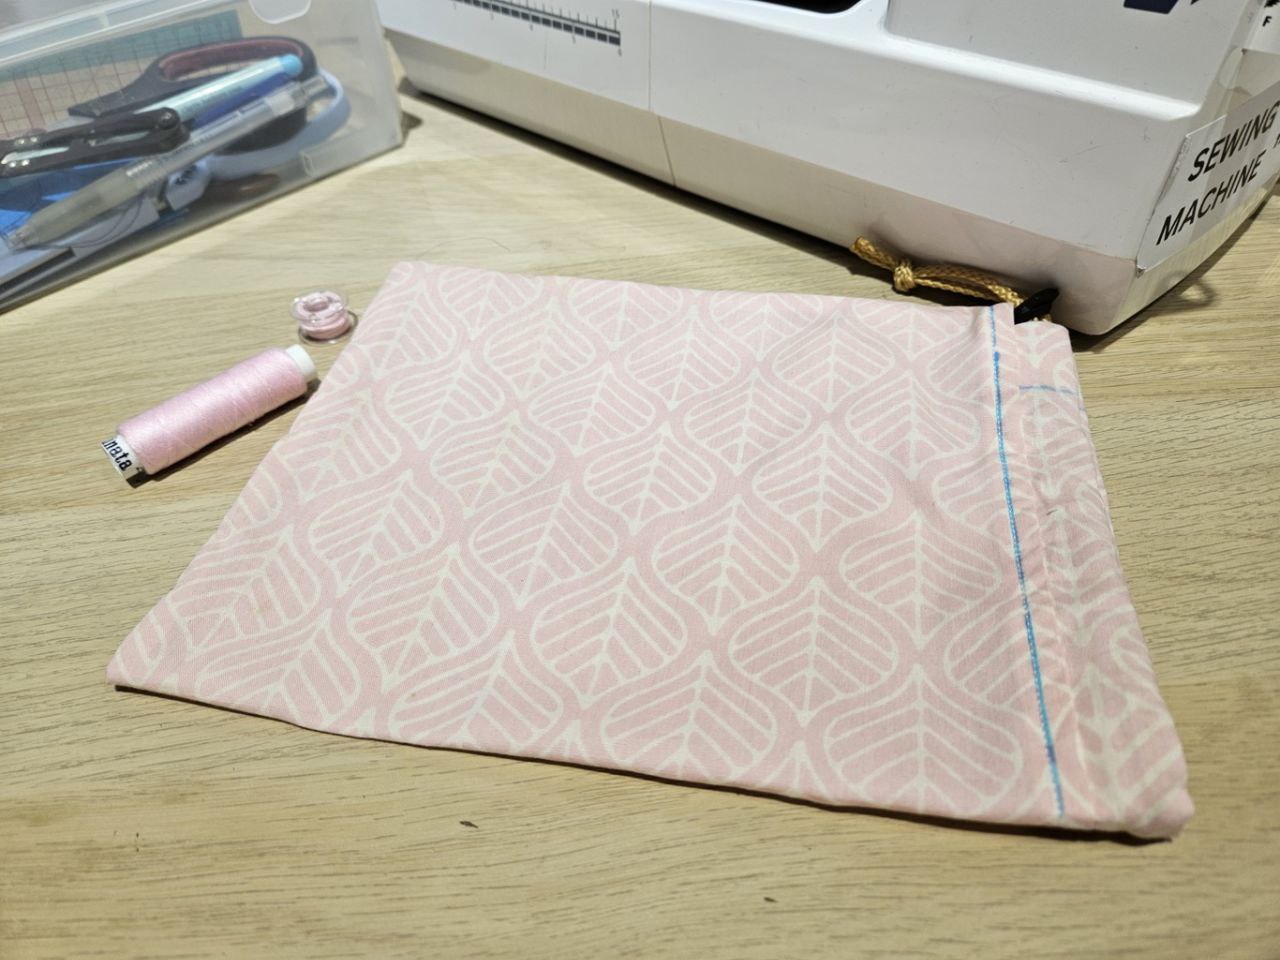
Attended a sewing class today, learnt how to use a serger, how to take measurements, and sewed up a small drawstring pouch :3
Would _love_ to have a serger but those things are LOUD! Gonna just use my overcast foot for now XD
If you're in Singapore and want to learn how to sew and more, check out Fashion Makerspace.
Before class though I went to SMHCRAFT in Chinatown and bought alot of stuff I needed like press studs, canvas, buckles, canvas belt and more. Nearby at People's Park Food Centre, there are lots of fabric shops. Went past one that was selling stuff like rayon, and what looked like technical fabric. For the moment I'm doing my prototyping with the cheapest poplin but the final version definitely gonna use some fabric that has wicking capability.
Also picked up some magnets on the way home, and spent the evening 3d printing the new parts, sewing and assembling them together.
Short Vid here showing the new magnetic tongue, as well as the press studs sewed into the jaw padding. Pretty good day!
Got around to cutting the fur out today! Gonna leave it that way for now though - I want to compare if the paint sticks better on washed vs unwashed fur.
Next a quick test with the eyes:
That works! I spent some time looking around for resin eyes and was about to get some when I asked myself... How are resin eyes made? More of curiousity as I have zero interest in getting a vacuum pump. Discovered... tutorials of people making eyes (not fursuit specific) using UV Resin! (o.0)
Gonna experiment there XD The required components aren't expensive, silicone mold, uv resin, uv light source. Already have paint.
This is going to be a departure from the mesh based eyes but I feel if I can get it right, it'd look much better as my snep is on the semi-realistic spectrum.
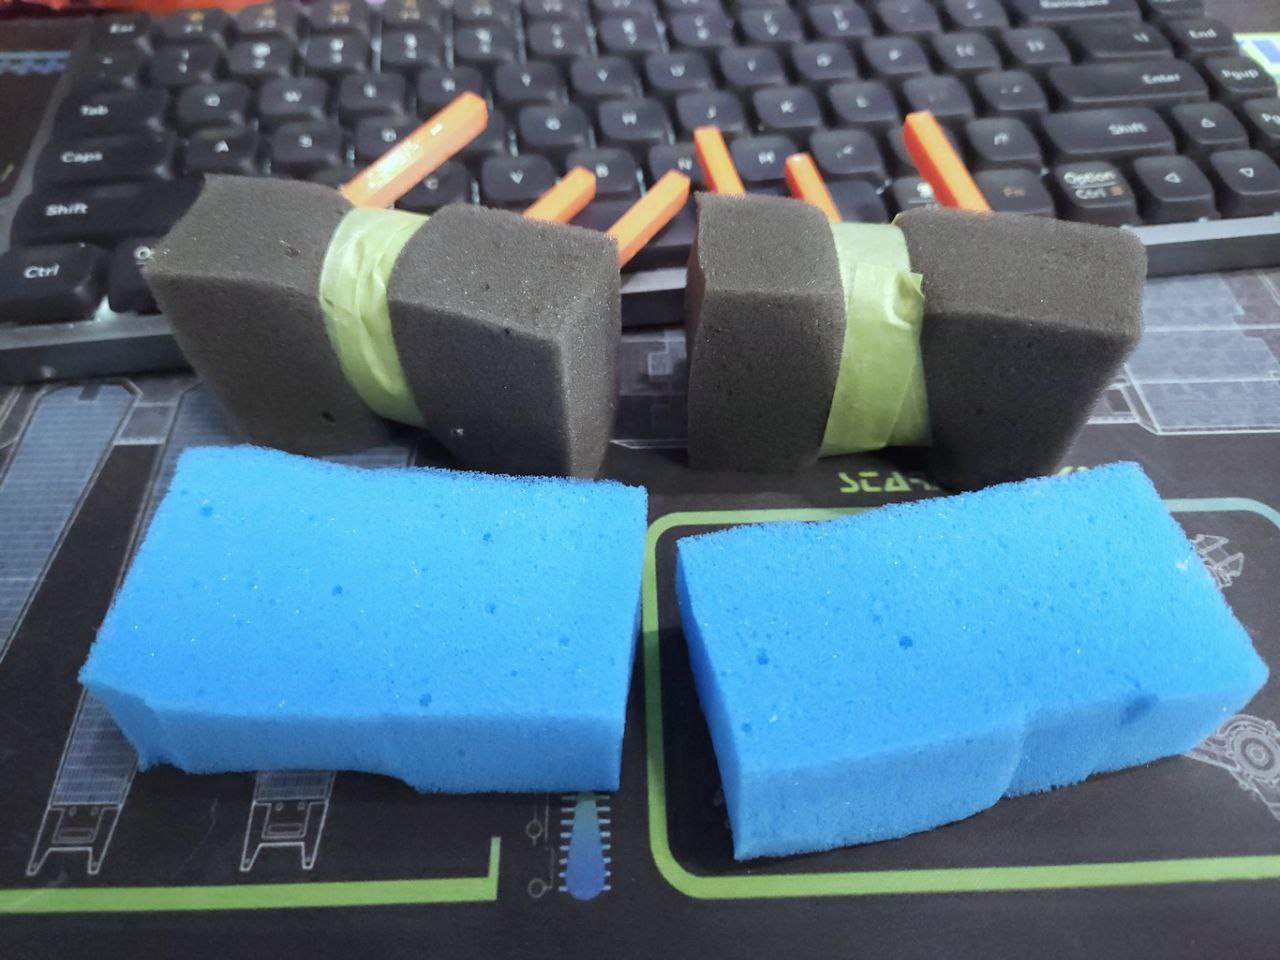
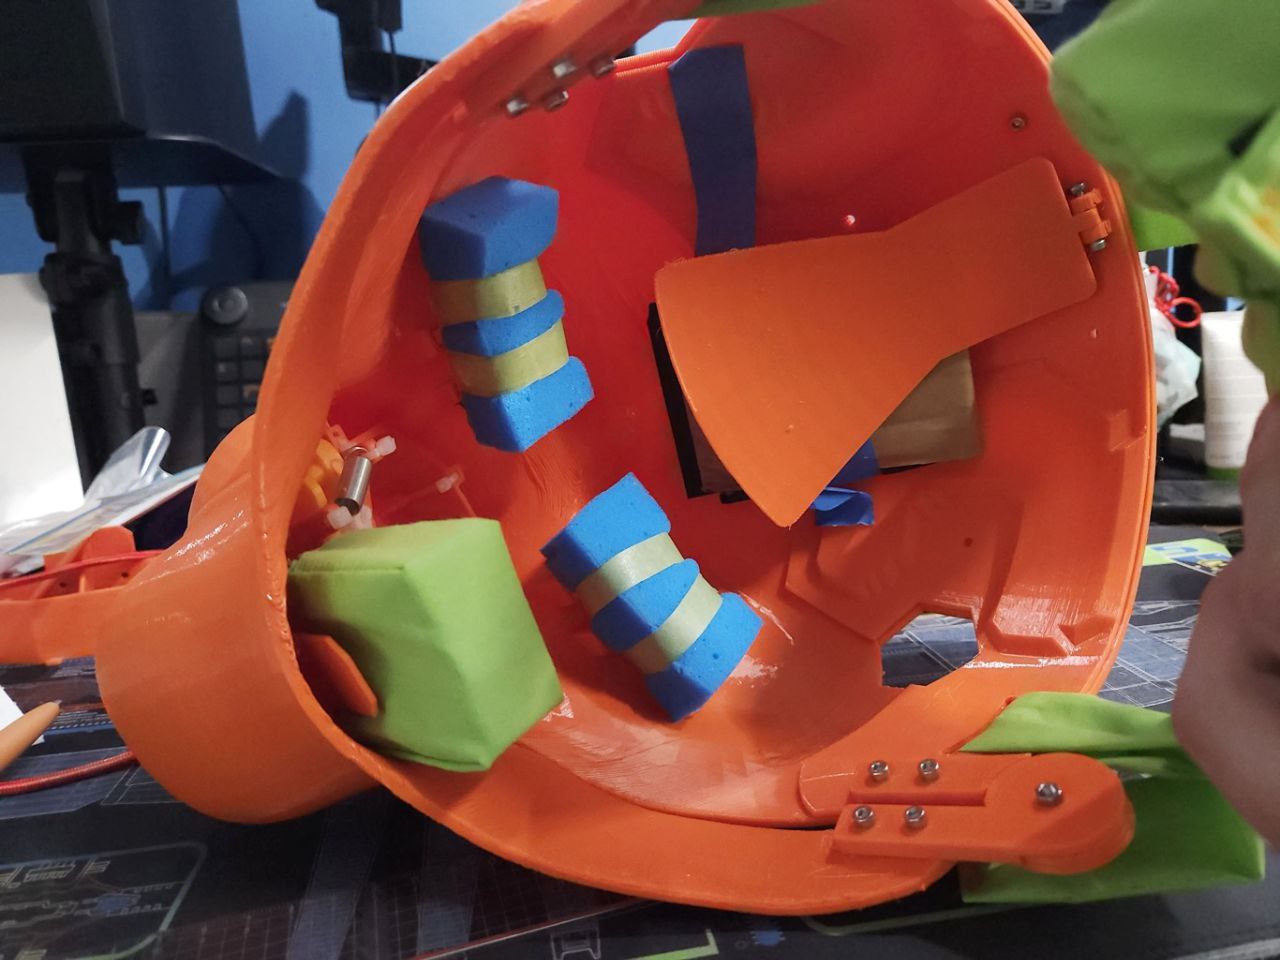
Last of the day I spent sewing up padding and making geometry that hopefully can hold them securely.
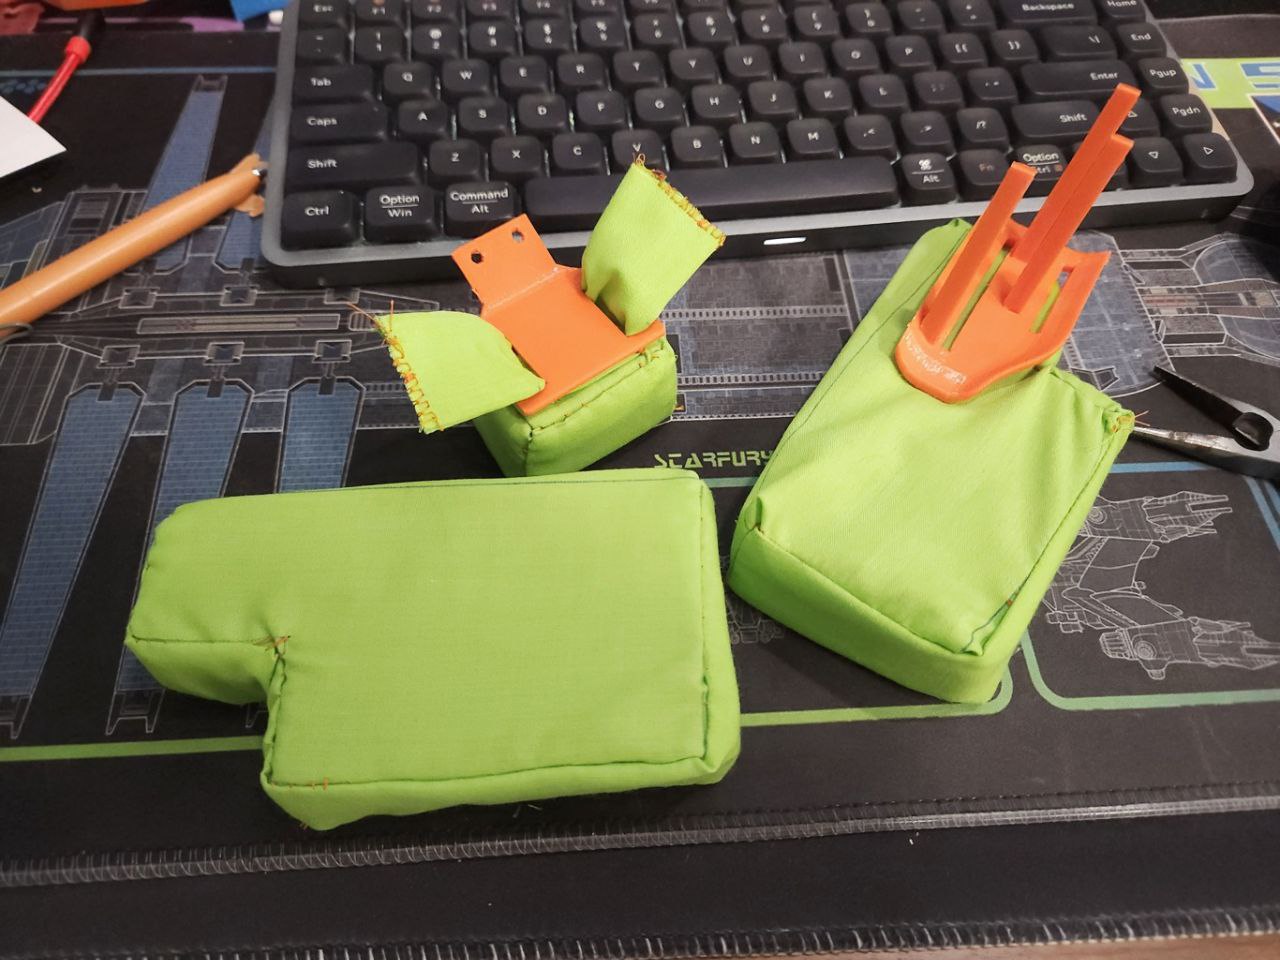
The bigger blocks are for my cheeks, and the smaller one with the flaps is padding for the jaw opening mechanism.
The tpu was just not melting at all. I cranked it up to 200C before it worked. It seems to hold up well though I haven't tried forcefully popping it. I need to do a few more tests with adhesives to decide which one to pick.
Another idea I'm floating is to make multiple tail inserts - that way the tail might be more flexible then just one large inflatable insert.
Got the patterns cut out but I've been leery to do more.... self doubt if I can actually airbrush this thing - concerns about if the paint will stick, if the paint will wash off.... sigh need to test. Tomorrow.
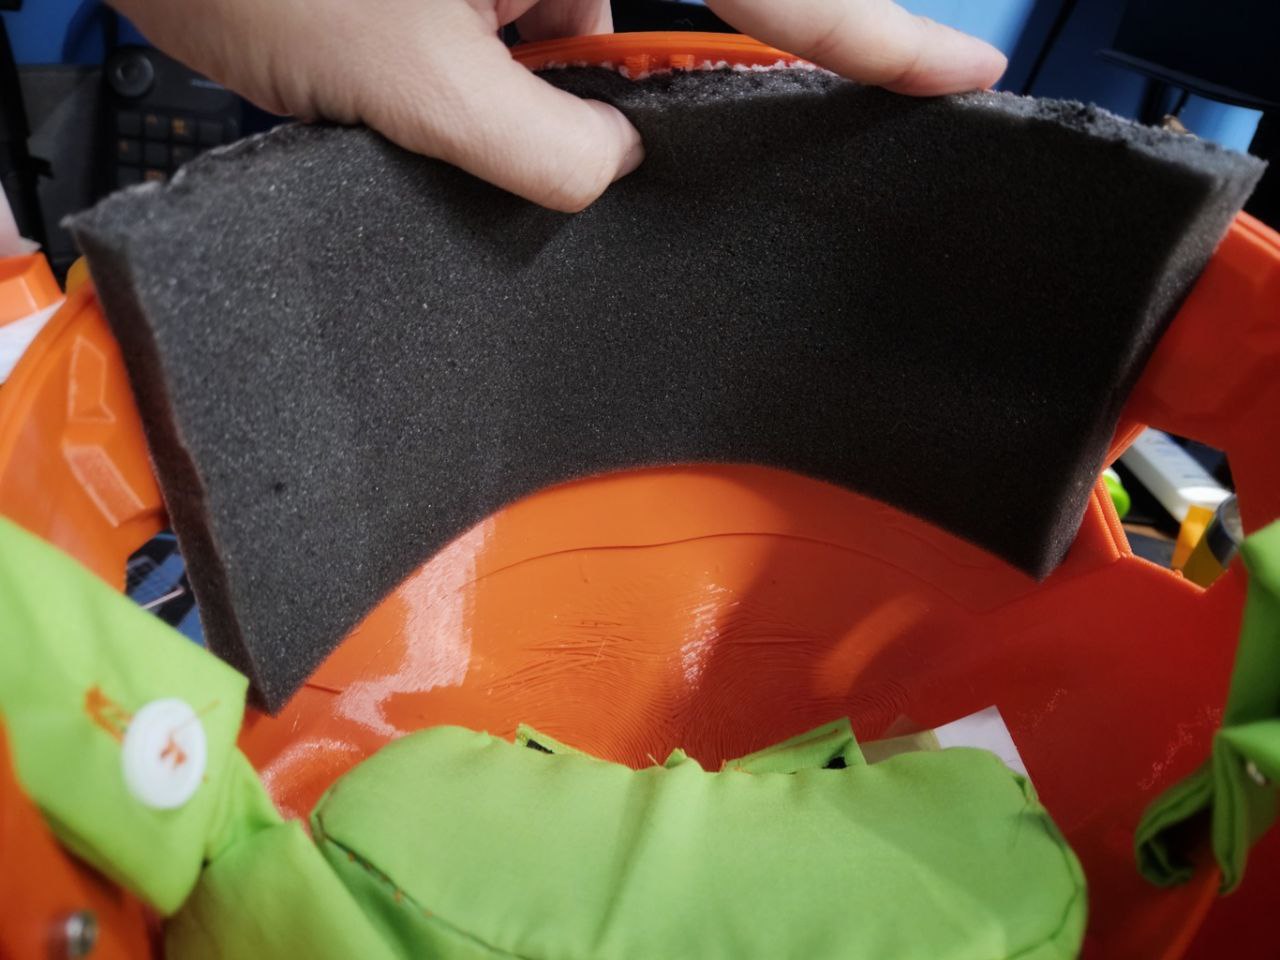
Bounced around to work on the padding. I tried using pu foam for the top but the 3cm foam I have is far too thick and messes up how the headstrap grips my head. I then experimented with some polyfill filled shapes and the one I did could be better filled. Am pondering if I should get like eva foam just for a bit of cushioning not necessary padding. I checked the prices on those and ouch, pretty expensive. Another idea is to smooth the insides of the base (at least the area around the top of the skull) and use minky fur as a lining. Lion christ minky fur feels soooo good on my paws, I'd love to be wrapped in it. That's yet another tomorrow thing.
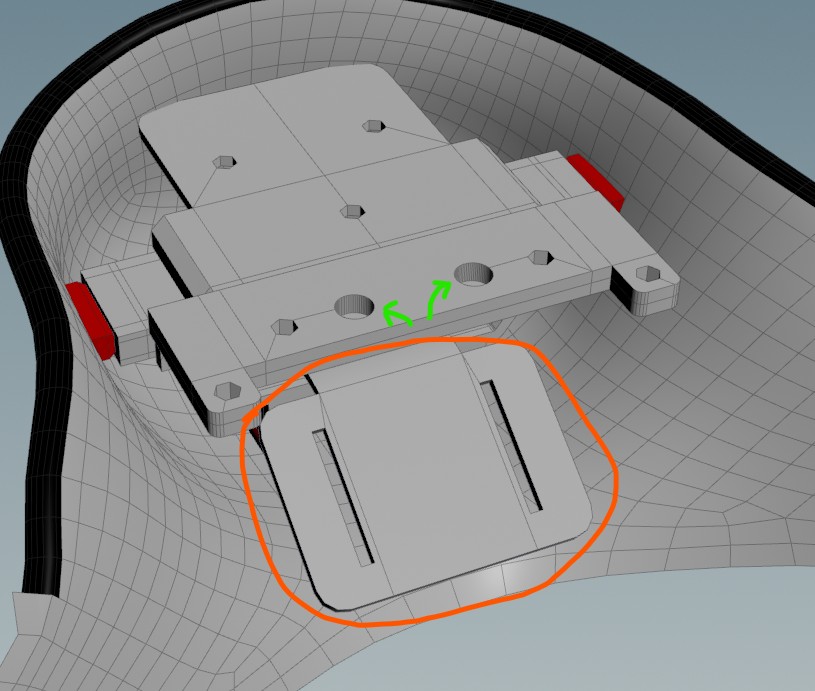
Also did some changes to the jaw structure - the green arrows point at places where magnets will be placed. Gonna try magnets for the tongue. I got some N35 30m m x 3mm magnets today and oh boy, those things are extremely strong, they started to repel each other ~5cm apart. Far too strong I think, so I've got some N35 5mm x 3mm ones on order.
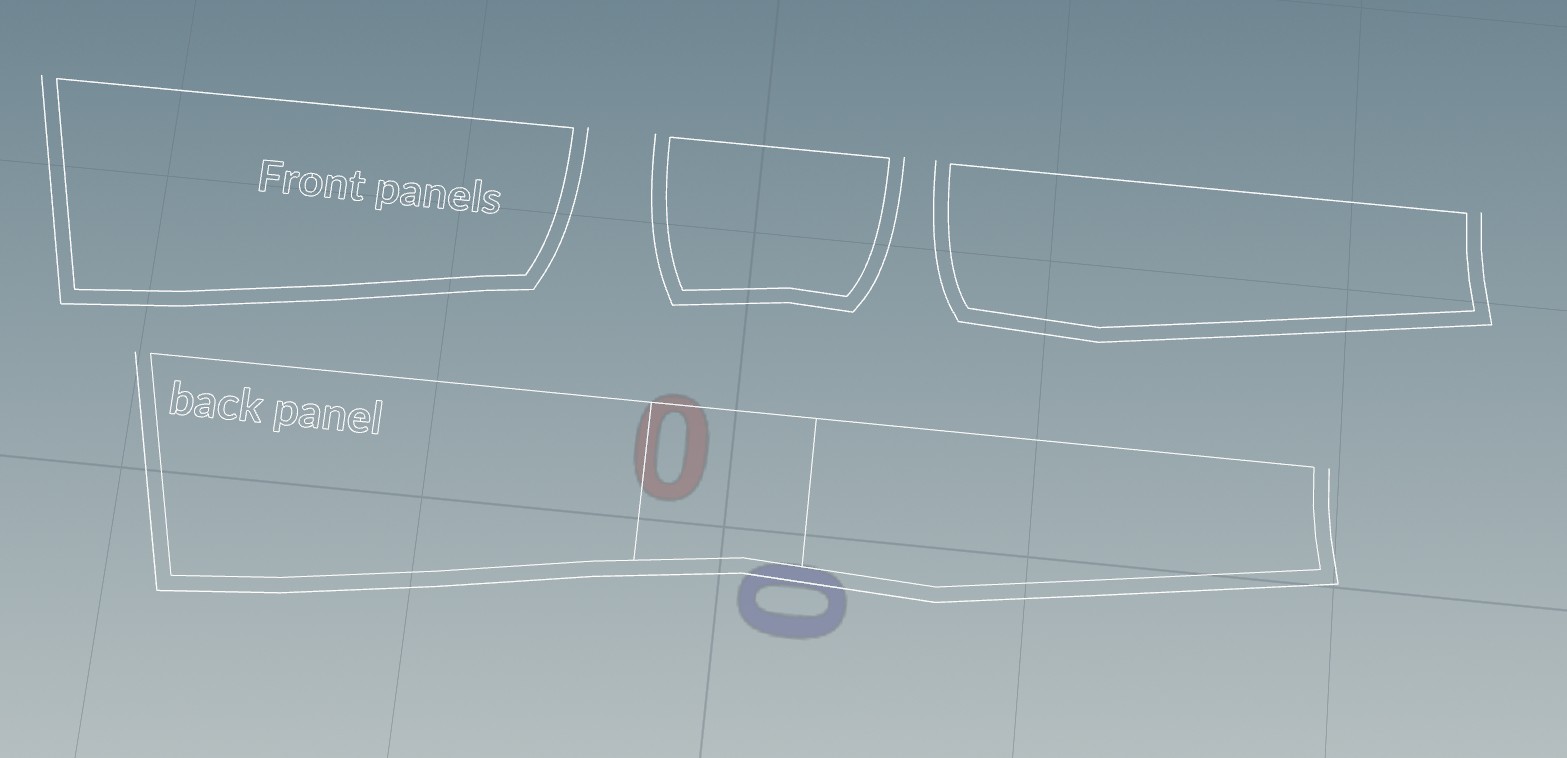
Finally, I also figured out some ways to attach the padding used to open the jaw (orange circle) - just some straps attached to the padding looped through those slits should hopefully do the trick. I might need to get some interfacing fabric or heck plastic mesh slotted in what fabric I'm using for the straps just to firm them up.
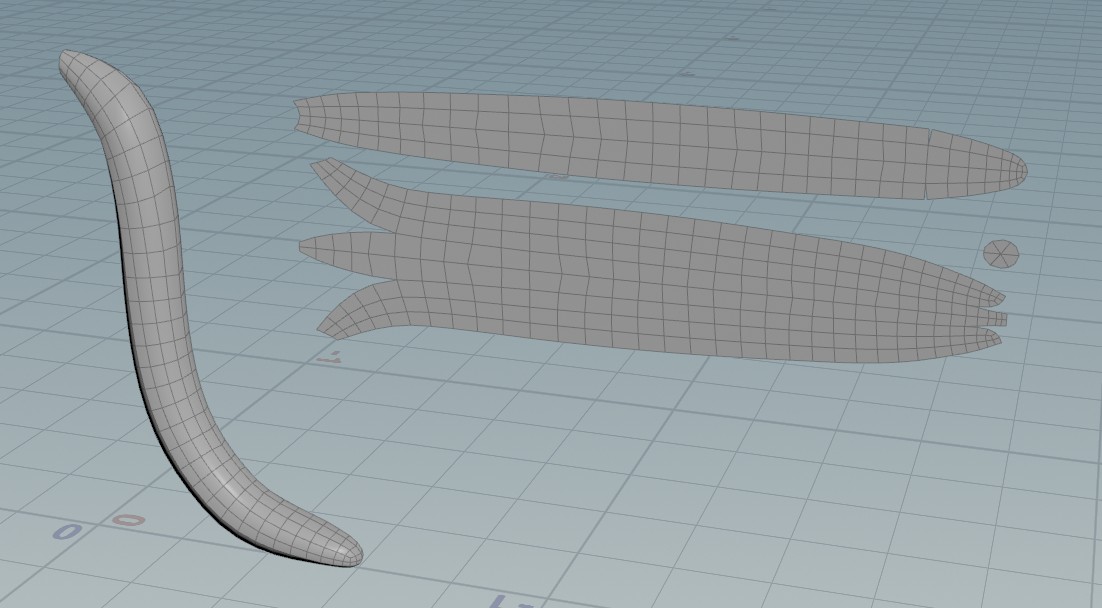
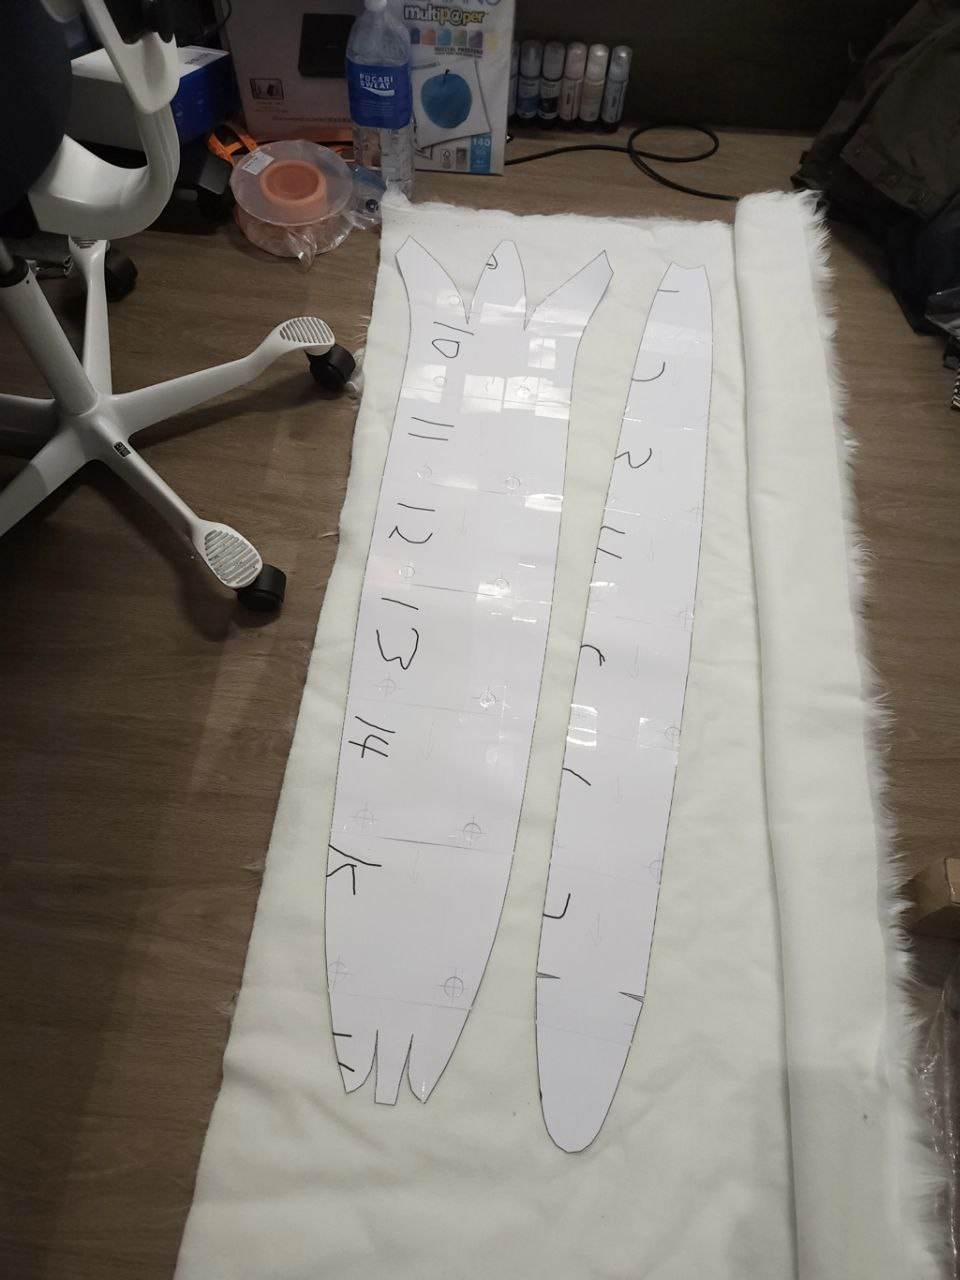
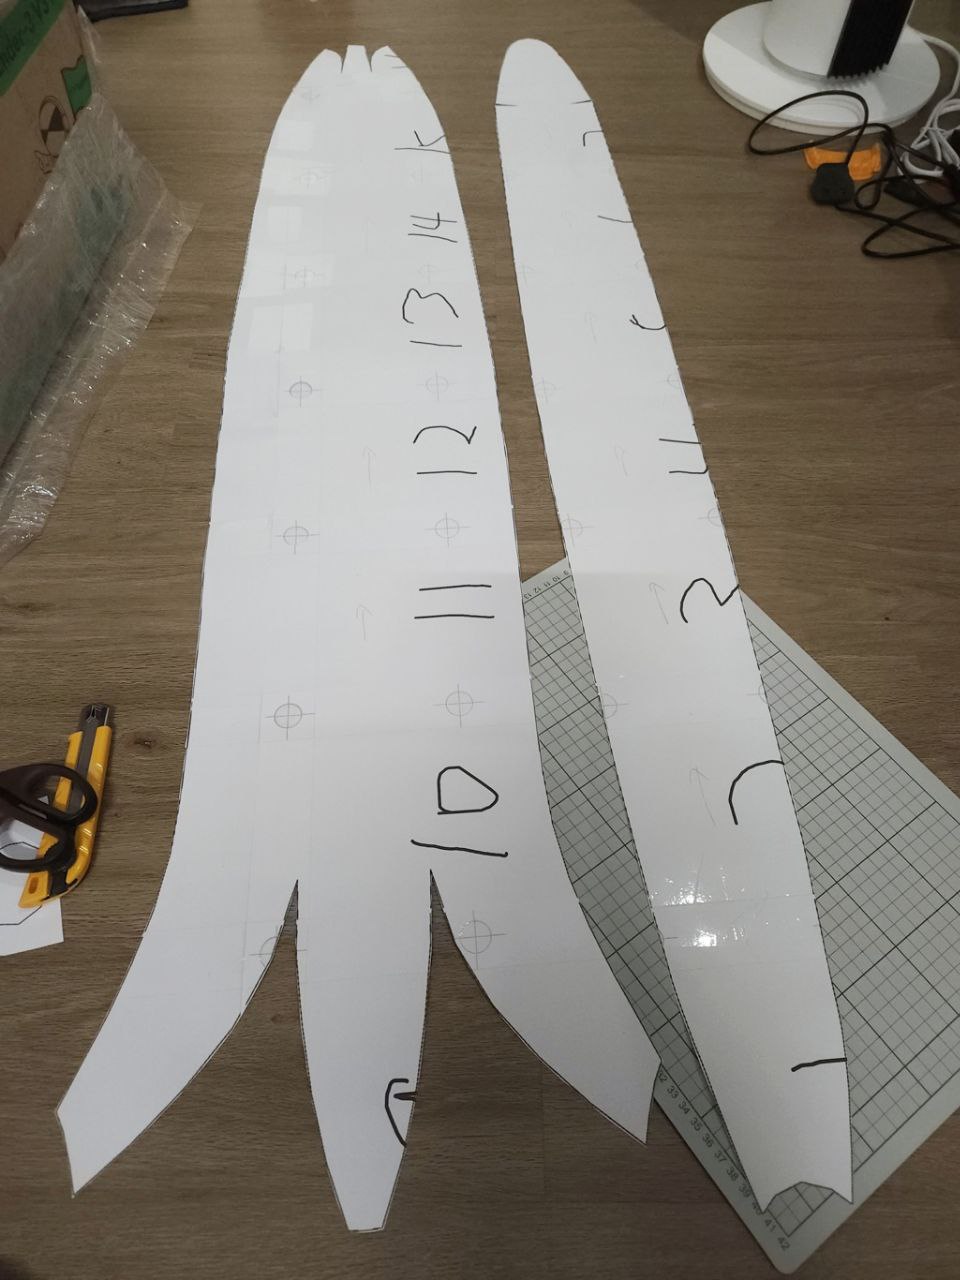
I mostly worked on the tail today. Given that I am going to be airbrushing the entire thing (I still haven't tried mixing the acrylic paint with the airbrush medium... aaaaaa) I decided to simplify the model so that can be made from an upper/bottom section. It'll likely be 4 pieces as I don't think the fur I have is that long - it's 1.3m on the long end and the fur I got is only a meter long.
The pattern will be printed on A4 paper, and I thought the easiest way to make some sort of registration markings was to create a template that I can overlay one edge over another. After messing around with some ideas and test came up with this:
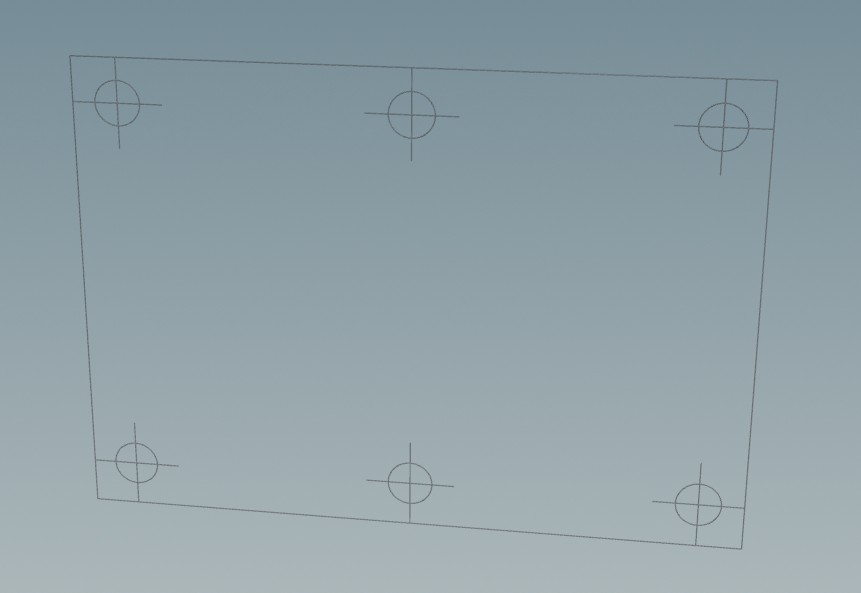
This matches the exact size of an A4 sheet, 297mm by 210mm.
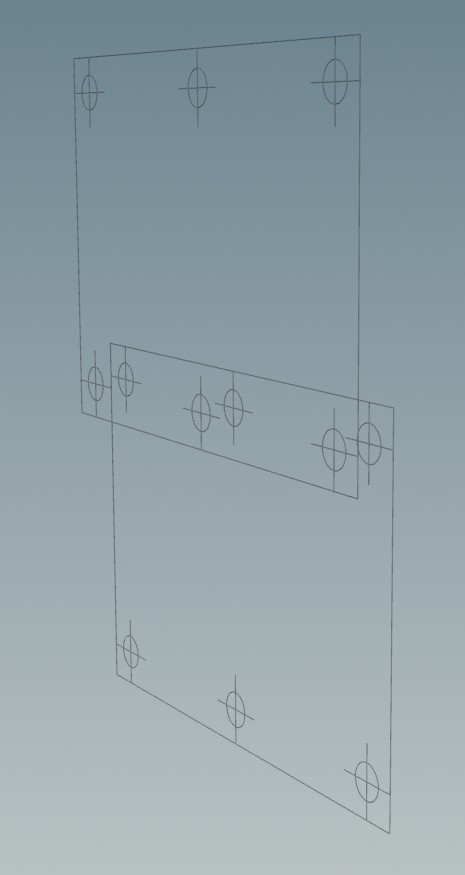
Individual sheets of paper will overlap over the circle/cross marks; the paper above will have the circle cut out, to align with the one below.
This was a pain to setup in Affinity Photo, though.
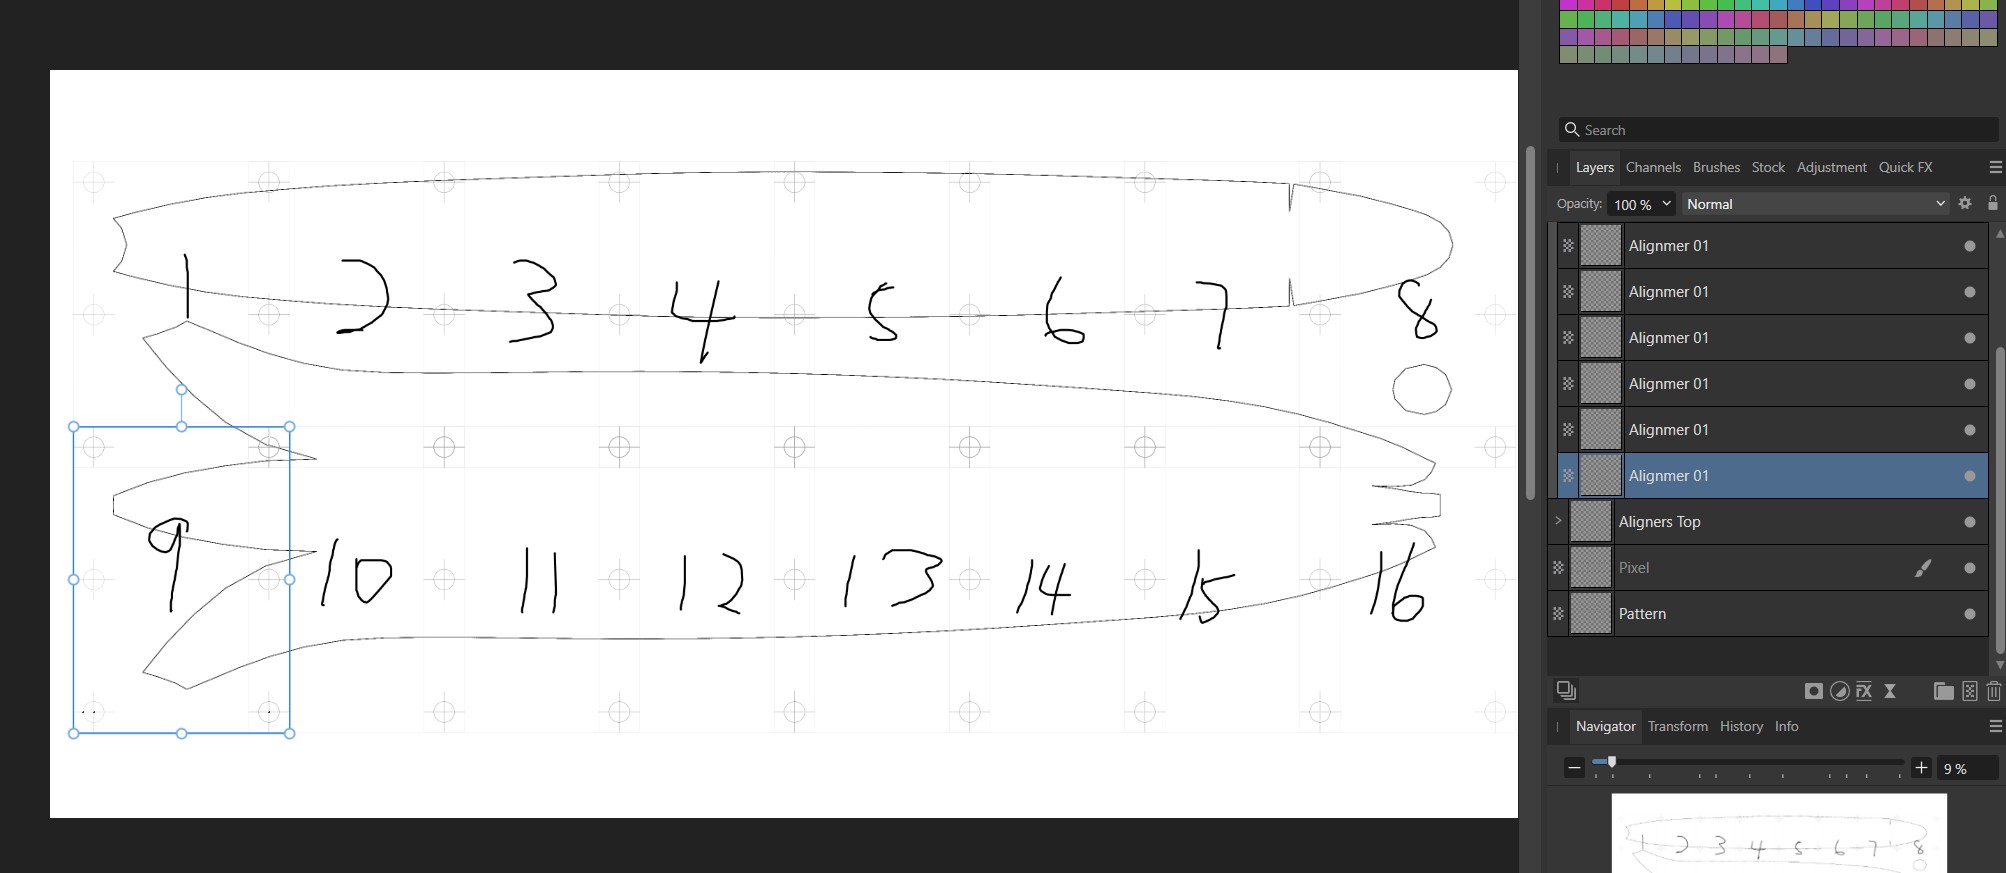
Printing it was also quite annoying, I would select a particular alignment layer, then switch to the crop tool (which automatically crops to the contents of the selection) then perform a crop. This leaves me with a perfect 29.7cm x 21cm area for printing. I did this 16 times and resulted in this pile of papers:
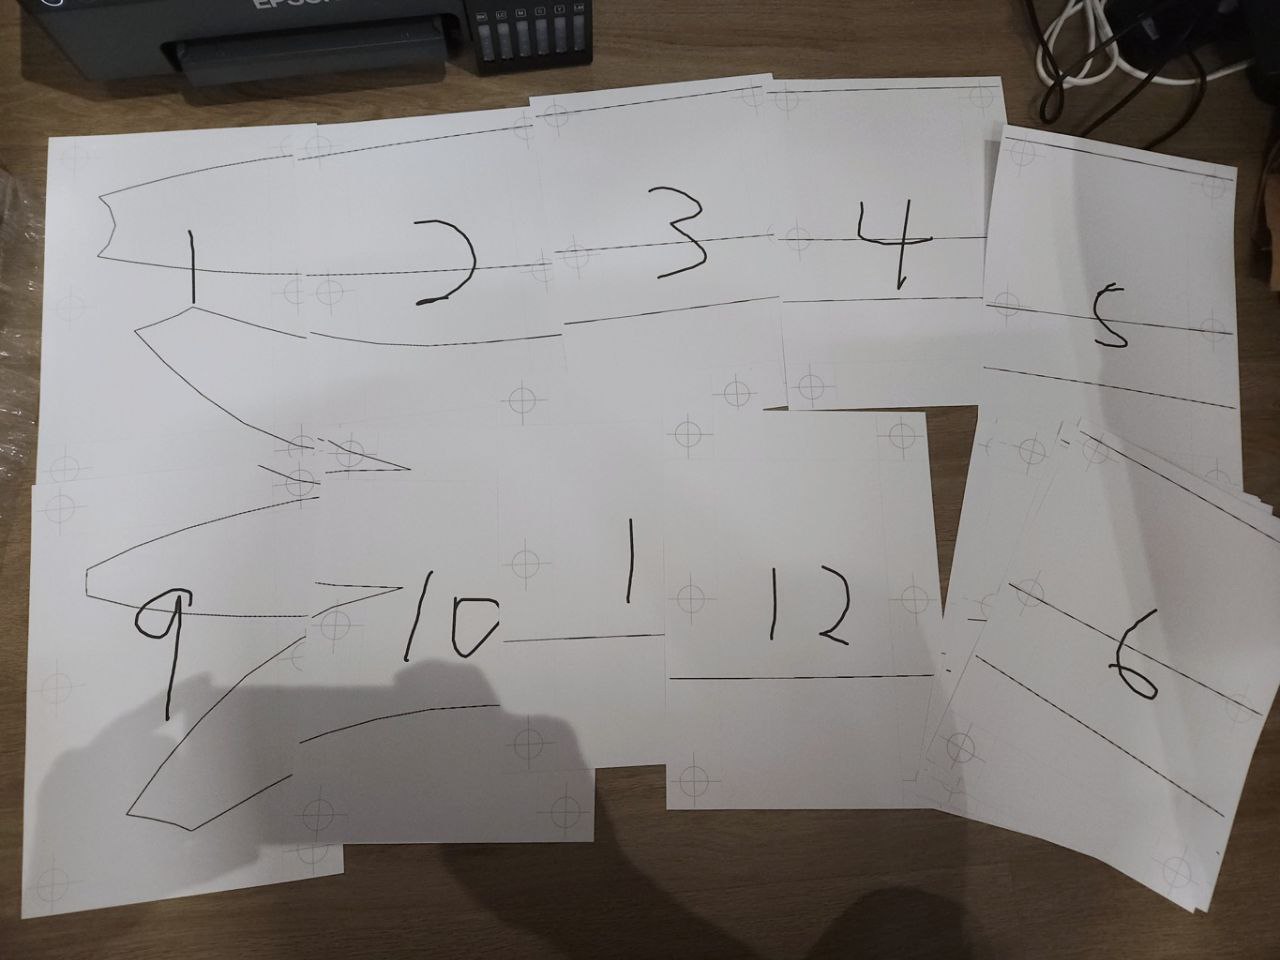
Yeah my room has no space to even put them down with all the stuff I bought for making the fursuit XD
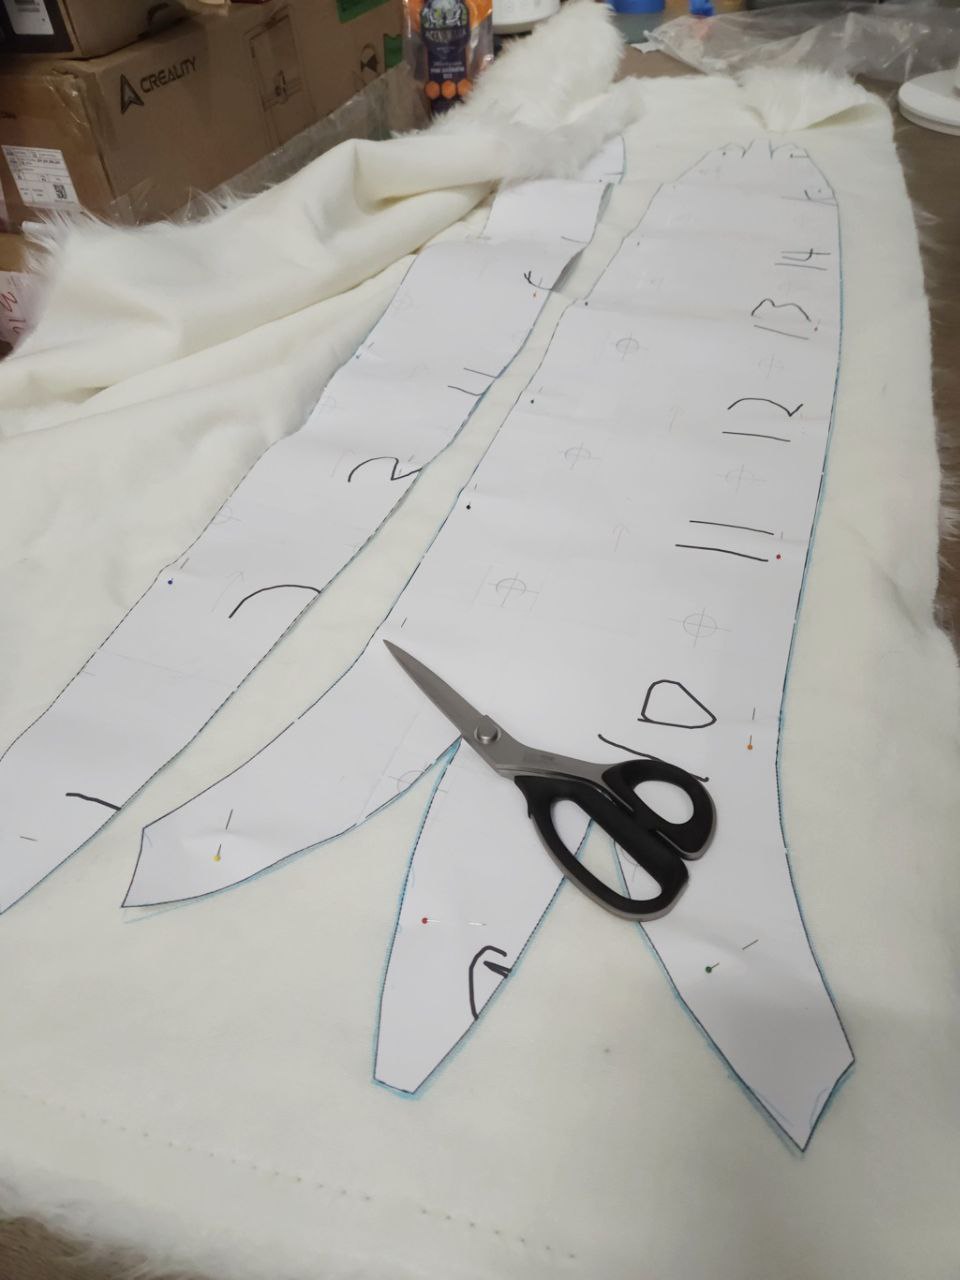
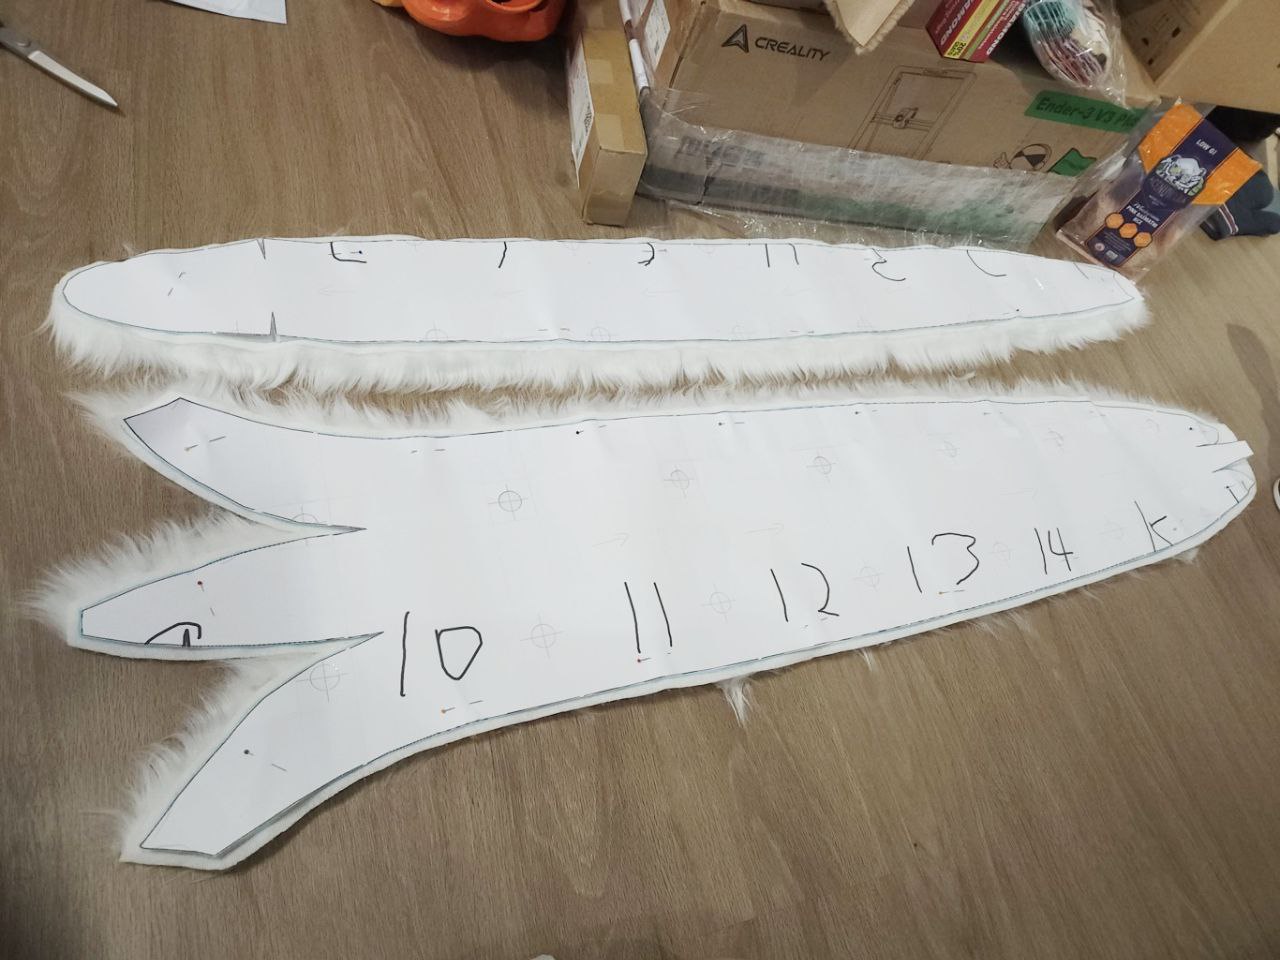
TBH the size of the pattern irl just makes me tired just looking at it... can't imagine how difficult it would be to actually cut then sew XD
I put that aside for the day and looked into the head padding. I thought I'd try the PU foam and it doesn't feel as warm as with the latex foam.
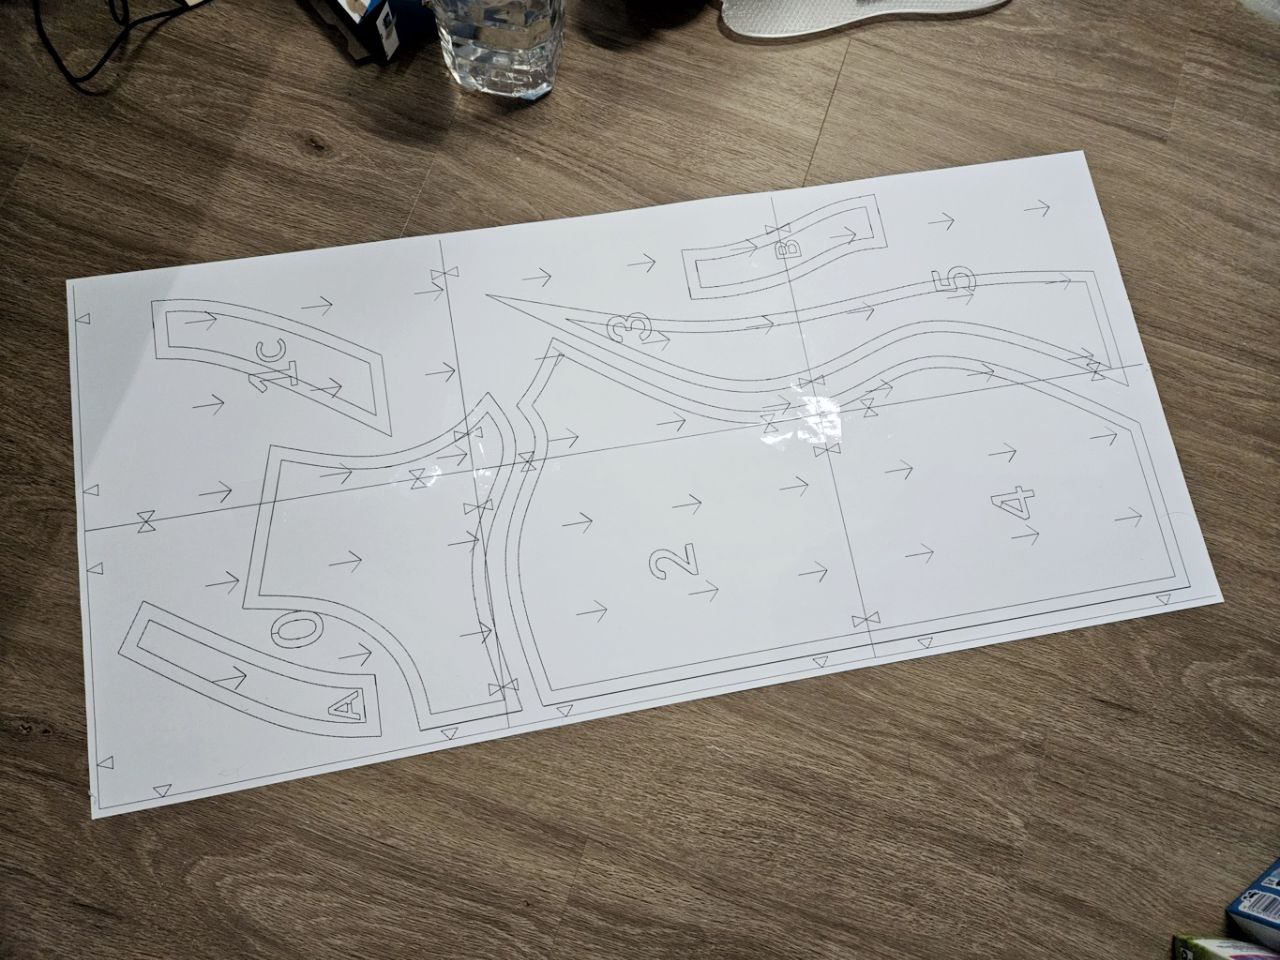
Decided to bite the bullet and taped the entire pattern together lol. Much respect for other fursuit/prop makers who have to assemble a big pattern from A4 prints XD
Part of me wished I'd gotten an A3 printer, this would have been done so much faster. That said, I don't have the space for an A3 printer - the current printer I already have no space.
Which is an issue, as it's an inkjet printer and needs to be used occasionally to prevent the ink lines from drying up. Supposedly. Can't just pack it up and jam it a shelf until I need it.
This was a factor when choosing a printer - given I'm away for months every year, if the printer were to dry out, I'd rather it happen to a cheaper printer.
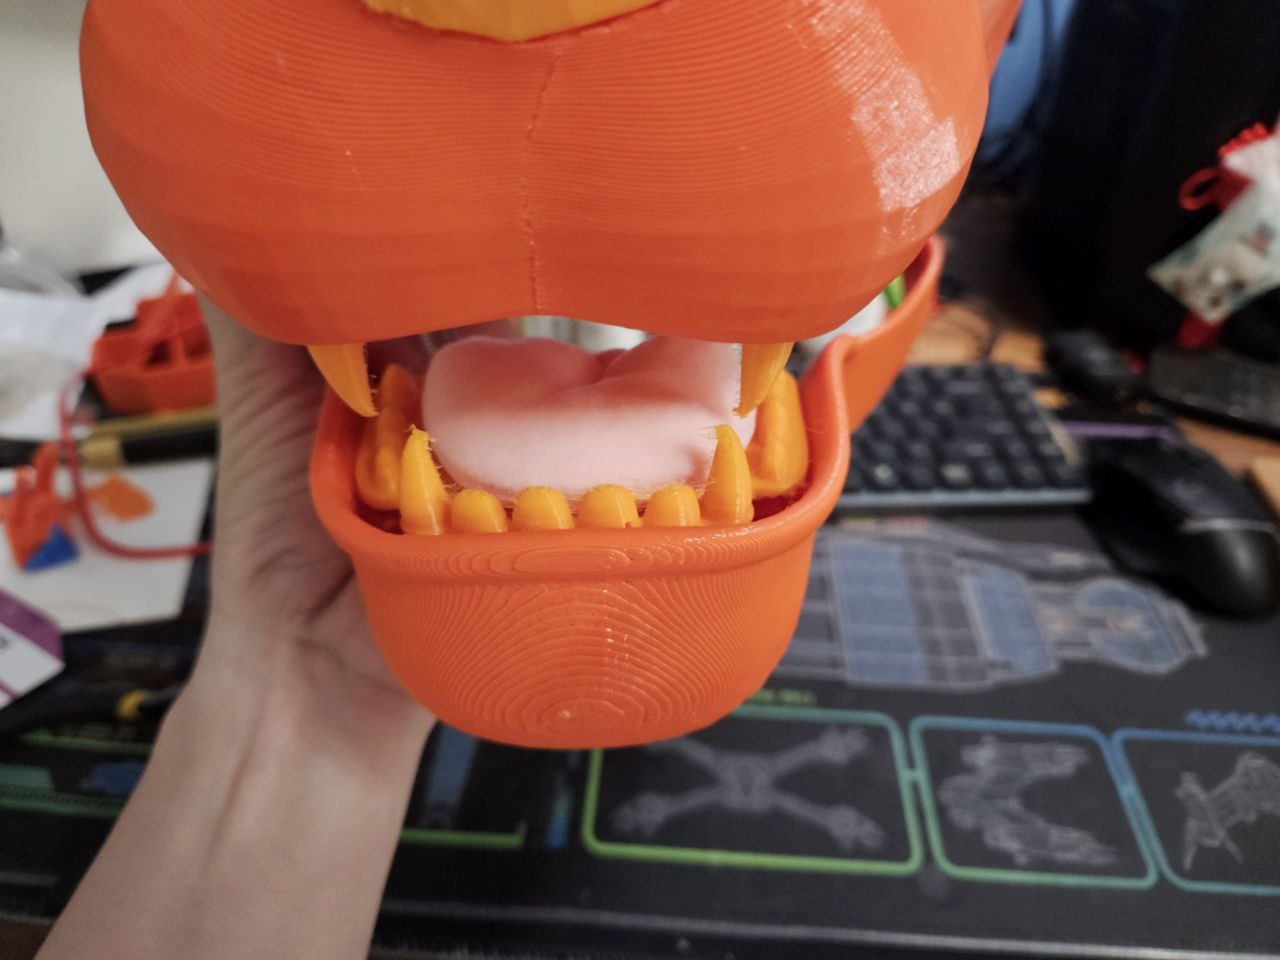
Printer arrived today! Quickly printed the pattern for the tongue and sewed it up. It's pretty asysmetrically, a testament to the amount of skill I have at sewing XD
The ladder stitches are also pretty bad lol. It does fit fine in the head base, but I need to re-think its attachment point. There are 8 small holes in the tpu teeth piece, and I don't think it's that good. I'm going to re-think this, maybe use snap buttons so the tongue can be removed for washing or swapped to another one. Maybe magnets?
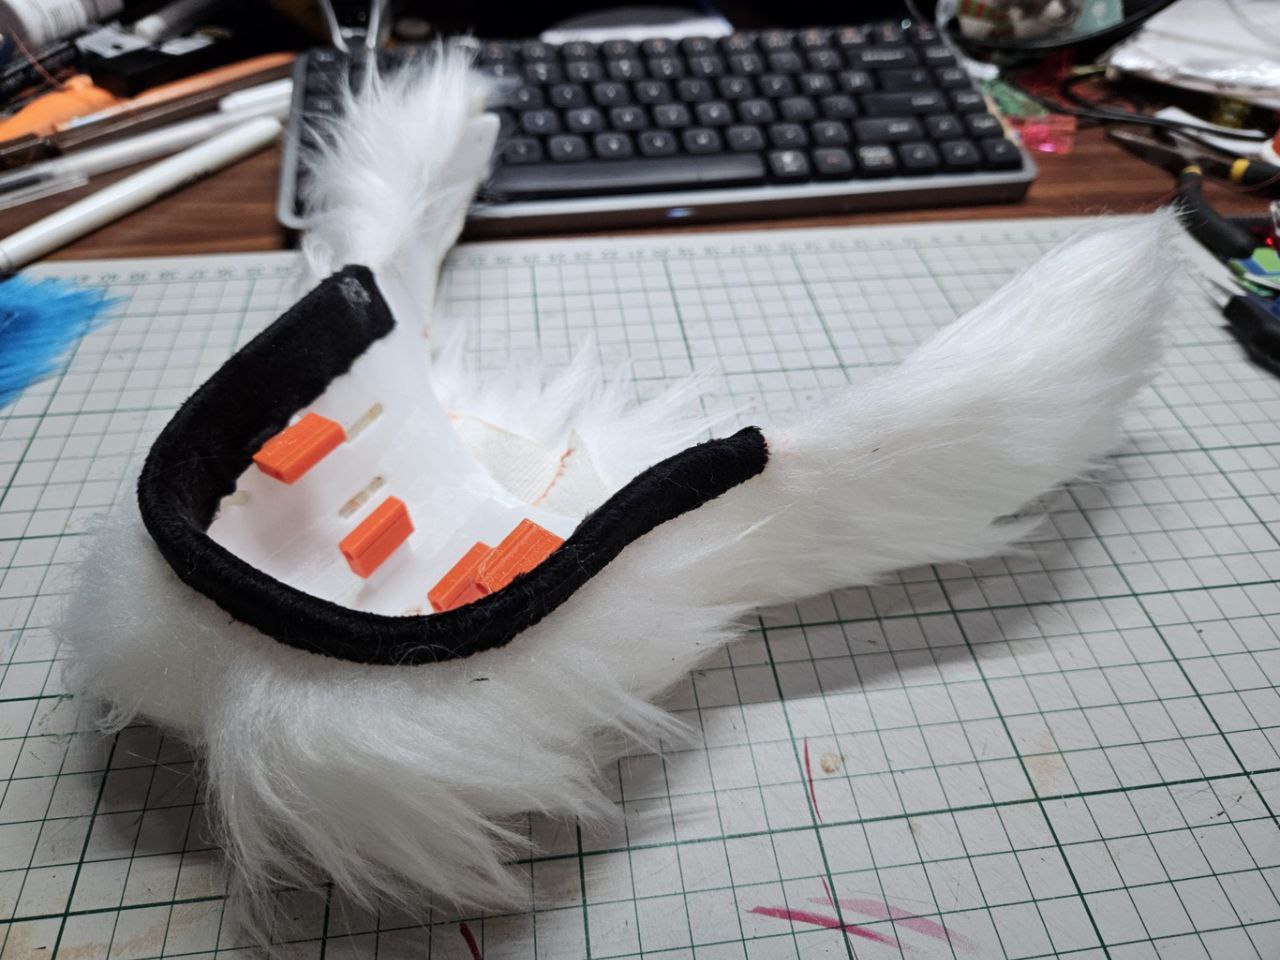
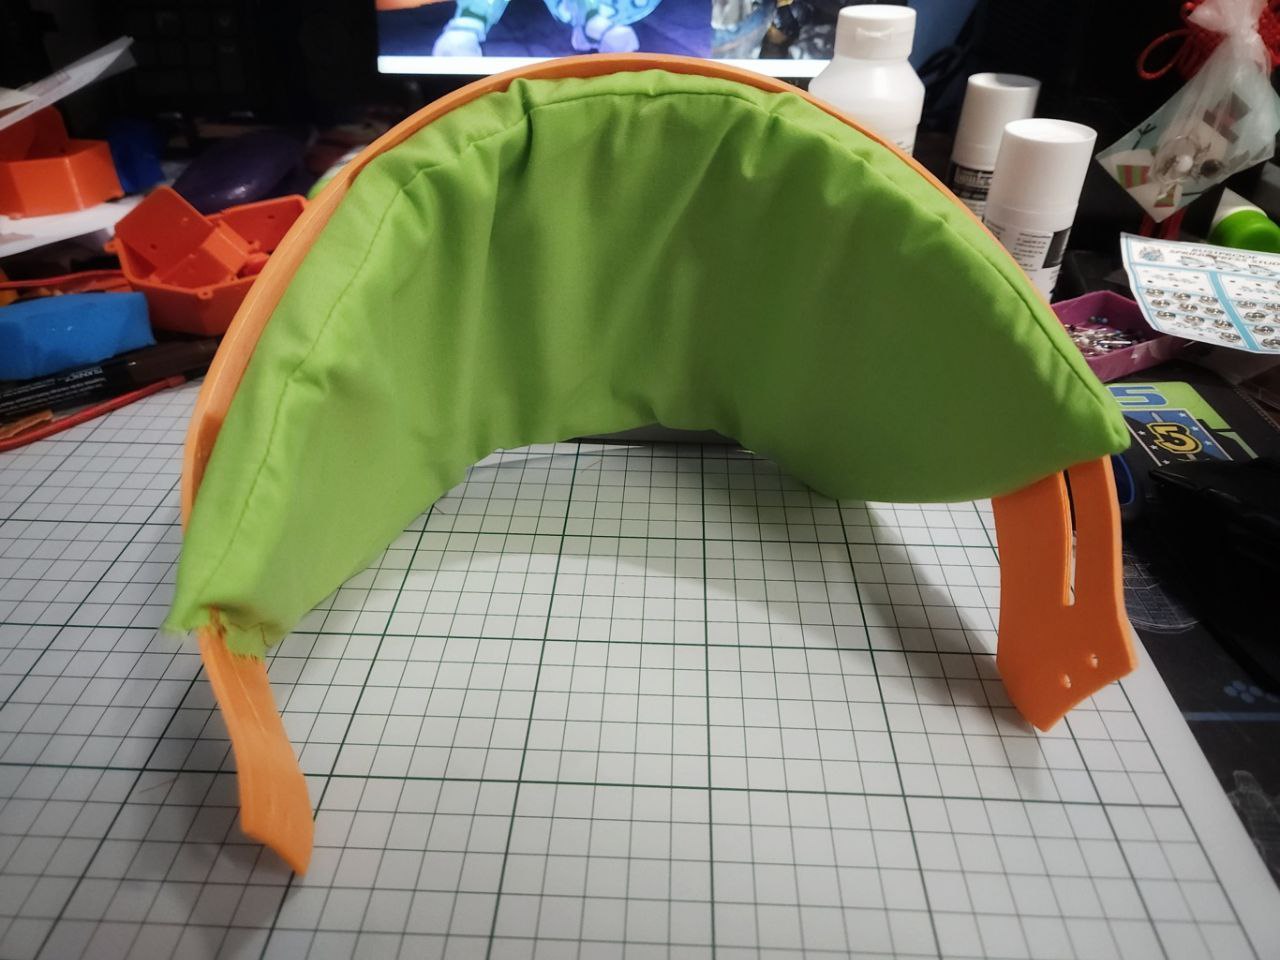
Sewed up more padding - the base can now be worn though it wobbles a fair bit. Next up will be to apply some foam to the area around my temples to (hopefully) stabilize it!
The foam around my cheeks also seem to work well, and I want to do more tests where the foam is extended to spread the pressure. The base is quite warm, need to think of ways to intake/exhaust air...

After some tweaking I found a sole shape that I liked, so went on to print a copy from pla that included a fully raised circumference, as well as a (do not know the technical term) heel stop to see how it fits. It worked great! Next up I started on designing the shoe's uppers.
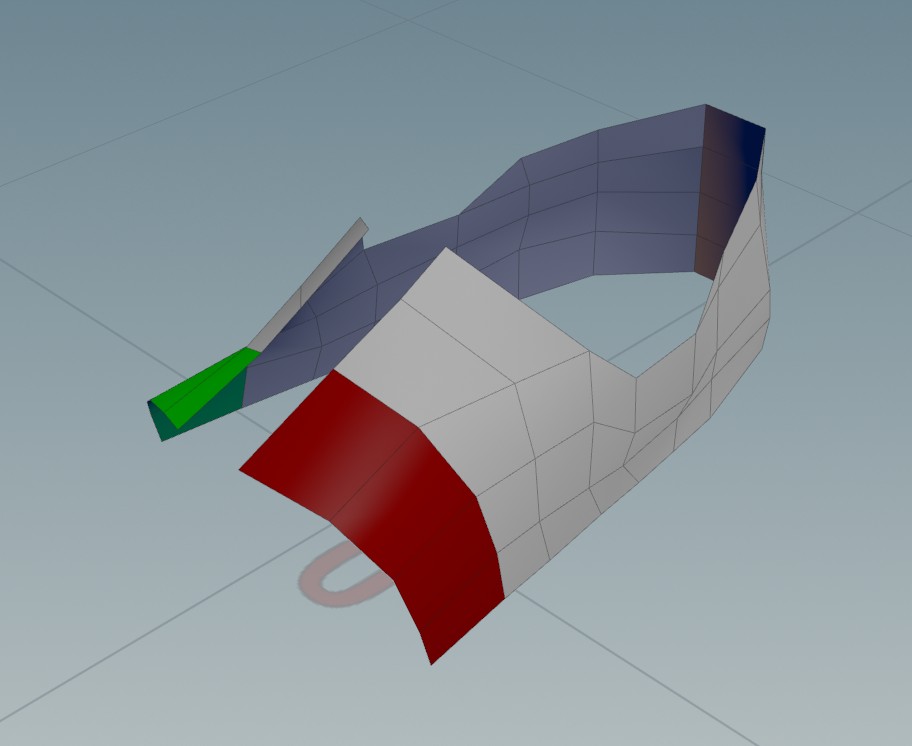
That did not go as well lol. I needed the left and right sections to be symetrical, but the curvature at the base of the shoe was different on either side, so I decided that I had to create a procedural setup that takes in the base curve and allows me to generate the shape of the uppers.
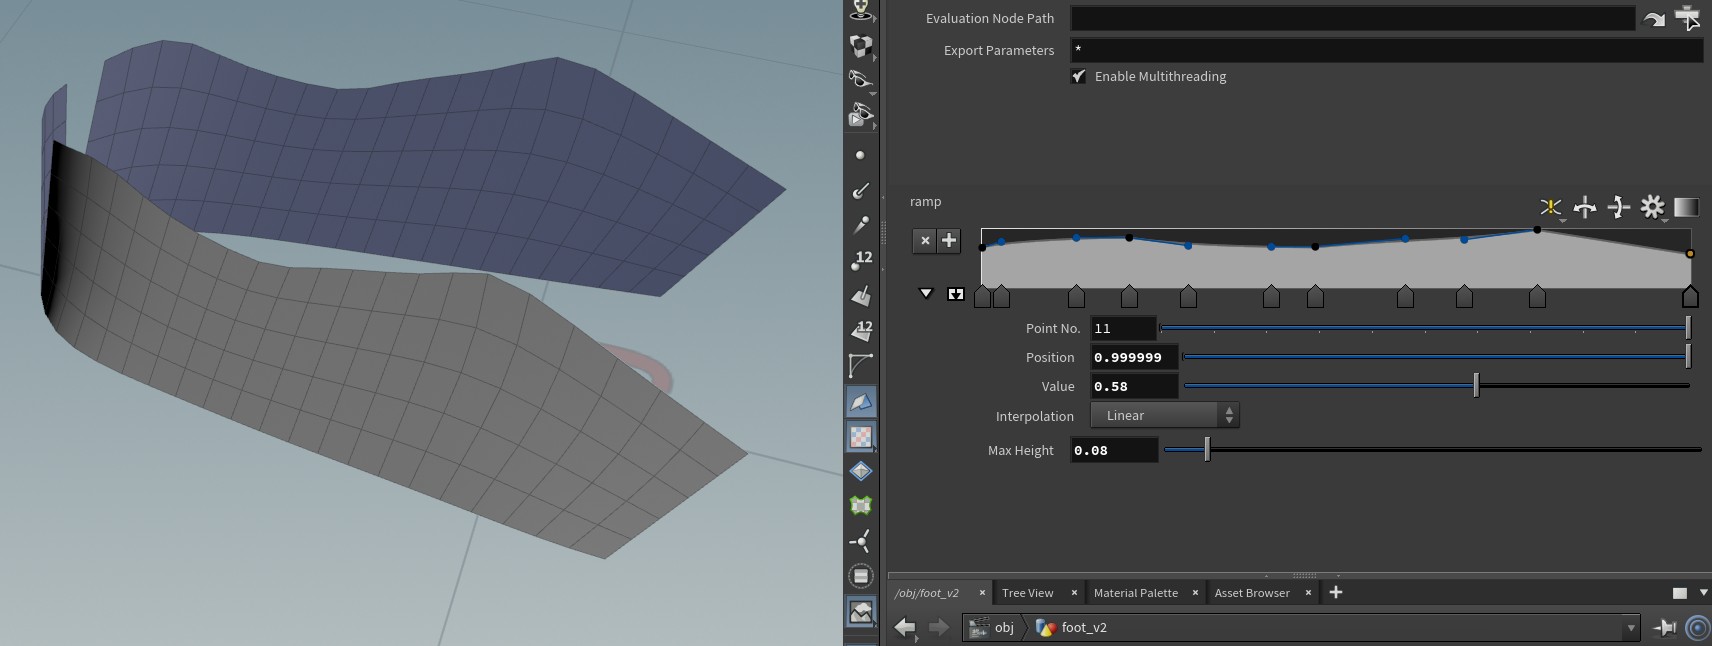
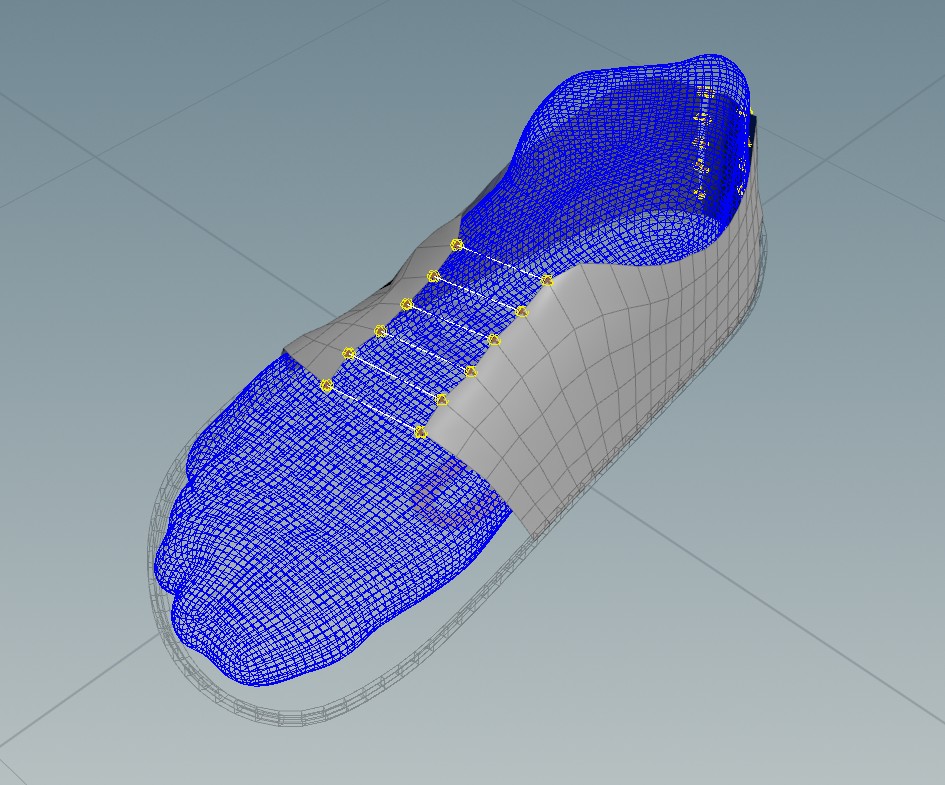
This is fine and dandy but would take annoying long to iterate if I had to test by printing a pattern or 3d printing it in tpu. Instead, I decided to run a vellum simulation that pulls the edges together. [ This worked pretty well ]!
The next step is to integrate the foot paw into the design - for eurofurence, I want this design to give the impression of a snow leopard paw bursting out of a pair of sneakers.

Did some more testing and it seems like 170 and up on my iron's display would be able to create welds that can resist being torn apart. That said, at that temperature the tpu basically melts into a liquid state - in the 180 example, you can see how much it spread out when I apply the roller to it. 170 doesn't spread as much.
I'm wondering if the 0.3mm thick tpu might be too thin and I should step up to like 0.5 or more. (shrugs)
After some more testing, I think the 180 setting is the one to use on my iron: It really welds both layers together. 170 setting is very strong, but going at it for a few times, I finally tore it apart.
Another thing I've noted is that the join can be sliced through when rolling if I roll on top of the middle heat resistant sheet. Photos to explain:
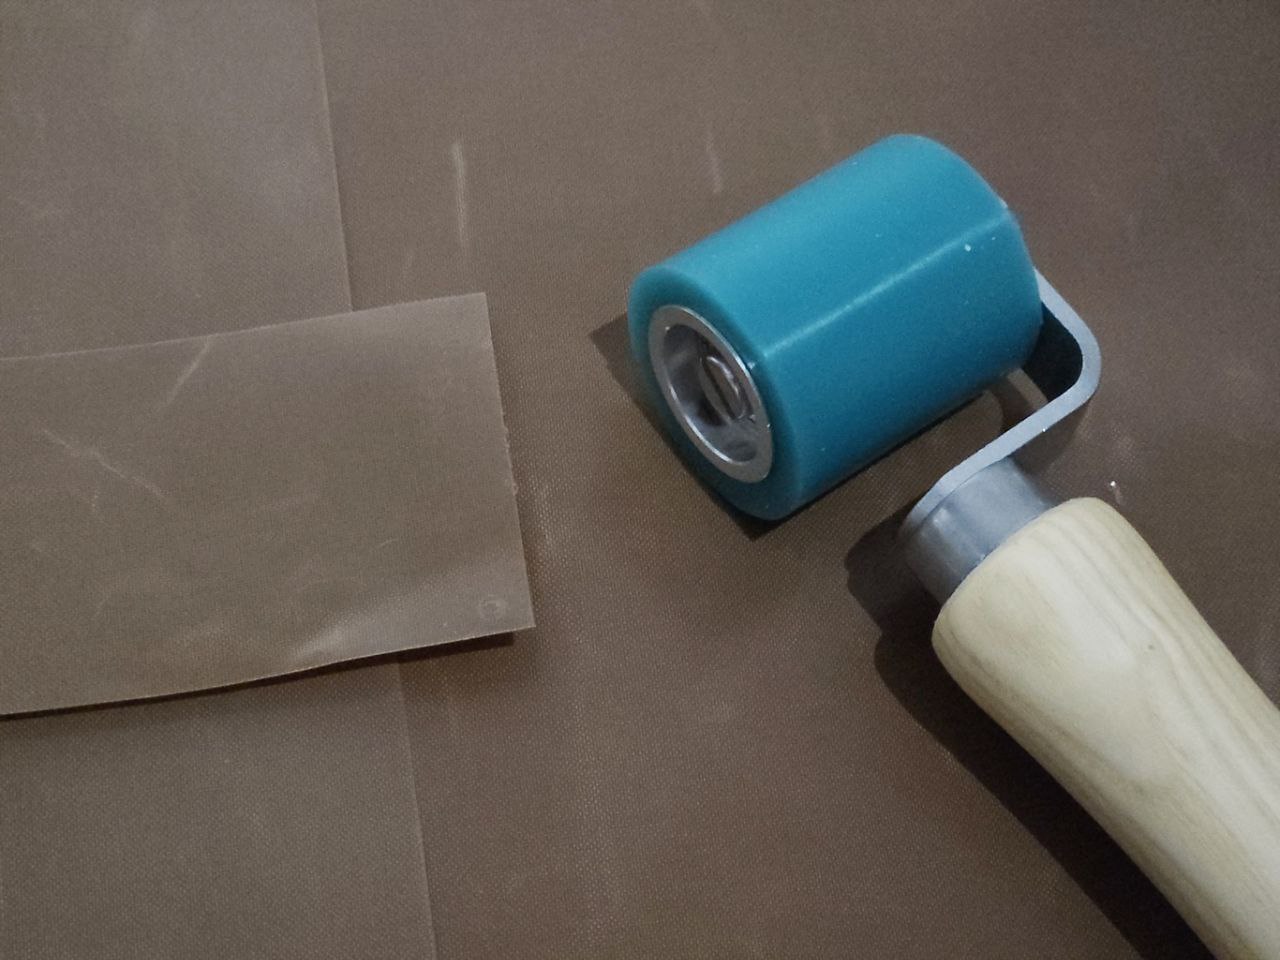
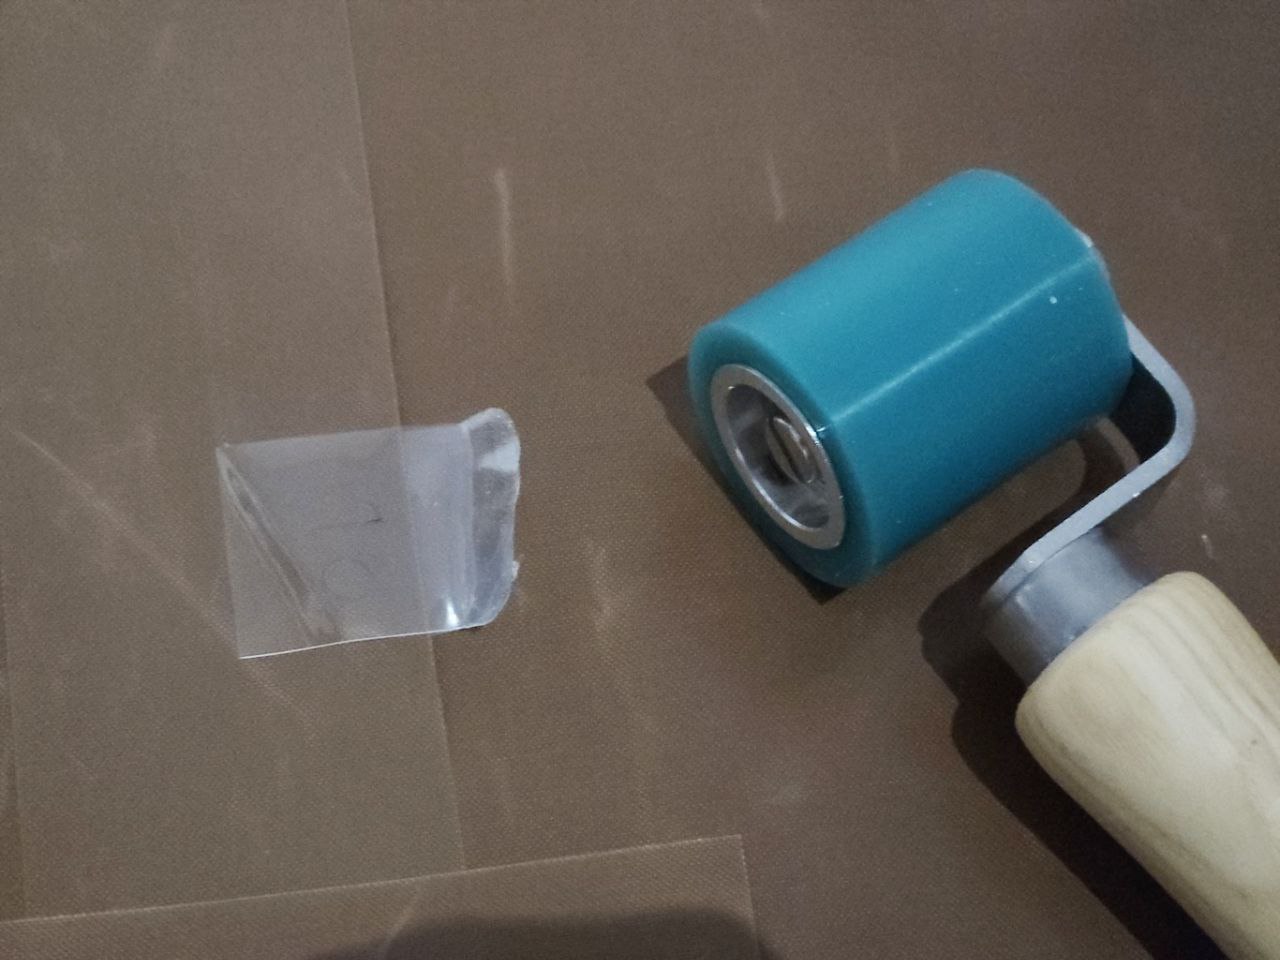
The first photo shows my setup: I have one heat resistant sheet covering my work area, I have one thin strip between the two piece of tpu I'm joining, and then more more strip on top to prevent direct contact between the iron and the tpu sheets. The 2nd photo shows the setup with the top layer removed.
If I were to roll over the strip that sits between the top and bottom sheets, that pushes the tpu sheet above against the edge of the middle heat resistant sheet, shearing/slicing it. I have to take care to make sure I only roll on the melted area only.
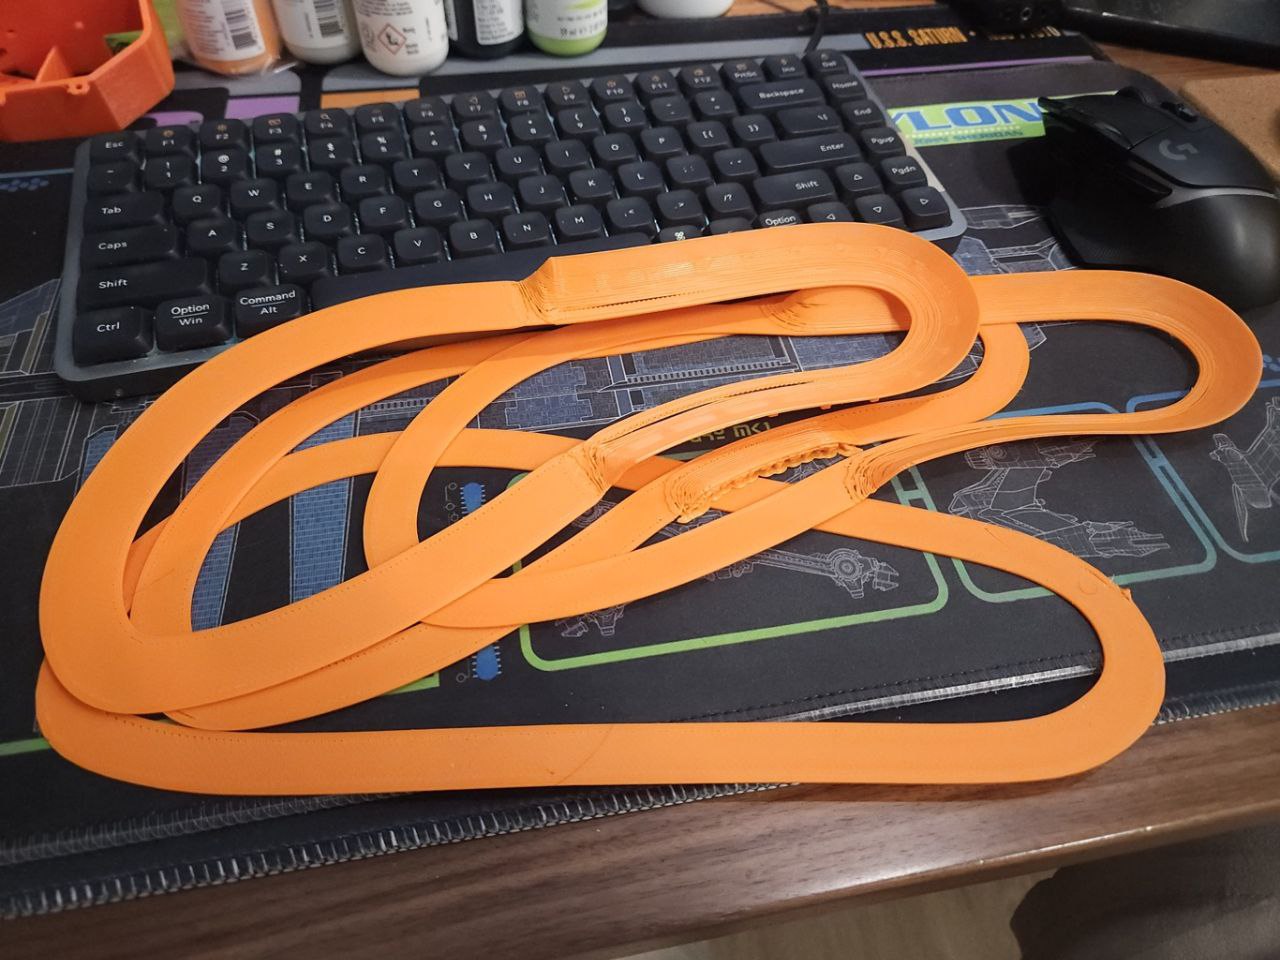
I've worked on the sole today, been trying to figure out how to support the arch of the foot and I decided that I am going for someing waaaaay simpler. The geometry around the arch is a bit too much for me to figure out without wasting lots of filament making adjustments. I think I would really need to do like a cast of my foot with a really good photogrammetry setup/laser scanner to get usable data. I'm just gonna go with a very simple outline of the foot as the sole and go from there. I wear minimalistic shoes anyways with zero support so I have no idea why I was thinking about that. If I really needed arch support, I could just buy some inserts and cut them to size.
Actual shoe contruction is far too complex for me to tackle, from traditional techniques (goodyear welt, blake stitch, etc) to crazy 3d printed stuff from Zellerfeld. I think I'm going to attack this with a hybrid approach - 3d printing parts of the shoe to be assembled together, not just 3d printing it all at a go.
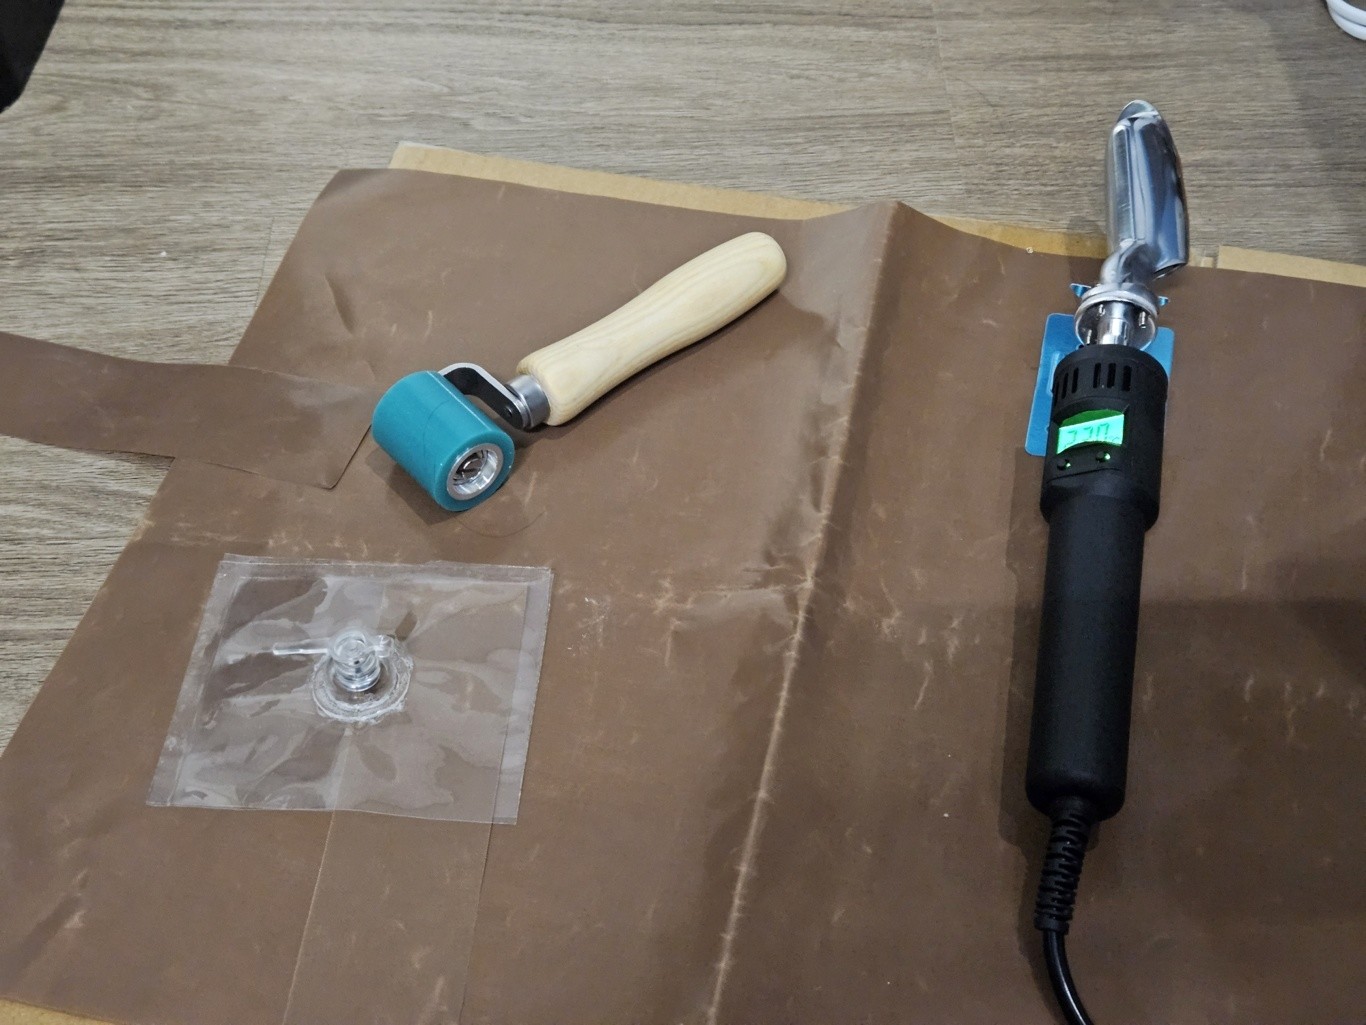
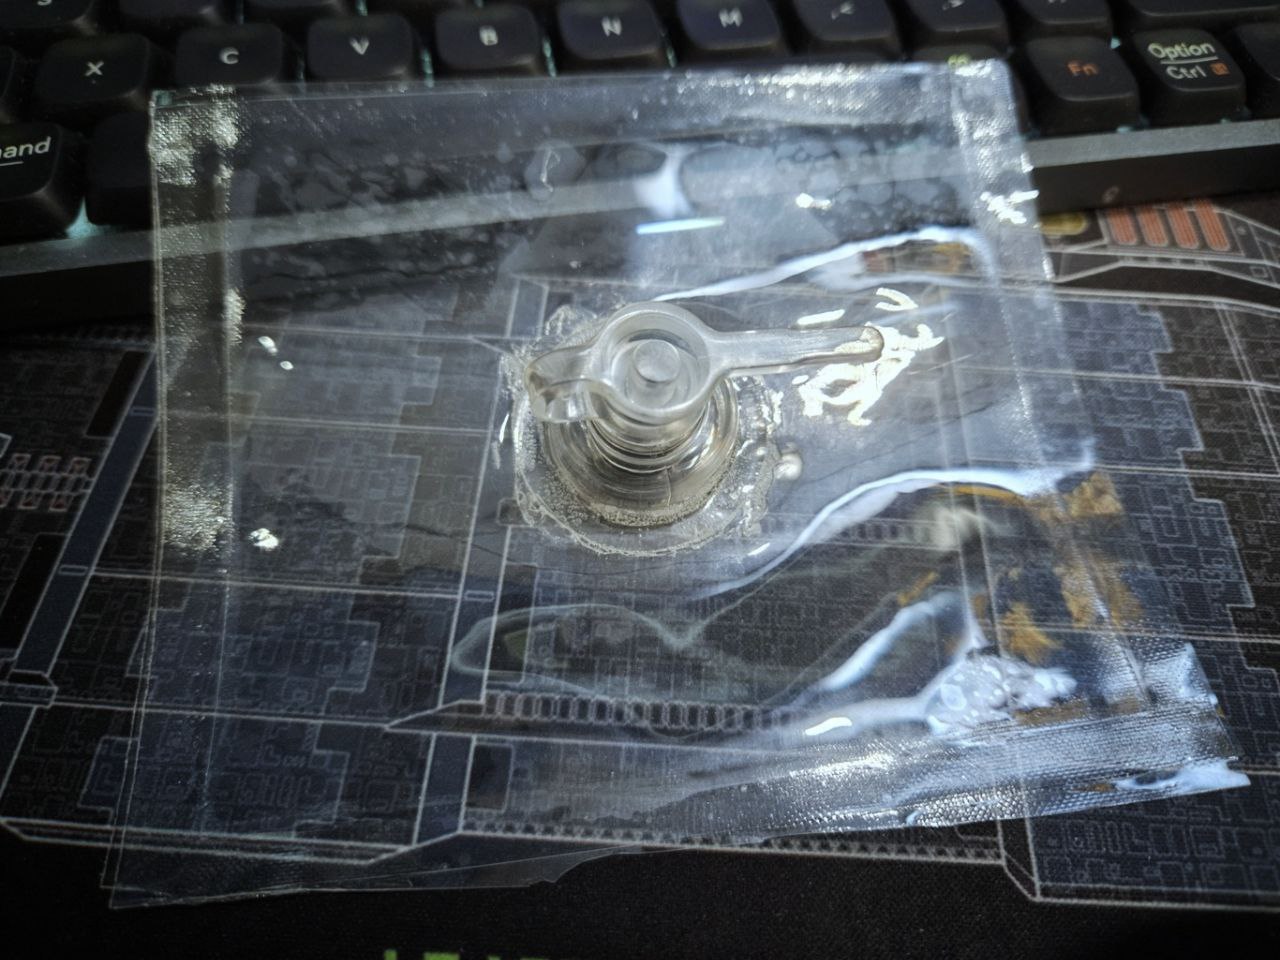

Quick test with heat seaming the tpu. Tested on some small strips to figure out if the layerring of heat resistant teflon sheets above the seam would allow the heat to pass through without just melting the tpu - it did - so I proceeded to testing. Initially I thought it went really well, but after some testing the seams easily blew out by forcefully blowing into the valve (middle image). I then tried making the seams thicker and it seemed to work! I did notice that this caused alot of bubbling to appear (3rd image). I'm guessing that is caused by the moisture in my breath.
I then forcefully squished it, and it held up for a bit before one of the seams popped. :/
I was going to put the blame on the moisture, but giving it a bit more though, I wonder if it's because I might have applied too much heat, damaging the polymers? It is definitely hot enough, I did test touching the iron directly to the TPU and it resulted in a melty mess (Not the metal directly to the tpu though, the iron came with a sticker that was supposed to be put on before applying the iron to leather and I put it on.)
TPU for a 3d printer melts around 200-220C, and while I set the leather iron to 220, there is no guarantee that _is_ 220C. Am tempted to get a heat gun but do those work on reflective surfaces?
Gonna think for a bit. The glue did turn out great though! It seemed to have formed a good bond. It does looks a bit messy, and I think designing something circular to provide a clamping force might help with adhesion.
The jaw now works pretty well, the springs close the jaw fine, and the fangs slide into their slot perfectly. The internal structure has been modified several times, mostly beefing the connecton points up. I can't wait for the next iteration with all the padding in so I don't have to use my paw to hold up the back strap lol.
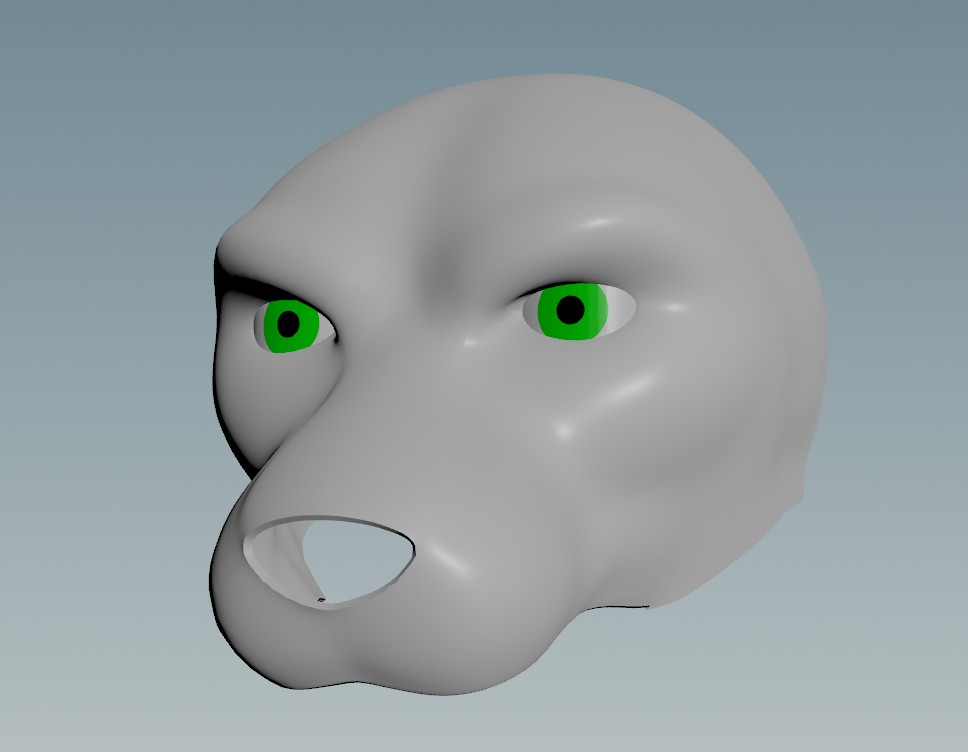
I've been amiss in figuring out the eyes. My original idea has been to use an eye mesh similar to toony suits. I've already aquired some mesh, and my plan is to airbrush the main colours (white/green/black) then use a paintbrush to (attempt to) put in finer detail. As yet I've not yet figured out how to mount the mesh. Have some ideas just need to think of a design that would fit into the head.
Been thinking about the shoe design as well, wish I have like at least an idex printer or tool changer just to have washable supports.
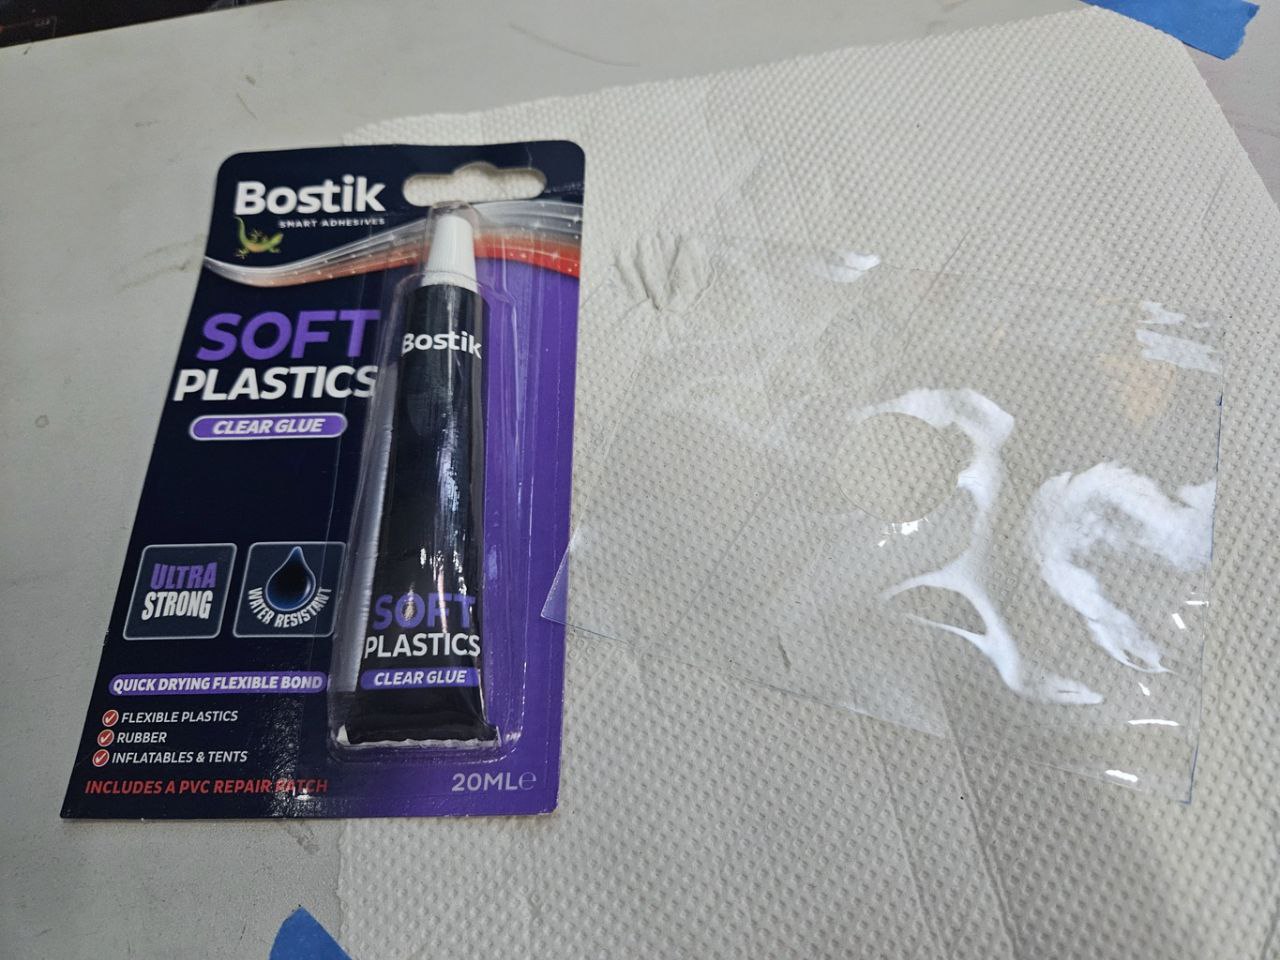
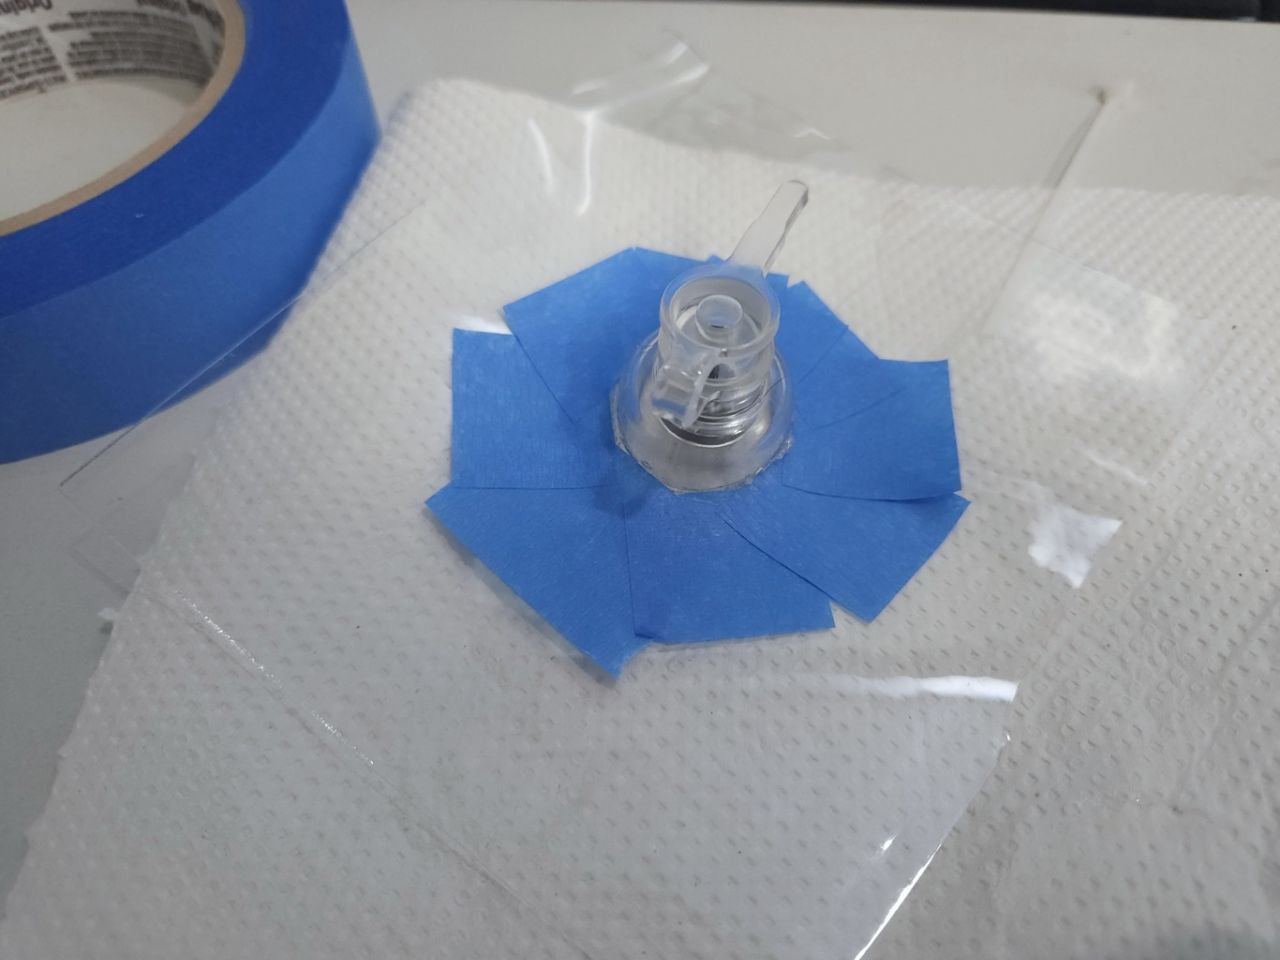
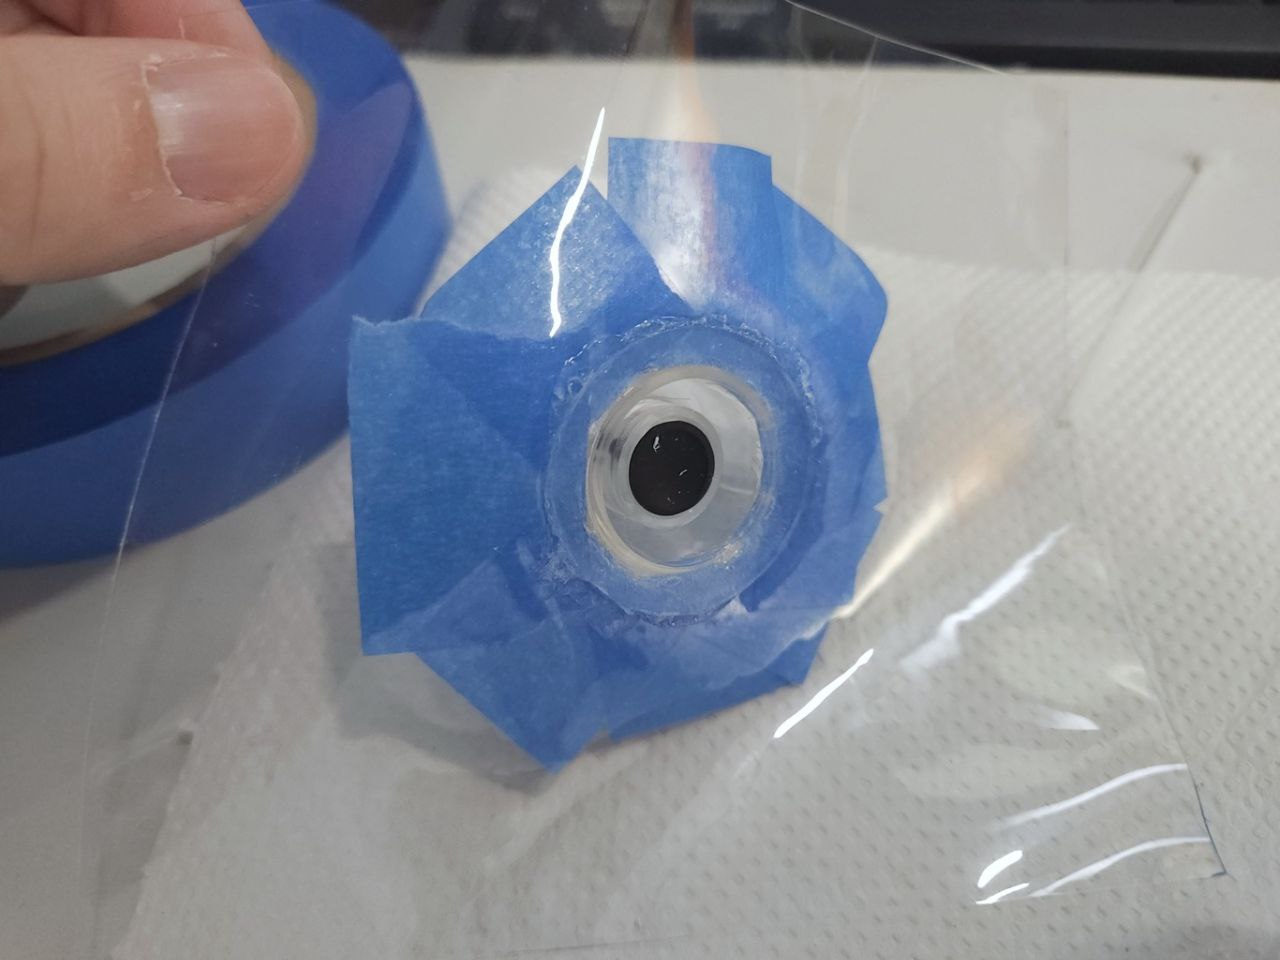
My tpu sheet arrived! It's a 0.3mm thick sheet that will be used to create an inflatable that fits inside my tail, instead of stuffing. I think I mentioned before this is to save weight and space when flying to conventions.
Atm I'm going to be making a very small inflatable to test out what kind of glues will work for the valve, as well as testing out heat welding the seams. I happened upon this Bostik Soft Plastics glue that can fix flexible materials like polyurethane.... which is tpu. So I've glued in a valve and according to the data sheet, takes 24hrs to set with max strength after 48hrs. Gonna leave it for awhile then :) In addition I've also glued together some printed tpu scraps to see if this glue will work.
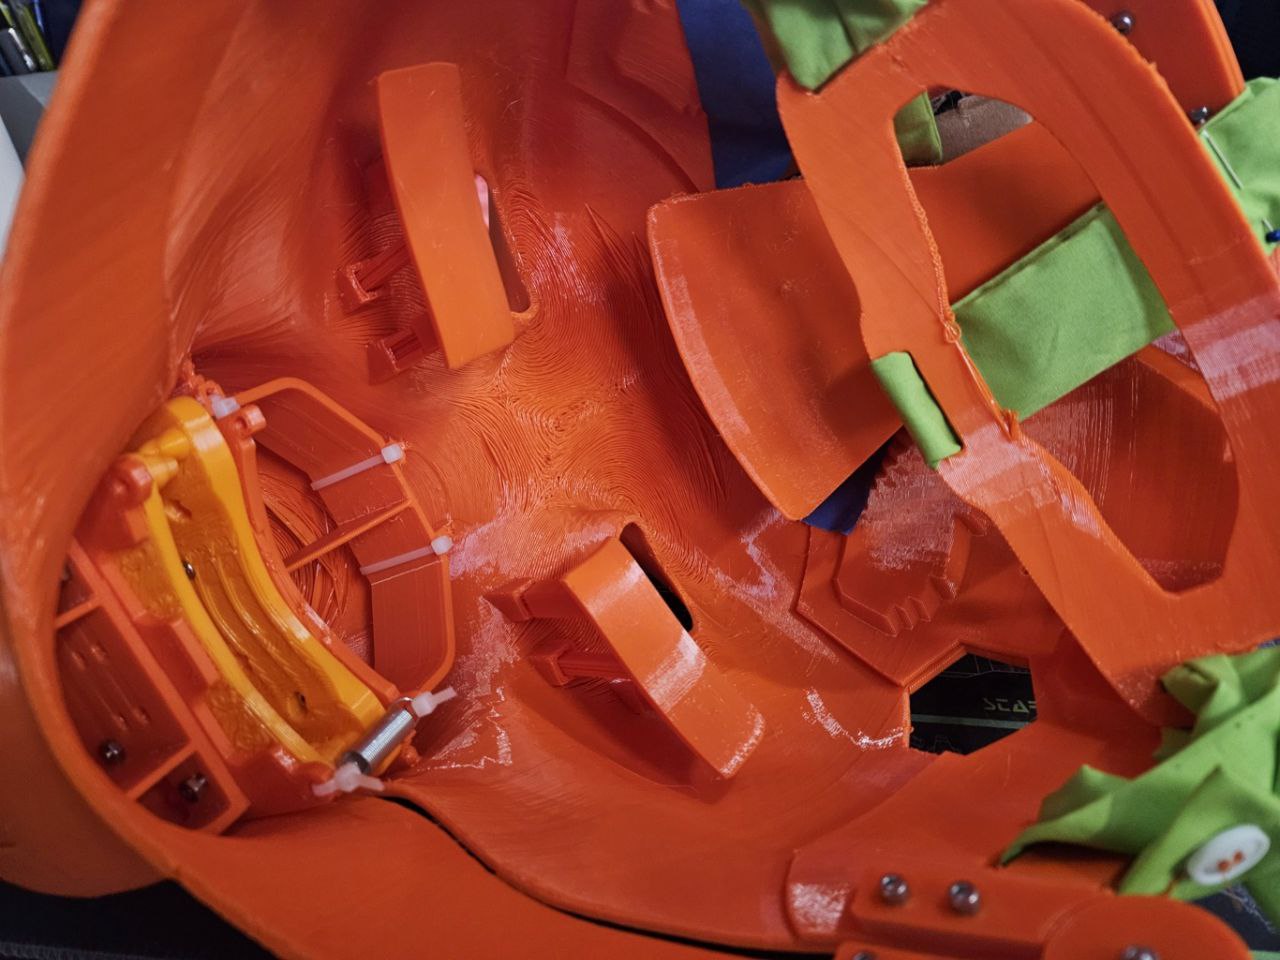
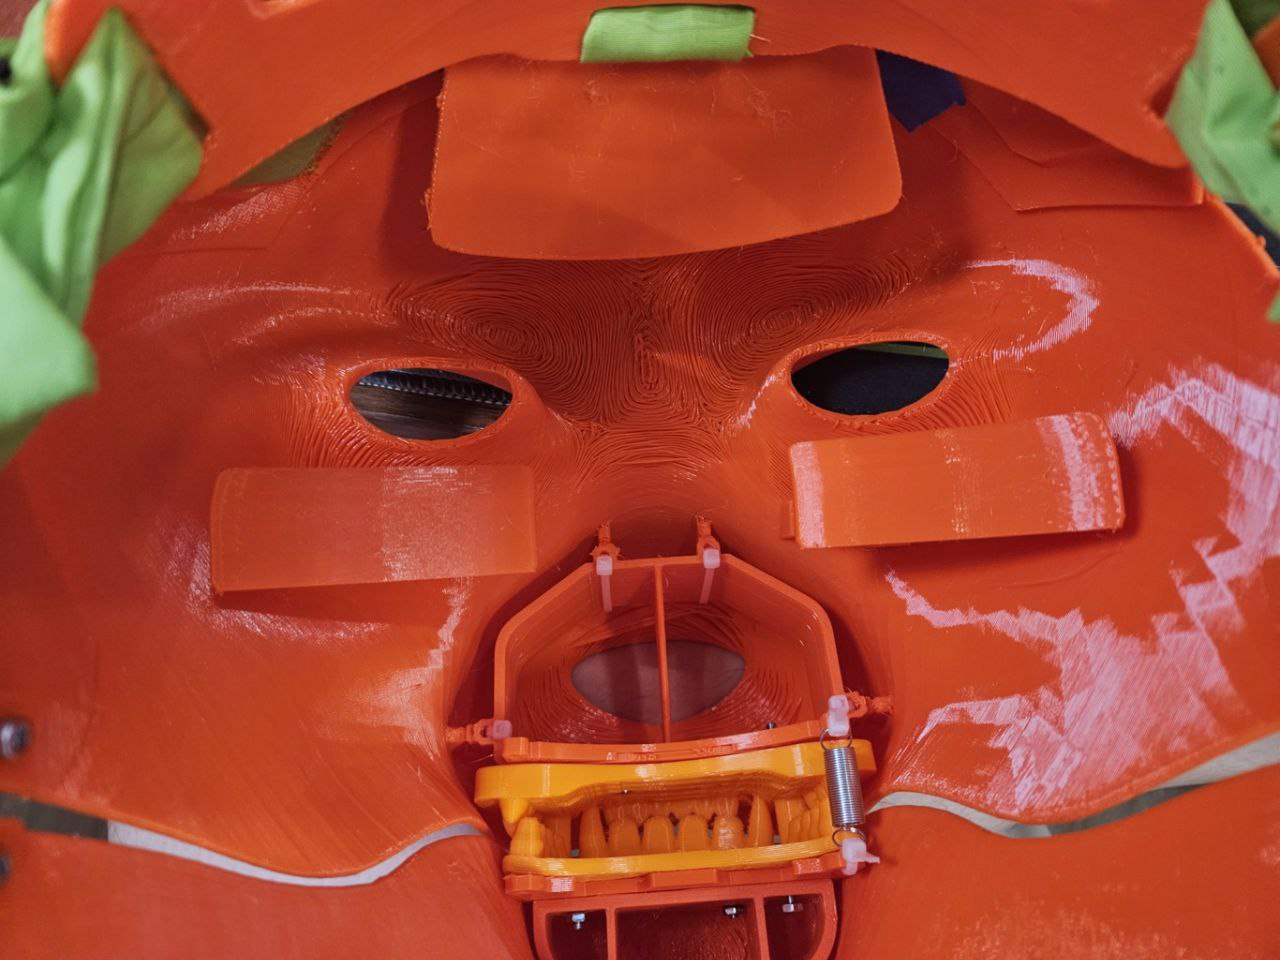
The updated head was also printed, and the internal structure _seems_ to work. I did find that it's quite difficult to access where the nuts are to be placed, will have a think to see if I can simplify it.
The variable cheek padding also worked out and I know how much it needs to extend towards my face. The next setup will be to have it expanded so as to increase the surface area it can support.
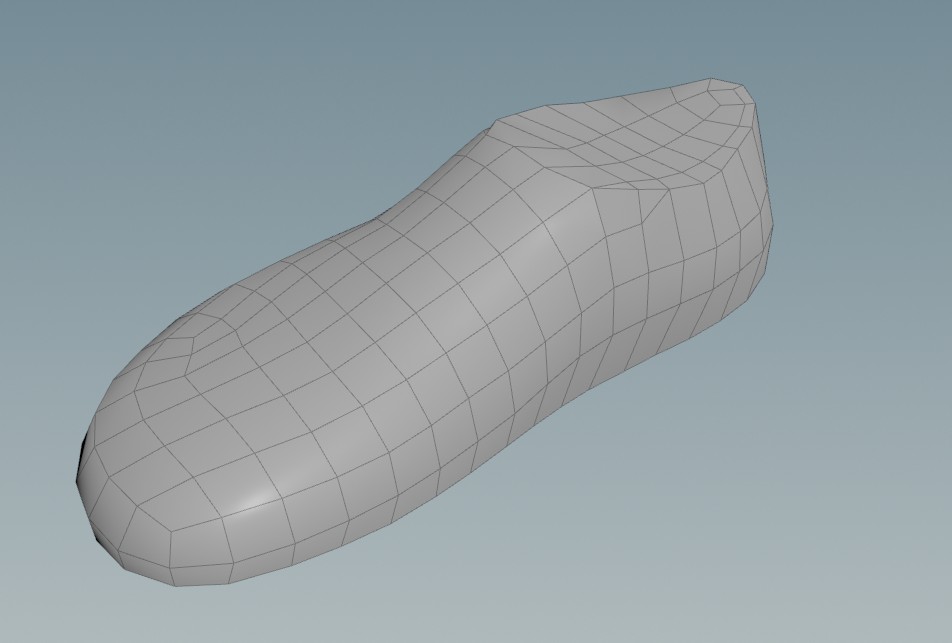
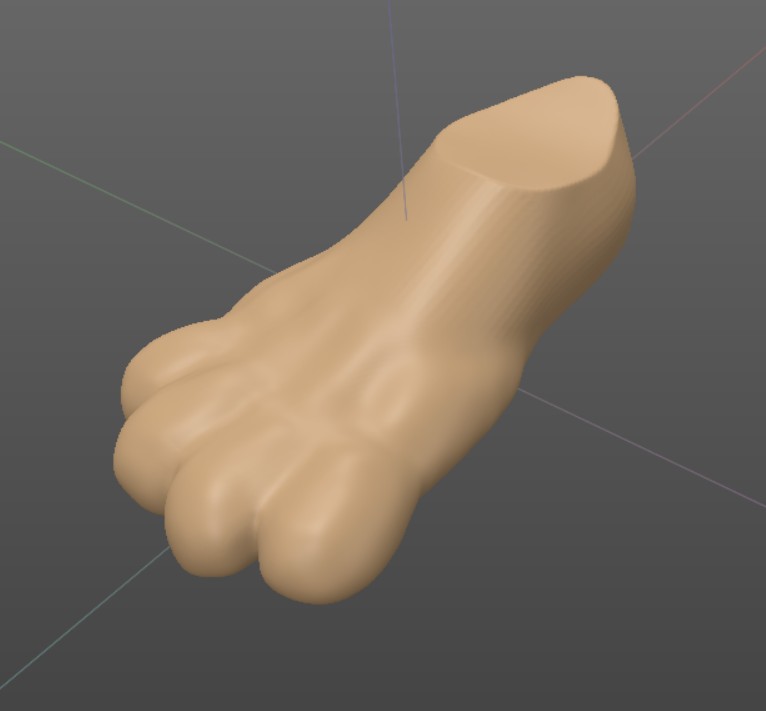
I've re-topo'd the sculpt from yesterday, and did some sculpting on it. Can't wait to try making a shoe out of this :)
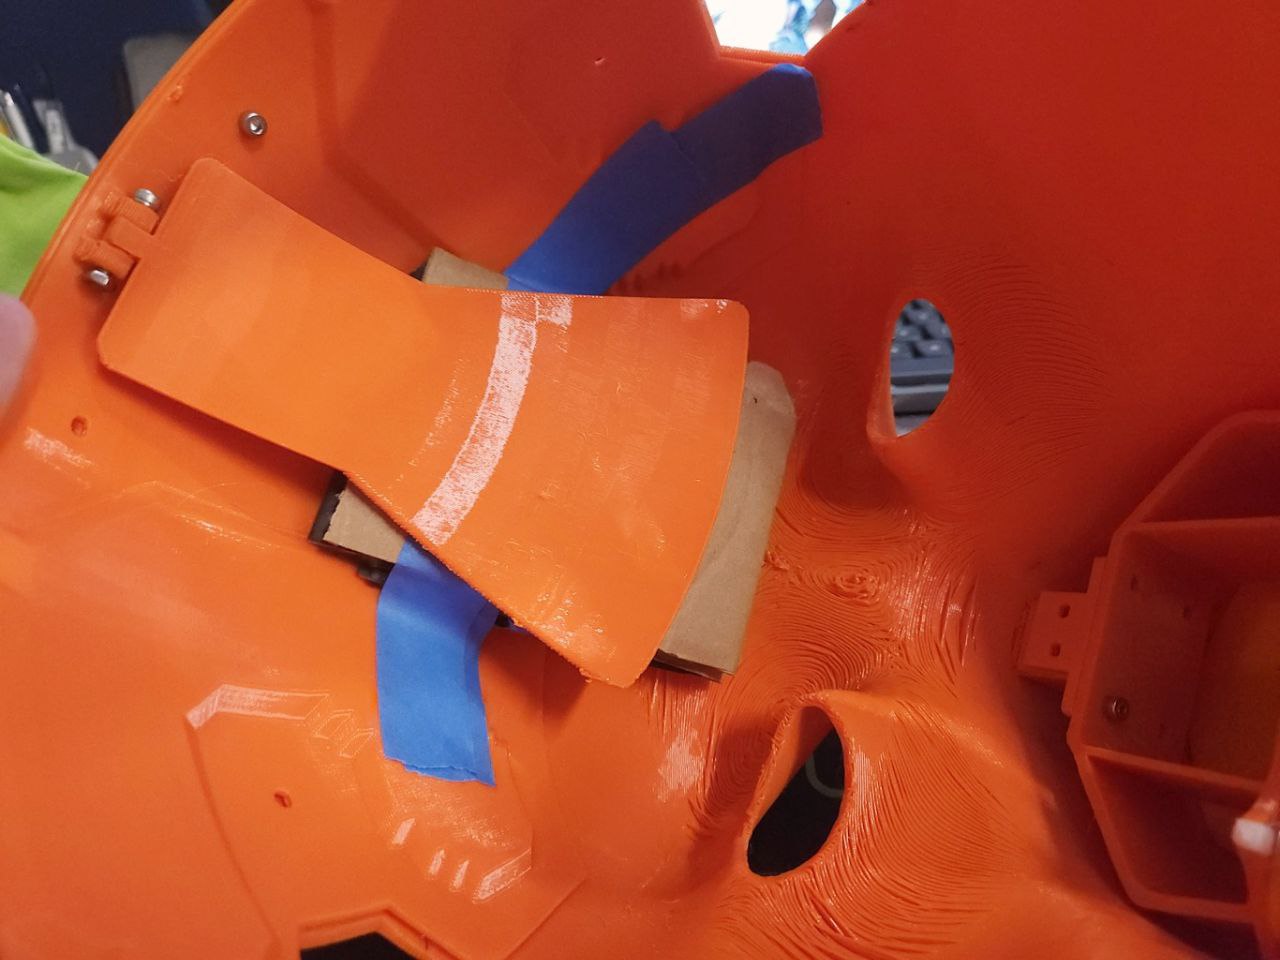
I think for the final version there won't be a hinge, I'm going to design some kind of support structure that attaches to the internal support, so it'd allow swapping to different heights/angles.
Another thing I'm considering is splitting up the head into two piece (or more). I don't like the idea. But it might make iterating on it faster - the rear end of the head is not going to change much atm only the front. Ahhhhh. I'll give it a think.
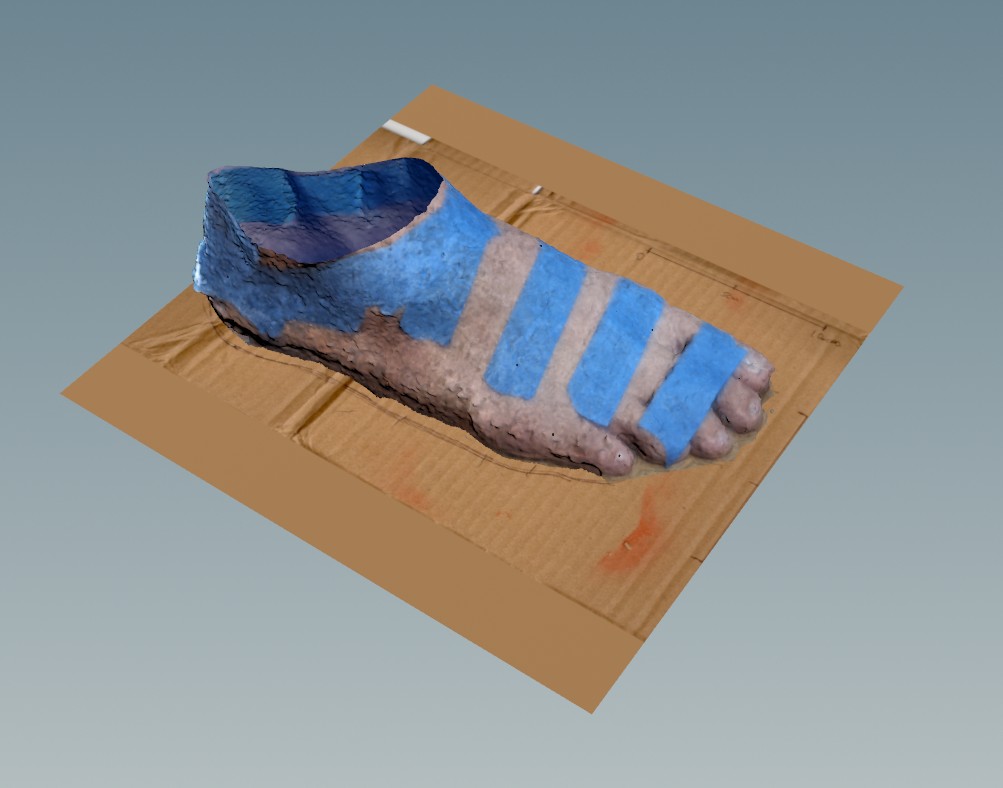
Currently just waiting for prints to be done, and I've come up with a better photogrammetry scan of my foot - I'm hoping to build a shoe made out of 3d printed tpu. This should make for a good reference. The tape I've attached to my foot has two purposes, first to help with the feature detection, and also a rough guide where the curve of the foot should should be versus my ankles.
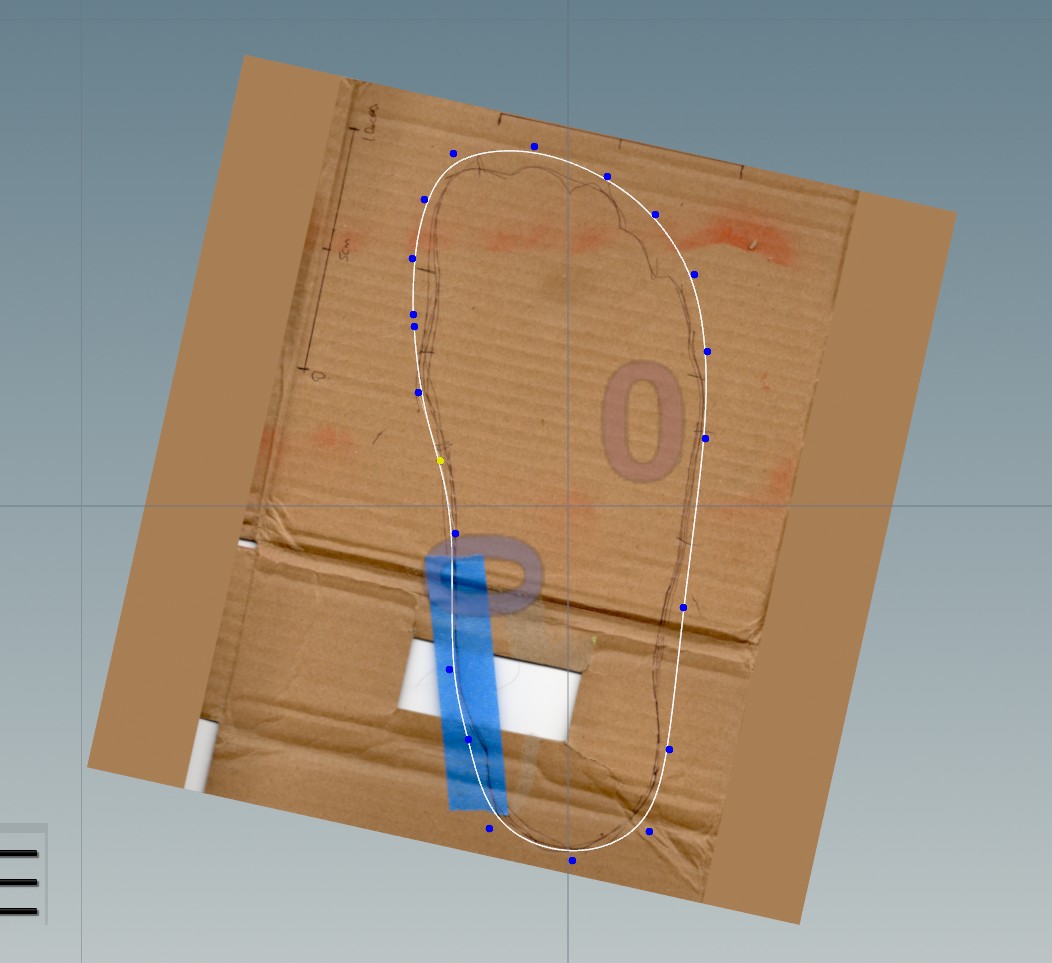
The curve I drew around my foot was scanned in and scaled appropriately. This allows me to draw a shape that could be used for a sole. The foot scan should be able to be used as a rough guide
to generate a pattern for the upper.
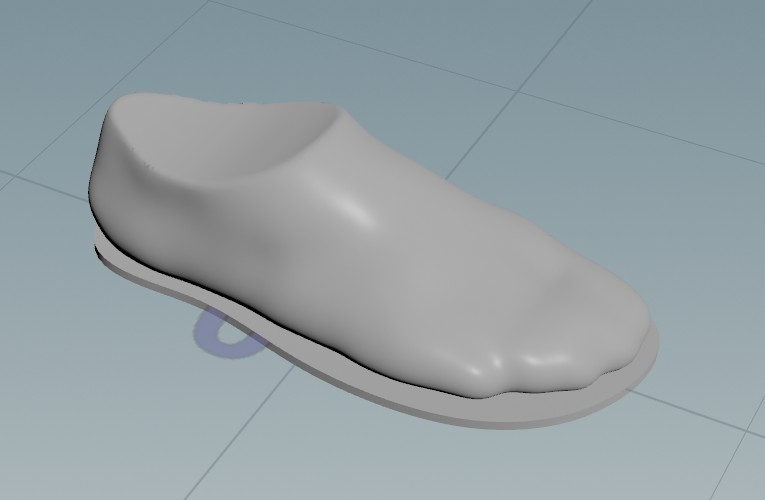
I don't need the underside of the foot so with some dot product magic, pulled all the points that were facing downwards to y=0
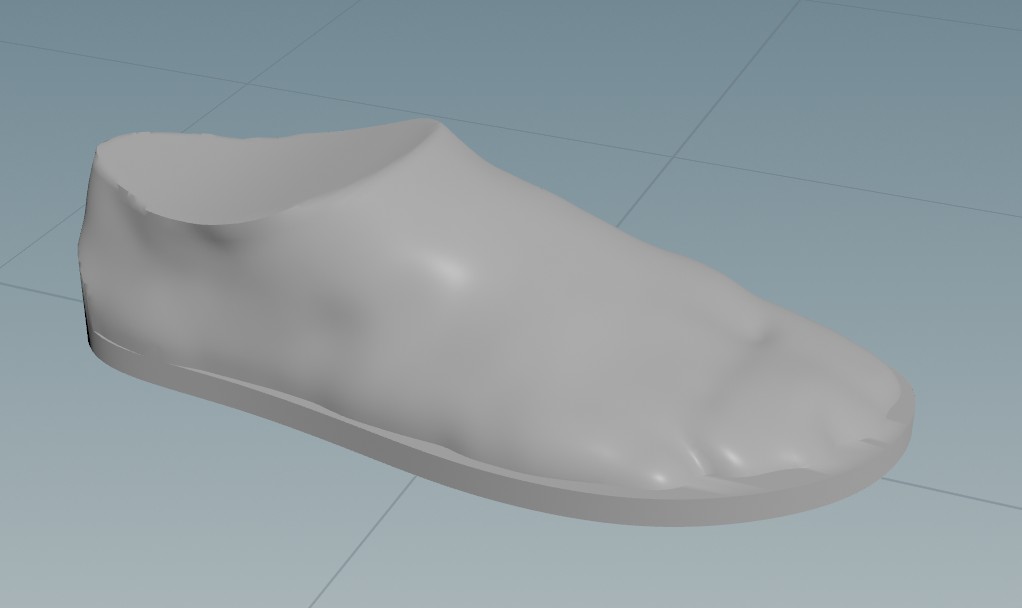
And some sculpting in 3DC Printing to merge the toes/sides etc into the sole, as well as smooth out the overall profile. This is pretty rough, so the next step will be to bring it back into houdini to re-topo the mesh.
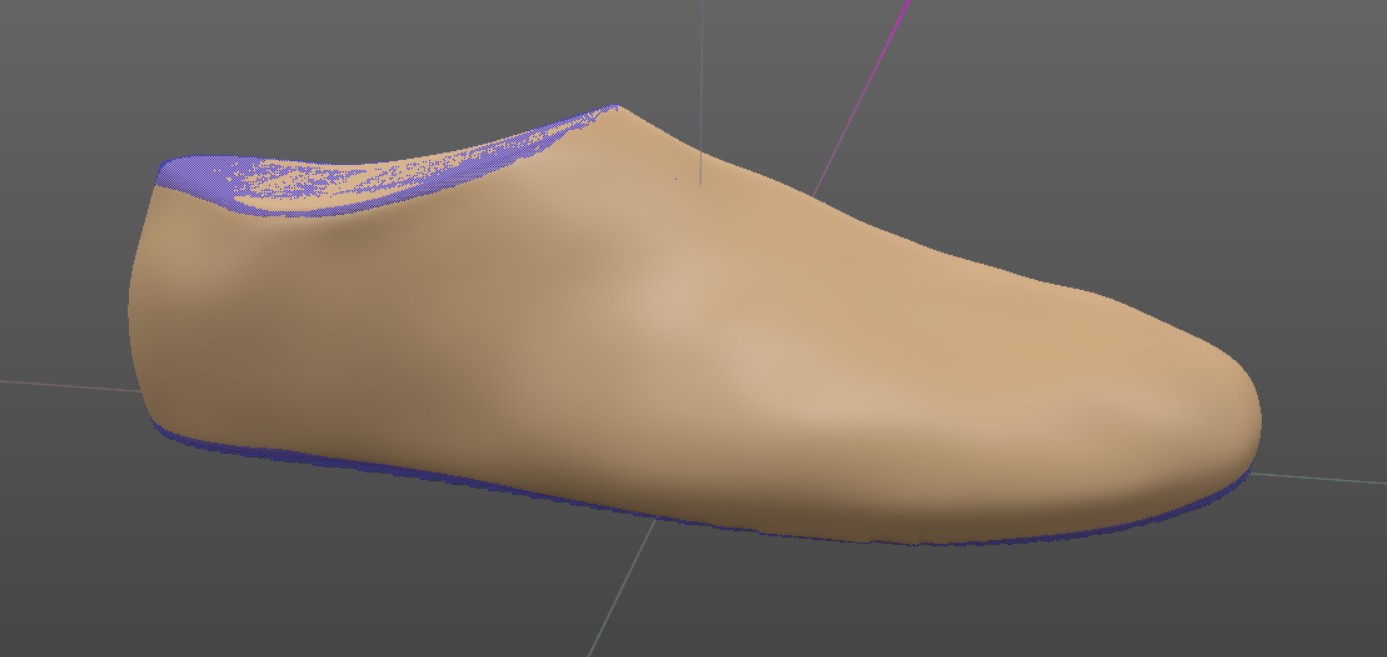
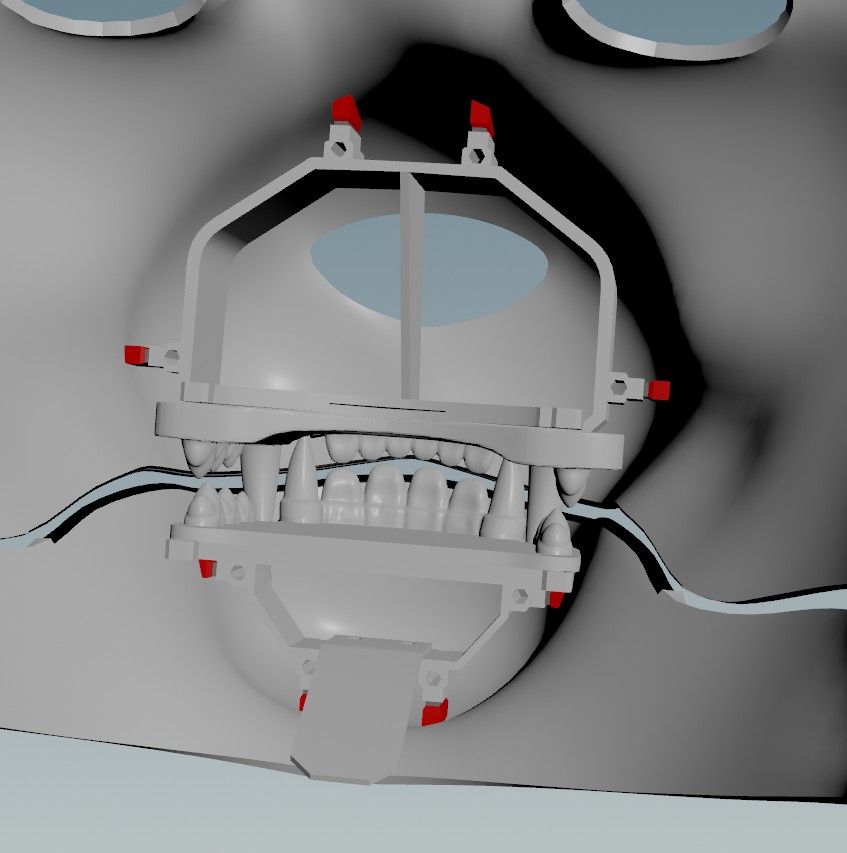
Totally redesigned the internal structure! Surprisingly this took only a few hours. I also updated the model for the teeth, the rear molars are more realistic. I've also added a piece that jutts out that allows my jaw to push down on.
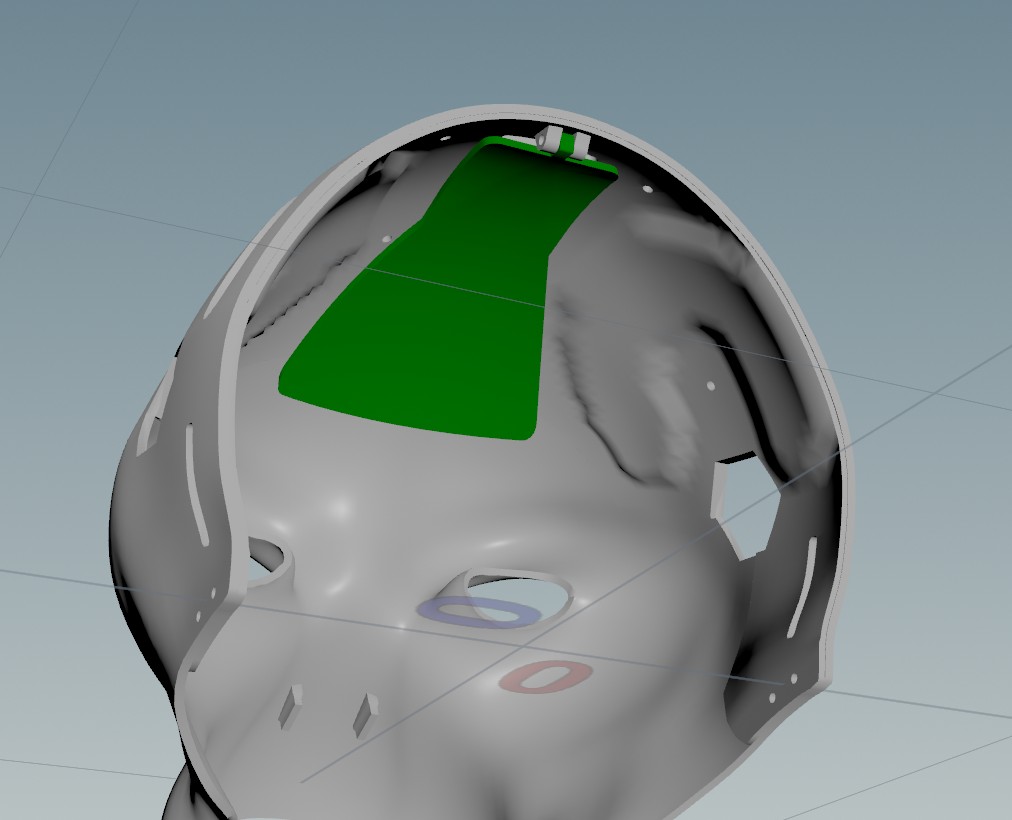

This is an idea I am experimenting with. A piece swivels and allows for various angles. This theoretically allows for the angle of the base to be adjusted against my line of sight. Will it work? Well it's on the printer XD
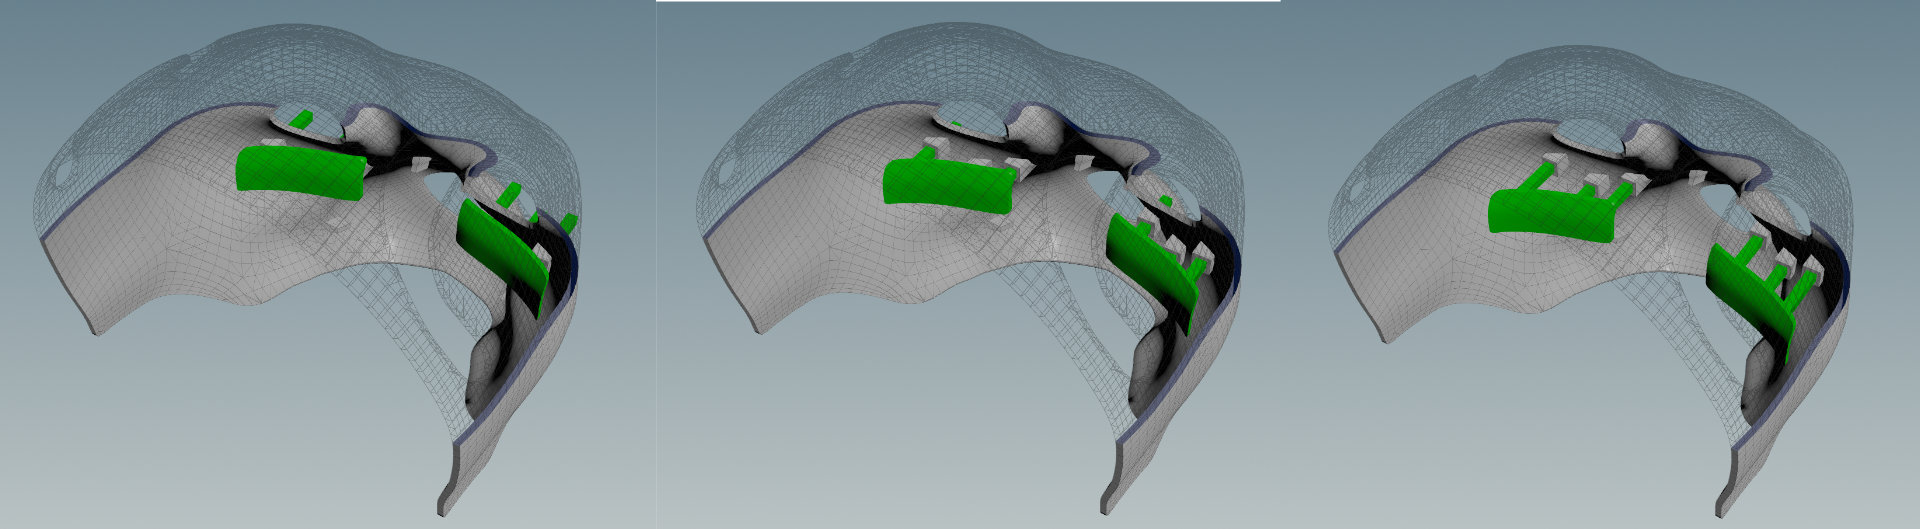
Last thing I'm experimenting with today is a padding holder. I hope it will work together with the headband and the head attitude adjuster previously mentioned to hold the headbase to my head securly and comfortably.
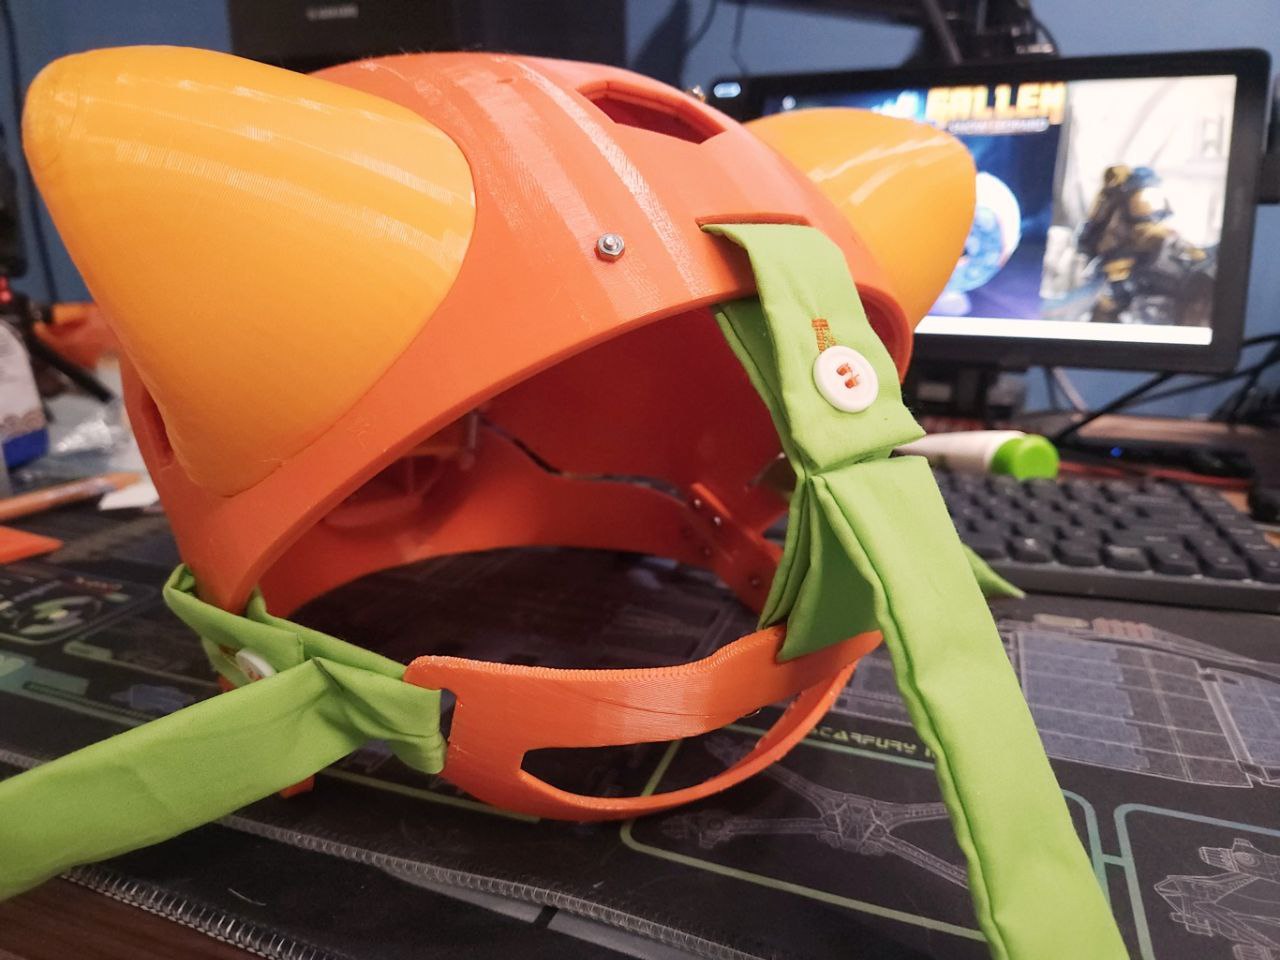
Looks like I need some foam before I can make further progress :/ The straps are also far too long... do I need to rethink how the headstraps work?
In any case, I want to simplyfy the design by using adhesives instead of fasteners.
This are the parts that form the current design:
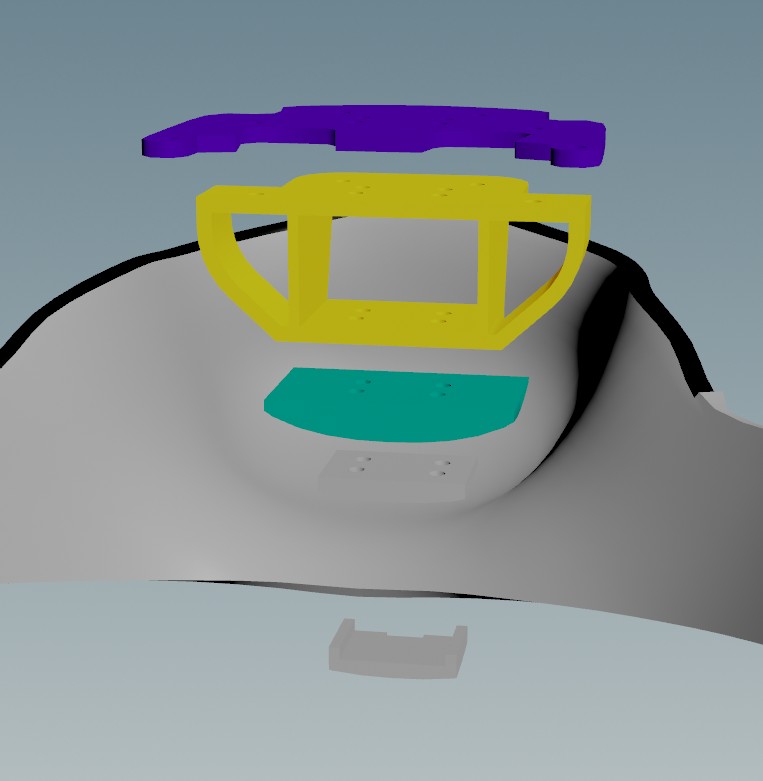
Here's my new concept design:
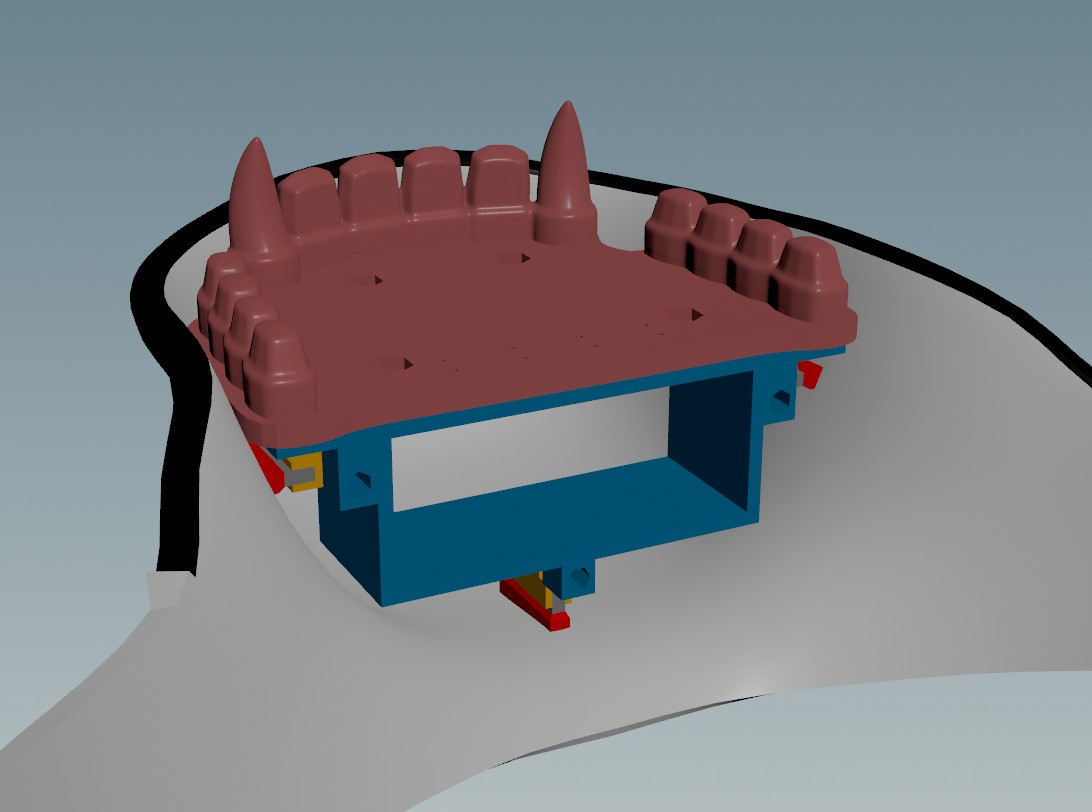
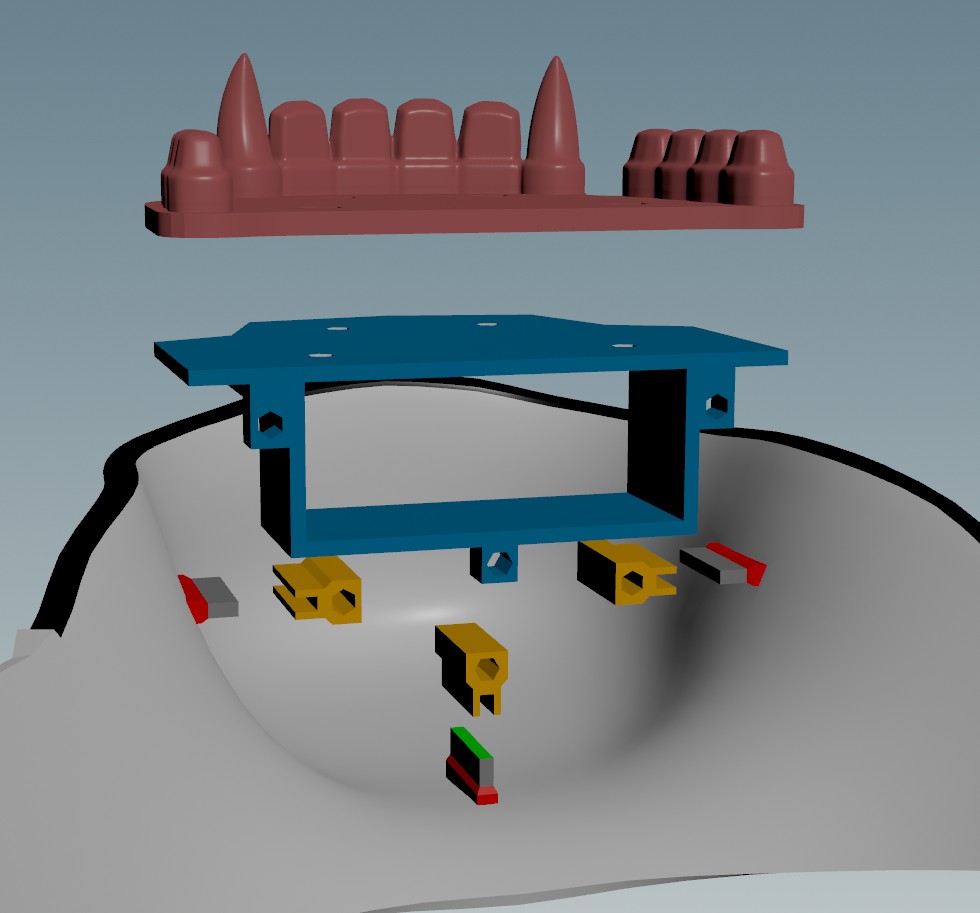
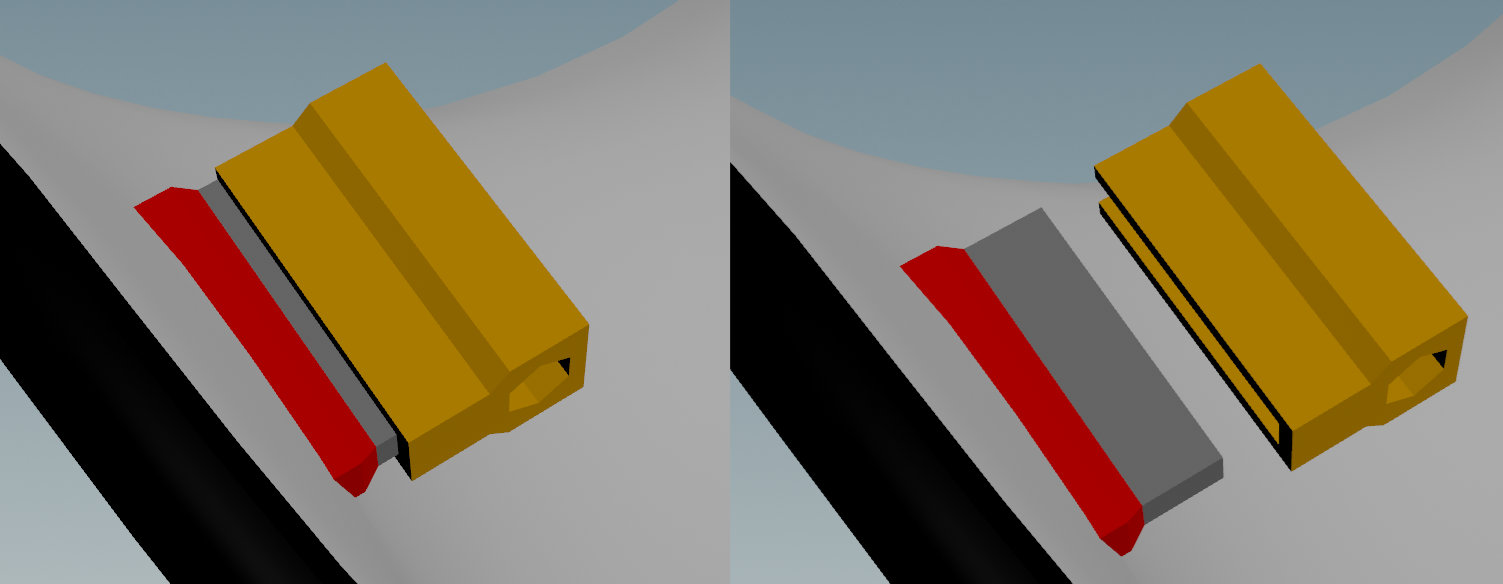
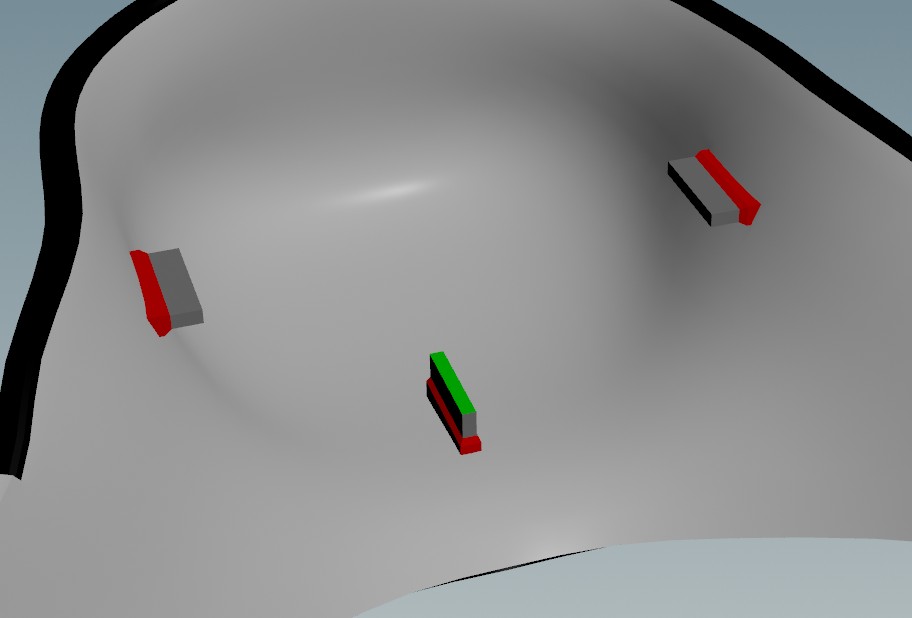
I actually made up a houdini digital asset to procedurally generate pegs that will automatically match the curvature of the mesh the red face is pointing at.
Screw mounts, in orange, are then glued to these pegs.
The internal structure is now just one piece and mount onto the screw mounts.
I need to try this out, I defintely have some concerns that excessive deformations will rip the 3 pegs off. However... petg has good flex so hopefullt it'll work. Also, I've tested some super glue that comes in gel form and that stuff is wicked strong - if something breaks it should be pretty straightforward to fix. Will still need to have a think to see if I can include some form of ability for the screws to slide horizontally to take up the deformation (slightly wider, horizontal screw holes might work?)
This design should also be slightly lighter!
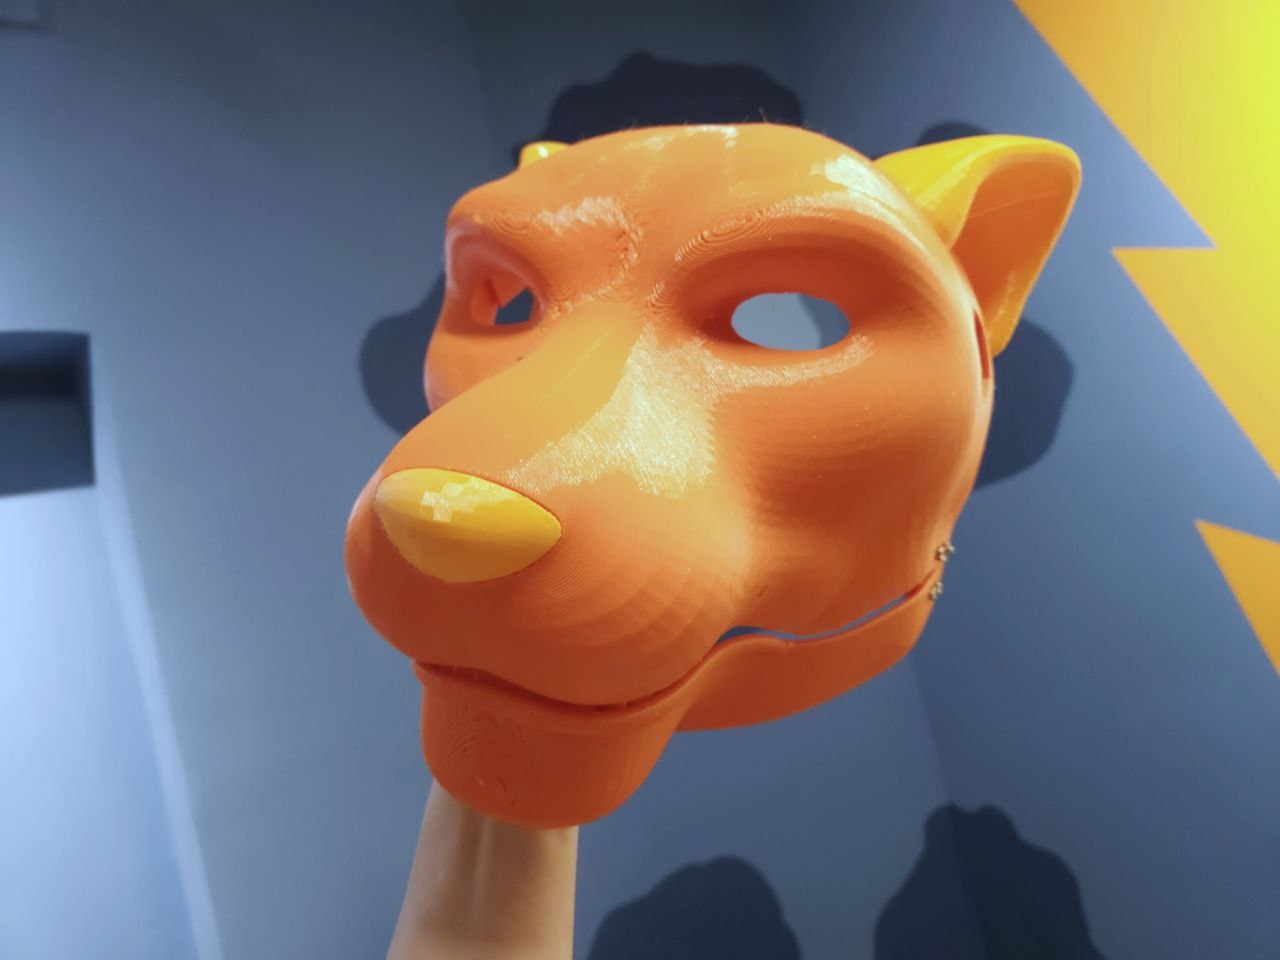
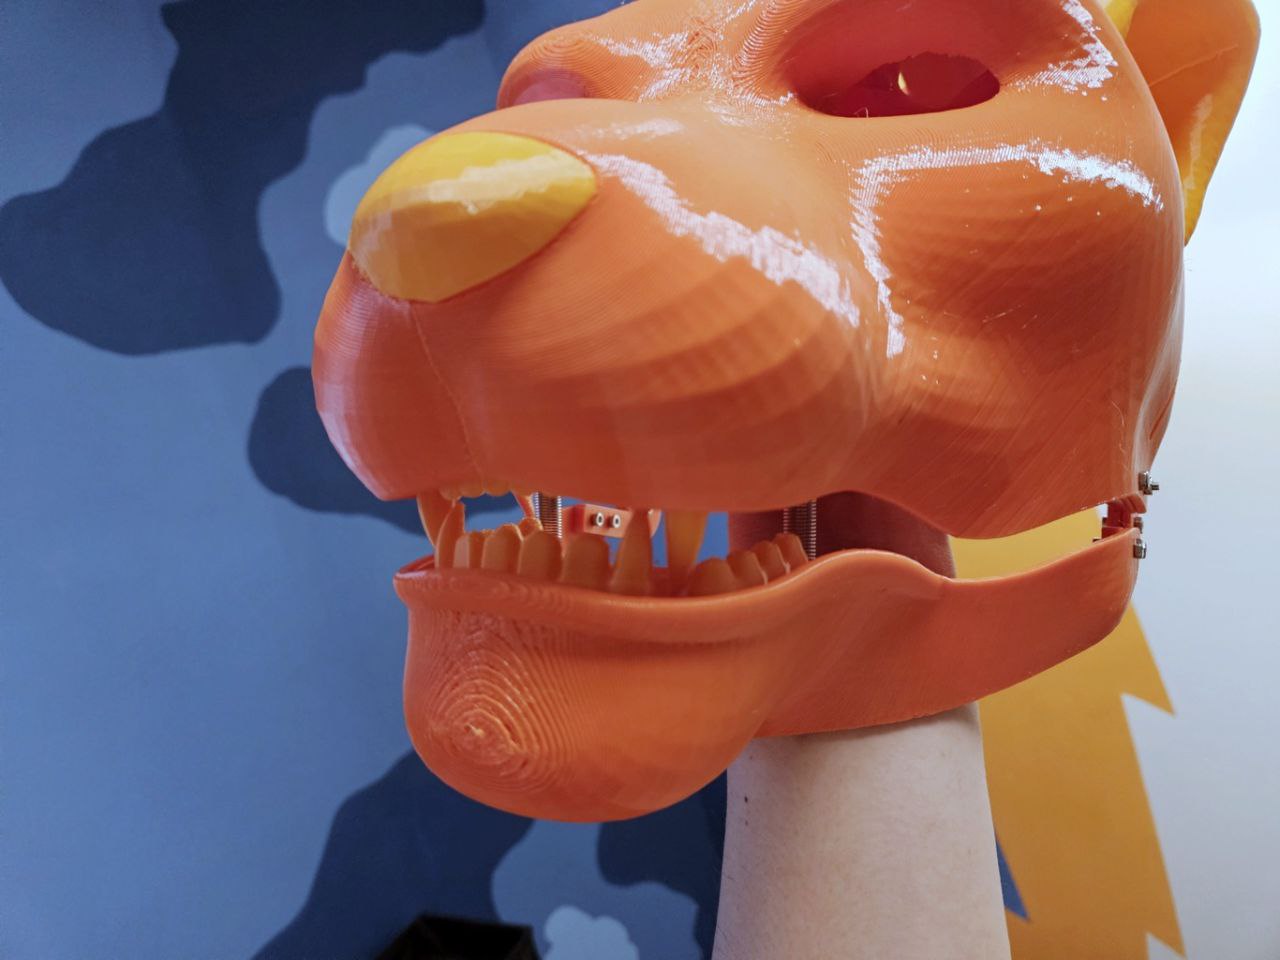
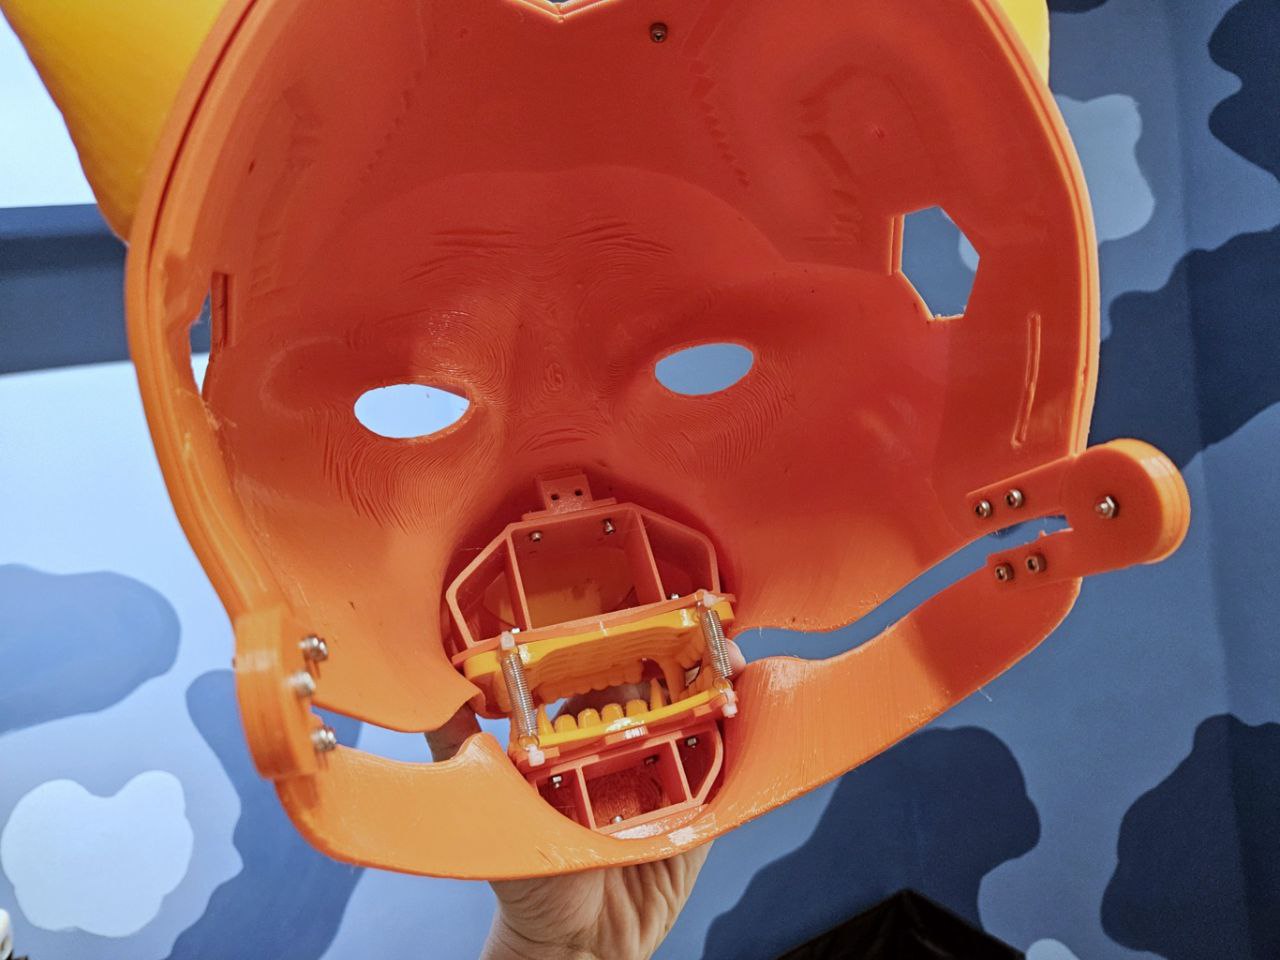
Finally got all the pieces necessary to assemble the first prototype!!! Have encountered several issues that needs to be sorted and have also come up with some ideas to improve how the internal structure mounts to the head base. Issues:
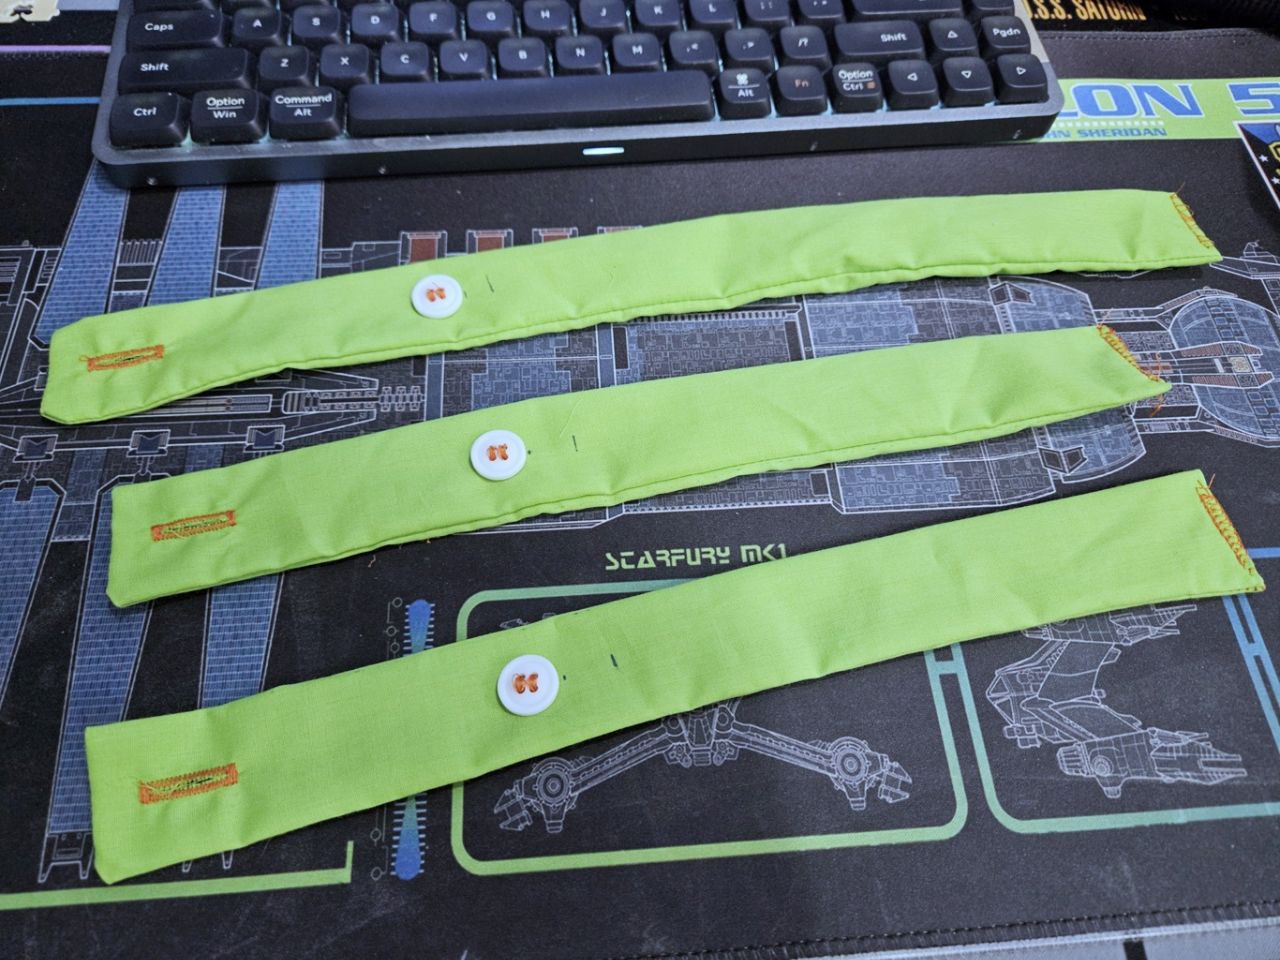
I've also sewed the head straps, that's about all I had time to do, gotta wake up earlier tomorrow. No luck getting foam yet. Should also look out for what kind of technique that can be used to sew up the open end after I flip it.
Also the tpu parts with the new settings still have some stringing, but they're very much easy to remove with a lighter and the results are better too!
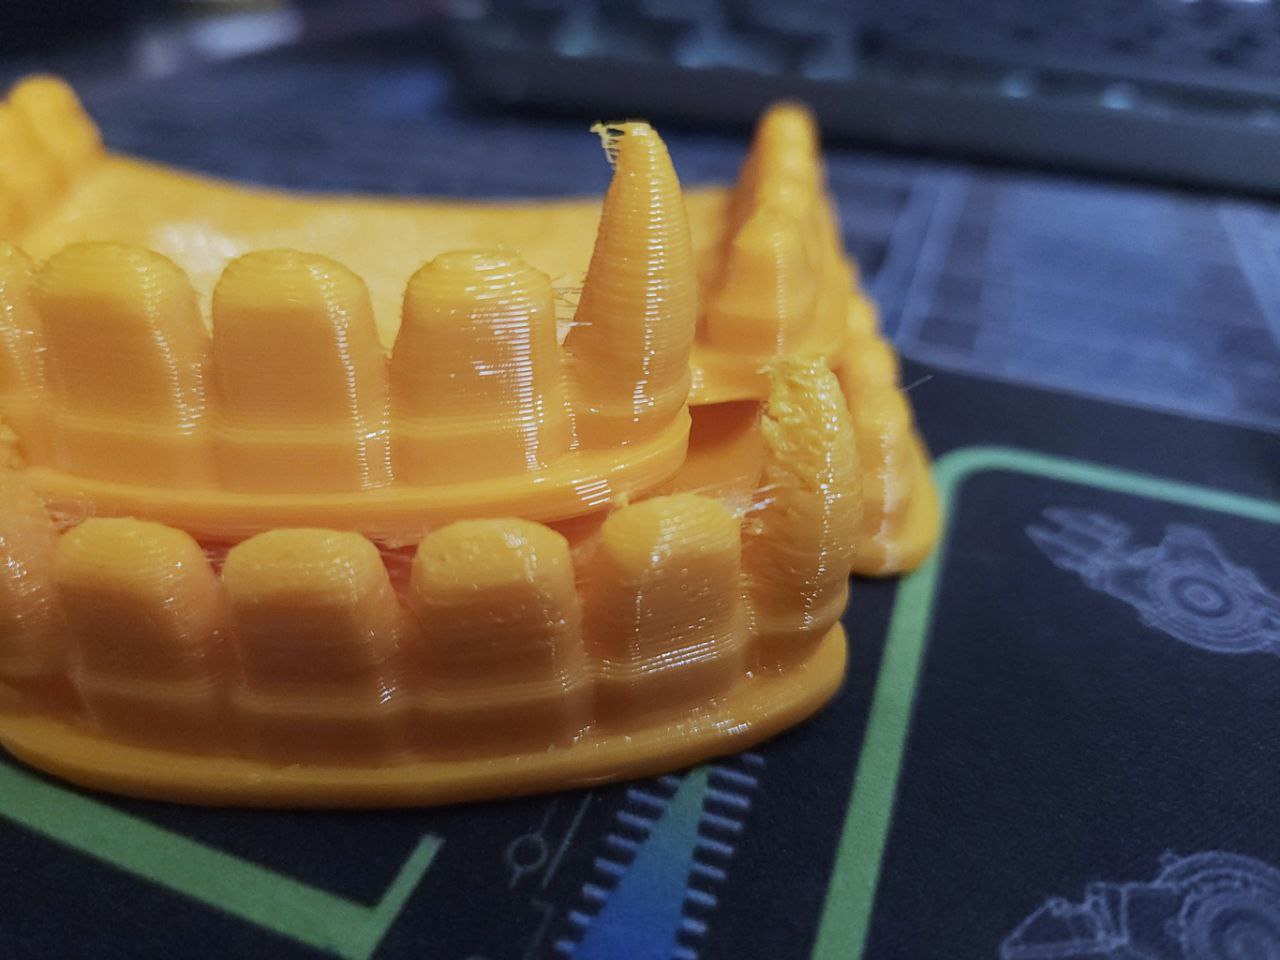
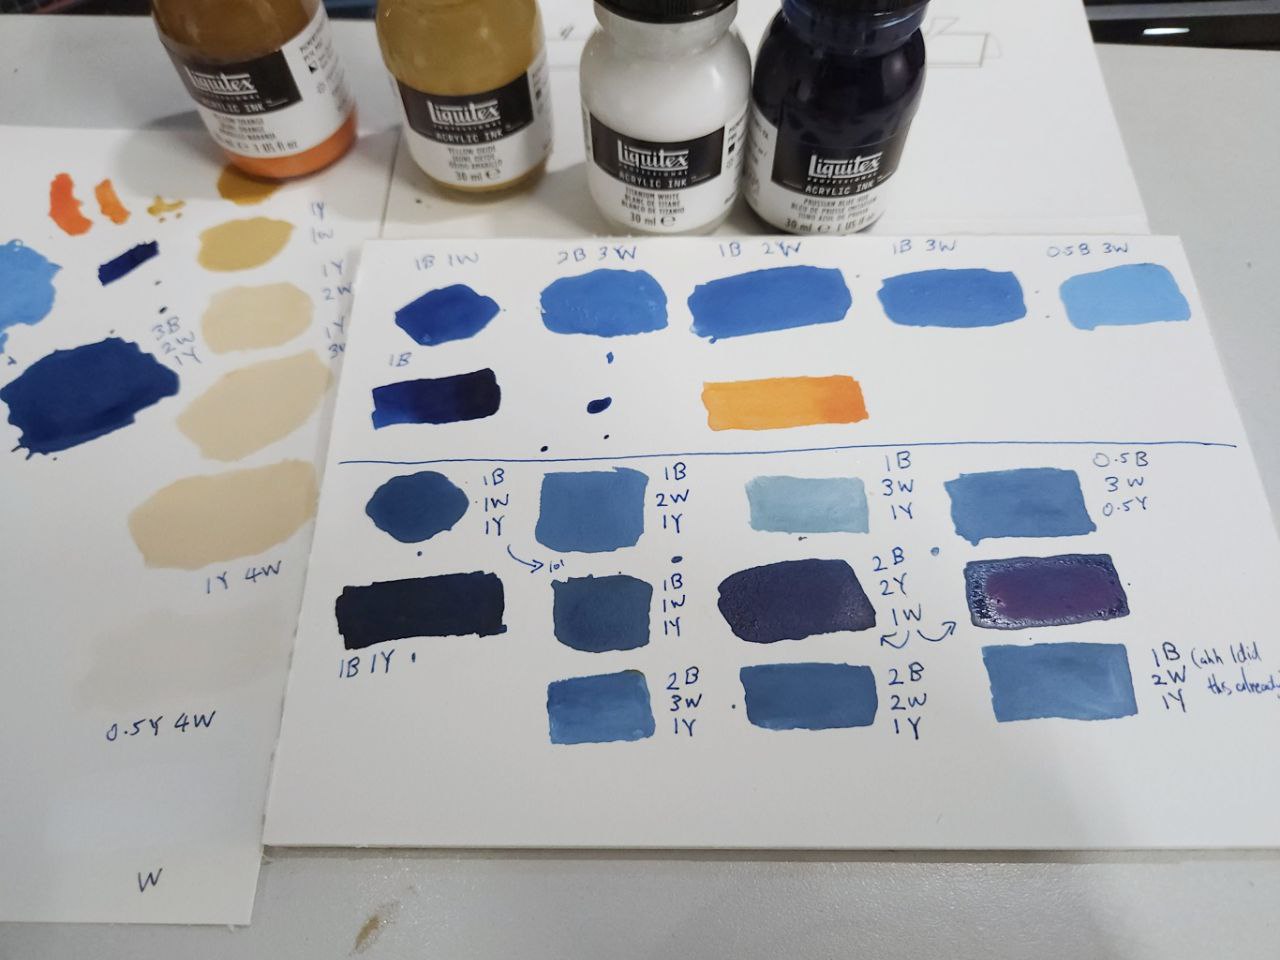
This seems to work well, so I'm going to try it on actual fur next. I am concerned how much ink I would actually need for the tail though!!!
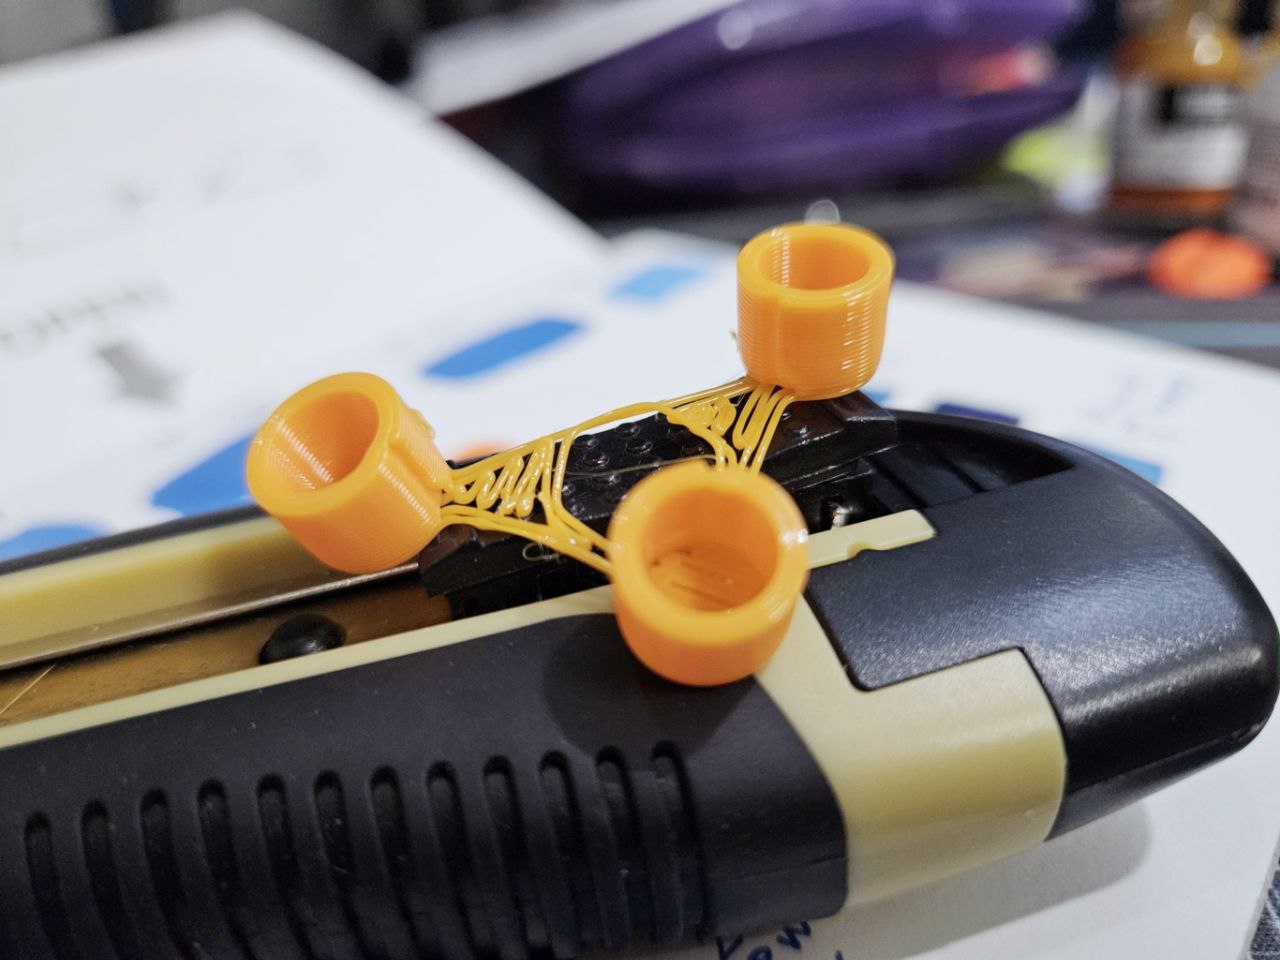
I also tried getting the tpu filament to stop stringing and was successfull!
The next parts to print are the TPU parts (nose and ears) but I'm currently printing a spool holder that uses ball bearings to support the spool. Hopefully it works, as I don't like how much friction there is between the spool/spool holder. I think that is fine for non-flexible filaments but I'm wondering if for tpu, the friction (and release) would cause uneven extrusion.
I certainly do not see that, but yanno. It's something that keeps ticking in my brain.
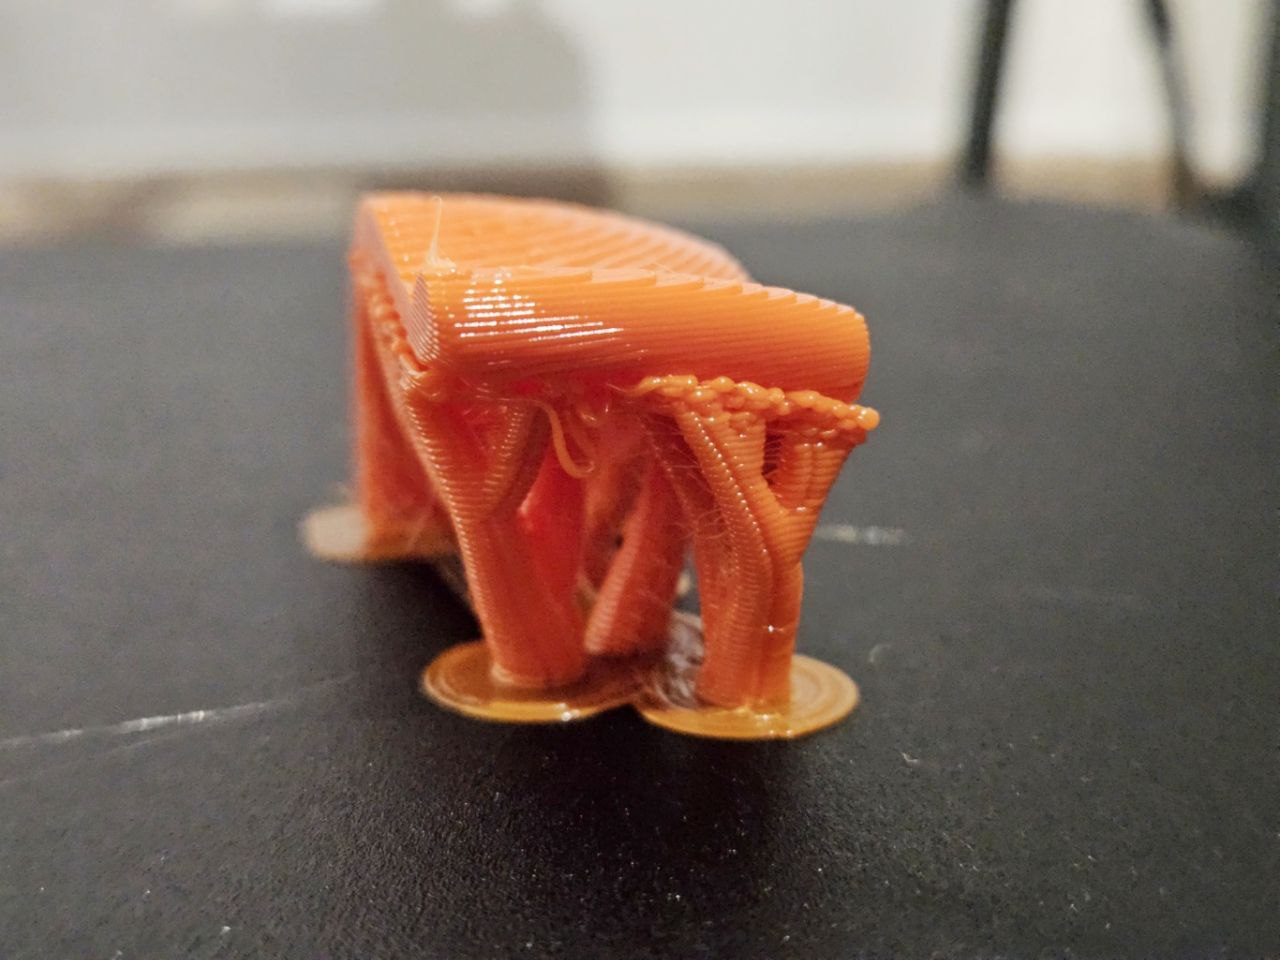
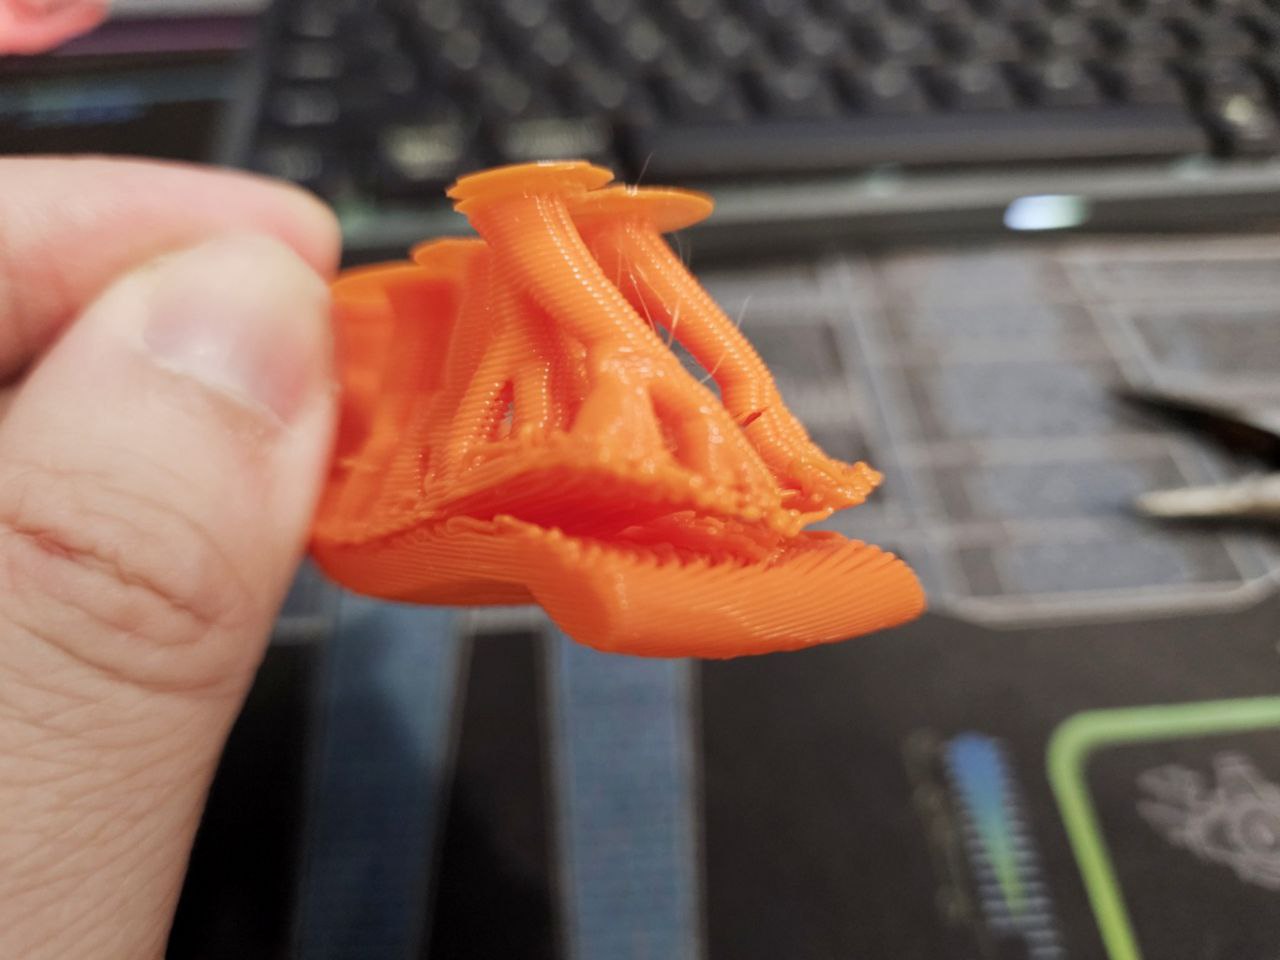

Did a design for a spool holder that uses bearings, that will be on the ender 3 parts page. Had some valves arrive for my inflatable tail insert, which will take awhile to get to as the tpu fabric I ordered got canceled :/
Also messed around with the headband design, looks better now, but still needs to be tested in actual use. I'm not sure what kind of padding to use for it, I could use foam, though the idea of using printed tpu as padding is a possibility.
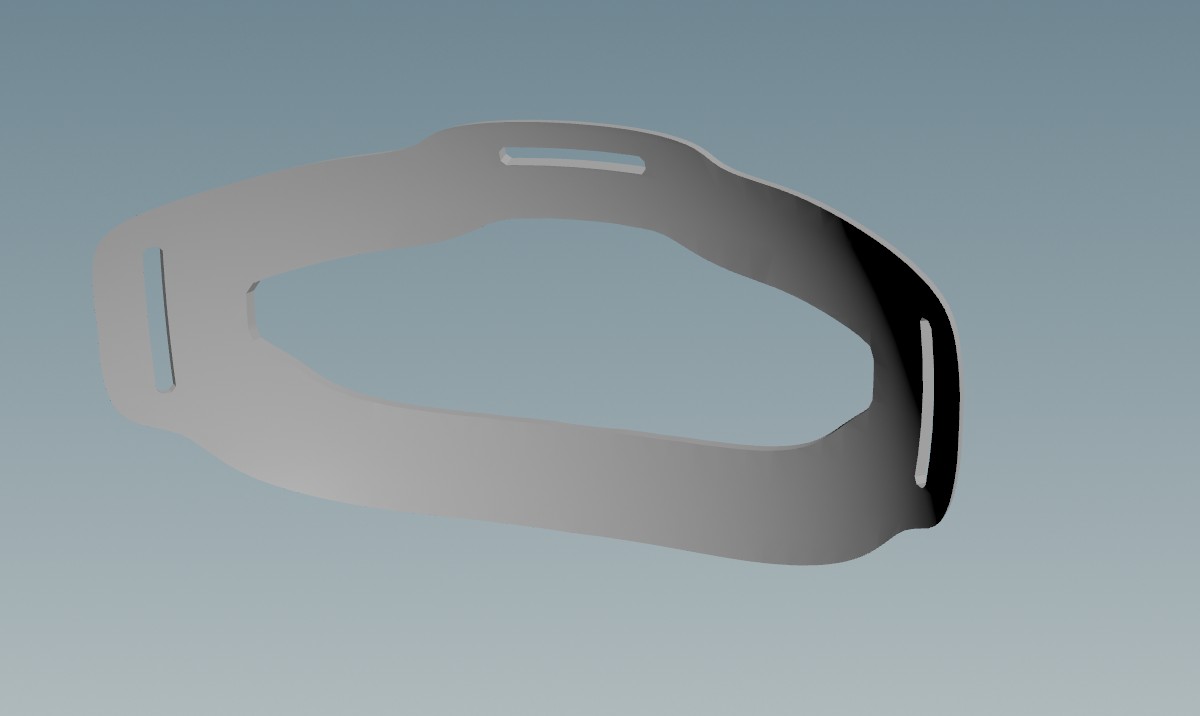
Other things I'm looking at are the fabric for the head straps. Looking into fabric that can wick sweat away and washable, and polyester and nylon fabric seem to be good options. Will be going with polyester as it's cheaper and also less stretchy, which will be good for something holding tight around my head. As for attaching the straps themselves to the headbase/headband, I'm thinking of using buttons, that way they can be removed to be washed and replaceable. ATM I'm thinking of plastic buckles for quick release, however I feel that adds a point of failure that is difficult to fix on the field - if a button pops at a bigger con, there is usually a sewing station to sort that out. Velcro is also an option I should consider...
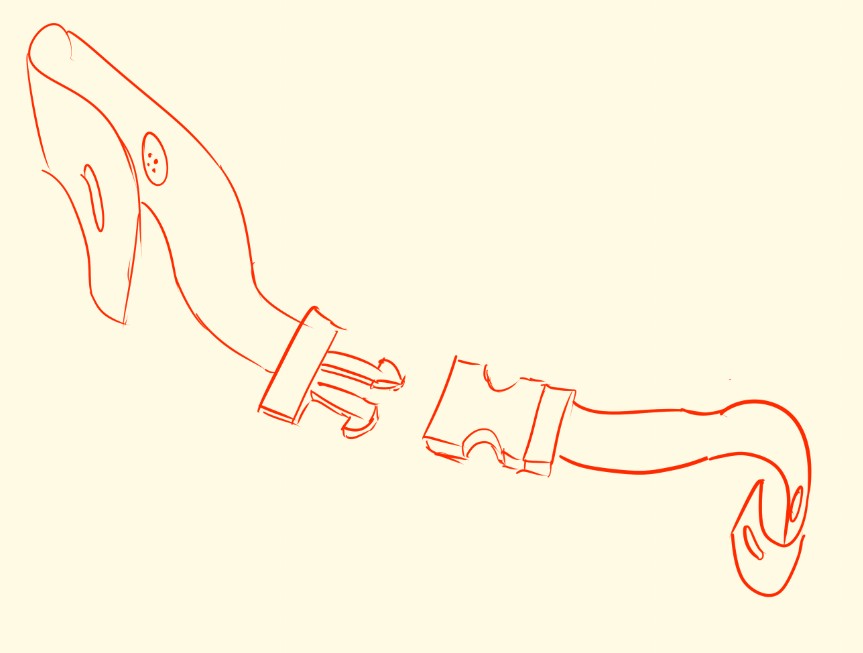
Some random thoughts I've been harbouring... should I have got a smaller 3d printer and made the head base out of multiple pieces instead of printing all at once?
The head takes about 14.5hrs to print. If this fails, it's all back to zero. Printing in pieces would reduce this possibility.
In addition, I could have fit a core xy machine with a full enclosure, that would help with the heat buildup in my room. And noise. Hmmmm.....
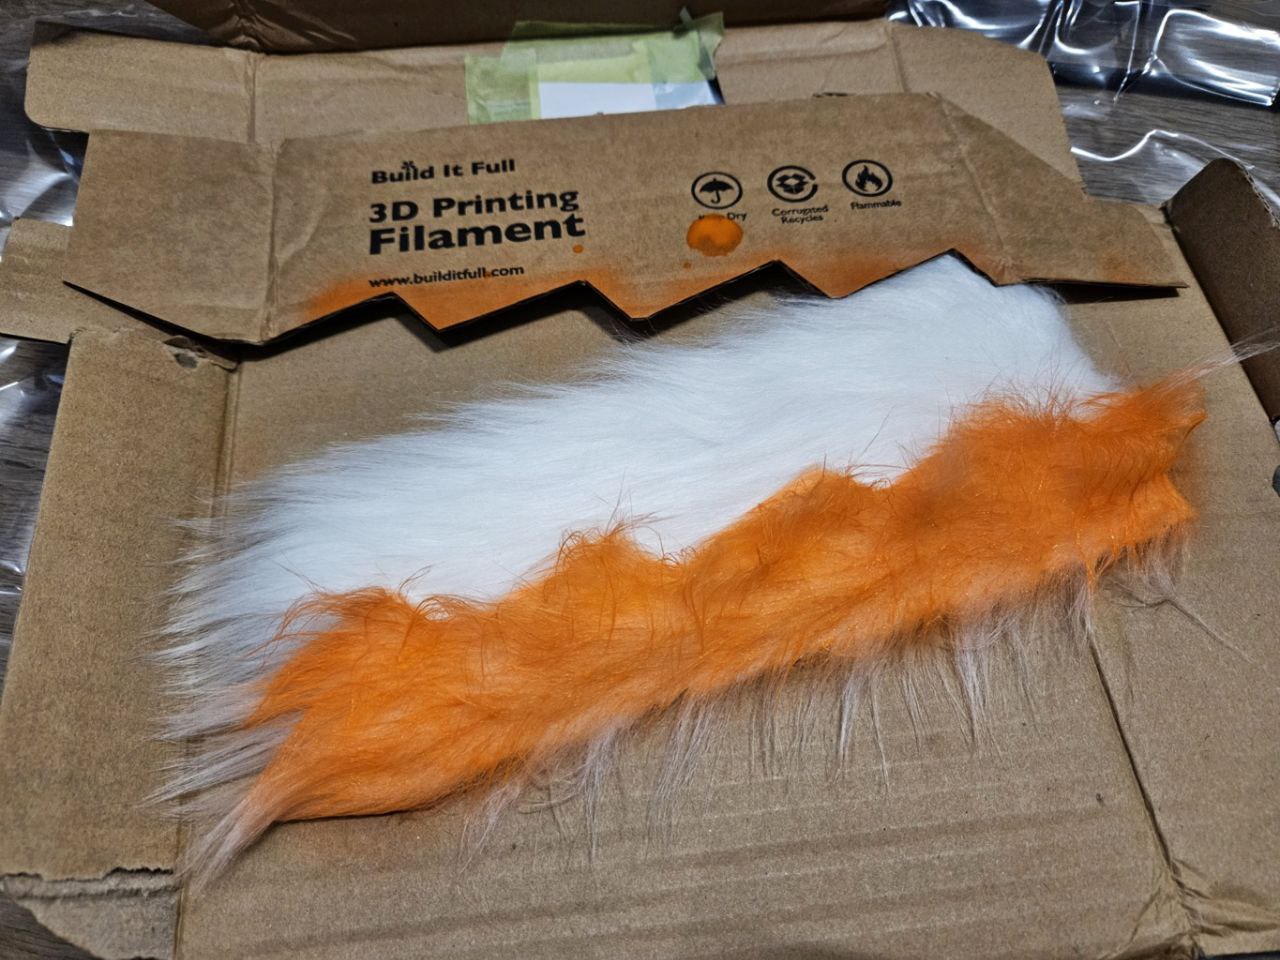
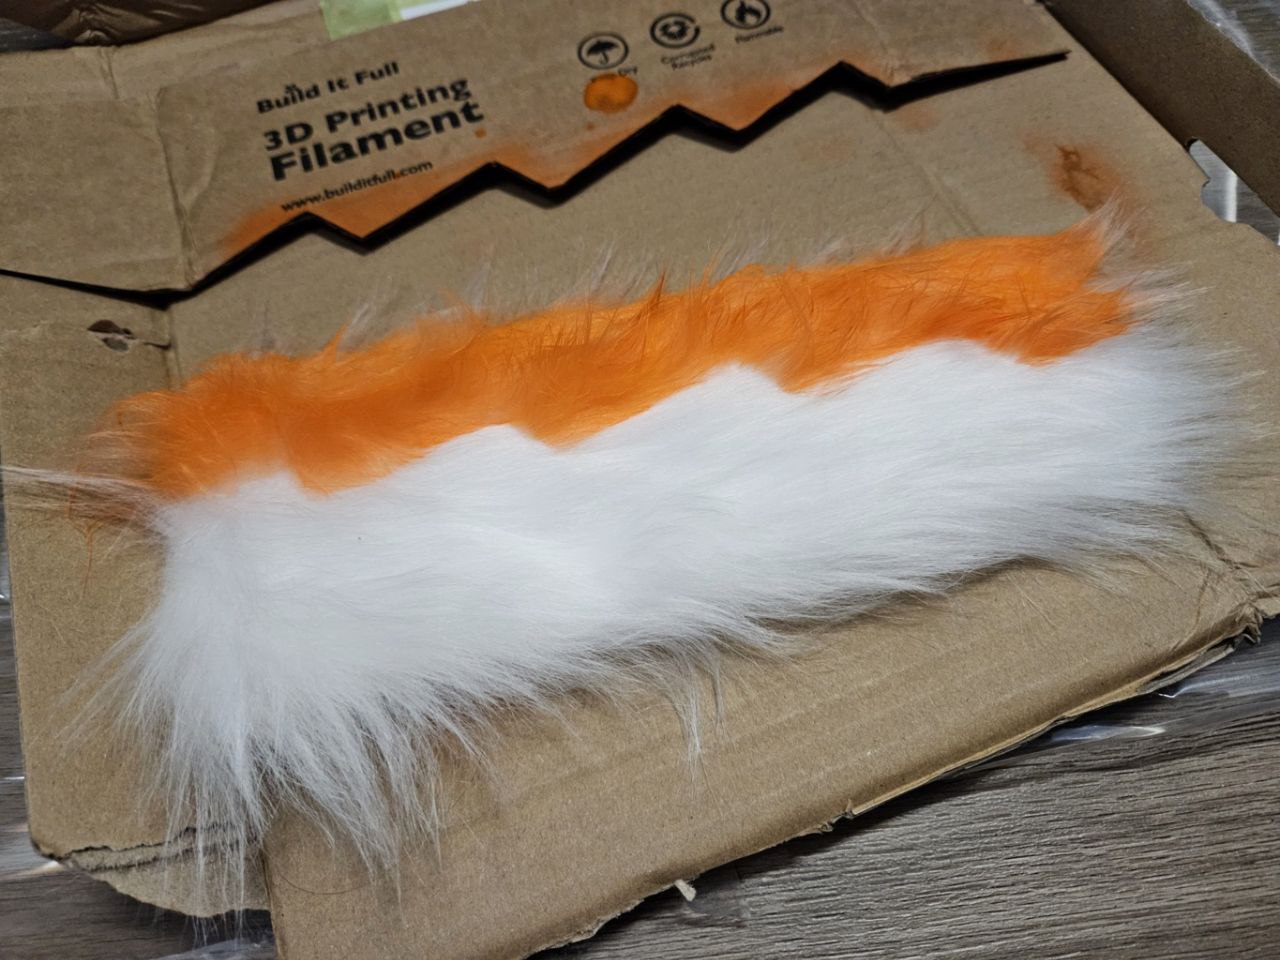
This evening I also experimented with airbrushing the fur with Liquitex Acrylic Ink (Bright Orange). I think this went pretty well! I'd cut out some carboard to use as a stencil.
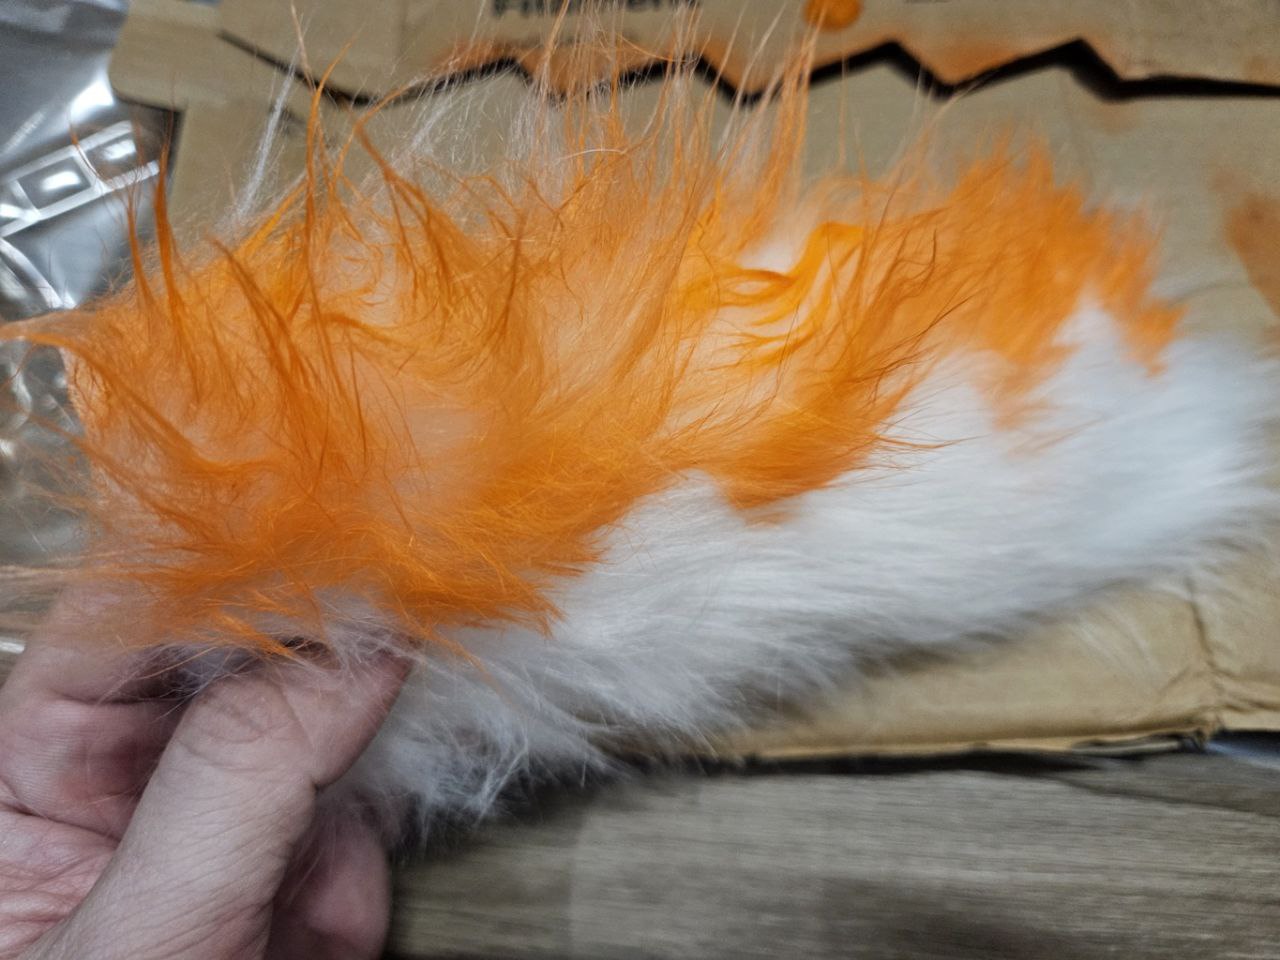
In the photo above, I examined the fur while it was drying, and the fur appears to stick to each other after airbrushing, I assume it's similar to how acrylic paints clog paintbrushes.
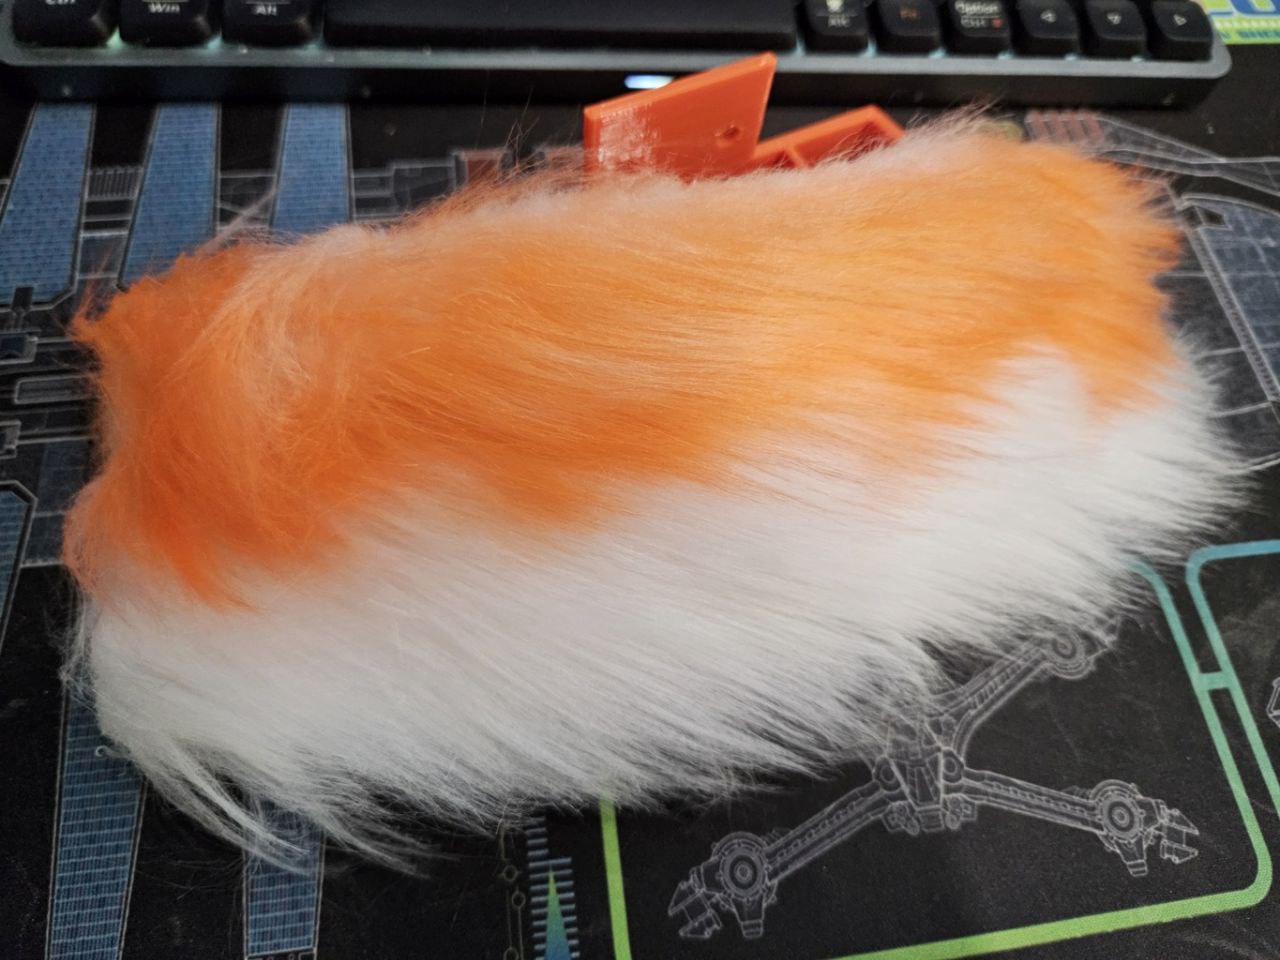
Once the fur was dry to the touch, I used a fur brush and the fur returned to its former lustre. Bright Orange though, is far too fluorescent for my taste. The next less bright orange is Yellow Orange, gonna get a bottle to test. The ink did dry slightly less saturated, but still very bright and fluorescent.
I'm pretty chuffed! I did note that the roots of the fur were pretty much untouched, I'd think on the real thing I'd have to apply multiple coats. Or perhaps, brush the fur so that it stands vertical, and then airbrush it while the roots are more accessible.
Going forward I'm going to make my tail and airbrush it entirely. If that works out, I'll definitely airbrush the head.
At the moment there aren't any colours that match what I want, but I do like their prussian blue and will start with that.
Now the orange was very easy to apply as I want it to absorb as much of the ink as much as possible. Not with Prussian Blue though, at masstone it is very dark, and I don't think I have the skill to apply light coats evenly. So this is my plan:
Use titanium white as a mixer. All the colours I want are far lighter than the full strength prussian blue, so in theory I could use white to lighten it up for more pastel-like colours . This should work for the 3 blues. Orange will be straight out the box, so no issue there. My belly fur is a shade of off-white though... I could just use the raw white fur (it is already a warm off white, but only very slightly) but I'm gonna see if Yellow Oxide (or Transparent Raw Sienna) lightened with Titanium White can give that effect.
For the airbrush, I picked up something I saw on youtube, a tiny little battery powered unit.
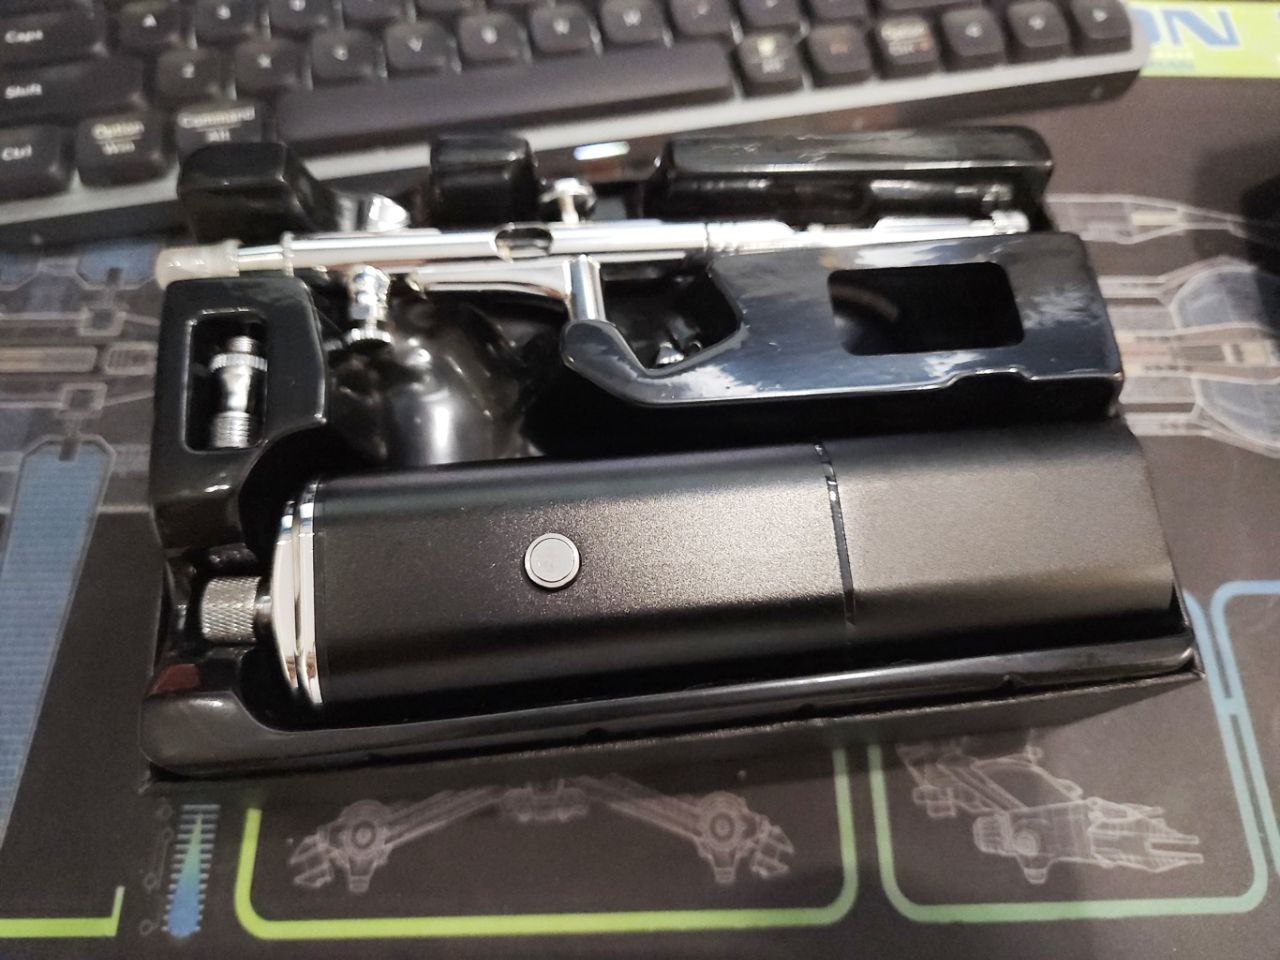
In terms of pressure, it is a far cry from the unit I had decades ago with a proper compressor and tank. But this worked surprisingly well for what I'd need, and my gut feeling tells me that it might have a very small resevoir, a tiny one enough for like half a second of airbrushing. The airflow was surprisingly smooth, I thought it'd go puff-puff-puff but I found it smooth, just not as strong as my old one.
The airbrush that came with it worked well too, a generic dual action. The package I bought came with an extension hose, metal and plastic cups and some cleaning brushes. It also has
a valve located on the opposite side of the paint cup. It is a "mac valve" and used to limit the flow of air. Never seen that before. If not, it worked like my previous airbrush.
Better actually, as mine did not have a limit stop to the pull back trigger. This is a nice feature, but one that I'd unlikely need for airbrushing fur.
One thing I'd note when buying a set like this is the availability of spare parts. Say I damage the needle on the airbrush, would I be able to get a replacement? Or heck if I decide to get a new airbrush, would the fittings be compatible?
For me this airbrush should last this fursuit building project. Just gonna be careful when cleaning it least I mess the needle up.

The 90% scaled one fit perfect! However, after some consideration I decided to go back one step - I would need space for the straps, and the most curved of the first set would have less of it touching my head at the sides, perfect for where the straps can loop in.
I had some difficulty wondering how to use this curve. Finally decided to just try skinning a few into a curved surface, give it some thickness then booleaned out some holes for the straps.
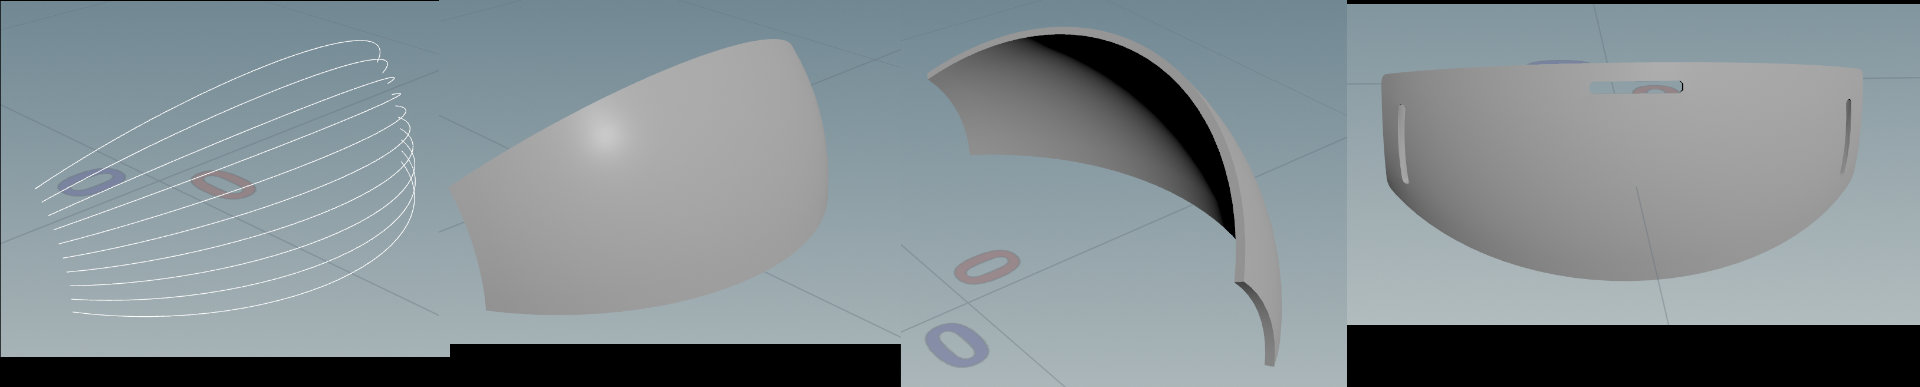
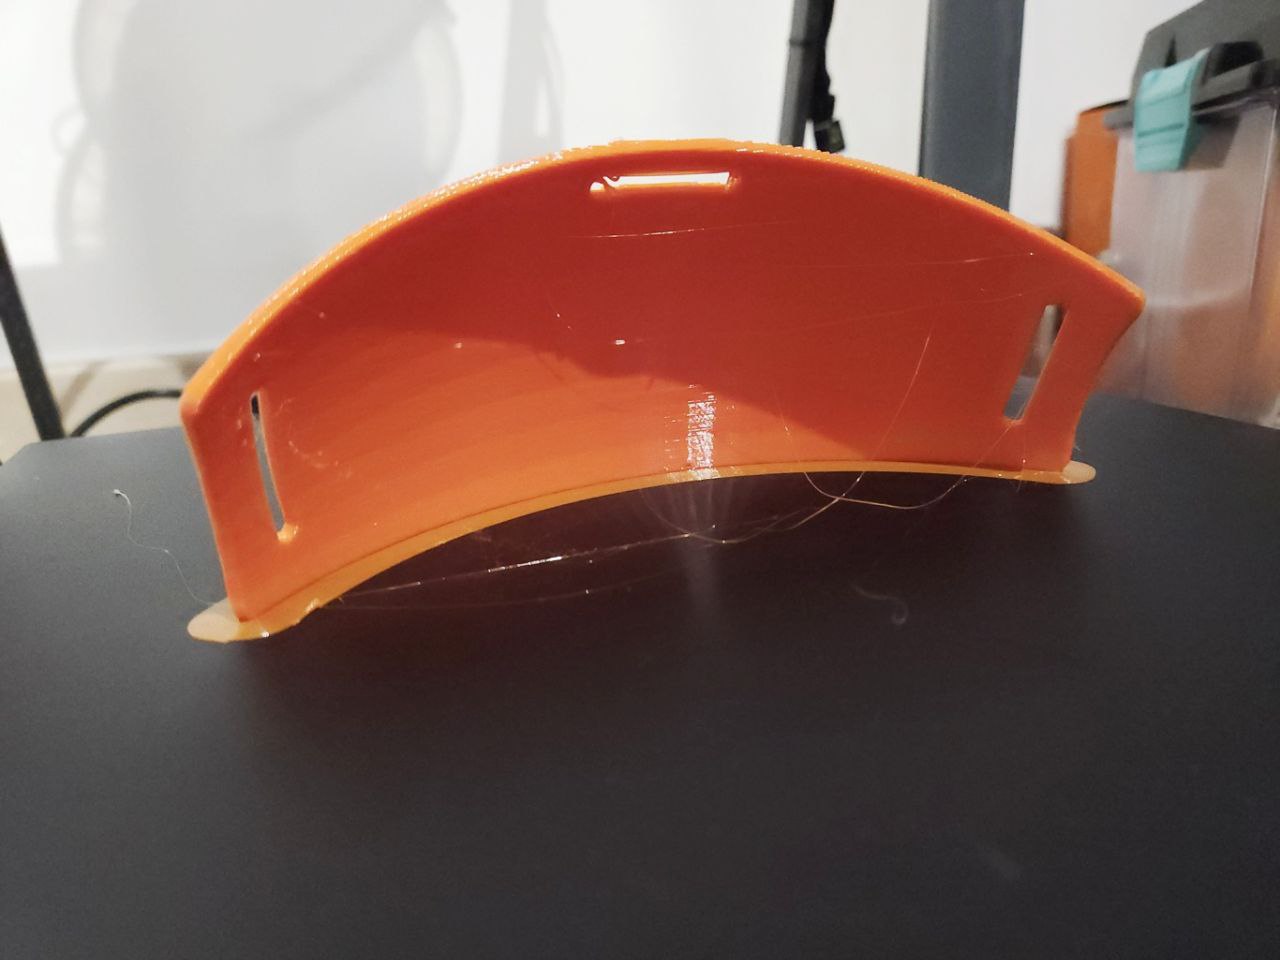
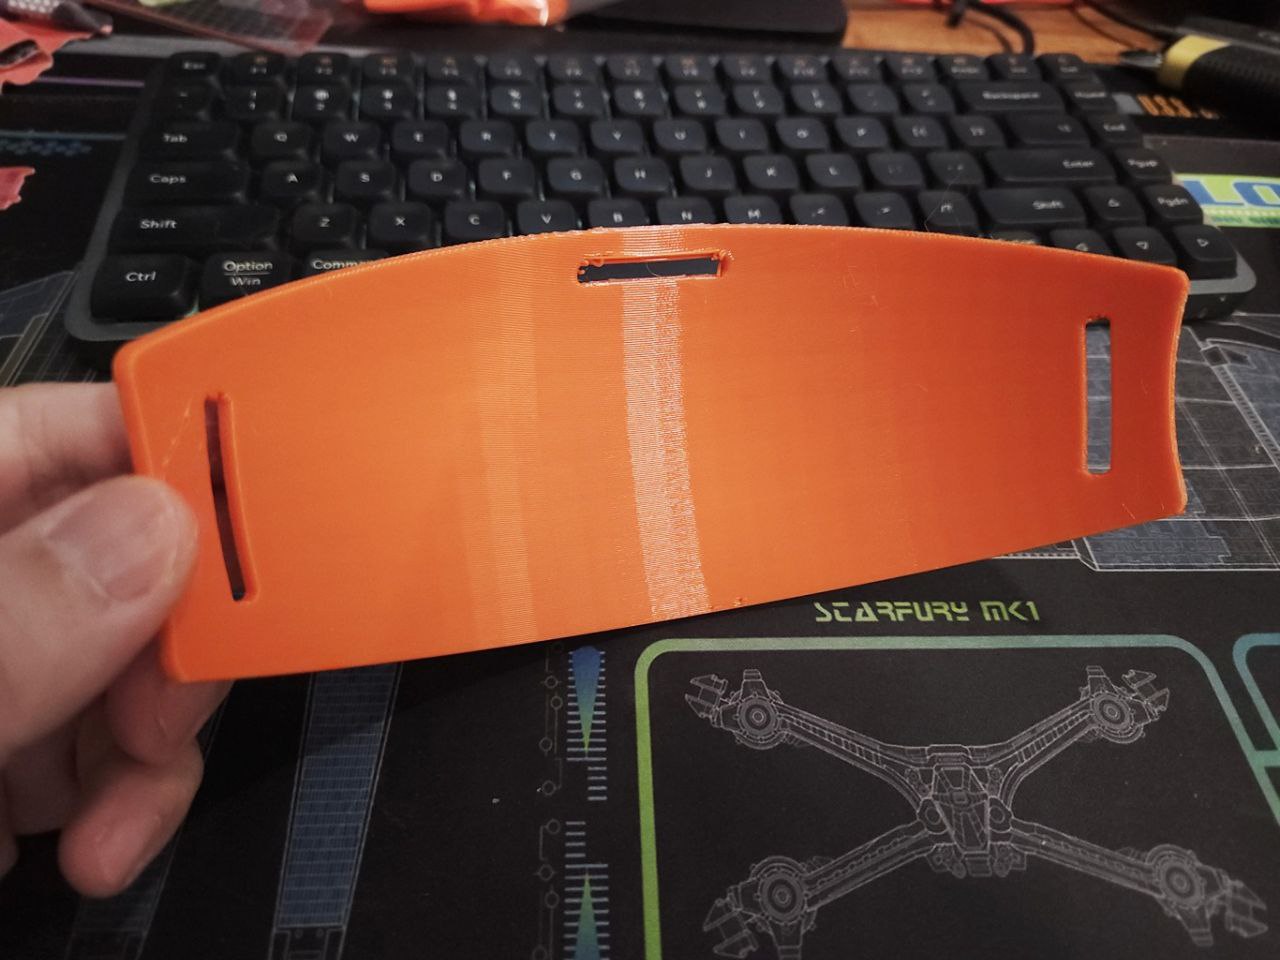
This seems to work and fits the back of my head well with space for the straps. When I get around to it I'll have to figure out what's a nice way to hollow it out for breathability and attach foam to it. Would also wanna see if I can make the design more aesthetic.
The next thing for the head will be to sew some straps to connect to the head base, and see if this will actually work to hold the headbase in place lol. That will take a day or two as it's a loooong print.
I've also had some white fur come in, gonna need to test airbrushing it, then washing the airbrushed fur to see how it holds up.
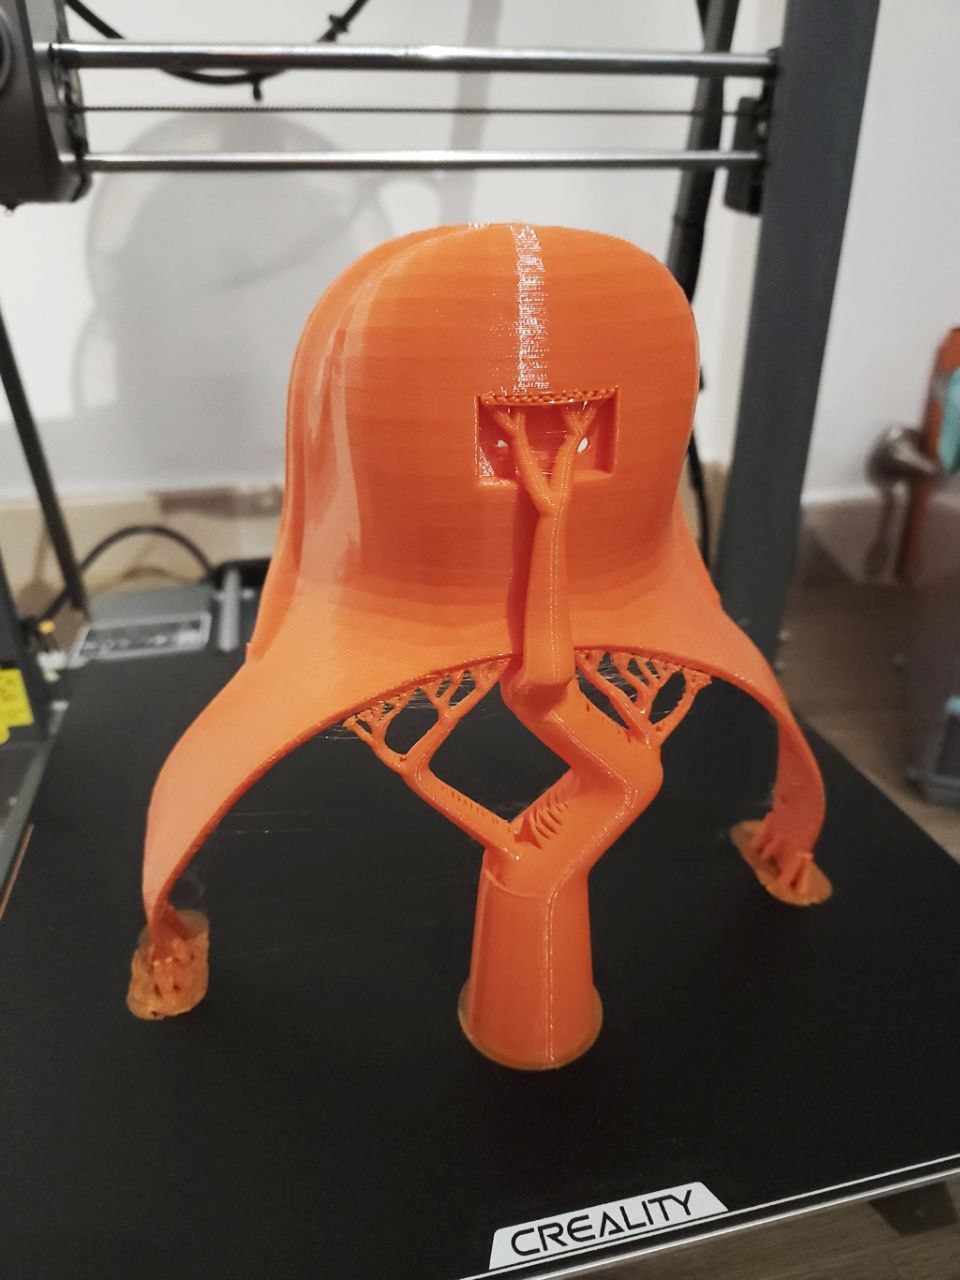
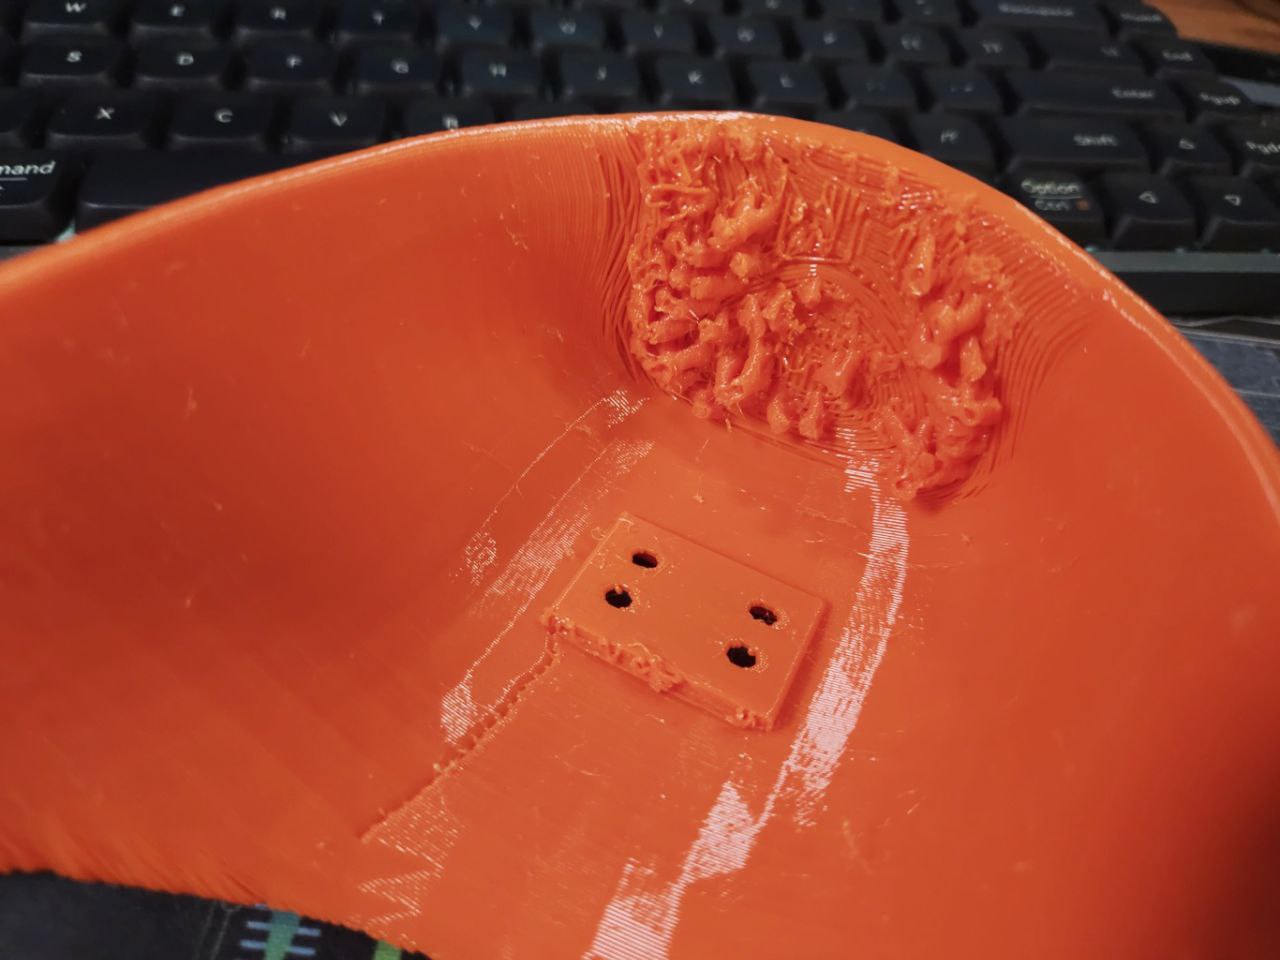
The supports for the inside of the jaw have been really difficult to remove, even though the supports in other places pop off very easily. I'm wondering what's up with that. Could it be some loss of (mechanical) precision at higher layers? Hmmmm...
After some looking into this, it seems like the folks there are using a Top Z distance that is greater than their layer height. In my case, it's below my layer height - I've experimented by setting the Top Z distance to ~110% of my layer height and that seems to have a reasonable gap in the preview. This doesn't explain why it works well for the lower parts of my model though, which now have their supports similarly moved down. Hmmm.
I thought maybe I could use a modifier to change just the top z height but that only work for the main options, not the support settings.
Here's what my original settings look like:
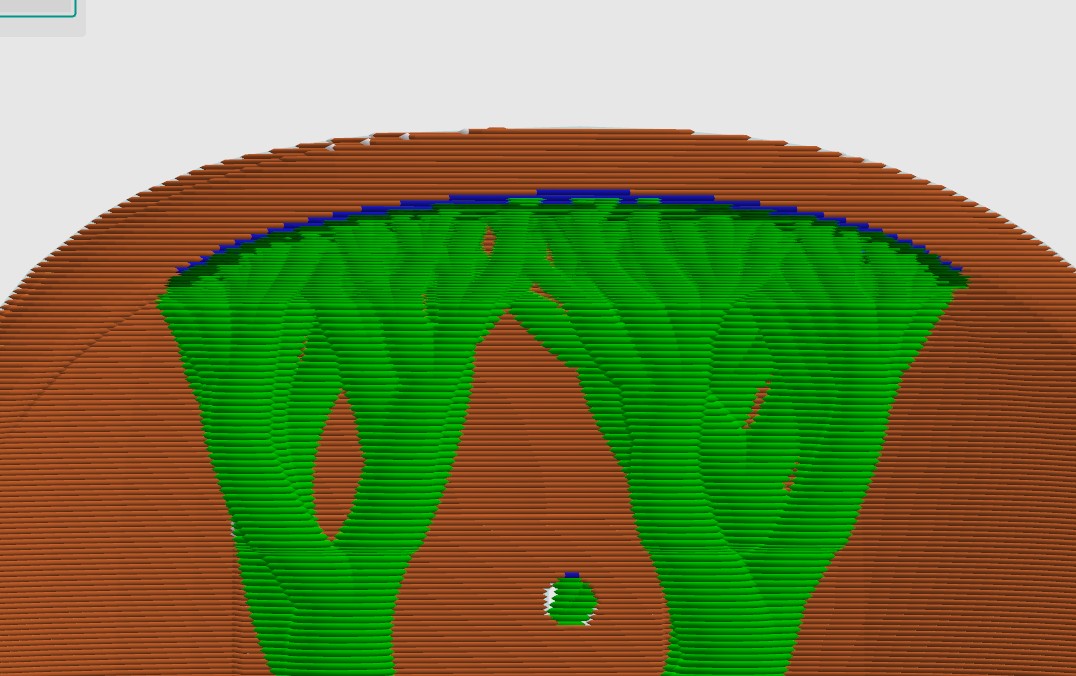
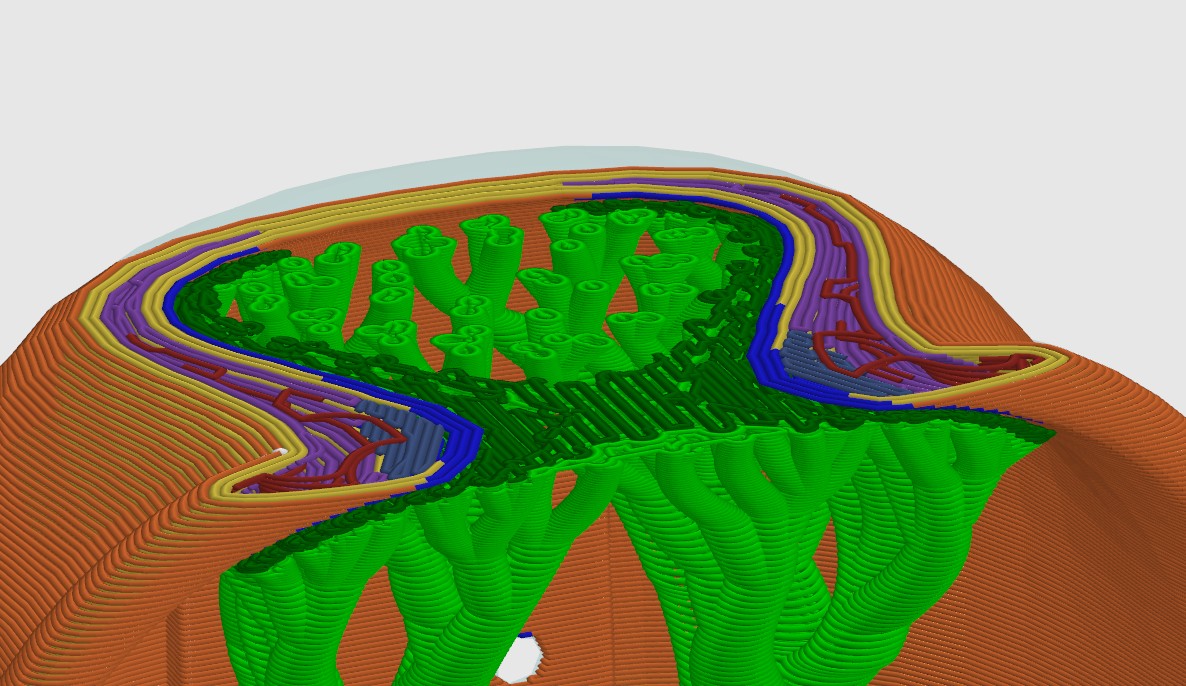
This is tree slim, and there are loads of branches, and the dark green support interface is pretty closely spaced.
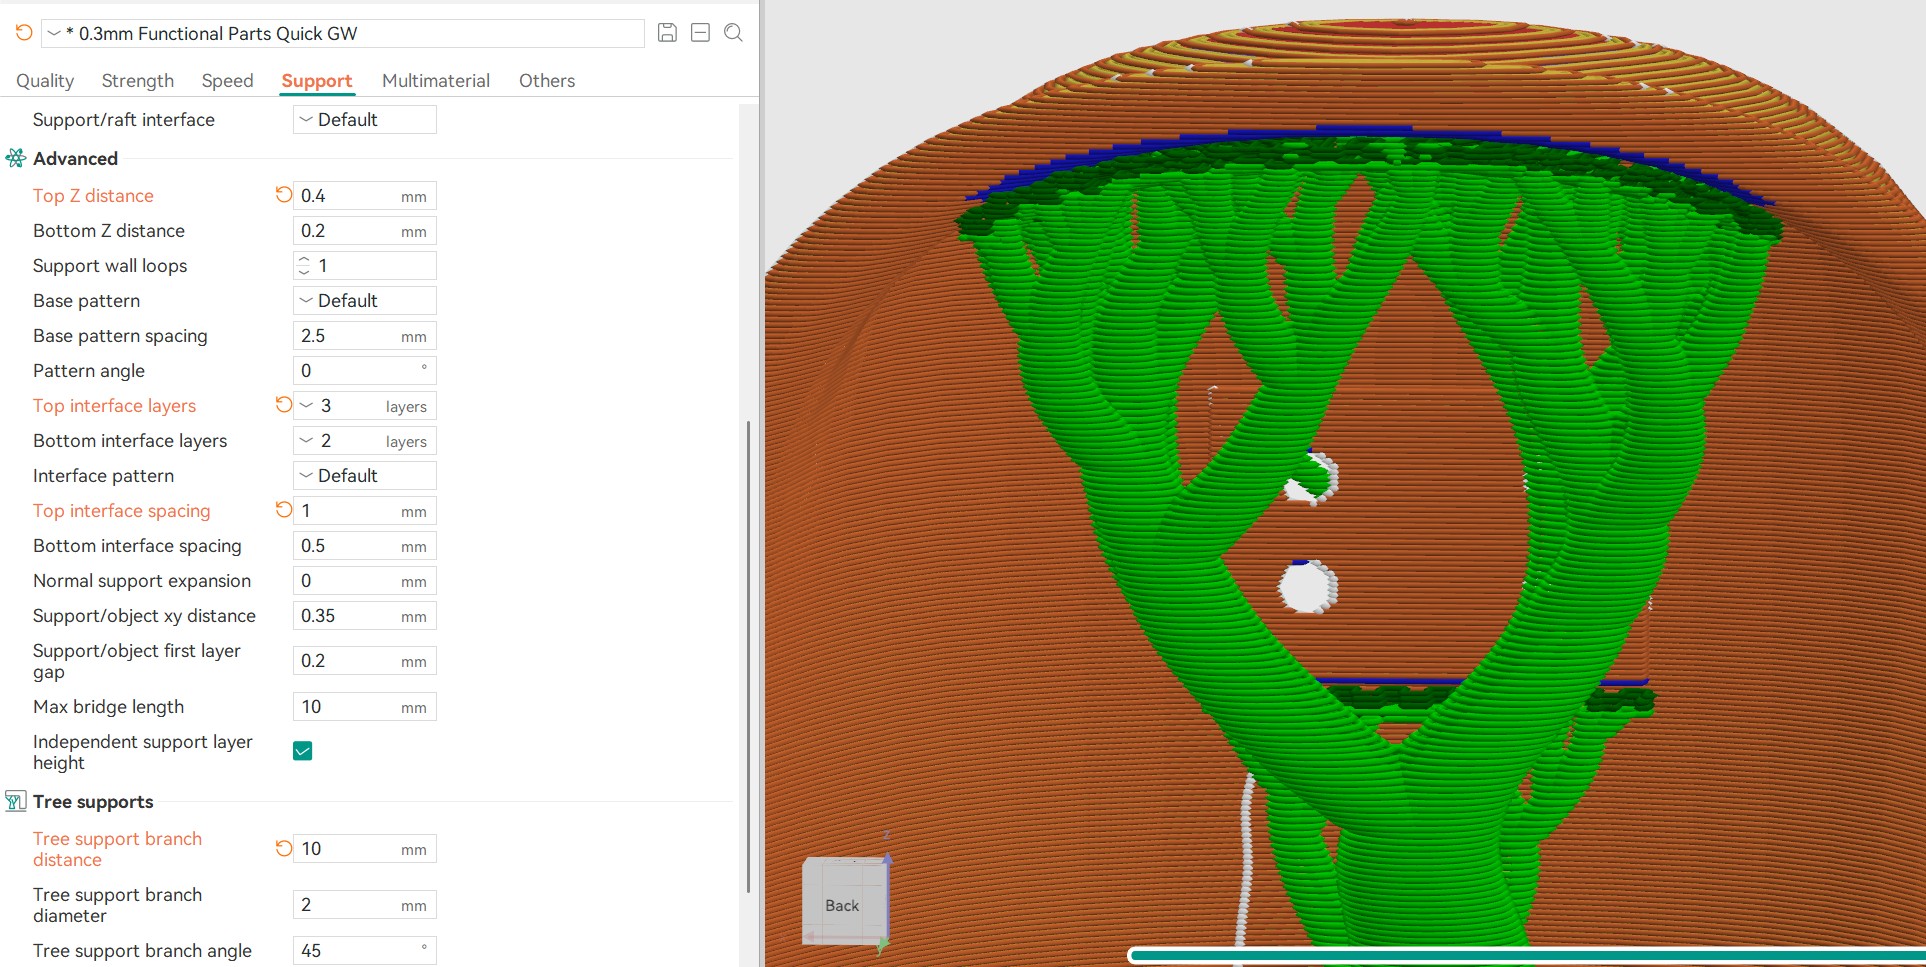
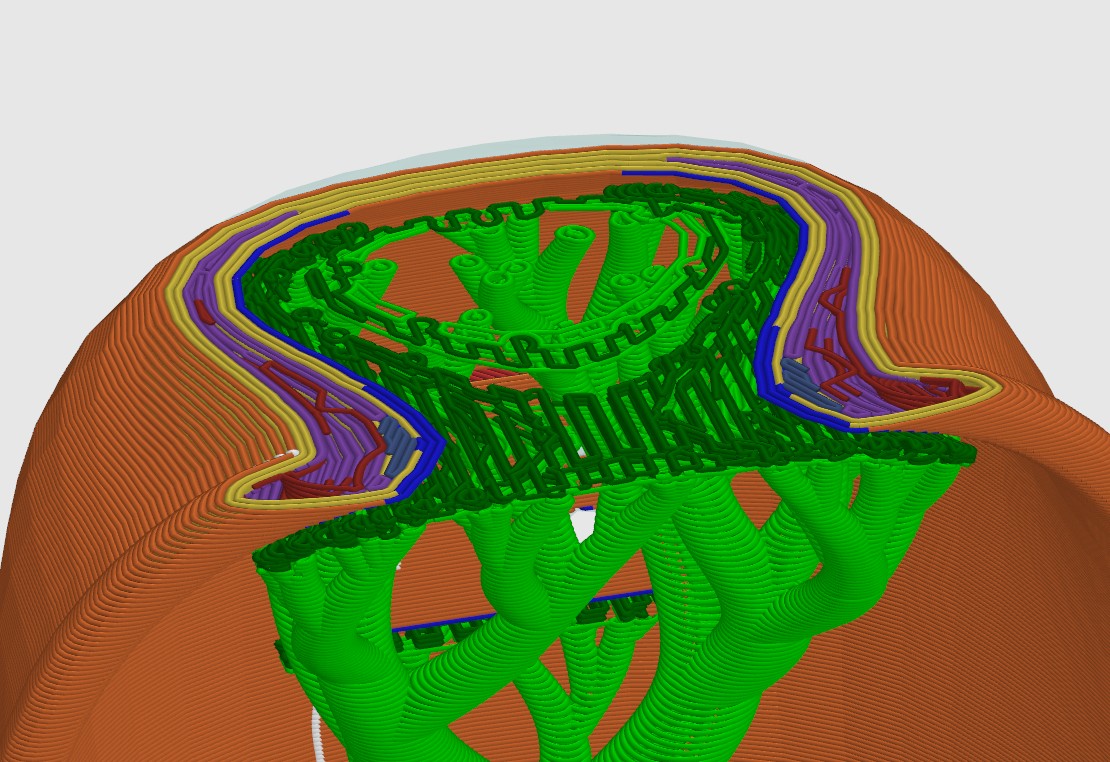
(You can open the image in new window to view the full resolution)
I've adjusted the Tree Support Branch distance to its widest, this generates less tendrils. Top Z distance is increased to be larger than layer height (my current layer height is 0.36, half of line width of 0.72) and now there is a more visible separation between the interface layer and the layer it is supporting. I've also increased the number of interface layers and increased their spacing, this results in a sparser interface layout, that I hope will be easier to break.
I haven't tested these settings on an actual print but will report back once I do. I'm also pretty keen to see if these settings will work on TPU!
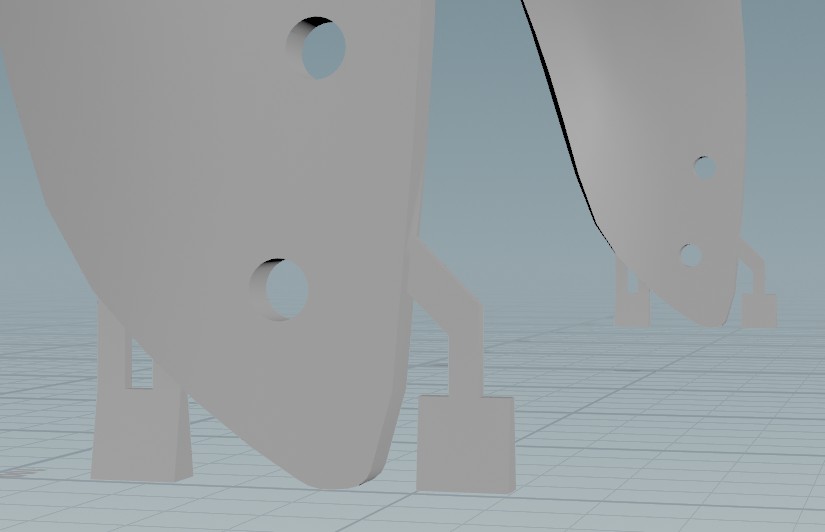
Also, for this print I added in some additional support structures at the base to increase the surface area, these were removed very easily after printing.
I never thought of that, I assumed it would be pretty lightweight. However, these are the estimates given by my slicer, rounded up to the nearest 5g:
Looking around for examples, this is pretty damned heavy! For example, Tioh's 3d print for the upper head is less than 300g.
A full tpu head using infill only is 6.3 ounces, less than 200g!
For the moment I'm not gonna fuss, my quest 3 weighs more than that I'm sure. *checks* What the hell, the quest 3 is just over 500g?! Oh dear, this _is_ going to be a heavy head XD
Anyways the modelling for the head is finally complete! A V1, at least. I'll be printing the parts over the next few days.

The next thing to work on is the strap to hold this to my head. I've had some early ideas that looked really terrible, so I've dropped this on the side for quite some time.
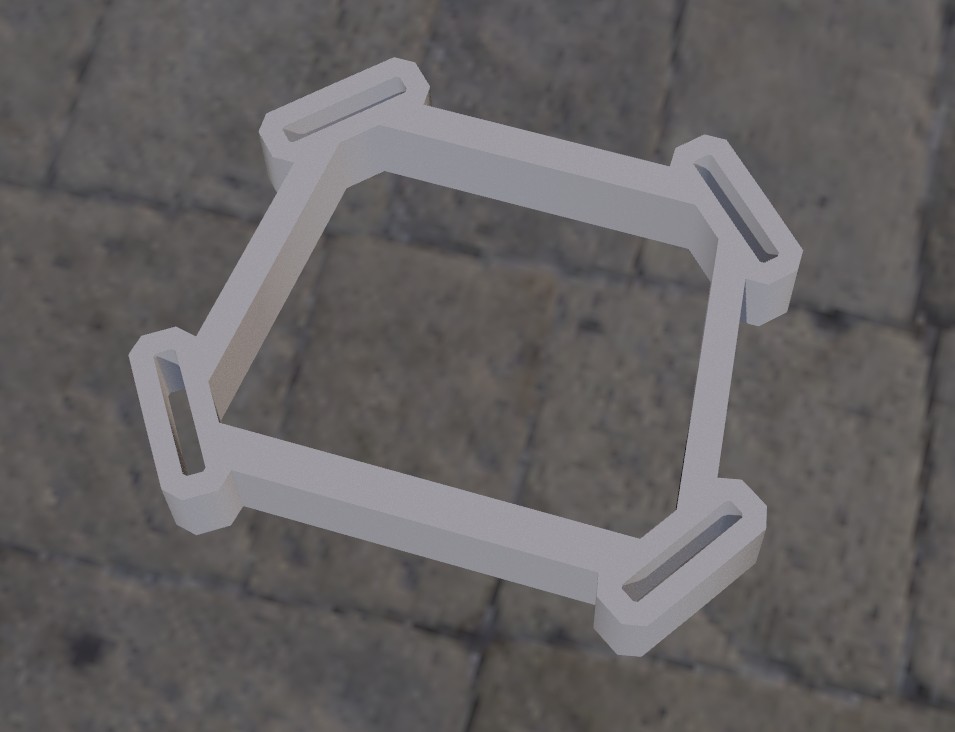
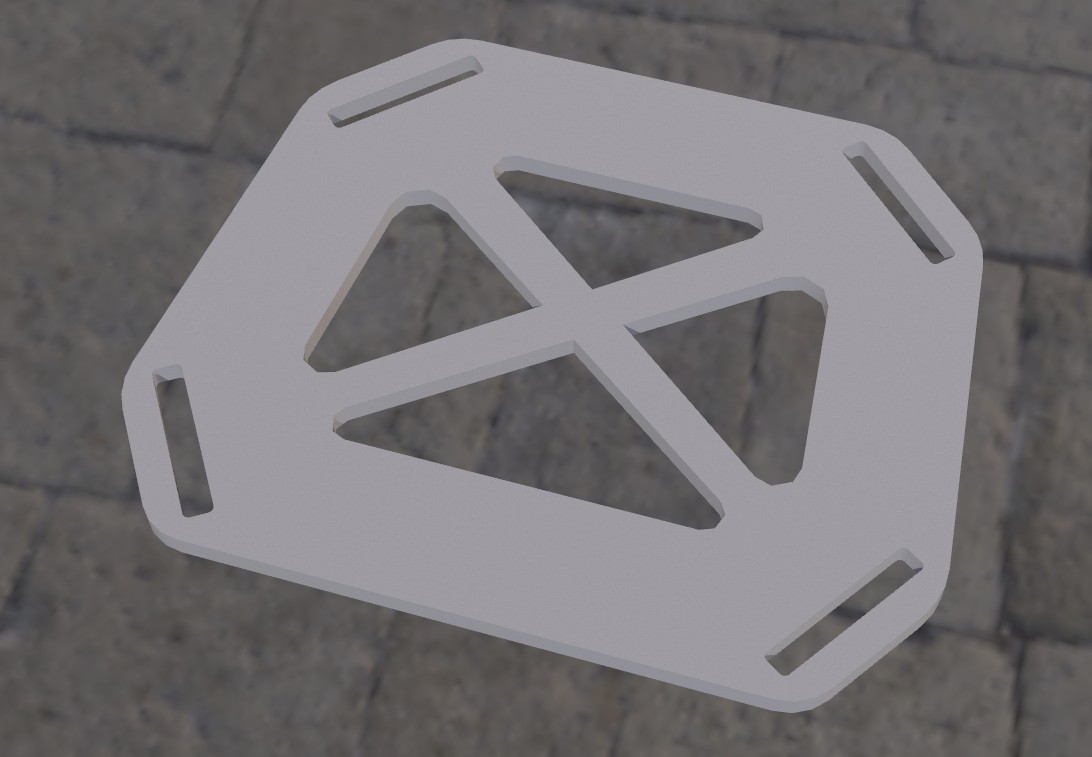
Now that I have to get it done, I'm printed out some various strips with various curvatures to see which fits my head the best.
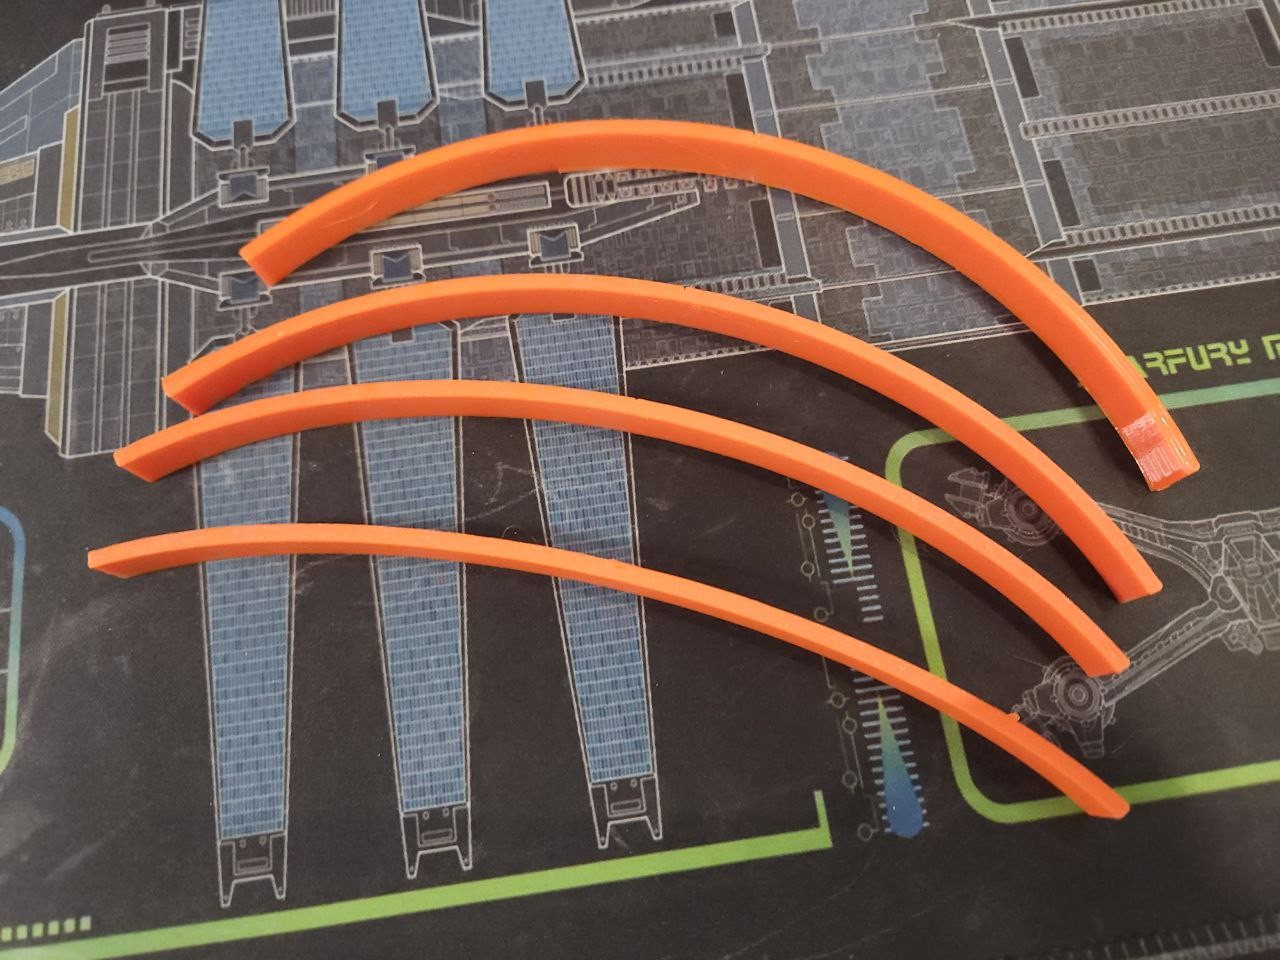
I switched the machine over to petg last night, autoleveled etc. am quite tired of how slow tpu printing is. And yesterday I had some idea to reduce travel speeds for a tpu print in the hopes to improve quality but the quality turned out worse.
Today though, I started printing the 3cm hinge in petg. The quality of the top surface was quite meh, resulting in the parts grinding against each other, so I turned on ironing to see if there's a difference. It helped alot, visually, but the parts aren't perfectly smooth up top, usually there' a blob at the very end of the print. I suppose just running these prints over some sandpaper will sort it out, that in increasing the height of some of the geometry to give the parts more space to move. (Photos show surface of top layers ironing enabled vs disabled)

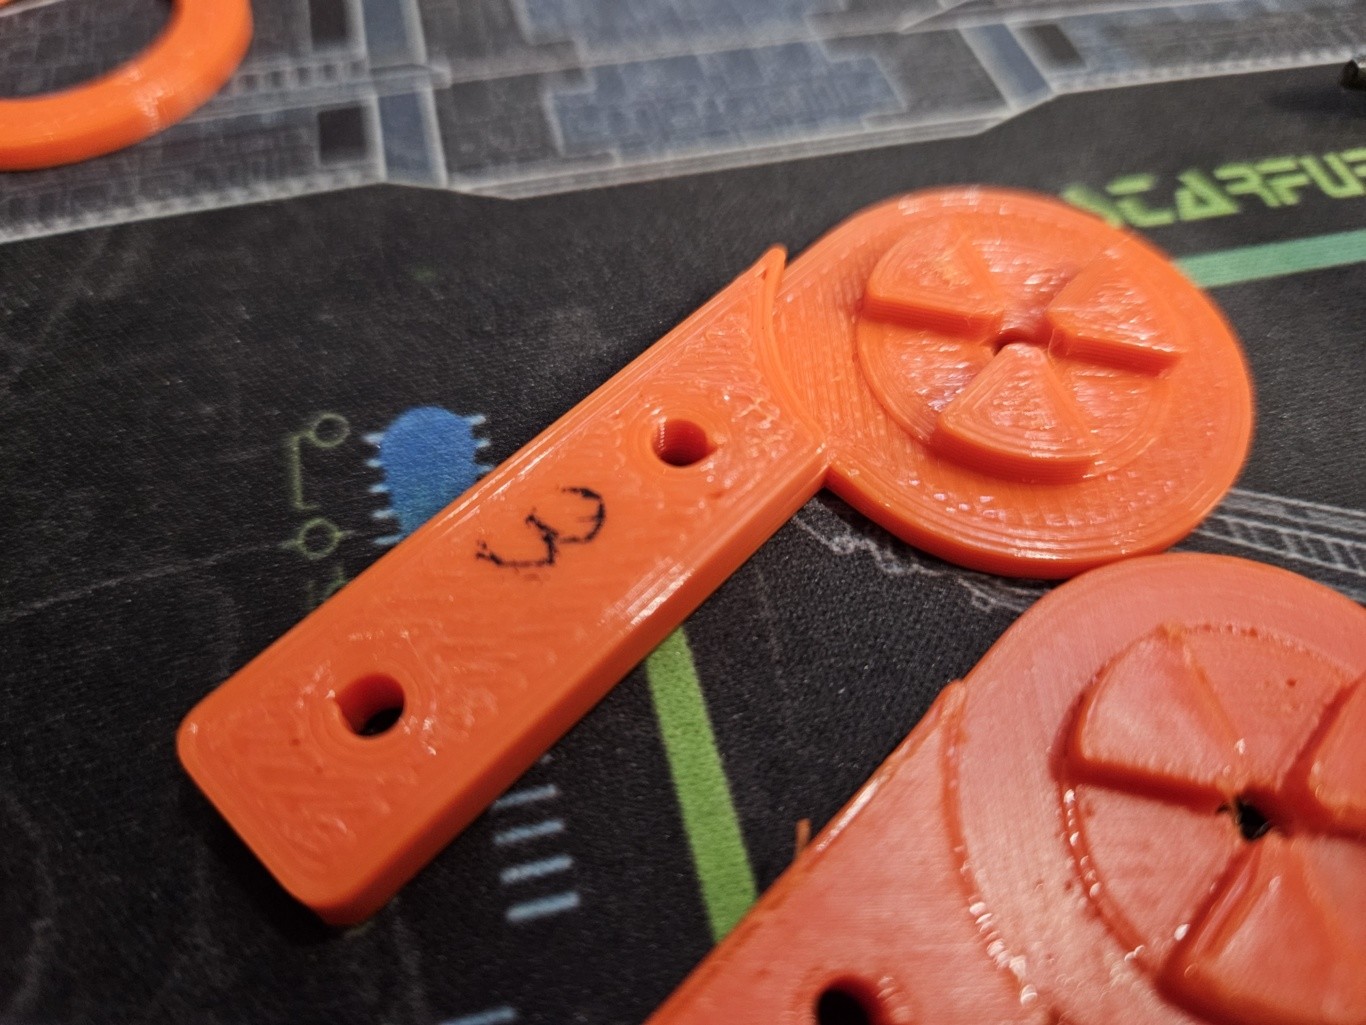
I think petg will be fine for this use case, tpu at this scale is far too flexible for my liking. petg just has a tiny bit of flex, enough to buffer against minor knocks. Also tried printing the lower jaw now that it's more or less done, unfortunately around half way through, I heard a loud crack and it fell over XD
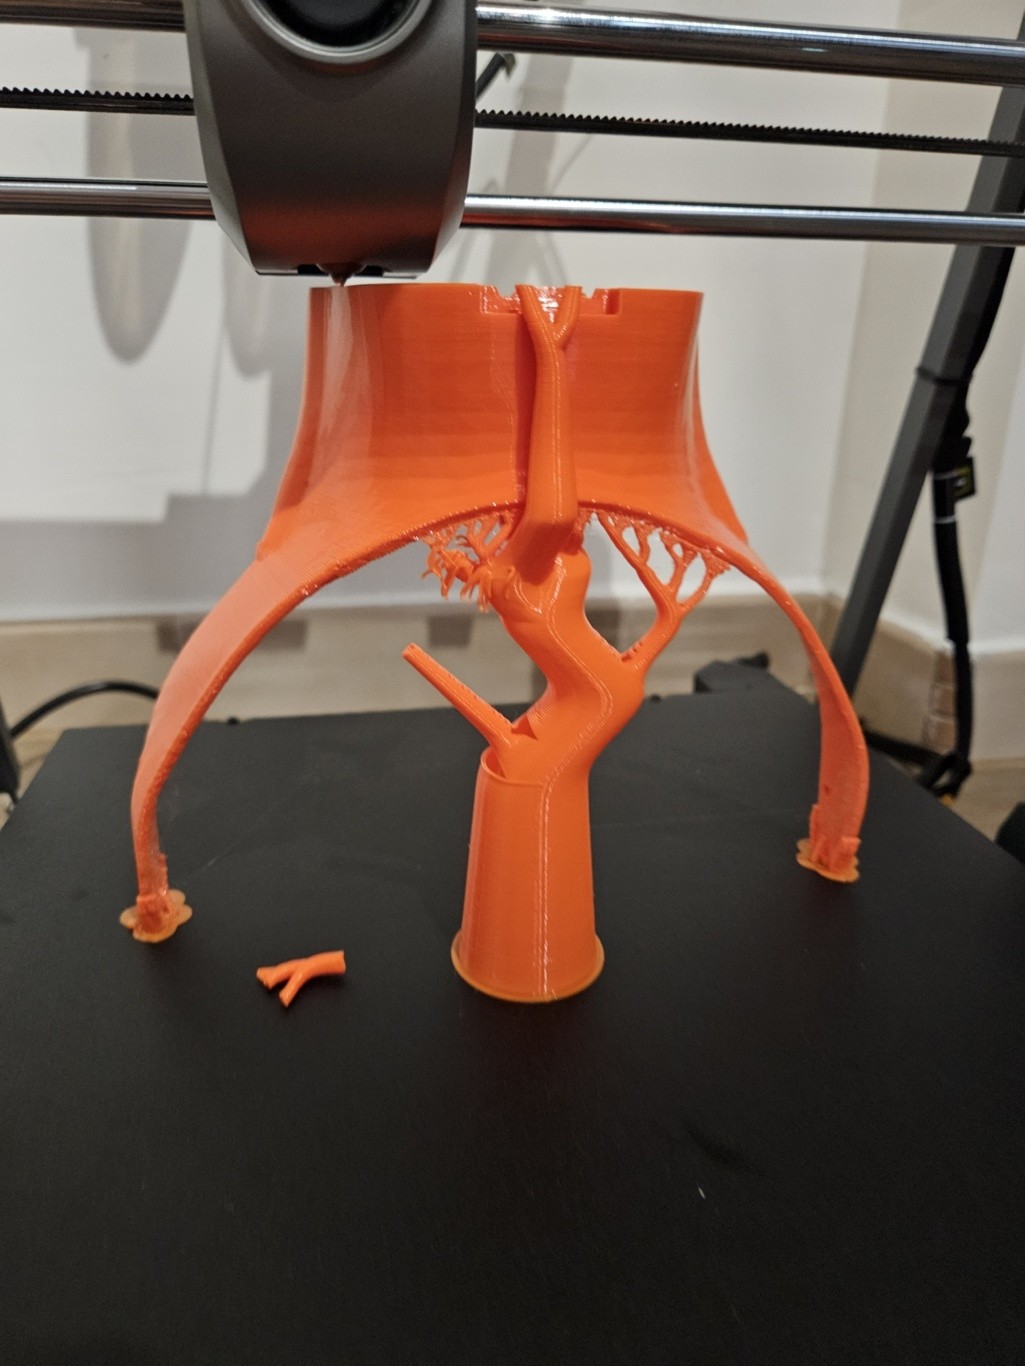
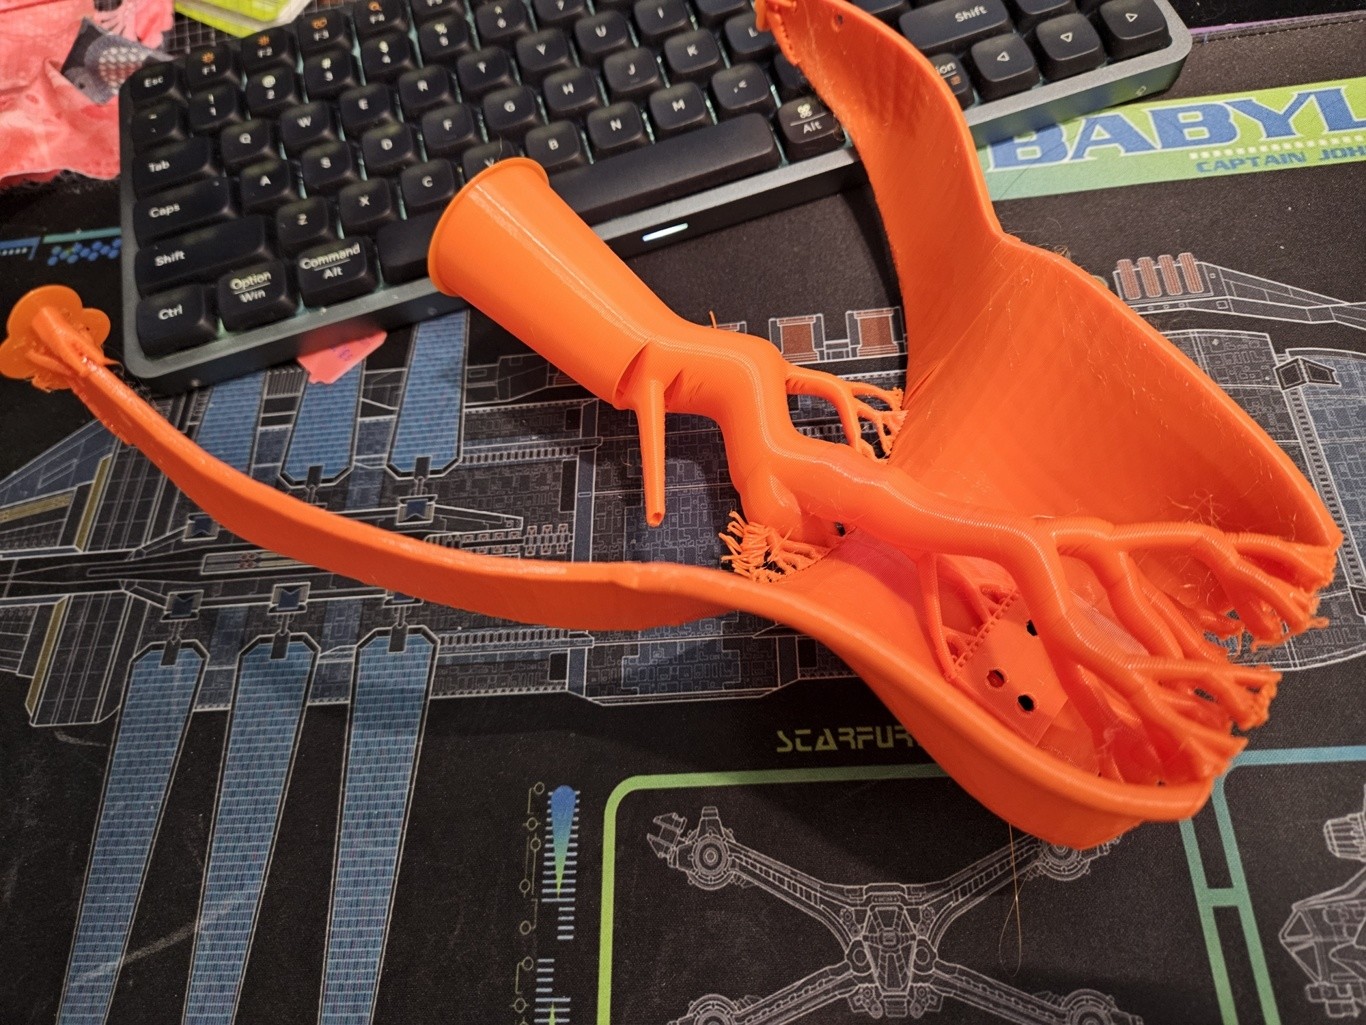
Thankfull, it'd already printed out the area that will be used to connect to the internal structure, so I can still use this for fit testing. (The part was printed for speed not quality anyways)
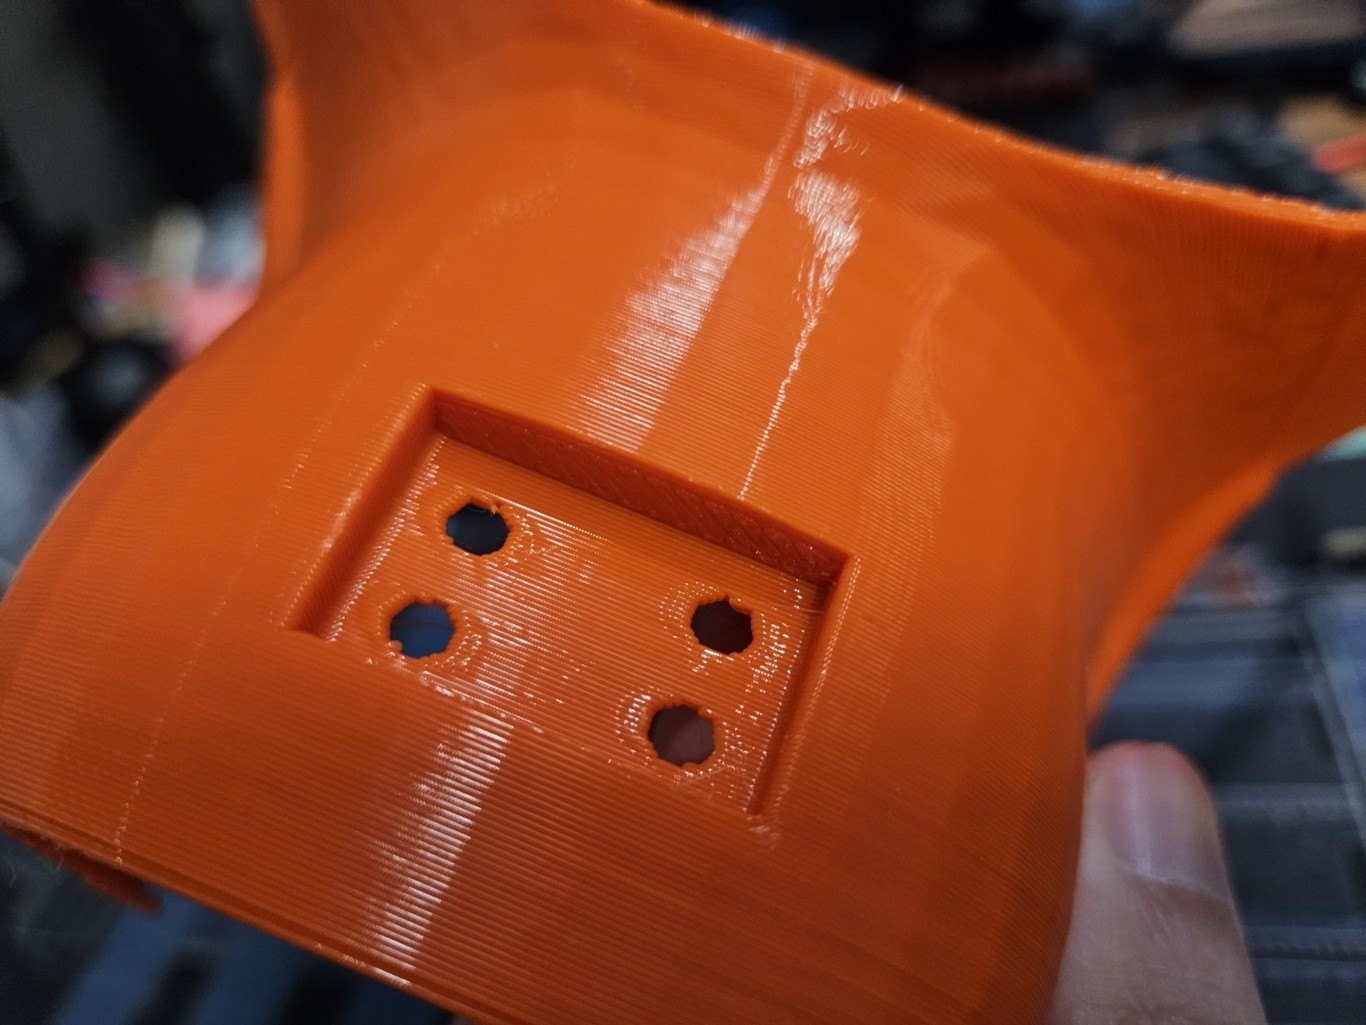
The tree supports came off very easily :3 Would love one day to have a machine with dual toolheads, one head just for suitable support material.
I think I will add in some of my own supports to hold it up next time. And maybe increase the brim + slow down travel speeds.
The support structure for the teeth/gums fit perfect though! I will be making some changes to the geometry to get more strength, especially around the two holes for the tension springs.

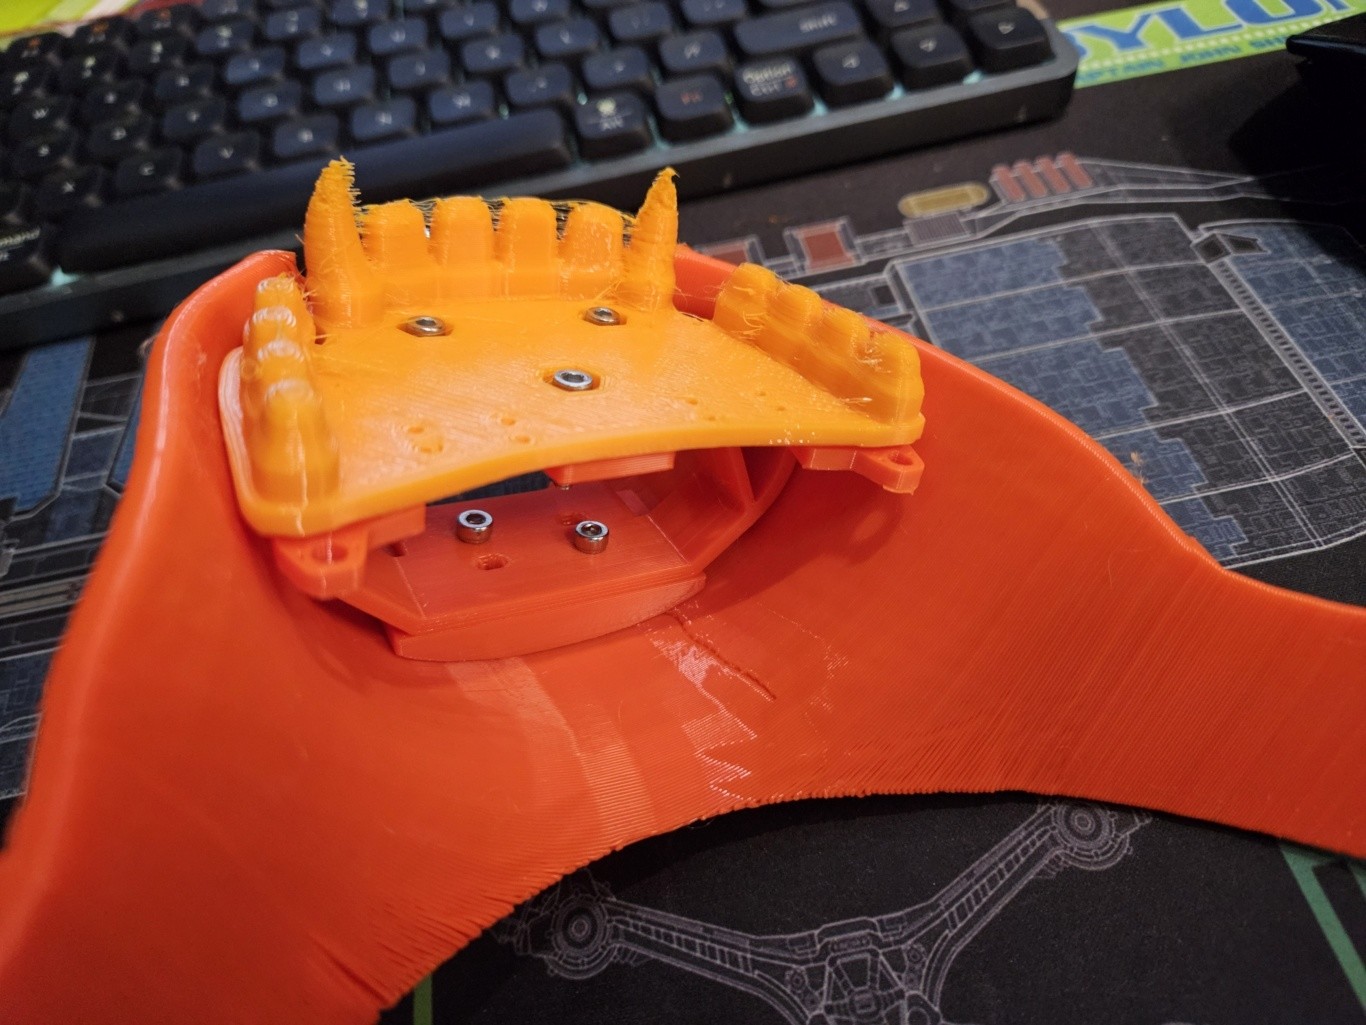
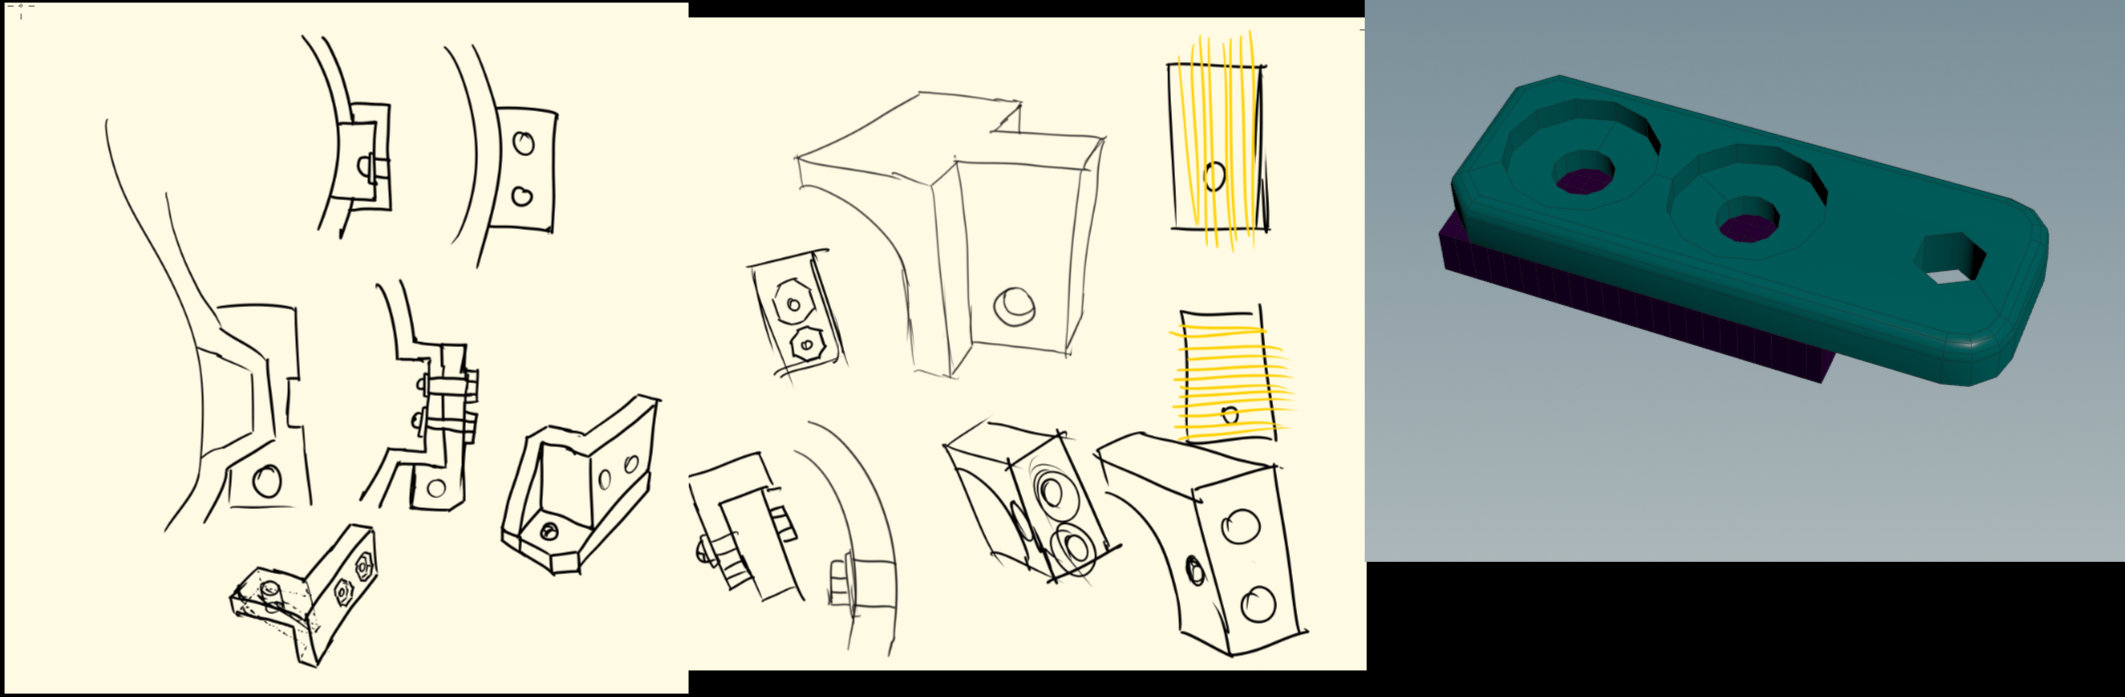
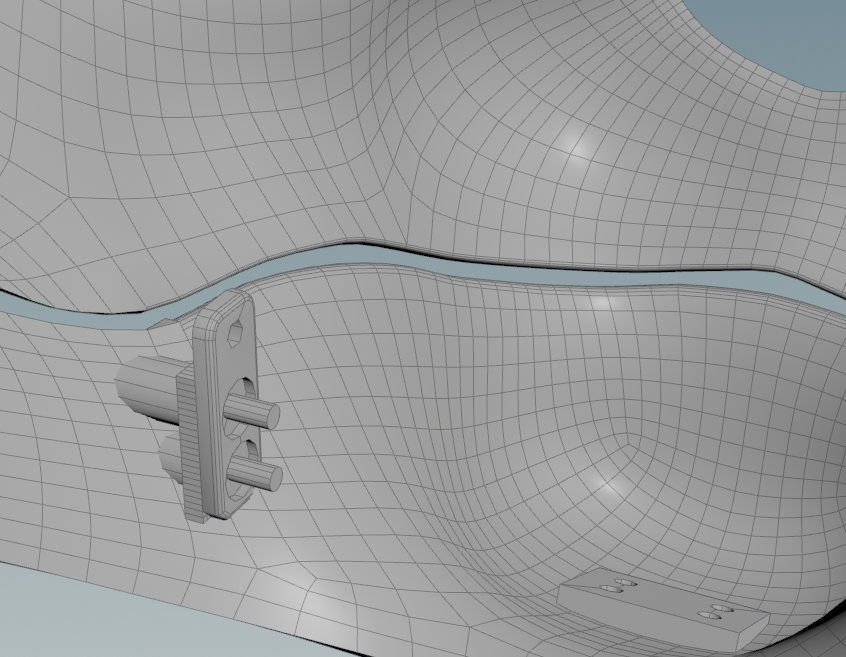
After much thinking I decided to put the spring mounts on the tongue mount. Its counterpart for the palate will hold the other end of the springs.
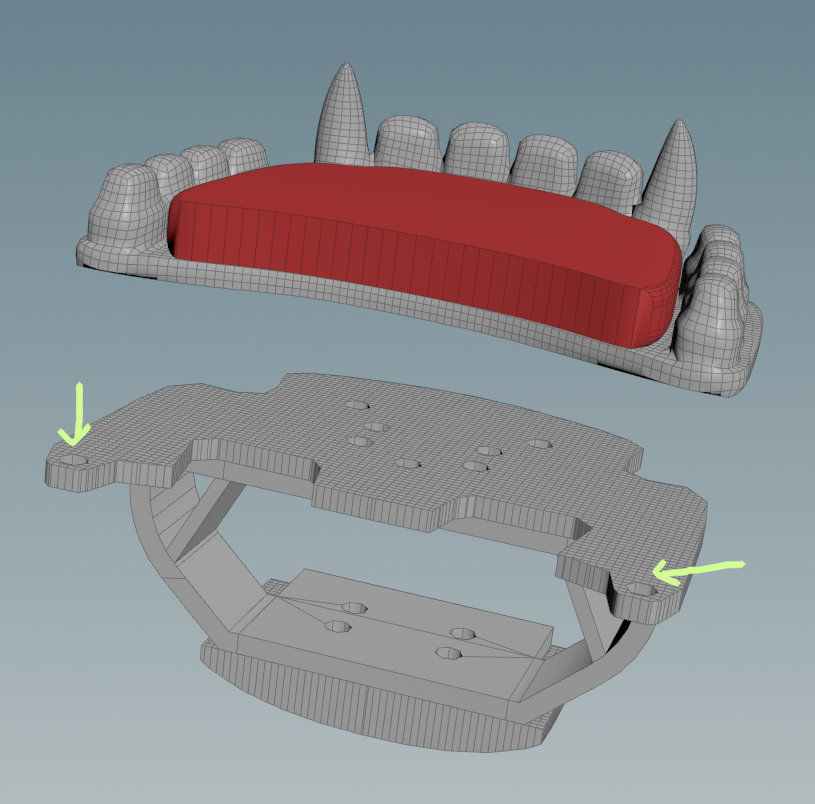
I've also doubled the amount of mounting screws in the base, and spread them further apart to hopefully improve their load bearing ability.
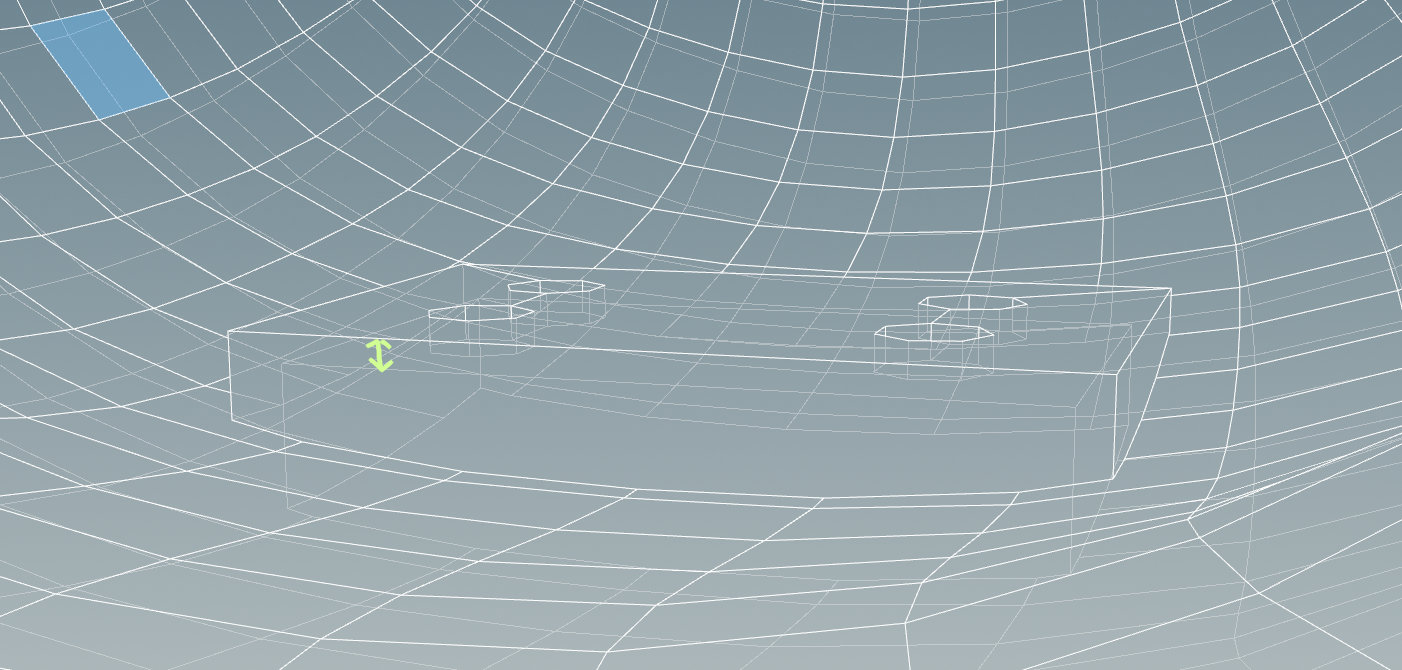
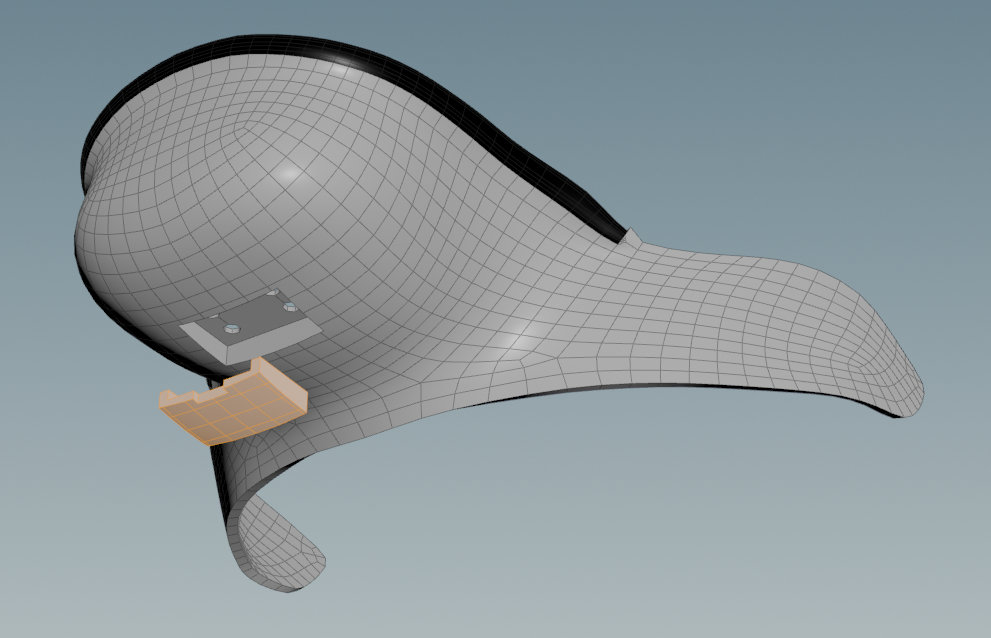
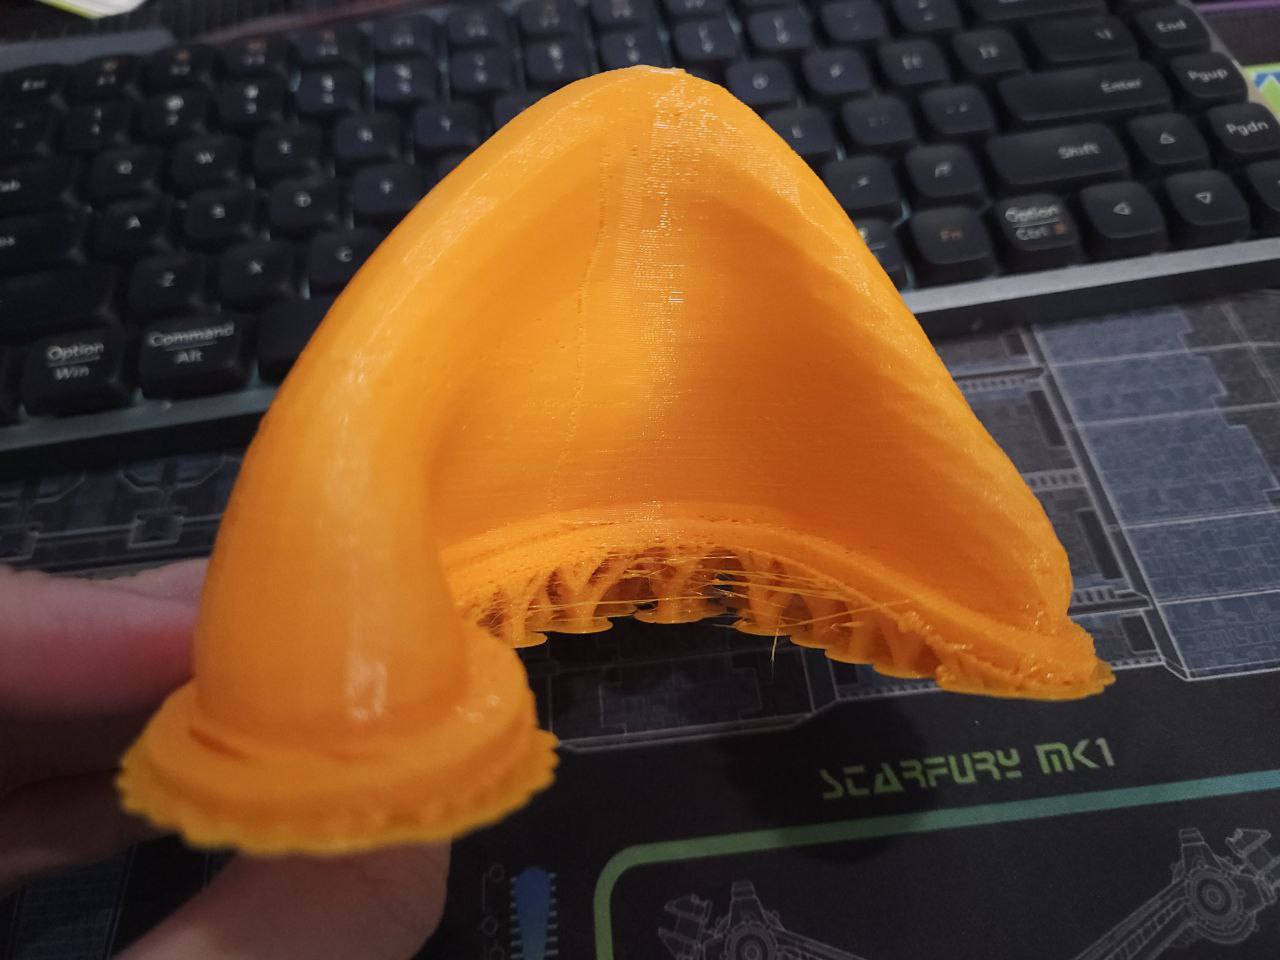
First up, got a new print of the ear just to validate the gcode. And it works! No stringing at all for the important areas.
This one was a test with only 2 walls, and while I like the softness, I'm going to go with 3 walls for the strength.
Next, I got around to designing a simpler, more aesthetic looking structure to hold up the teeth/gums.
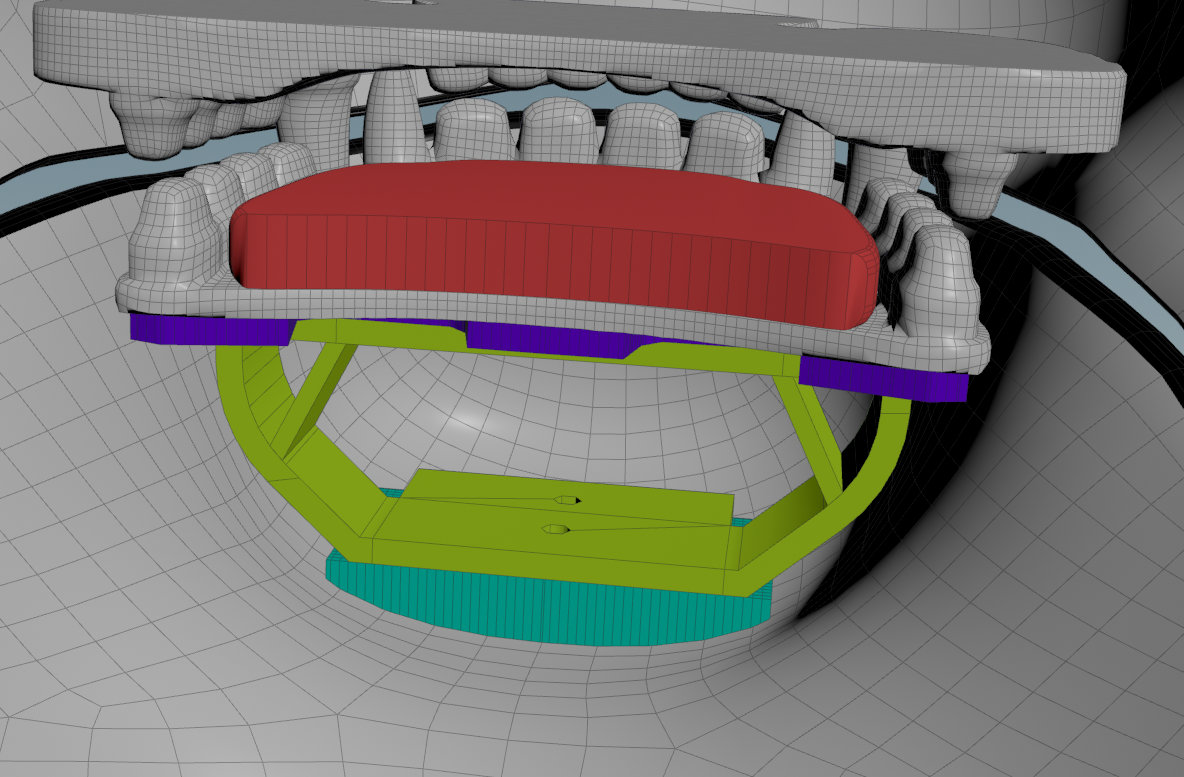

The previous design would be stronger with its crossbars and tongue-in-groove joints (that would require gluing together) would be much stronger. However there is no need for such strength (and the complications that come with it) since the inside of the maw isn't going to be supporting constant pressure.
The design I worked on today is designed to be connected via screws and can be quickly printed in petg.
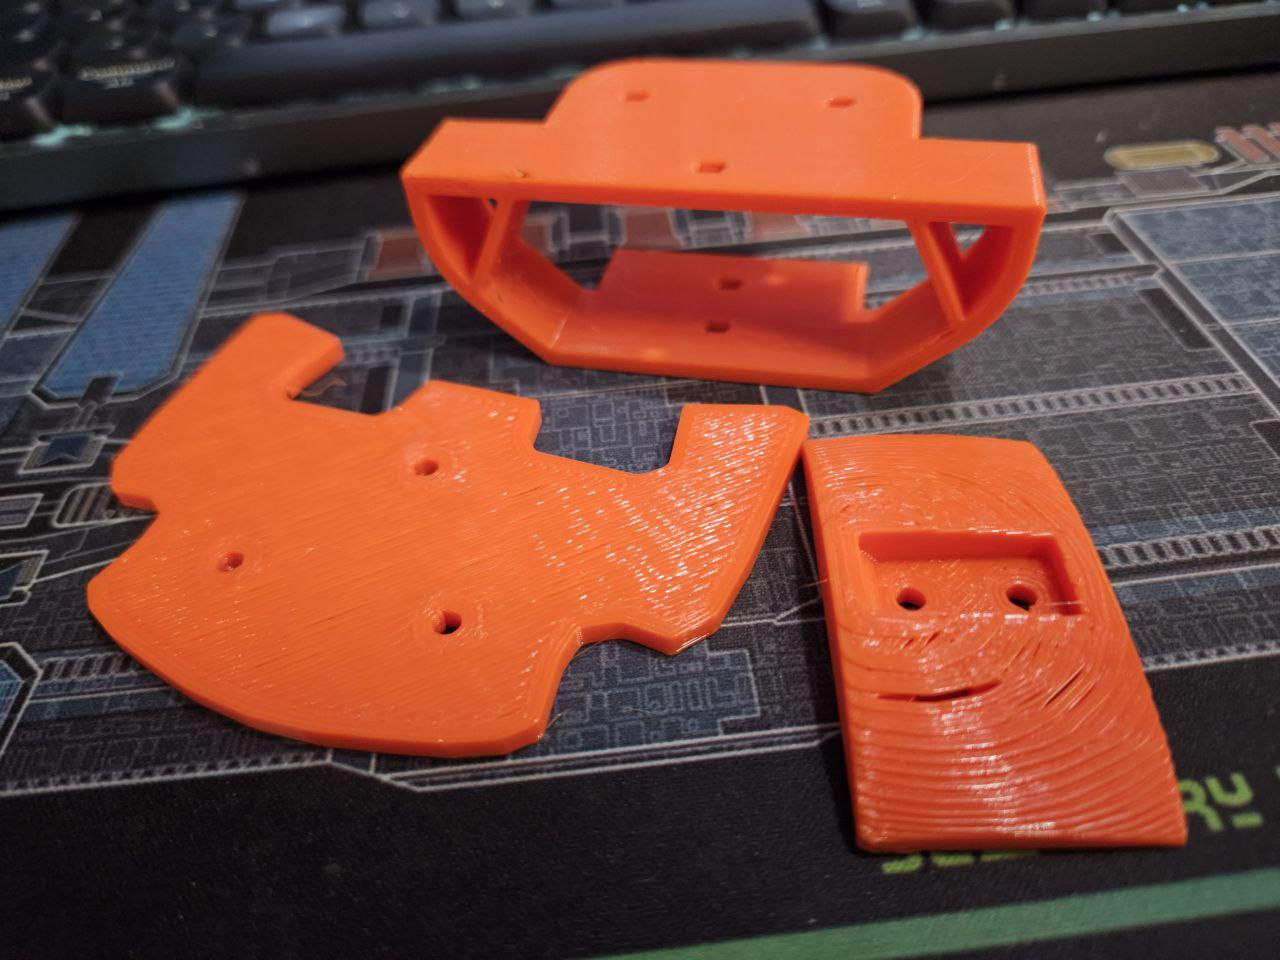
The prints seem to be fine, though the holes probably need to be slightly larger. Or... just use a drill to enlarge them to proper size.
That said, the support that I'm most concerned would flex alot is fine. It's just going to support like 30g of 3d printed teeth lol.
Here's a video of it getting punched into my desk lol.
Notes to myself: Prints are using 2 top shell layers, should use 3 for final print. Should also try turning on adaptive layer height for the curved base support to get it _really_ smooth.

Started printing one ear in tpu and noticed there was alot of stringing. I wondered if there was a setting that made the head move inside the print and it seemed there was!
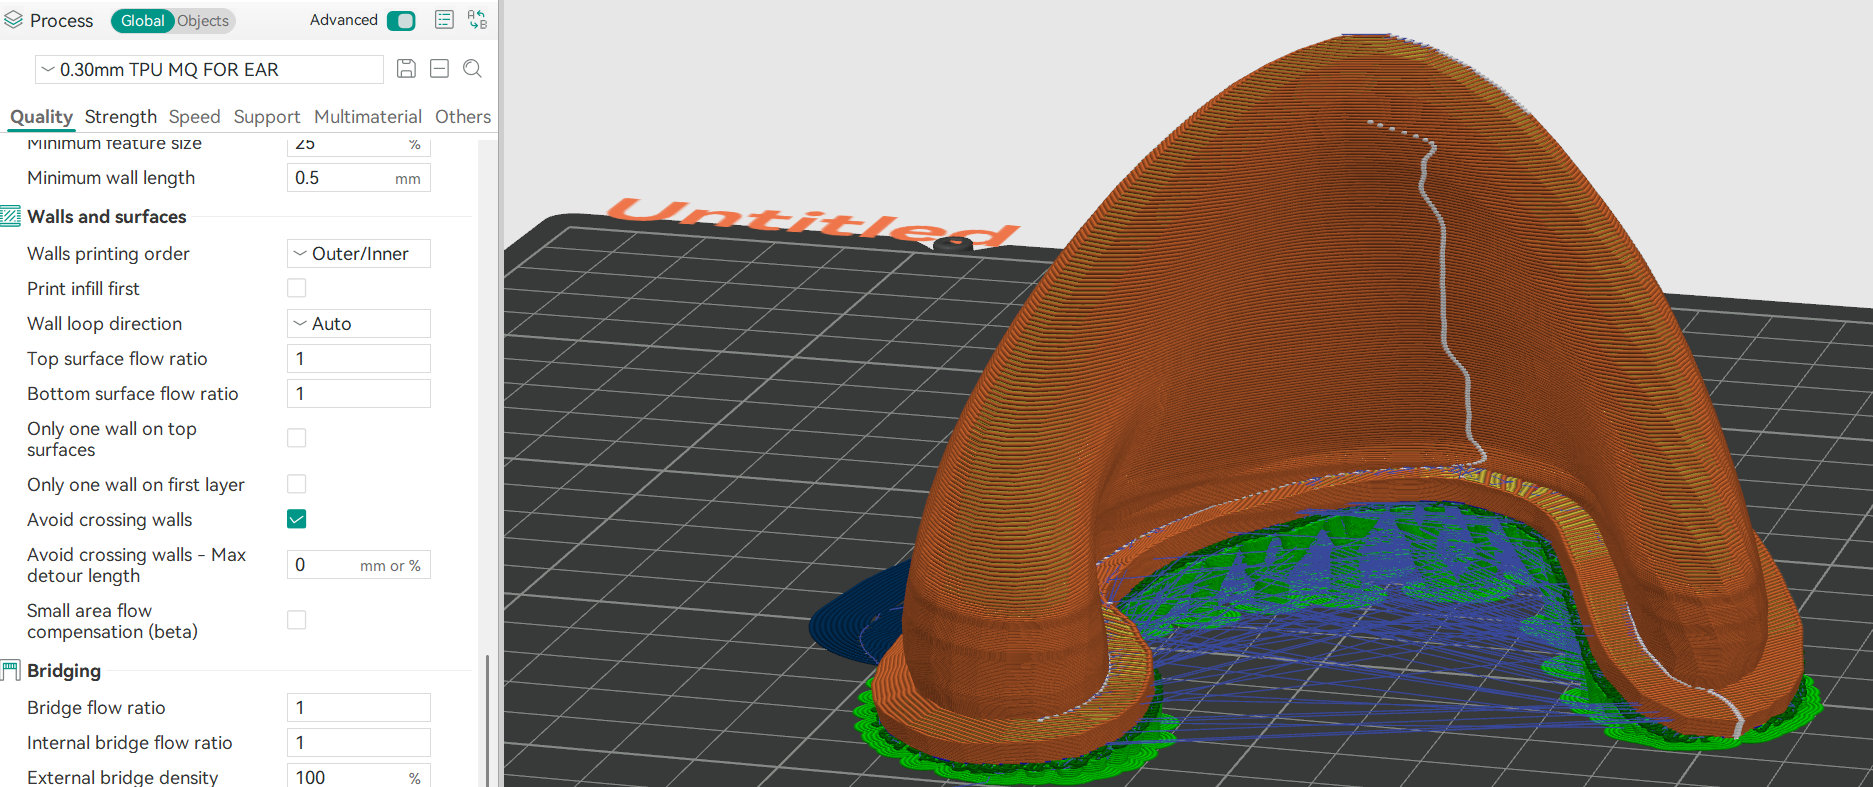
Setting "Avoid crossing walls" and dang, the only that are unavoidable are where supports exist. Now from what I've looked into, this is likely due to the "Solid Infill" when "Sparse Infill Density" is set to zero. Let's compare.
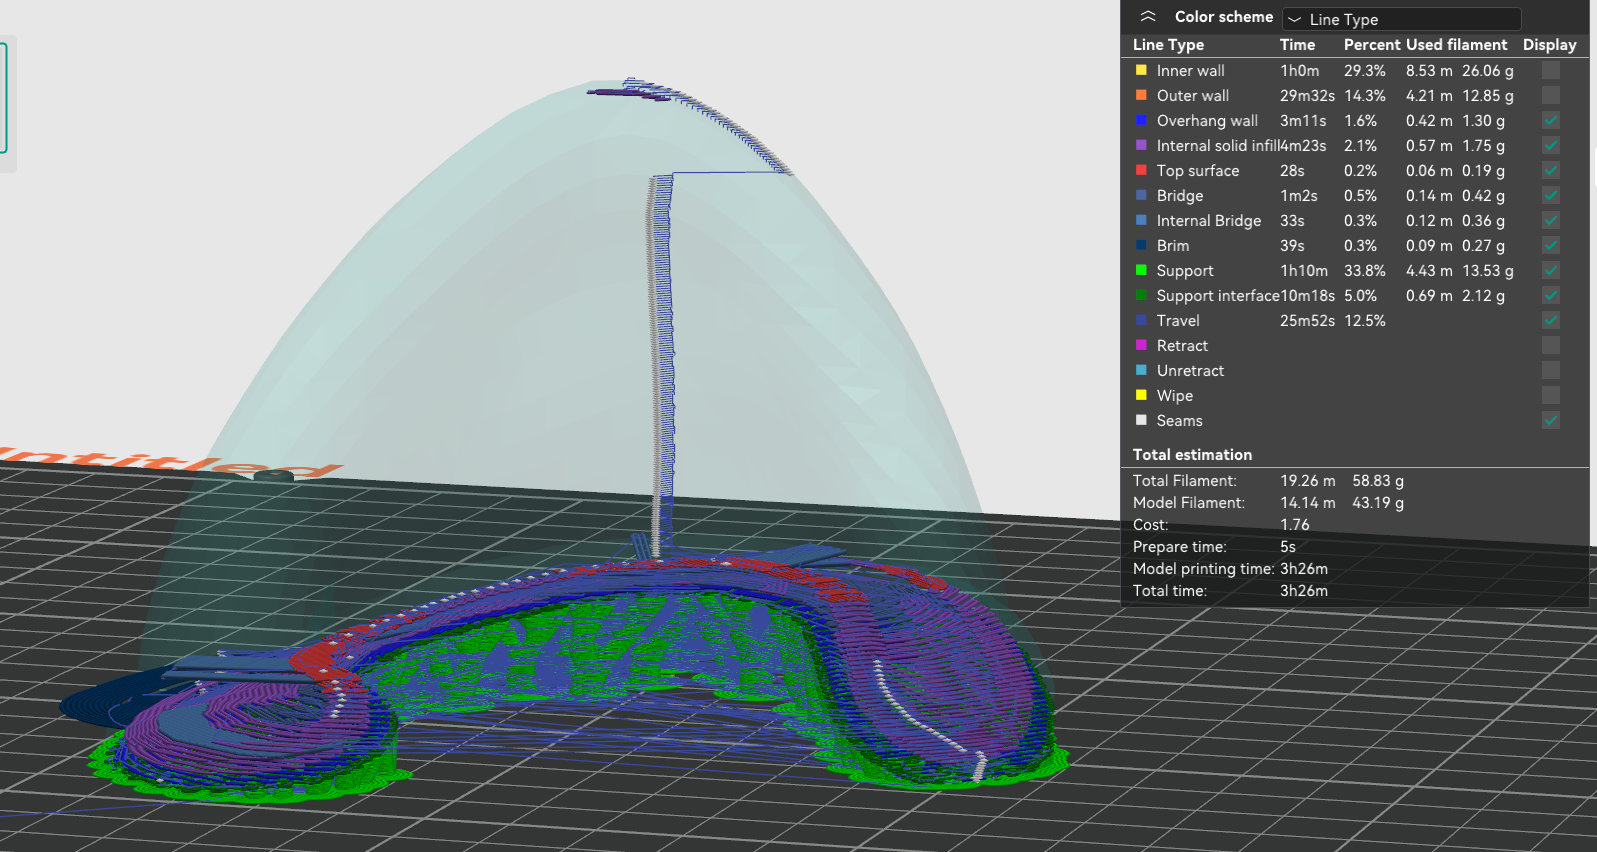
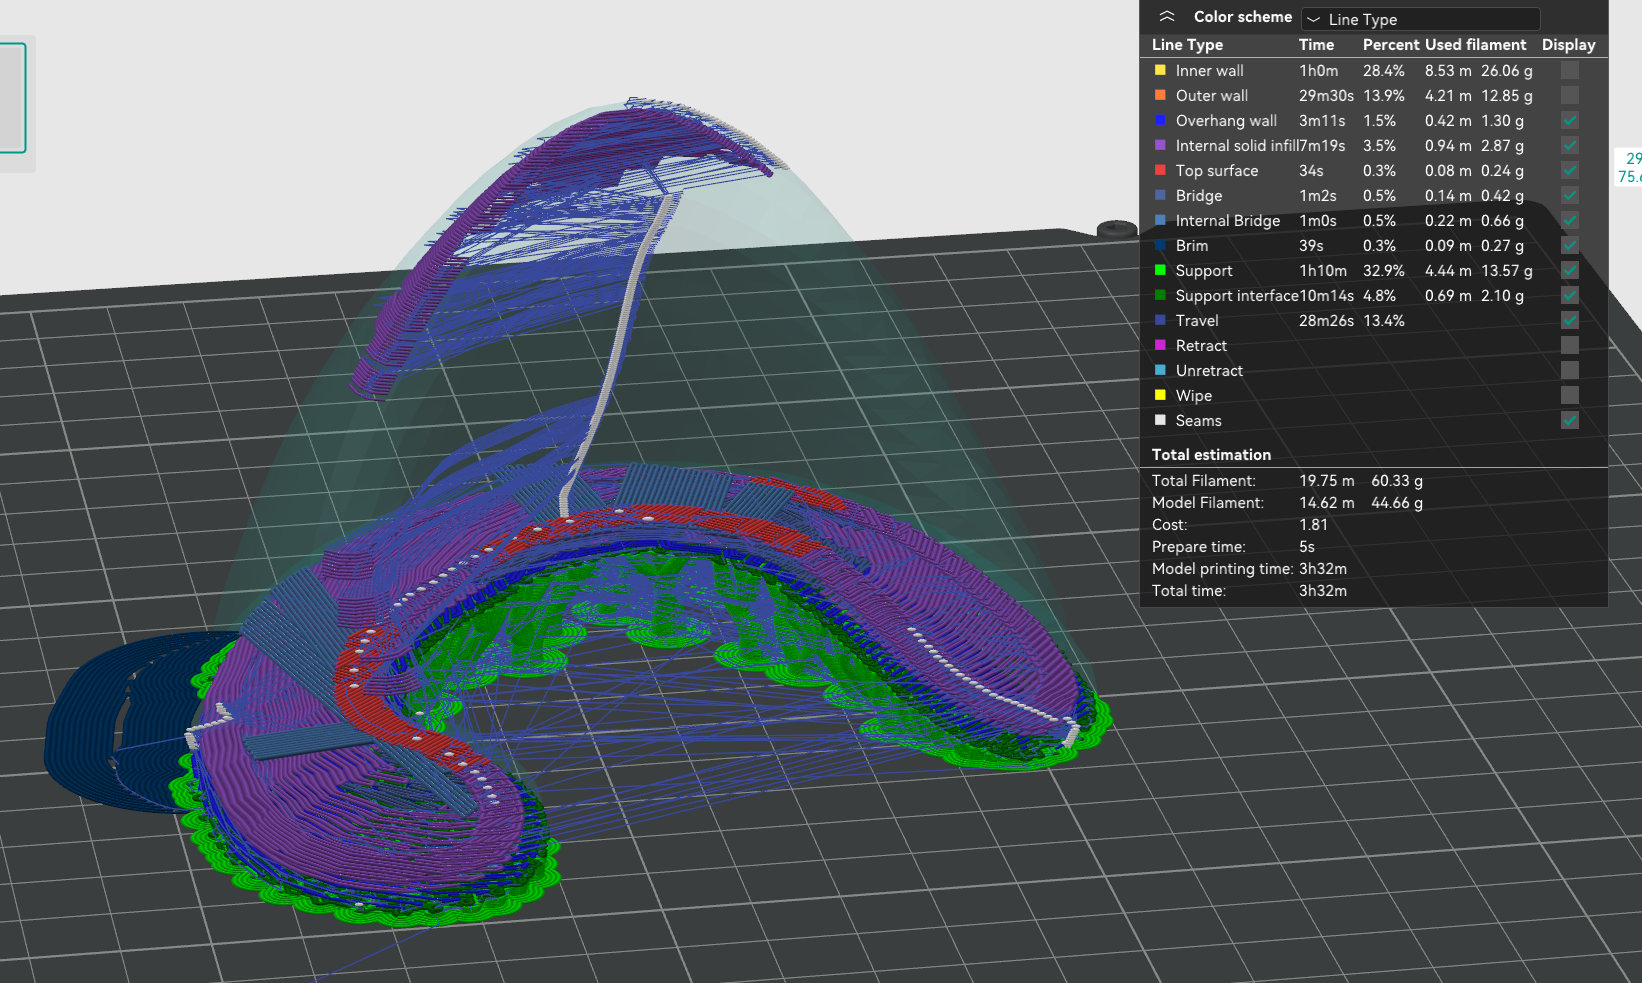
Once again, Sparse Infill is set to 0%. The image on the left has no travels across the outer walls as it does not have "Solid Infill" - this is because I set the number of "Top Shell Layers" to 2.
The image on the right however, has alot of travel across the outer walls, and it also has alot of "Solid Infill". In this example, the "Top Shell Layers is set to 3.
For some reason, when Sparse Infill is at 0%, the Solid Infill does not respect Avoid Crossing Walls. A quick workaround is to just set Sparse Infill to 1%.
If you want to keep your Sparse Infill at 0%, try tuning the Top Shell Layers. Reducing the quantity of top shell layers appears to reduce the amount of Solid Infill generated. Another method that seemed to work is setting the line width to really high values (setting 0.8mm on my 0.6mm nozzle seems to work.)
While the printer was doing its thing, I finished up modelling the teeth and gums. (The tongue is going to be made from minky fabric, so that's a stand in.) But how to mount them in the fursuit base?
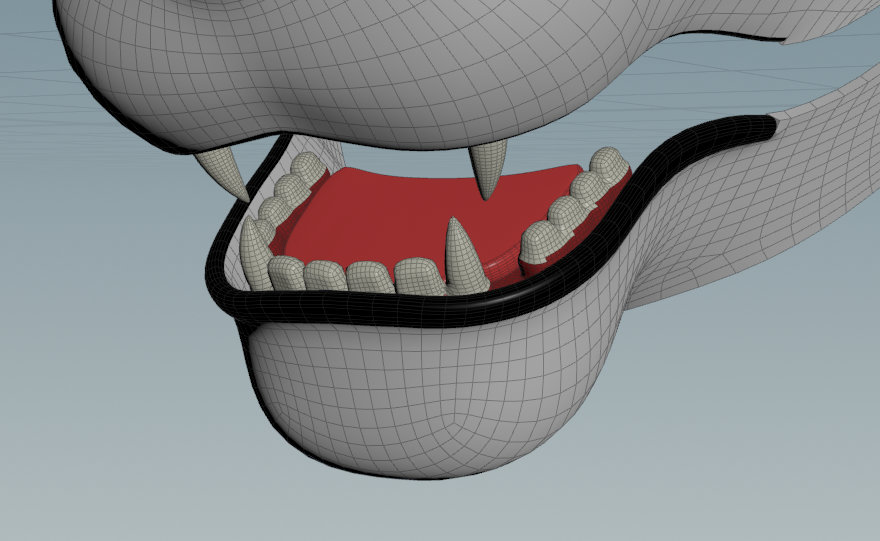
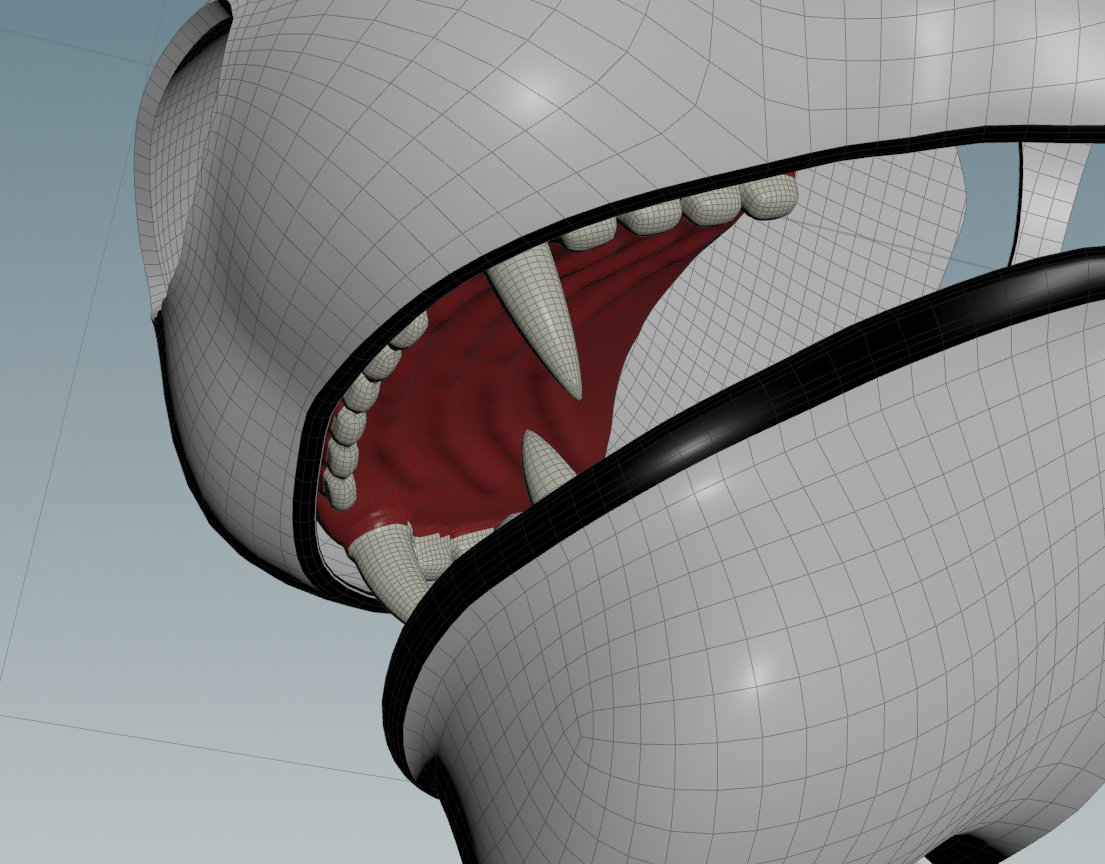
This is something I whipped up.
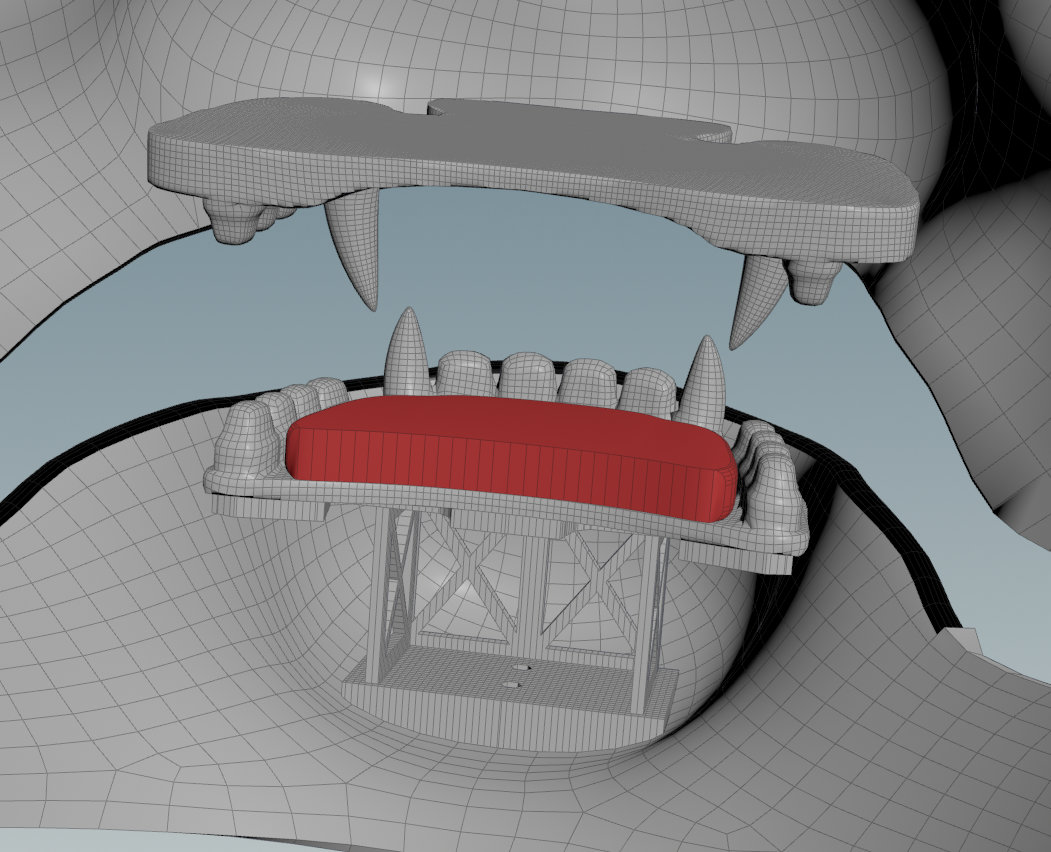
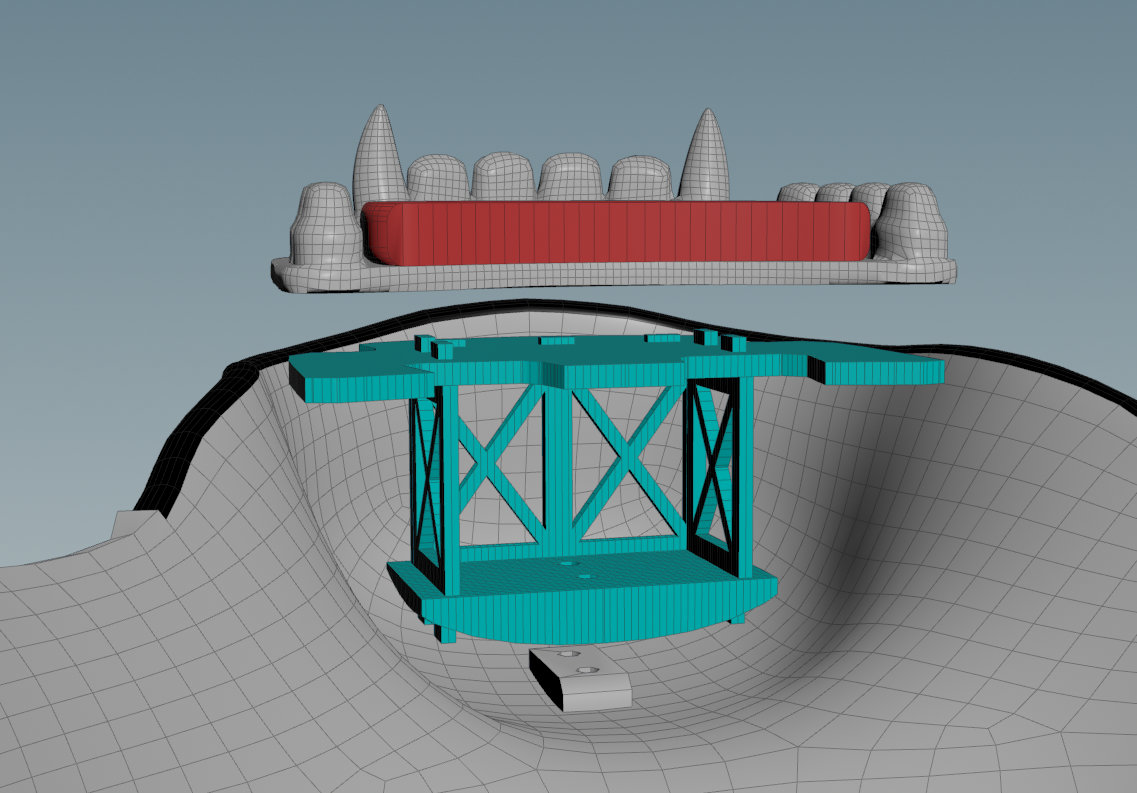
All of these will be able to be printed without supports, and I've designed it to be glued together. (The little nubs are there because I haven't yet used them to cut holes in adjacent parts)
The entire structure is then connected to the base via screws.
I think this will work great BUT.... It doesn't look nice XD
I have another idea for a support structure that would look nice BUT won't be the strongest. Gonna zzzz then figure that one out XD
Am also wondering about putting a fan in the space - either in the lower jaw or the upper muzzle area. The upper muzzle area has ALOT of space.
Oh forgot to mention if you're curious why the teeth/gums are so short - the head base is very close fitting to my face, and that's basically the space available.
Got around to running a max flow rate test, and the extruder started to click after around 12mm3/s. This is pretty surprising as I've read normal tpu speeds are in the 3.5mm3/s range. For safety's sake, I've set it at 10mm3/s as a safety margin.
I'll test some hinges to see if it'll work in a real working case. But here's a photo of when the extruder started to click and extrude little bumps instead of a clean line.
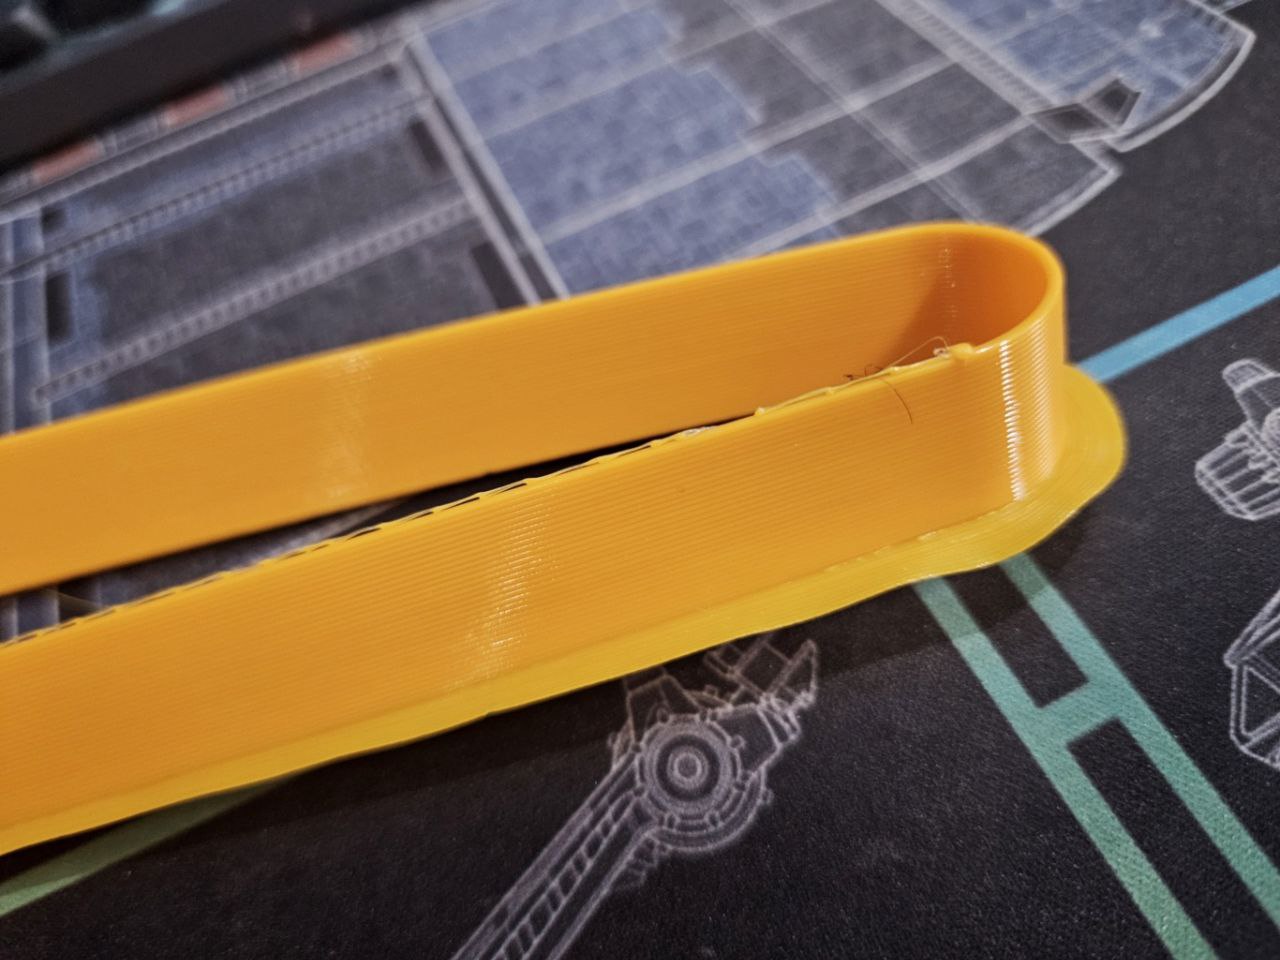
Tried a few small test prints and those turned out well, so I thought I'd print one of the ears. Nope. After about 3-4 layers it started skipping. Boo. Oh well. Gonna go back to the 3.5mm3/s flow rate. Rather have something solid and usable then fast but finicky.
Got the 2cm and 3cm hinge design printed on tpu and I think both are a bit too flexy to my taste. I could be wrong and these are the way to go though XD
Am going to test the 3cm design on petg to see how that works - really want a bit of flex here. Worse case scenario I'll just use pla, the pla hinge prints feel really solid.
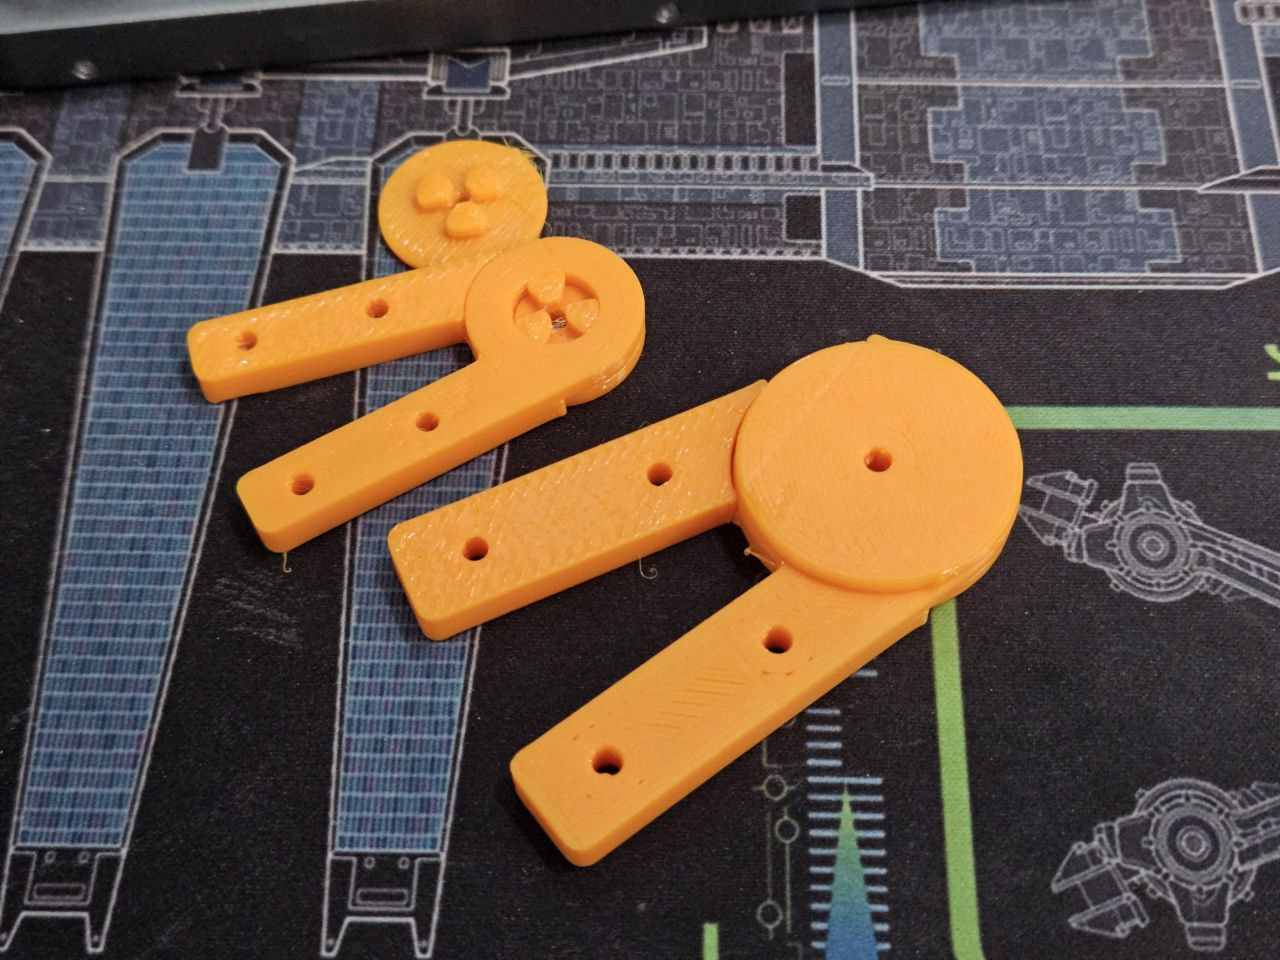
I also decided that... I'll make the teeth myself. While the pattern I've bought will work for sure, I kinda... wanna have an accurate representation of how the fangs in a snow leopard go together.
As such I designed a procedural system in Houdini that allows me to build a set of teeth. Here's a video showing how the teeth automatically align to the shape of the curve.
This way, I can easily tweak the sizes of the upper/lower jaw dentition. I've gone so far as to wrap it up as a houdini digital asset so there's a very simple interface to use.
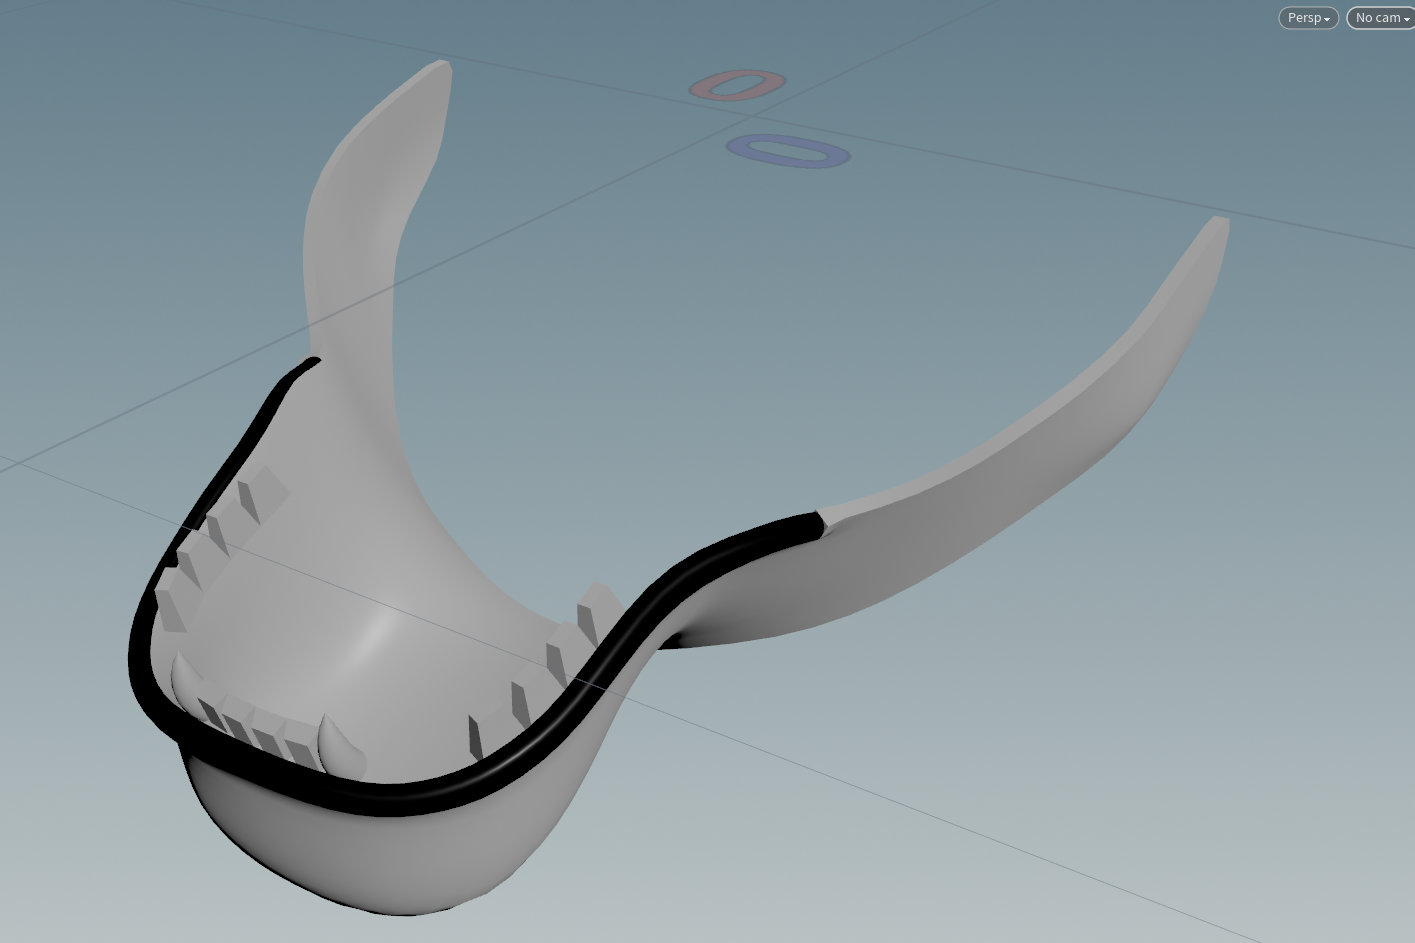
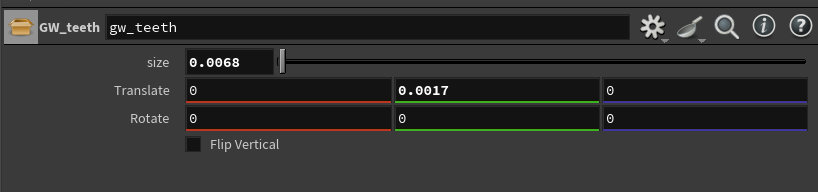
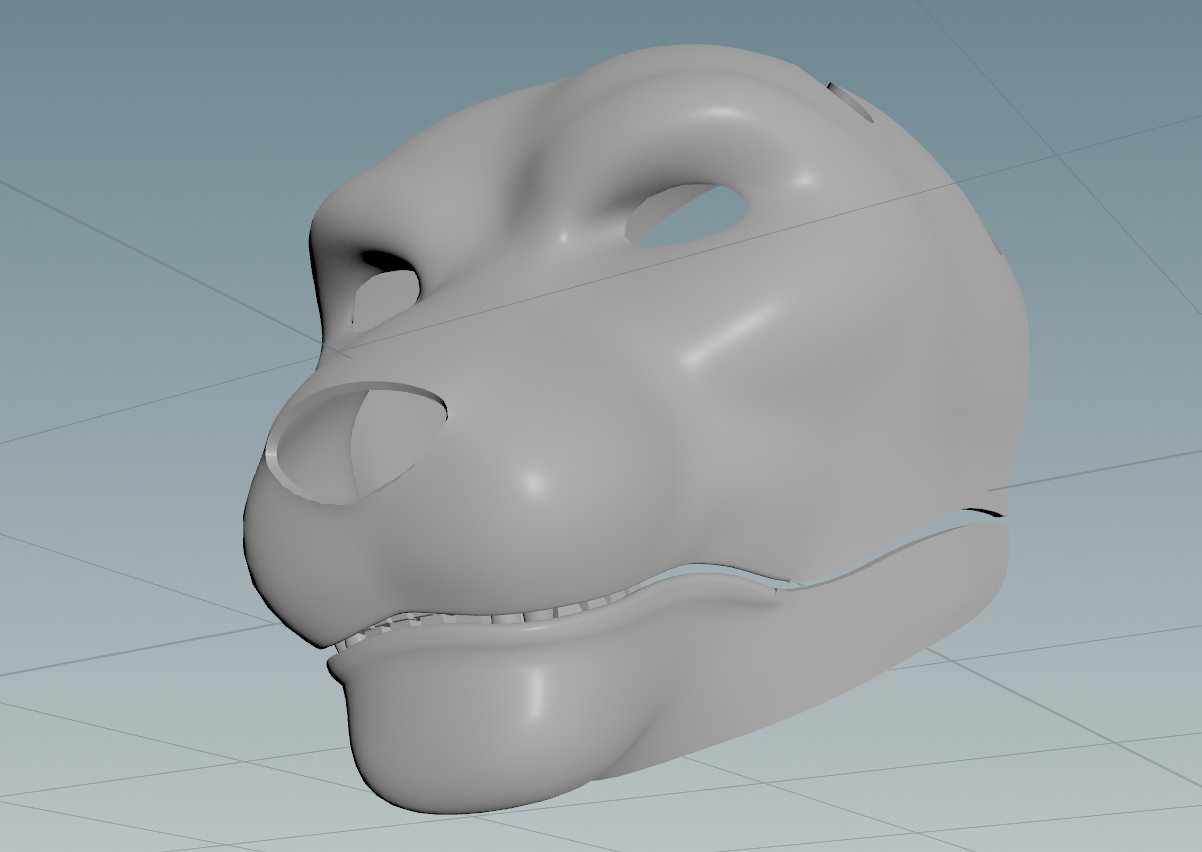
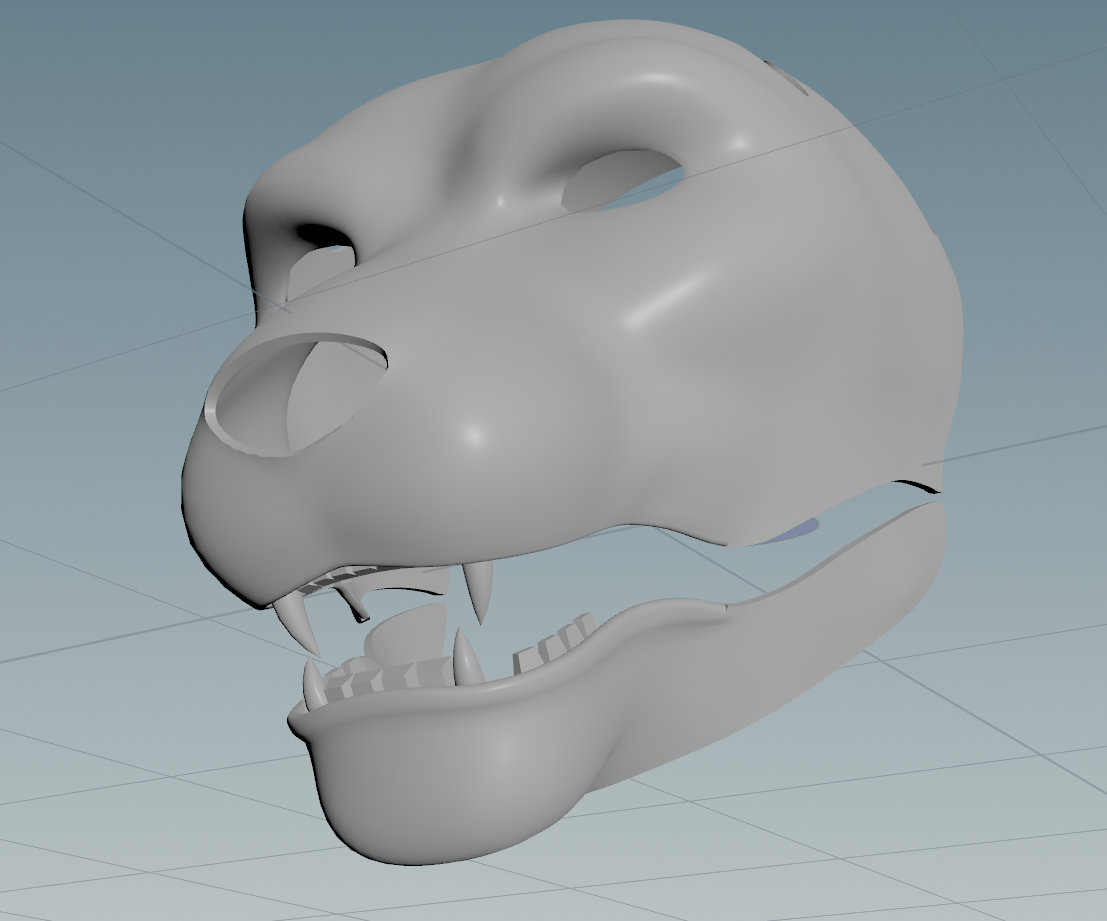
Still a bit of ways to go, need to:
For the flow rate tests, it prints out a series of rectangles. Each rectangle has a + or - offset from the current flow rate. Once that's done I'd have to choose the best print - each print has a label with the amount of offset that can be added to the current flowrate. Once that is done, a 2nd pass with the new value can be done to fine tune the print quality.
A little note - My eyesight isn't the best to visually determine the best quality print from the lot. I've taken to relying on the reflection/highlights on the prints (visual) as well as the smoothness (touch) to determine this. The "best" choices always are the smoothest, and thus have a relatively flat and broad reflection. The ones that have too much or too little material result in bumps or dips, which are quite easy to tell via running a fingertip over them. These bumps also result in reflections that are broken up.
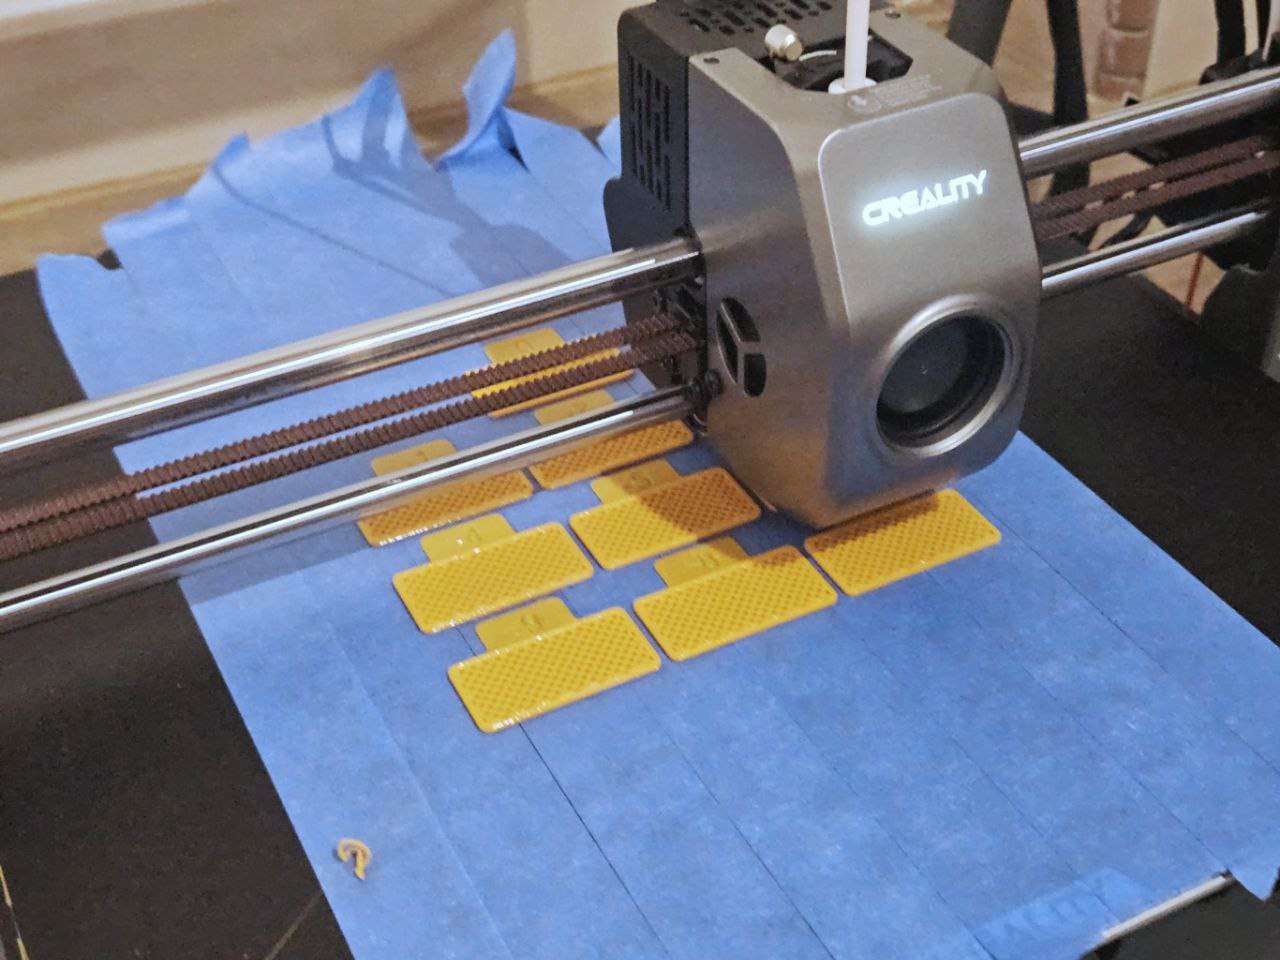
One very interesting observation is how flexible (or not) each of these pieces are. The test pieces with a higher flow rate (and thus more filament) are pretty solid, while those with lower flow rate (like -20%) are very floppy - for the exact same thickness.
This brings me up to my hinge design. The original one from a few days back is chonk, it's built around a tube structure with 3cm diameter, with a height of 11mm.
After observing the original design for a bit I had an idea, why do the two hinge structures need to move simultanously? Only one piece needs to move for this to work. I can up with this new 3 piece design.
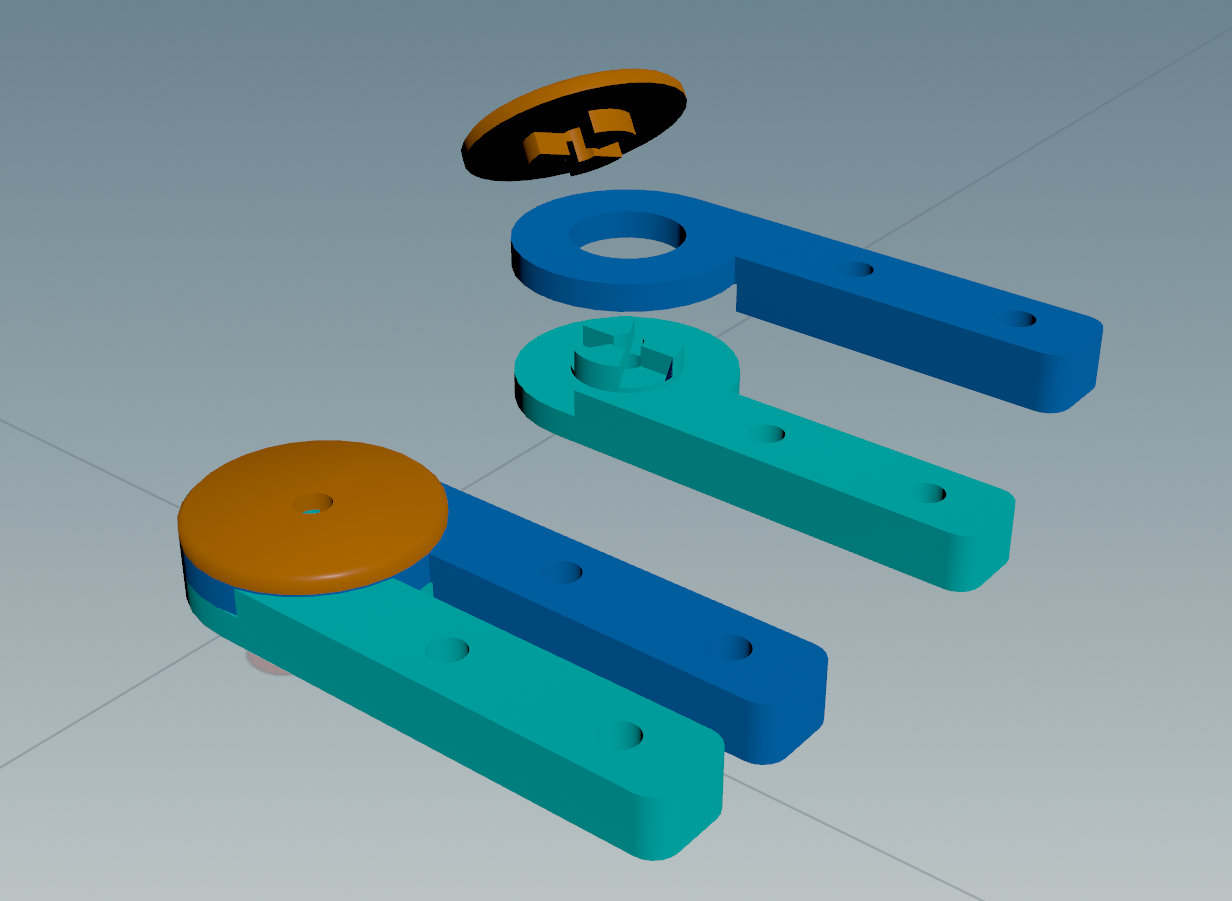
This one is built around a 2cm diameter hinge, with a total thickness of 6.5mm. The prongs no longer have an offset from each other, and are 5mm at their thickest. Once the calibration is done I'm gonna print some tests with different thicknesses to find out what's strong enough for my needs. At the moment I'm thinking increasing the number of walls (and top/bottom layers), together with a gyroid/3d honeycomb infill will do the trick.
(This is over-engineering. I'm certain hinges for sale are more than sufficient for the task.)
So right I spent some time designing hinges. First up, why? I've looked at existing fursuit hinge designs and don't like that it's possible to overtighten the screws, and I feel that alot of forces are being handled by the rotating part of the hinge. Here's an example of what comes to mind when I think "fursuit head base hinge":
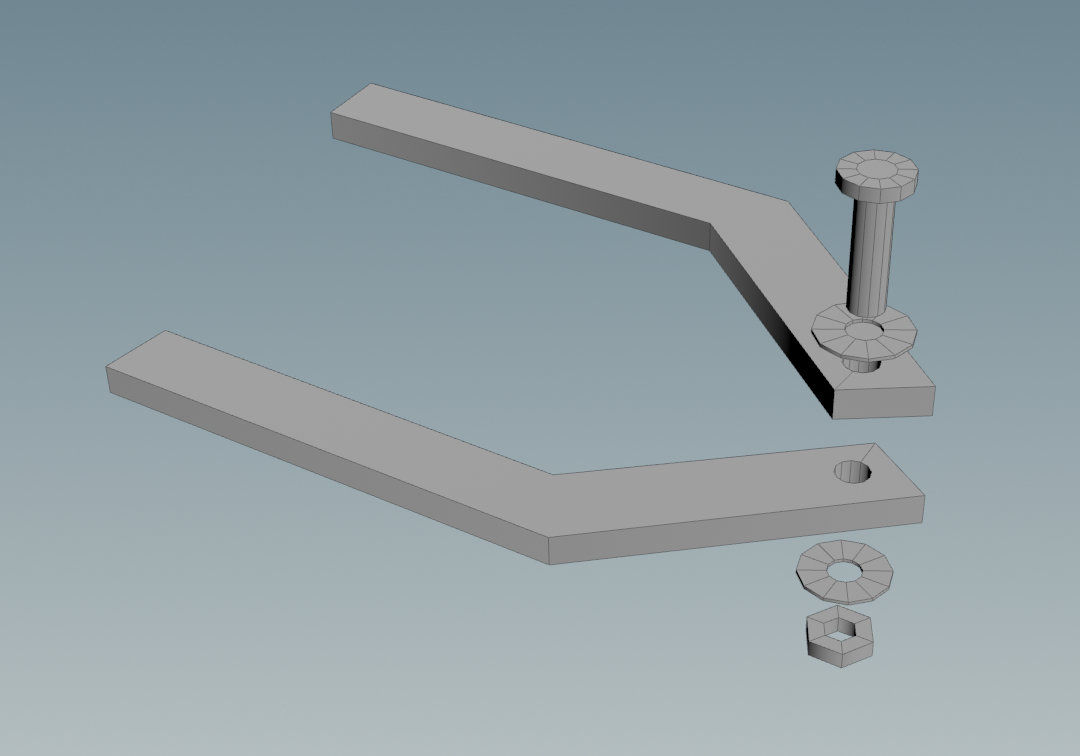
Now this is my design:
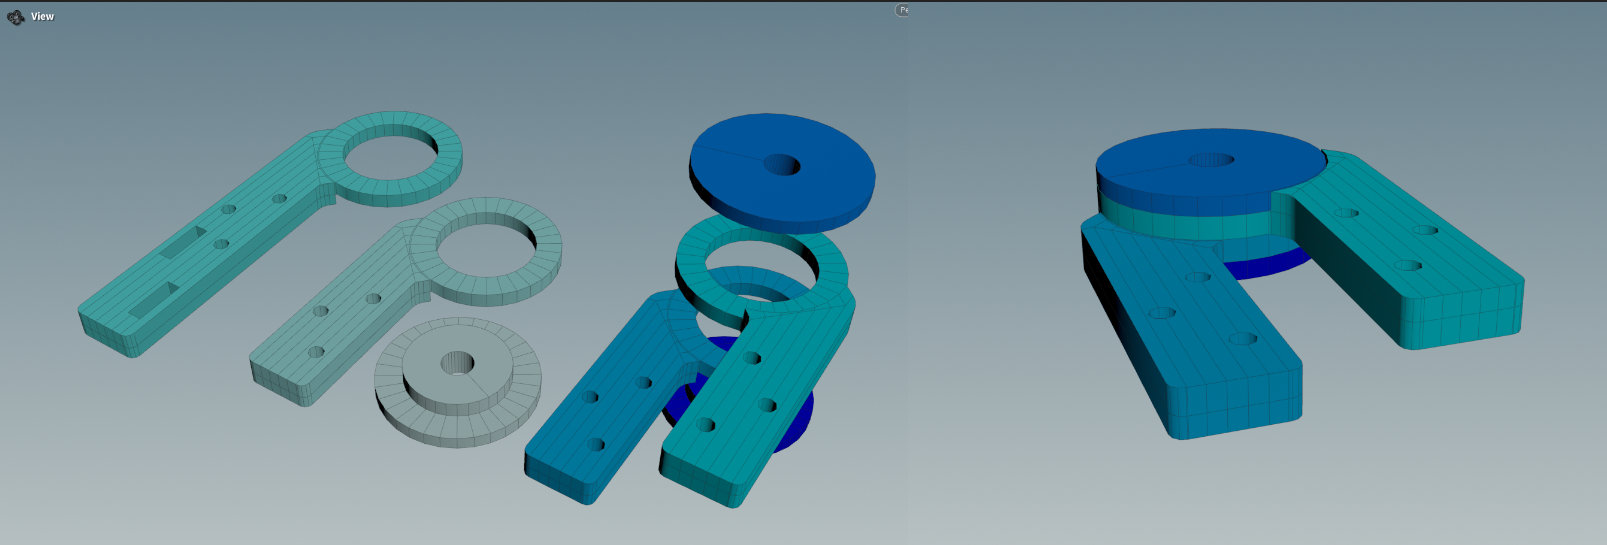
The assembled hinge is on the right, and there's an exploded view in the center. As you can see, there are two "endcaps" that hold the hinge in place, and can be connected using a screw and nut.
This captures the two hinge mechanisms, which are secured to the jaw/upper head.
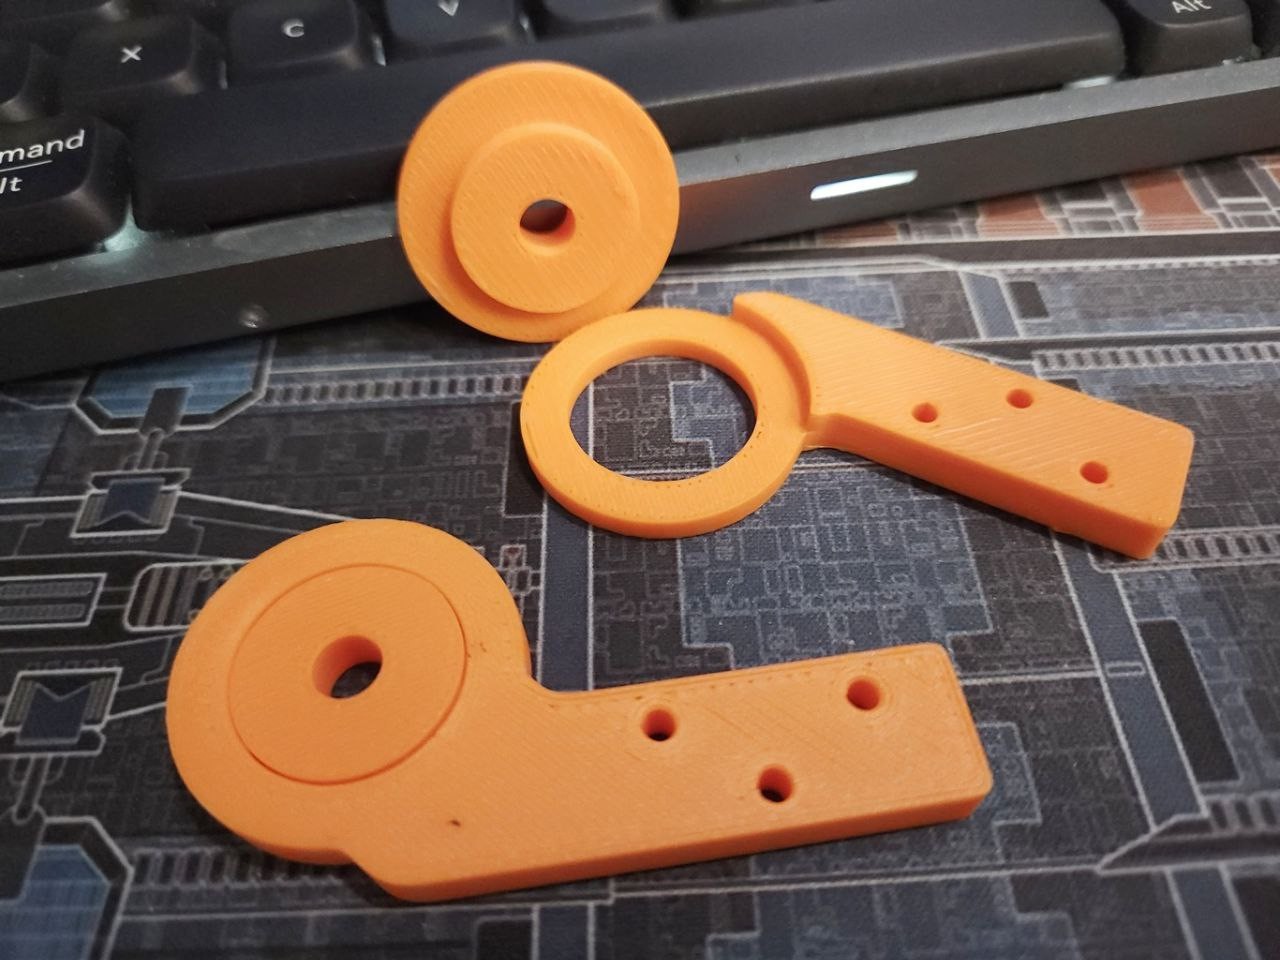
At the moment I'm thinking the "endcaps" should be printed using petg, it should resist compression relatively well and the particular filament I have is very slick, though ideally, it should be printed using nylon, as I've seen mention that nylon has self-lubricating properties. The price of nylon filament though, ouch! Still the quanity required for just the endcaps is minimal.
The main hinge mechanism I would print using tpu to give it a bit of flex to take up any unexpected torsional stresses.
A few things to work on next. First, I want to re-design the "endcaps" so that they slot into each other and not freely rotate. That will reduce the chance of the screw/nut wearing loose over time (Note to self, use loctite). The head base mesh also needs to be edited to accomodate this.
Update: Oops, redesigned it.
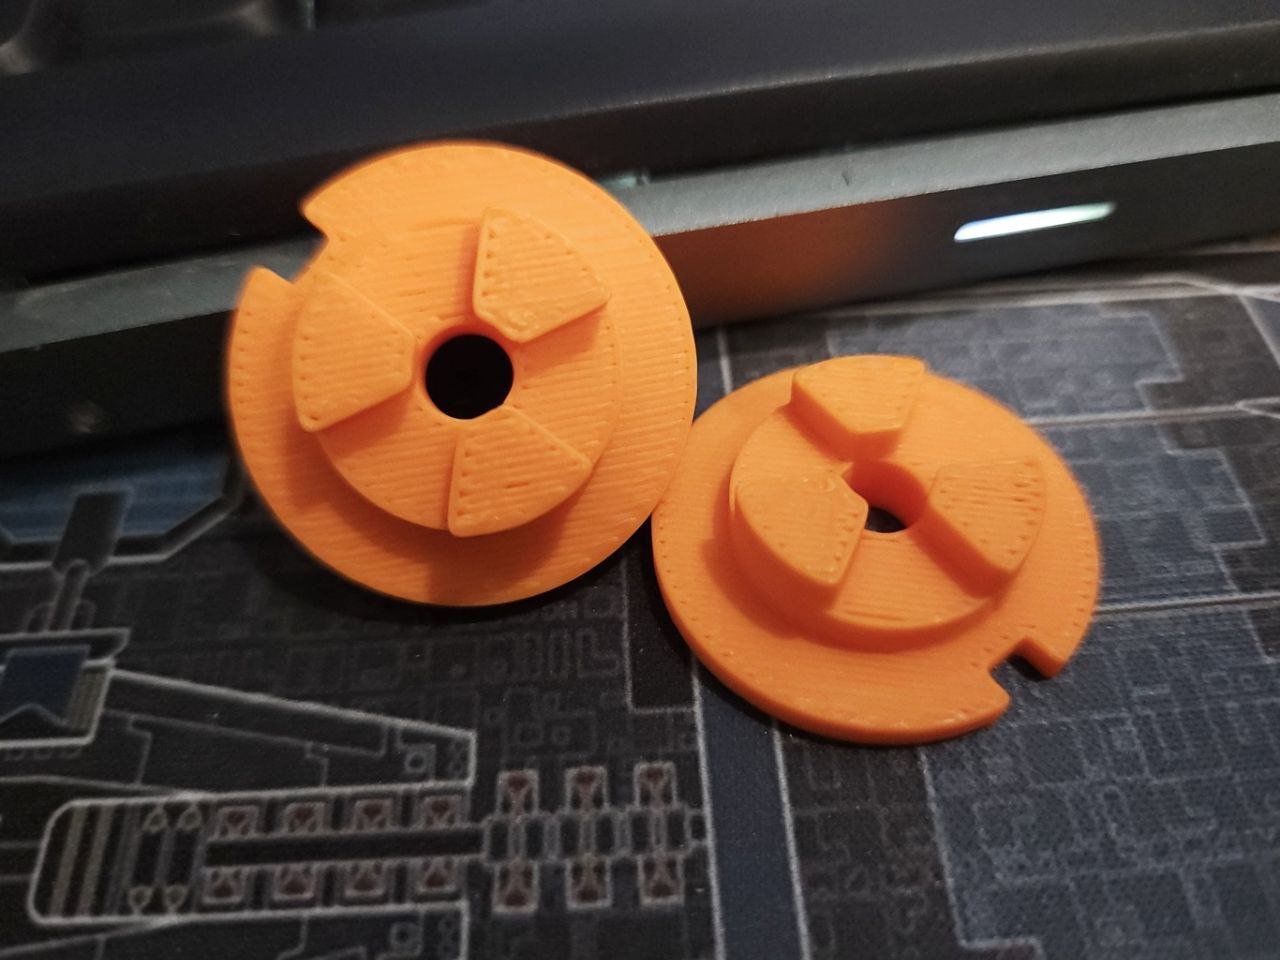
Ok one last thing I would like to add to the end caps is some kind of inset so that the fasterners can be flat against the endcaps. However, that's on the side that's currently flat on the printer bed, so it would require some kind of supports for that to work. Gonna call this done for now and get it fitted into the head base.
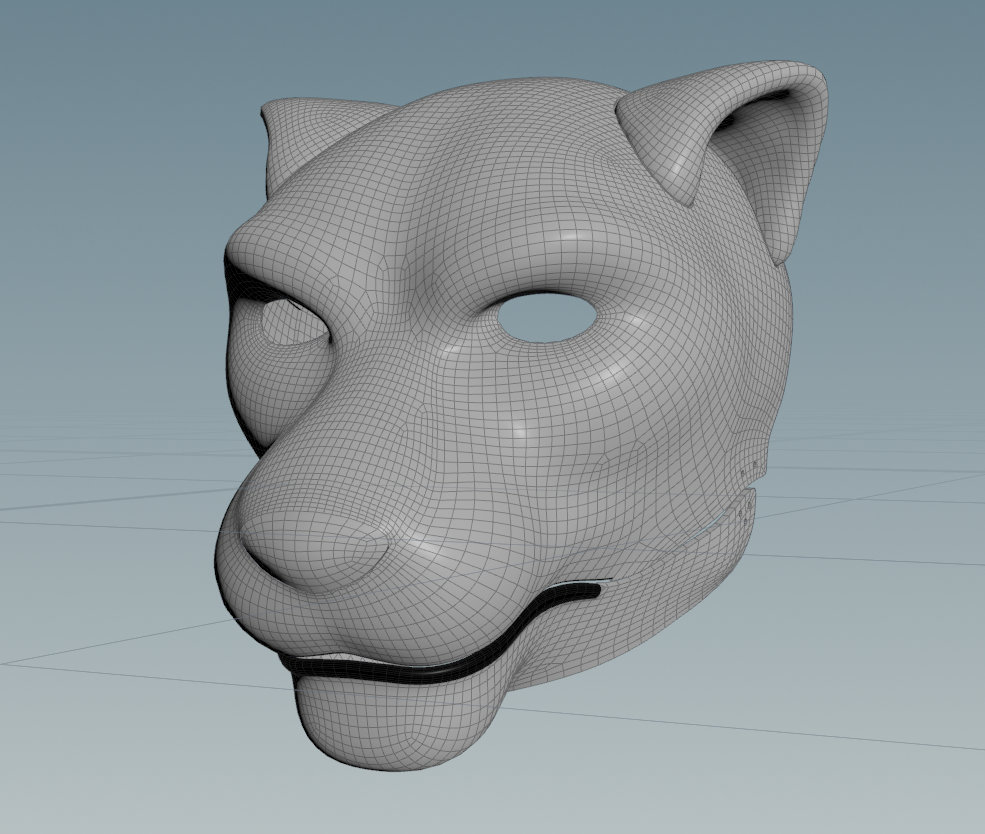
I've been putting this off for a while - subdividing the model and getting some final details in. With the hingework mostly sorted out - I was thinking this morning that I should really beef up the hinge size - got around to rounding out the front of the jaw to add a black lip seen on big cats. This black area will be hand painted.
I've also printed another test using yesterday's model using petg. It's my first time printing with petg at such a large scale.
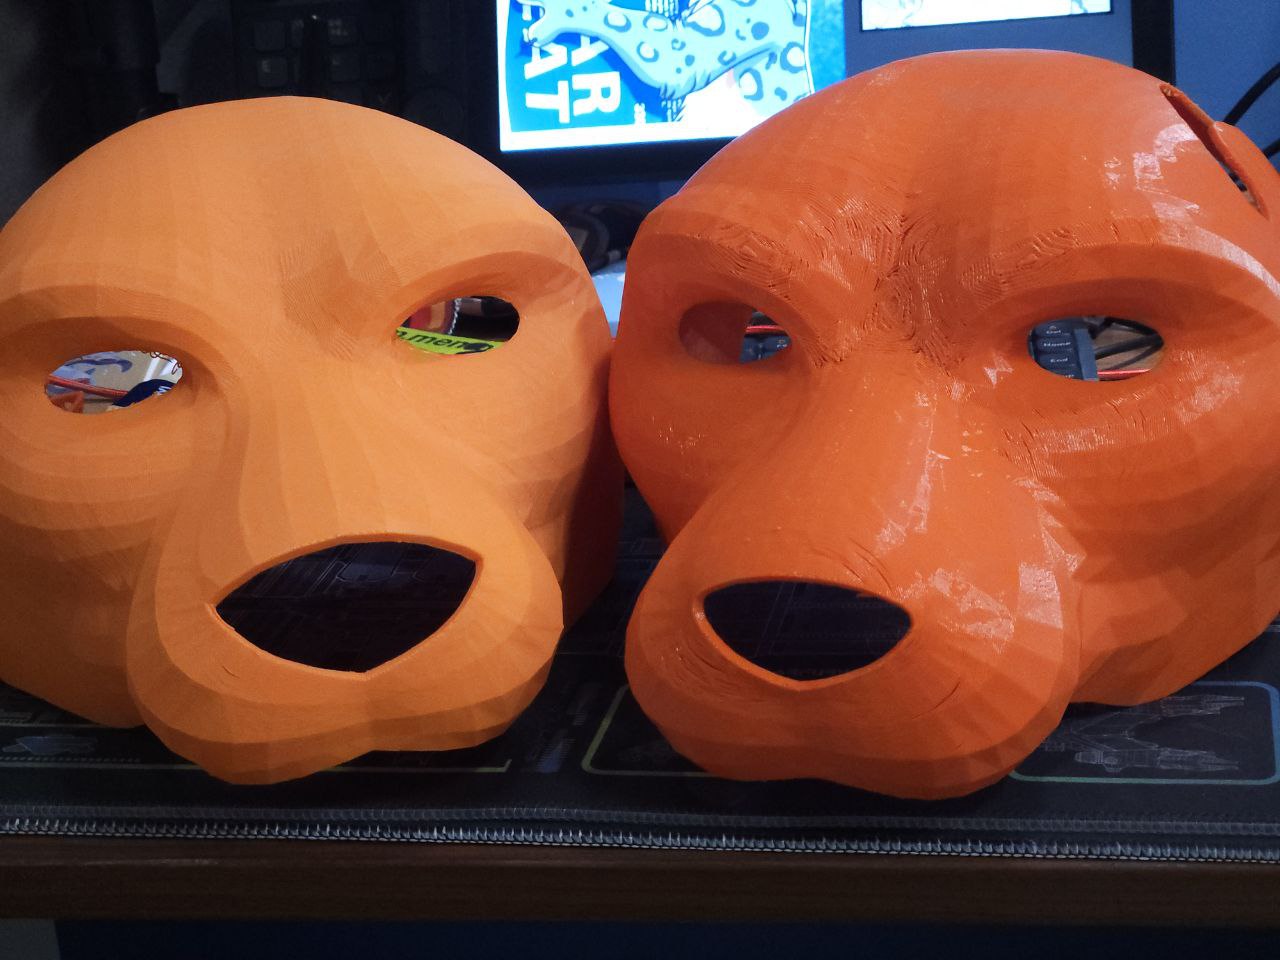
The print itself has a bit of give and the surface is very slick, almost feels oily compared to the pla print. (The pla print I also think might be a matte filament...) This extra bit of flexibility should be useful if I were to pack it into a very full suitcase. And I hope hot glue will actually stick the fur to this XD
At the moment I'm test printing a temperature tower for tpu filament.
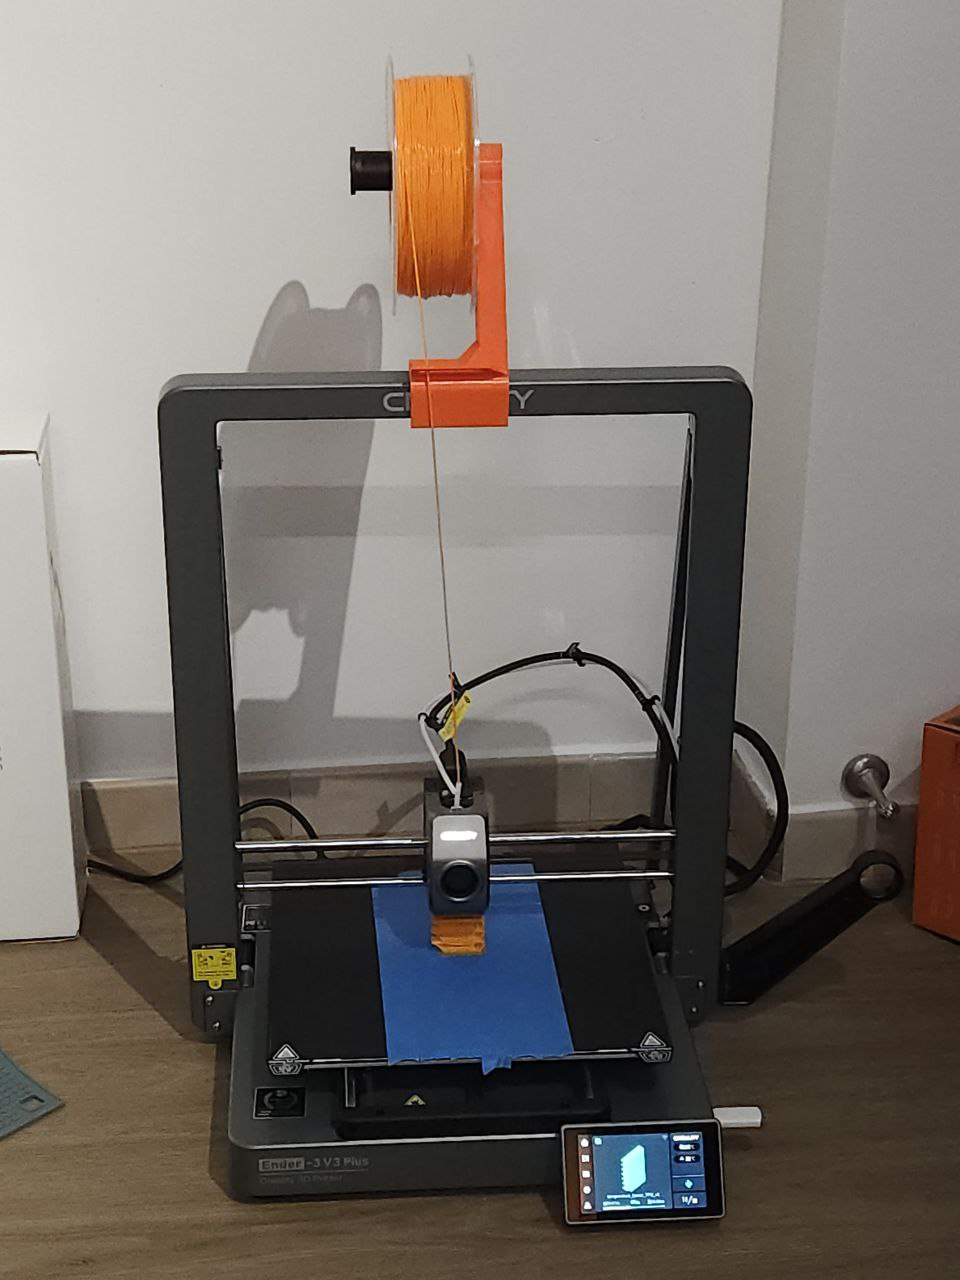
This is my first time ever printing with tpu, and I had some issues getting it to extrude. It seems like there was some leftover petg/pla inside the nozzle and the tpu wasn't able to melt - the extruder kept clicking, indicating the filament could not be fed. After trying to "clean" the nozzle by running petg and pla through it, I remembered that the printer came with a long piece of wire ending in a loop labeled "nozzle cleaner" in the manual. I basically heated up the hot end to 240C, jammed it in and pulled it out, and it was covered in filament. I also tried letting the hotend cool down to around 100c before pulling it out. Once I did this a few times, the wire came up clean (though I could definitely feel some sticky filament at the very bottom of the nozzle, nothing came up).
Finally, I was able to extrude the tpu without issue. The photo above shows a temperature tower being printed.
I also placed some painter's tape down on the bed - supposedly tpu sticks really well to pei build plates, so well that the layer of pei on the build plate could be torn off. Painter's tape can be used to protect the build surface, as tpu seems to adhere very well to it.
Another thing about tpu/flexible filaments, is to have as little friction/resistance in the filament's path - given the filament is very stretchable, it can cause underextrusion as strethed and thus smaller quantities of filament are being extruded. The orange overhead spool holder is a design included on a usb stick that came with the printer; this design alleviates the need for a tube to feed the filament in and allows it go almost go directly into the hotend, without the need to travel around the bowden tube and all the extra friction that would have.
......
Whelp the temp tower is printed, seems 215-220c is the best temperature. Now the top of the temperature tower drops the heat levels to around 195c, and that jams up the nozzle :/
I had to do the cleaning routine again and it's printing fine now. TPU is such a fussy filament XD
Update: Ears are done! I'd printed one with 3 walls (1.8mm thick) and 2 walls (1.2mm thick). You can watch this video to see how they react.
The 3 wall version seems very usable! I am going to make a tweak in the design so that the flange holding the ears in are thicker. ATM they slide out of the cutouts with very little force. The 2 wall version tore apart when I was trying to remove the support material, and is a bit too soft I think.
I'm also going to try making a version with 4 walls to see how it feels. Personally I'd like to see the ears made from a softer filament. Right now it's 95A that's quite easy to get here. 90A I've only seen one local seller. But I don't reall need tpu ears that feel great, they're gonna be covered in fur and I really want the flex more for transport. So stop brain, stop. No buying softer tpu.
I'm also looking into making the hinge design more generic and can be shared with other furry makers. ATM the hinge design I have has one issue that bugs me: my original idea is to use a screw and nut to connect the two halves of the head base. I don't like that it's possible to overtighten the screw to the nut, though for simplicity sake, just making a good tight connection with washers (metal on outside, teflon on the touching surfaces) and a bit of loctite on the nut will do the trick. I've been working on a design that allows the fasterners to be clamped tight but still allow movement. This, on the other hand, is overcomplication.
Am gonna stew on it. At the very least, I've managed to stop myself from designing a hinge that uses ball bearings - tpu seems to be quite a pretty slick material, so it would work fine for moving parts. The PETG filament I have is also super slick, so that might be an option if I need something firm.
ANOTHER NOTE TO SELF: Original plan was to airbrush the white fur to more of an off-white. A better idea might be to dye it. Time to look up the lightfastness of fabric dyes.

Also need some kind of design to accomodate springs or elastics up front to close the jaw. I've
seen some examples where the hinge itself has slots to put elastics in and I think that is a very clever design, however,
I think putting the springs up front would not put so much stress on the hinge joint.
I'm also actively trying to not include a bearings for the hinges. Stop overcomplicating things, brain!!!
Anyways here's the design thus far. The red parts I plan to print in TPU, and the green parts PETG.
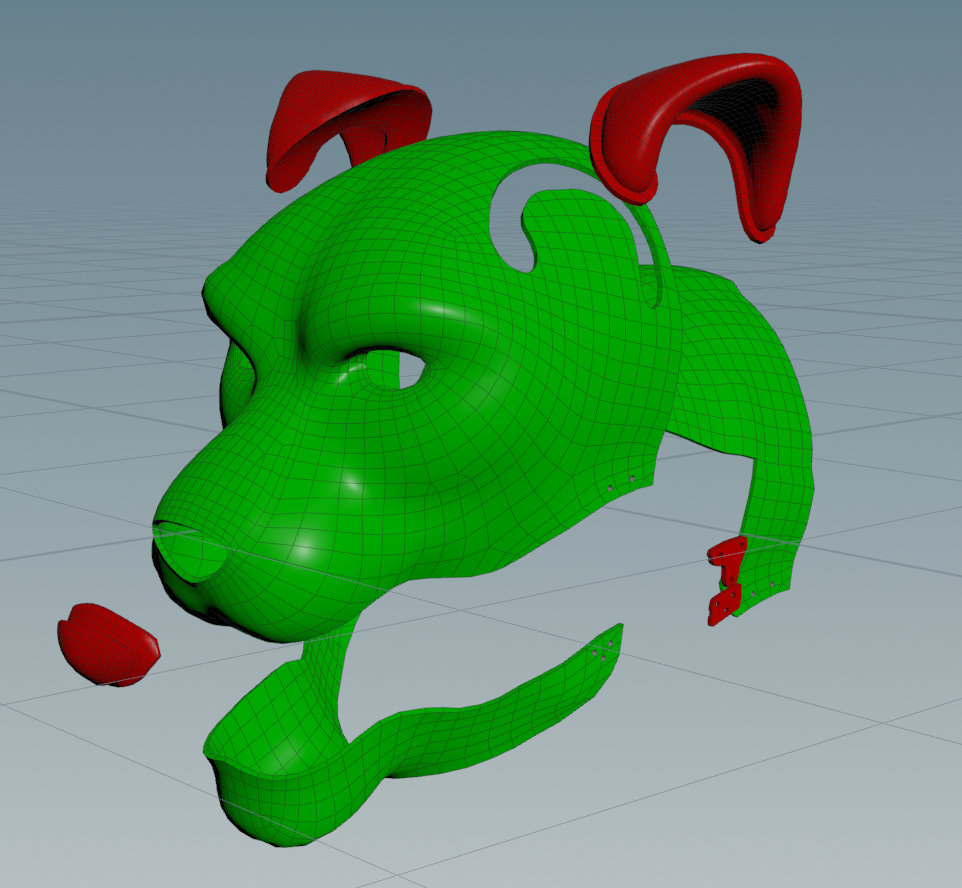
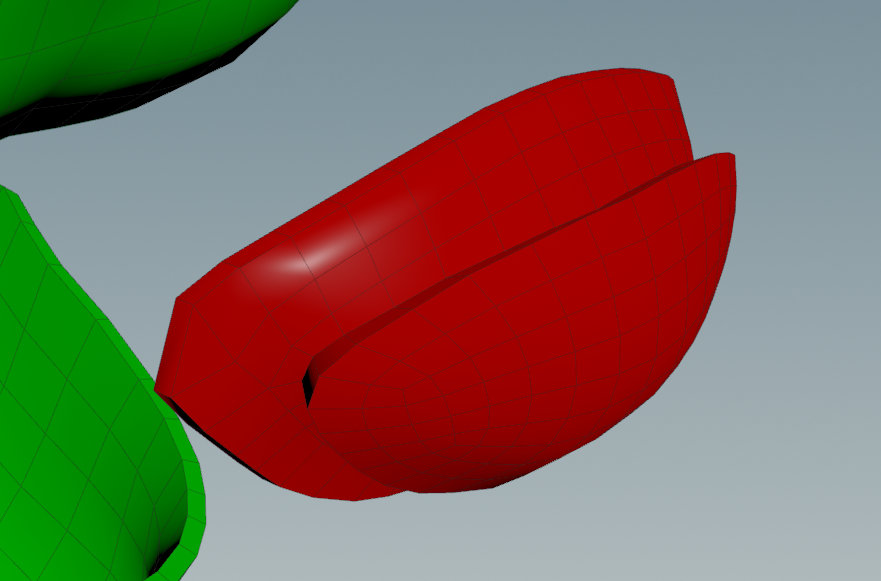
I've also included a closeup on the nose model, it has flanges that fit into the upper head base.
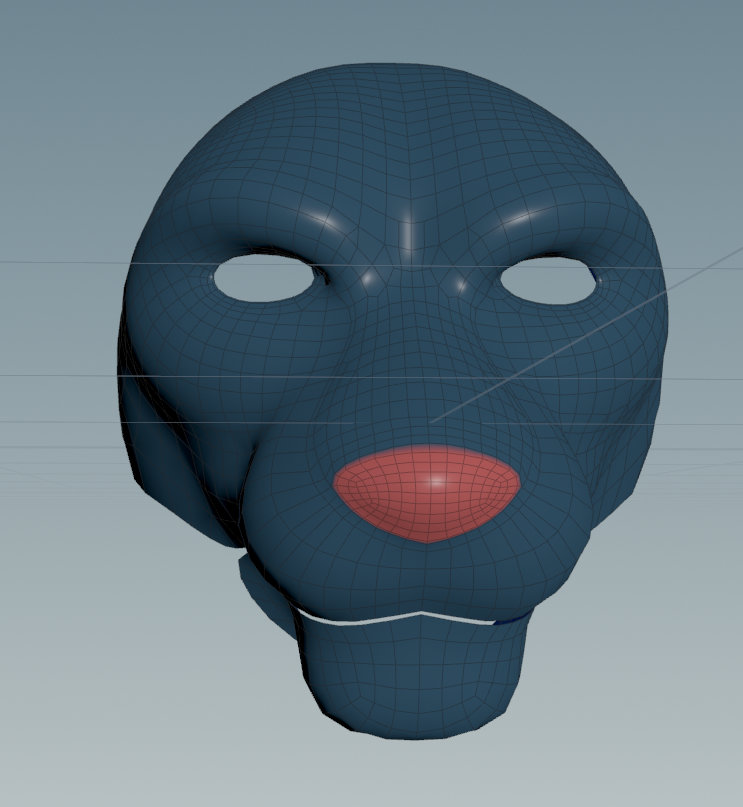
Also adjusted the topology, I do want to separate the nose apart to be printed with a tpu.
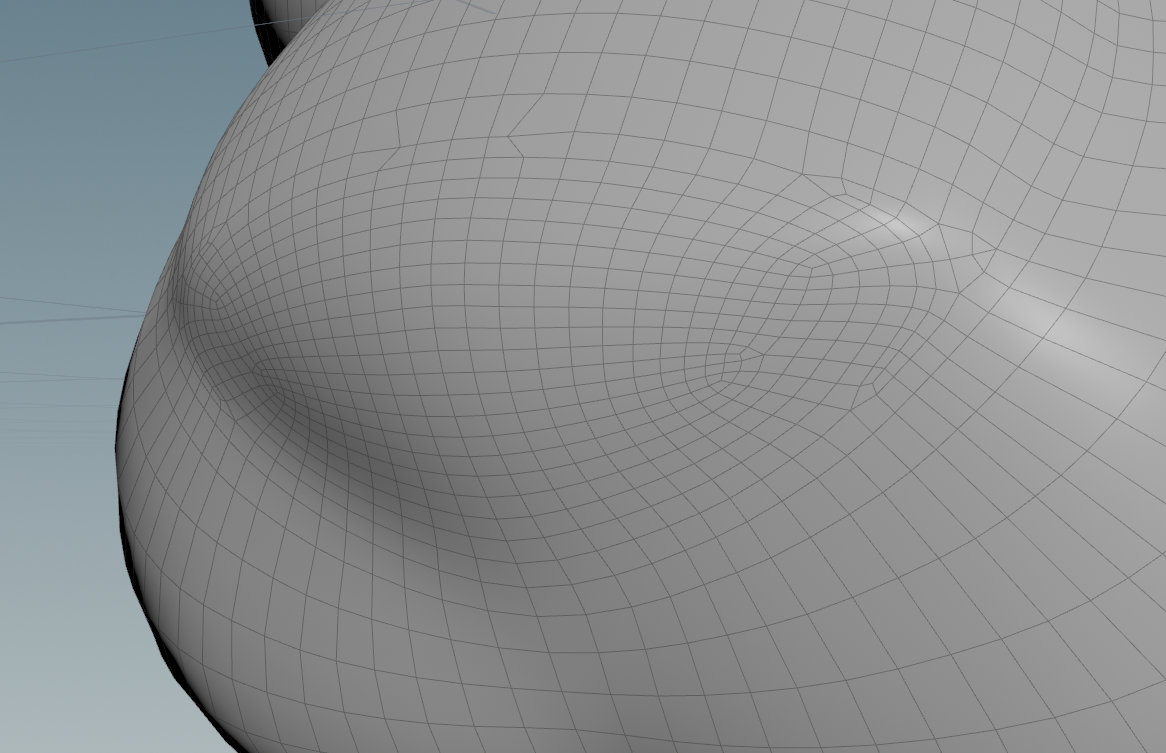
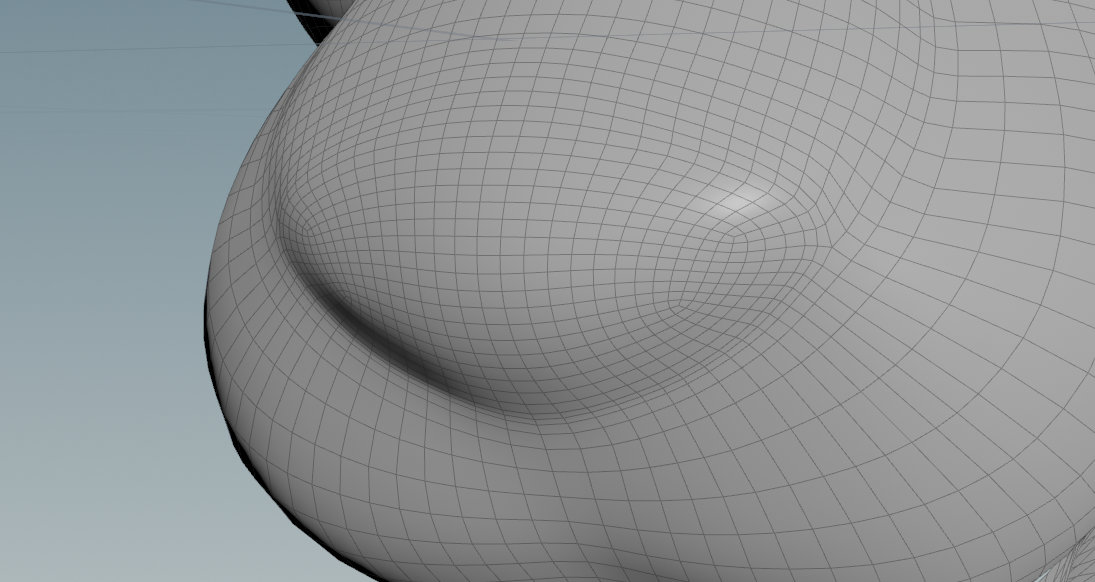
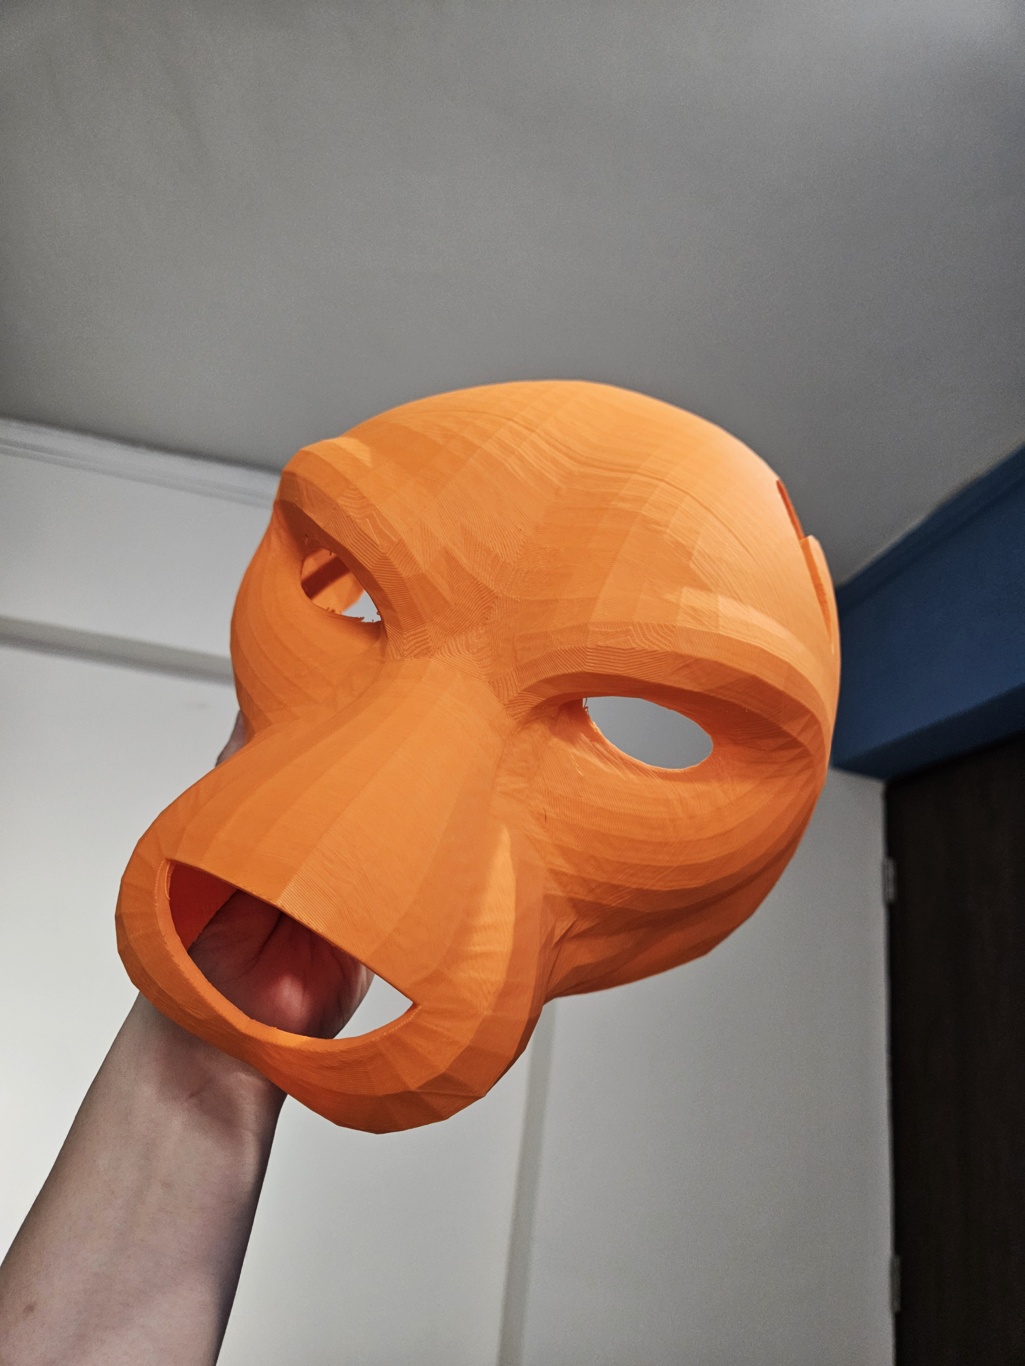
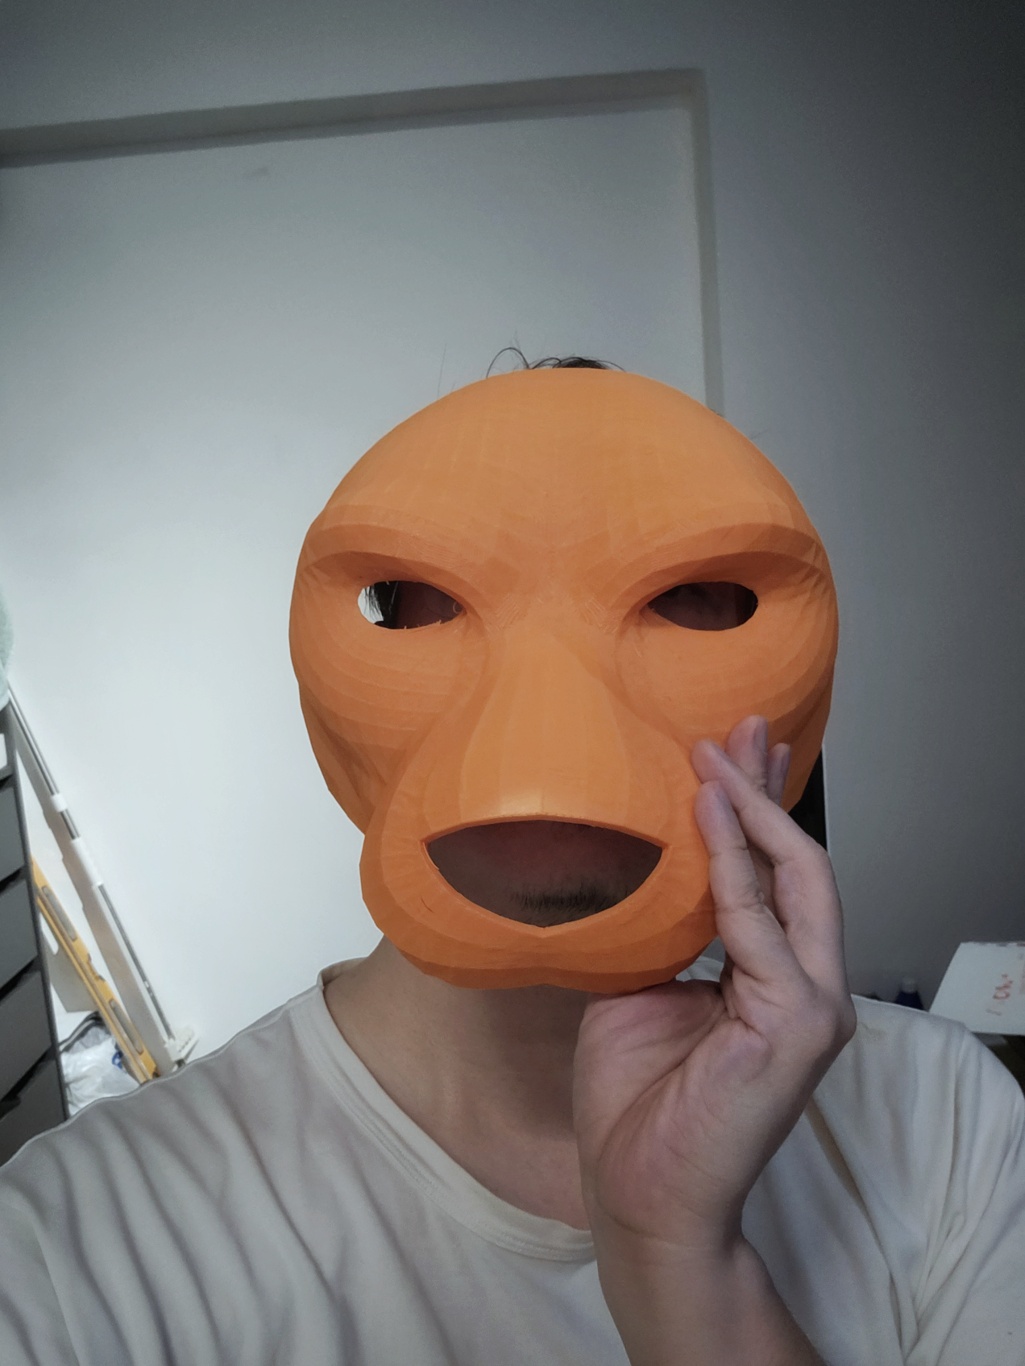
Pretty chuffed! It fits pretty well though I'm going to adjust the hole for the nose, that's waay too big.
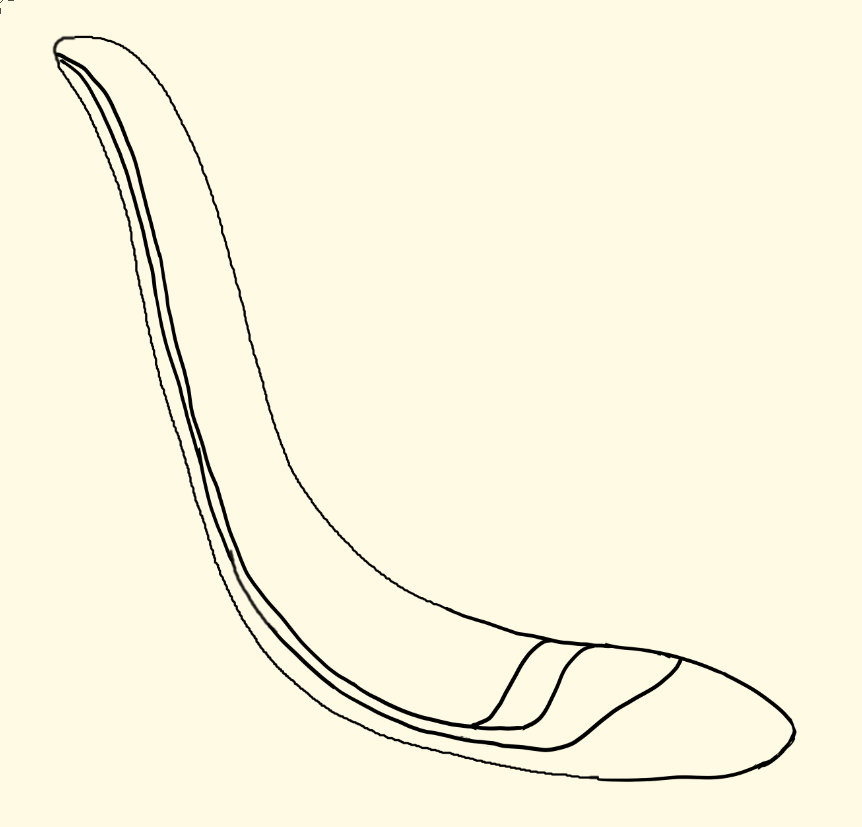
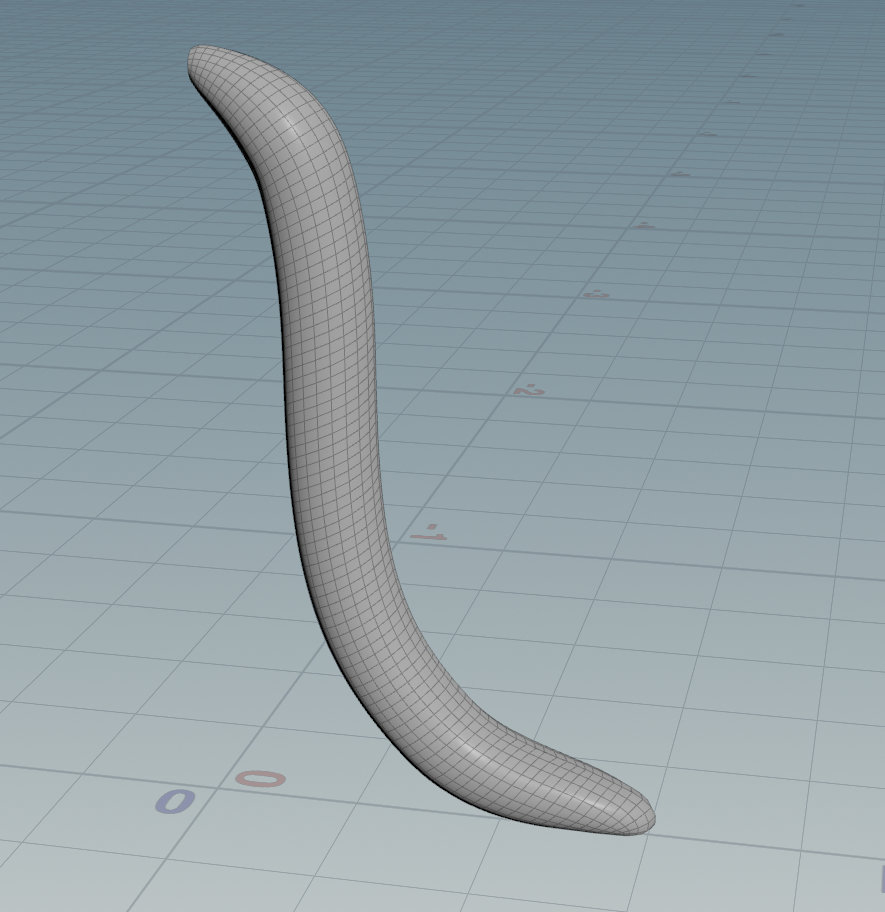
I've also been messing around with the tail in 3D, and could not get a good shape. I decided to experiment in CSP instead and came up with a concept I liked. I then brought a similar shape into 3DC Printing, sculpted it then brought it back to Houdini.
I should be able to use the model as a pattern once I make the necessary cuts.
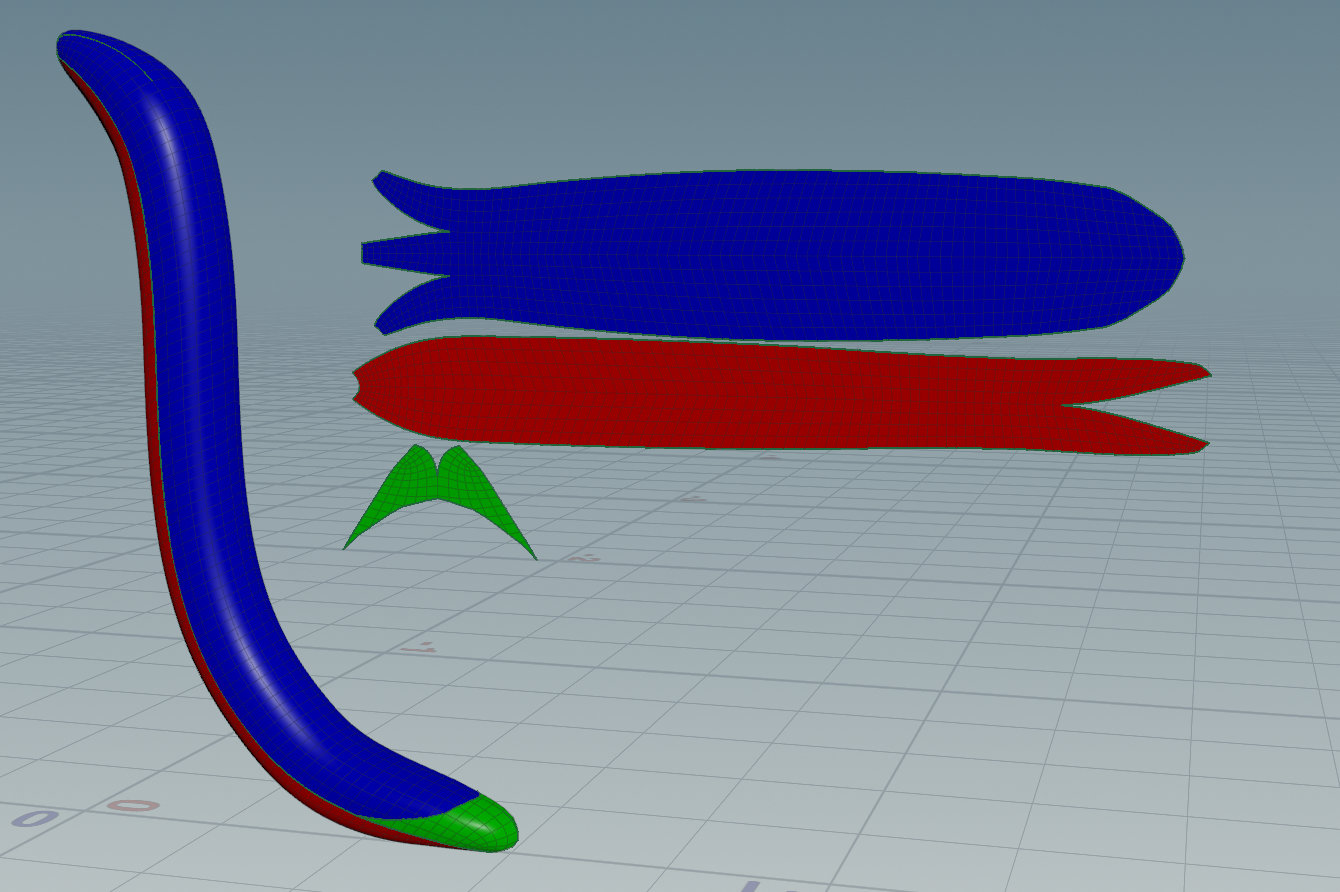
This brings up the question of how to actually get a physical pattern to use lol. I think I'll need a printer, likely going to get an A3 printer. Print the pattern in sections and stick them together. Another thing I haven't accounted yet is the direction of the fur.
Should be simple enough to just cut up the pattern to accomodate that.
Spent some time separating the ears from the head. I wanted the ears to be a bit flexible, so I thought I'd try printing them with TPU filament (Thermoplastic polyurethane, a similar material to what phone cases are made with). But attaching those to the head base might be a challenge - I'm not sure what kind of glue would work, and I'd rather use some kind of design that could hold the ears in place. Here's what I came up with:
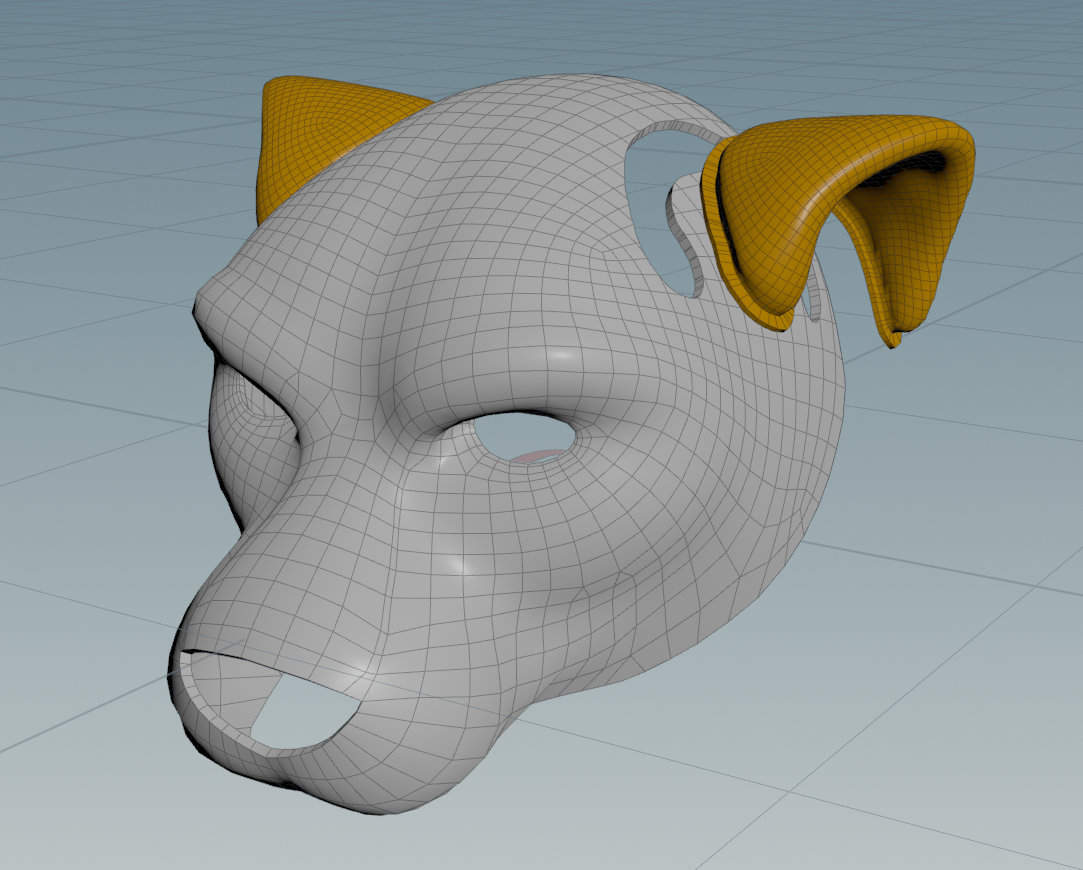
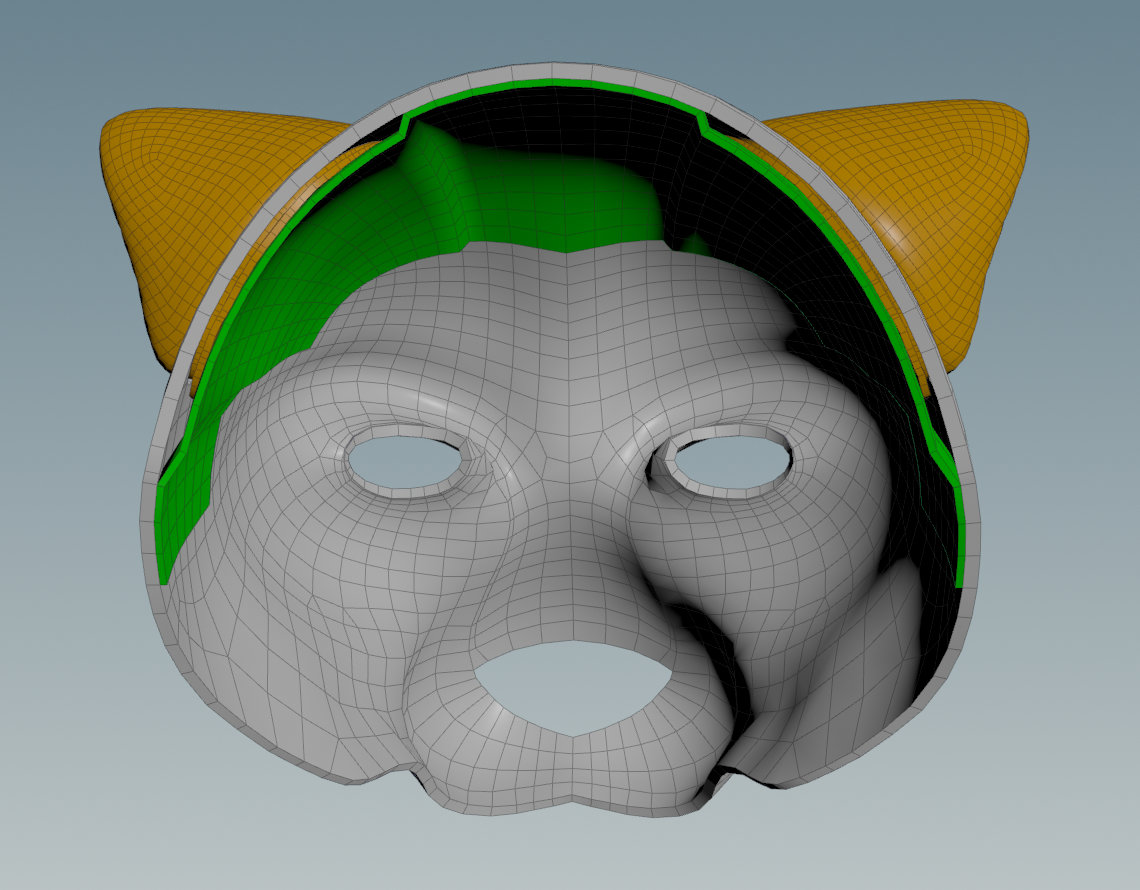
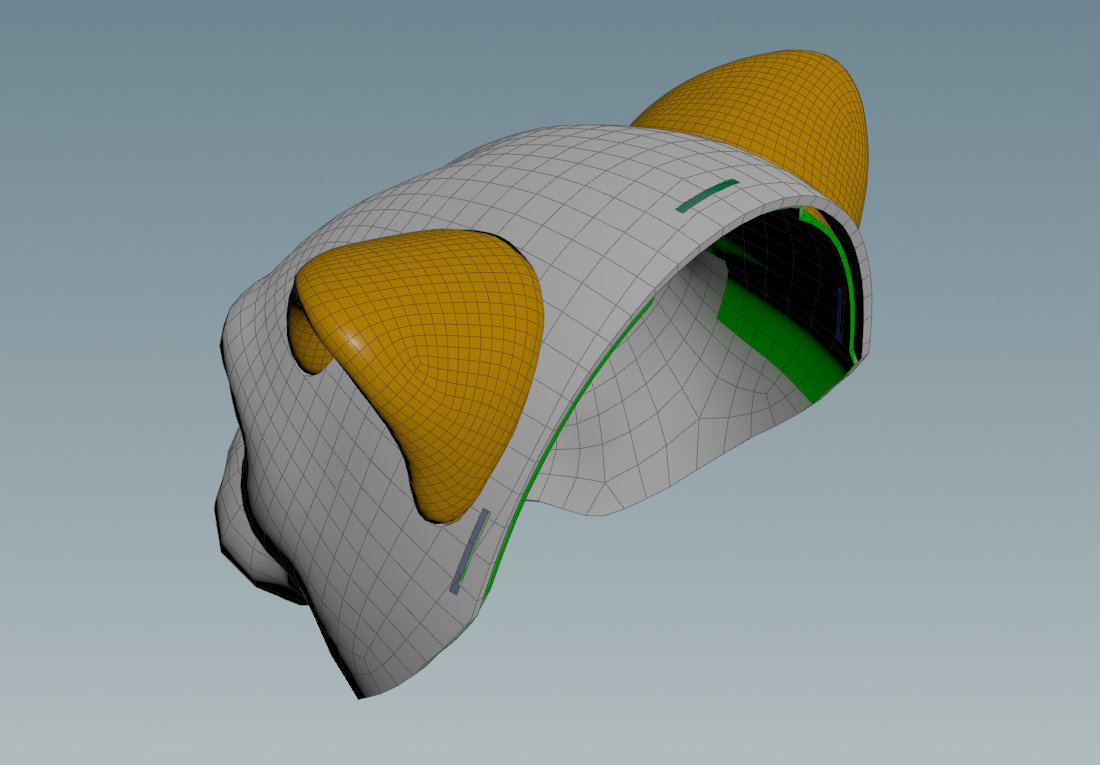
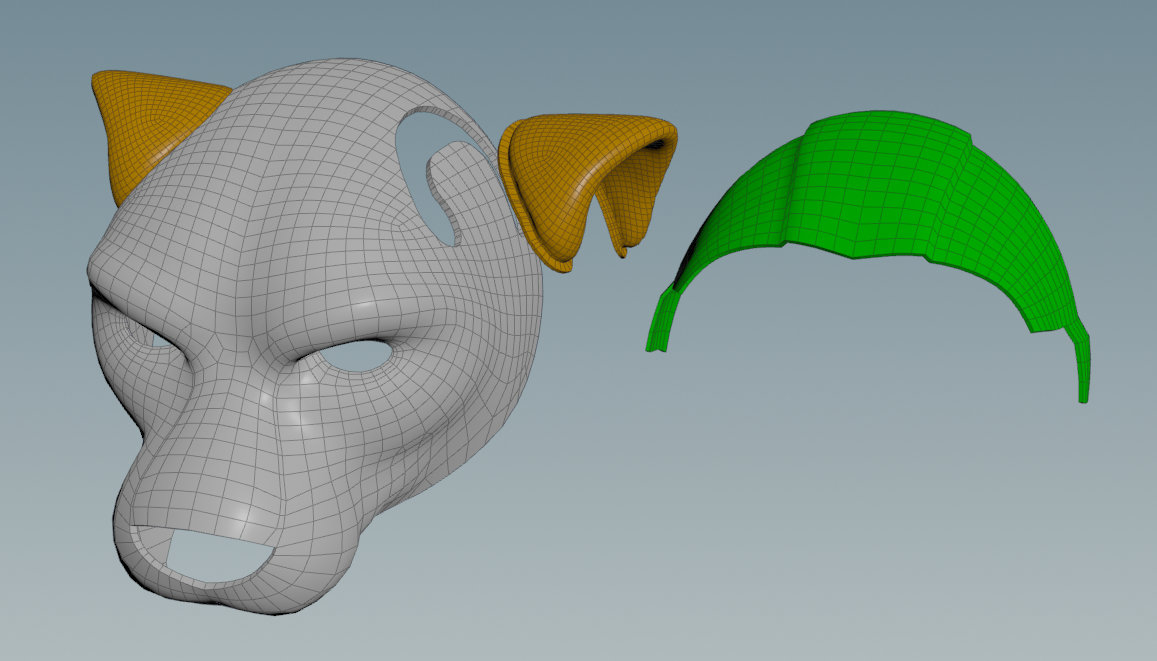
I designed a flange of sorts around the base of the ears that, hopefully, will be able to slide into cutouts made into the base. (I did order some 95A hardness tpu filament, hopefully it'll be flexible enough!)
In order to secure it, another plate (shown in green) will hold the ears in place from inside. At the moment, I am planning to use some kind of mechanical fasteners (screws or otherwise) to join this plate to the main head - I am planning to use PETG filament for these two parts and am not sure what kind of glues would be flexible enough to bond petg together, given the amount of flexing a fursuit head will encounter.
I've also started some rough ideas on where to put in holes for straps to hold the head to my own head. It's my hope that the main head itself and the inner plate together will be strong enough to resist the deformation forces and not break.
Finally, I also wanted to put some holes in the mesh for ventilation/hearing but am concerned about weakening the area around the ear, given that it's got a big cut for the ears and strap holes. Will look into that later.
Still need to figure out the opening jaw :/
It was very straightforward to get into, and I'd got the head sliced in minutes. It takes forever to print something this big though, just under 18hrs >.>
The printer also only comes with a 0.4mm nozzle, and will need a bigger one to reduce the print time.
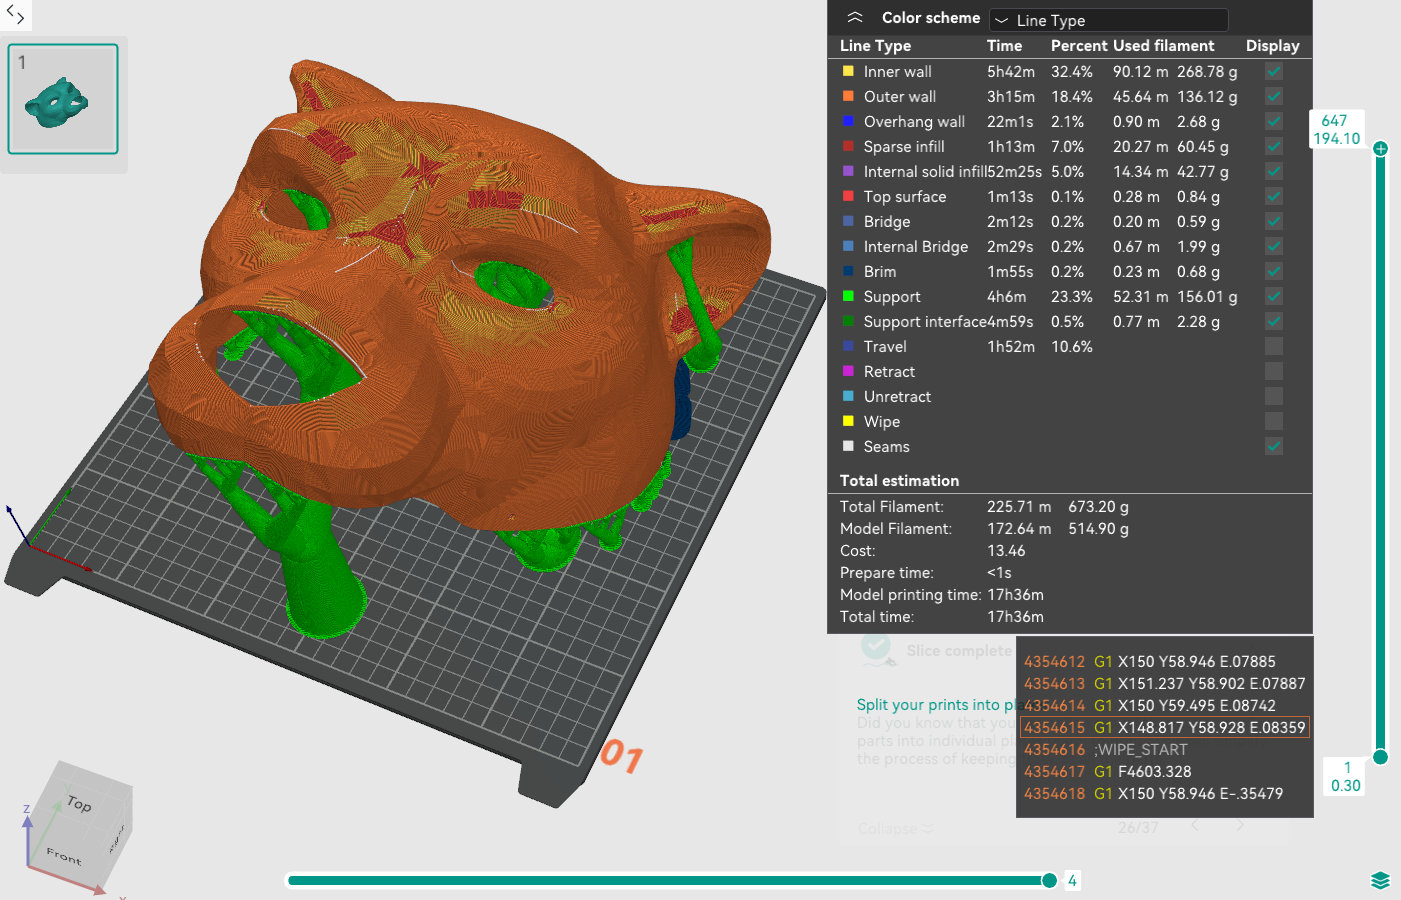
Another thing I've been looking into is making a custom inflatable to be stuffed inside my tail instead of using stuffing. I've already purchased some tpu sheets and pvc valves to test this out. The issue I've been looking into is how to make joins/welds that are airtight.
https://www.diypackraft.com/ was a site that came up in my hunt and it's more about welding TPU coated fabric together. They use heat for this, and I think this is probably the best kind of joint as the different layers of TPU melt and essentially become a single layer of TPU. Another option is to chemically melt the tpu, and achieve a level of bonding similar to heat welding is using a solvent called "Tetrahydrofuran". I am not able to find it locally. Yet. I also have read that it becomes explosive so yeah, I don't think I'm going down _that_ route.
An adhesive that _might_ work is "E6000". Lots of it available online here but I was somewhat concerned if they were legit and I was right. The packaging and branding are largely similar but not the same as the real thing. However, horme hardware and selffix does seem to carry it, and I don't think they would carry knock-offs. I'll get a small tube from them to try once the tpu sheet arrives.
.... I also should have mentioned that I could have gone with regular PVC sheets for this, that's what most pooltoys are made with after all. Quite a few sites have mentioned TPU is more eco-friendly, more resilient material so I went with that. How true those facts are though, I can't be sure, given how questionable information is on the internet these days.
Note to self: Some other adhesives to look into: aquaseal (its made from thermoset urethane, which uh, is TPU? Watersport and outdoor shops appear to stock them), barge contact cement, hh66 adhesives
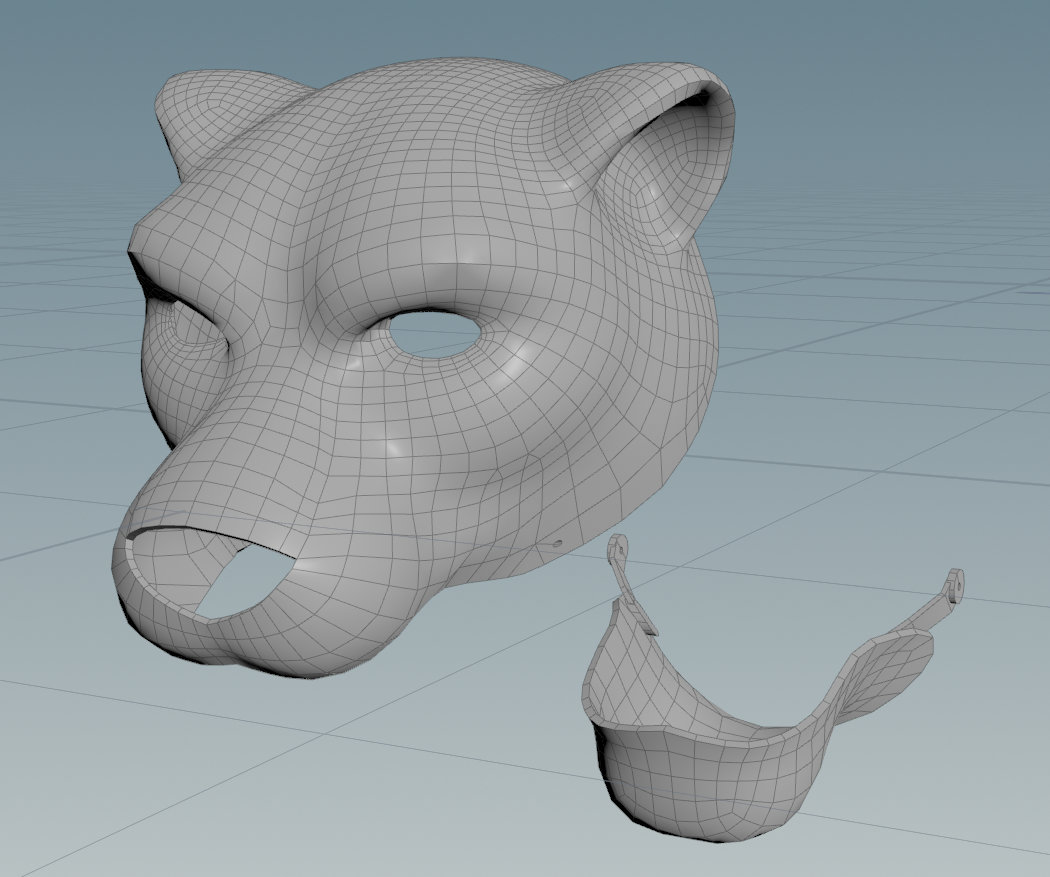
I'm pretty sure I've overcomplicated the design, most moving jaw fursuits use a much simpler mechanism. For now I'm just leaving it here while I wait for a 3d printer to validate this design.
Another thing I'm looking into are designing my foot paws. I love the foot paws of this commission I got from Kaji:
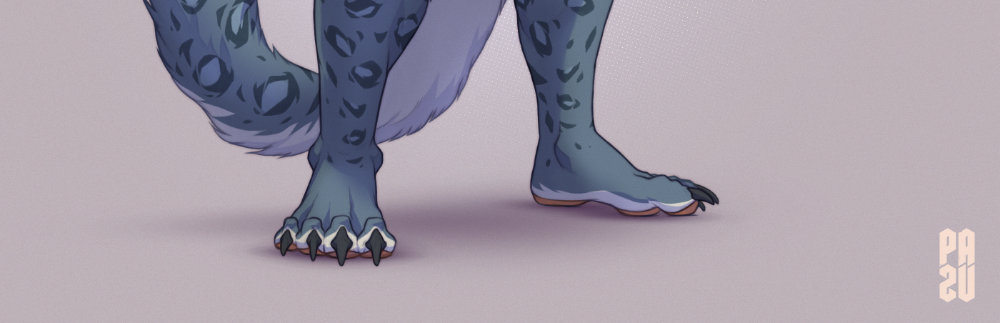
I've seen examples of shoes 3d printed using TPU (Thermoplastic polyurethane), a soft flexible material similar to what what some phone cases are built from. I have been thinking that I could use that material to get a similar effect. I've no experience with TPU though, my previous printed had a bowden extruder that's not good for flexible filament.
As such, I've been looking into foot paw designs. I did this yesterday but I'm torn between more animalistic design vs a more normal human-ish foot.
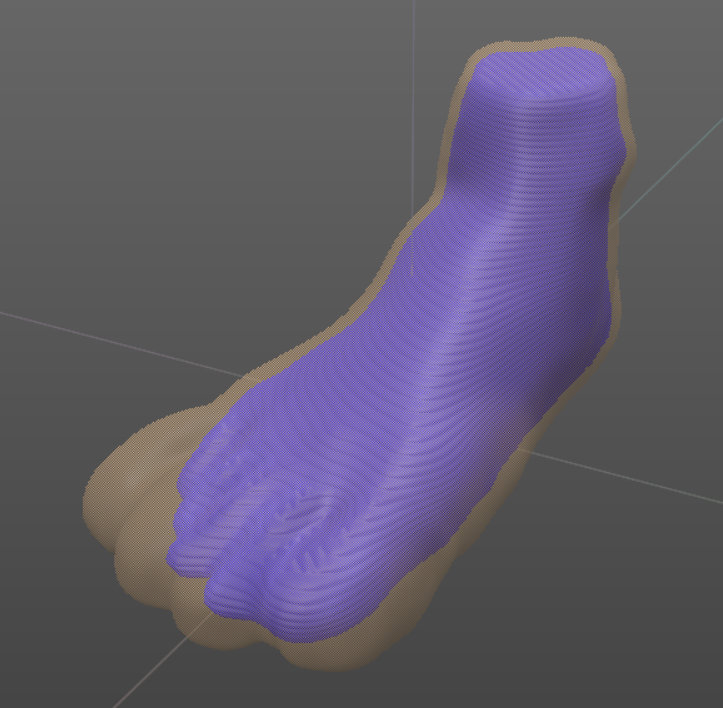
This though, is kind of a waste of time as this mesh is not going to be rigged, it just makes me very satisfied to look at.
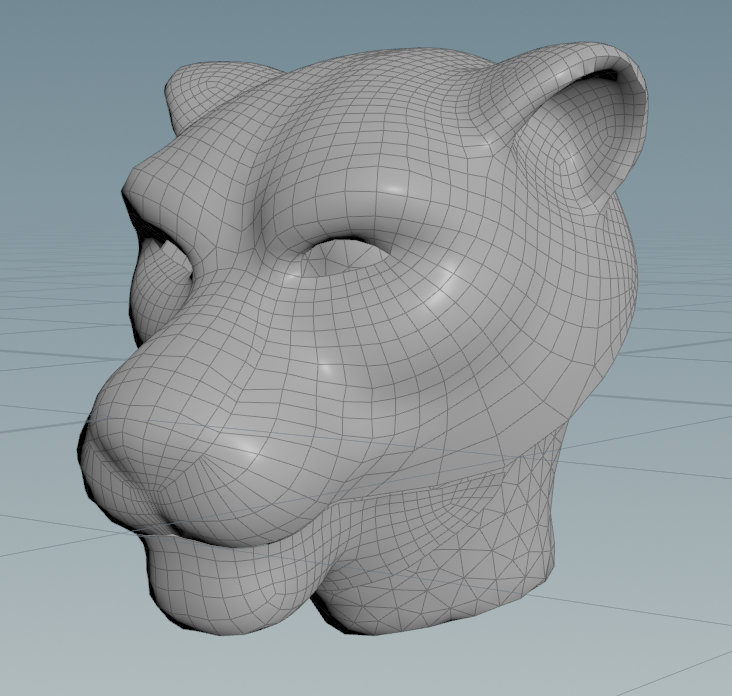
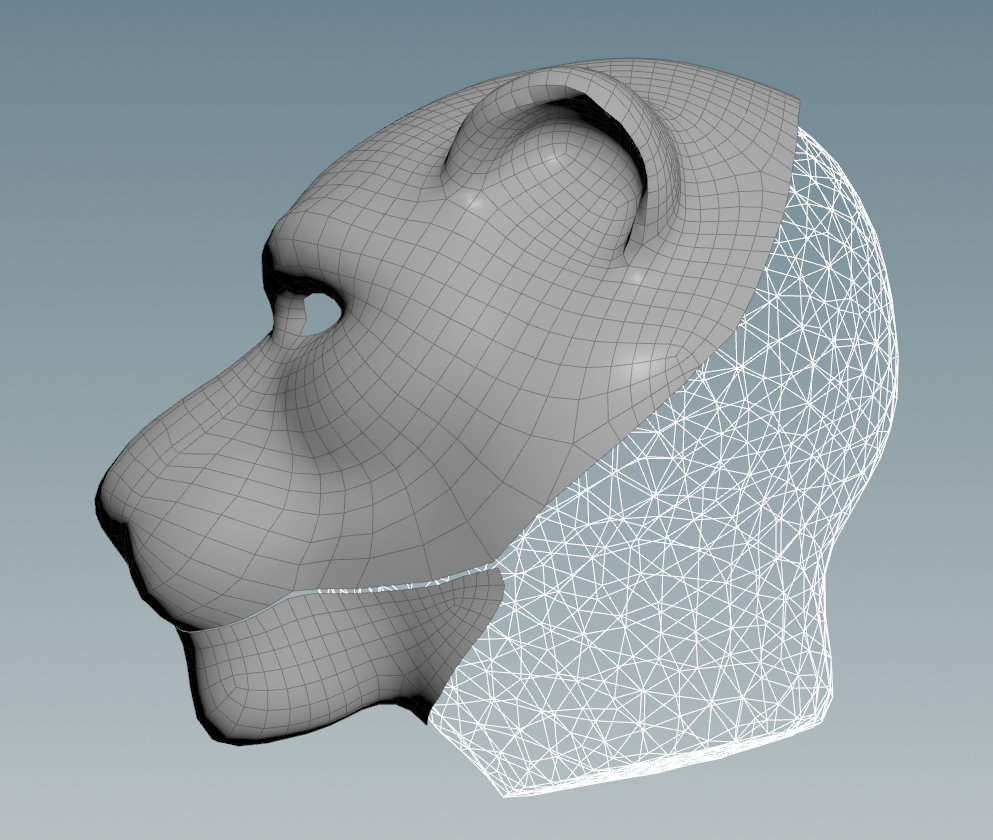
I also tested out making a simple tail, and using the UV Flatten sop's distortion view to make cuts to reduce those distortions, and then use the end results as a pattern. Given I'm hand-coding this website, here's a link to an mp4 that shows how the two parts of the tail flatten out.
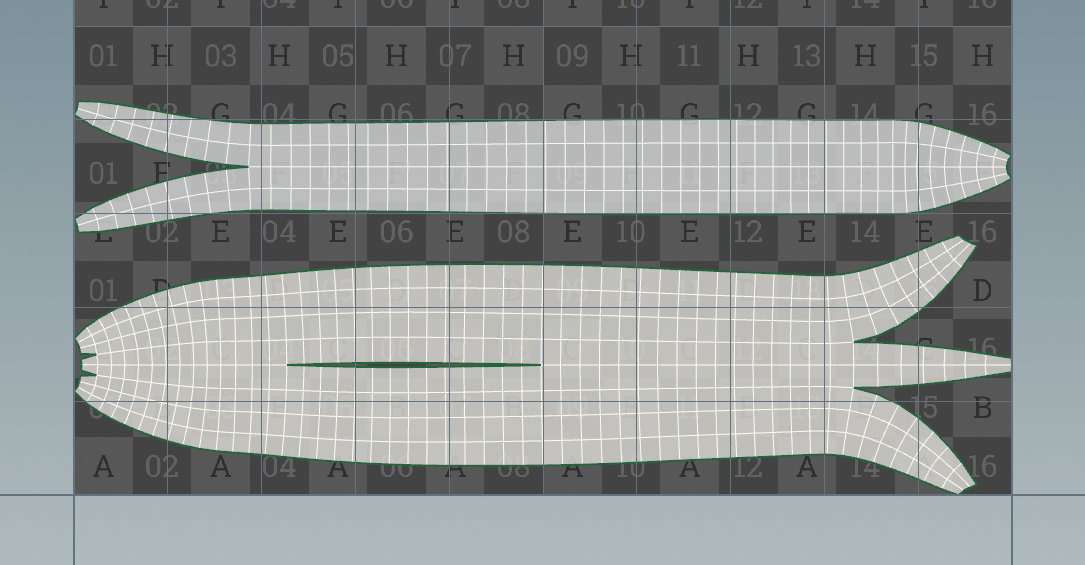
Its too bad the model is not downloadable, but using it to get an idea of where the skull hinges is enough. As well as those teeth.
Also, I'd actually gotten some fake fur swatches from Miemifur on Aliexpres and spent time brushing them out.
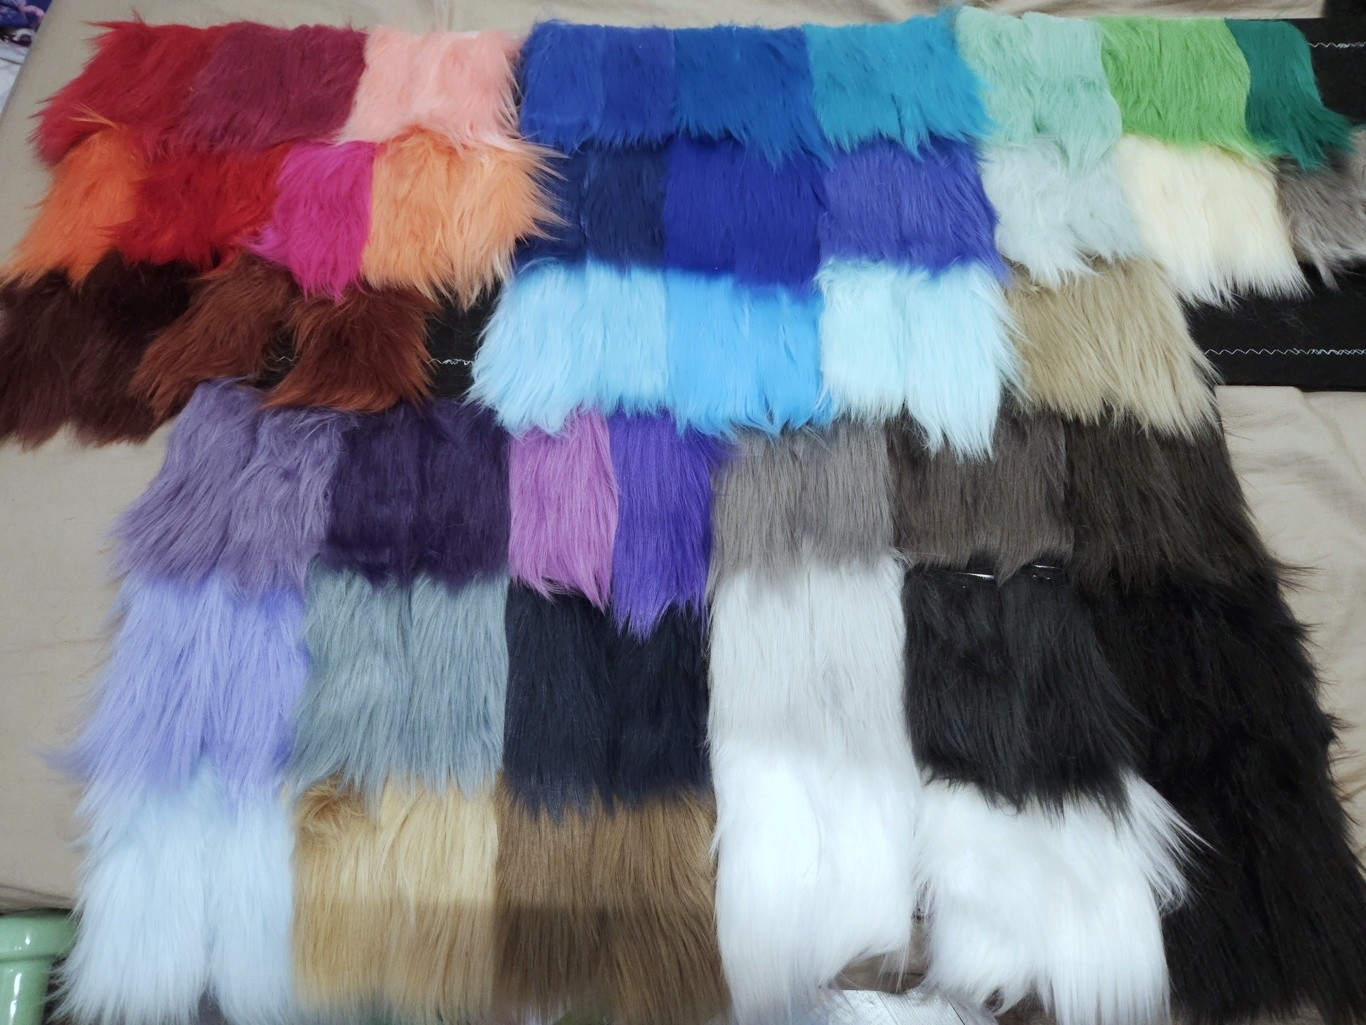
Originally I'd wanted to get swatches from the usual suspects (Howl, BigZ etc) but the shipping costs from the US to Singapore were astronomical >.>
Plus, I didn't want to ruin expensive fake fur and decided a more budget friendly fur option for my first fursuit build would be more appropriate. I'd also gotten some "minky" fur and "rabbit" fur (?!) but they haven't arrived yet. Just small samples. I think the minky fur would be good for the hand paws, and rabbit fur is supposed to be courser and easier for newbies to work with. I'll see.
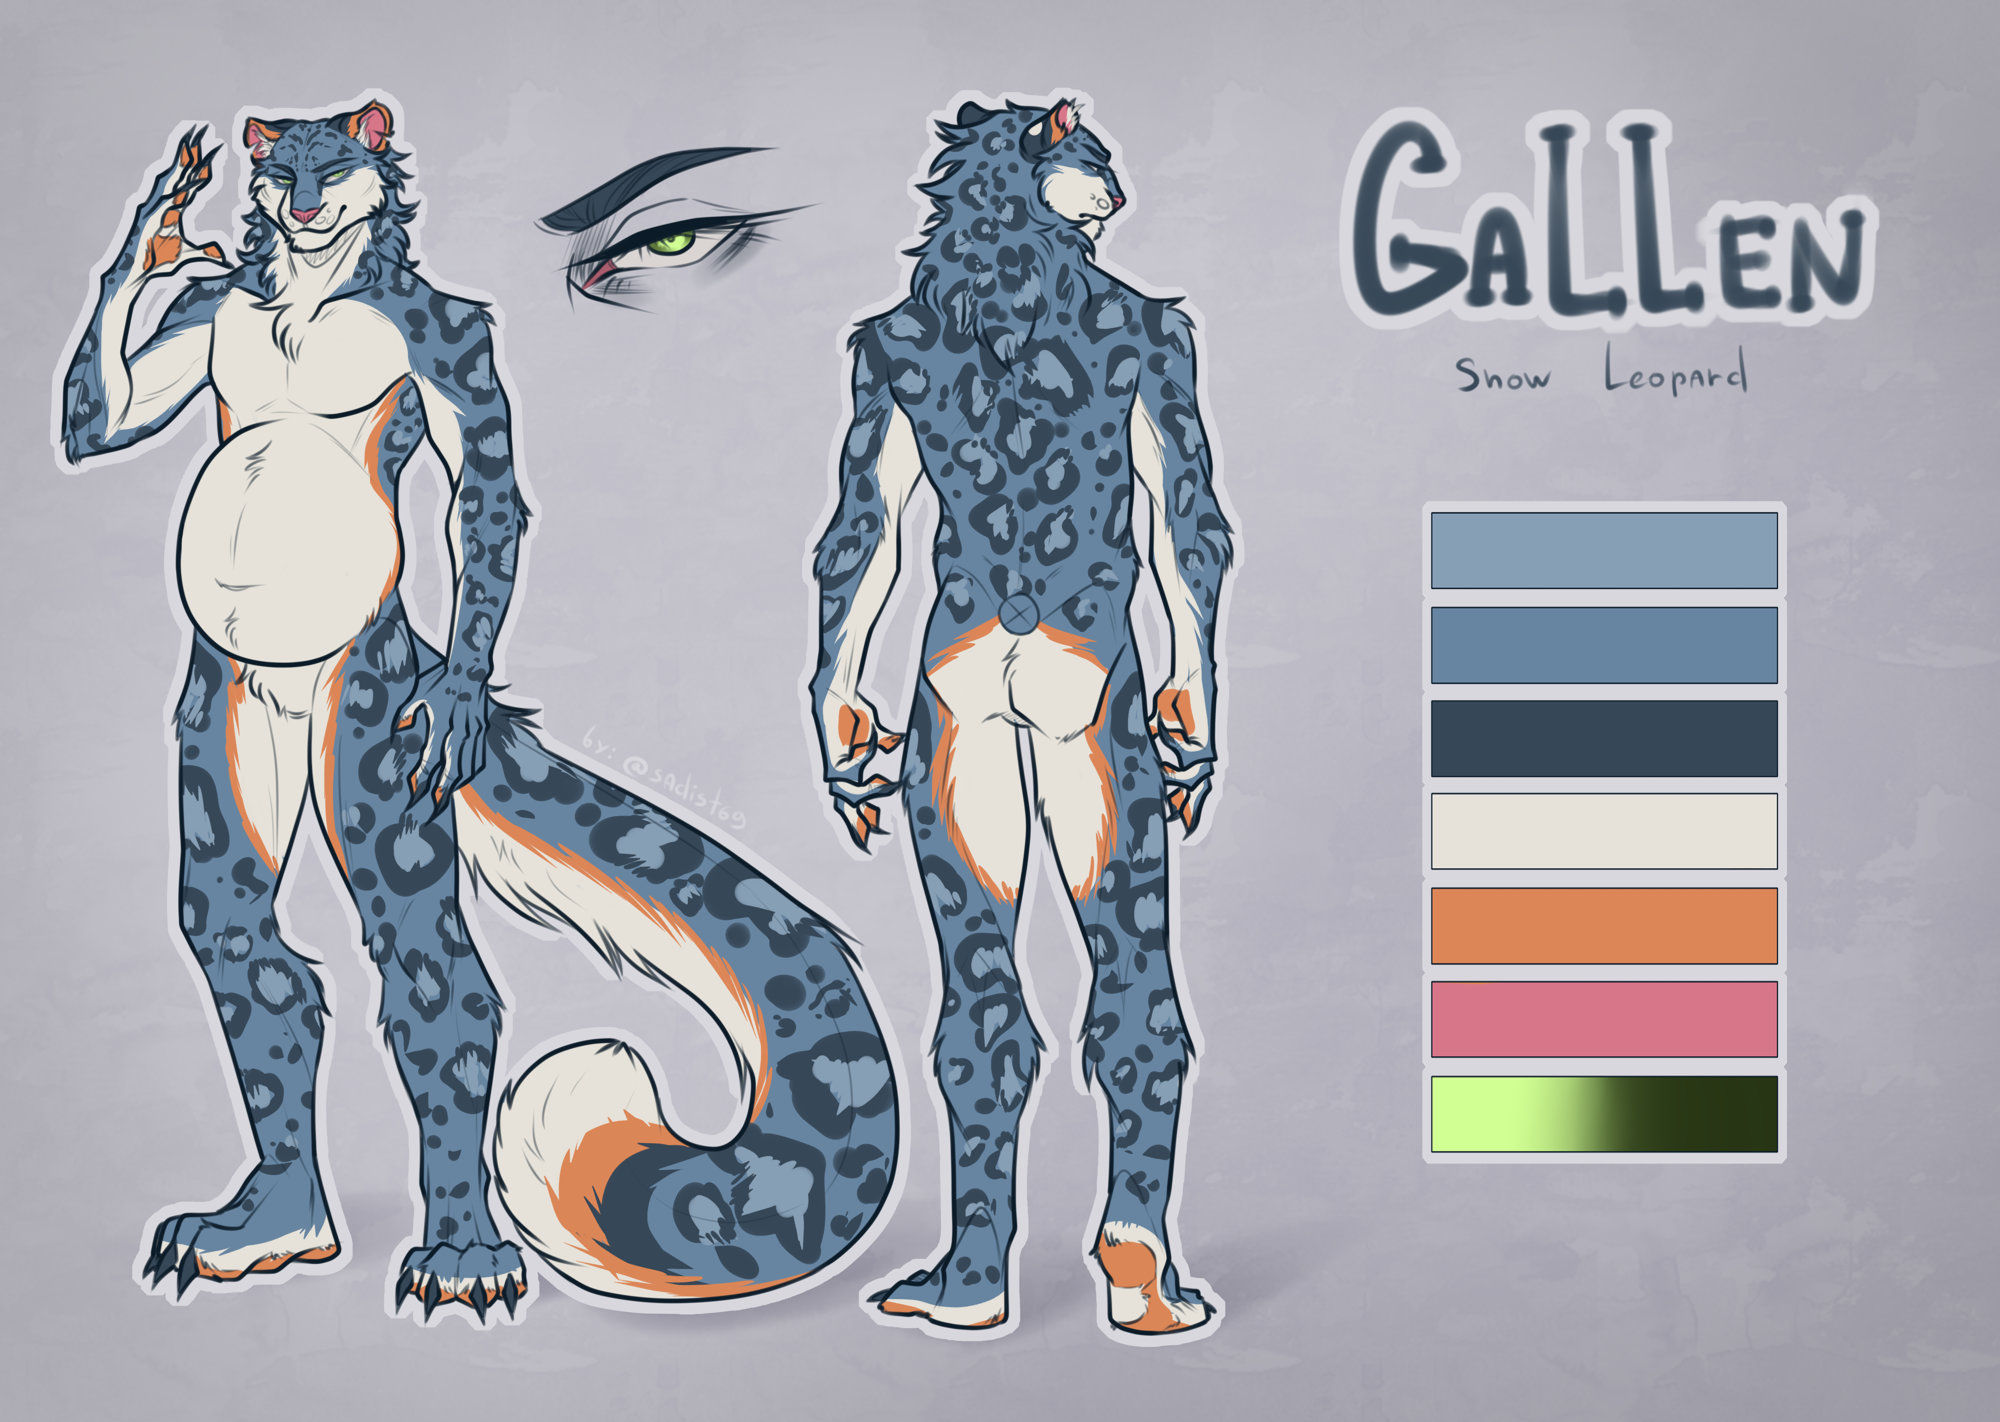
Once I've laid out the swatches, I realized that none of the colours are close to my reference >.>
For now, I'm actually going to do something crazy... I'm going to test out by building and airbrushing my entire tail and see how much that costs, and if I like the results. (I have airbrushed gundam/zoids before so hopefully that experience is applicable)
The miemiefur samples have two "whites", Pure White and Bleach. Bleach is... very white. Almost a pure neutral white with a tiny bit towards blue. Pure white otoh is a warmer colour. In either case, it's nigh impossible to tell unless they're side by side in good light. So my plan is to take Pure White and airbrush Liquitex acrylic inks on them and see if the results are usable.
Now this idea started because of the narrow orange stripe I have going along my torso and tail - if I were to use fake fur for that stripe I think it would be a pain in the rear to sew, as well as a big weakpoint. I thought, instead of using orange fur, I could airbrush the offwhite belly fur with orange, so there would not need to be a narrow strip. Then the blues and rosettes will be actual fur. I'll see how that goes.
********
Also! My sewing machine arrived! It's a Brother A150 computerized machine. From what I understand, it's the top of the line for their Innov-is series that's for beginners.
A few reasons why I chose this machine:
(Items marked with an asterisk seem to be the important ones, from the fursuit making videos I've watched)
I've not used a sewing machine before and the included instructions for setting up the machine for sewing are not as clear as I'd like in some places. But. There are lots of amazing videos on youtube showing how to set the machine up and I was off to the races. The fabric I bought was the cheapest I could find at Spotlight (local singapore fabric/arts and crafts chain). The rest of the manual is fantastic though! Lots of details about how to use each foot.
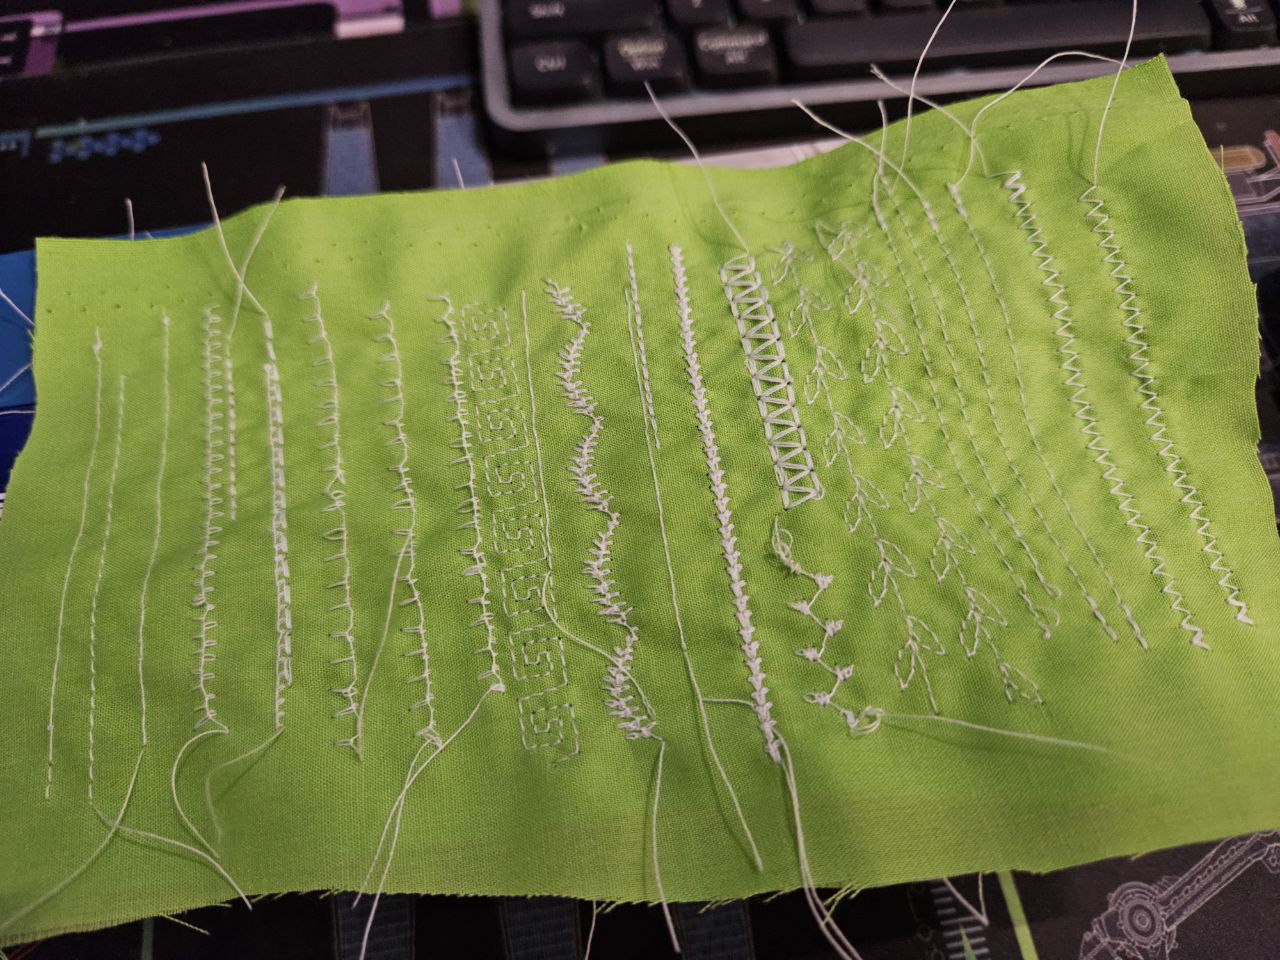
There seems to be some wrinkling going on with the material and from what I'm looked up, it has to do with the needle size, I need a smaller needle.
Some thoughts on the machine after just messing with it for a few hours:
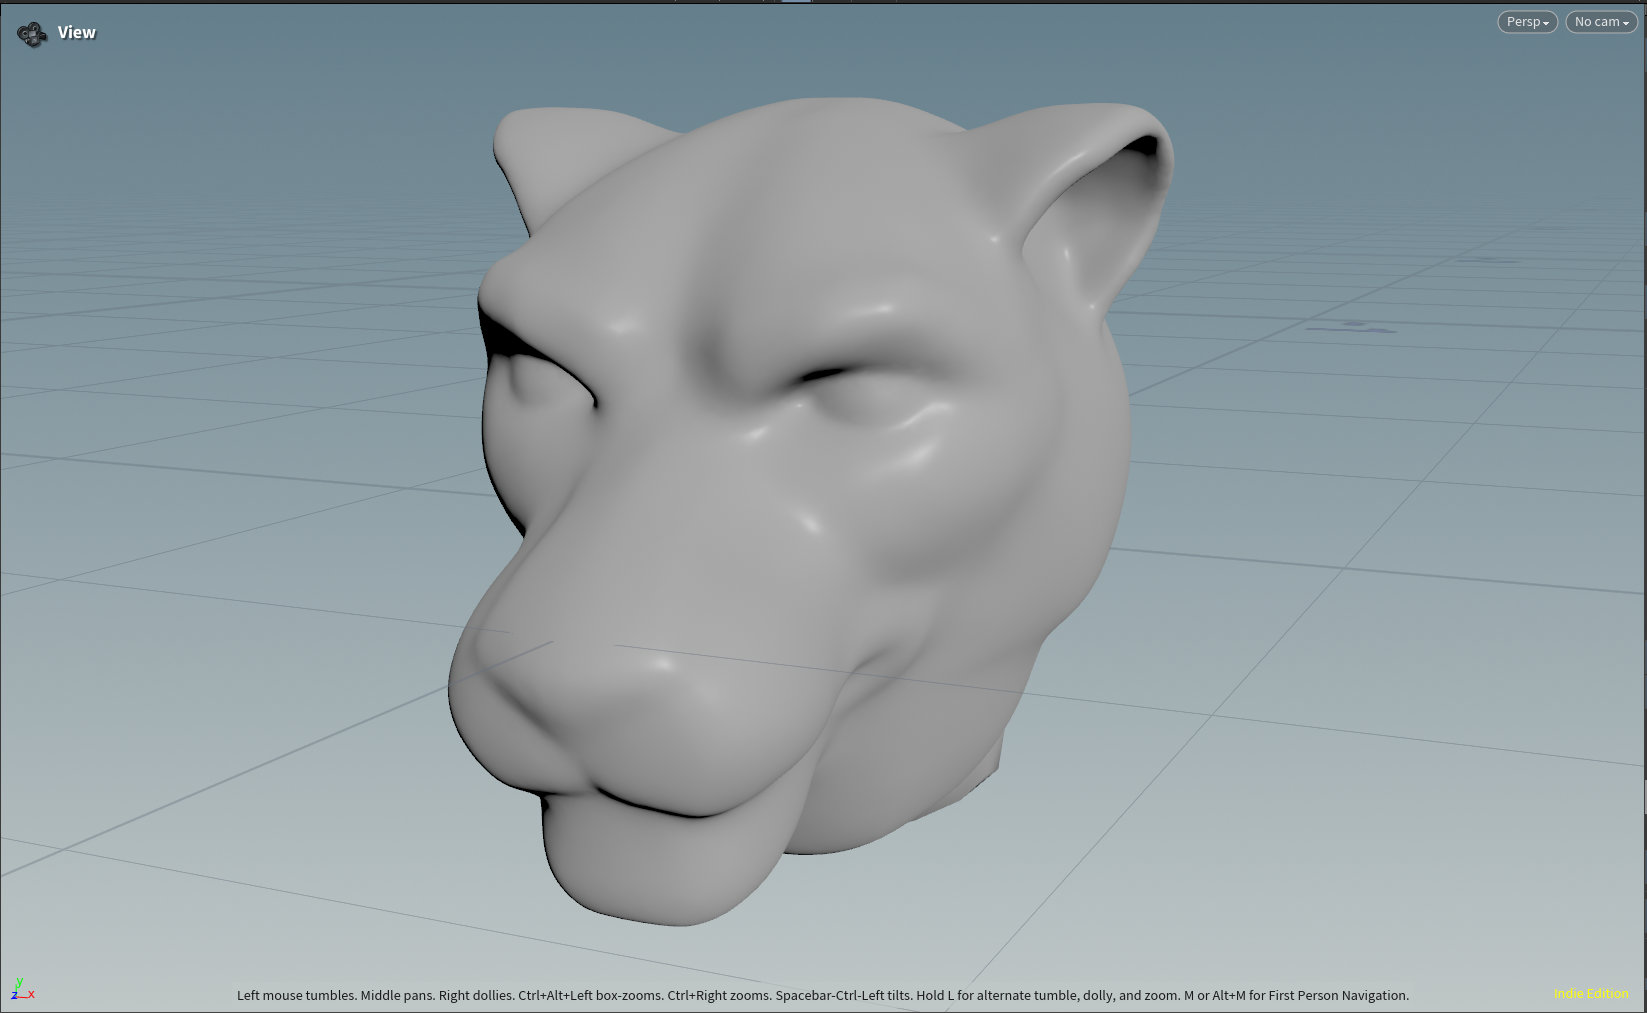
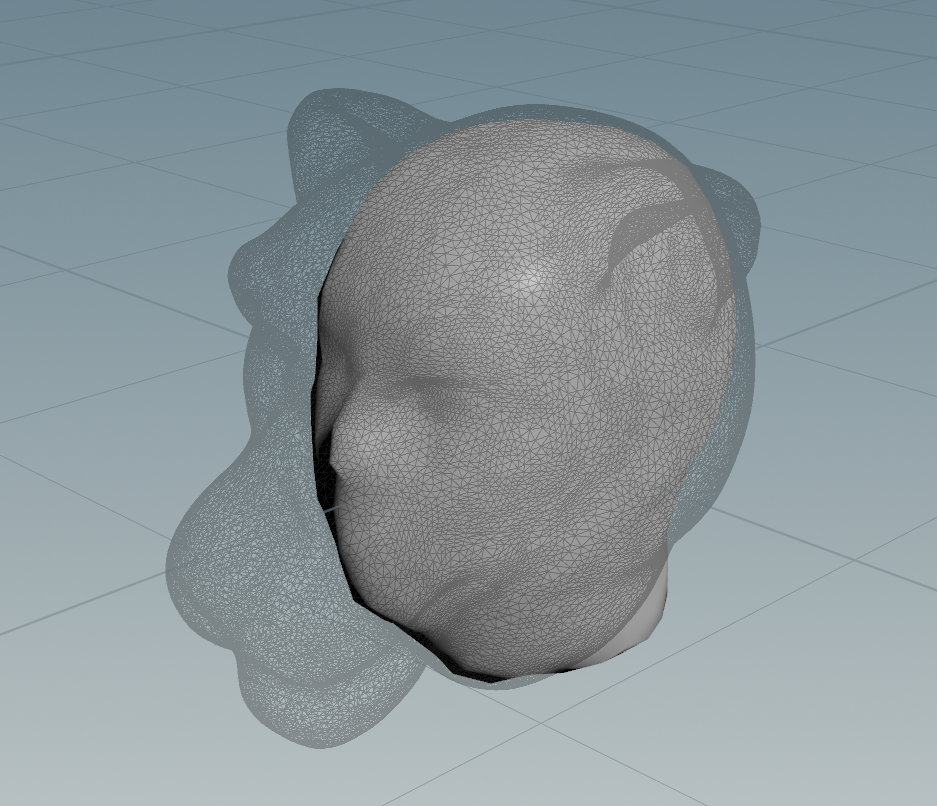

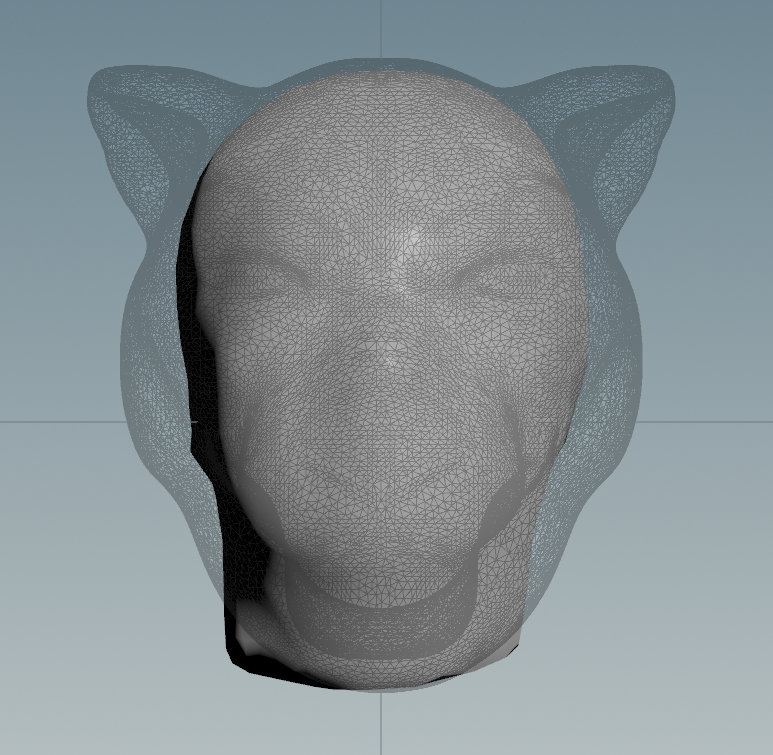
With the sculpt in a good place, I wanted to re-topo the mesh. The output from 3DC-Printing is only .STL format, a common format for 3D printers. Thankfully, this is also a format that Houdini can read easily. This is fine if you wanted to print it out directly but I wanted to work in some fine details, so started to manually re-topologize the mesh into quads.
It's been a long while since I had to re-topo stuff, so I thought I'd look into what Houdini had for automatic retopo and found the Quad Remesh Sop.
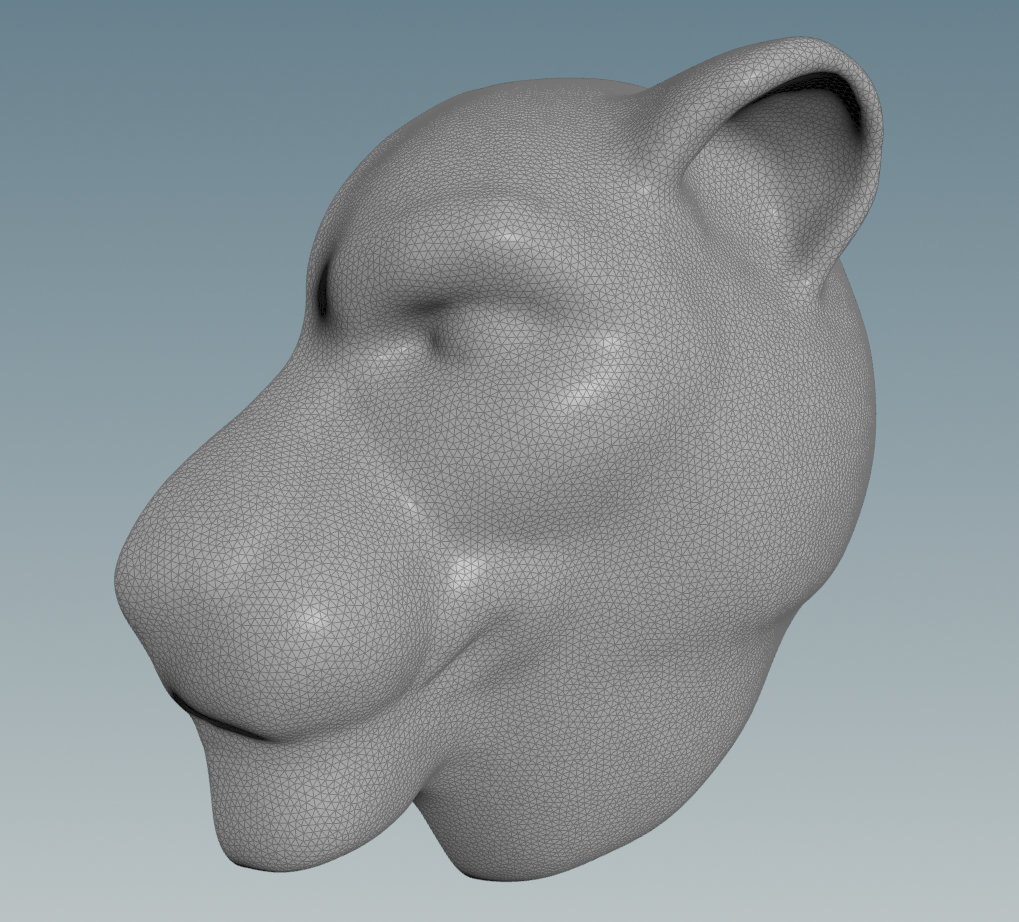
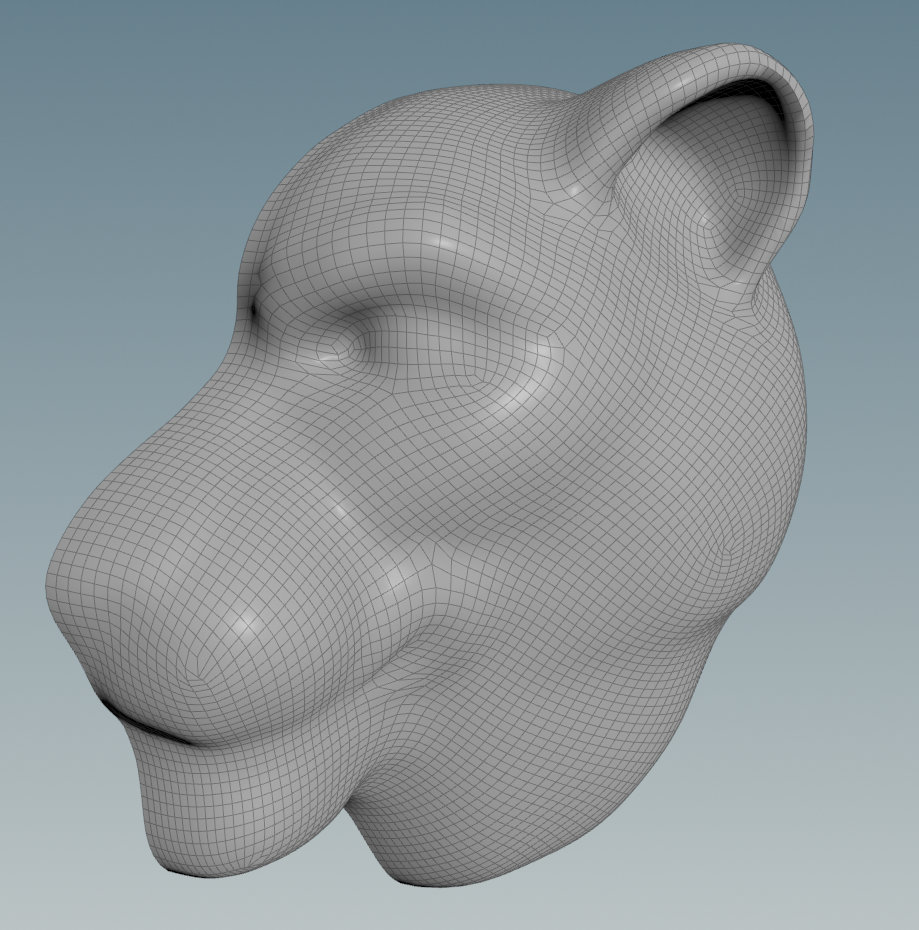
This is what re-topologizing a mesh is, making a mesh made from quads and triangles instead of just a mesh of triangles. The Quad Remesh SOP (SOP: Surface Operator, a houdini node) does an amazing job but I wanted very specific mesh lines as I want to flatten the mesh later to use as a pattern for the fur. Hence, I used the TopoBuild SOP to manually lay out the quads, using the triangle mesh as a reference.
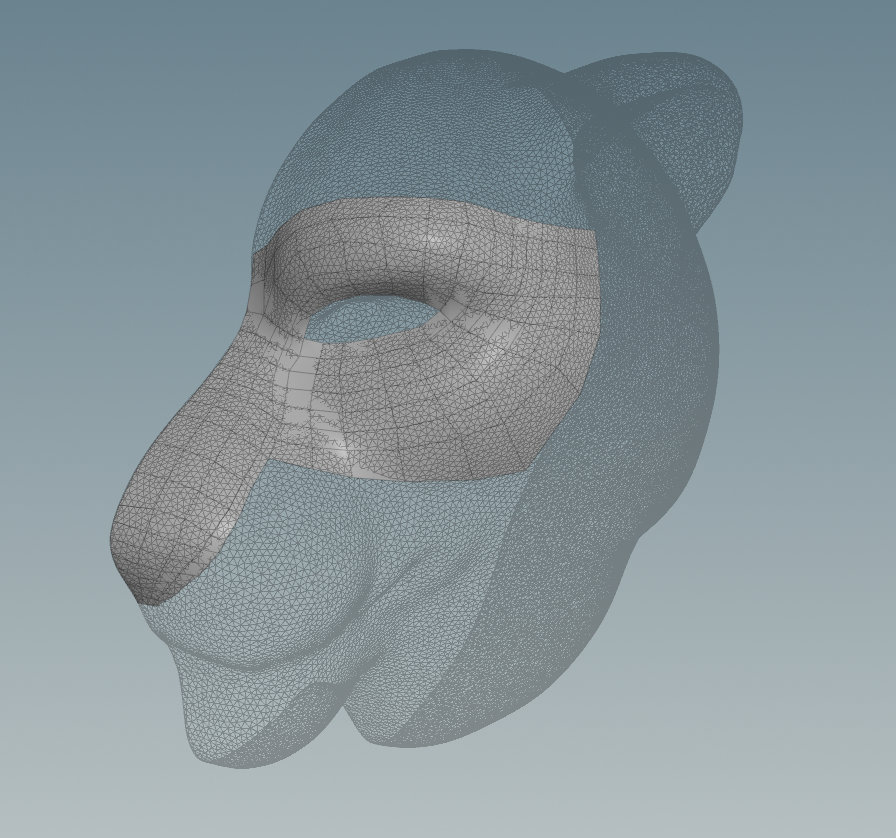
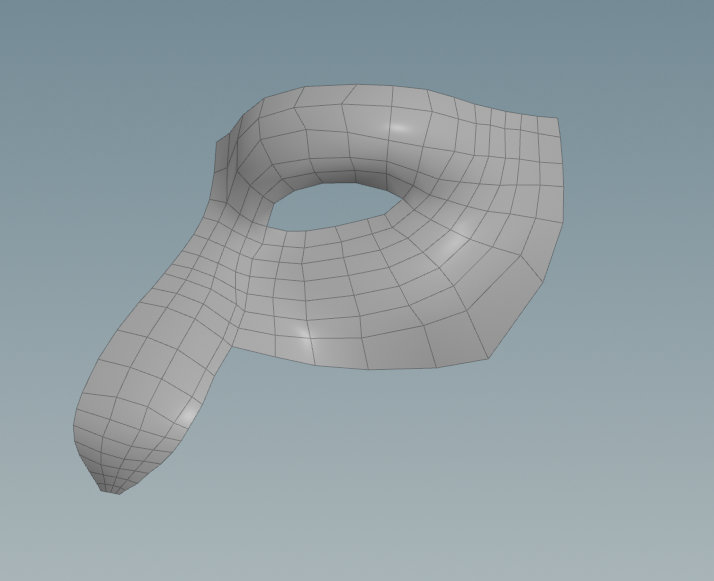
The next image shows the upper part of the head fully re-topologized with mostly quads. Next, I used the UV Flatten sop to create a uv layout for this mesh.
Imagine if you tried to stretch out this mesh flat, the image on the right would be what it would look like. The UV Flatten Sop has a feature that marks out what areas are highly distorted. These are the areas that need cuts in order for the fur to be able to properly conform to the surface. Now I must say... I have no idea if this will actually work - in most fursuit tutorials, people will 3D print the base out then stick duct tape all over it, cut the duct tape in specific ways to create the pattern for the fur.
Given I'm not in a time rush and am very curious, I am gonna try and see if this will work irl.
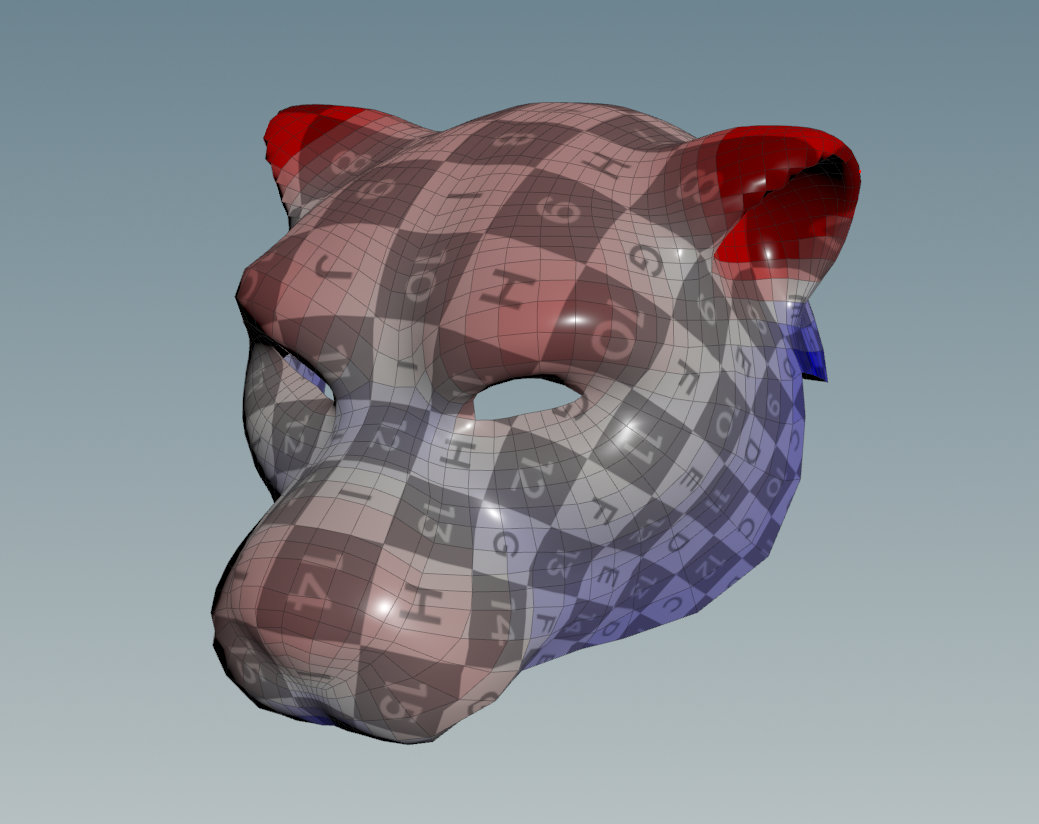
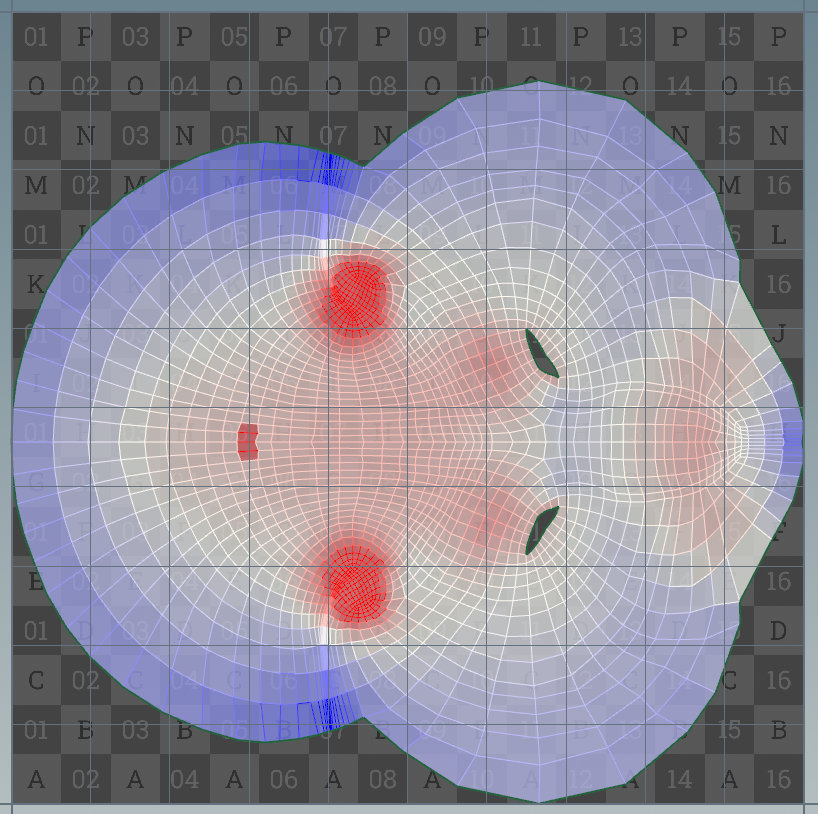
The main "issue" is that in drawings and real snow leopards, their heads are longer than they are tall, unlike humans with taller heads that don't have a long muzzle. I looked through my old commissions and thought that perhaps I could shape the head like this piece I got from The Narutoshi awhile back that would fit the bill; by having a raised skull to accomodate mine, the overall size of the head could be scaled down.

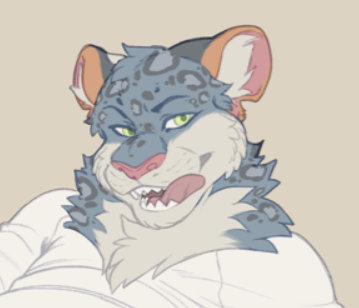
However, after some fussing in Houdini, I realized that just tilting the head downwards provided lots of space for my head, and I only needed a small resculpt. Plus, head on, this looked very like what snow leopards look like!
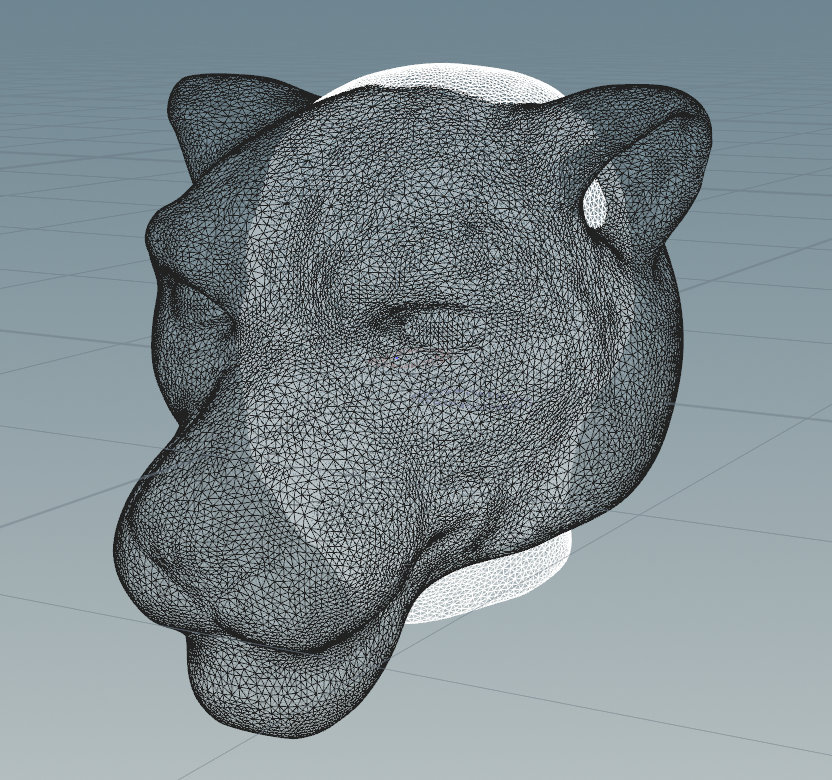
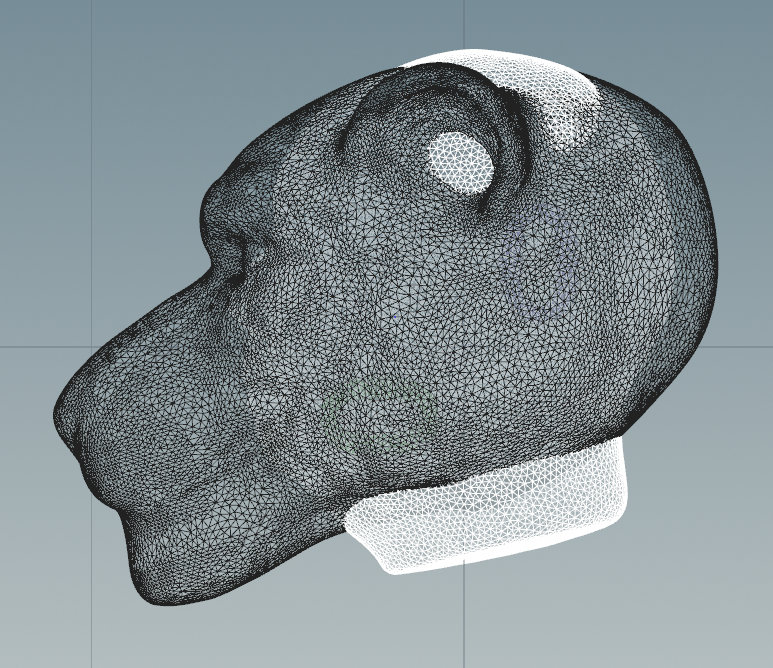
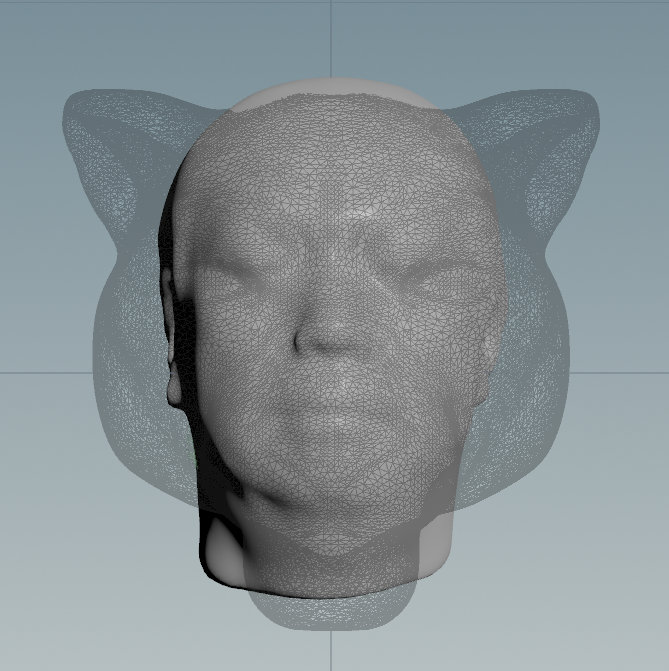
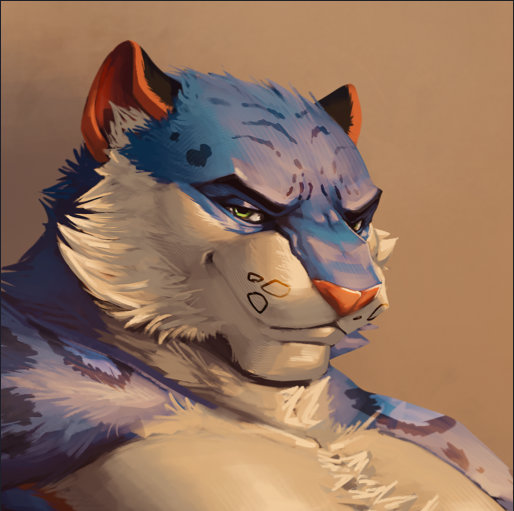
I really liked the angular brows and pushed out jaw, and I decided to move my sculpt in that direction.
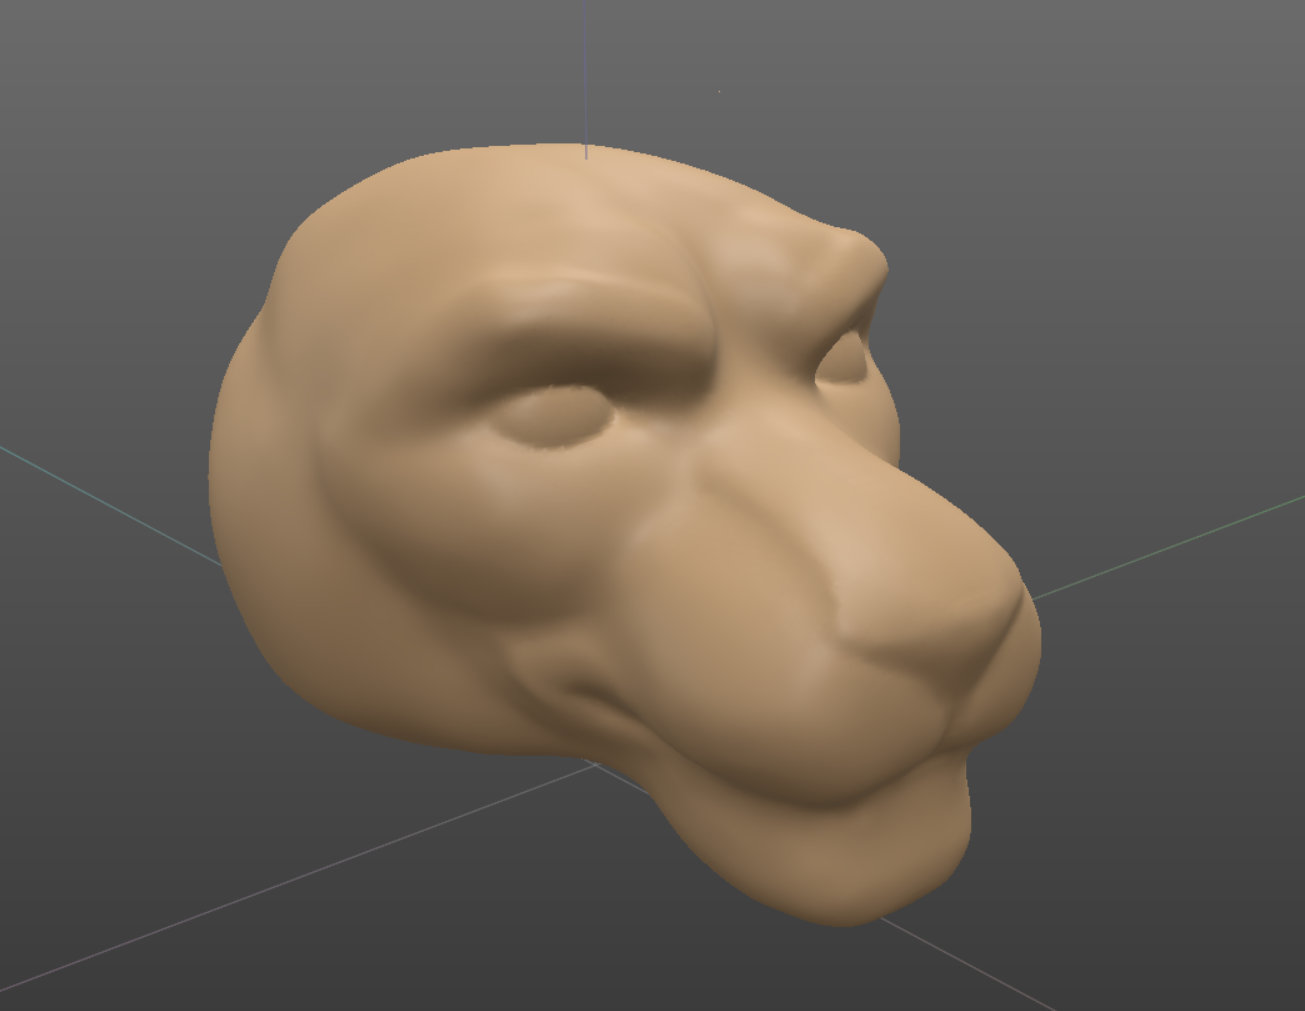
Results from the end of the day:
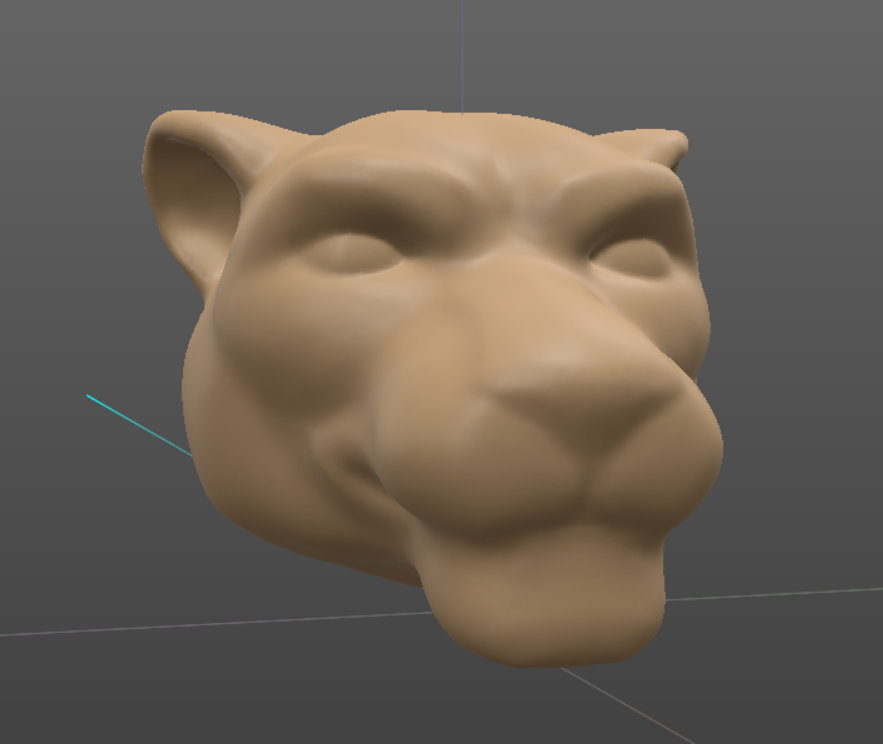
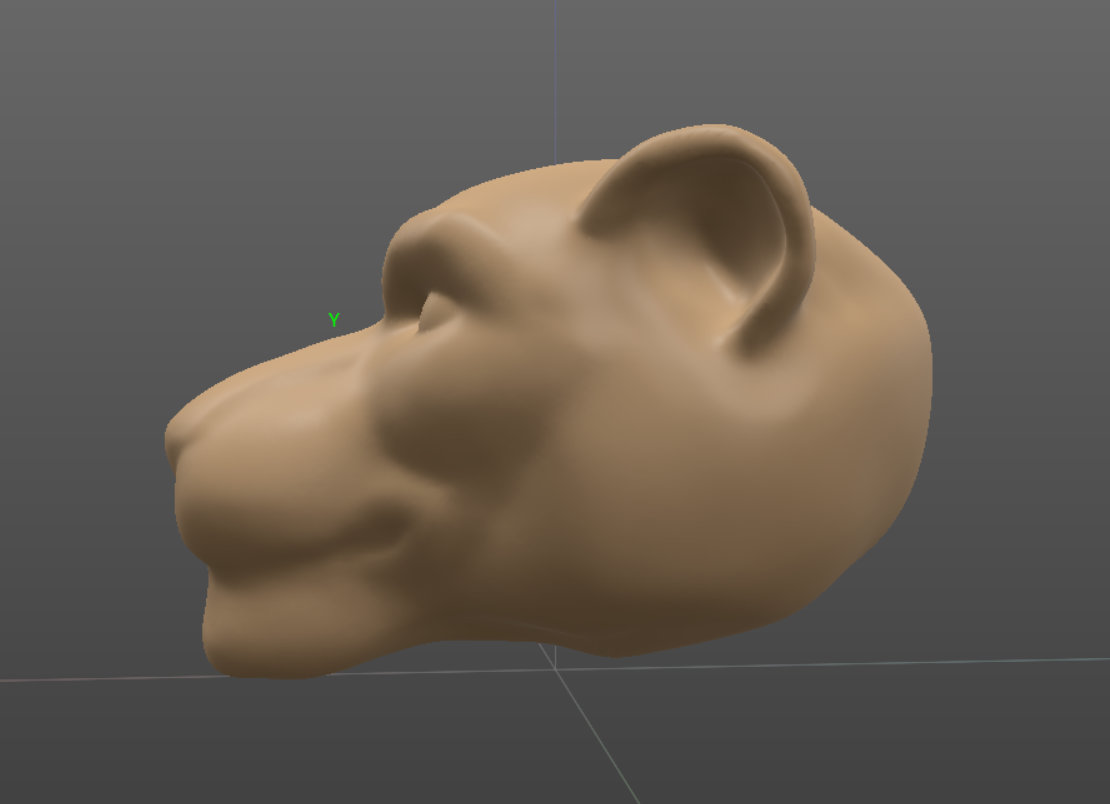
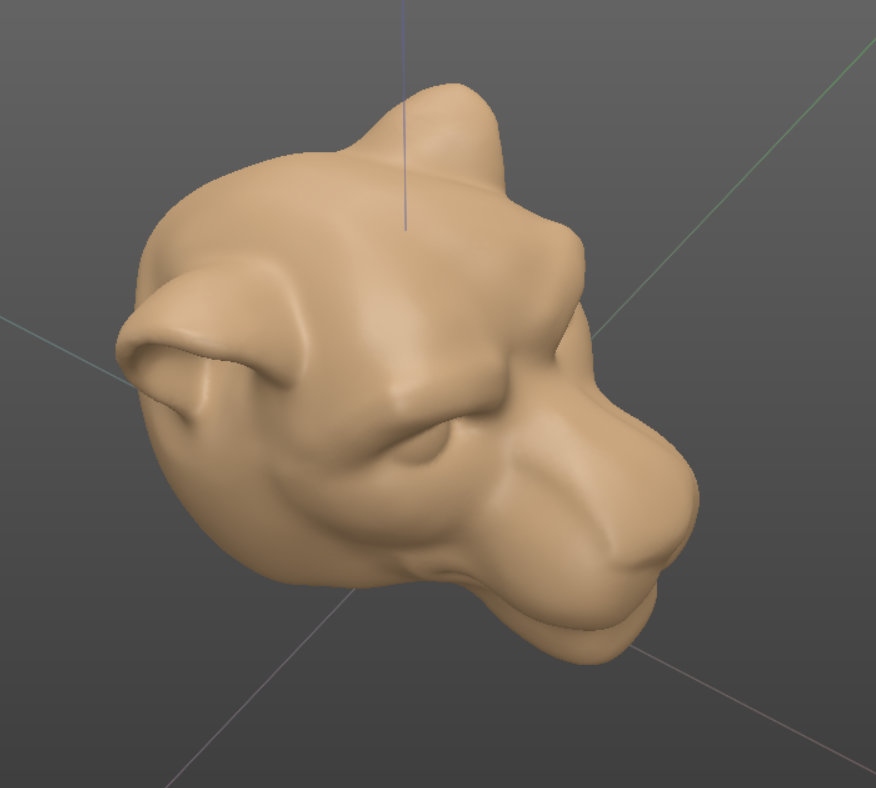
I first started sculpting without any reference and I ended up with this bear like head XD
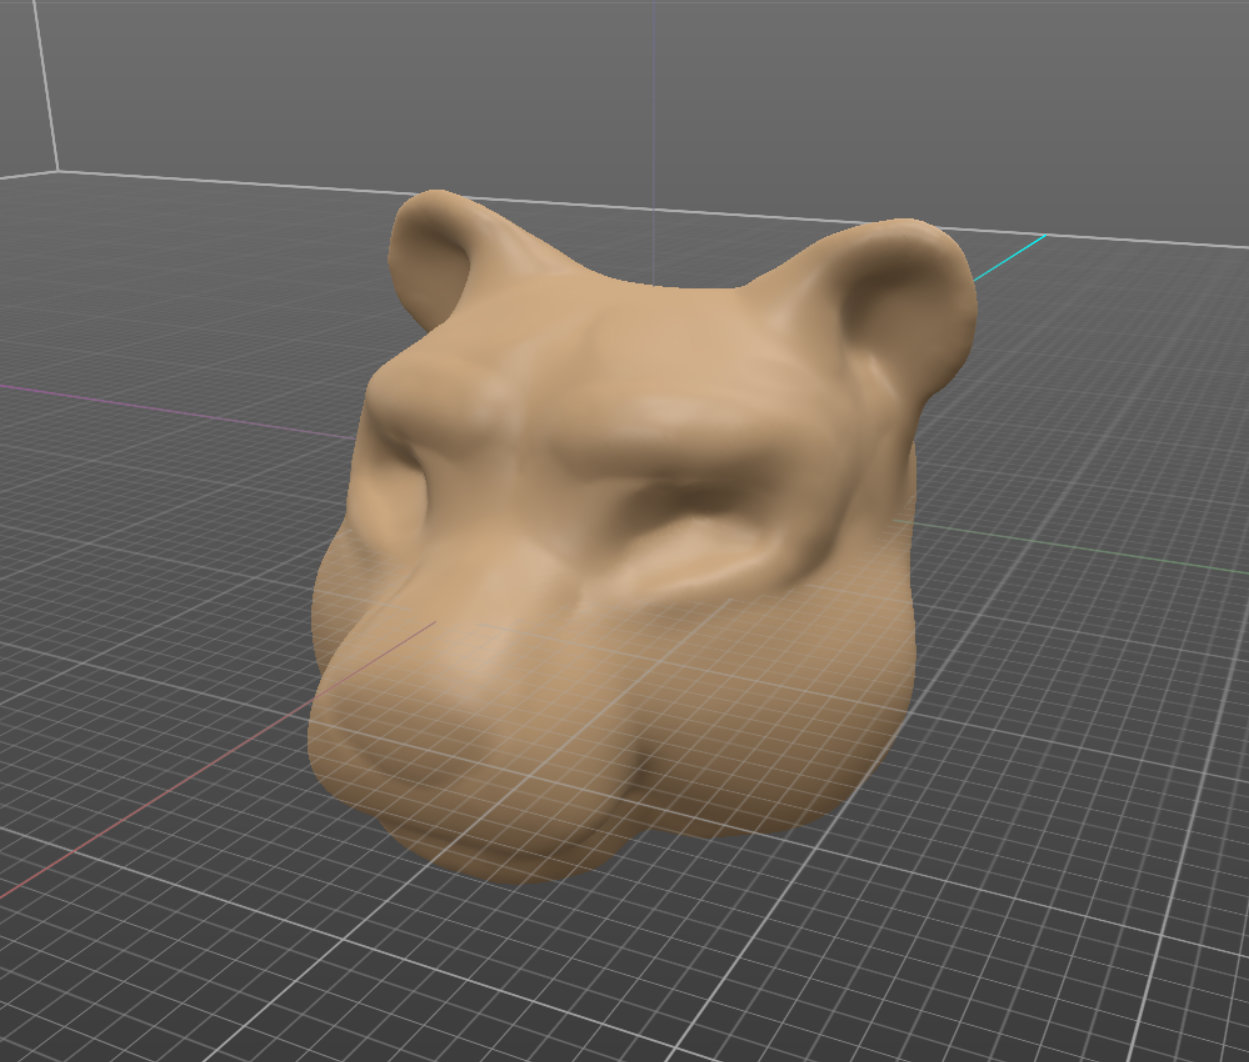
After looking at photo reference online, I got a much better result.
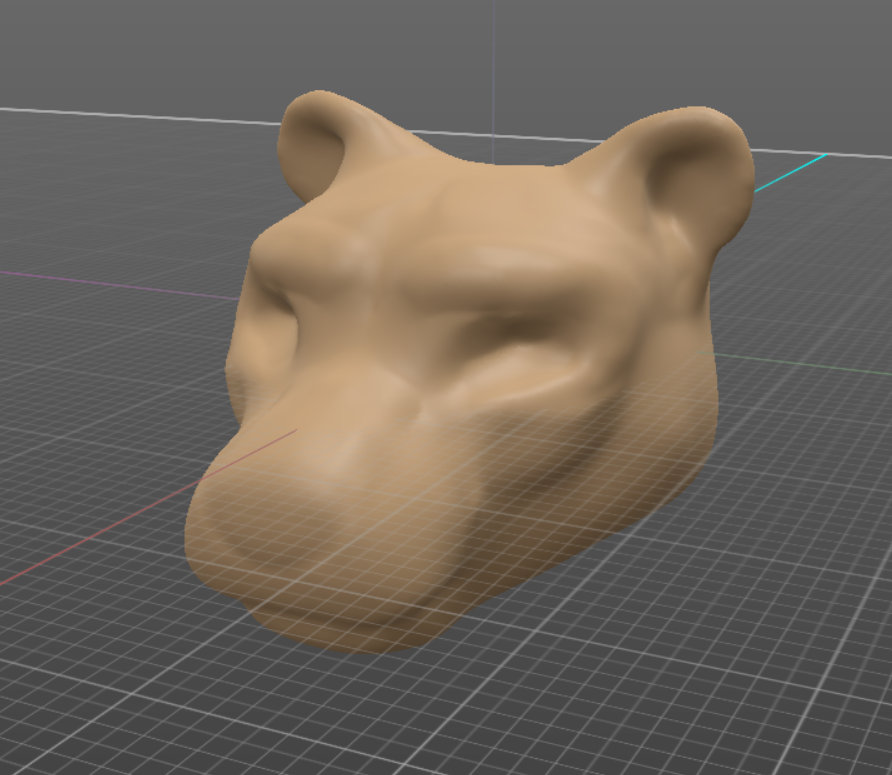
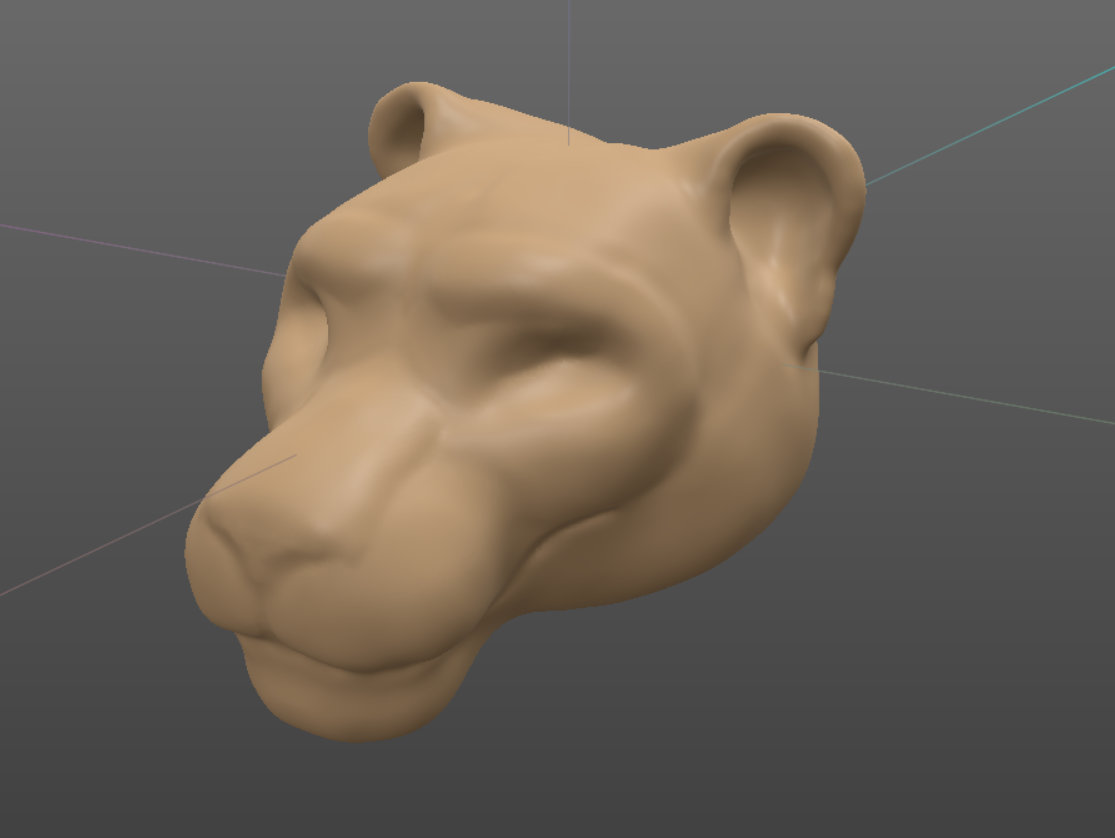
I also decided to look at art that I liked for inspiration. Originally, one of my main inspirations for this project was this commission from Adeptusfuraffinitus:
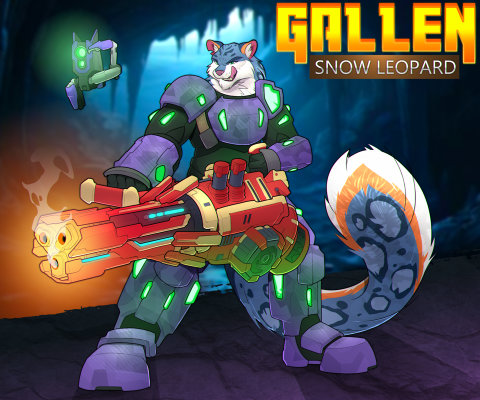
I thought that would work really well for the head, being quite stylized. However, there is another artist that does lovely feline heads, Volcha (Warning: NSFW). I'd also gotten a comm from them before and loved how he drew my head. In the end, I made up a mood board with all these heads as inspiration:
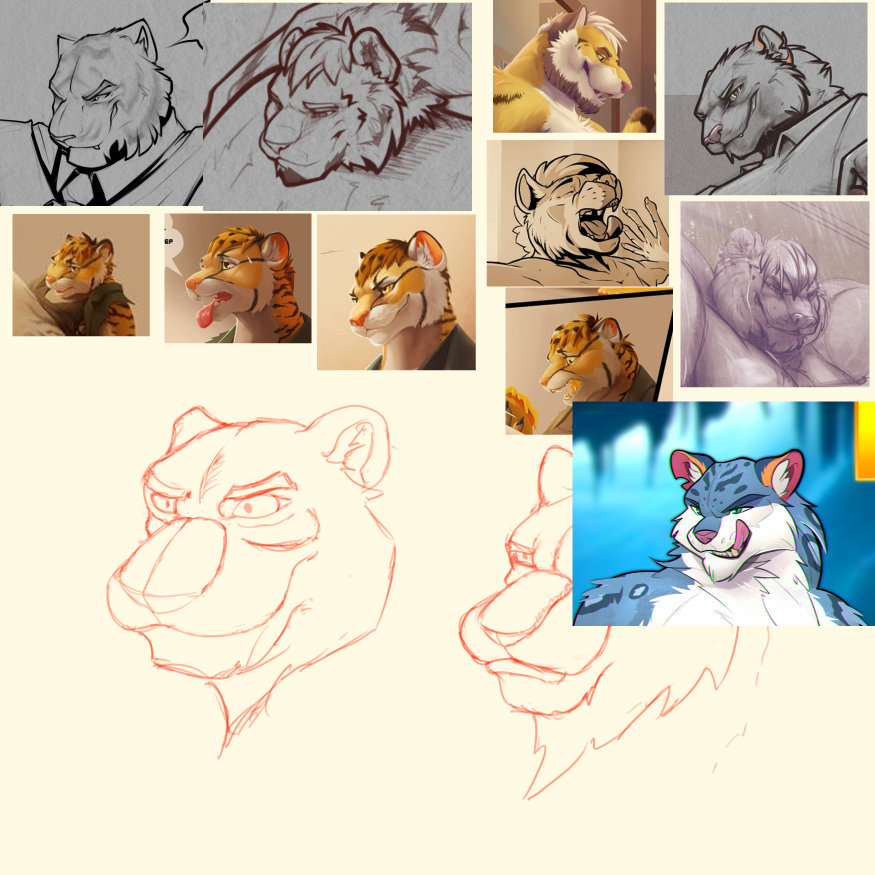
At the end of the day, taking inspiration from the mood board this was the result I got: